$1000 DIY Bathroom Makeover That Doesn’t Look Cheap
This $1000 DIY bathroom makeover took just 6 weeks to complete and doesn’t look cheap! It looks like we spent so much more!
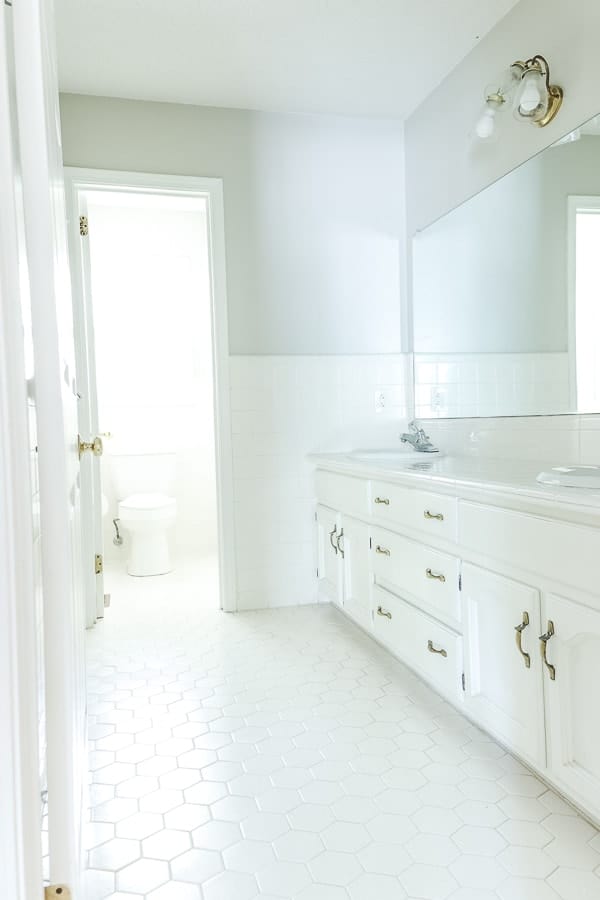
Yawn.
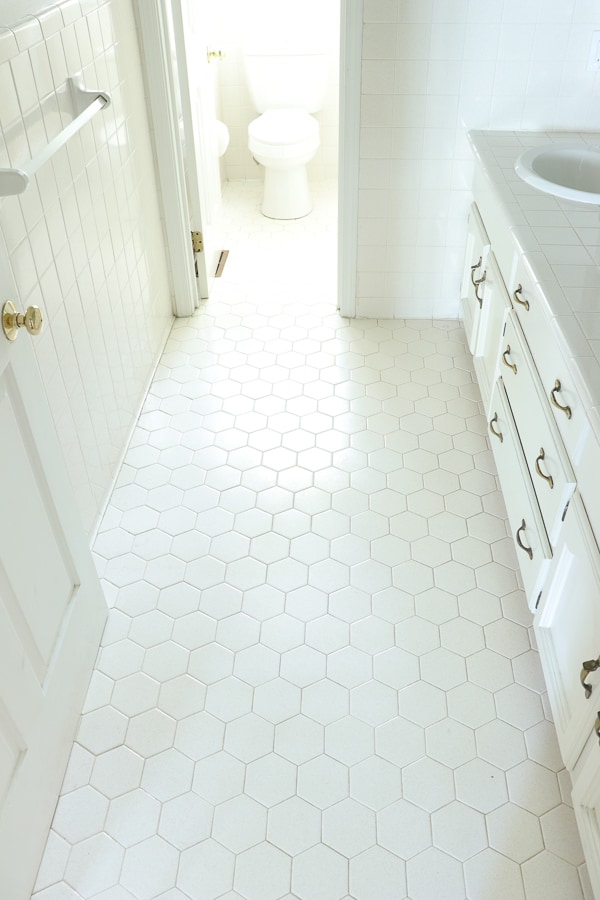
What a boring before! Dated fixtures, bland tile, and a countertop that was too low.
We weren’t ready to tackle another huge remodel this year, but when I walked in to see my 6’6″ son trying to wash his face on this really low countertop, I knew we needed to address this room.
But, we didn’t have any money left in the budget this year for a complete renovation. So we had to work with what we had and created a gorgeous space for just $1000!
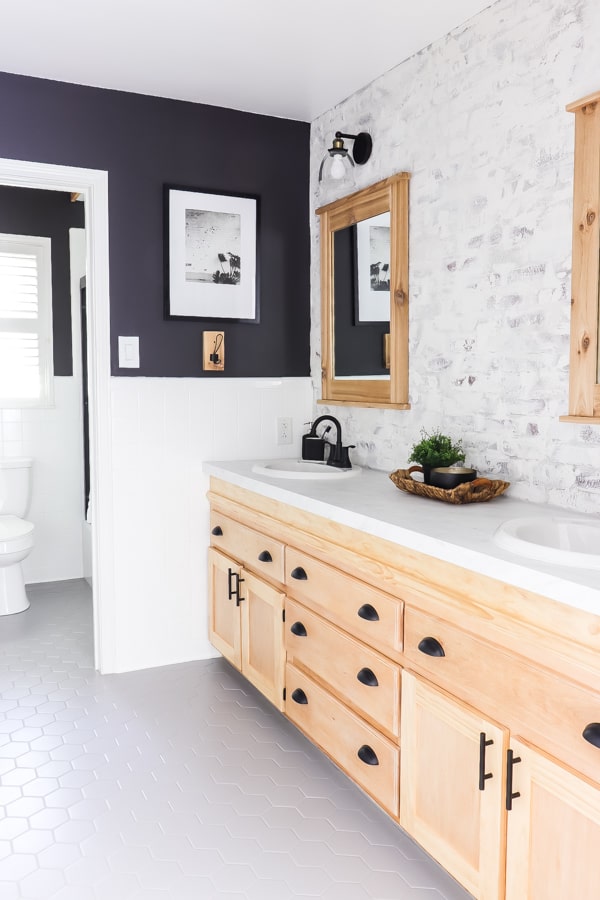
Yes, this is the same room! This $1000 DIY bathroom makeover took us just six weeks and we are just as amazed with the results!
Here’s how we did it.
Problem #1 Low Countertops

This bathroom was built to be handicapped accessible, however, I have really tall boys, and that 30″ counter was just too low.

We removed the top and raised the cabinet base by adding 1 x 6 boards to the existing frame. After sanding down the base, we hid the seam by adding a small piece of trim across the front.
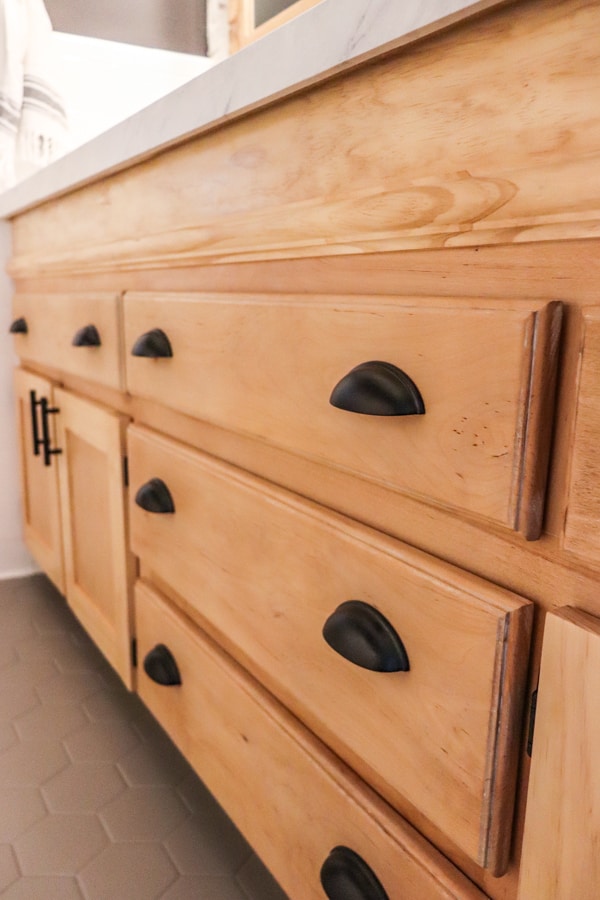
We updated the look by building new doors and adding beautiful black door handles and drawer pulls we found on Amazon.
Then we replaced the countertop with a formica counter we saved from our pantry rebuild and covered it with an industrial vinyl wrap in marble.
I scored finding it in a matte finish. Most vinyl film is high gloss and I wanted a subdued look. We love how realistic the film looks and it was super easy to install!
You would never know that it wasn’t real marble!
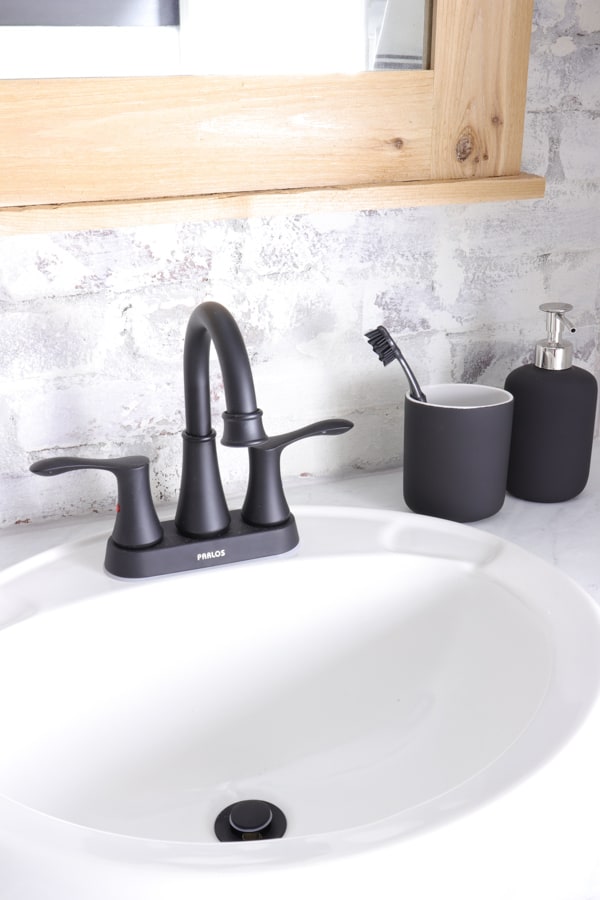
After the vinyl film was installed, we cut holes in the top and put the old sinks back in place.
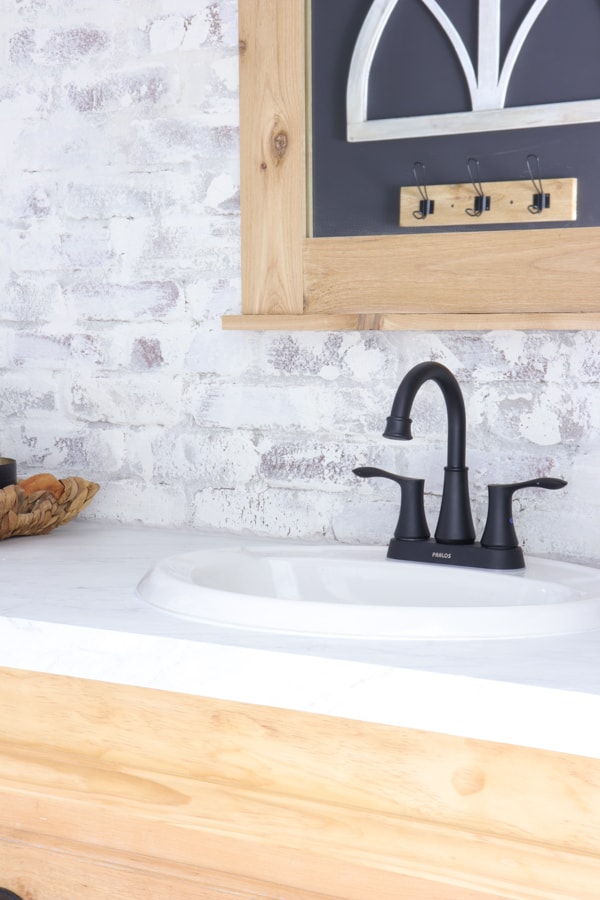
We gave them a fresh, updated look with these matte black faucets I found on Amazon.
I love how sleek it looks!
You can read all the details about how we did this easy DIY in this post.
Problem #2 Update the Tile and Fix Grout Issues
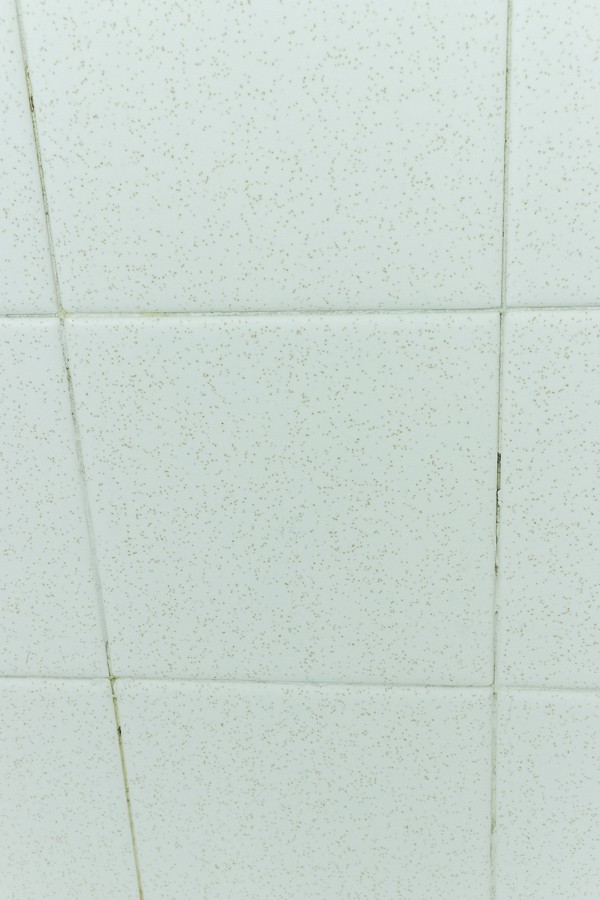
Not only was our tile this be-speckled beauty from the 80s that needed to be updated, but we had major grout issues as well.
The full tutorial on how to regrout your tub is here with helpful tips to make it quick and easy!
After we removed and replaced the grout around the tub, we were able to give this dated tile a full facelift using Rust-Oleum’s Tub and Tile kit in white.
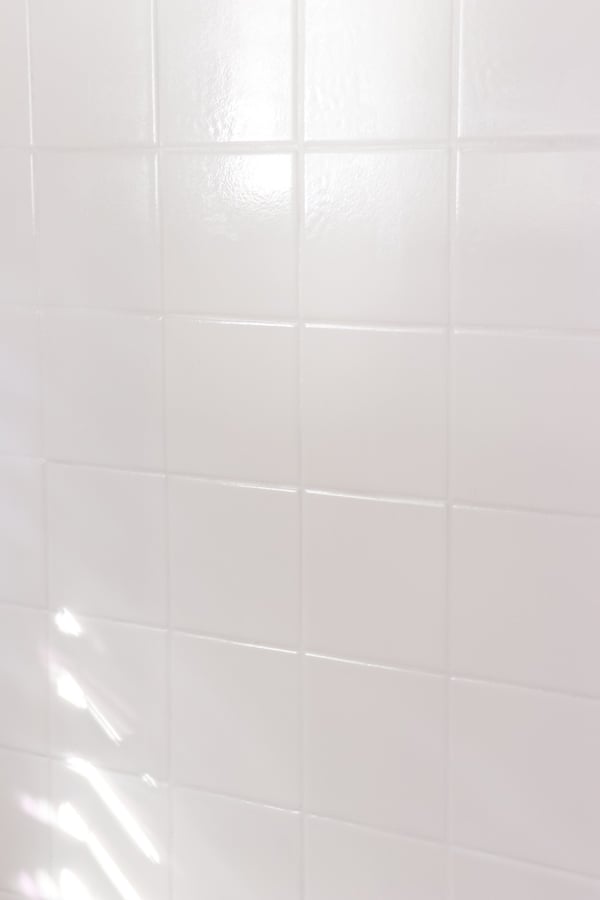
We painted all the tile on the half-wall as well as the tub and what a difference that bright white makes.
Our floor was also rather dated. Once we learned that Rust-Oleum has a new floor paint called Rust-Oleum HOME Floor Coating, we knew it would be the perfect durability for this room.
Look at this before and after!
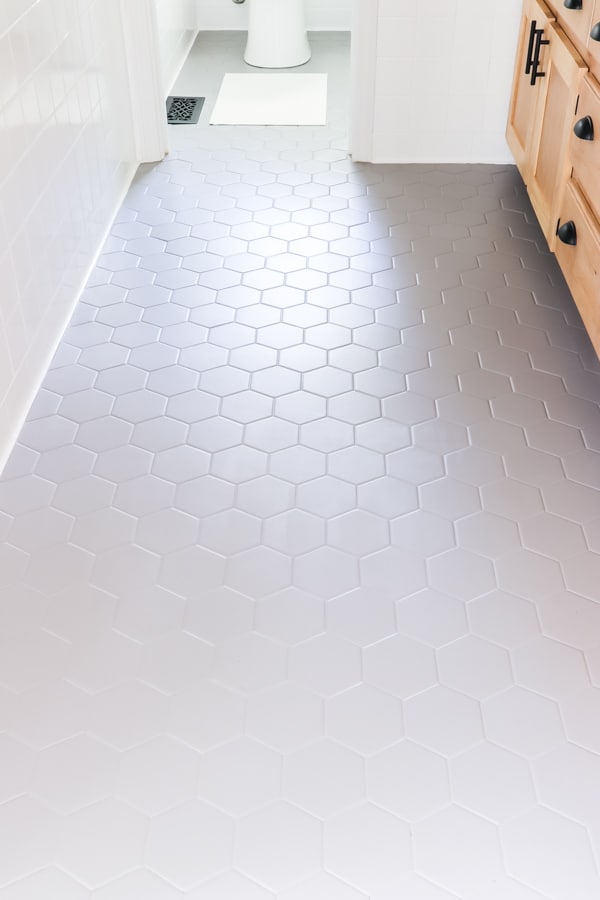
We chose Aged Gray and couldn’t believe how easy it was to change the look of our floors in just 6 hours!
To see the full tutorial on how we painted our tile, you can click here.
Problem #3 Low Shower Ceiling
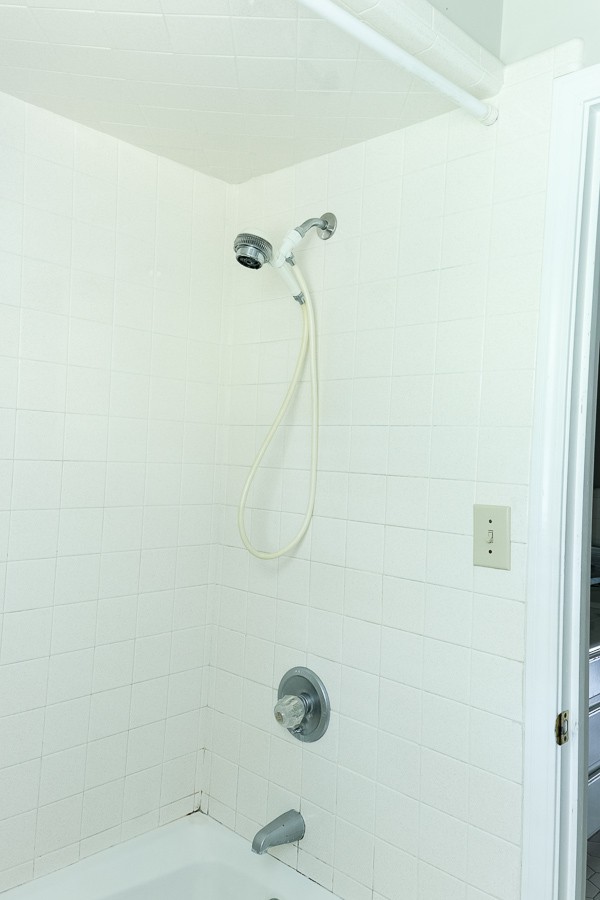
My gentle giant didn’t tell me that when he bathed, his elbows hit the ceiling while washing his hair.
So we busted out the tiled ceiling and raised the roof about a foot.
You can read all the details about that easy DIY in this post.
We capped off the top of the old tile with a new trim edge and after painting it with the Rust-Oleum Tub and Tile Paint, you can’t tell they weren’t original.
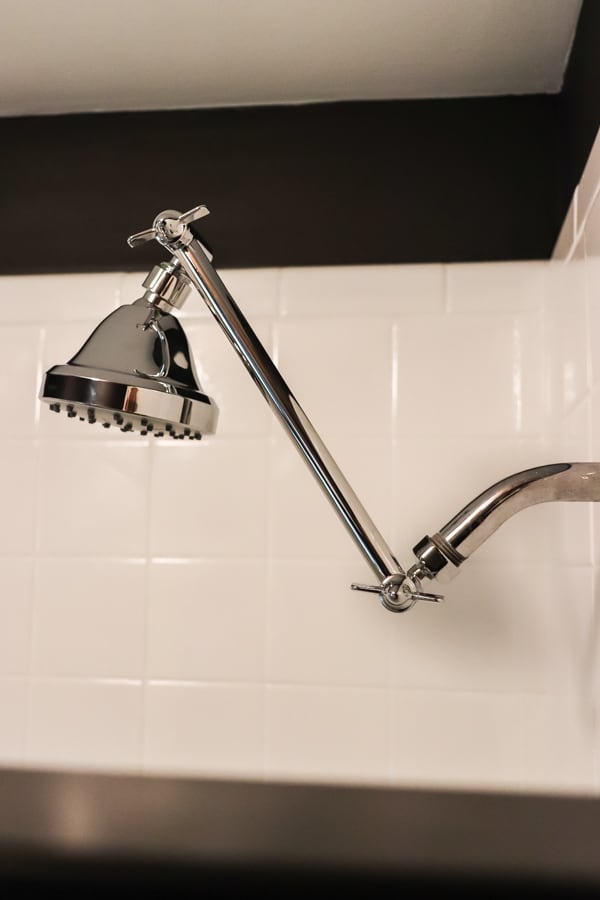
Next we added a new shower head that adjusts for our son’s height.
Now he can raise his arms and barely reach the ceiling!

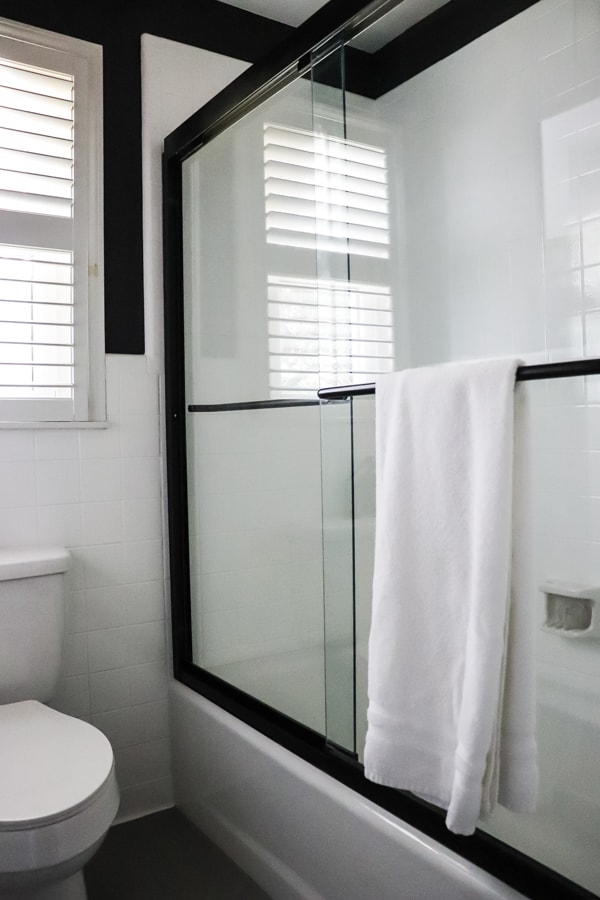
In the process of this renovation, we found these used shower doors on the Facebook Marketplace for $80.
Trent spray painted them in matte black to have them flow with the design of the room.
We did have to order some new shower door parts, like wheels and screws, but it was still much cheaper than purchasing new doors in black!
You can read all the details about this easy DIY in this post.
Problem #4 Popcorn Ceilings

My popcorn ceiling and I have some major issues and they need to be evicted from my home! They are in every. single. room.
We were able to scrape the ceilings in this room pretty quickly, but ran into a problem in the shower area.
The builders mis-cut a hole for the light fixture which was hidden under all that popcorn.
No matter how we tried to fix it, we couldn’t cover it, but fate stepped in and we found such a creative solution!
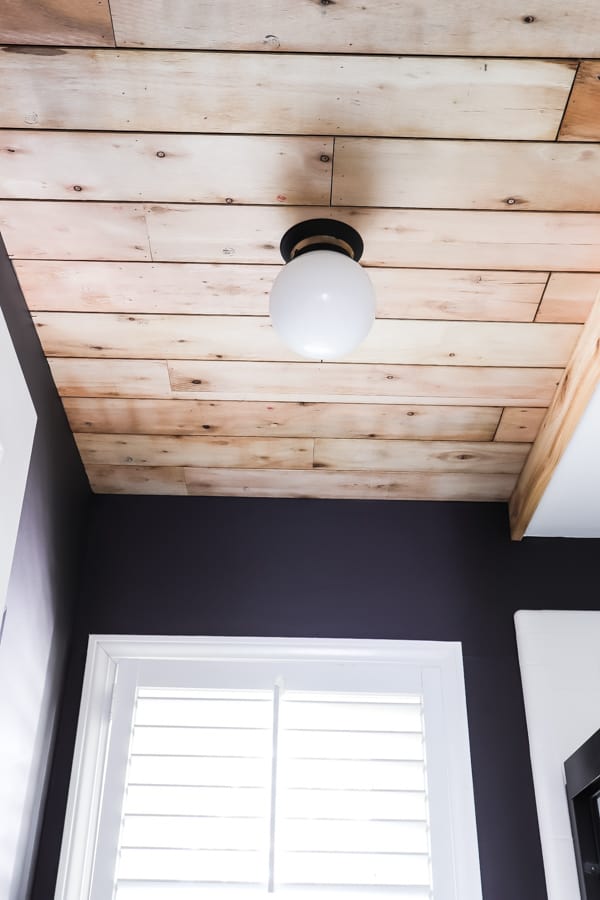
This is flooring – on my ceiling.
Better yet, this is the bottom side of flooring you are seeing.
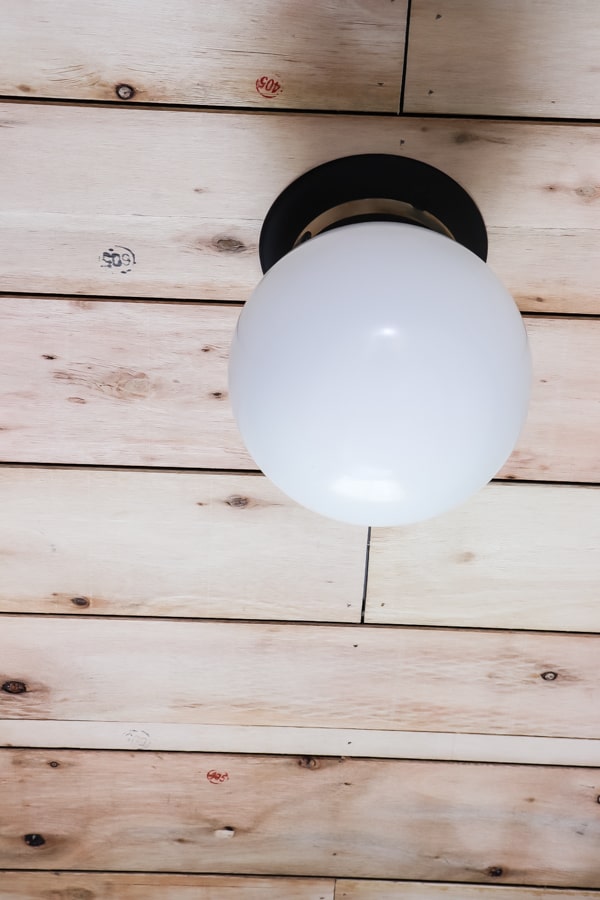
We had some flooring left over from the previous owners down in our basement and tried to see how they looked as a ceiling fix. The color wasn’t a match.
Until we flipped it over!
I can’t even with this, y’all!
I love all those little inspector stamps exposed. We just cut them to fit and nailed them into place.
Trent used the same spray paint and updated the old light fixture, taping off a stripe so that the old brass peeks through.
You can read all the details about how to build this easy DIY in this post.
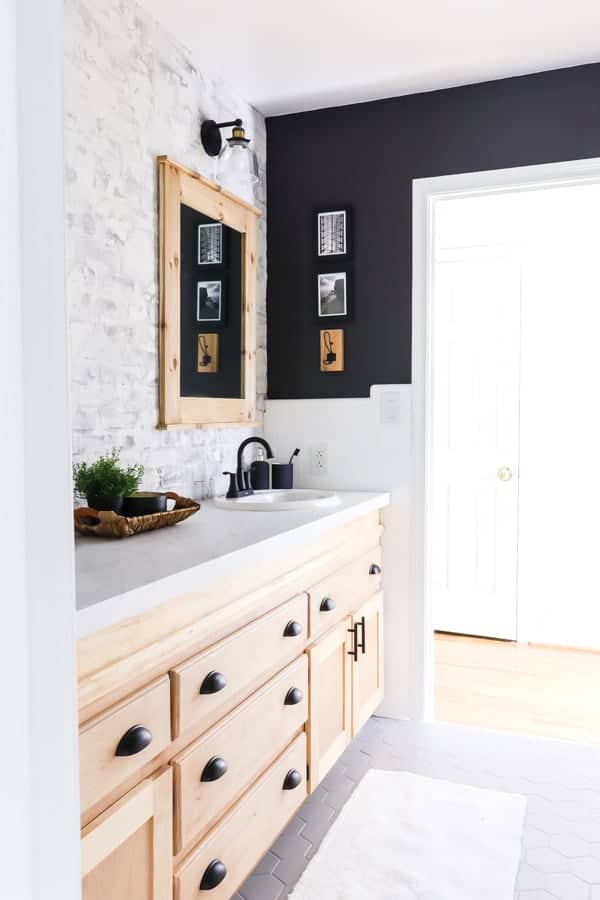
Problem #5 Wall of Mirrors and 1 Light Fixture
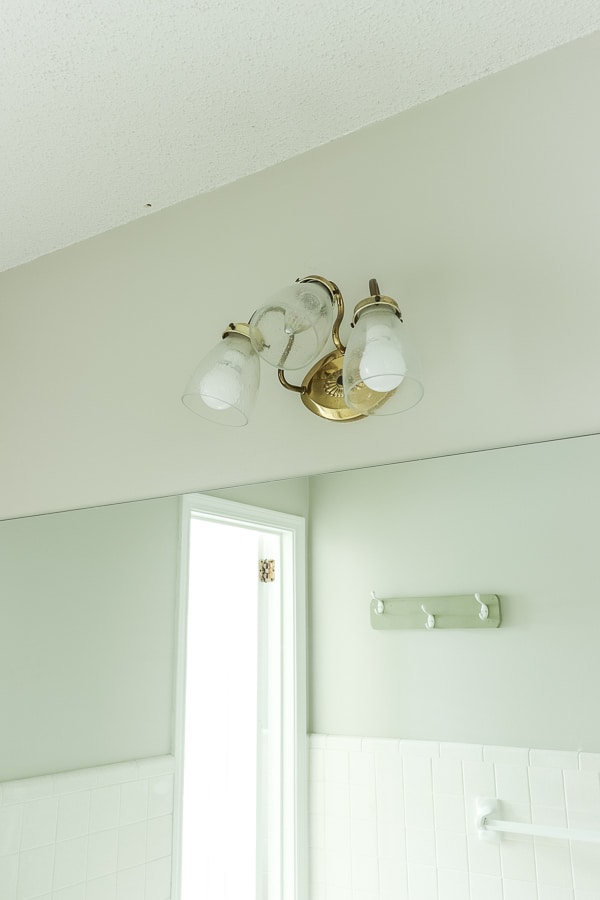
We had one 8 foot long builder’s grade mirror with one single light hanging above it in the middle.
This cried out for a feature wall and boy did we get one!

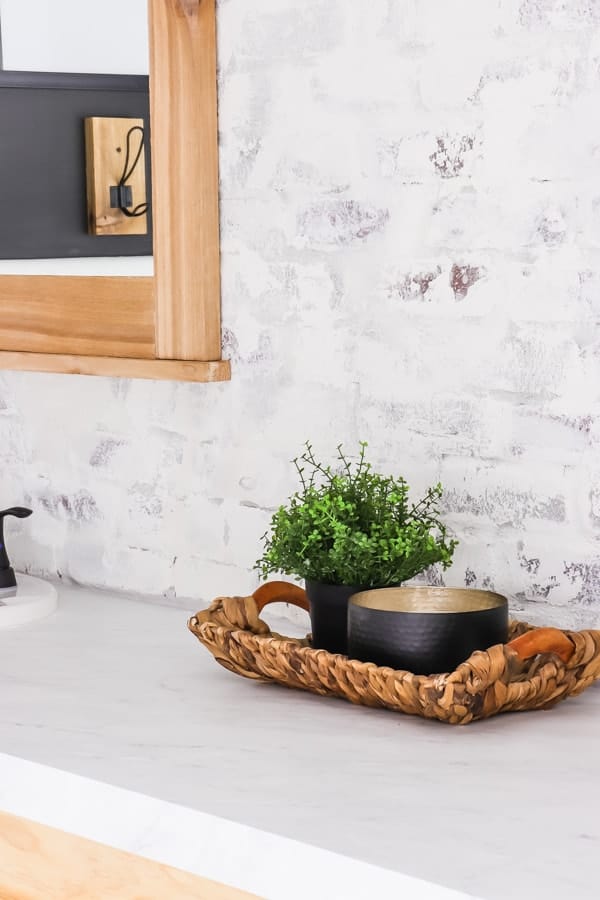
We installed this Thin Brick from General Shale and immediately fell in love.
I wanted to create a look of an antiqued wall – and you all know my love for Limewash, so I reached out to Romabio Paints.
They sent me 3 different colors of their Limewash and I created this weathered look.
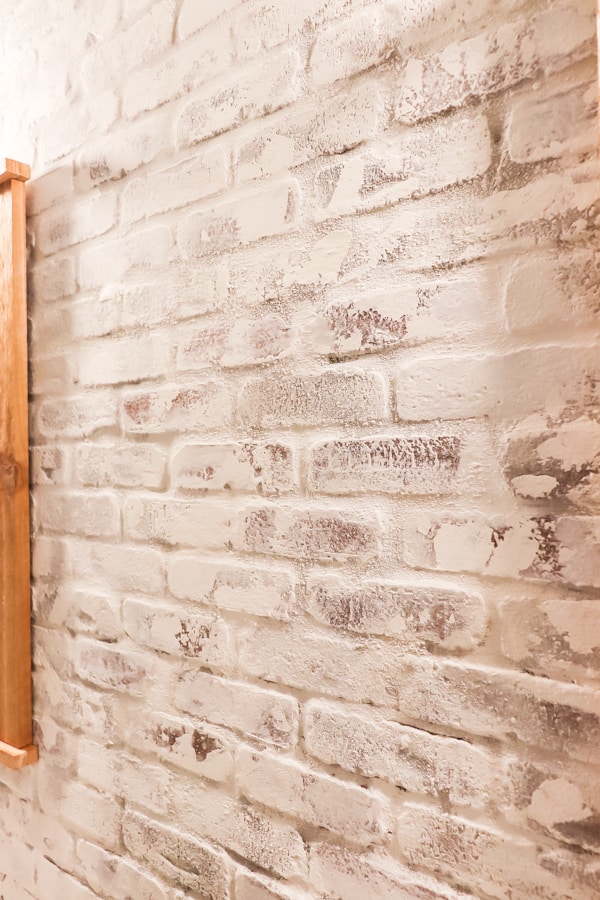
Using Cristallo White, Avorio White and Silver Lining, I layered the colors to get this aged look.

I can’t stop staring at this feature wall!
Here’s a full tutorial of how we created this amazing wall!
Pulling It All Together
For the lights, Trent climbed up into the attic and split the single light wiring into two separate fixtures.
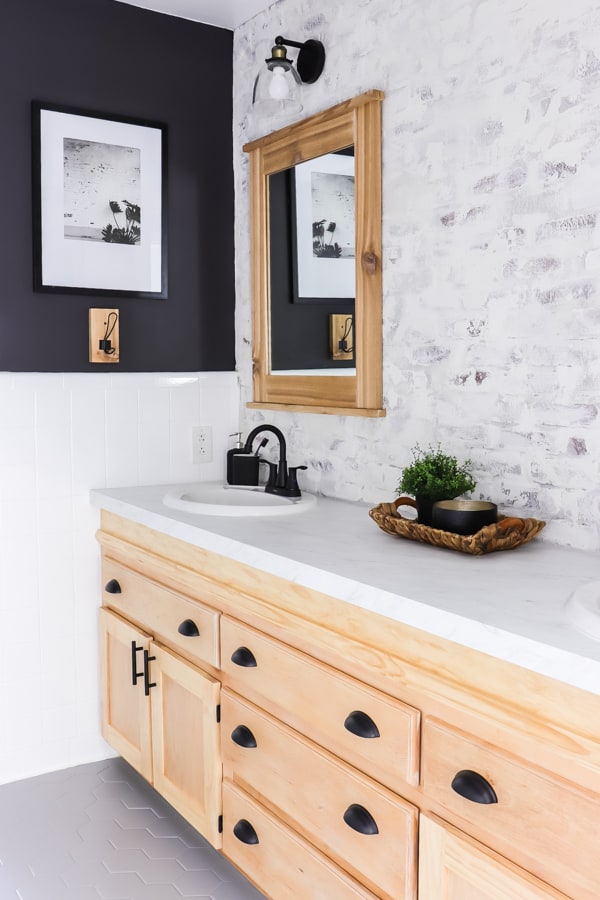
I loved these black and brass lights I found at Home Depot.
And don’t they just pop against that accent wall!
And those mirrors are DIYs as well.
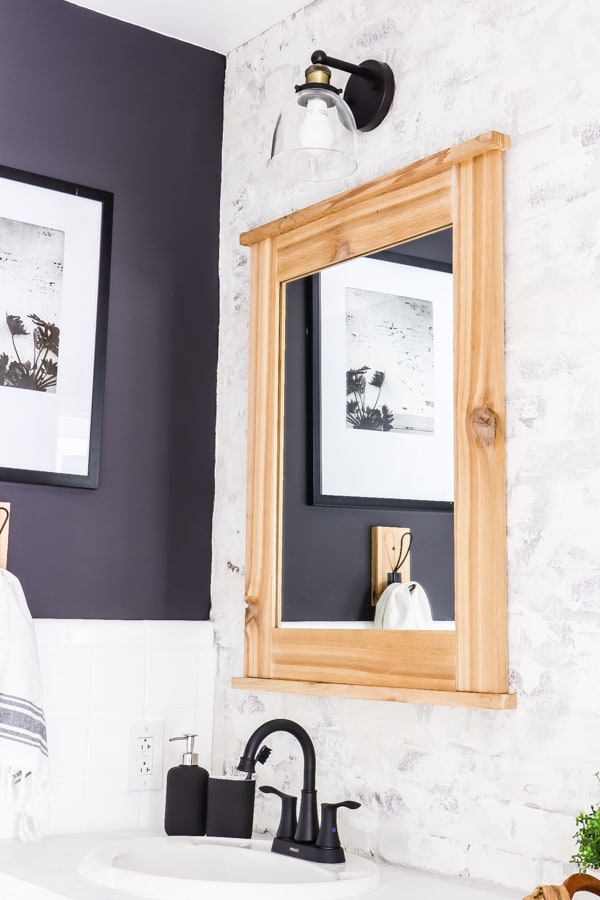
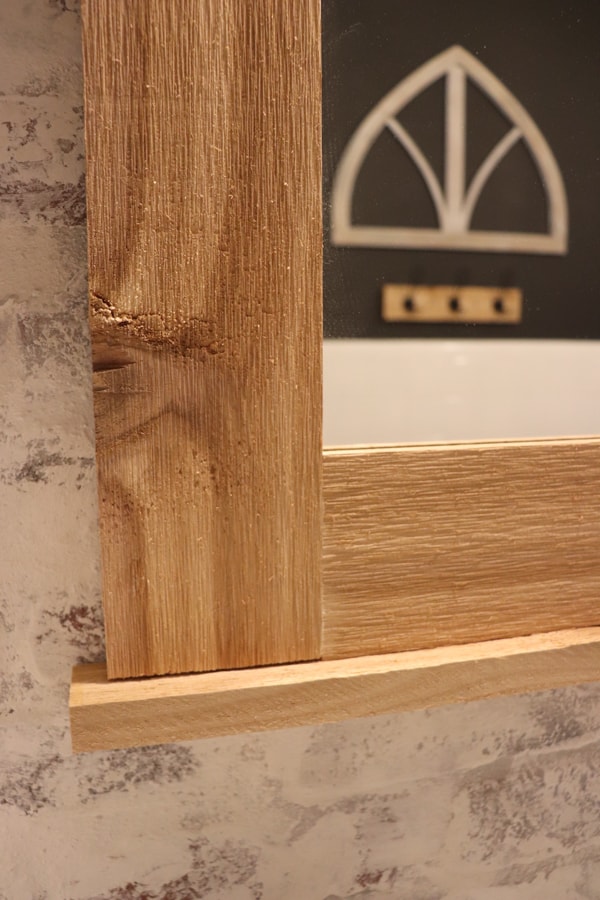
We borrowed a glass cutting kit from my in-laws and cut down the existing mirror into two 24 X 30 inch pieces.
Using Cedar wood, we framed the mirrors for $22 each!
You can read all the details about how to build this easy DIY in this post.
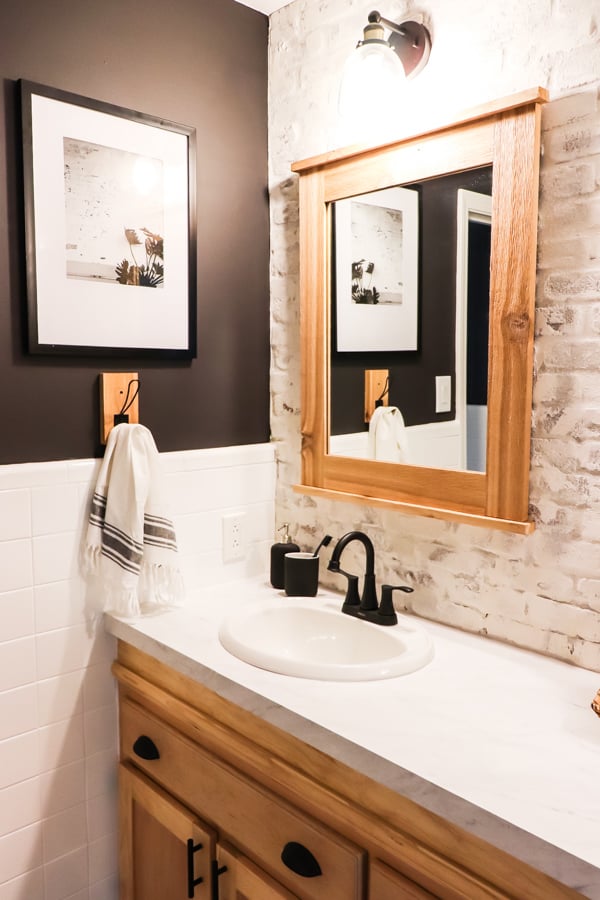
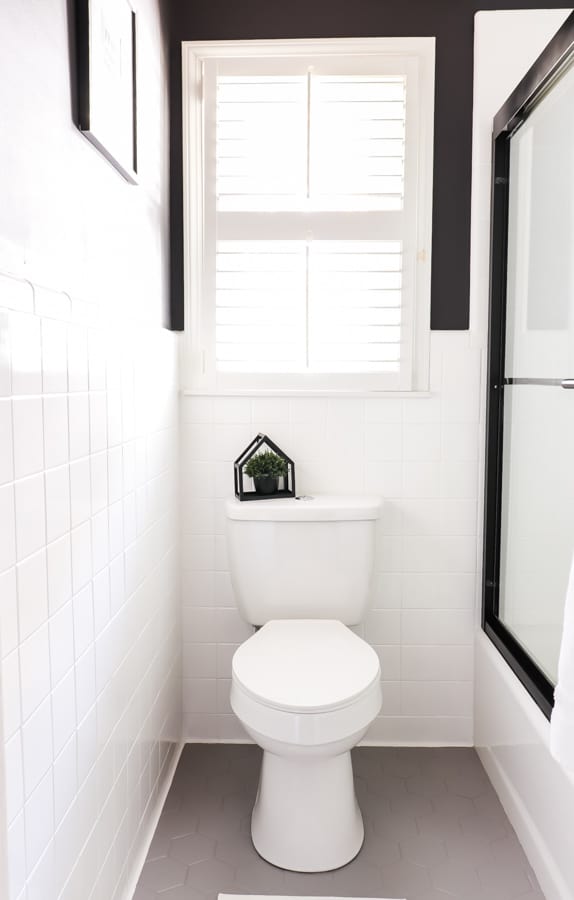
And to finish off the room, our walls were painted in a color from my capsule collection with Romabio Paints. It’s called Iron City.
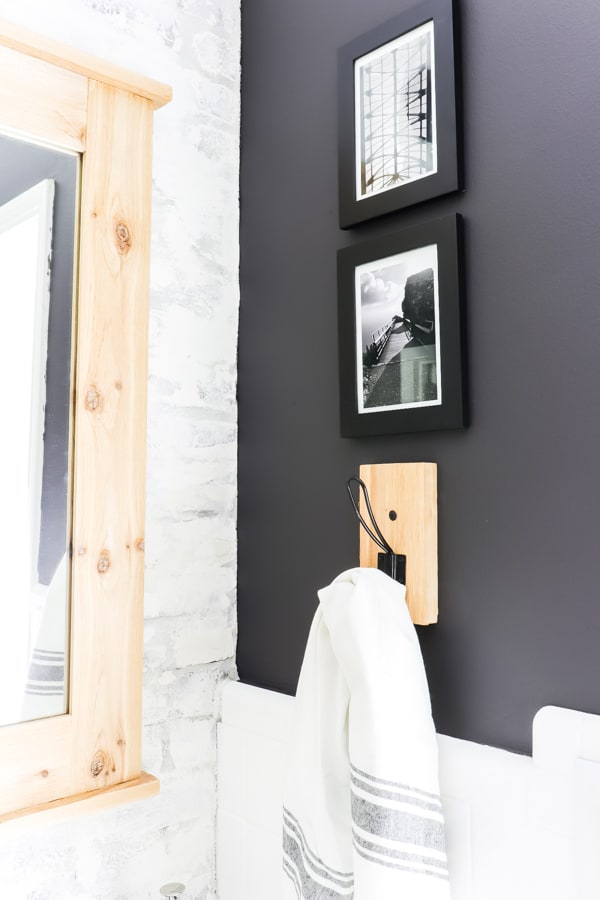

To finish the room, all the decor was gathered from around my house. Each picture was a clearance item I found at Hobby Lobby last spring that was tucked away in the closet.
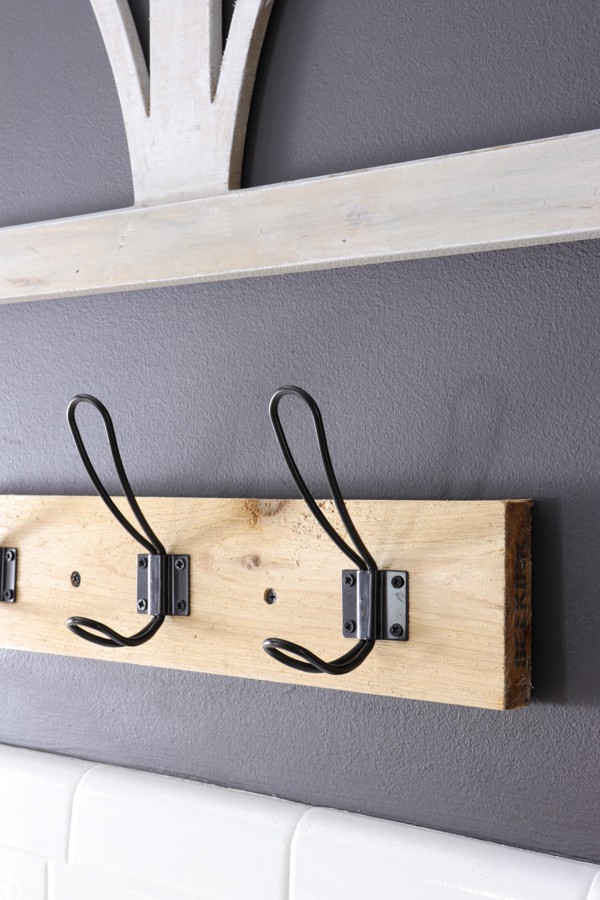
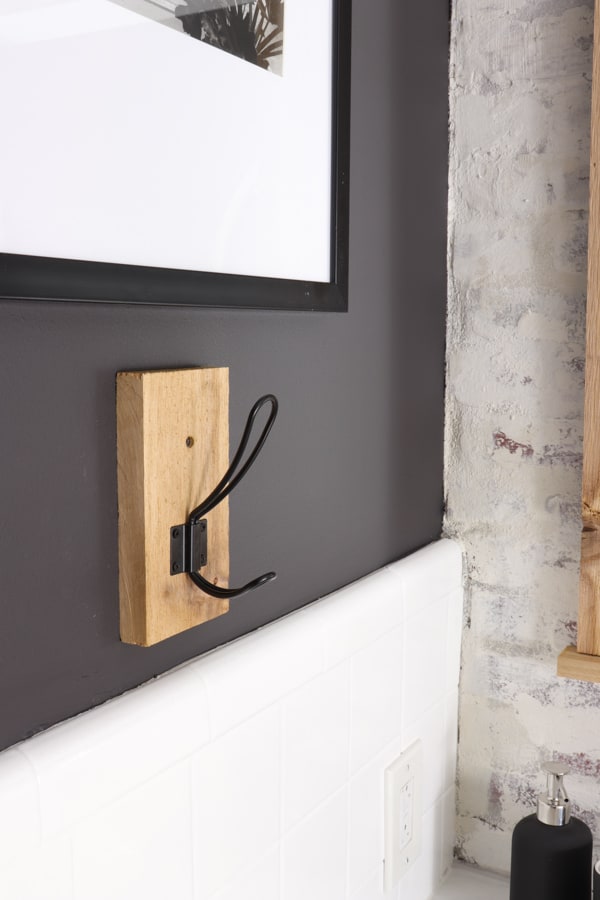
I made the towel racks myself using farmhouse hooks and leftover wood.
The one thing I did order were these soap dispensers and toothbrush holders from Ikea.
The hand towels I’ve had for years. Add a few pots of faux greenery and a candle and call it done! All items I previously had.
Of course, you want to know the cost breakdown of how were were able to create this $1000 DIY Bathroom Makeover. So here you go, my friend! I’ve included links to certain items if you’re looking for them. If I’ve left any off, let me know and I will get those to you.
$1000 DIY Bathroom Makeover
Cost Breakdown
(Some affiliate links are provided below. Full disclosure here.)
- Remove Countertop – free
- Take Down Vanity Mirror – free
- Remove Tub Grout problems – $22 for Dremel Bit
- Demo the Ceiling over the Tub – free
- Remove Ceramic Fixtures – free
- Drywall Ceiling – $17.65 for Green Board
- Move Electricity – $15 for boxes and switch
- Sand Vanity Base and Add 6 inches – $36 for wood (tutorial)
- Build Cabinet Doors – $39 for Wood
- Build DIY countertop – $35 for Matte Marble Film
- Re-grout the Tub Surround – free (tutorial)
- Scrape Popcorn Ceilings – free (flooring for ceiling – free) (my secret tricks)
- Paint all Tile and Floor – $52 for walls $100 for floors
- Paint Walls – free using Iron City from Romabio Paints
- Install Brick Accent Wall – sponsored by General Shale and RomaBio Paints
- Find Used Shower Doors – $80 + $72 in new parts & $12 in spray paint
- Cut and Frame mirror to 2 DIY mirrors – $45 for Cedar Wood (tutorial)
- Replace Light Fixture – $66 (2 from Home Depot)
- Replace Faucets – $80 in matte black + $16 plumbing supplies
- Update door knobs – $26
- Replace cabinet hardware – $44 (handles) (drawer pulls)
- Replace Shower Head – $25 from Home Depot
- Replace Floor Register – $24 from Home Depot
- Misc supplies (caulk, paint brushes, tax, drill bits, etc.) – $171.57
- DECORATE – mostly from on hand – $33 Soap/Toothbrush Dispenser, Farmhouse Hooks
FINAL COST: $1011.22
So, there you have it!
I can’t believe that we were able to makeover this room for so little with these results!
This $1000 DIY bathroom makeover certainly doesn’t look like it was that cheap.
And to be honest, I didn’t think we could pull it off!
Boy, am I surprised! It’s amazing how thinking outside the box pushes you to be creative and find solutions to your decor dilemmas.
Thank you so much for following along on this journey with us and for cheering us on! We couldn’t do this blog without you and your input. I would love to hear what you think of this reveal. Please leave me a comment below.

And certainly, don’t miss out on the other spaces my blogger friends are revealing today. Over at the One Room Challenge, you can follow along with the 20 featured bloggers or the other guest bloggers like me.
You will definitely find creative ideas for any room you are tackling.
A huge thanks to Linda from the One Room Challenge and the sponsors listed below for giving me the inspiration I need to create a room for those I love!


Pin This for Later!

Don’t miss the other posts
in this Bathroom Makeover!
THE BEFORE
RAISE THE ROOF: HOW WE MADE THE BATHROOM CEILING TALLER
DIY SHOWER DOOR UPDATE
HOW TO MAKE A BATHROOM VANITY TALLER
REGROUTING BATHROOM TILE
INSTALLING AND LIMEWASHING BRICK VENEER
DIY CEILING PLANKS FROM LAMINATE FLOORING
HOW WE CHANGED OUR BATHROOM TILE FOR $150
HOW TO MAKE CEDAR FRAMED MIRRORS
THE BIG REVEAL!
Thanks to The Spruce for featuring this blog post! You can read that full article here.


I absolutely loved this DIY bathroom makeover! The transformation is stunning and proves that a beautiful space doesn’t have to break the bank. The tips on choosing budget-friendly materials were super helpful. Can’t wait to try some of these ideas in my own bathroom!
Wow, this makeover is incredible! I can’t believe how much you accomplished with just $1000. The before-and-after photos are so inspiring, and I love the color scheme you chose. Can’t wait to try some of these ideas in my own bathroom! Thanks for sharing!