How to Plan a Budget Bathroom Remodel
We are starting another renovation for the One Room Challenge and available funds are tight. Here’s how to plan a budget bathroom remodel.
I didn’t think I would be starting another remodel this year. It was just a few weeks ago when I talked about taking a break from large projects.
But then…
It was an early evening when I walked down the hall to check to see if the boys were getting ready for ready for bed.
My oldest was washing his face and it stopped me in my tracks.
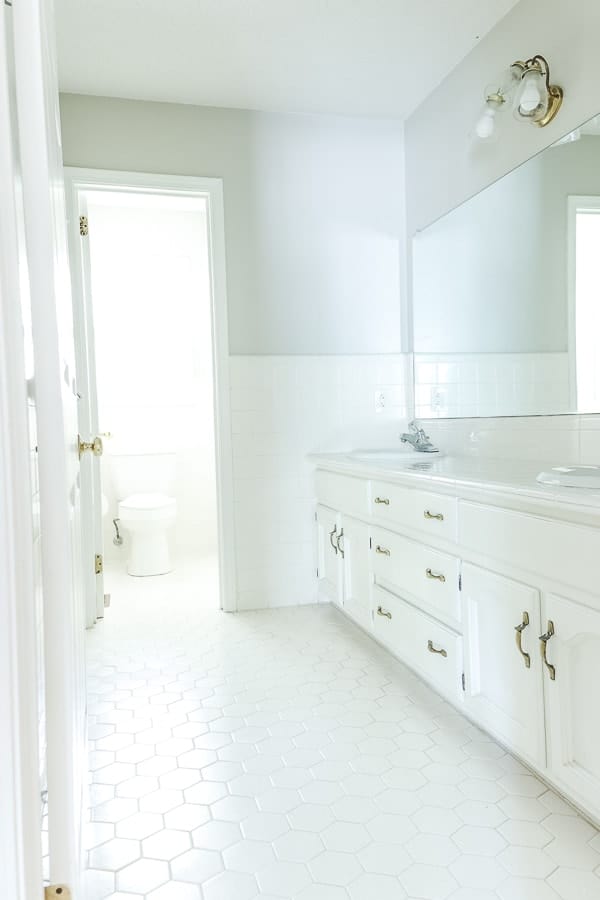
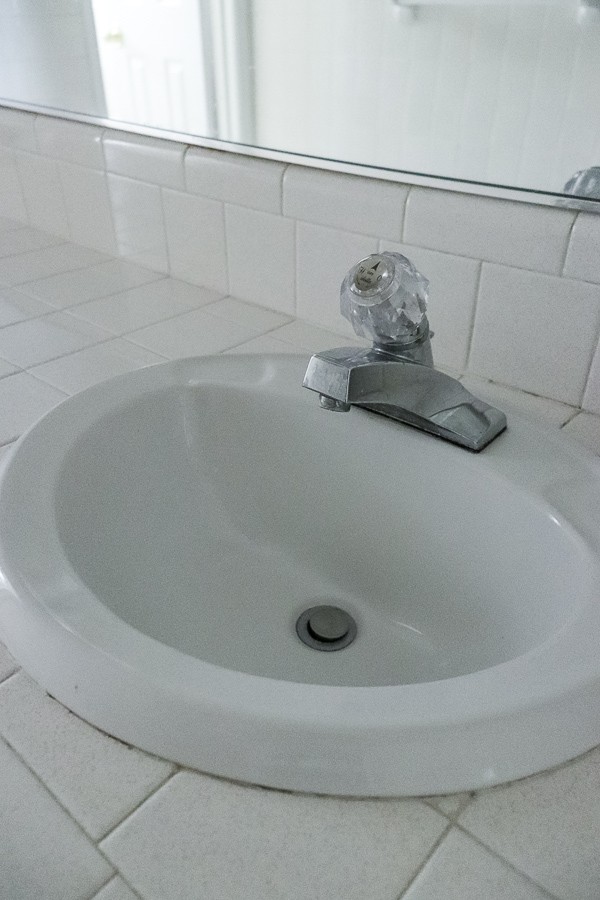
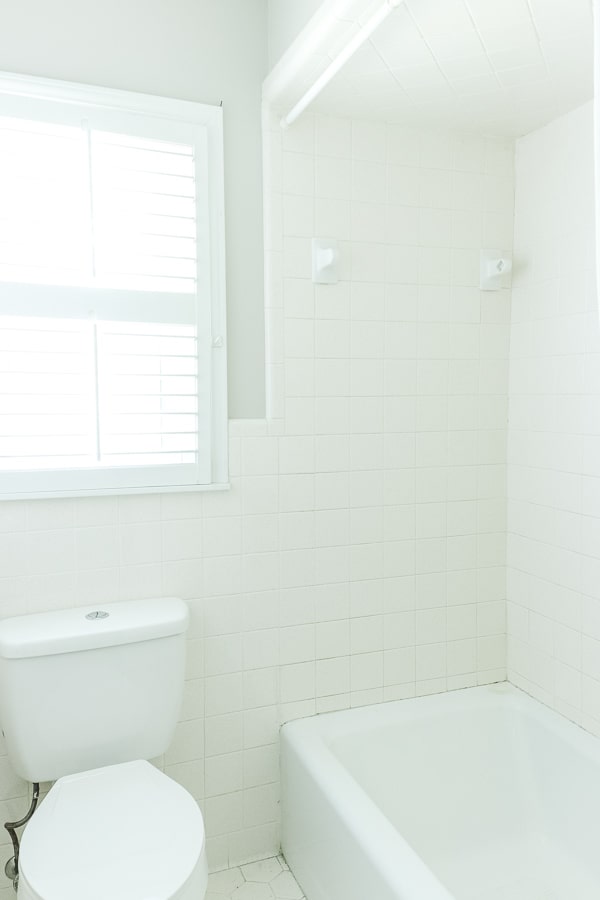
You see, his bathroom is still the original to this circa 1986 house and was built as a handicapped accessible bathroom.
What’s the big deal, you ask? Well, the doors are wider – which isn’t a problem – and the countertops are lower.
And there’s the issue.
My 15 year old is 6’6″ and watching him contort his body to simply reach the sink was quite the sight.
But it didn’t stop there.
When he stood up to talk to me, I noticed that he can’t even see the top of his head in the mirror.
So here we are – tackling another room for the One Room Challenge and I’m really excited about it!
For those of you who are new here, you may be wondering what the One Room Challenge is. The One Room Challenge is a widely anticipated biannual event, co-hosted by Better Homes and Gardens, where bloggers, like me, document their progress each week over a 6 week period. While it’s high stress to race to the finish line in such a sort amount of time, being able to rally together with other DIYers and support each other is something I always look forward to!
In fact, it’s so much fun that this is my seventh One Room Challenge I’ve participated in!
But here’s the kicker…..
Our budget is teeny tiny! I mean, I can’t even say this is design on a dime cuz momma doesn’t have one to spare!
So I thought I would share tips for how to plan a budget bathroom remodel and save costs.
How to Plan a
Budget Bathroom Remodel
Repurpose, Reuse, Recycle
This is the number one way to save on costs. By using what you already have and working with it, you can really help that bottom line.
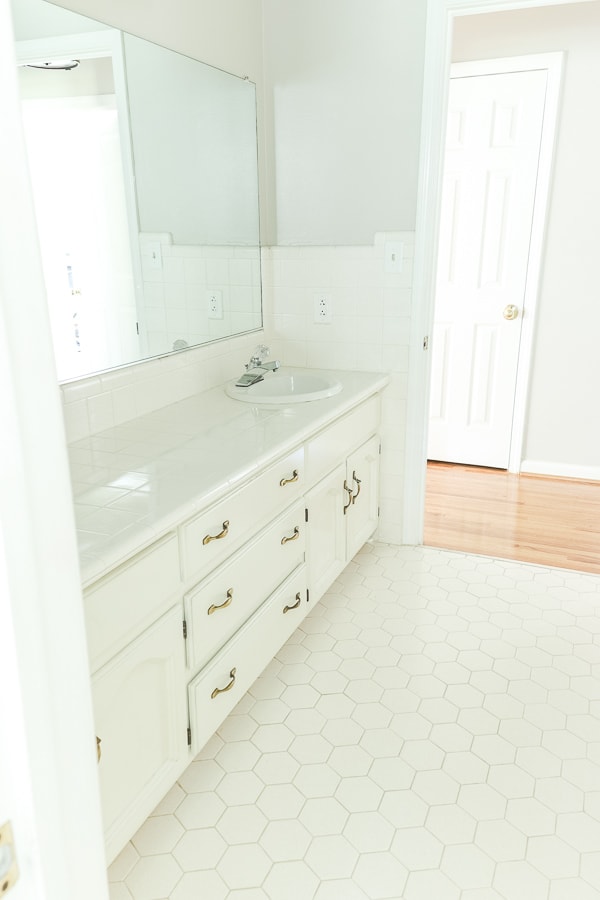
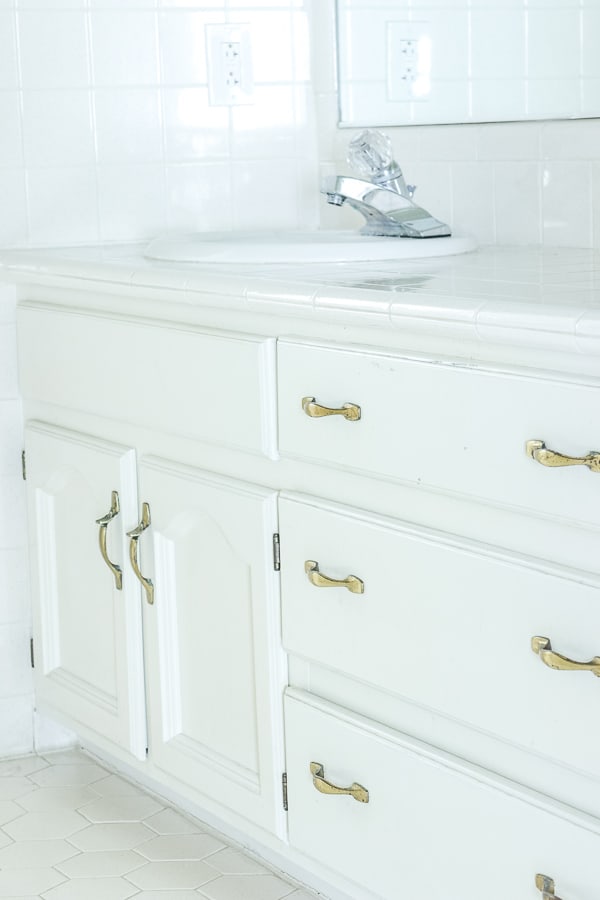
Since our number one issue is the counter height, we plan to repurpose this by raising the height six inches to accommodate our tall son. We will also sand down the wood to a natural finish.
We’ll update the knobs and pulls which you can find really cheap on Amazon!
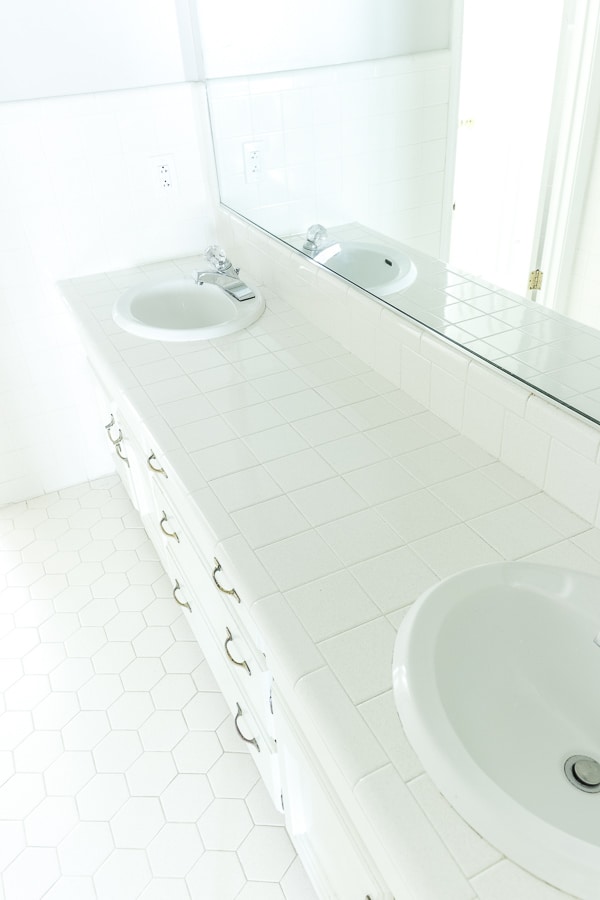
The sinks are in great shape, so we’ll keep those, but plan to replace the countertops with a DIY hack. We saved an old countertop when we updated our Butler’s Pantry and hope to reuse that here.
We’ll remove the large mirror and have it cut down to two smaller mirrors that we plan to frame out.
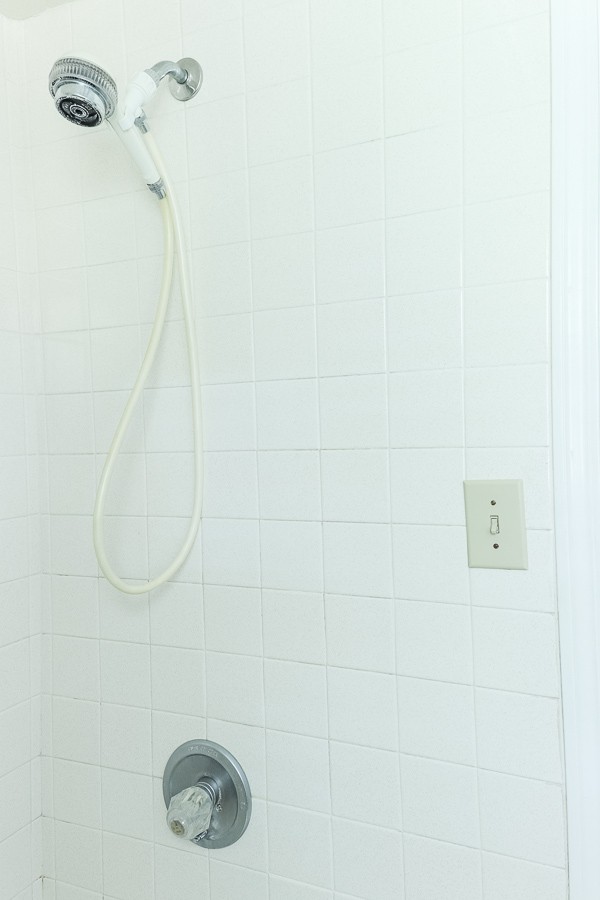
We will also replace the faucets. These have seen better days and one is constantly dripping. That shouldn’t be too expensive.
Find Creative Solutions for your Problems
Sometimes the cheapest fix for a design dilemma is to think outside the box.
Confession time.
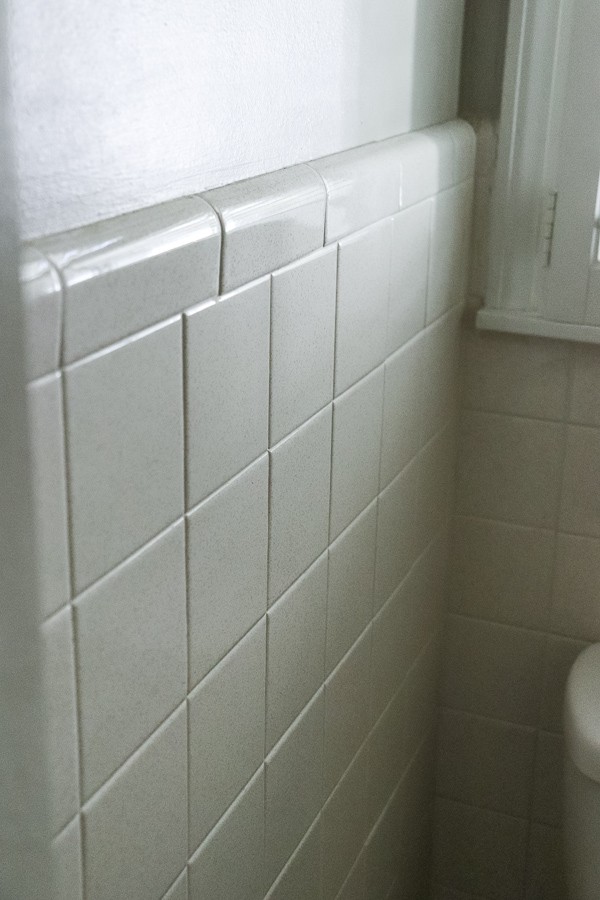
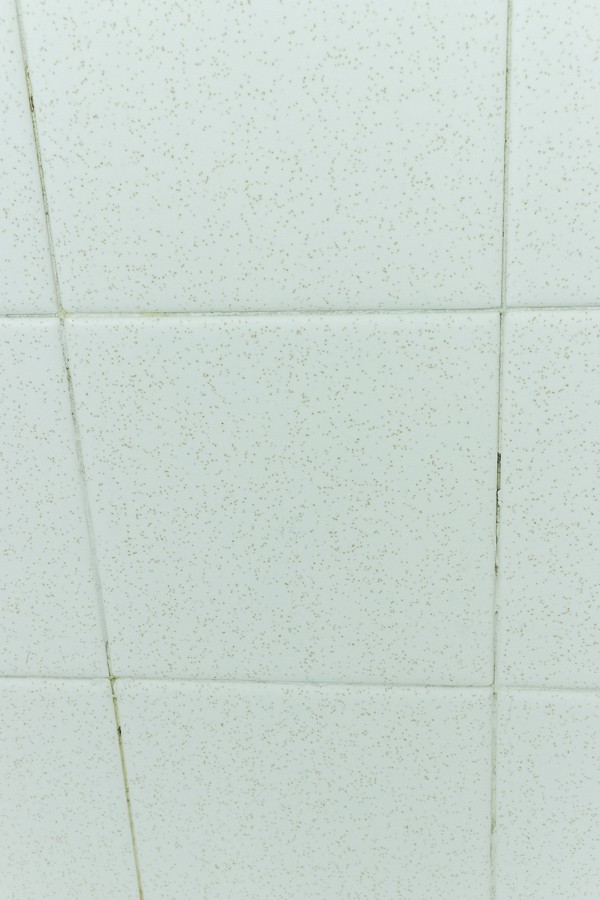
I really hate the tile in this bathroom.

Bespeckled and dated.
It’s a white based tile, but with those tiny specks, the color reads almond sometimes.
But here’s the kicker.
For 30 year old tile – it’s in excellent shape! So to bust it out and retile the entire bathroom just because I don’t like the color is wasteful and a lot of time and effort.
And we all know that time costs money!
So we plan to paint the existing wall tile with Rust-oleum’s Tub and Tile Paint in a bright white.
A paint kit is just $25 and after reading reviews, it’s really easy to use.
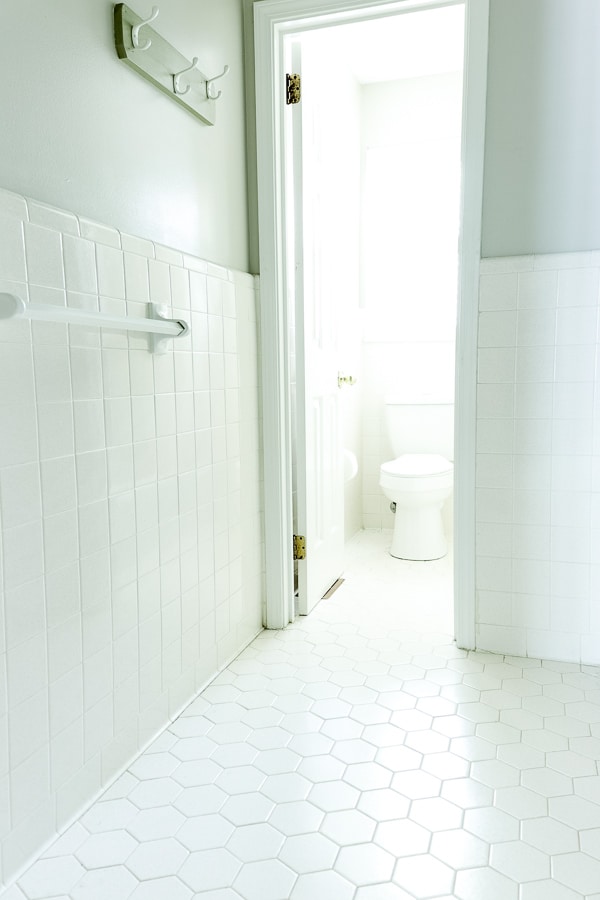
And speaking of tile paint, we will also be addressing the floor.
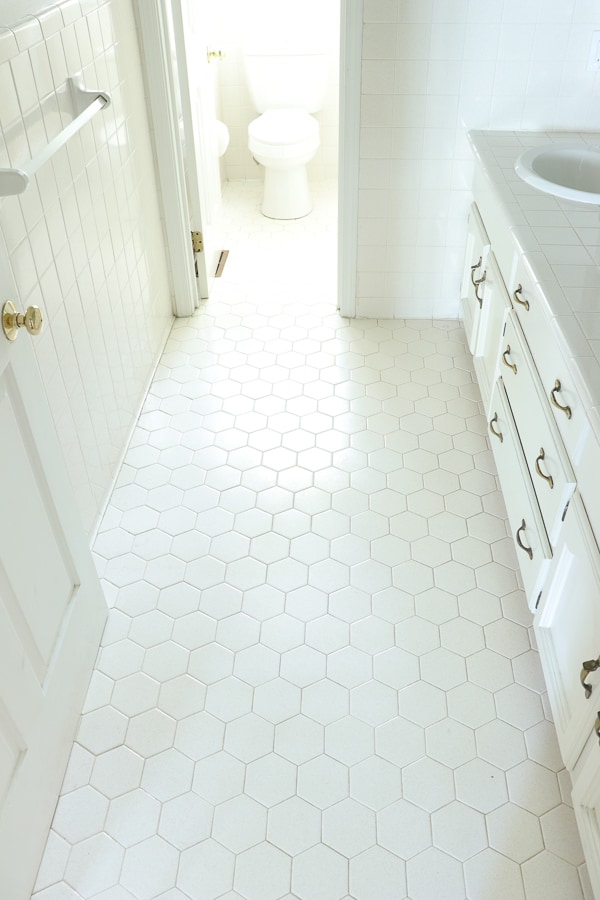
Our floor tile is a fun hexagonal shape that has had a resurgence in the tile world. We are going to use another Rust-oleum product called RockSolid Home and paint the floor in a gray color.
So by painting the tile instead of replacing it, it will save on costs big time!
Another issue is the grout in our tub.
As you can see, some of the grout has worn away.
We are going to use a Dremel tool called the Multi-max to remove the existing grout, then re-grout the tub surround and follow it up with the tub and tile paint.
By thinking creatively, we will be able to fix this problem and have a new look.
DIY Construction
One of the best ways to save on costs is to do the work yourself.
With so many tutorials available on the world wide web, you can educate yourself and try many repairs yourself.
For this room, we have to address another issue.
Over the tub, the ceiling is dropped down about a foot, which is common to houses this age, but not good if you want your too-tall son to wash the top of his head.
So, very carefully, we plan to remove only the tiled ceiling without damaging any other tile.
Then we will raise the ceiling and drywall that in.
It will be time consuming and messy since the attic is above, but we did the same thing in our Master Bath remodel, so I know it can be done!
The main things we steer clear of in construction are major plumbing and electrical (with the exception of replacing lights or outlet switches). Those are best left to the professional. When we remodeled our bathroom last fall, we called in a plumber to help move pipes and we were so glad we did.
In this bathroom, we have the issue of the electrical being too close to a water source, so we plan to move that to the other side of the wall.
Can you say safety hazard?!
Work with Brands
If you are a blogger, this is common knowledge that brands want to work with influencers. But what if you’re not a blogger?
Friend, you are not out of luck! This is what I did before I was a blogger.
Don’t think you can’t reach out to companies. Businesses are constantly having markdowns, closeouts, clearance sections, etc.
Find a tile on closeout at a store? Reach out to their other locations to gather as much as you need.
There are errors in production that they try to sell to recoup some of their manufacturing costs. That’s how outlets were born!
Search Facebook Marketplace. I hope to find a used shower door for this room on there. Sometimes local businesses list their store closing and you can score a steal.
With a little bit of research and asking around, you can find deals and big discounts for your renovation. Just think outside the box a bit.
Other Details of this Remodel
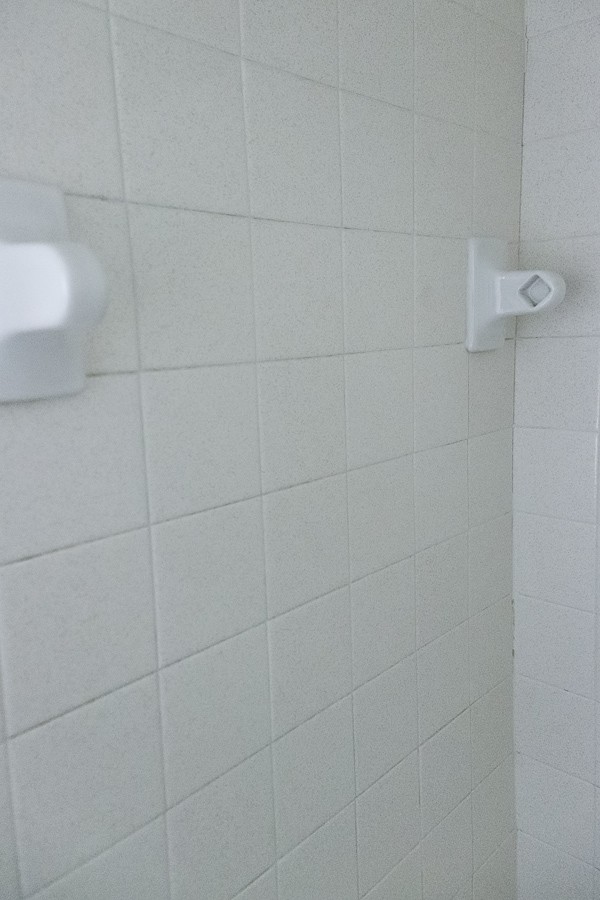
We have some dated items, like these ceramic towel racks, that need to be removed. We plan to remove and replace those tiles before we paint to bring it up to date.
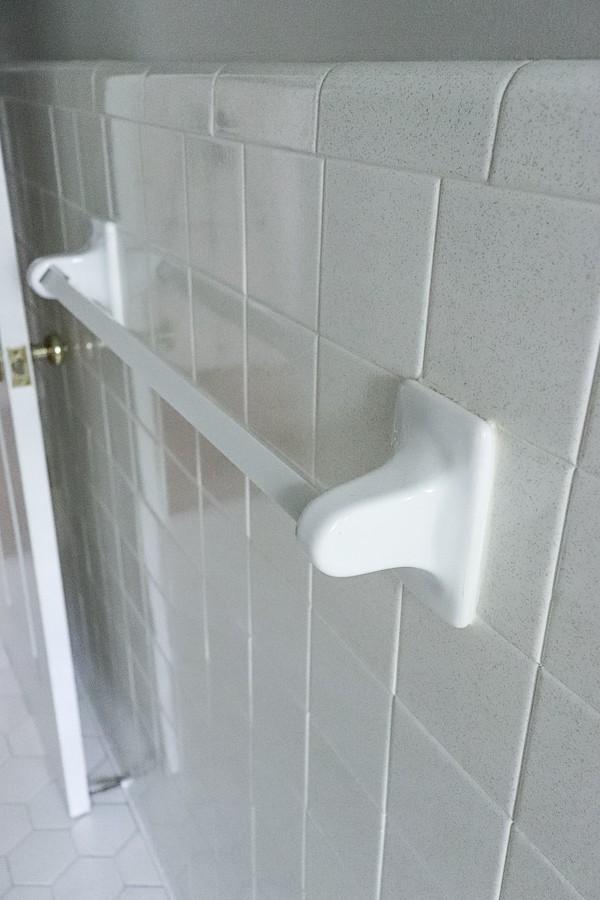
That should be an easy fix.
And light fixtures – they need a bit of love.
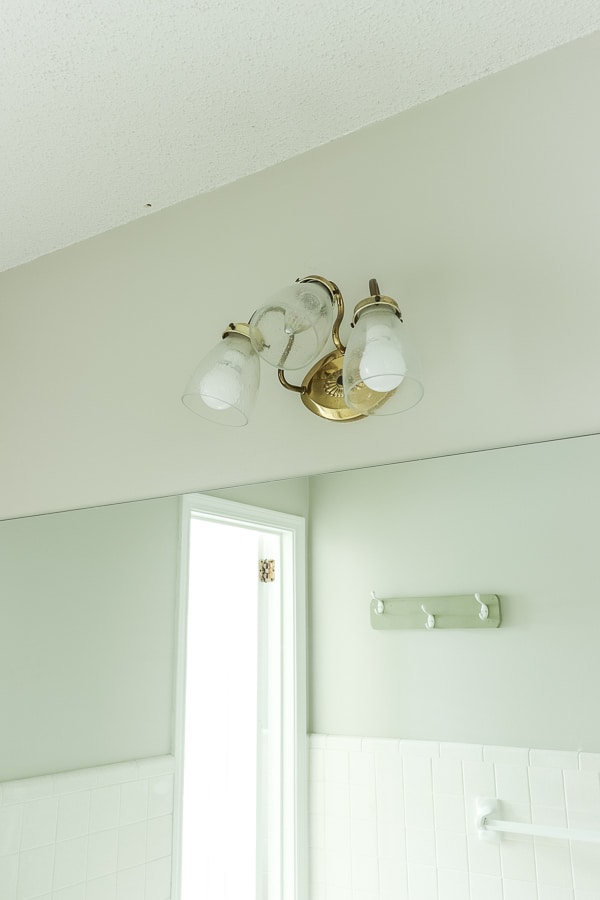
This is something we aren’t sure how it will work until we get into demo mode, but hopefully we can split this electricity into two and have two lights.

This light isn’t too bad and I can make this one work, but those ceilings have to go!
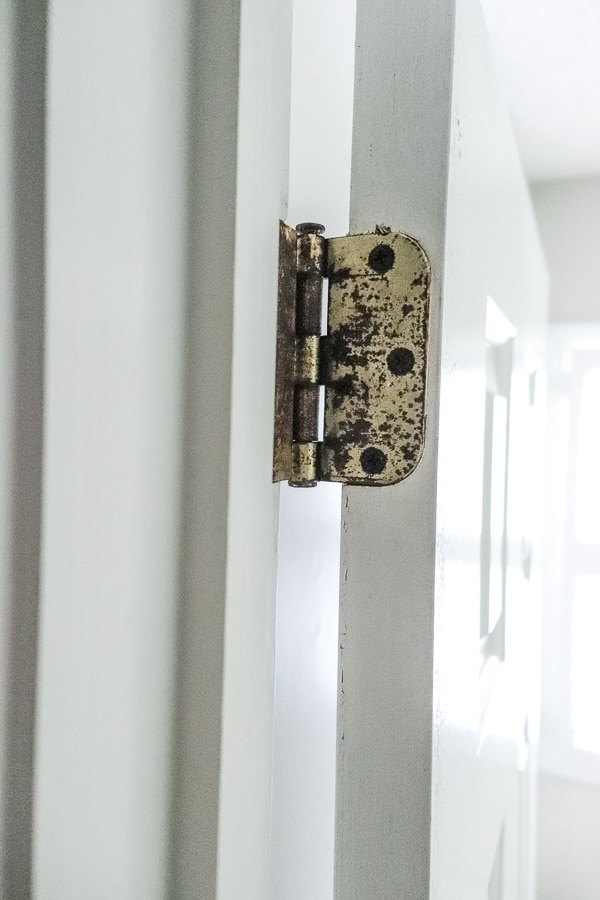
All the hardware is very dated and/or rusty so we need to replace these items also.
And new bathroom fixtures are needed. This is too low for our son, so I hope to find one that’s not too expensive.
So that’s the plan for this room – to bring it up to date and into the new century!
Now let’s look at our to do list that we need to tackle in just 6 weeks.
ORC Budget Bathroom
Remodel To Do List
- Remove Countertop
- Take Down Vanity Mirror
- Remove Tub Grout problems
- Demo the Ceiling over the Tub
- Remove Ceramic Fixtures
- Drywall Ceiling
- Move Electricity
- Sand Vanity Base and Add 6 inches
- Build DIY countertop
- Re-grout the Tub Surround
- Scrape Popcorn Ceilings
- Paint all Tile and Floor
- Paint Walls
- Install Brick Accent Wall (This is something I am SOO excited about!)
- Find Used Shower Doors
- Cut and Frame mirror to 2 DIY mirrors
- Replace Light Fixture
- Replace Faucets
- Paint or replace door hardware and hinges
- Replace cabinet hardware
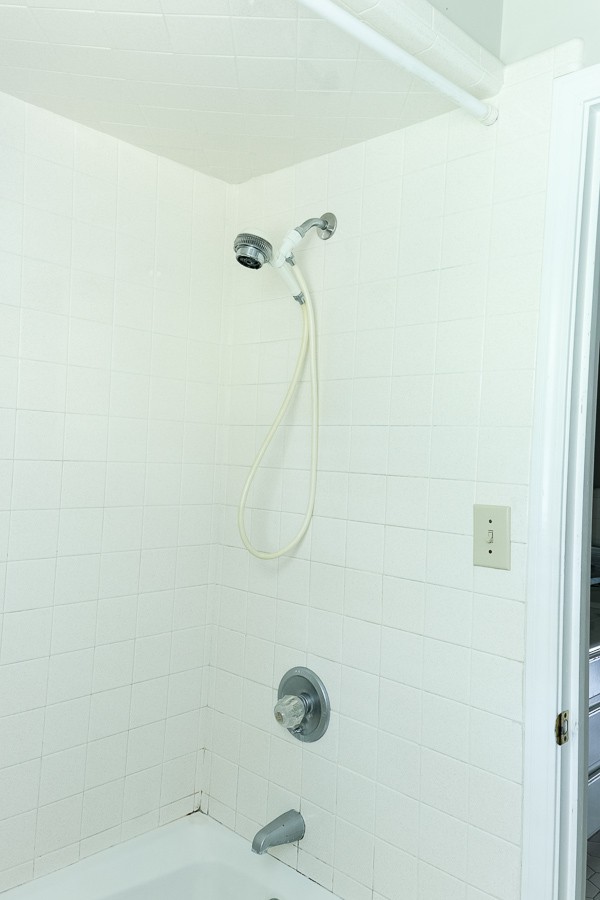
- Replace Shower Head
- Update Light switches
- DECORATE!
We can’t wait to get started and create a space for our boys.
And know that we will be focusing on the bottom line as much as possible!

Don’t miss out on the other spaces my blogger friends are renovating. Over at the One Room Challenge, you can follow along with the 20 featured bloggers or the other guest bloggers like me. Last year, there were over 200 link ups so oodles of inspiration!
You will definitely find creative ideas for any room you are tackling.
Now I’m off to get busy on this room, and I hope you come back next week to see how far we’ve gotten!
A huge thanks to Linda from the One Room Challenge and the sponsors listed below for giving me the inspiration I need to create a room for those I love!


Don’t miss the other posts
in this Bathroom Makeover!
THE BEFORE
RAISE THE ROOF: HOW WE MADE THE BATHROOM CEILING TALLER
DIY SHOWER DOOR UPDATE
HOW TO MAKE A BATHROOM VANITY TALLER
REGROUTING BATHROOM TILE
INSTALLING AND LIMEWASHING BRICK VENEER
DIY CEILING PLANKS FROM LAMINATE FLOORING
HOW WE CHANGED OUR BATHROOM TILE FOR $150
HOW TO MAKE CEDAR FRAMED MIRRORS
THE BIG REVEAL!


We did our kitchen last Spring! Good luck! I’ll be following along!
Thank you Kristin! Let’s hope we can pull it off!
This is going to be so amazing!
Stopping in from the ORC – I am doing my kitchen this year.
So excited to watch the transformation of your space. We have the same hexagonal tile in all our bathrooms, too. Looking forward to following along.
Elizabeth | blushmagnoliablog.com
I’m excited to watch what you do! Bathrooms can be soooo expensive, but you have some amazing solutions. Looking forward to seeing your progress!