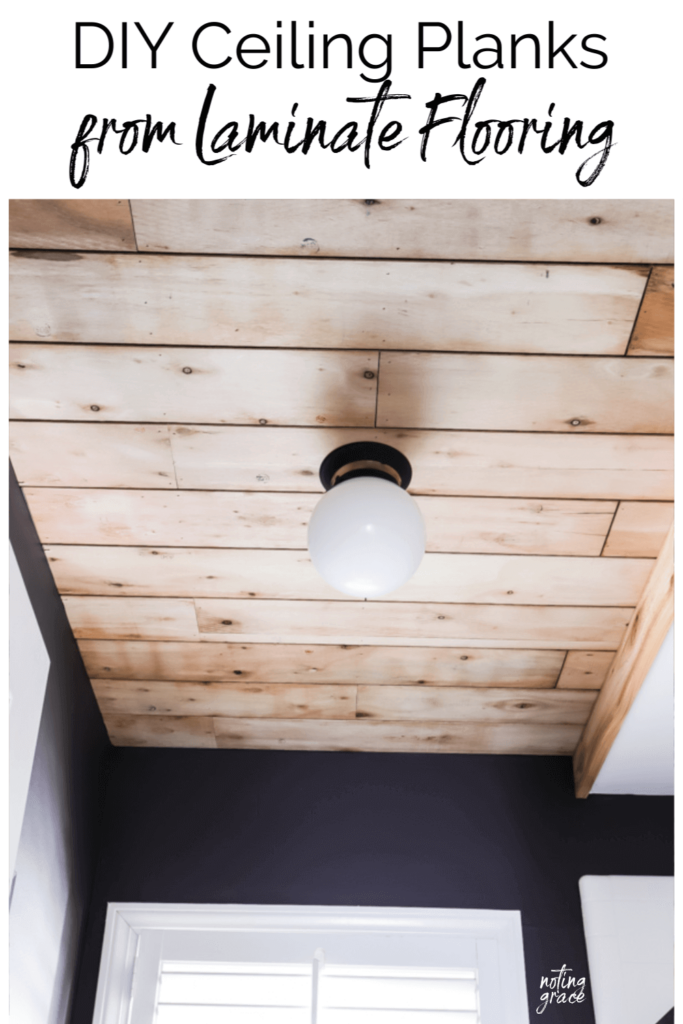
DIY Ceiling Planks from Laminate Flooring
When we made over our Boys Bathroom, we needed to hide a bad ceiling repair, but our budget was low. Here’s how we made DIY Ceiling Planks from Laminate Flooring.
We love our recent bathroom makeover!
But I never shared our sneaky trick to hiding a big boo boo from the builders.
So I thought I would share how we fixed our problem with a super creative solution!
DIY Ceiling Planks from Laminate Flooring
(Some affiliate links are provided below. Full disclosure here.)

We were all gung ho about scraping this popcorn ceiling and giving this bathroom a much needed update.
All was going so well until this happened.
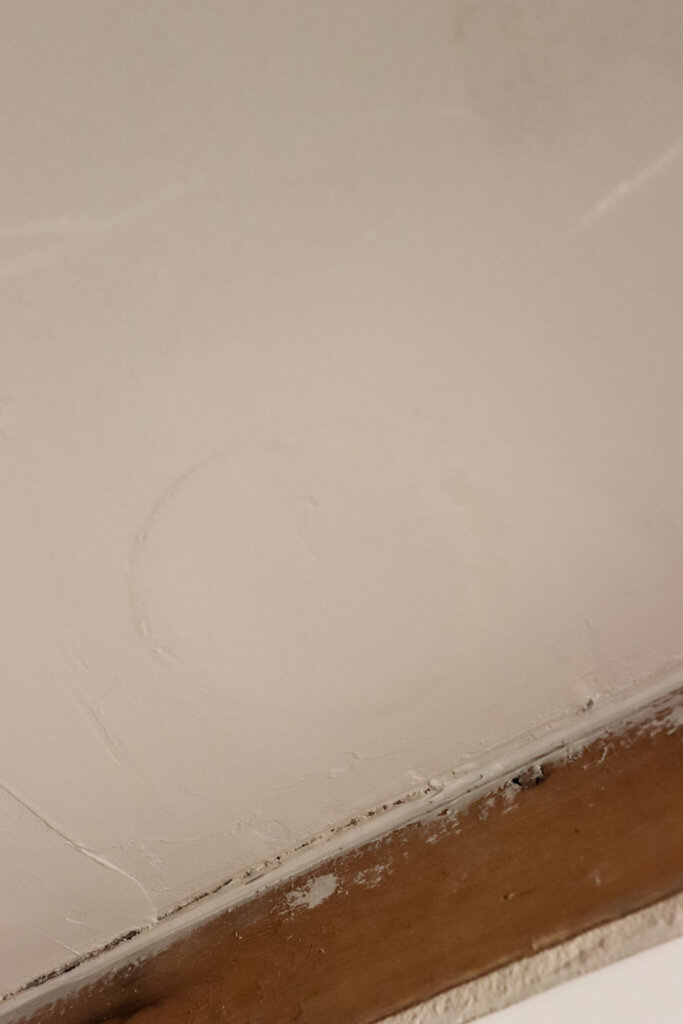
See that big circle? It’s about the size of a paint can lid.
It kept coming back to the party, no matter how many times we times we tried to kick it out.
This is after about 4 passes of compound that we finally threw in the towel.
Budget was the biggest factor when we made over our boys bathroom. We only hand $1000 to spend and we needed to cut corners everywhere. Which was why we scraped the popcorn off the ceiling to begin with.
We realized this was a mistake from when they built this house, but it was never known because of that popcorn.
I was really getting discouraged until I had an epiphany.
In our basement, the previous owners had installed laminate flooring in the kitchenette. They left us boxes of leftovers in one of the closets!
I ran as fast as I could and brought it upstairs.
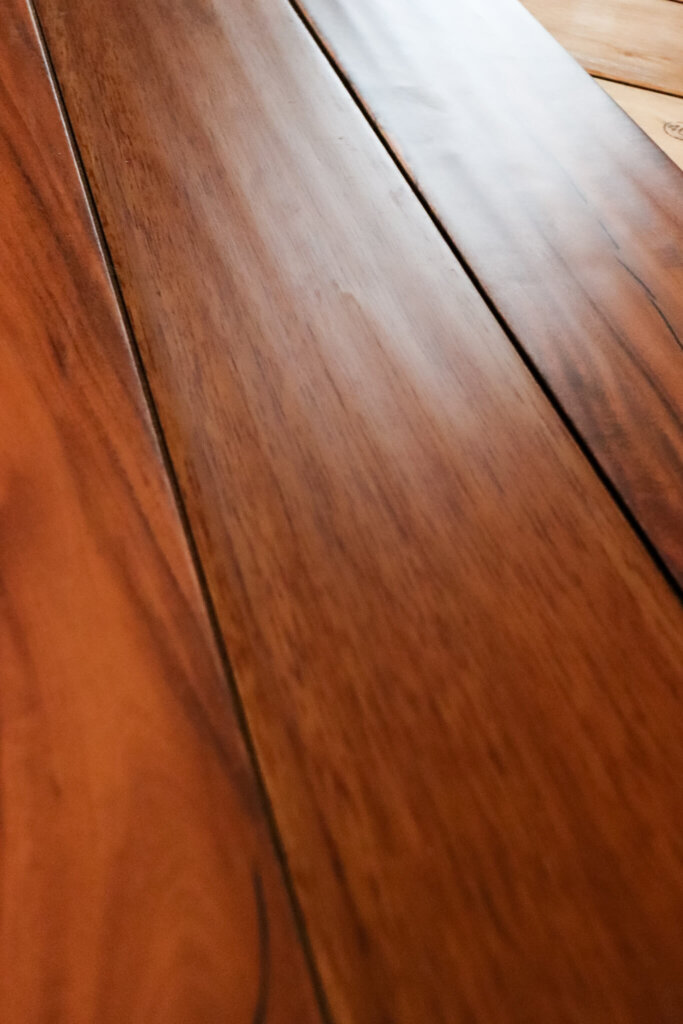
I was super excited to have a solution until I brought it into the room.
It was wayyyyyy too orange.
So, defeated, I set the wood on the counters upside down, and noticed this.
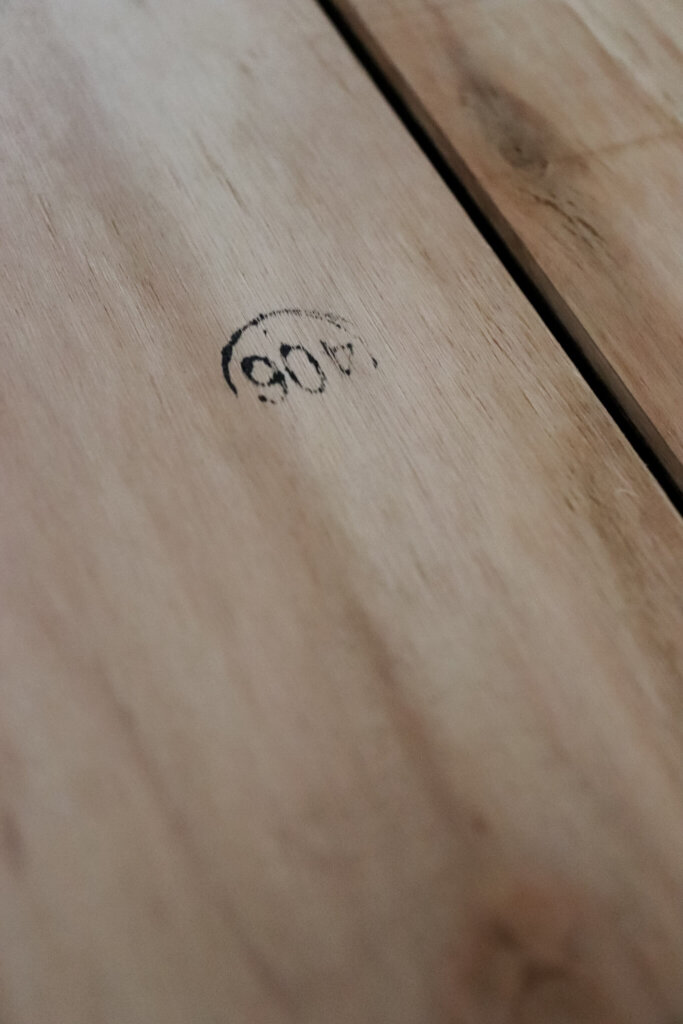
A cute little inspection stamp.
On the perfect color wood!
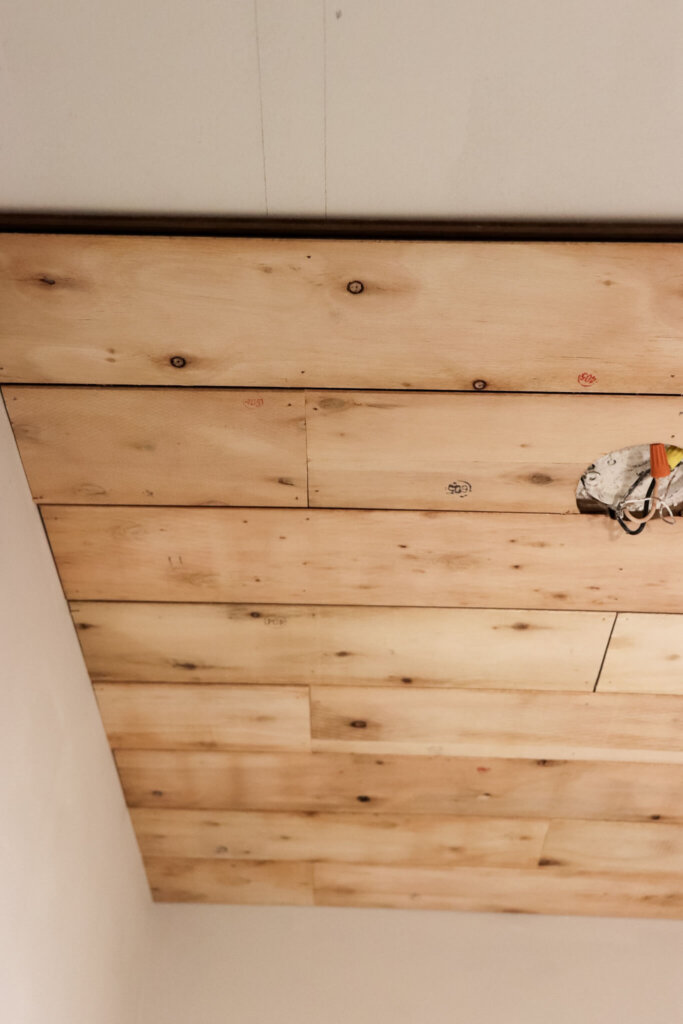
I started unpacking the rest of the wood and laid it out upside down.
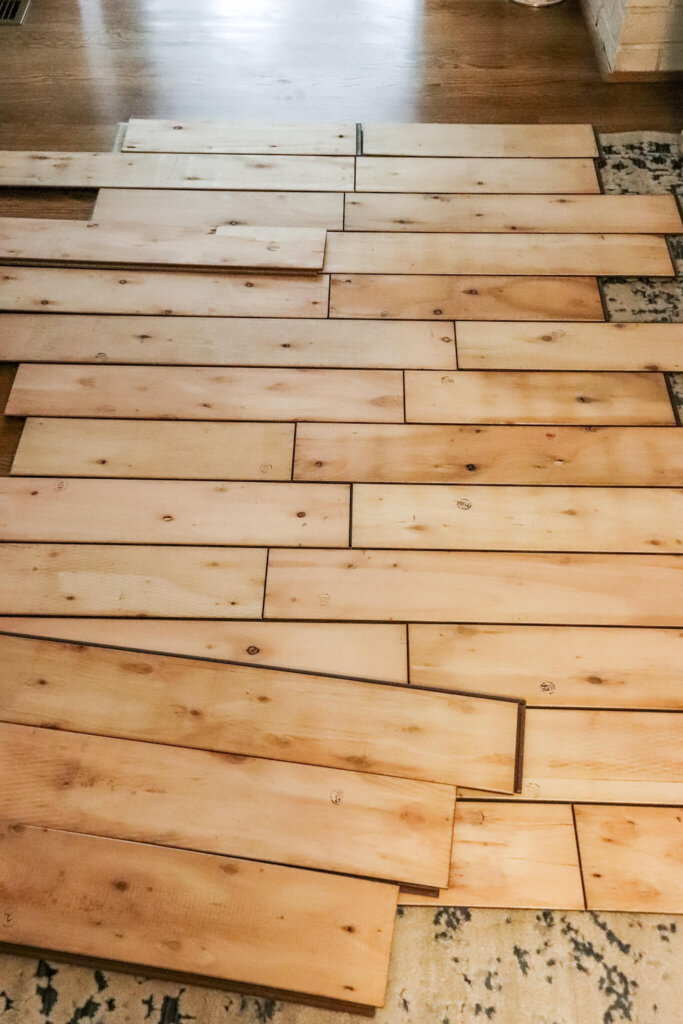
All those knots and stamps had me swooning!
What a lucky break we had by simply turning the wood over.
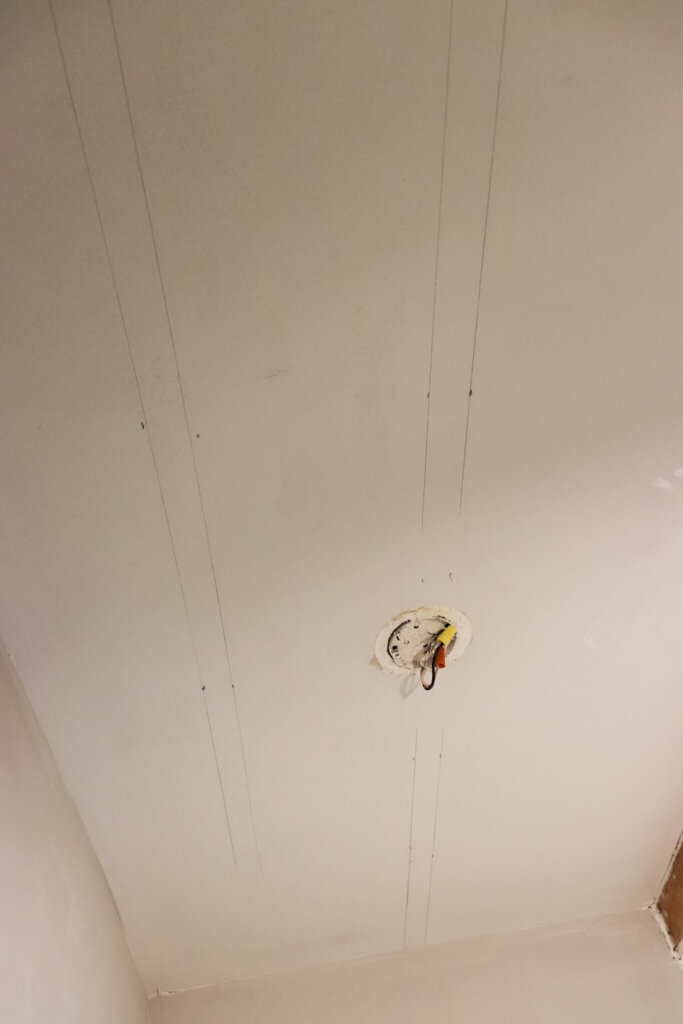
To begin with, we marked the studs. Those are the two side-by-side marks.
Then using a large level, we drew lines so we would know where to nail the boards in.
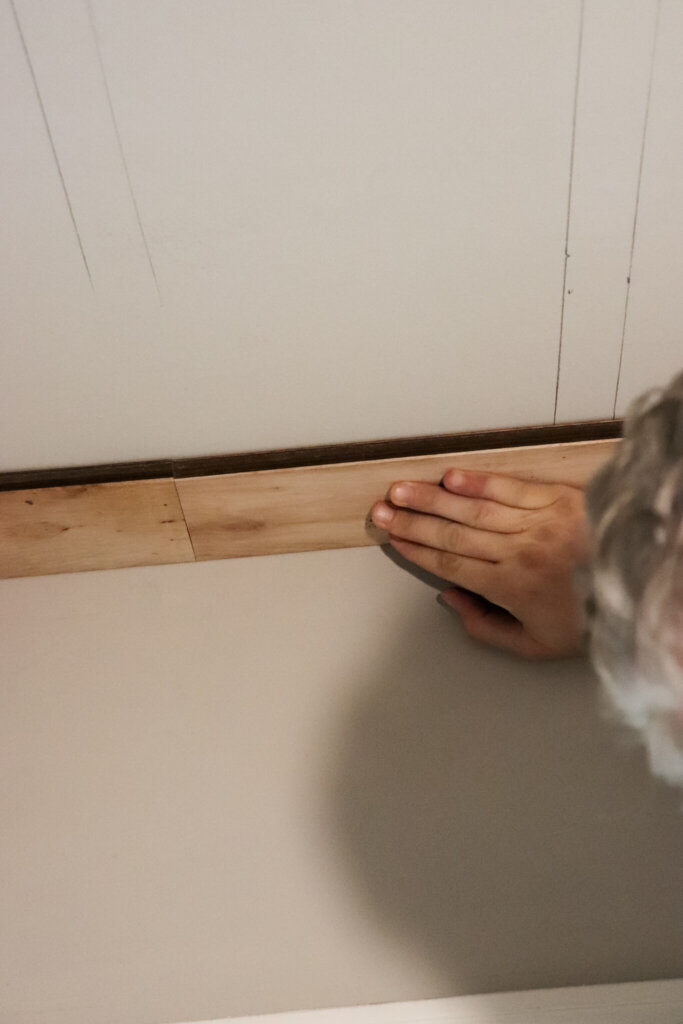
The first row is particularly important to get straight.
If you mess that up, the entire ceiling would look off kilter. So take your time when you install that first row and double check that you are square.
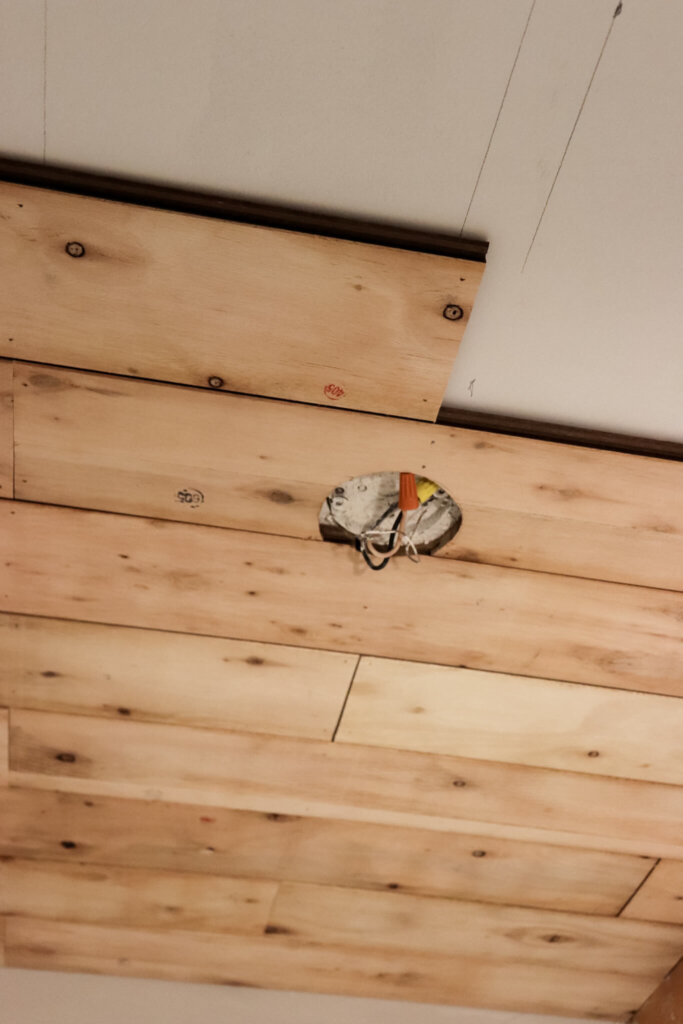
Once that first row was in, everything else went super fast.
We had to cut out a hole so the ceiling light would hang properly. So I got out a jigsaw and was able to trim the board to fit.
Afterward, we were back at the progress we had before and finished the entire ceiling in about an hour.
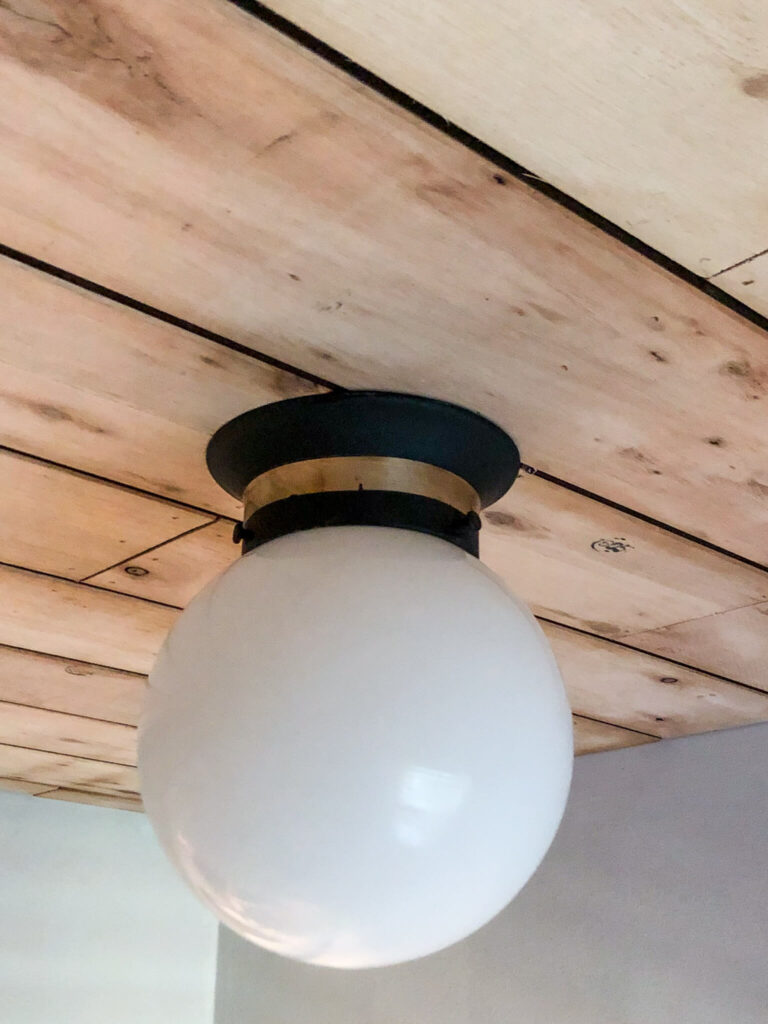
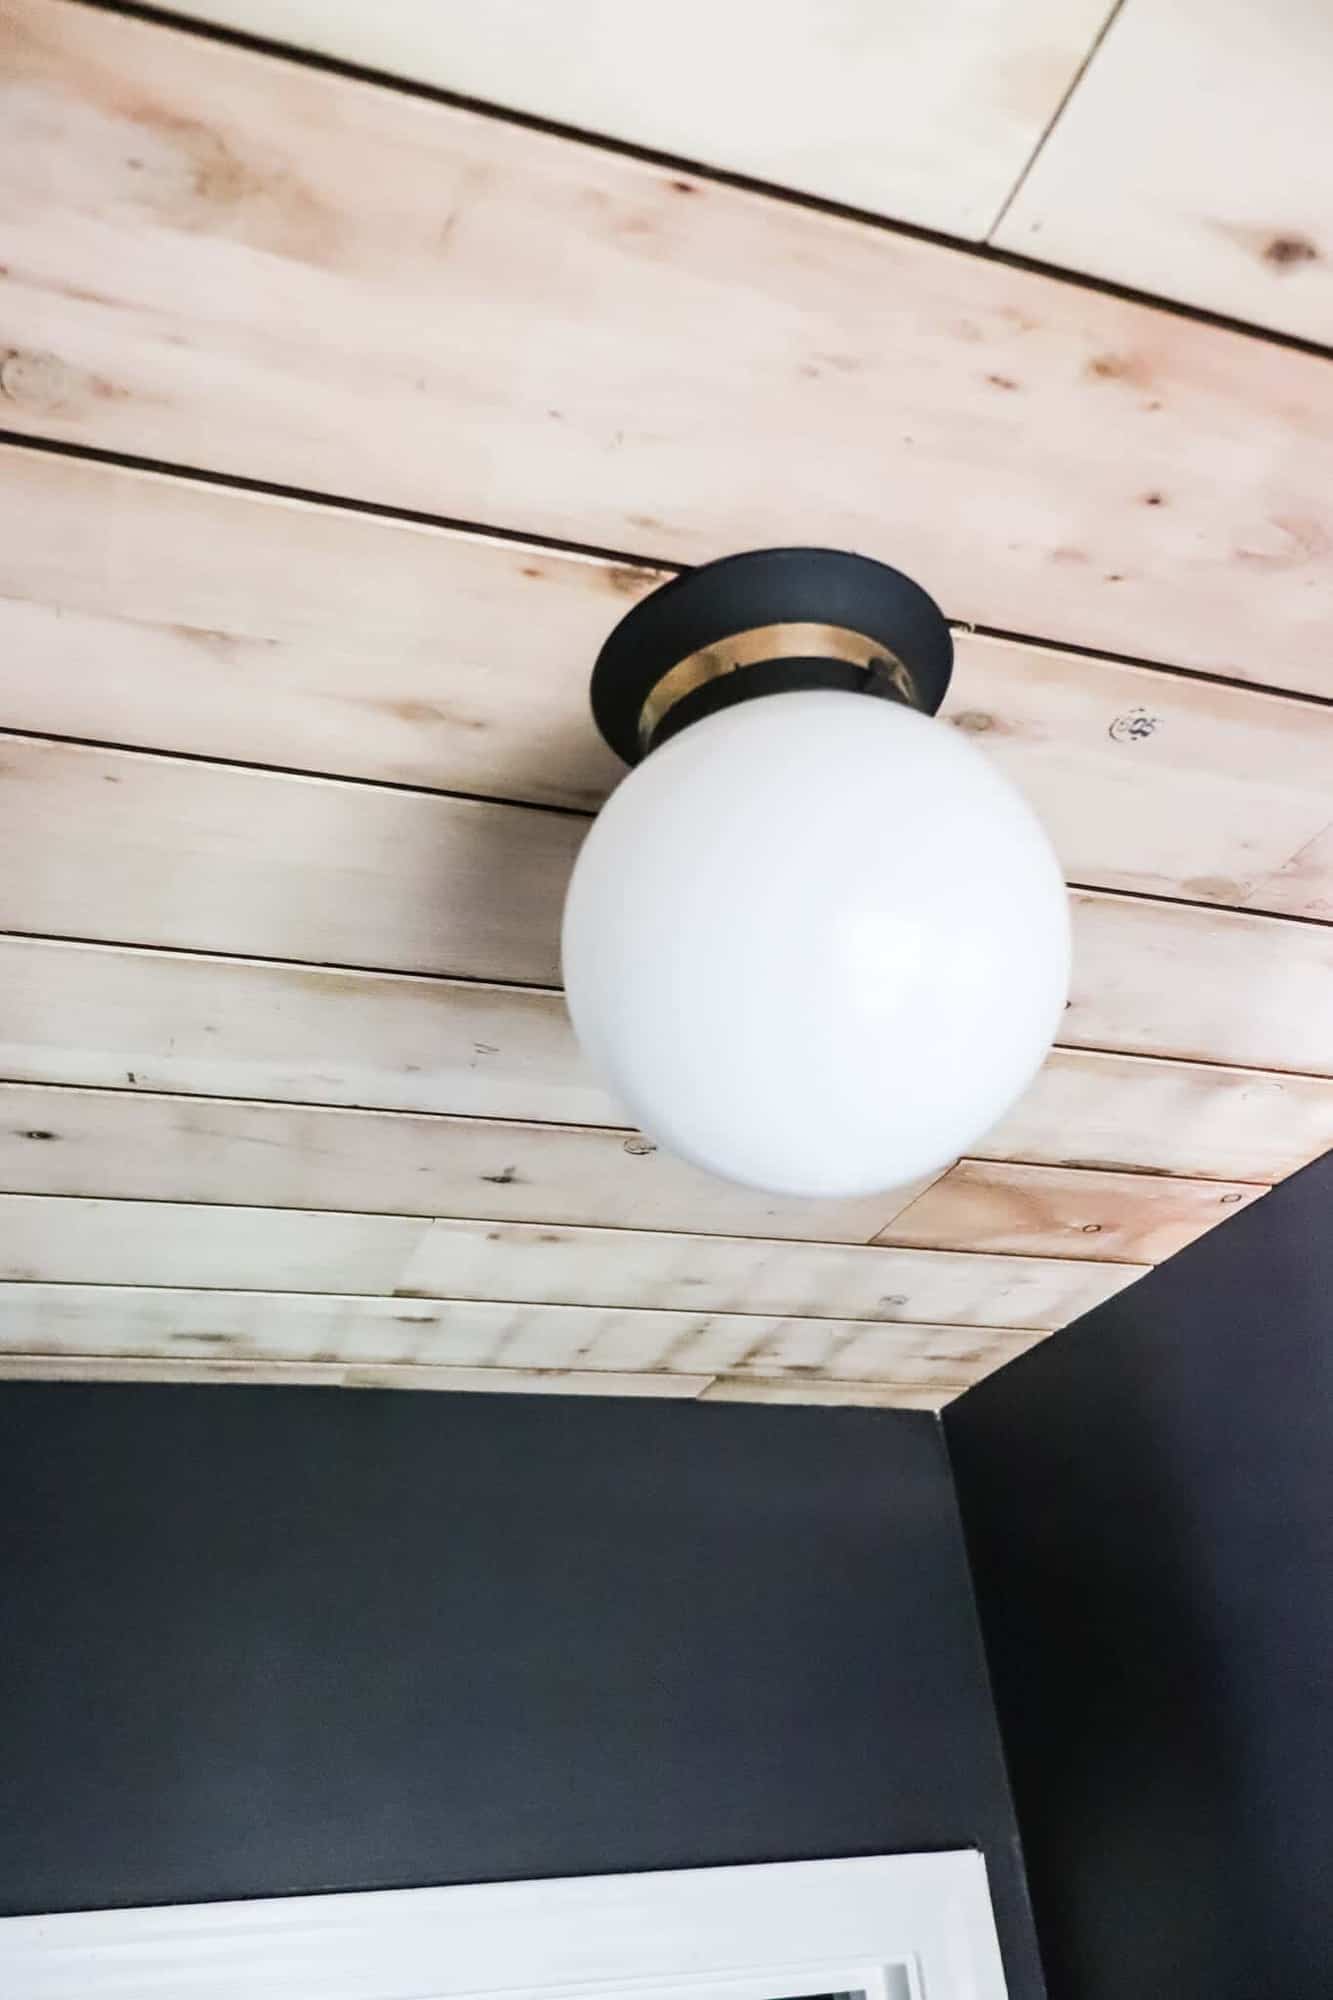
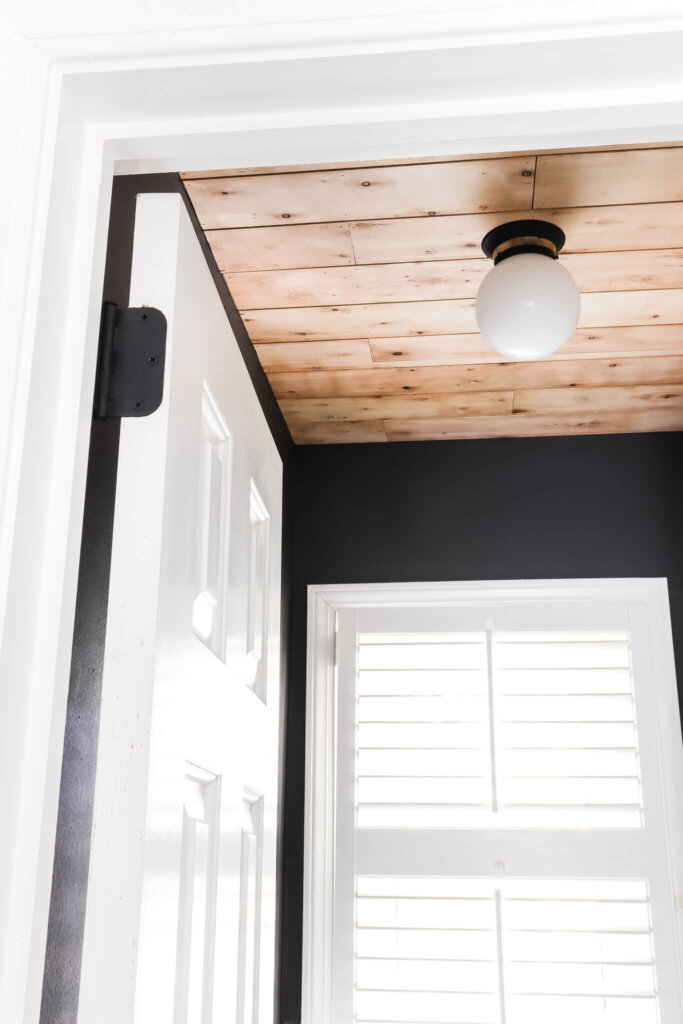
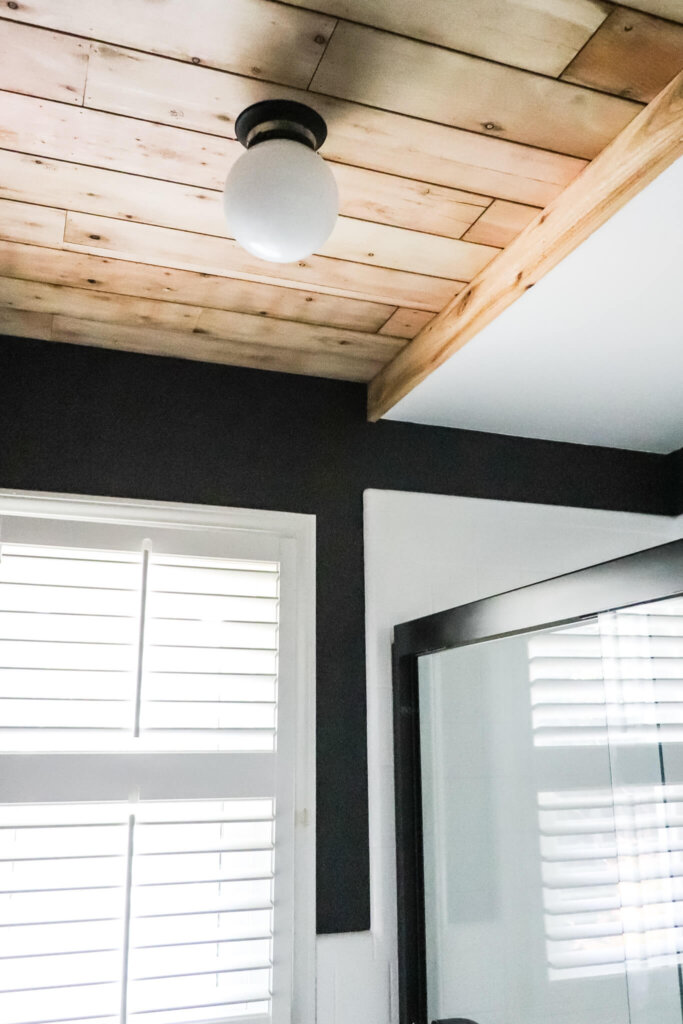
Then it was time to hang the light.
Our fixtures over the sinks were black with brass accents.
We used the same brass fixture, but taped off a ring. Now it mimics those other fixtures perfectly!
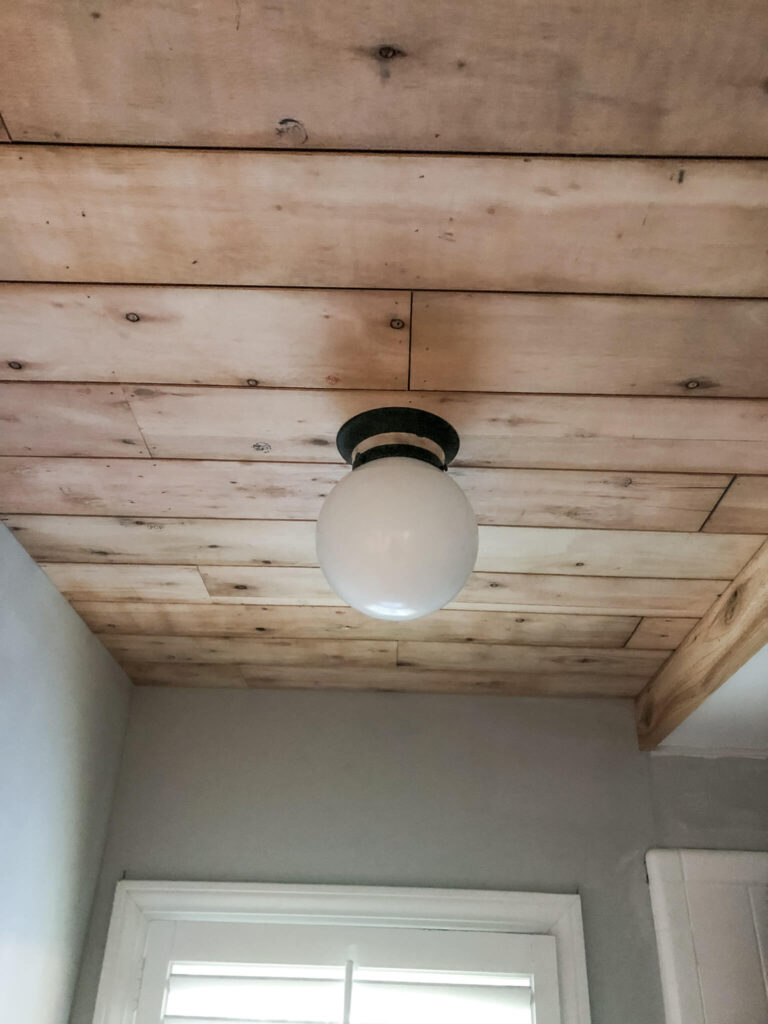
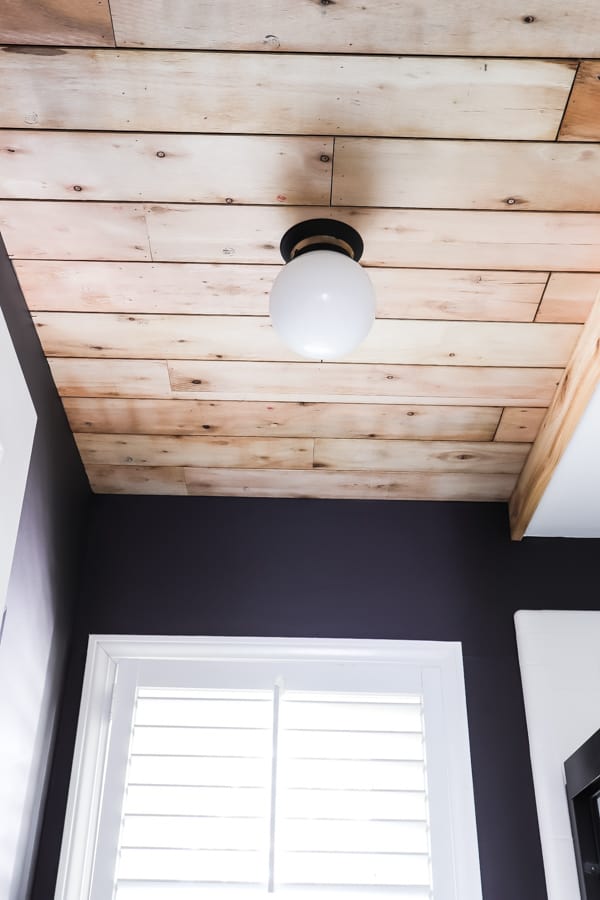
We tied it all together by adding a strip of cedar to the drop ceiling above the shower.
Then we painted the walls using Iron City by Romabio Paints. It’s one of my custom colors with them!
I just love when things work out like that!
It was a total fluke, but with stunning results!

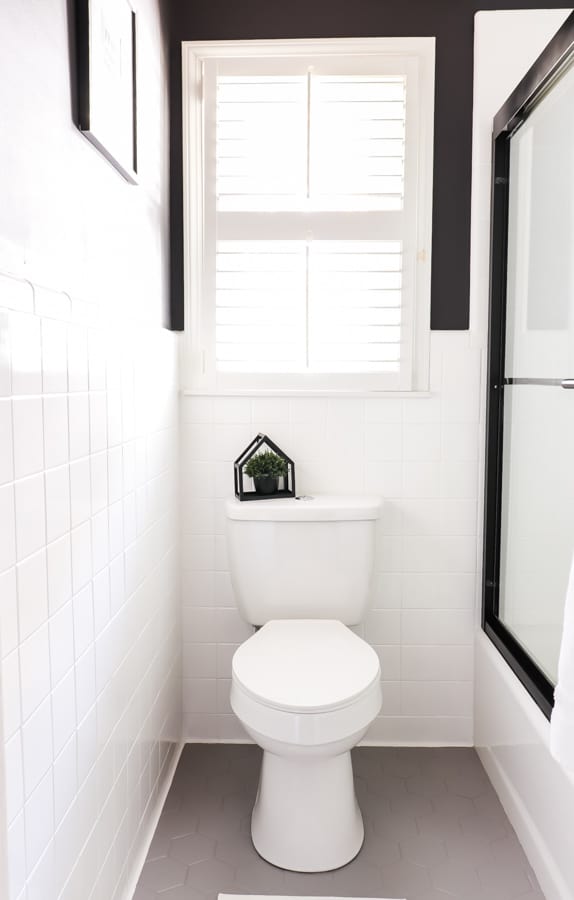
Since this is our boys shared bathroom, this gives it that rustic feel it needs!
So the next time you need to find a creative solution for your problem, don’t be afraid to think outside the box.
You just may find a happy little mistake like we did!
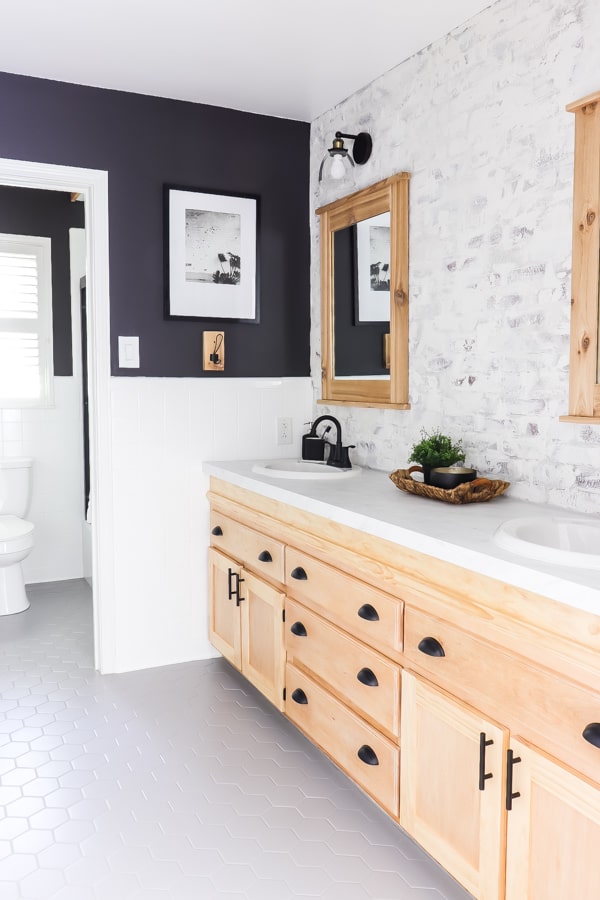
Don’t miss the full bathroom reveal. We were able to make over this entire bathroom for just under $1000!
Pin This for Later!
Don’t miss the other posts
in this Bathroom Makeover!
THE BEFORE
RAISE THE ROOF: HOW WE MADE THE BATHROOM CEILING TALLER
DIY SHOWER DOOR UPDATE
HOW TO MAKE A BATHROOM VANITY TALLER
REGROUTING BATHROOM TILE
INSTALLING AND LIMEWASHING BRICK VENEER
DIY CEILING PLANKS FROM LAMINATE FLOORING
HOW WE CHANGED OUR BATHROOM TILE FOR $150
HOW TO MAKE CEDAR FRAMED MIRRORS
THE BIG REVEAL!


That’s a great question, Jessica – Unfortunately, the previous homeowner only left the flooring pieces and not the boxes they came in. Sorry – wish I could help more!