How to Easily Make a Bathroom Countertop Taller
When we updated our boys bathroom makeover to accommodate my tall son, the most asked question we received was how to easily make a bathroom countertop taller. Today I am sharing all the details with you!
I knew almost immediately that we needed to make drastic changes to our boys bathroom.
It was when I saw my son bent in half trying to wash his face one night, I knew we had to tackle this issue with their low bathroom countertops.
That doesn’t work when you have a 6-foot-7 teenager. So we had to find an easy and economical solution to fix this problem.
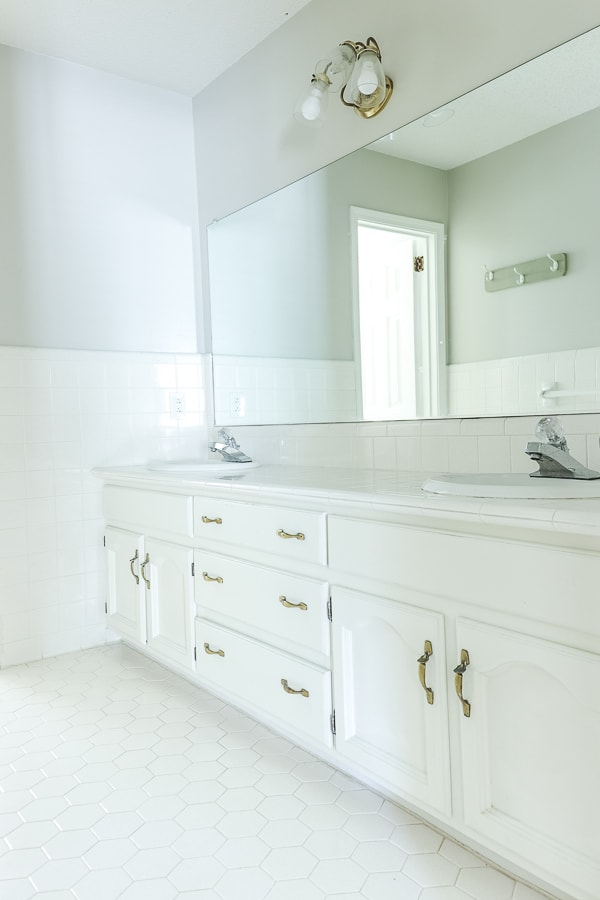
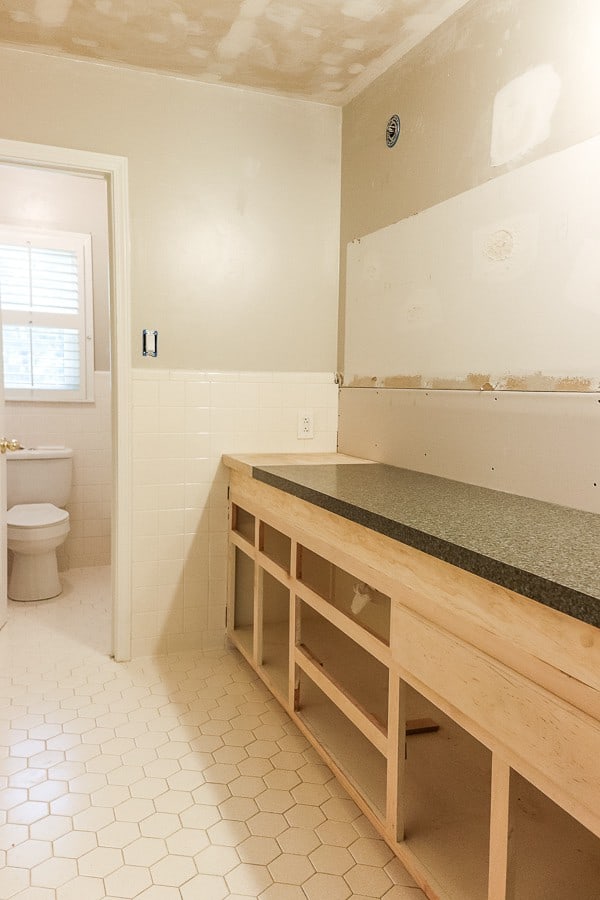
When we moved into this house, our boys bathroom was built to be handicap assessable, meaning the doors were wider, and the counters were low.
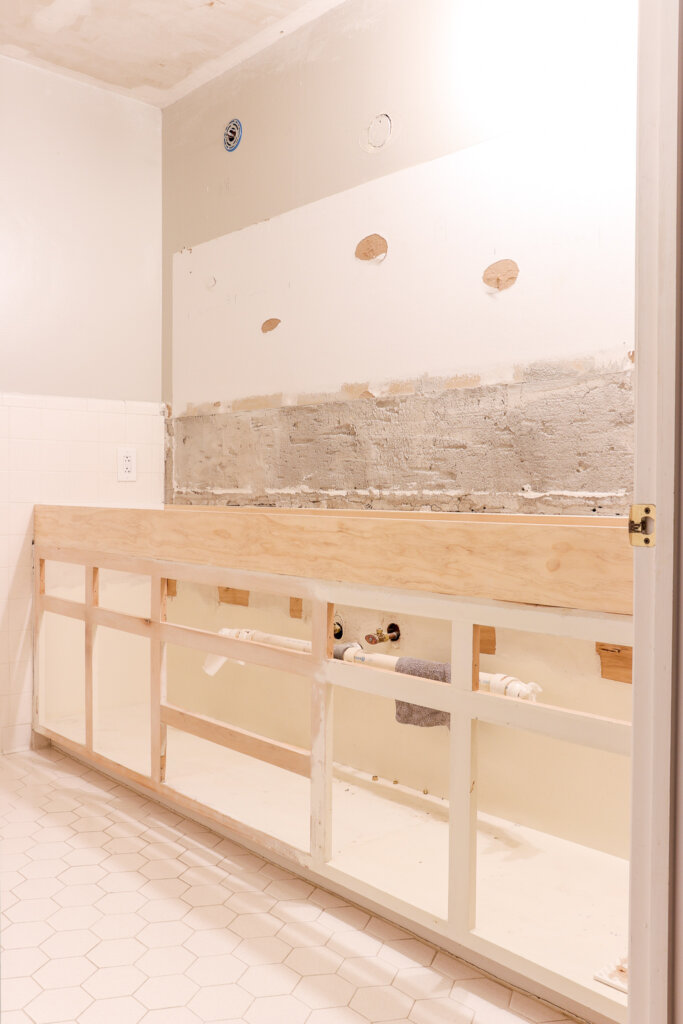
Here is what it looked like before the bathroom remodel.
The original plan was to remove the entire cabinet base and raise it up six inches by adding base and feet to the cabinet.
But then we noticed that the builders installed the wall and floor tile around the cabinet, making the simple task of lifting the base a now impossible one.
What were we to do? We came up with a solution that I think is way easier than our original plan.
Here’s how we did it!
How to Easily Make a Bathroom
Countertop Taller
(Some affiliate links are provided below. Full disclosure here.)
Supplies Needed:
1 x 6 boards cut the length of your vanity – ours was 8 foot
1 x 6 boards cut the depth of your vanity – most are 22 inches
Kreg Jig Pocket Hole Kit
Drill (this one is our favorite)
Countertop – you can reuse your existing one or find out how we repurposed one down below
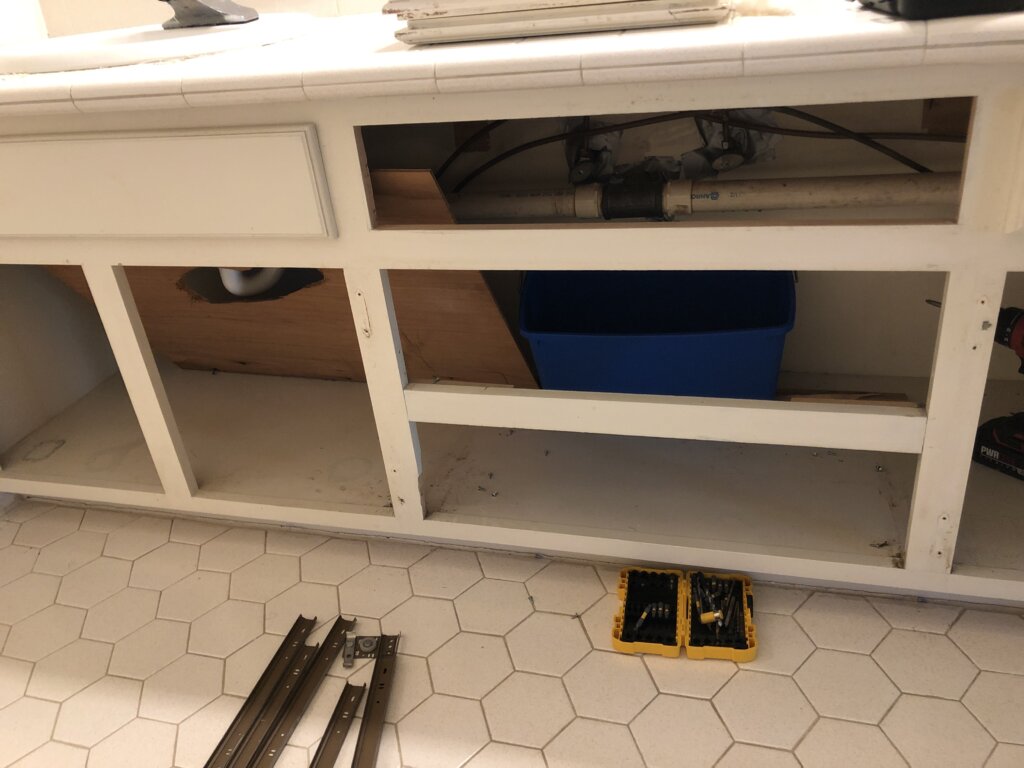
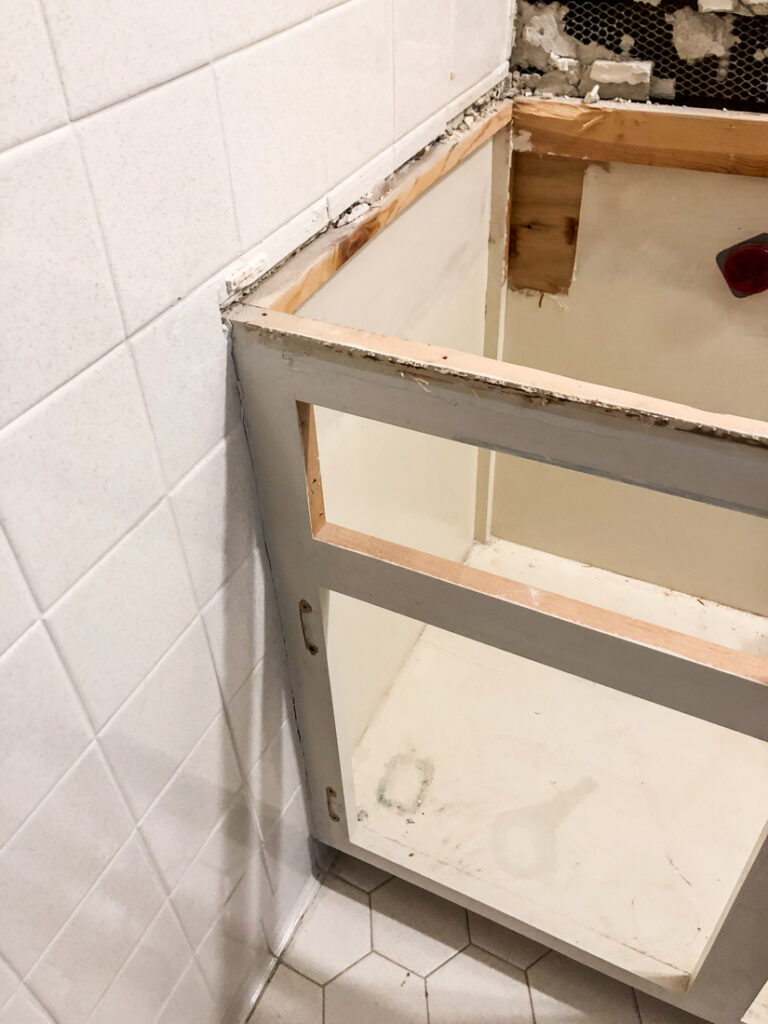
We started this project by removing the cabinet doors and drawer fronts.
This allows for easy access to the under side of the countertop.
Next we removed the large mirror above the counter as well as the faucets and the sinks.
TIP: If you aren’t experienced at plumbing, I suggest you hire a professional to remove the sinks for you. We found it to be an easy DIY by simply turning off the water supply lines to the sinks.
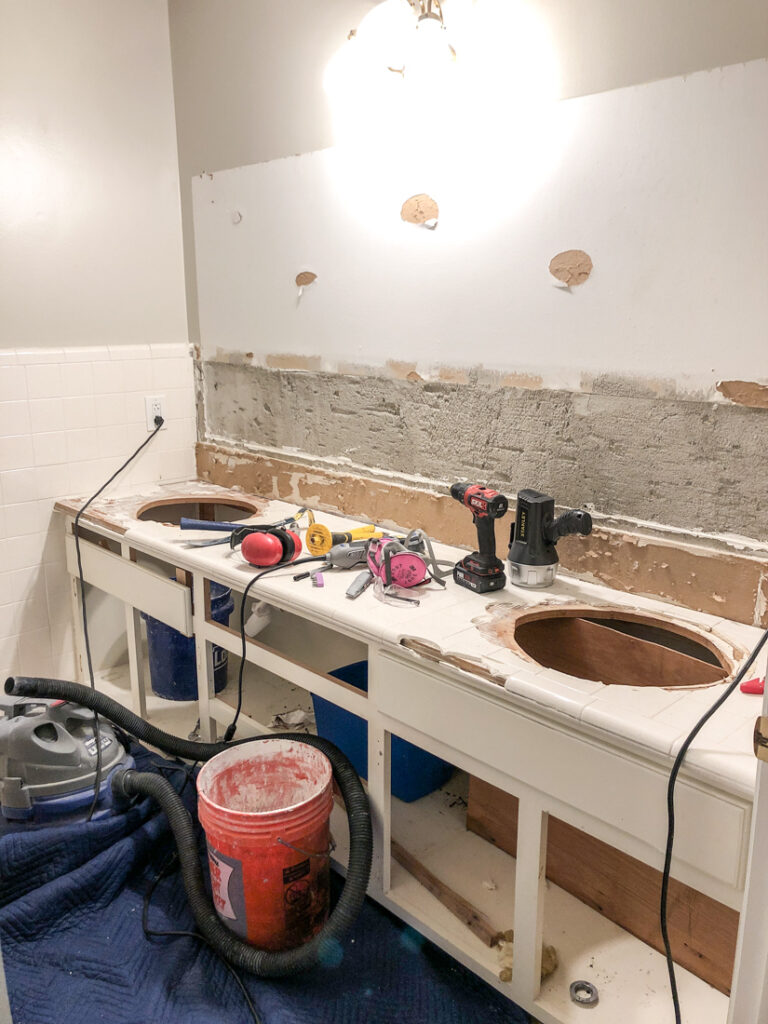
Now we were ready to smash the tile on the countertop.
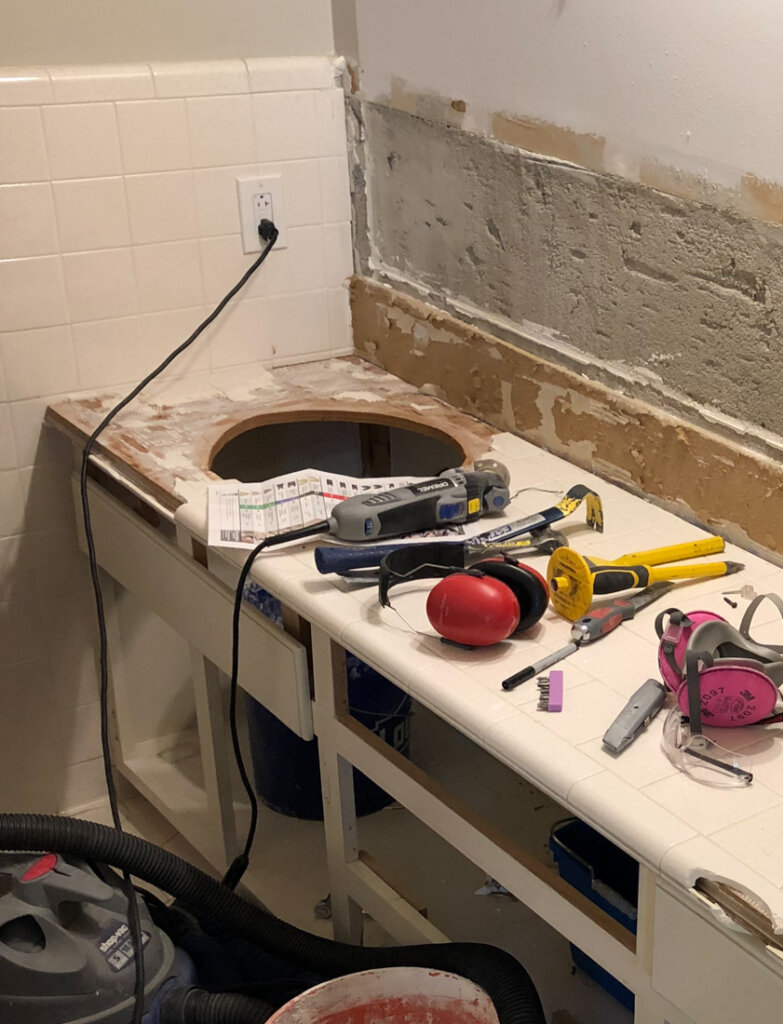
Be sure to have proper safety gear if you are dealing with tile. Goggles, masks, gloves and ear protection help make the demolition easy.
Also equipping yourself with the proper tools are essential. We used hammers and pry bars to remove our tile.
With buckets on hand to catch the tile and a shop vac, we kept the mess to a minimum.
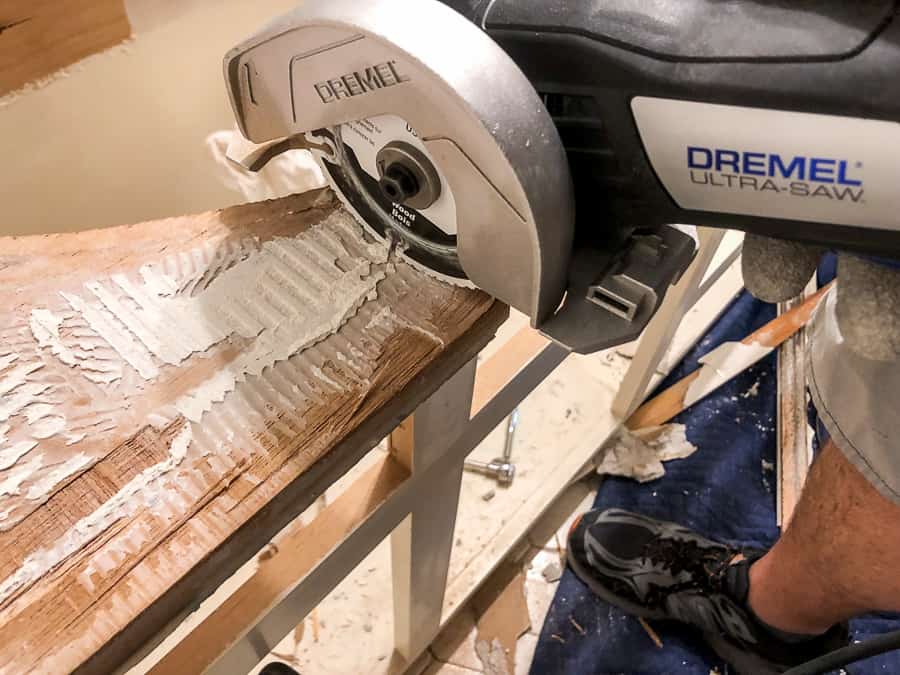
After all the tile was removed, we used our Dremel Ultra-Saw to cut away the wood countertop base. Use whatever you have that will cut wood!

This is when our design plan changed.
We knew we needed to raise the countertop 6 inches. Our initial plan was to remove the entire cabinet base and raise it about 6 inches and add a new base underneath.
However they tiled around the countertop base when this house was built.
The only way to raise the base was to remove the rest of the wall tile.
It was going to be too time consuming and costly to knock out all that tile just to raise up the counter 6 inches.
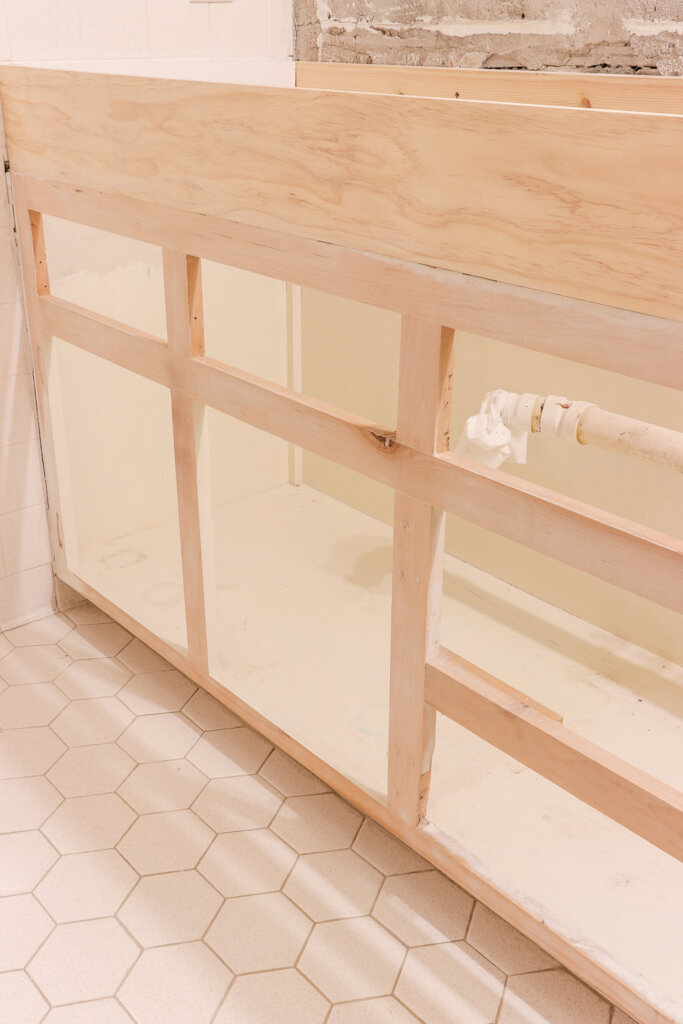
So we purchased one-by-six boards to raise the counter that 6 inches we needed.
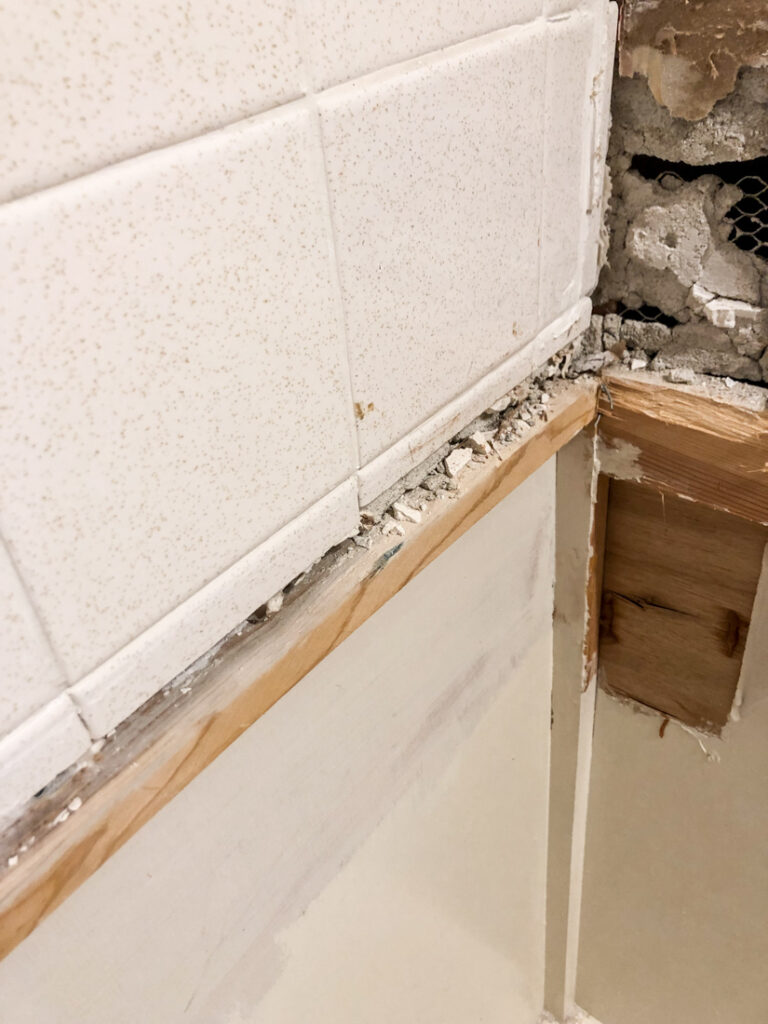
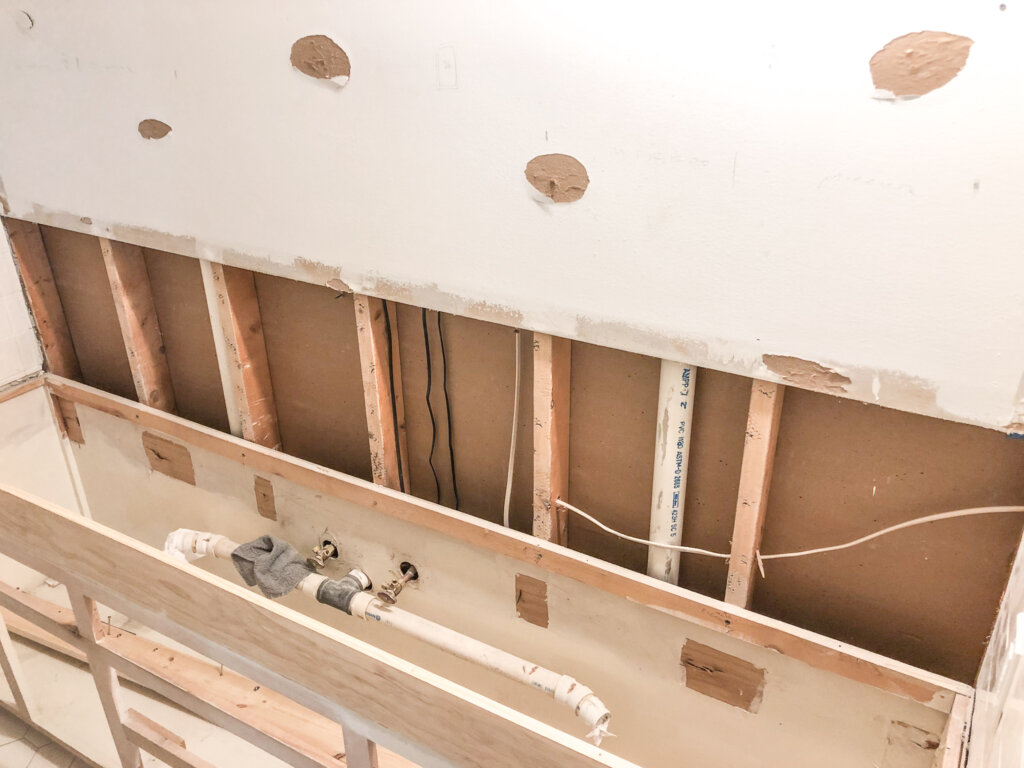
But first we needed to prepare the wall above the countertop where the mesh was that held the old tile.
We removed all the old mesh and thinset and installed drywall.

Now we were ready to install the boards.
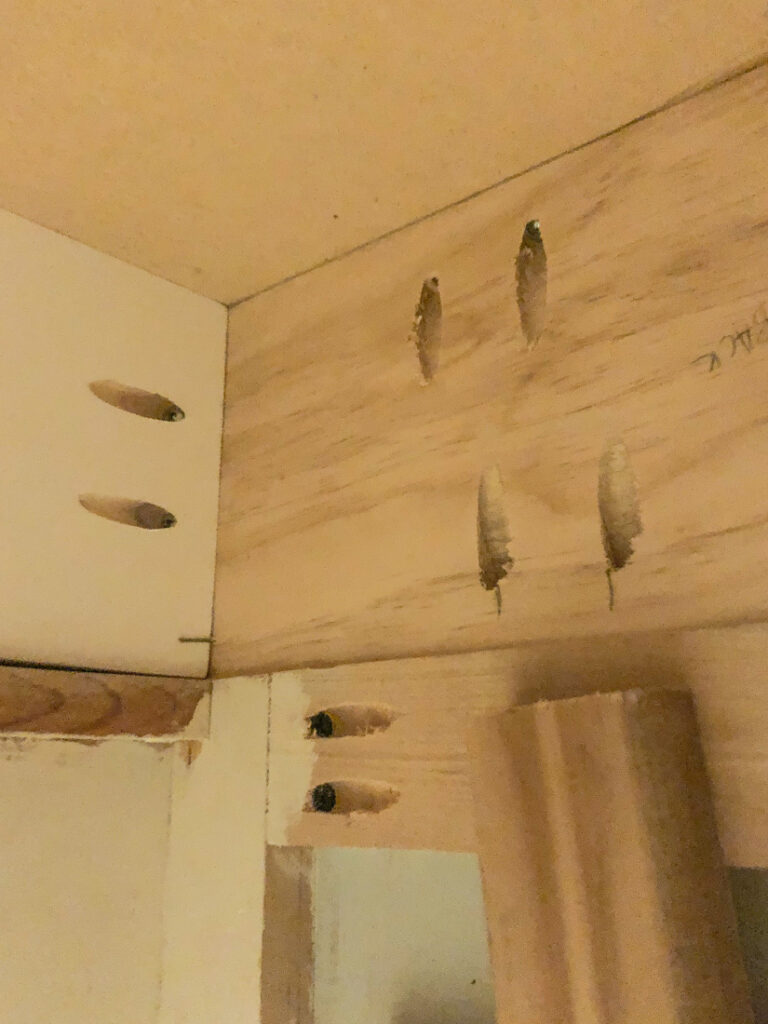
Using a Kreg Jig, we made pocket holes and screwed the 1 x 6 boards onto the existing cabinet base. This is one of those tools that makes a project like this so unbelievably easy. I’m not sure there is a better way to do this. Besides, you’ll be glad you have it and will find yourself using it ALL the time and wondering why you didn’t already have one!
After we installed the boards, we sanded the cabinet base down to the natural wood.
Now we could use the old countertop that we had!
We had a laminate countertop that we removed from our butler’s pantry makeover.
Unlike most projects, we tend to hold on to items like this just in case we need it in the future. And boy am I glad we did!
The only problem was that it was not long enough for this space! So we had to build and extension to have it be a smooth and seamless transition.
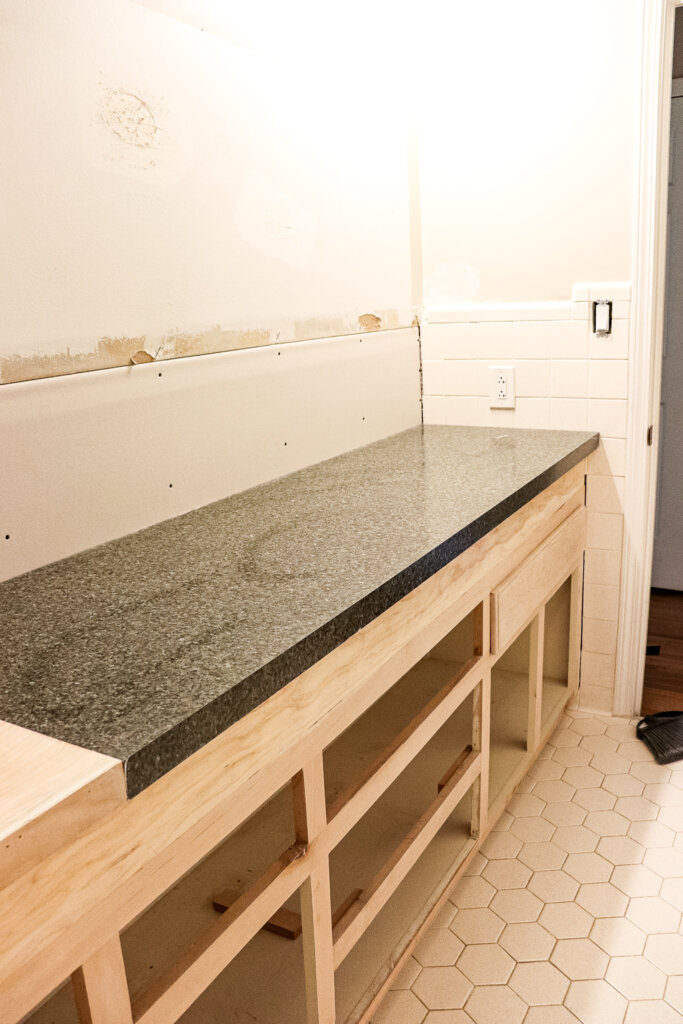
It was anything but! We were able to square it up on the top, but then the front wouldn’t lineup. If we lined up the front, the top wasn’t perfect!
So if you look closely at the counters, you would see and 1/8 inch dip along the front of the counters.
We went ahead and screwed the laminate top to the cabinet base using the Kreg jig.
Here’s a picture of what the pocket holes look like.
Sometimes DIY’s don’t turn out perfectly, but that’s OK!
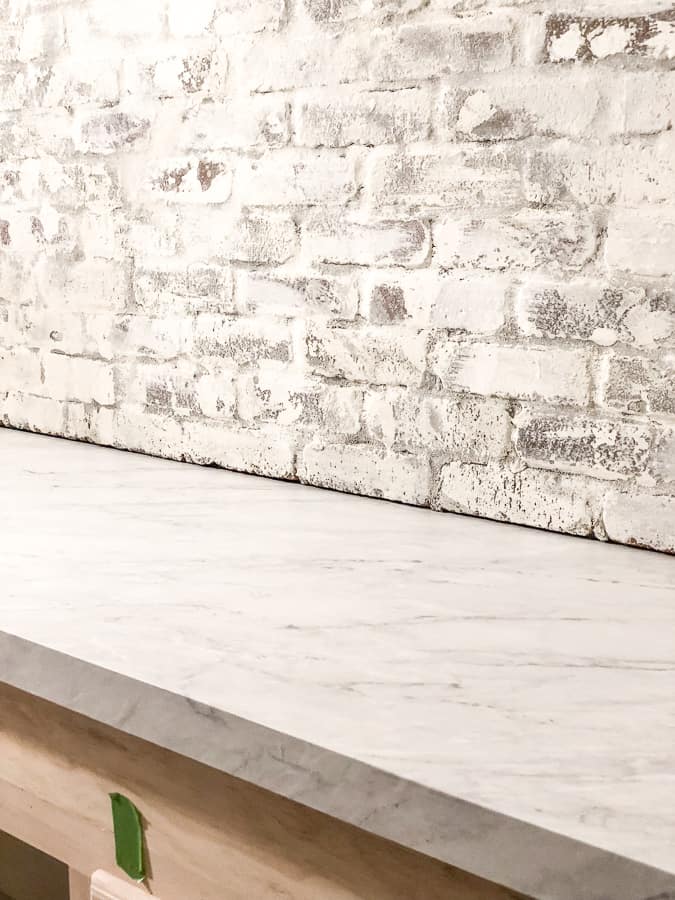
In order to help hide the imperfection, I found this fun marble contact paper. It is a heavy duty vinyl, and has a beautiful matte finish. (Ours is the Matte Gray Marble)
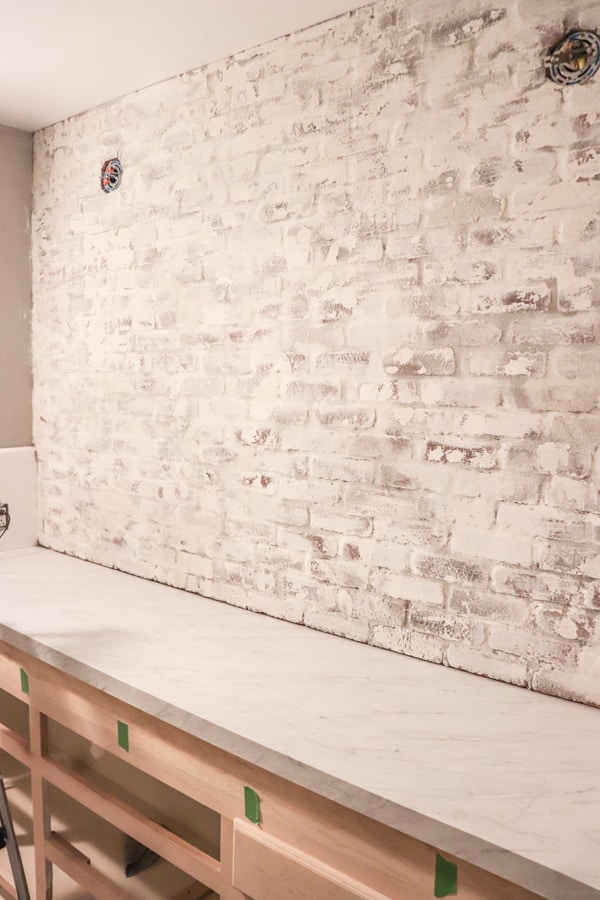
I think it looks just like real marble, don’t you?
It’s a bit tricky to apply the vinyl in one solid sheet, so be patient and take your time.
A trick to help the process is to mist the top with a squirt bottle filled with water and one drop of dish detergent. That helps keep the film movable in case you need to reposition it.
Check out our Thin Brick Accent Wall post for the full tutorial on how to create this look.
And if you get bubbles in your vinyl, use a squeegee tool to push them out toward the edge. I still had a few that were stubborn.
According to the manufacturer, you simply get a pin, poke a tiny hole, and push out all the air. I used that trick, and you can’t even see where the hole was!
Now we were ready to drop in the sinks. To save costs, we reused the old sinks.
Trent made a template of those sinks and cut a hole.
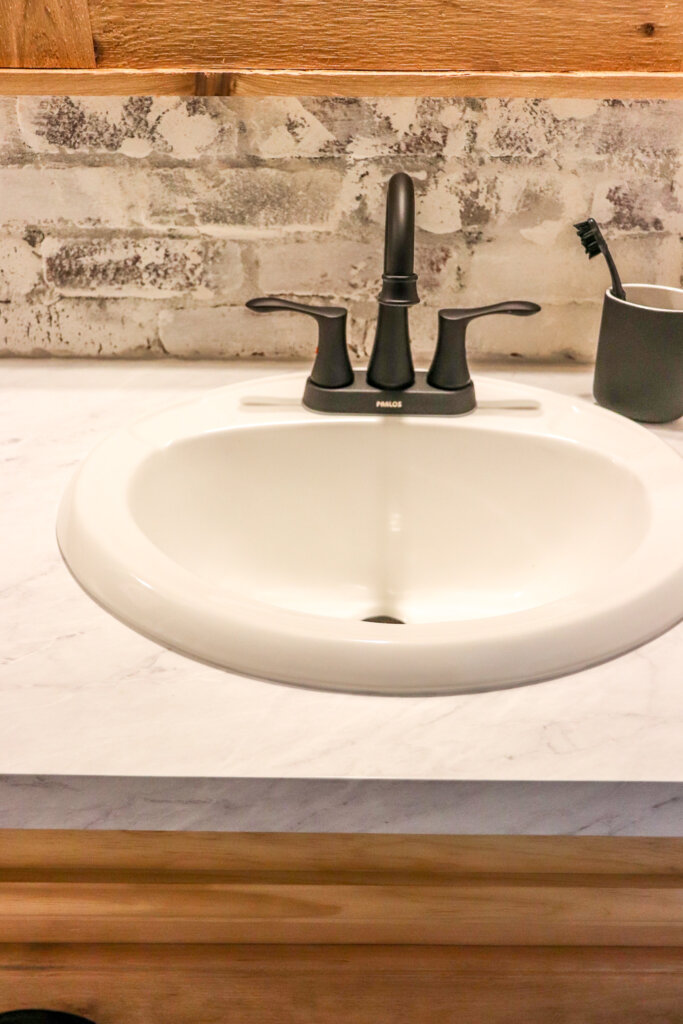
We used these handsome black faucets to update the look of this bathroom.
But now for the finishing touches.
In order to hide the seam between the old countertop base and the new wood, we nailed in this piece of trim across the front.
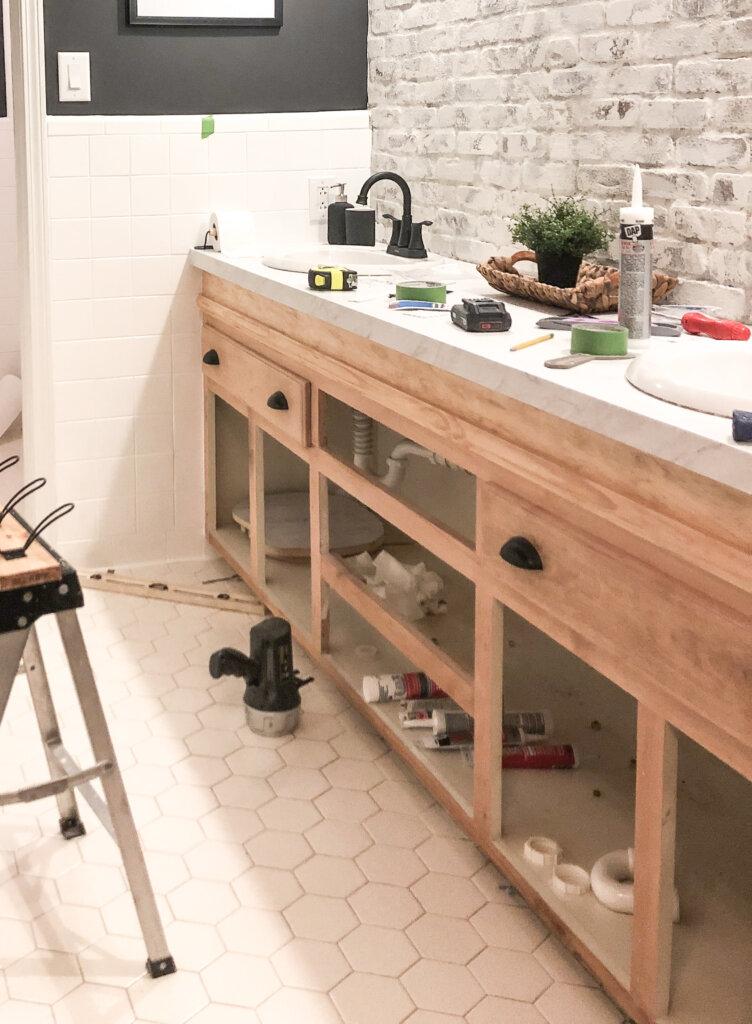
I think it adds a nice element, making it look intentional!

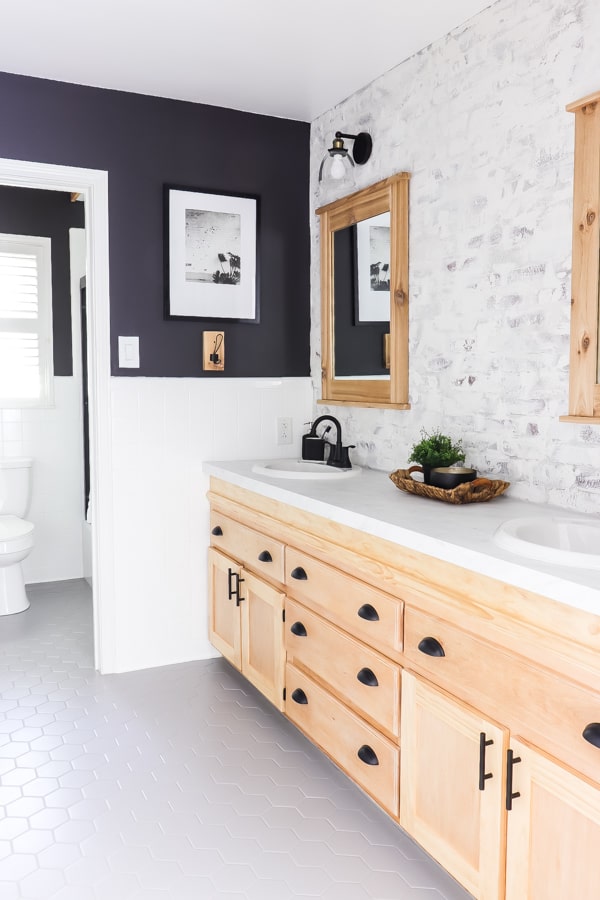
Here is how the bathroom looks now!
So much better!

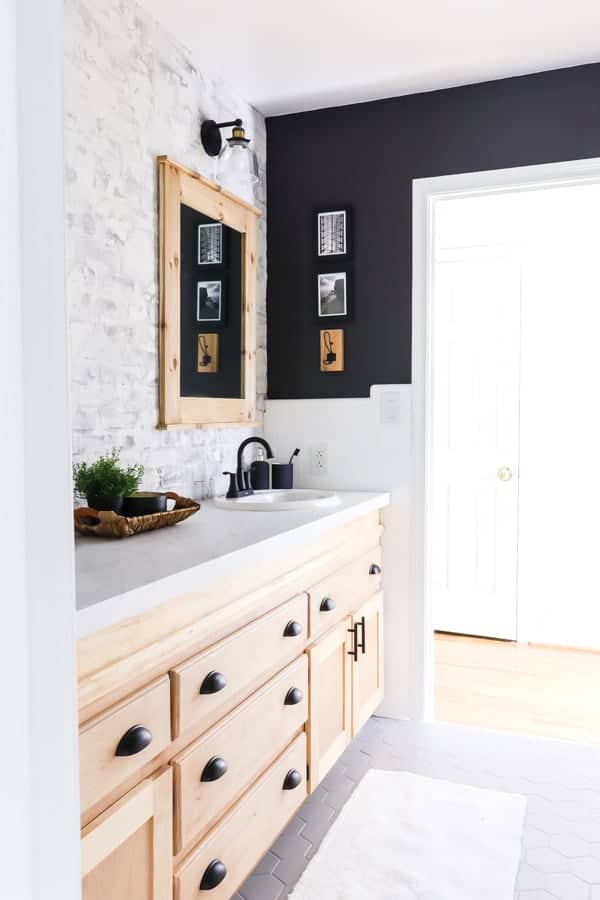
I love how this turned out!
And now my tall boys are happier having a countertop that suits them.
So I hope this tutorial on how to easily make a bathroom countertop taller inspires you to think creatively if you have the same issue.
Did I leave out some details? Leave me a comment below and I will be sure to answer any questions you have.
If you want to see the full reveal of this bathroom makeover, click below.

Don’t miss the other posts
in this Bathroom Makeover!
THE BEFORE
RAISE THE ROOF: HOW WE MADE THE BATHROOM CEILING TALLER
DIY SHOWER DOOR UPDATE
HOW TO MAKE A BATHROOM VANITY TALLER
REGROUTING BATHROOM TILE
INSTALLING AND LIMEWASHING BRICK VENEER
DIY CEILING PLANKS FROM LAMINATE FLOORING
HOW WE CHANGED OUR BATHROOM TILE FOR $150
HOW TO MAKE CEDAR FRAMED MIRRORS
THE BIG REVEAL!
Don’t forget this Post! Pin
“How to Easily Make a Bathroom Countertop Taller”
for Later!


That’s a great question – we did have to purchase longer water lines and a drain extension to compensate for the taller height. We took the old components to our hardware store and they found the correct replacement that worked with the new height.
Hope that helps!
Thank you for the info on adding height to your BR vanity.
My question is how did you match up water connections hookups once the counter is now taller?
Thank you
Kate
Hey Sue! Thanks so much for reaching out! Our vanity is still in great shape, even with 2 teen boys! No issues with the plumbing, but we did need to make the drain pipe taller to fit since ours were cut.
It shouldn’t take that long either – we were able to do it over a long weekend, and that included stripping the paint from the cabinet.
Hope that helps and good luck with your project!
You got this!
Jen and Trent
We are planning to do the exact same thing in our master bathroom. How has it held up over the years? Any issues with plumbing? How long did it take? Ours should be simpler since we do not have the tile issue and could use our same vanity top. We got a bid for a professional to do it and the labor alone was $3,000!! We can buy all the tools and even screw up a few times and still be ahead.
This is great! Thank you! Do you also have a tutorial or some photos on how you adjusted the plumbing to the new higher sink?
Great question, Marla!
We used the existing cabinet drawers and sanded down the fronts. But for the doors, Trent made new ones to give the look a fresh, new update!
Hope that helps!
Love the bathroom remodel! Did you also sand down the existing cabinet doors and drawers or purchase new ones?