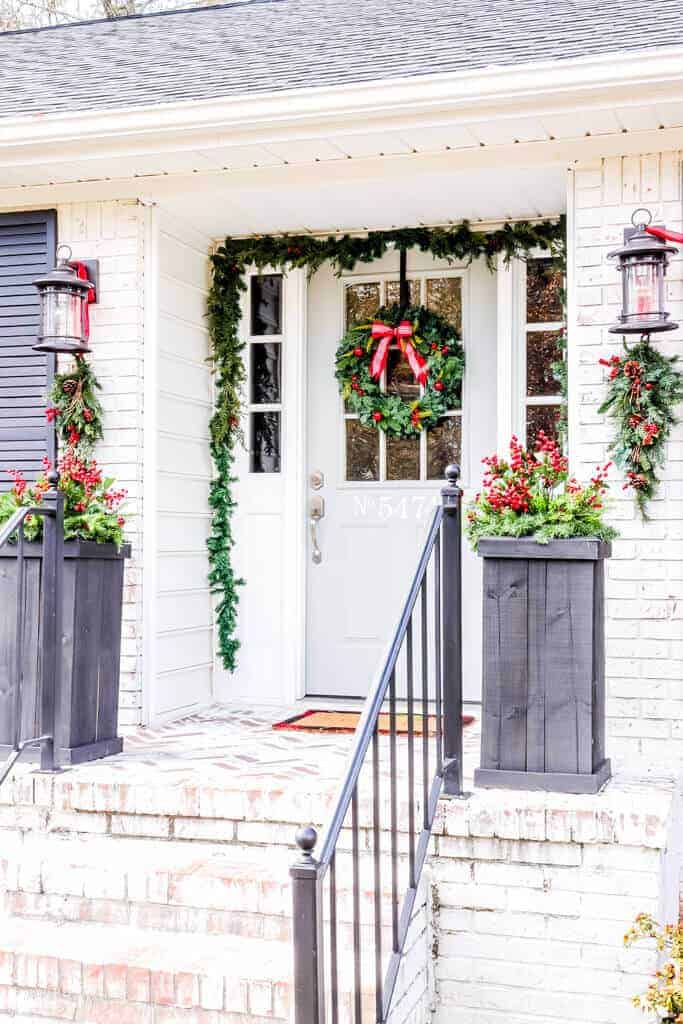
Our Pantry Hallway Reveal
Yes, you read that right! Our Pantry Hallway Reveal is indeed a hallway complete with 2 pantries.
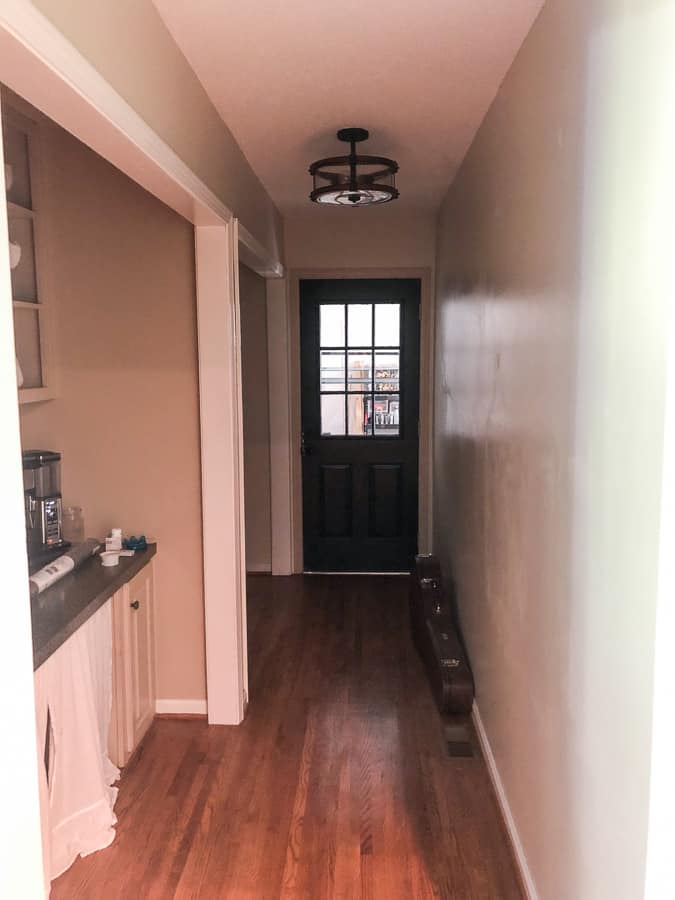
It was dark, dated and didn’t quite work for our family!
This has been a drawn out DIY project that we took on after we completed our Kitchen Renovation and Apron Front Sink Install.
Admittedly, I wasn’t up for the challenge.
Of course, mentally, I was ready to rock this thing! But physically, my body was saying Uh-uh.
You see, just before we tackled our kitchen, we had completed limewashing the exterior of our home.
So, long story short – my body was finished. I have a tendency to keep going until any project is completed, meaning, I don’t listen to the cues my body gives to stop and rest.
Well this time, I did listen.
And while I didn’t hit my goal deadline, I am so appreciative that first, it is done, and secondly – I am not utterly exhausted!
So are you ready for the big reveal?
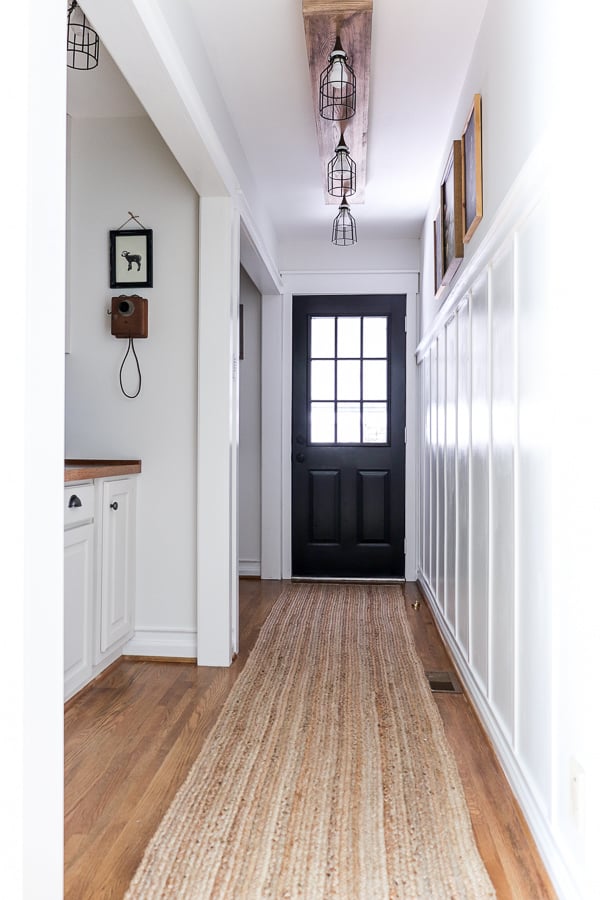
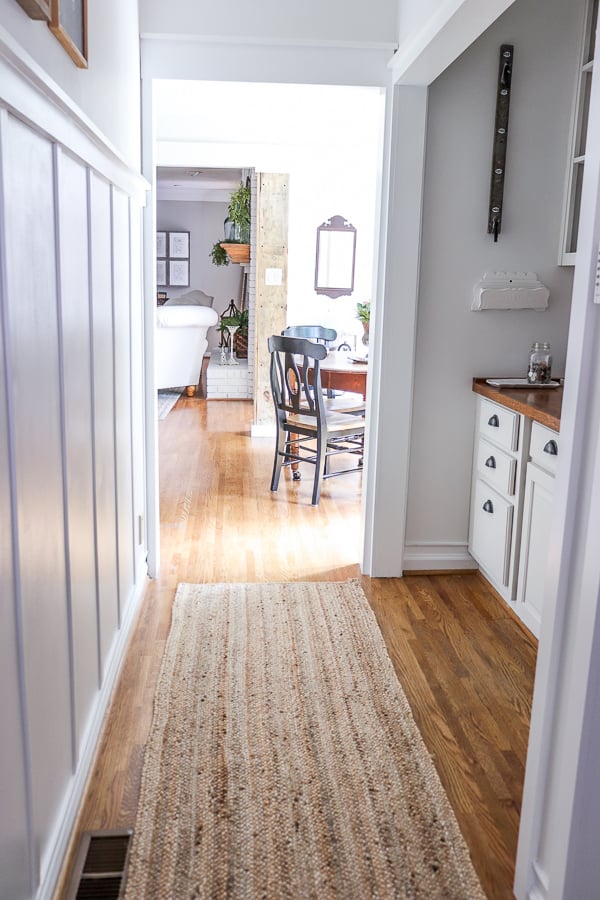
Installing the Board and Batten
Materials Used:
- Board and Batten Walls and Door Casings: Trim: 1×6, 1×3, and 1×2, Board and Batten PVC Strips
- Wall color: Grace Note
- High Traffic Jute Runner 2’6″x12
- Artwork: Clearance Hobby Lobby Finds
First, we started by removing all the trim around the door casings. We wanted the trim to match the Farmhouse Trim in our Kitchen.
We replaced the sides of each door casing with 1×3 primed wood, topped it with a 1×6 the width of the door opening, and capped that with a 1×2 topper.
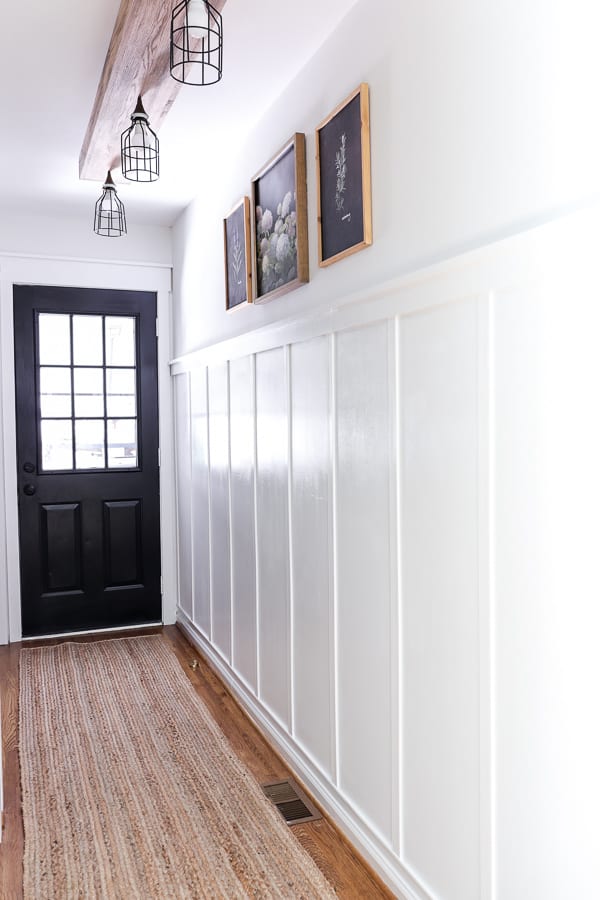
For the Board and Batten, we ran a 1×3 board along the top, capped with another 1×2. The strips are PVC lath strips. They are 2 1/2 inches wide, but create the perfect look without sticking out too far.
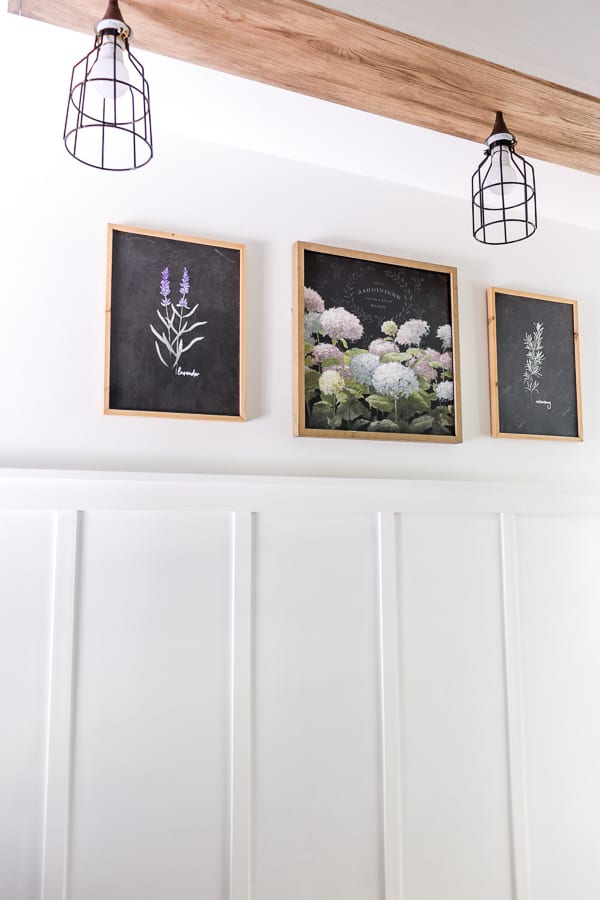
I found the two side pieces of artwork on clearance at Hobby Lobby.
Wanting something to anchor them, I bought this poster at Hobby Lobby and framed it to match the other two.
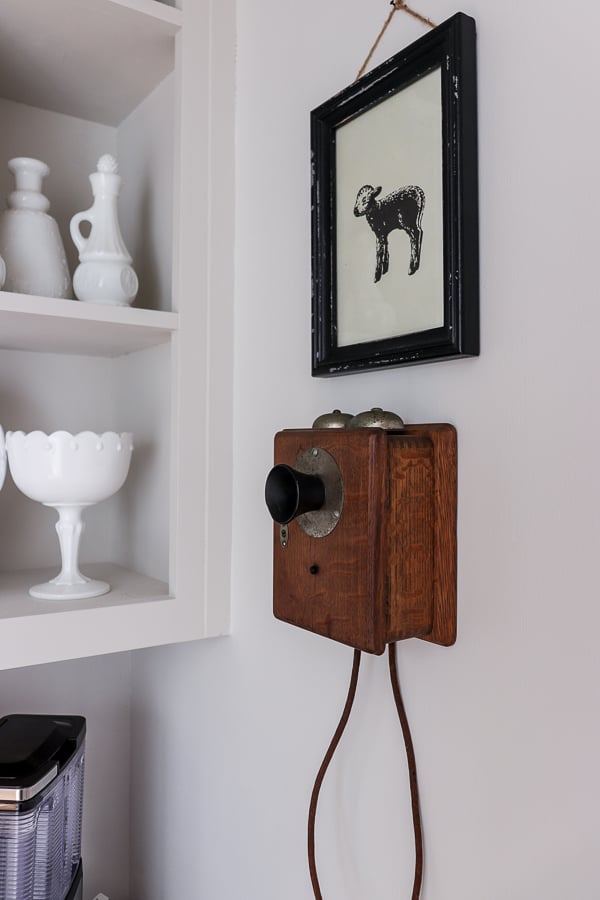
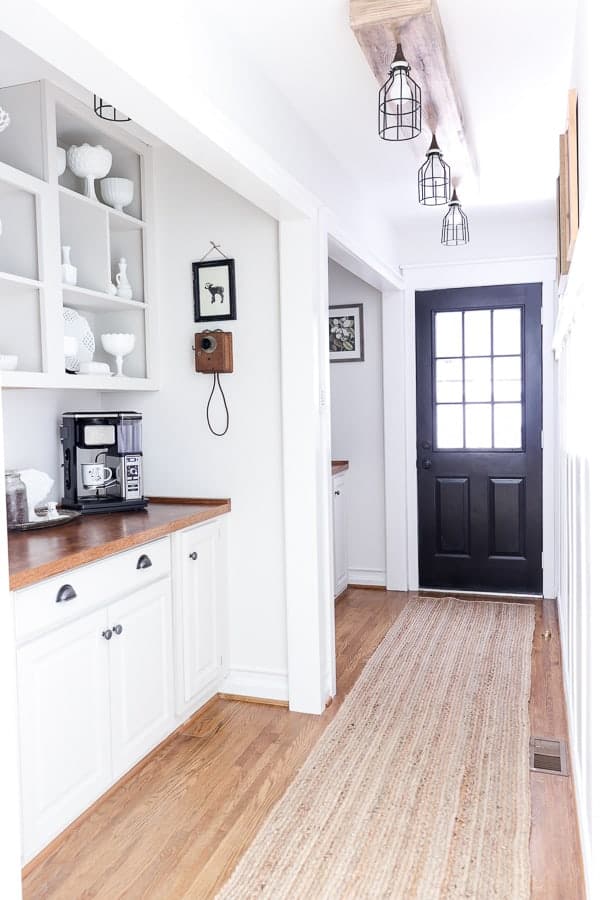
The Light Box
Materials Used:
- Light Box: Built from Red Oak Wood
- Portfolio Bronze Mini Pendant Fixture
- Metal Light Cages
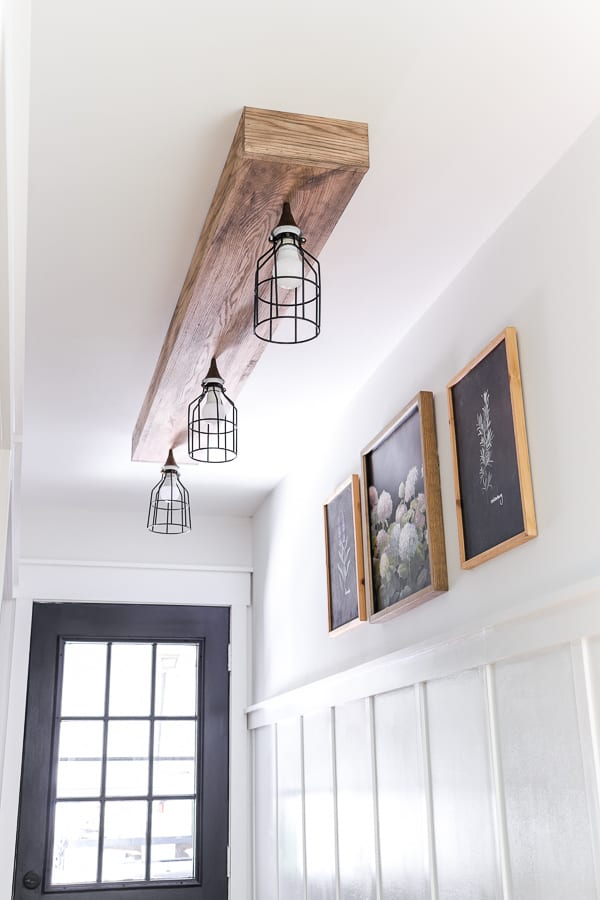
Our Hallway had one center light that didn’t offer any light whatsoever. So I wanted to create something that would span the entire hallway.
Here’s how we did it.
I found this 3 pendant light fixture and remembered the light box we built for our old home.
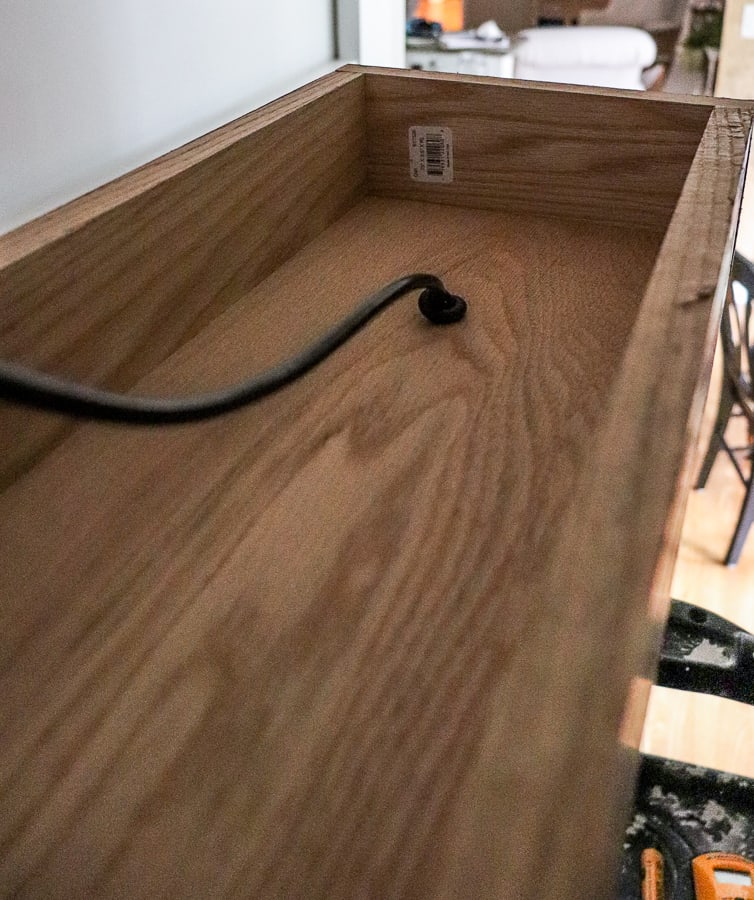
To begin, we started by building a box out of red oak and pre-drilled three holes for each pendant light.
Before wiring the light, you run each pendant light through the pre-drilled holes in the box and knot them to your desired length.
Then Trent replaced the old light with the pendant fixture.
If wiring intimidates you, then I suggest you hire this out with a reputable electrician.
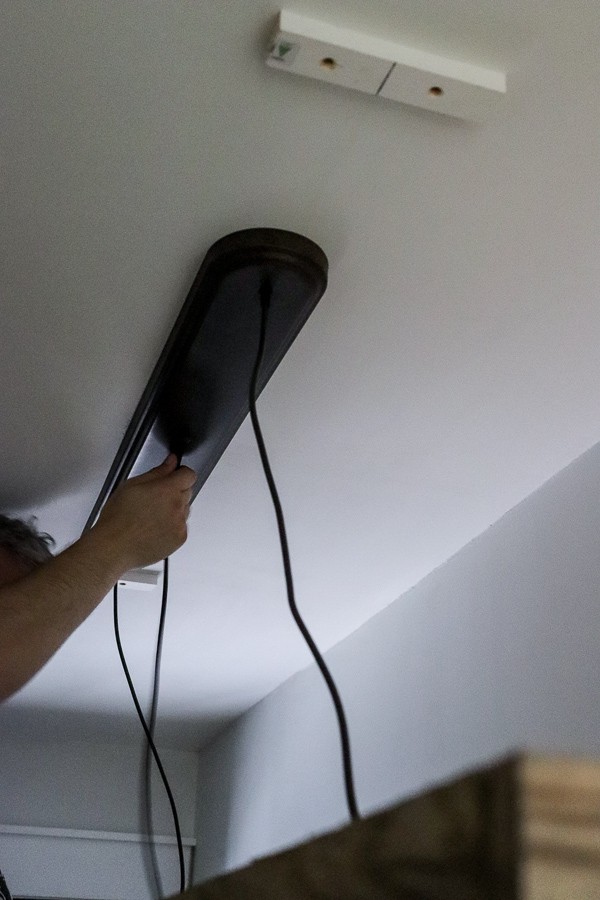
Trent wired it up and then hung the light box from 2 cleats screwed into ceiling joists using a nail gun.

Once the light box was hung, we attached the metal light cages and light bulbs.
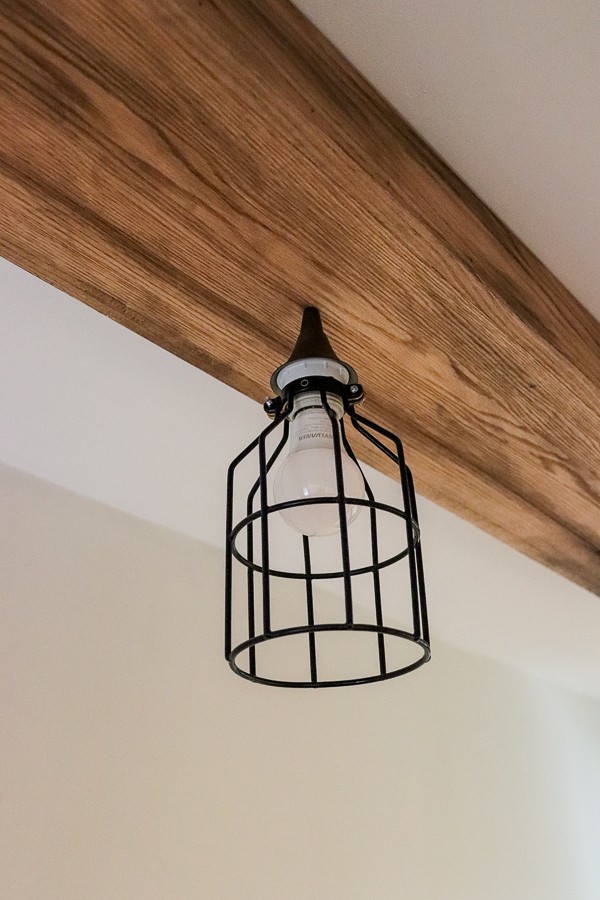
Now we have light that spans the entire hallway!
Now it’s time for the pantry details.
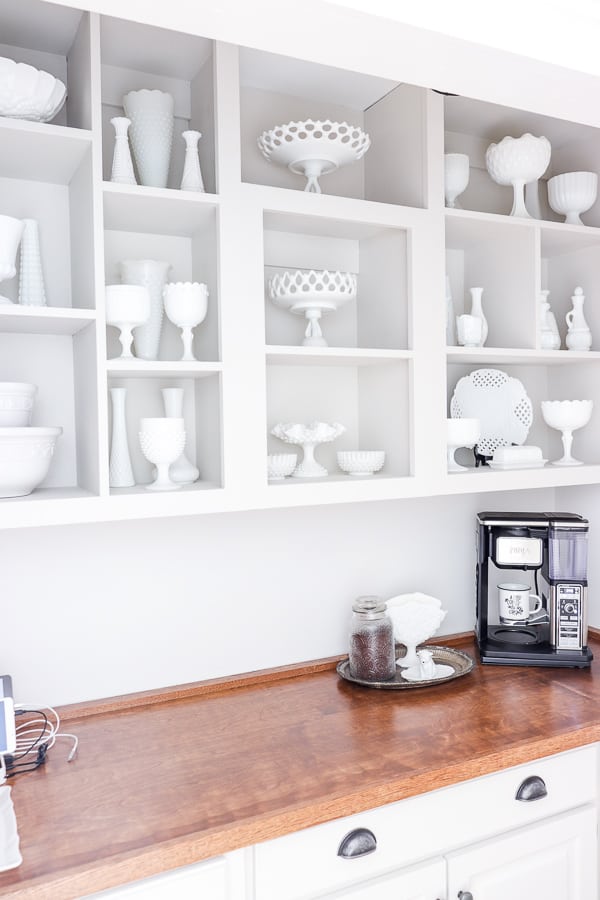
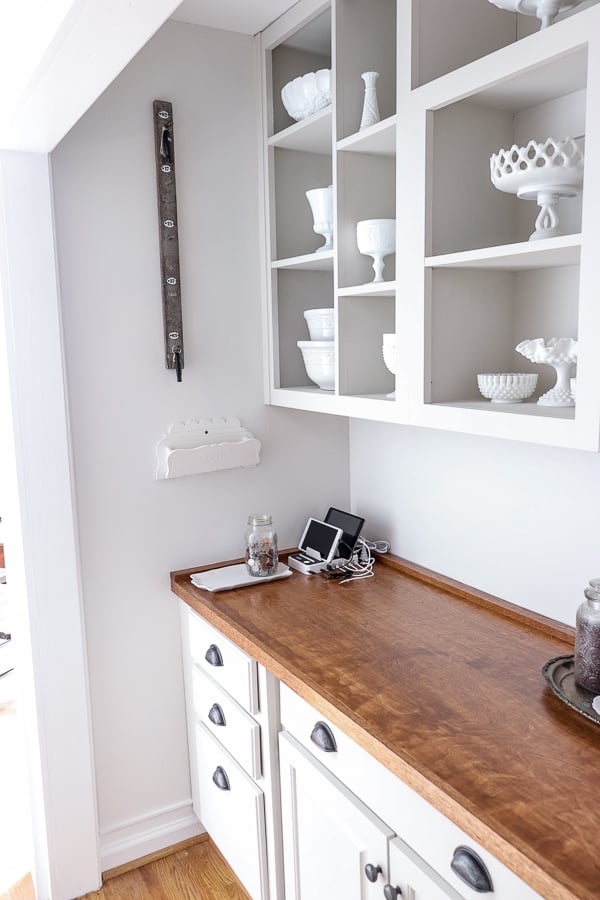
The Butler’s Pantry
Materials Used:
- Existing Cabinets and door fronts from our old island. Cabinet color a custom tint.
- Countertops: 4×8 Red Oak Covered Plywood cut in half and trimmed in Red Oak
- Stain: Early American
- Wall color: Grace Note
- Drawer Pulls from D. Lawless Hardware
- Desktop Extension Cords
- Charging station
- Coffee Bar: Ninja Coffee Maker
- Artwork: Repurposed from previous home
- Vintage Decor: Collection over the years
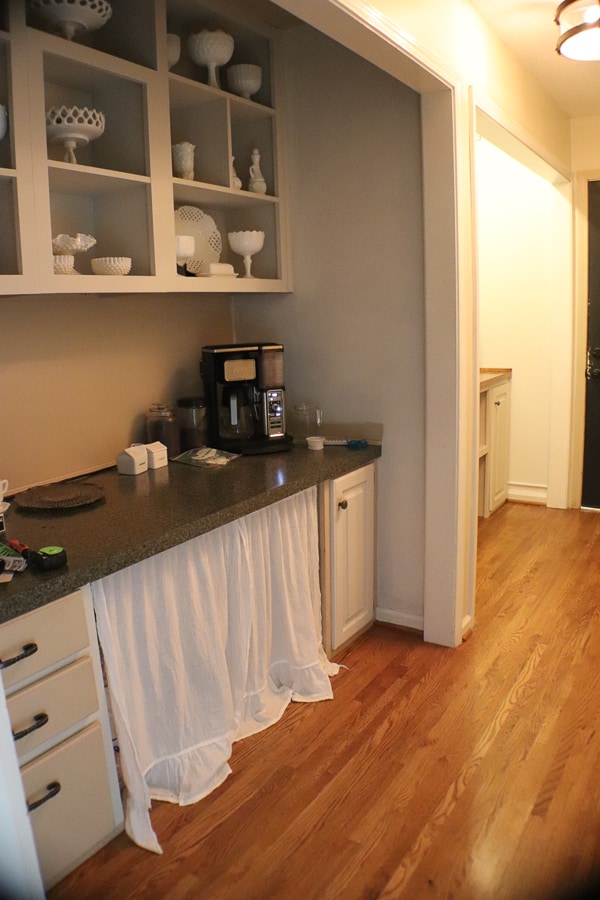
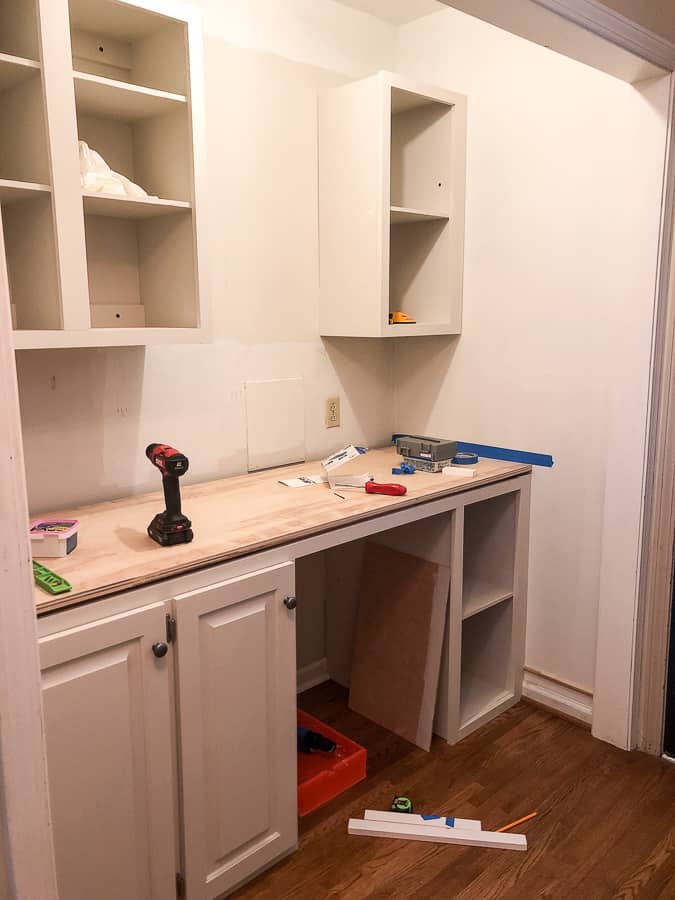
We took this built-in desk area and converted it into a butler’s pantry/coffee bar.
We started by raising the cabinet bases and moving them in together.
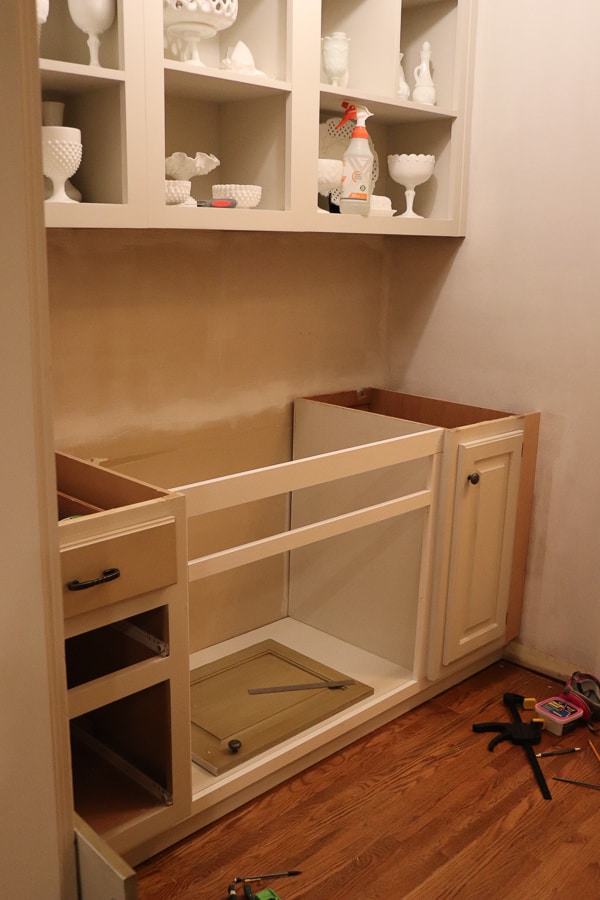
This made the bases typical counter height (36 inches) and we framed out a drawer and cabinet doors for appliance storage.
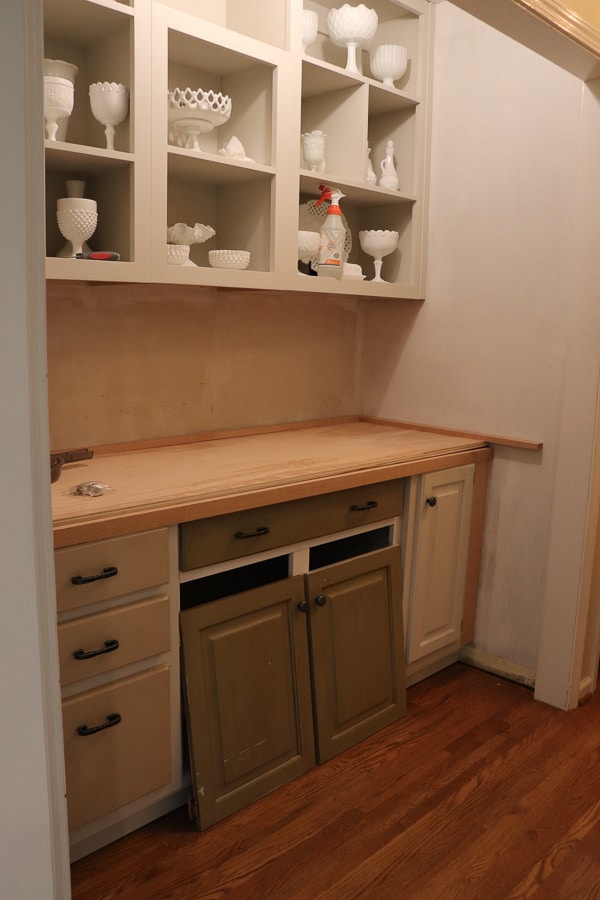
After a fresh coat of paint and stain, here’s how it looks now!
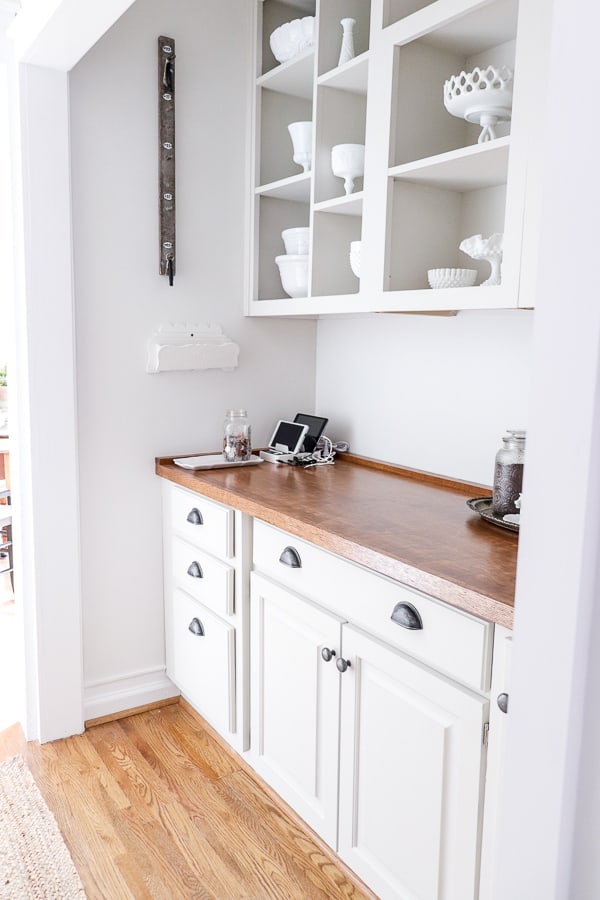
Using the same hardware from my kitchen, it now looks like an extension of our kitchen, instead of an afterthought.
One issue we had was where the power was located in this area. There is only one outlet and it is inside the cabinet.
Here’s a pic I took during the build process.
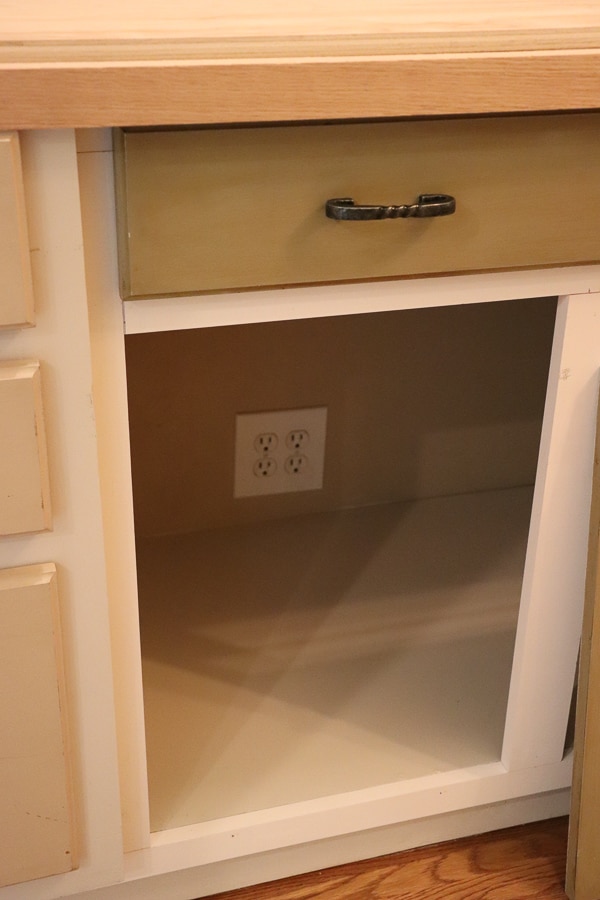
Since I wanted to make this a coffee bar, I had to add power to the top somehow.
I found this cool desk extension cord.
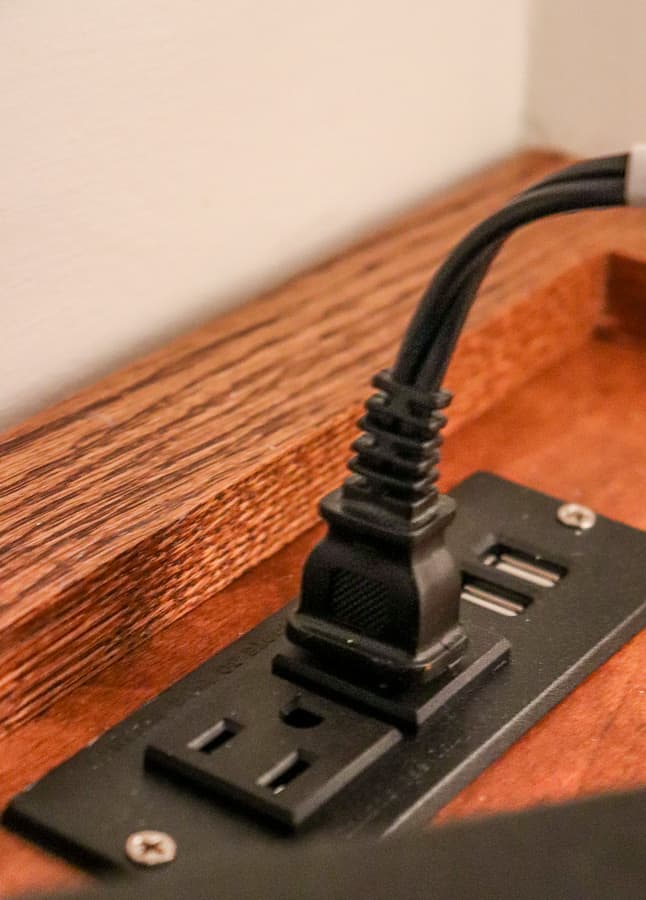
We drilled out the holes and inserted these to add to each side of the countertop.
The cord runs under the countertop and is hidden away, but I still have an option for power up top.
Which means I still have a coffee bar!
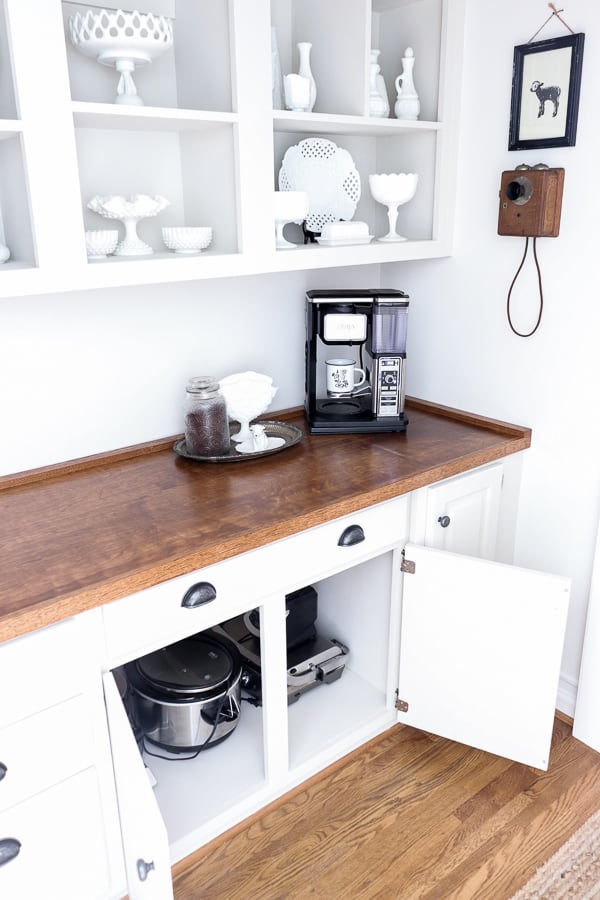

I love my Ninja Coffee Maker!
I can make a full pot, or one cup in various sizes. Switching from my Keurig has been an easy adjustment.
And I found the cutest milk glass piece to hold my coffee filters!
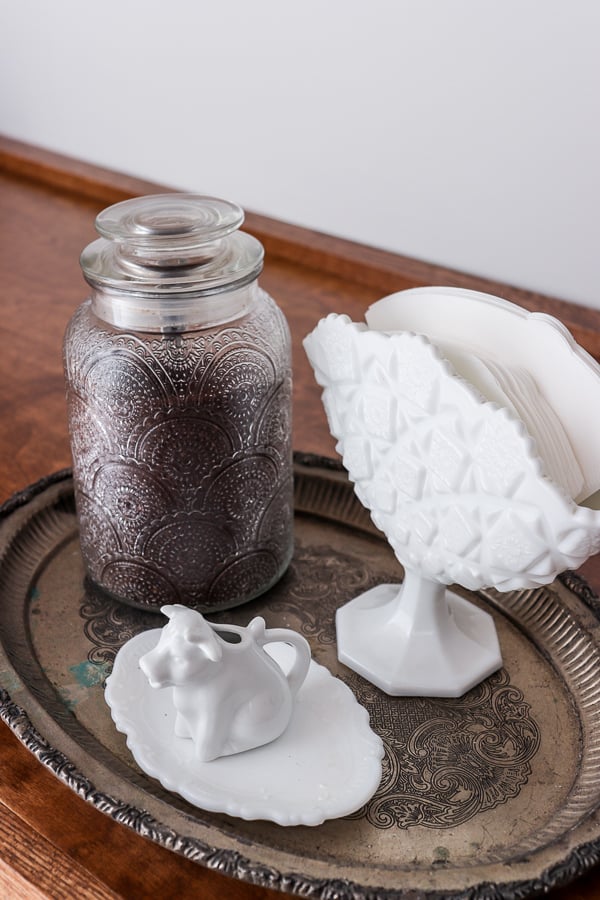
Isn’t that just darling? And it looks as if it were made to hold filters!
Of course, it fits in perfectly amongst all my other milk glass pieces.
On the opposite side, I wanted to create a charging station for our devices.
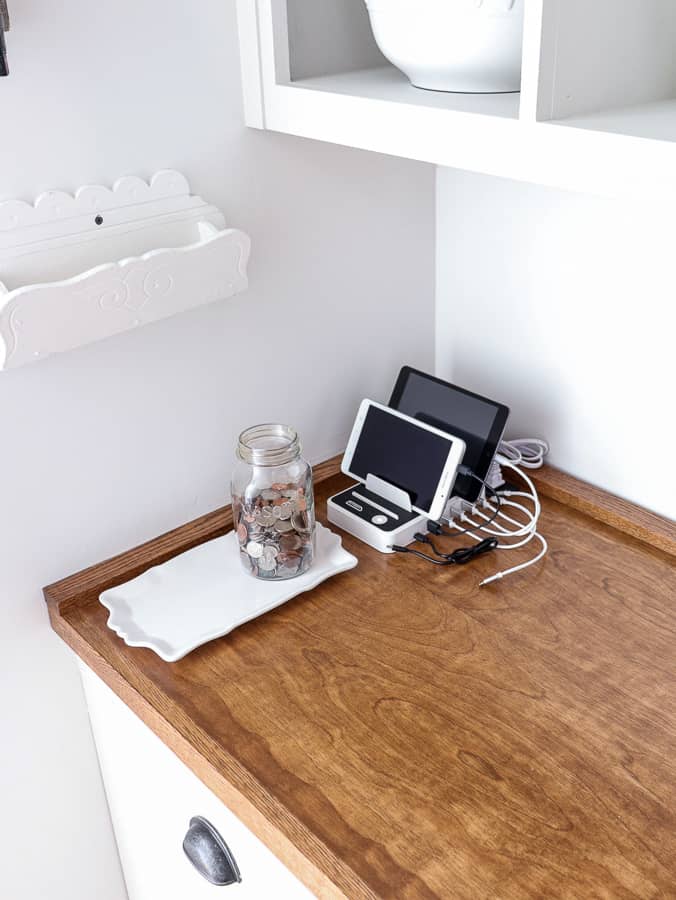
We have a ‘no cell phone in the bedroom rule’ in our home and needed a dedicated device spot.
Now this is a great spot to corral all our devices in one place without an octopus of cords everywhere!
The Food Pantry
Materials Used:
- Existing Cabinets and door fronts from our old island. Cabinet Color a custom tint
- Countertops: 4×8 Red Oak Covered Plywood cut in half and trimmed in Red Oak
- Stain: Early American
- Wall color: Grace Note
- Remnant Shiplap pieces for backsplash
- Wireless Light Switch Kit
- Talented Kitchen Pantry Labels
- Anchor Hocking Cracker Jars
- Black Farmhouse Coat Hooks
- Wooden Crates
- General Store Sign
- Vintage Decor: Collection over the years
The last part to show you of Our Pantry Hallway Reveal is our Food Pantry.
This is what greeted me when I walked through the door every time I came home.
The Before:
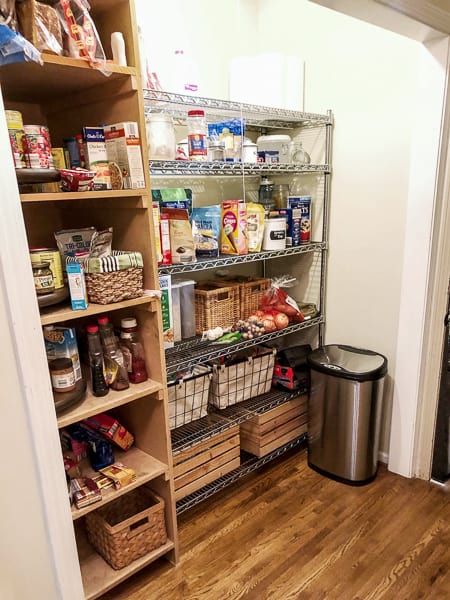
What an ugly, exposed mess!
In my last post, I shared the details of how we repurposed cabinet doors from our old kitchen island and built custom cabinet bases to hide this area.
But I never shared the reveal with you!

I was initially worried that this space wouldn’t hold all my groceries, but I actually have room to spare!
These labels from Talented Kitchen on Amazon helped make things organized.
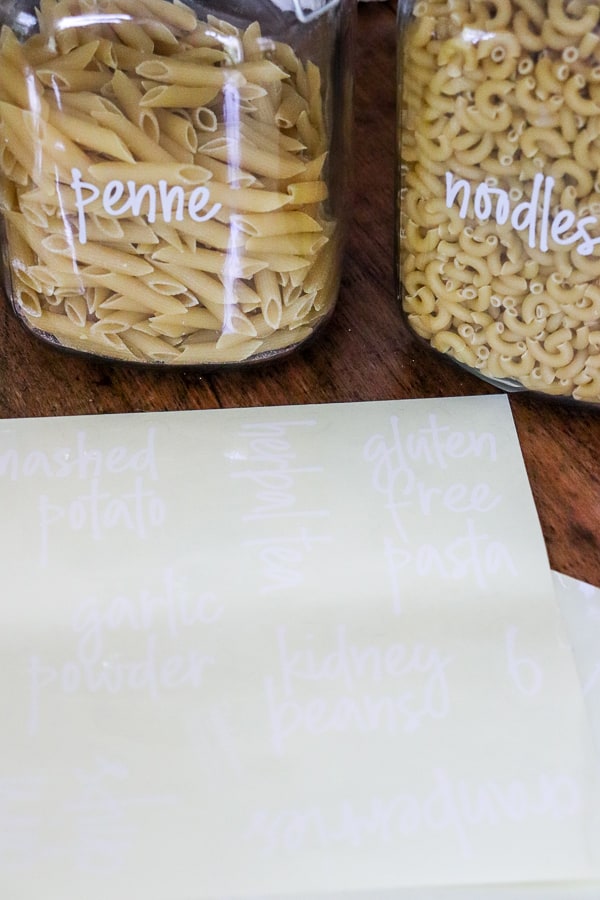
I opted for the white script pantry labels. They come in sheets that are easy to find what you need and apply.
I started by dividing my pantry cabinets into zones. For the upper cabinets, I made one section for canned goods, and another for condiments and baking goods.

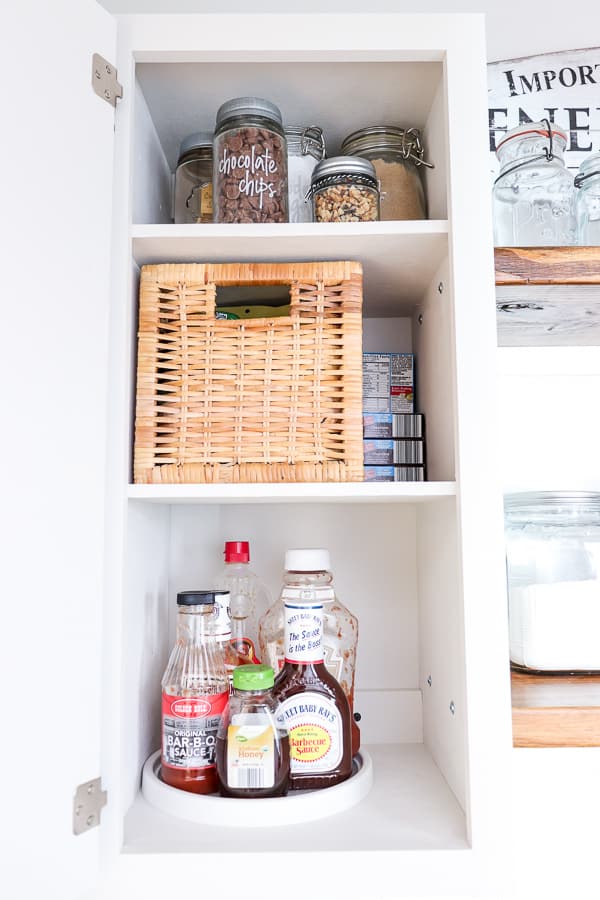
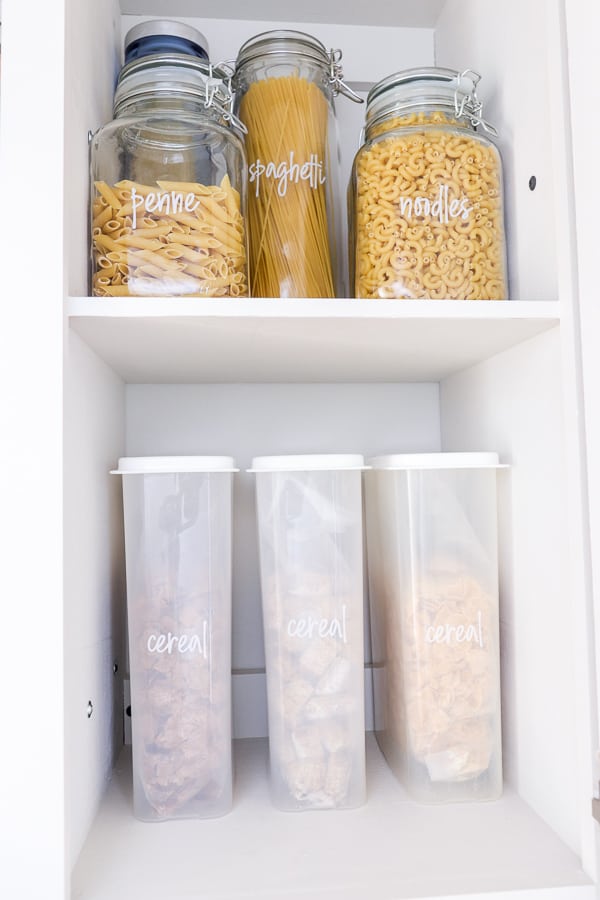
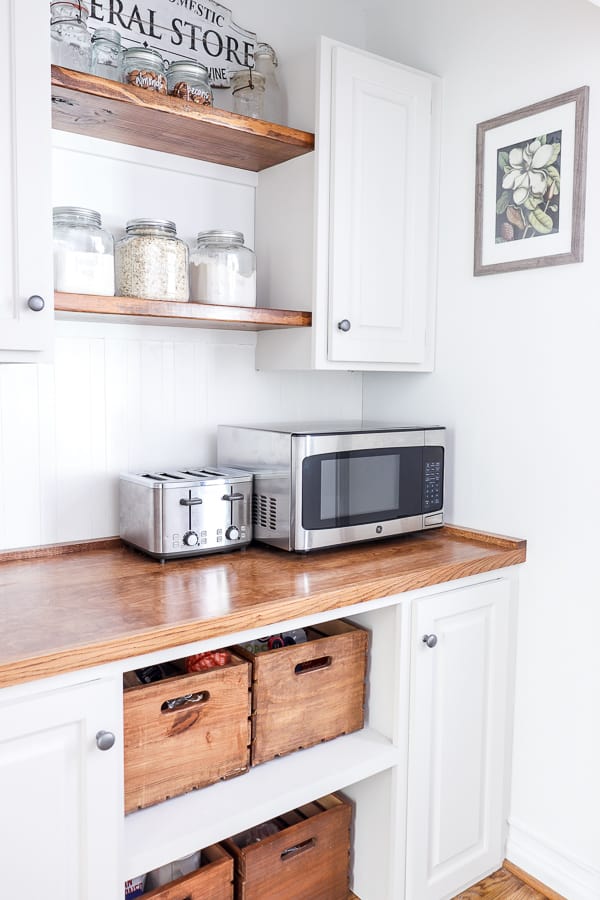
Above the microwave, I created an area for our pastas and cereals for the kids.
It keeps things tidy and makes finding what you need a breeze!
Between the upper cabinets, we installed shelving for an open pantry look.
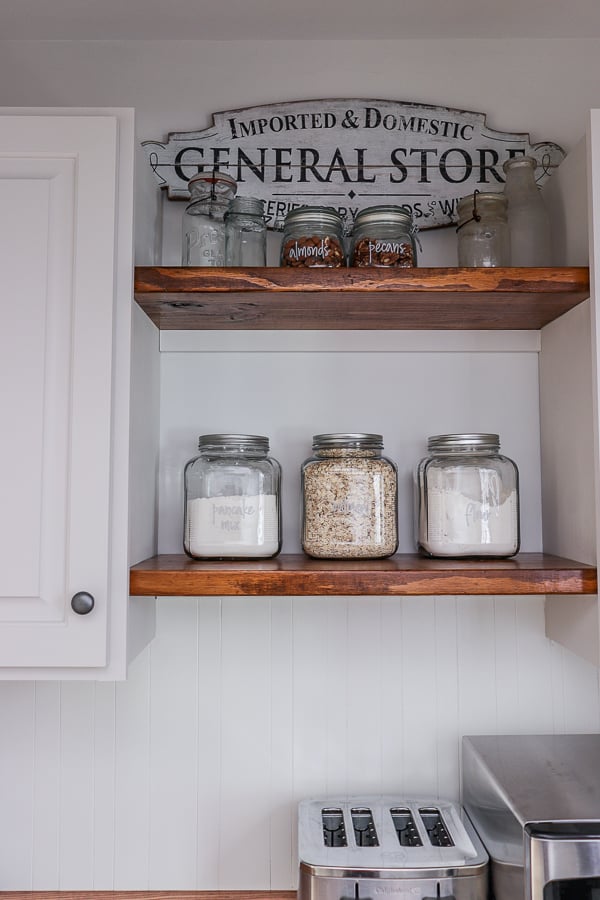
This makes those quick grab items easy to reach.
I love how nondescript the labels are. I wanted them to be clear to read, but not stand out too much. The white script is a perfect combo!
We have deeper lower cabinets, which will be perfect for extra storage, but I haven’t even had to use it yet!
Here’s how I organized my lower cabinets.
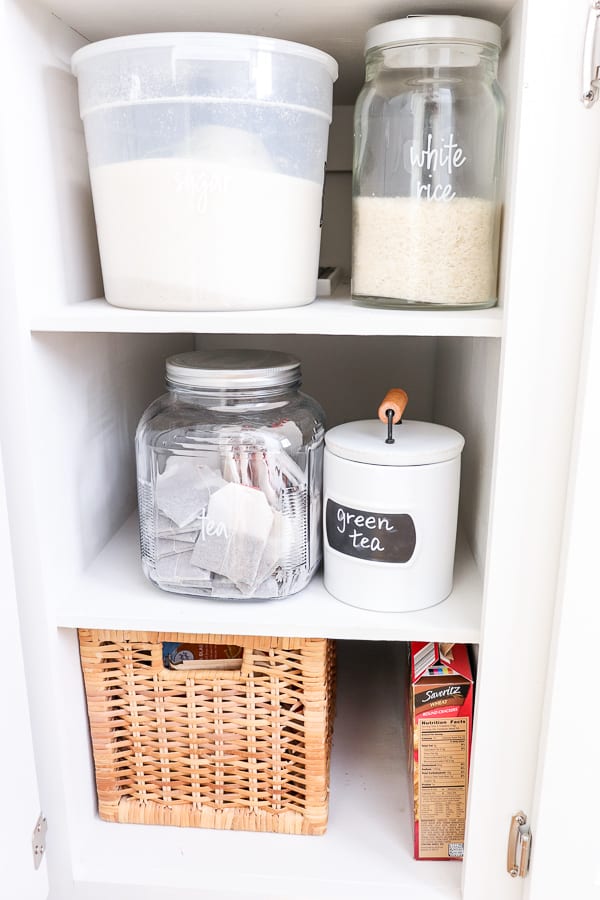
One side has our sweet tea supplies – a must in this household as well as dry goods storage!
Next to that is another dry goods area for crackers peanut butter.
I installed these stained crates for quick access for the kids lunches.
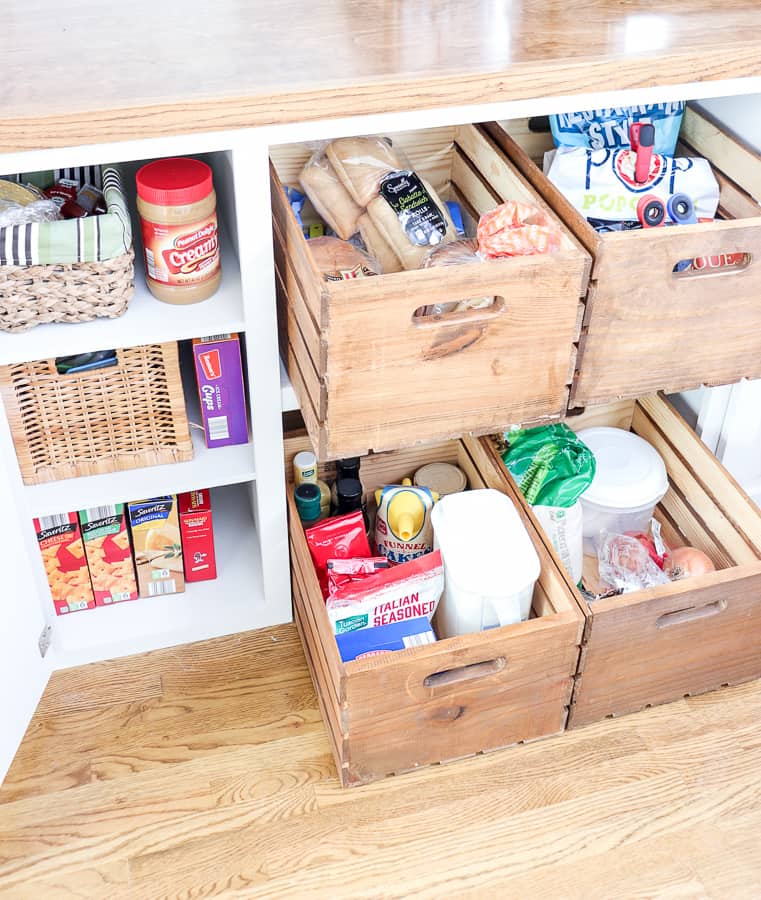
The top two crates are on drawer pull out hardware and hold our bread and chips. Perfect for when the kids make their lunches for school.
The lower two crates hold our overflow or rarely used groceries as well as our potatoes and onions.
The lower crates are on felt sliders to make it easy to pull in and out.
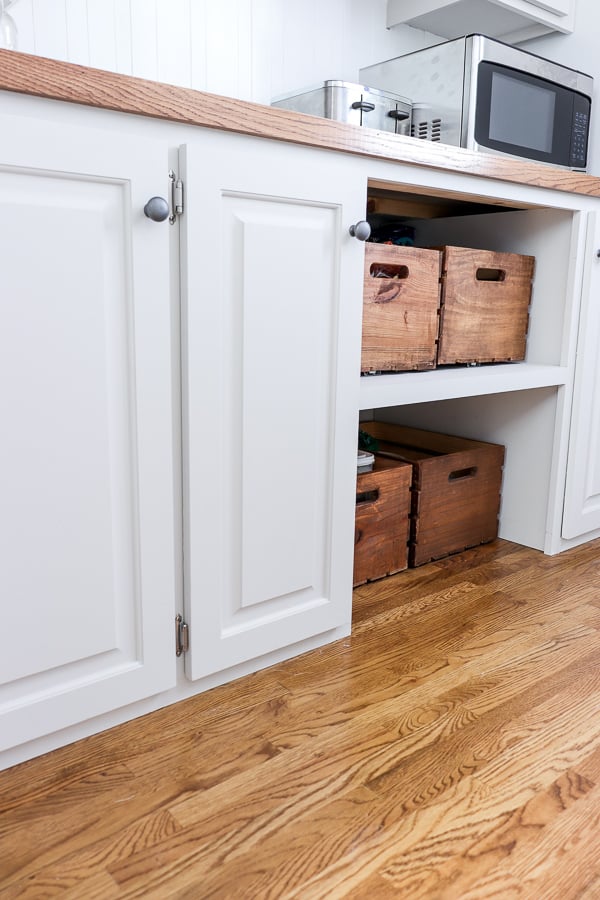
When it’s all closed up, it still looks pretty!
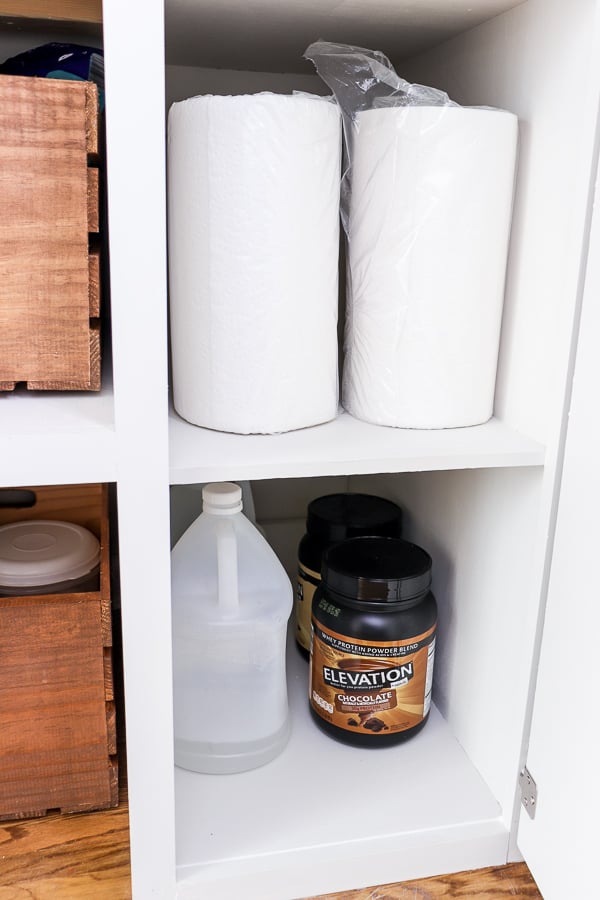
Under our microwave is our paper towel storage as well as those odd extras that need more space, like vinegar bottles or protein powder.
At first, Trent wasn’t too keen on moving the microwave down the hall, but it hasn’t created a hassle whatsoever!
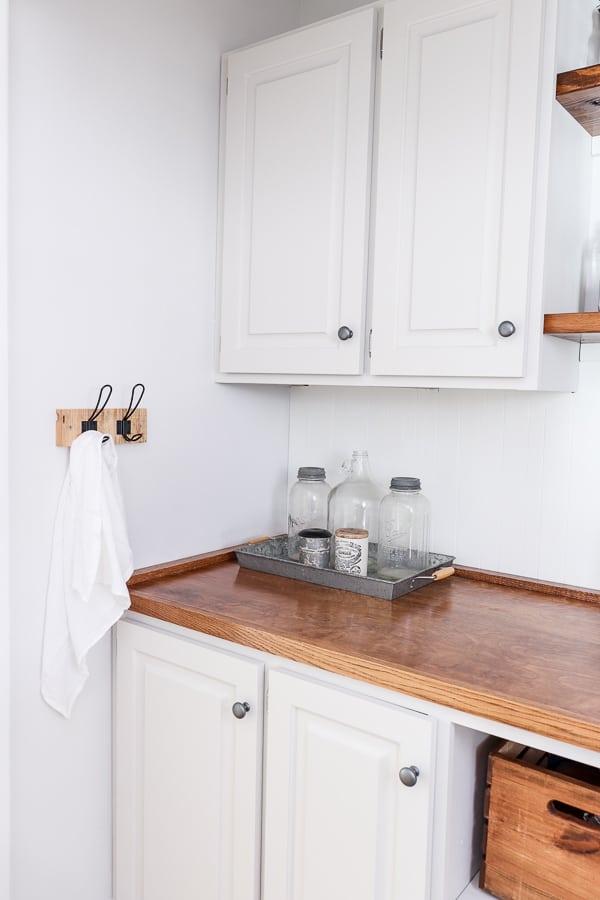
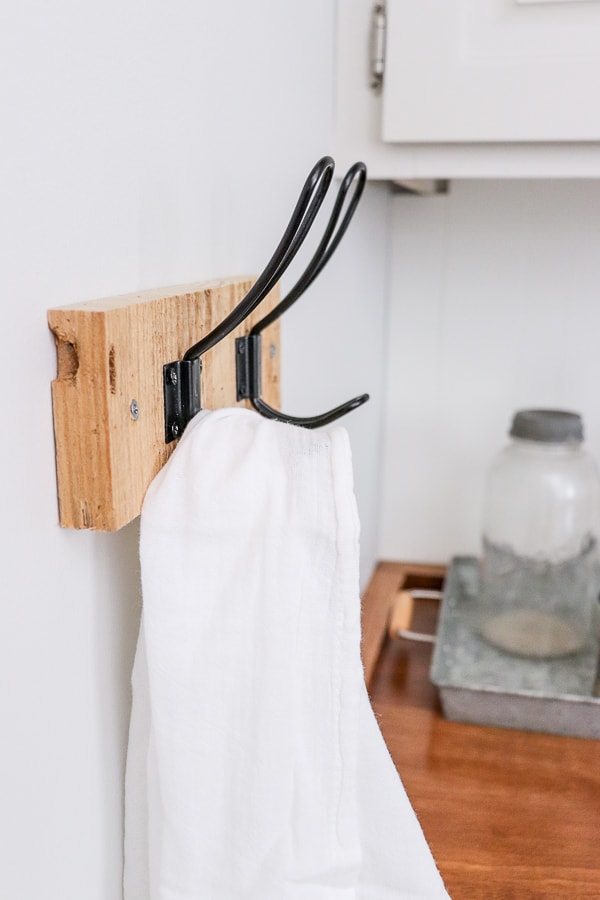
One thing we needed in case a dish from the microwave is too hot to carry was some sort of pot holder.
On the opposite side, I hung some black Farmhouse coat hooks. I took a rough piece of scrap cedar and screwed them in place.
Now I can hang a pretty towel or potholder to carry heated food back into the kitchen.
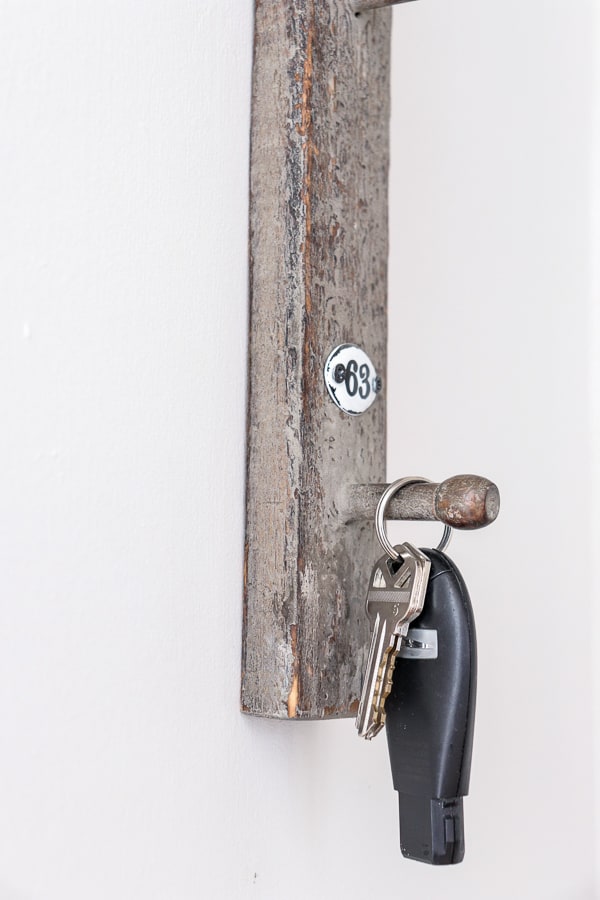
One last little thing that we needed a solution for were the lights in each pantry.
They were both pull string lights meaning there was no light switch to turn them on or off.
And we were constantly moving that cord out of our faces.
Or, if you’re like me, and utterly afraid of spiders, you squeal each time it brushed across your cheek thinking you were suddenly in a spider web.
So this needed to be fixed!
They make a wireless light switch kit that will solve the problem.
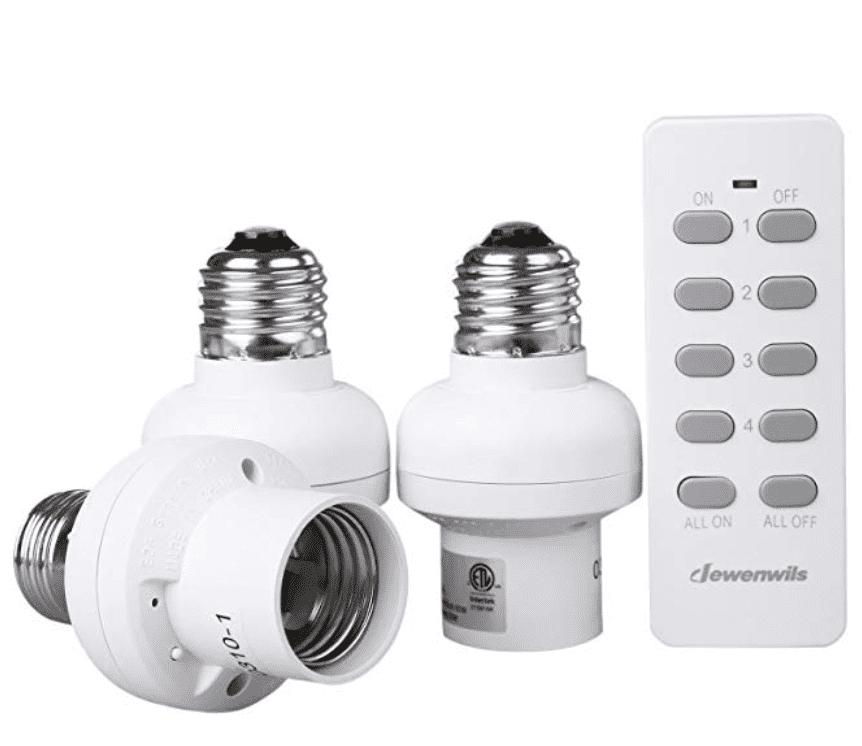
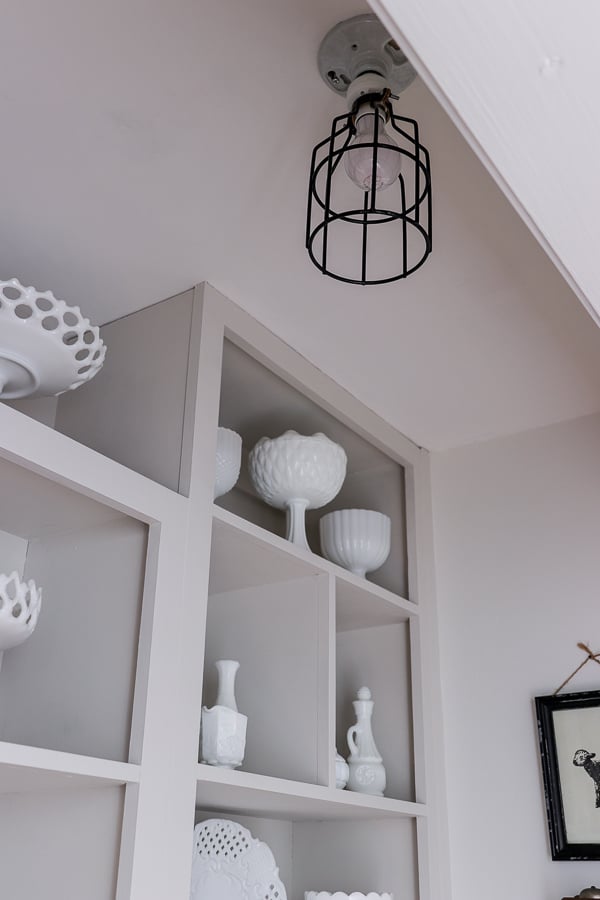
We screwed them into the sockets and added the same metal light cages we used for our light box.
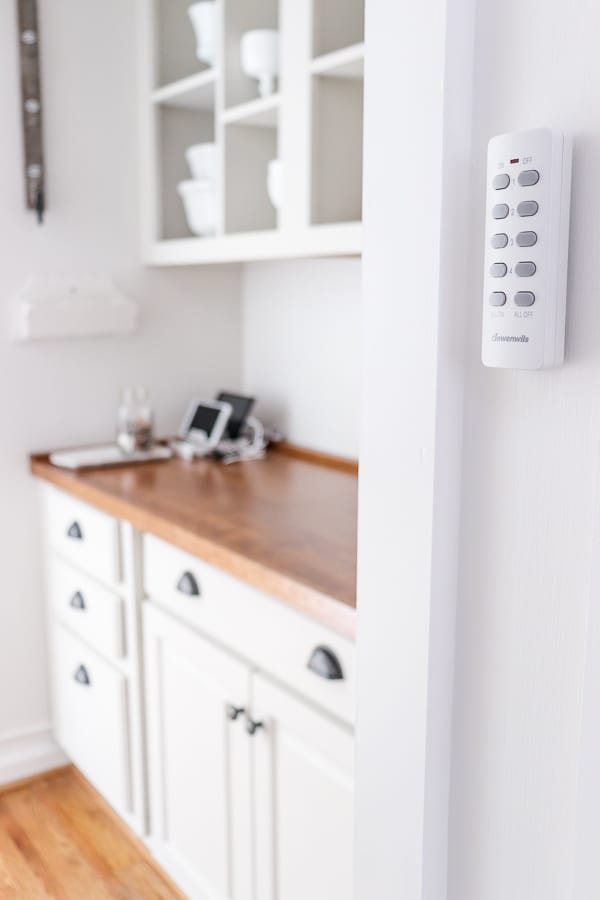
Now we have a wireless remote to turn on or off those lights without a pull chain dangling in our face!
Using a command strip, I hung the remote between the two pantries for easy access.
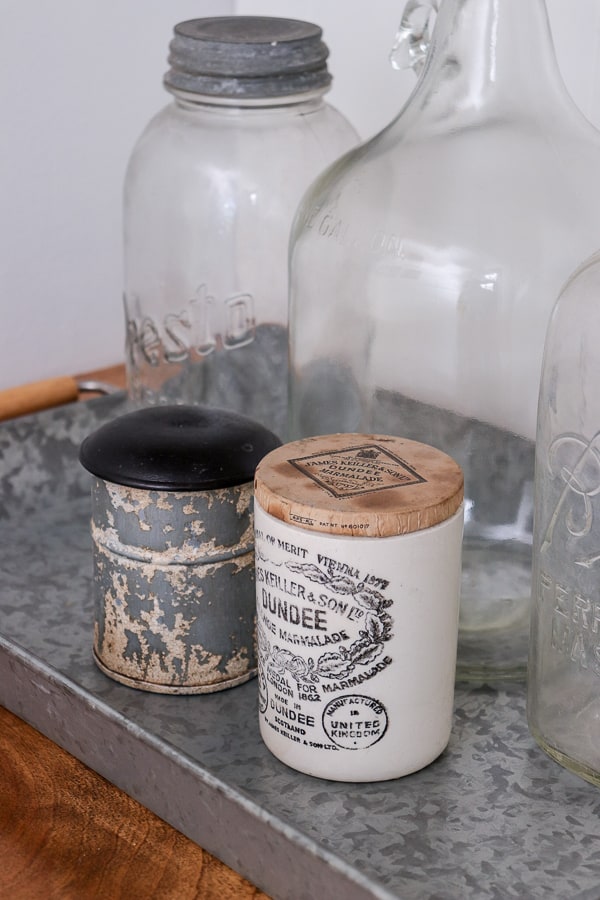
I finished off this space with some of my favorite vintage finds.

Now I have a welcoming hallway that greets me when I get home.
And a functional yet beautiful spot to store all the essentials of home.
So that’s it for Our Pantry Hallway Reveal.
We took our time, saved money by repurposing items, and created a space that is functional for our family.
If you have a space that you want to transform, let me tell you this!
You can do this, too!
Hi Diana – I’m so glad this inspired you! So the hallway ends at our kitchen and eat in breakfast nook. If you look at my kitchen photos, you can see where the hallway is in conjunction to our kitchen.
Beautiful. We just bought a house with an ugly version of this. Where is your kitchen in relation to the pantry. Ours is around the corner. I am not sure how workable this is but changing would be major project