How to Build Affordable DIY Sound-Absorbing Panels (Easy Beginner Guide)
Today, I’m sharing an easy and inexpensive way to build DIY sound-absorbing panels for a music studio, home theater, or even a noisy home gym.
DIY sound-absorbing panels reduce echo by using dense insulation wrapped in breathable fabric inside a wood frame. They’re affordable, beginner-friendly, and ideal for music rooms, home gyms, or home theaters.
If your room sounds echo-y or loud no matter what you do, you’re not imagining it — hard surfaces can make noise bounce everywhere.
That’s what happened to our home gym.
We have a history with making soundproofing panels.
Trent and I have been professional musicians for many, many years now and we’ve had a recording studio in each home we’ve ever lived in.
And since my husband is a drummer, I quickly learned how sound travels – especially when we were sharing walls in a duplex!
So we needed to find the easiest ways to build sound absorbing panels to help keep our neighbors happy!
Many moons ago, when we lived in Vegas, we built these sound panels that have lasted years in all the homes we’ve lived in.
This is the 4th home we’ve used these sound panels and I’m surprised at how well they have stayed together all these years!
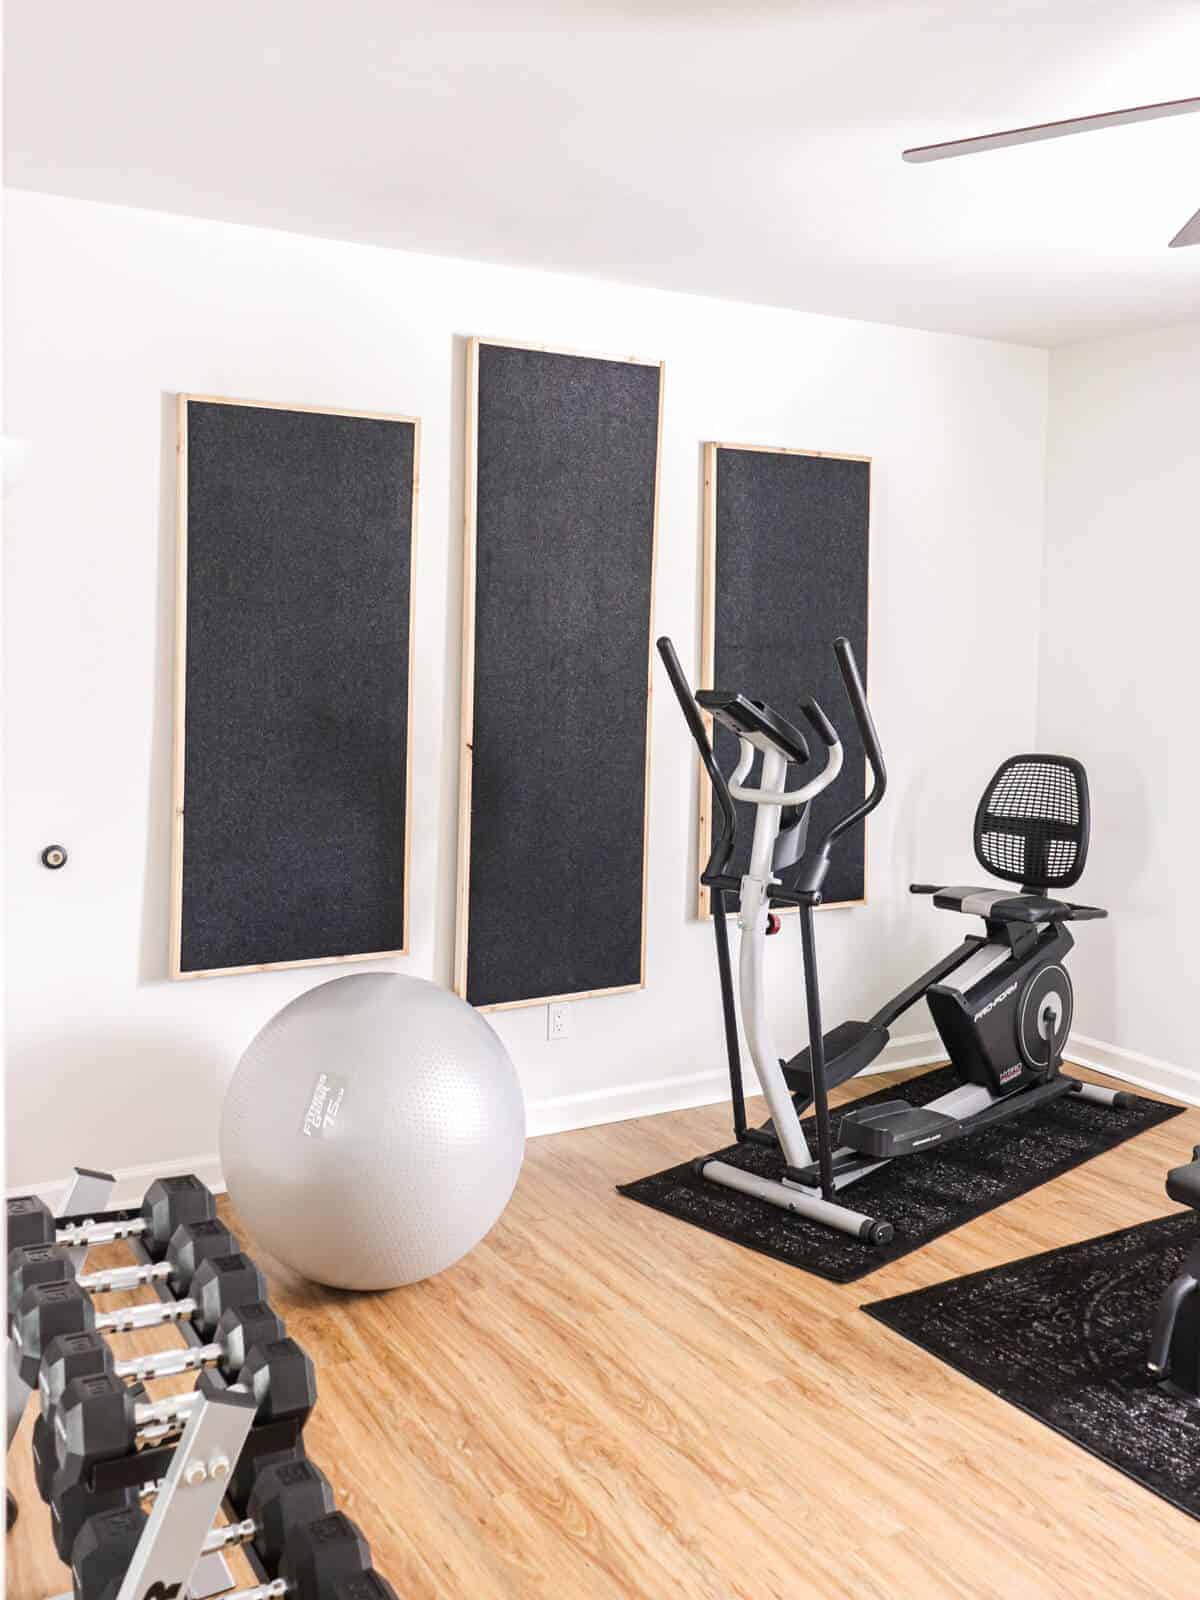
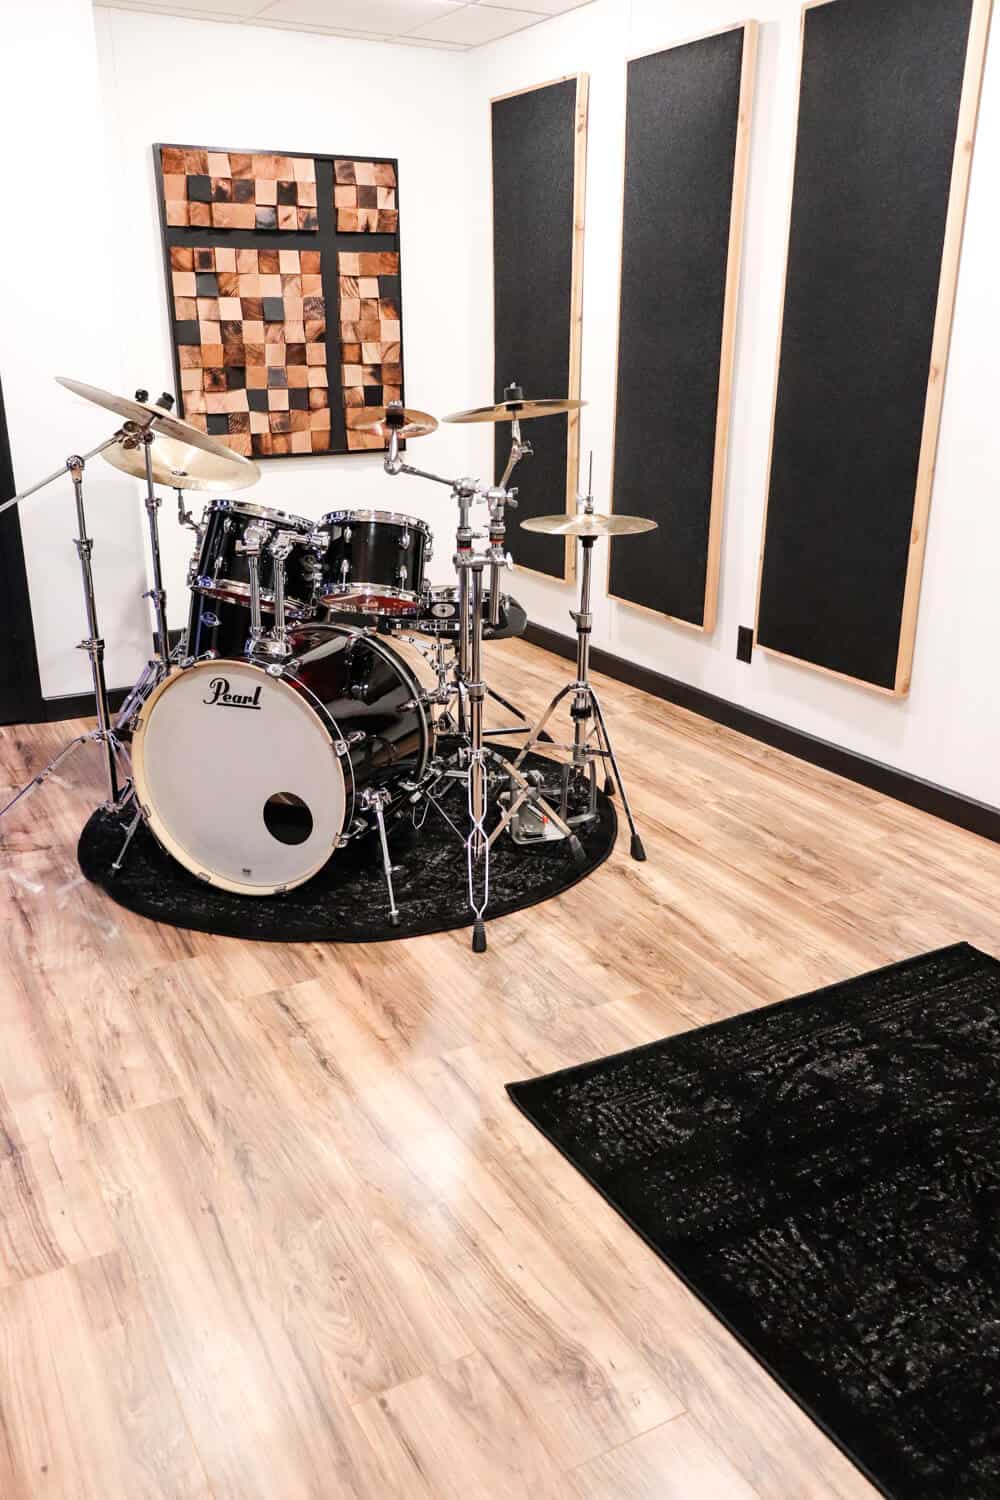
When we were making over our Small Home Gym, we instantly noticed how noisy the room was with all the hard surfaces.
So we added these sound absorption panels to help with noise reduction.
What Are DIY Sound-Absorbing Panels?
DIY sound-absorbing panels are a simple, affordable way to reduce echo and improve the sound inside a room.
As working musicians, we’ve built and reused these panels across multiple homes and studios, so we’ve seen firsthand how much of a difference they make.
If you’ve ever walked into a space that feels hollow or noisy, these panels help soften that sound without requiring expensive studio upgrades. We’ve found they’re surprisingly easy to build — just a basic wooden frame, dense sound-absorbing insulation, and breathable fabric to wrap everything together for a clean, finished look.
I thought this may be helpful if you have a movie room, a home studio, or even a loud home gym like we did!
This post contains some affiliate links for your convenience. Click here to read my full disclosure.
Supplies You’ll Need
These are the supplies you’ll need for this project.
- Furring Strips – we got ours from Home Depot
- Circular saw
- Nail Gun – we love this pneumatic one
- Staple Gun
- L brackets and screws
- Foam
- Batting
- Fabric
- Tape Measure
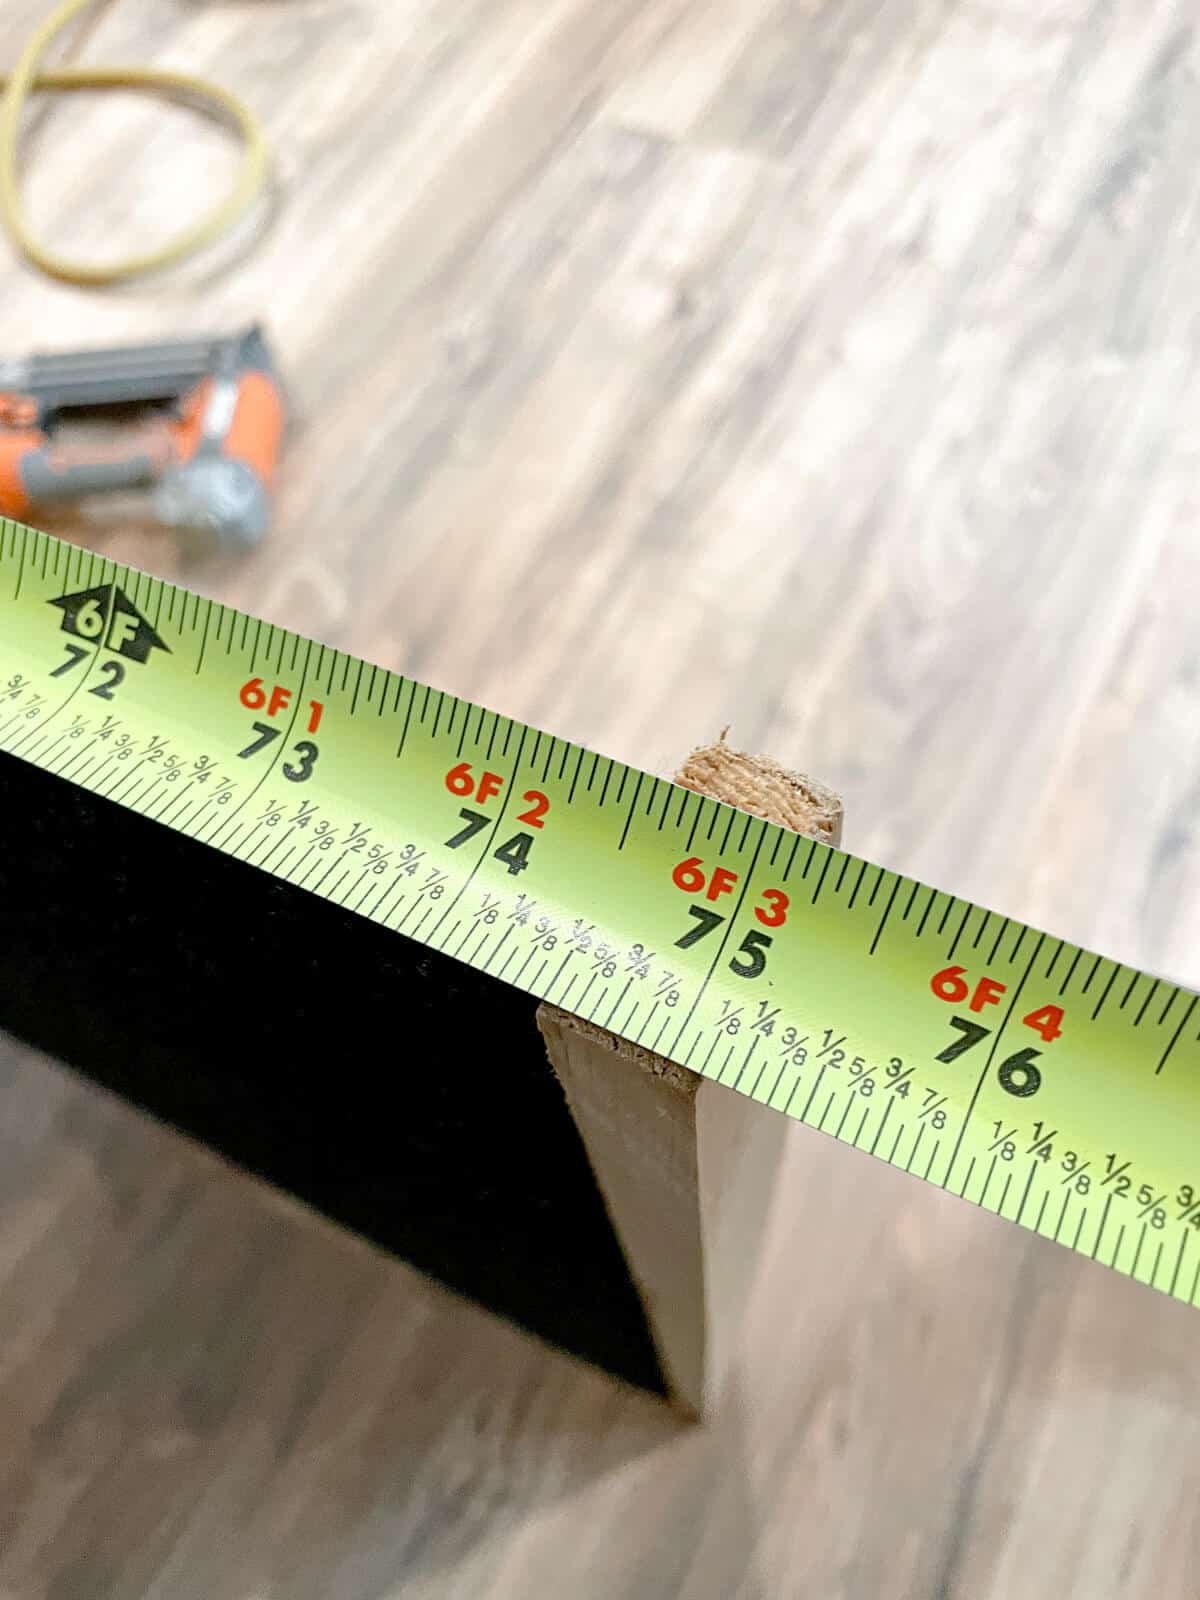
How to Build the Frame
Since I can’t travel back in time and take photos of the frame build, I’ll be as detailed as possible in how we made them.
Basically, you’re building a long rectangular wood frame. We used 1 inch furring strips. If you want a thicker panel, you can change the size of the wood.
But we have found that the furring strips keep the panels light and still are an effective way to absorb ambient noise in your room.
Cut the length of the pieces of wood to your desired size. Ours are approx 6 ft tall x 2 ft wide. We have a few that are a different size as well.
The easiest strategy is to build butt joints. You could use wood screws or nail them together after adding a dab of wood glue to the end where the joints meet up.
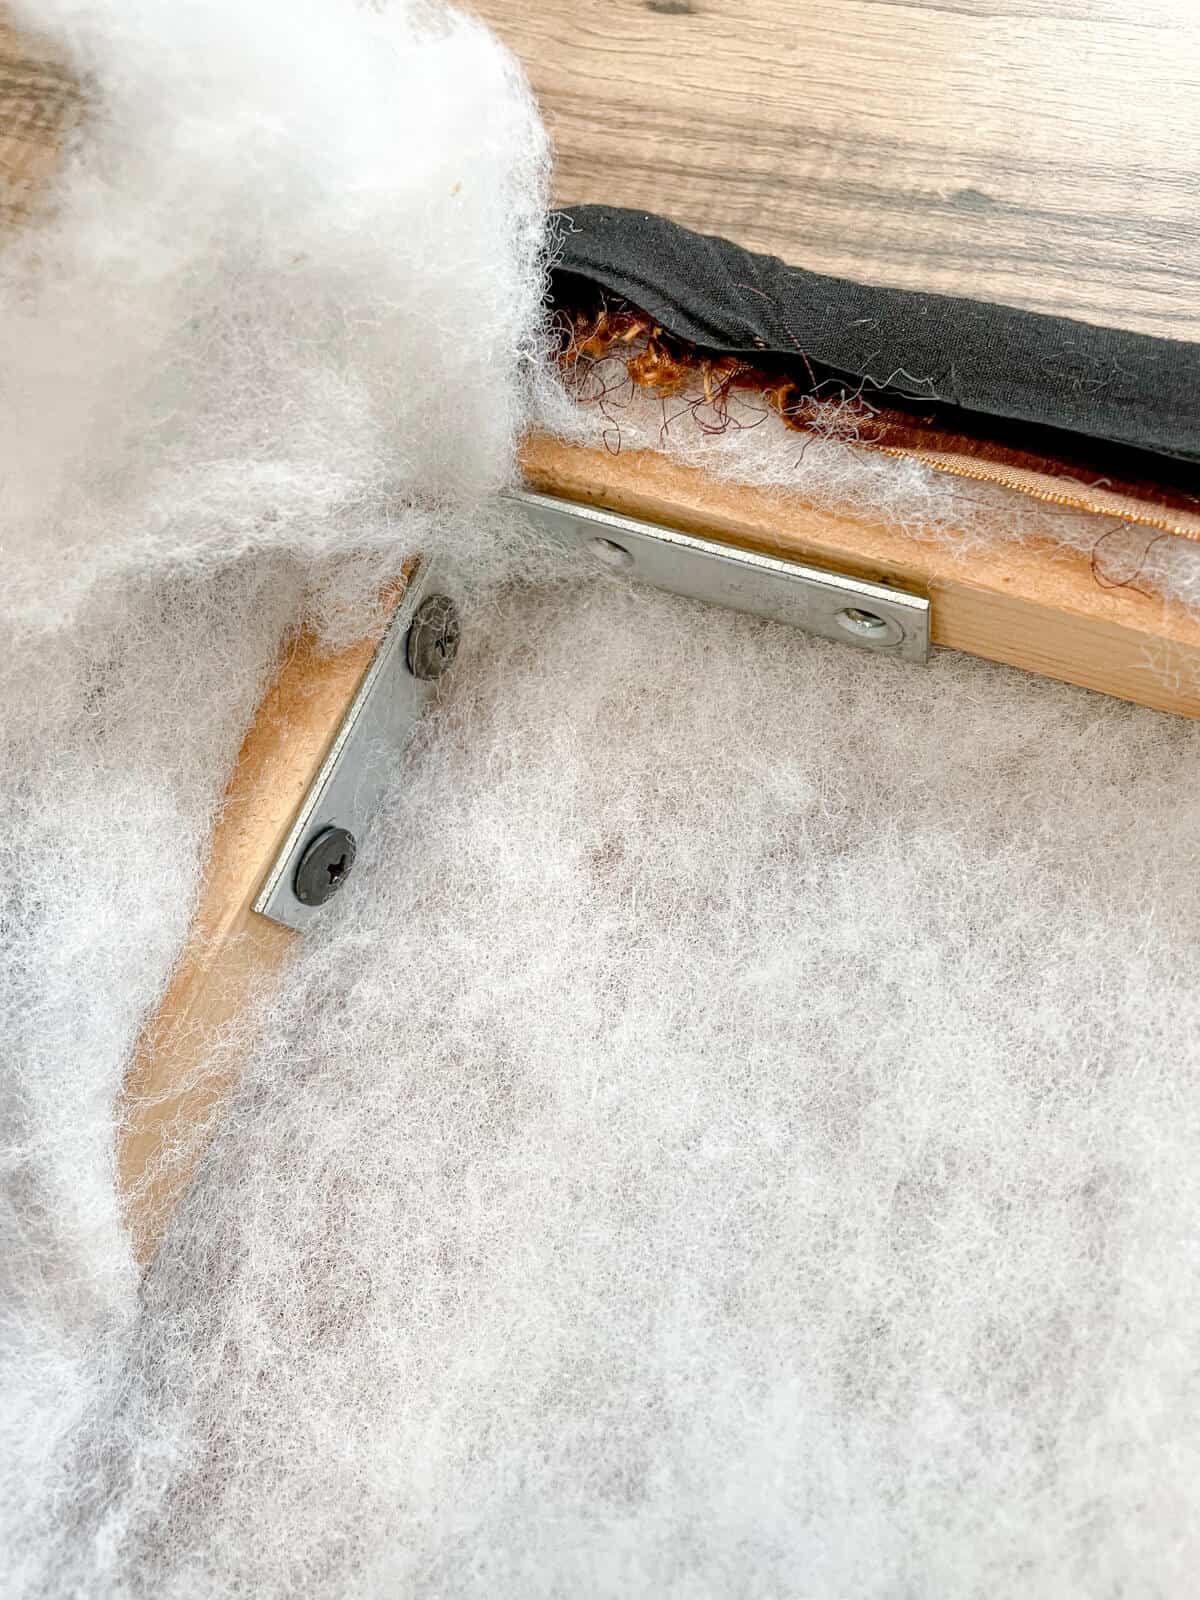
Since these will hang from the wall, we added L brackets to the inside of the joint.
This little trick has been secret to our panels not falling apart all these years later.
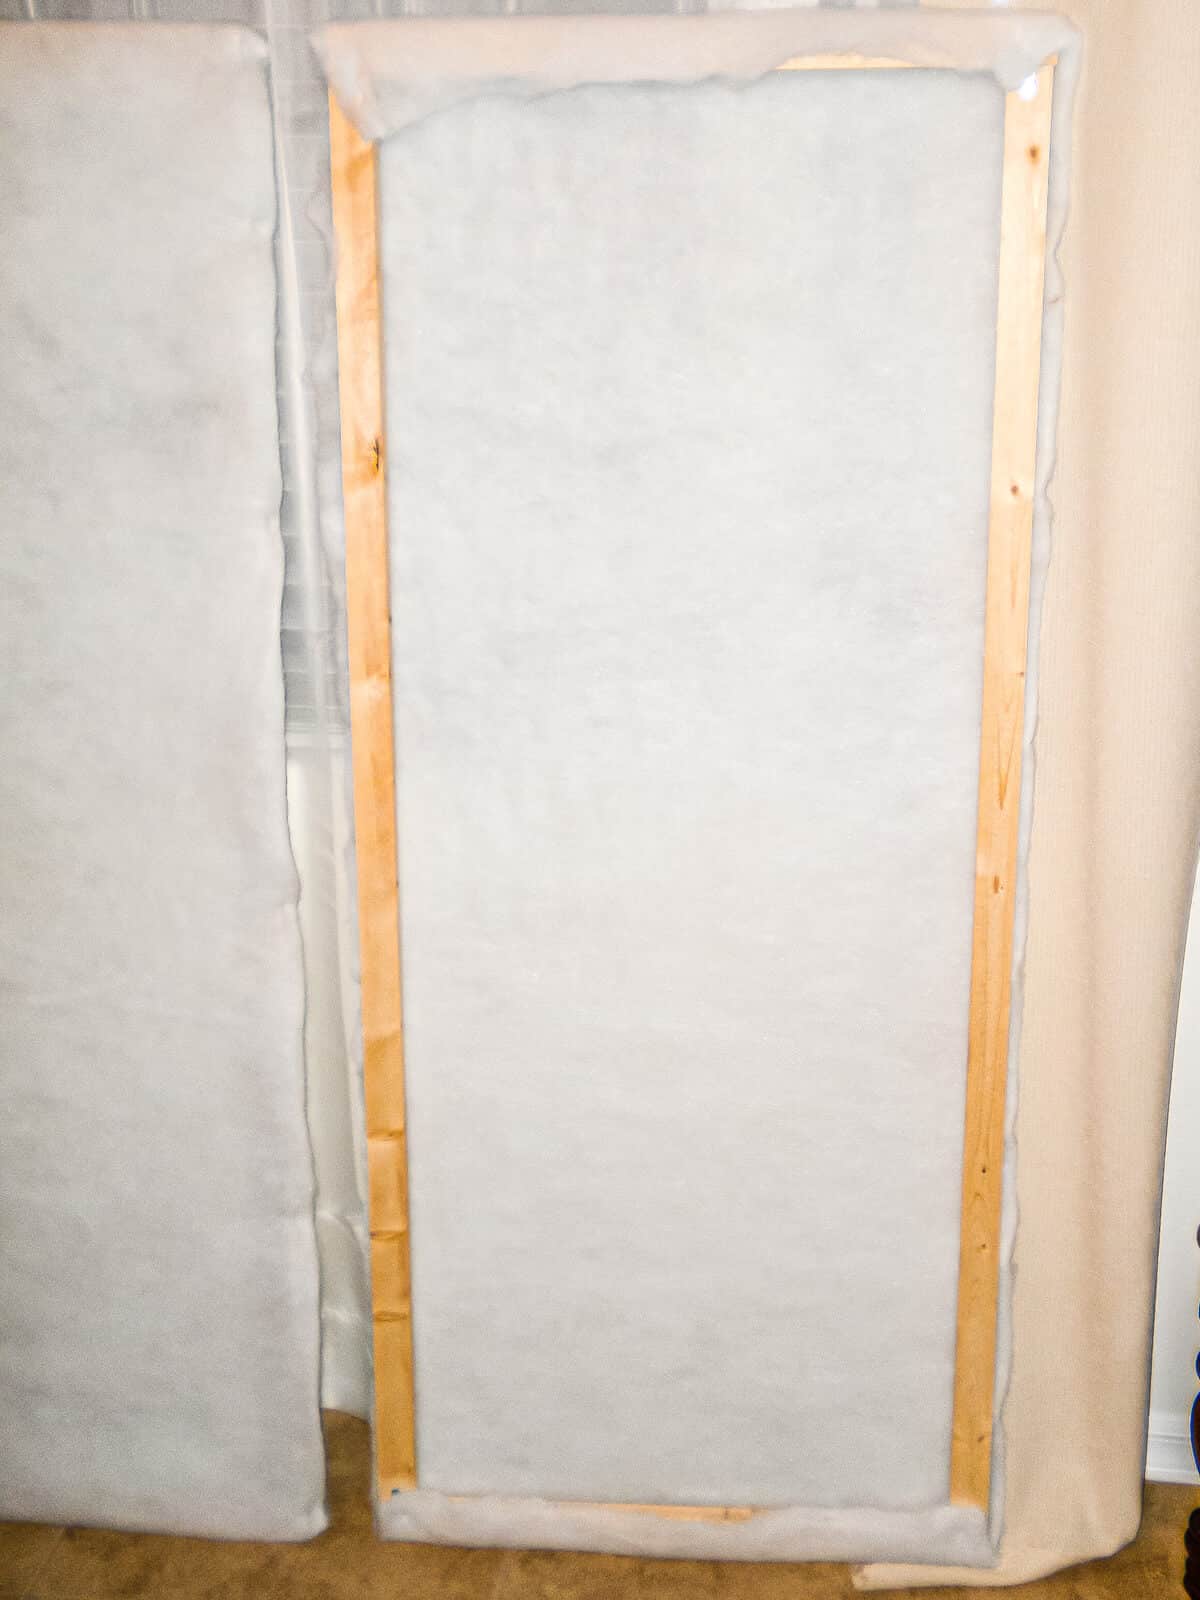
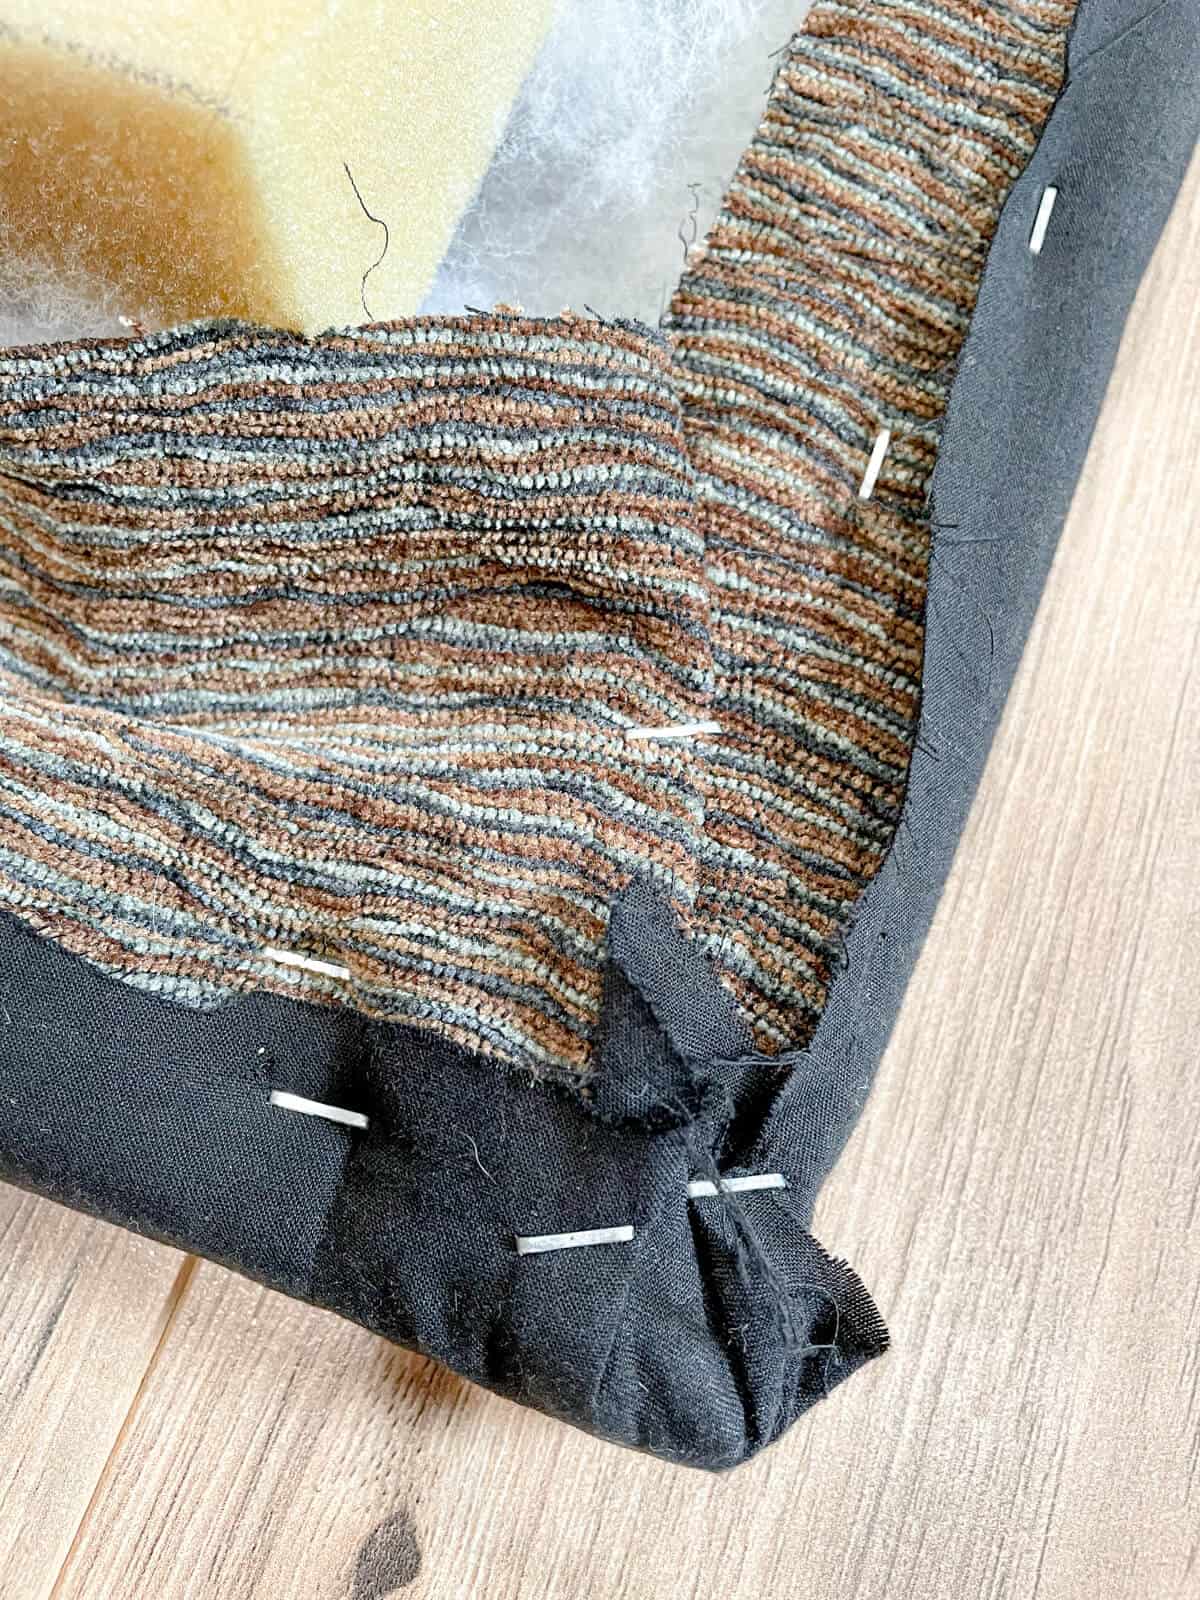
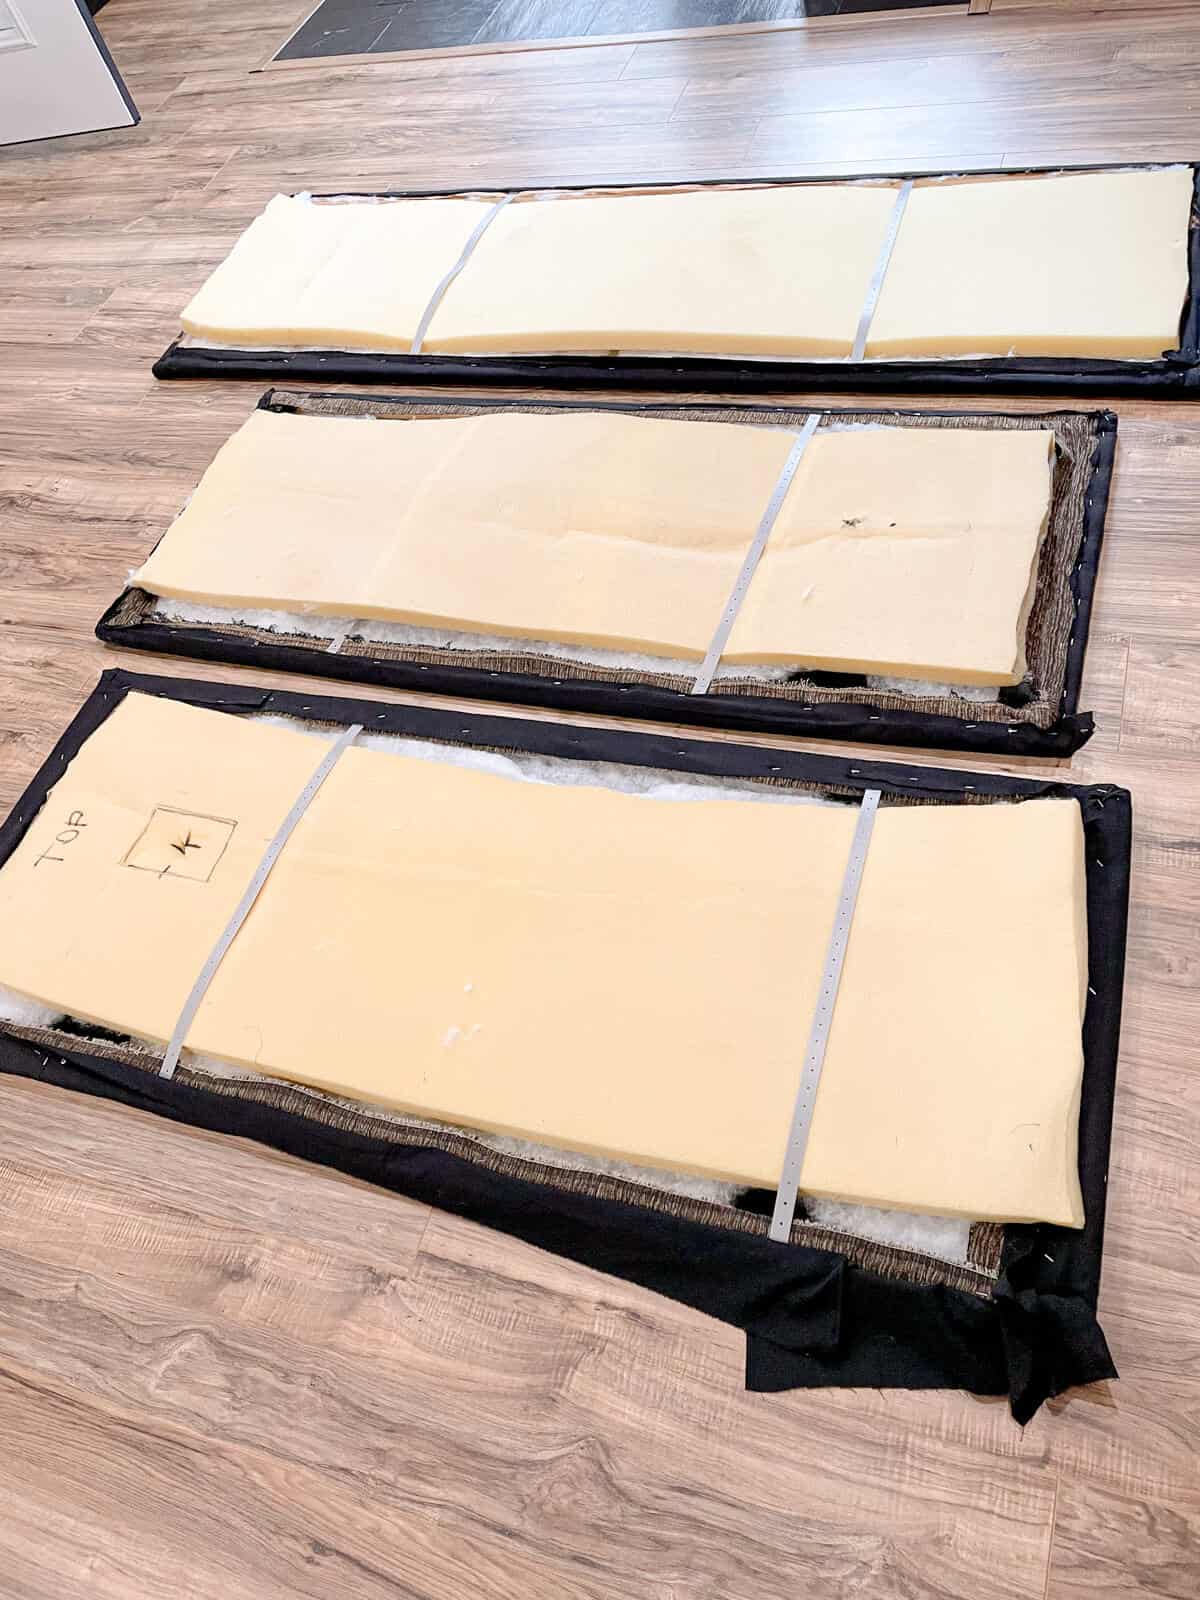
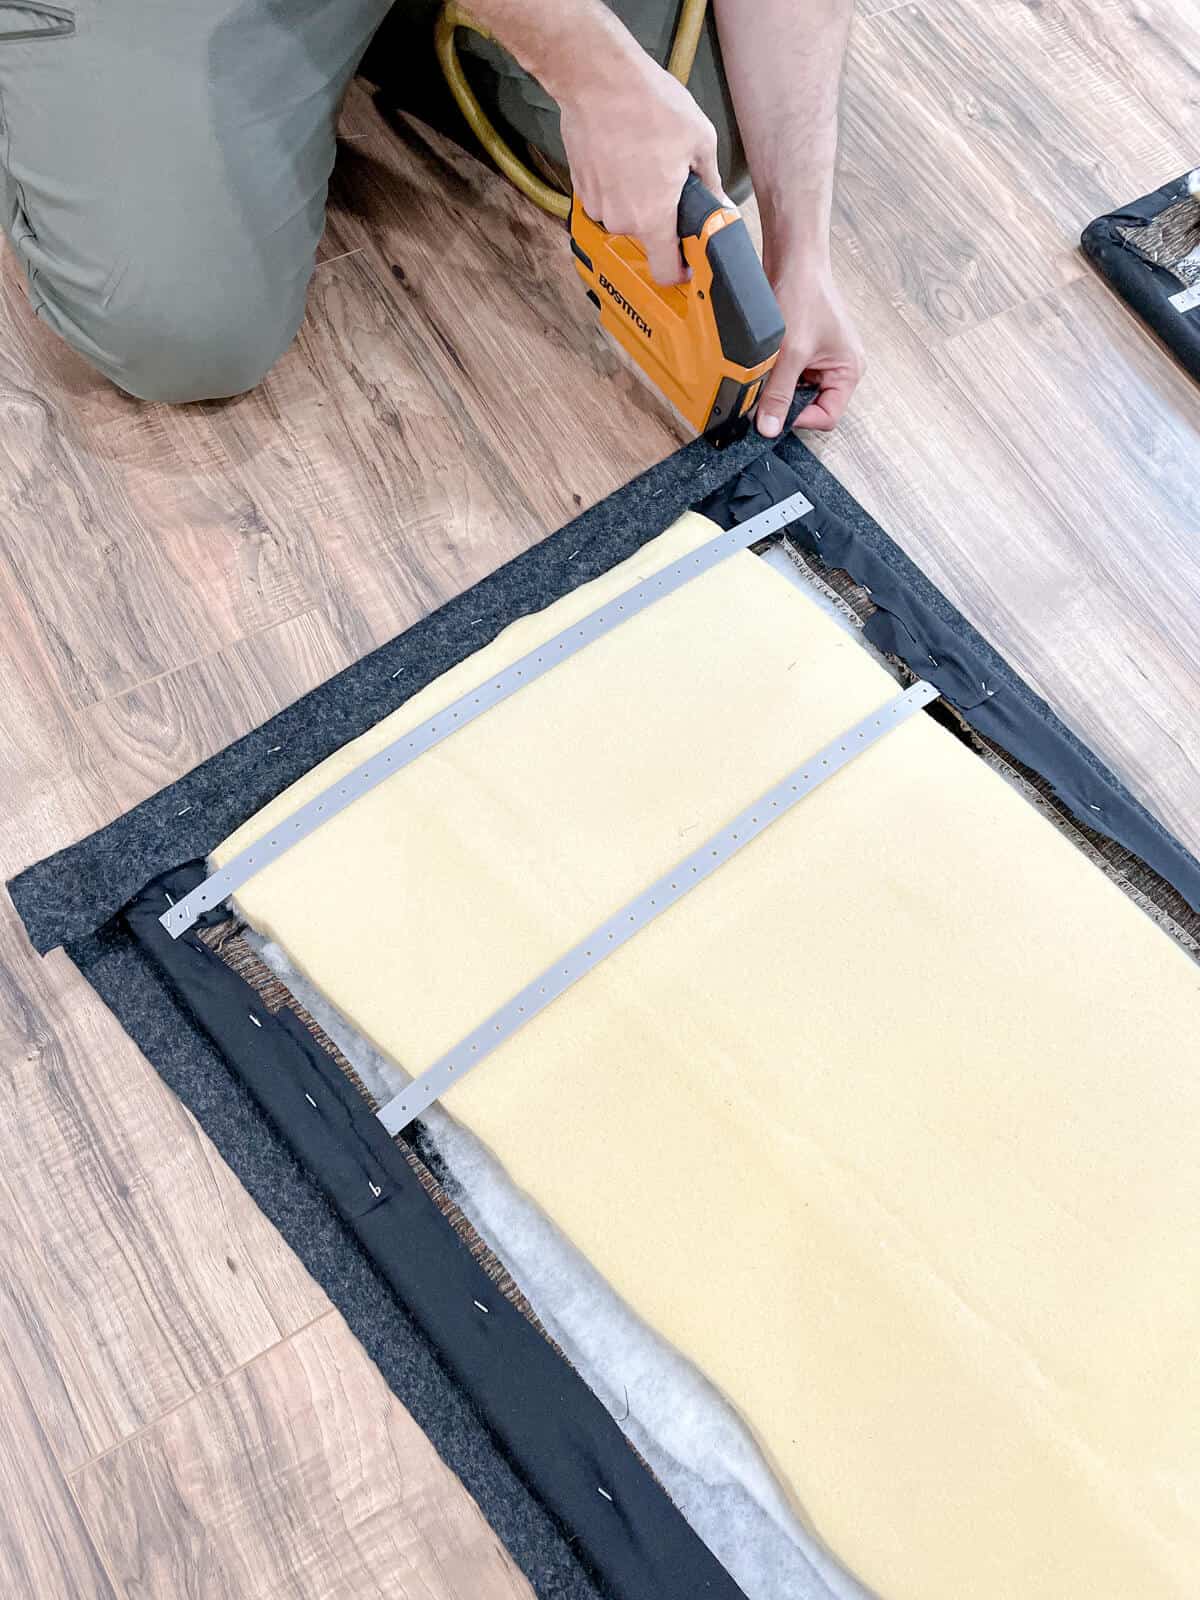
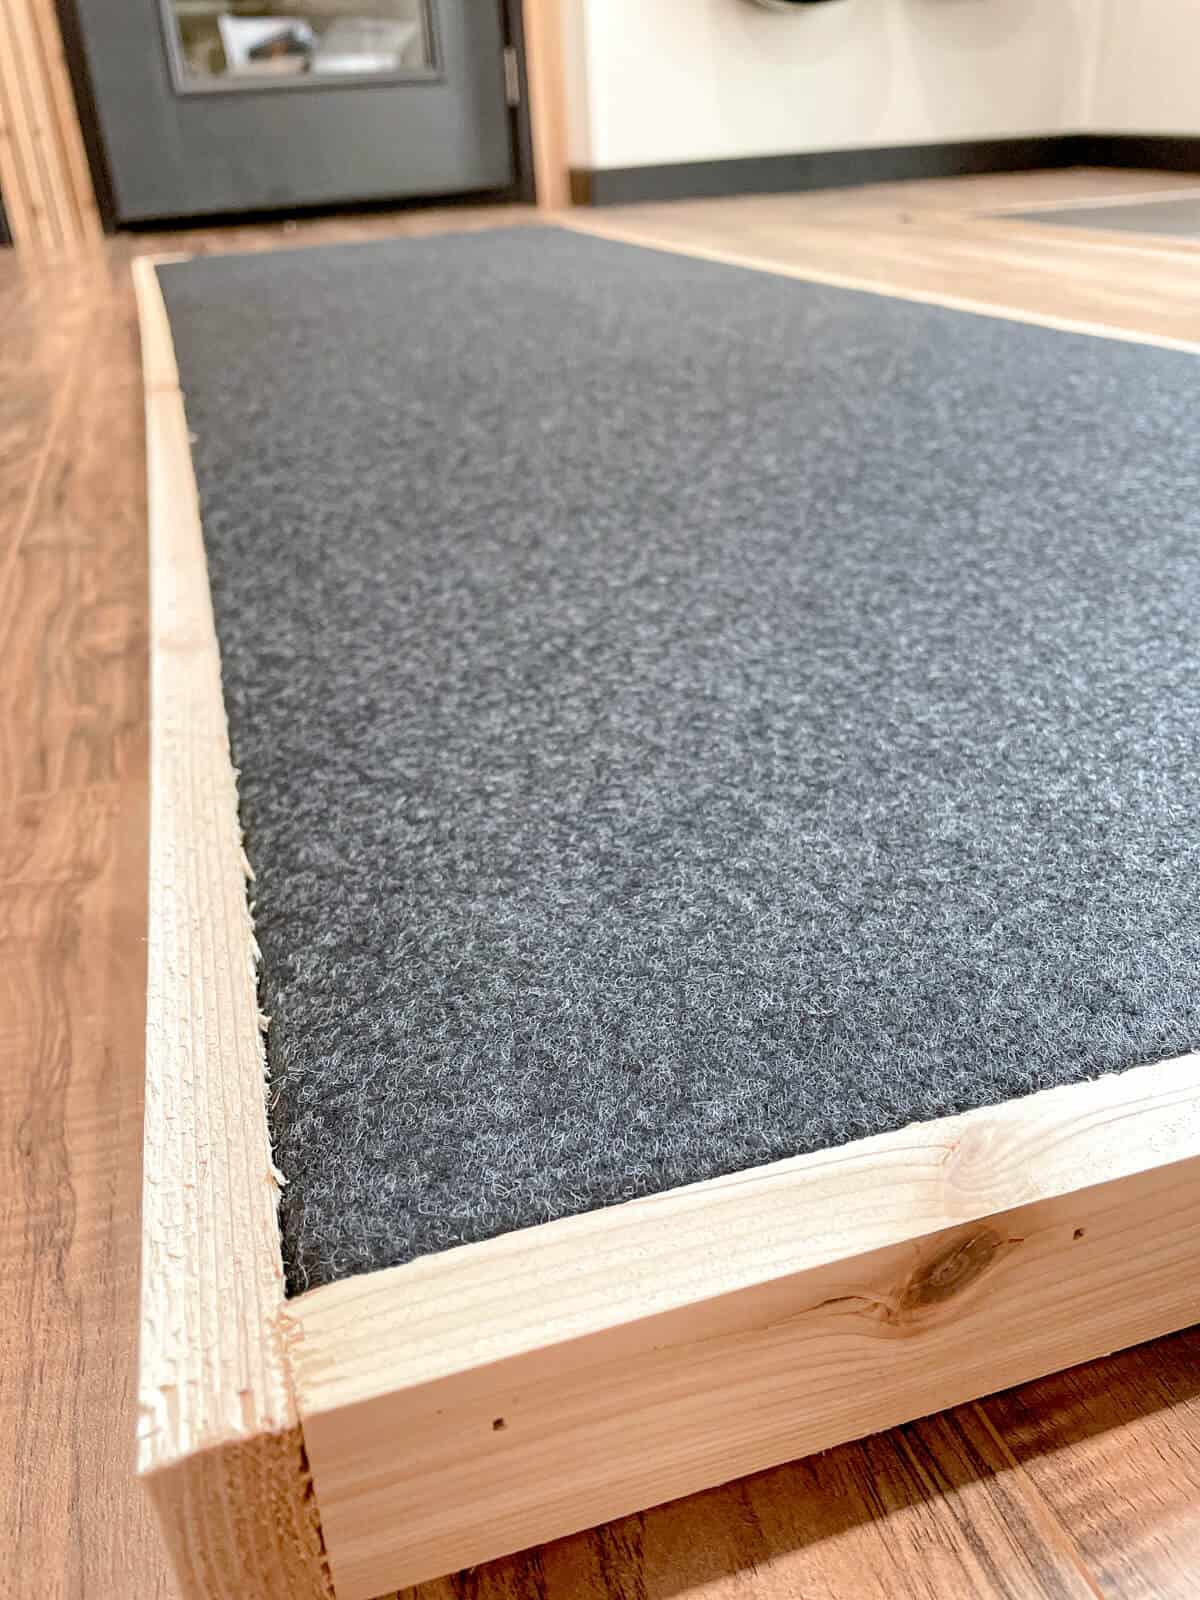
Adding Insulation and Fabric
The first thing you want to do after building your frame is cover the wood with batting.
For the inside of our diy soundproof panels, we used foam bedding toppers to fill the inside space.
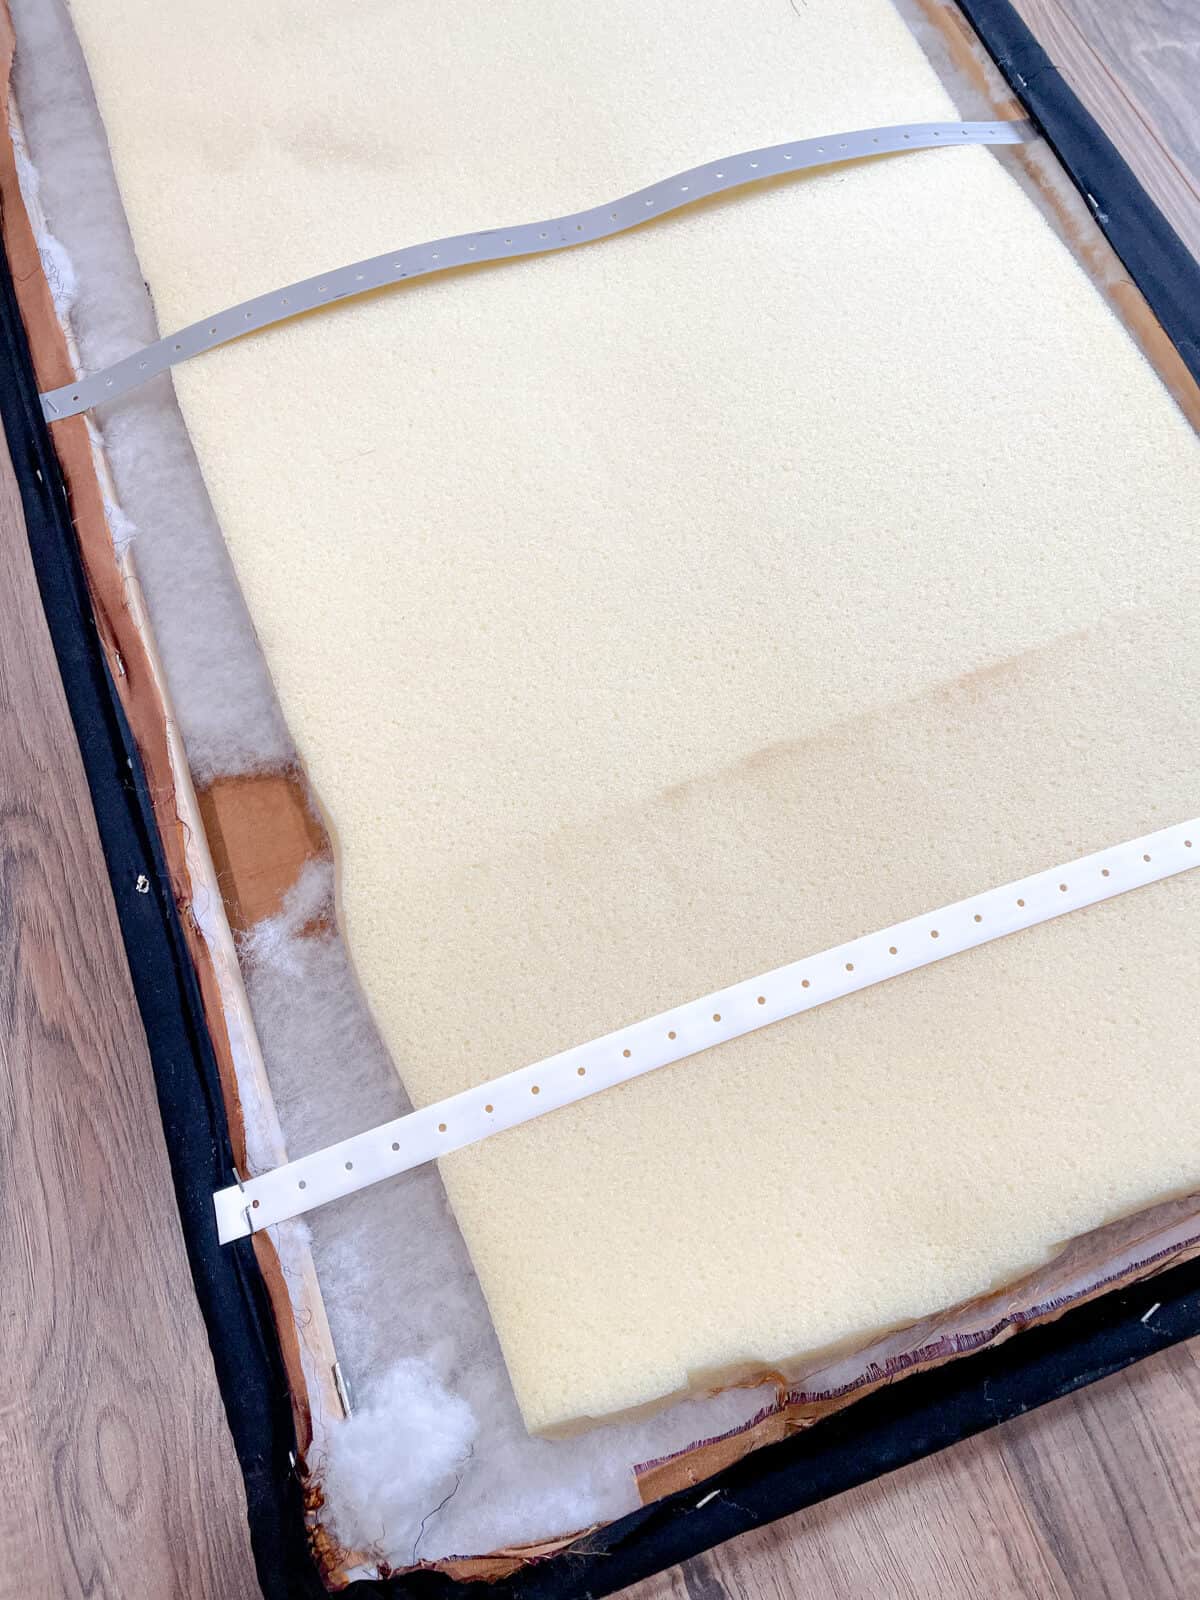
We secured ours to the frame using these plastic straps, but spray adhesive would also work by attaching it to the batting.
The next step is to cover it with your fabric.
You could purchase sound absorption material, but we just used different fabrics each time.
The first time we covered it with an upholstery type of fabric and the second layer was black cotton. The best fabric is one that works well with your home decor!
Like I said before, we have used these in multiple houses and the fabric had taken quite a beating.
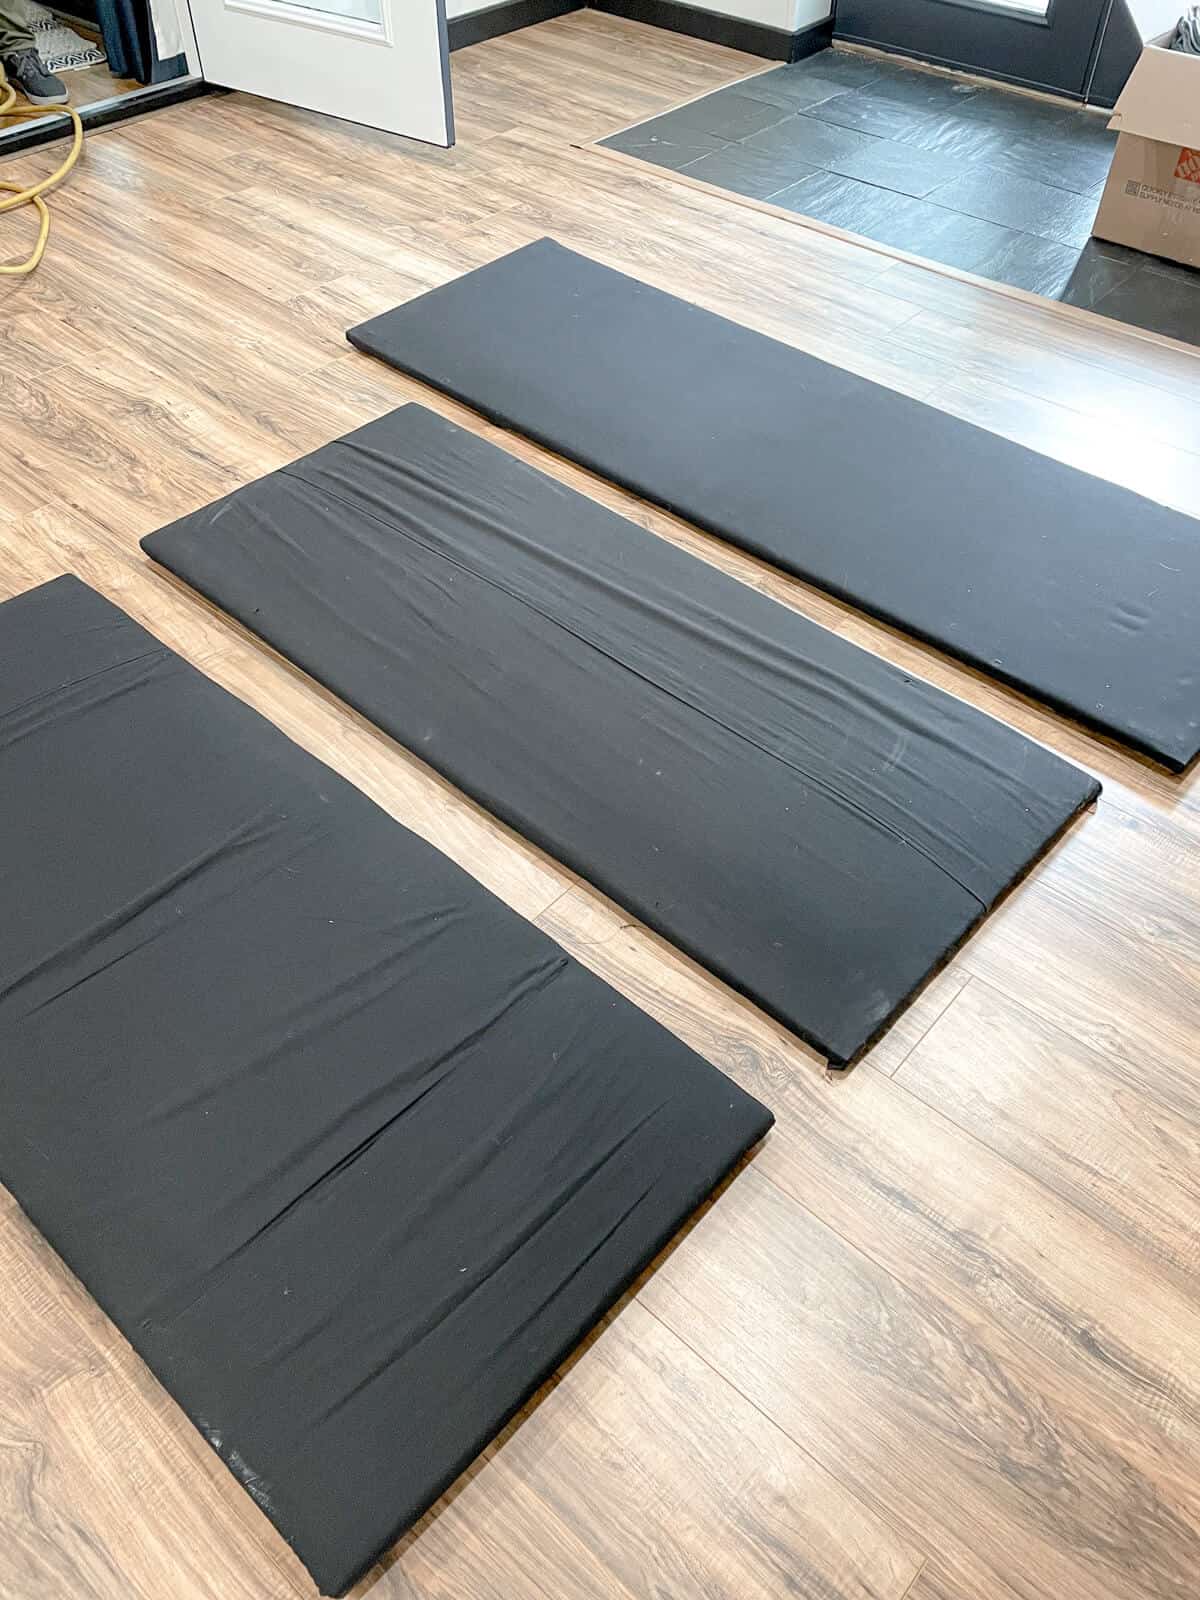
So I wanted to recover them one more time using a charcoal colored felt that I found at Walmart.
So you want to lay your panel down on a flat surface.

You want to trim your fabric so there’s enough of an edge to fully wrap around the wood frame you built.
Then you lay your panel on top of the fabric with the back of the panel facing the ceiling.
Hint: Test how your fabric pulls. This may allow you to adjust your cuts. Since we used felt, it had a lot of pull and we could cut the fabric about an inch around each side.
Then you simply staple the fabric to the frame.
We started with short side of the frame and then moved to the long side.
Since we didn’t remove the previous fabric from the frames, we pulled out our pneumatic staple gun and it worked perfectly.
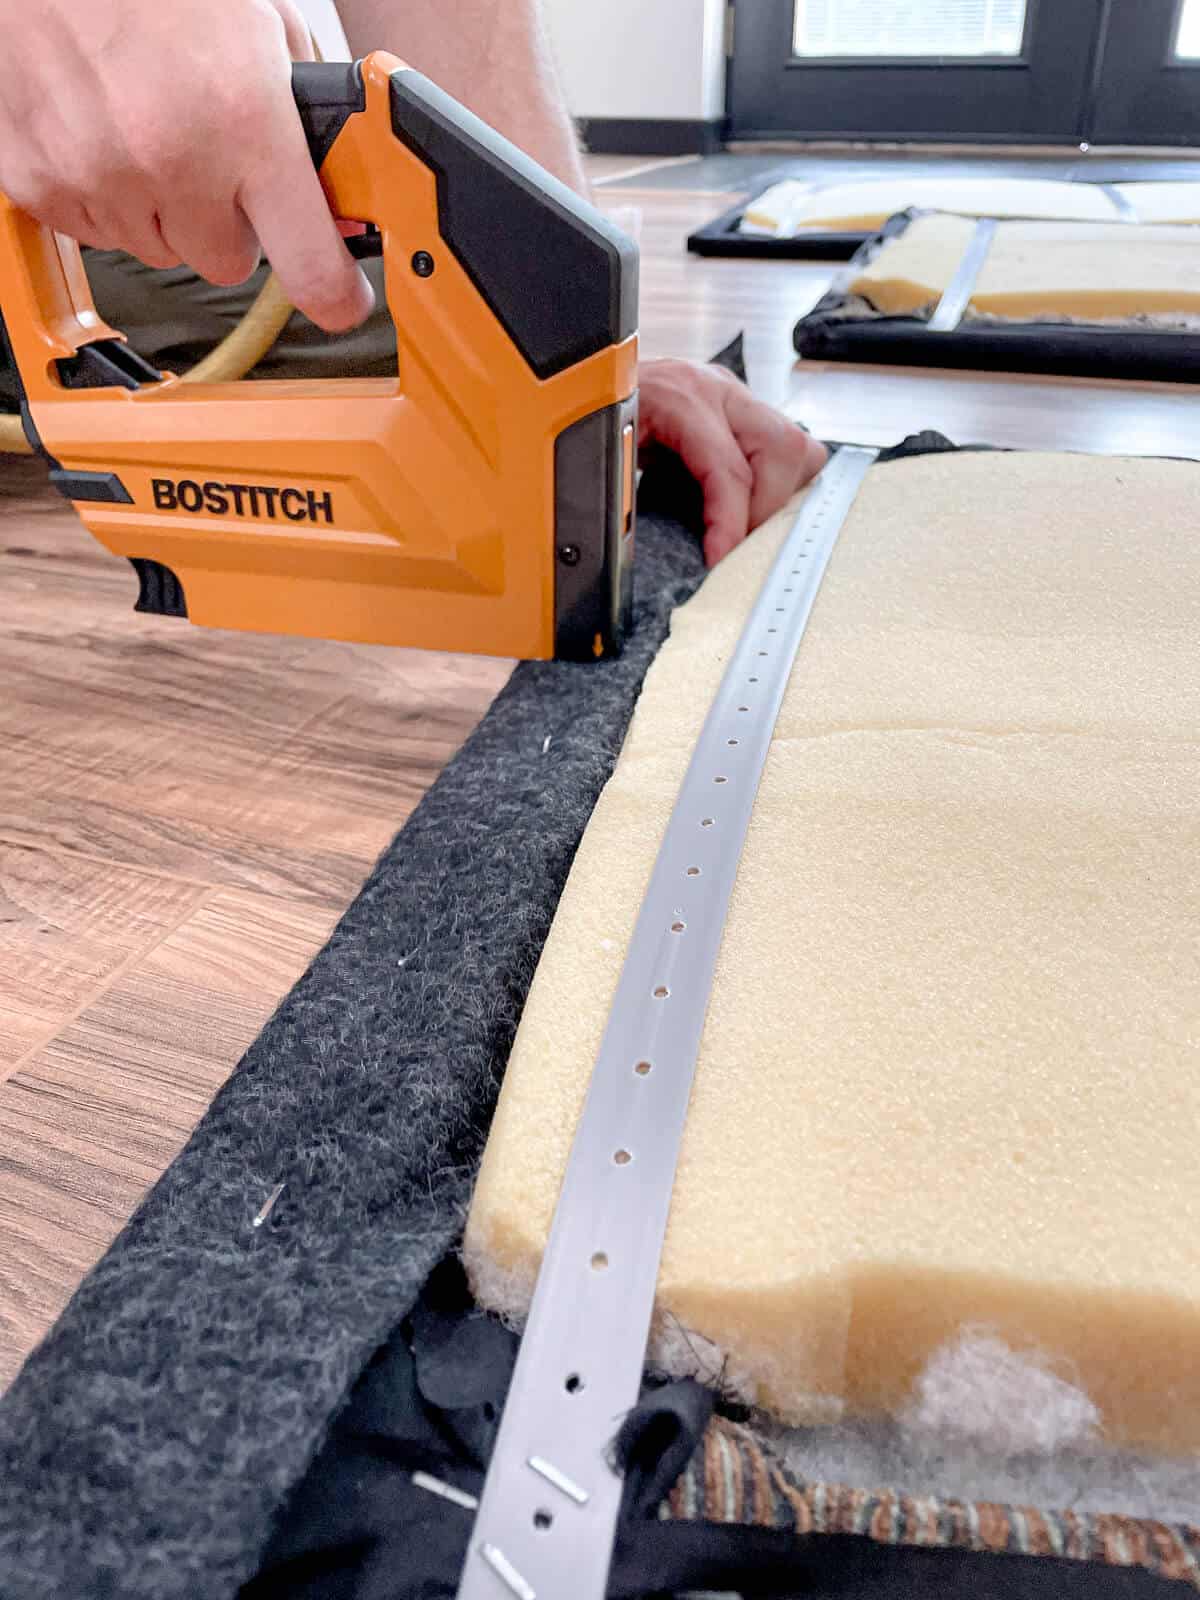
Continue around the back of the frame until all your fabric is stapled.
Flip the panel around to check how the fabric looks on the front of the panel.
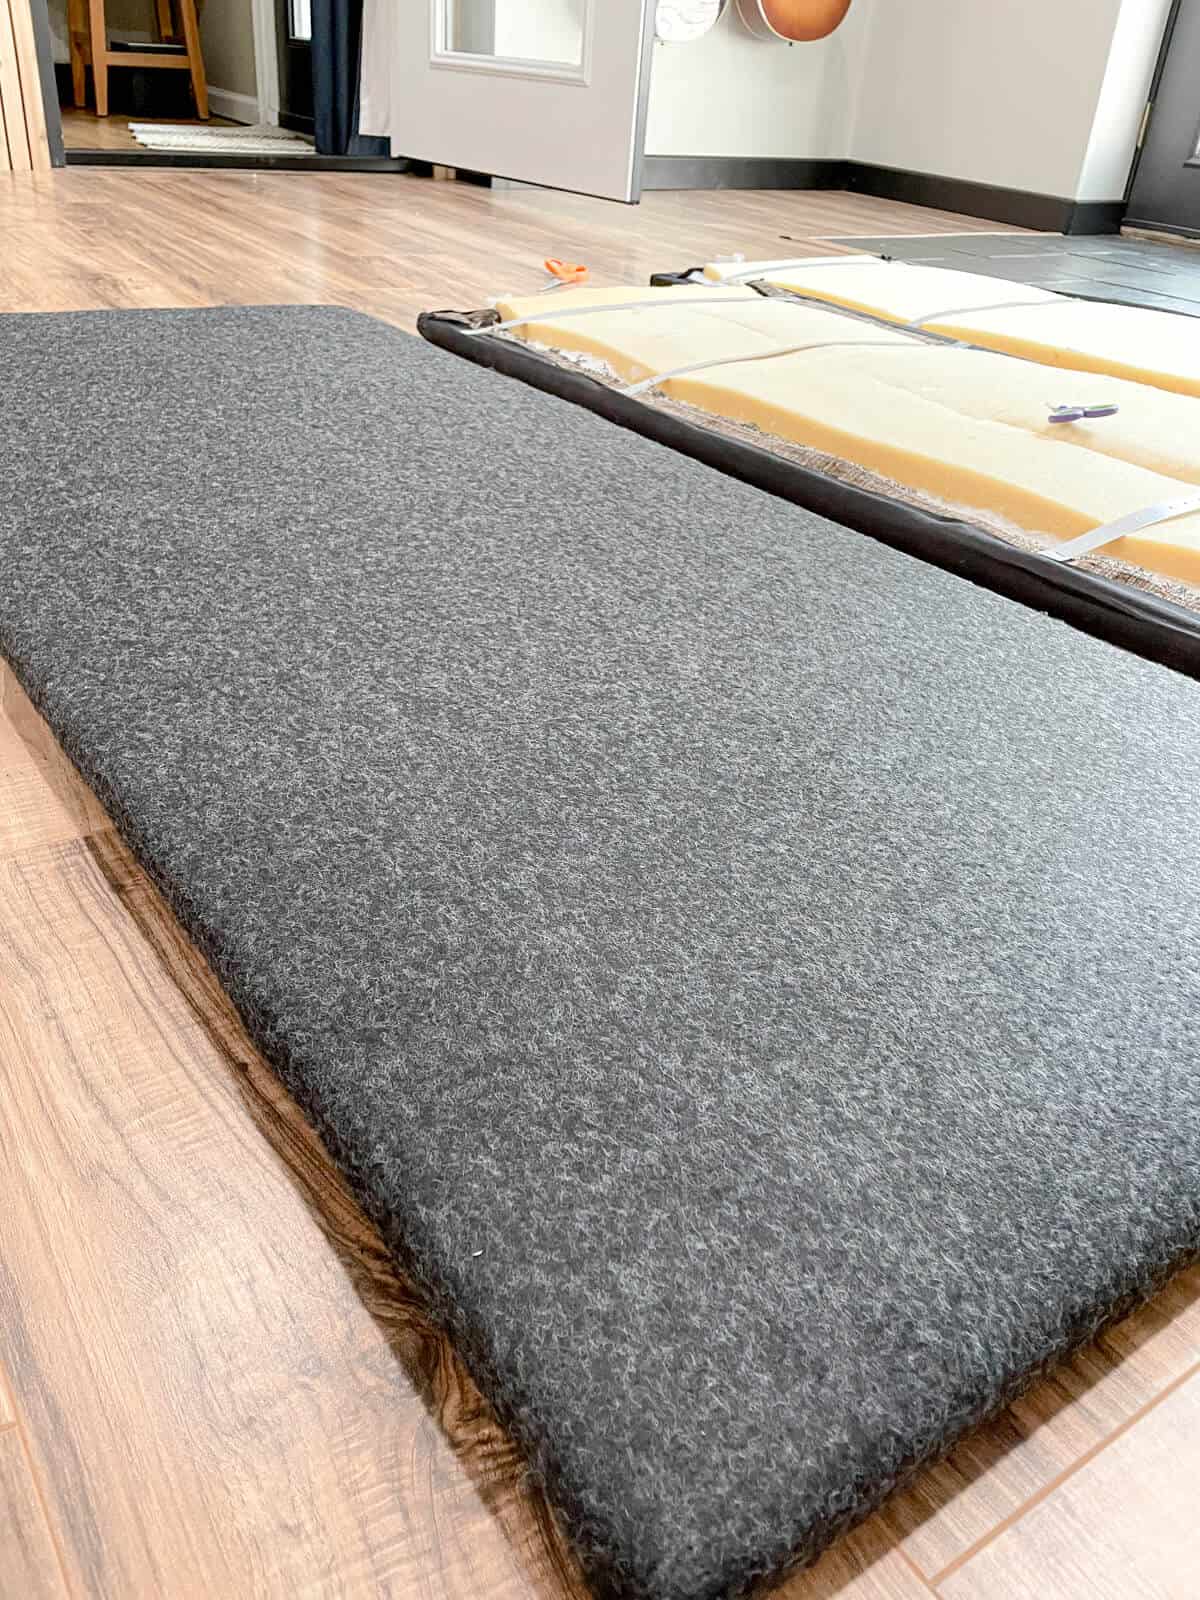
You just want to make sure the fabric isn’t puckering or pulling where it shouldn’t.
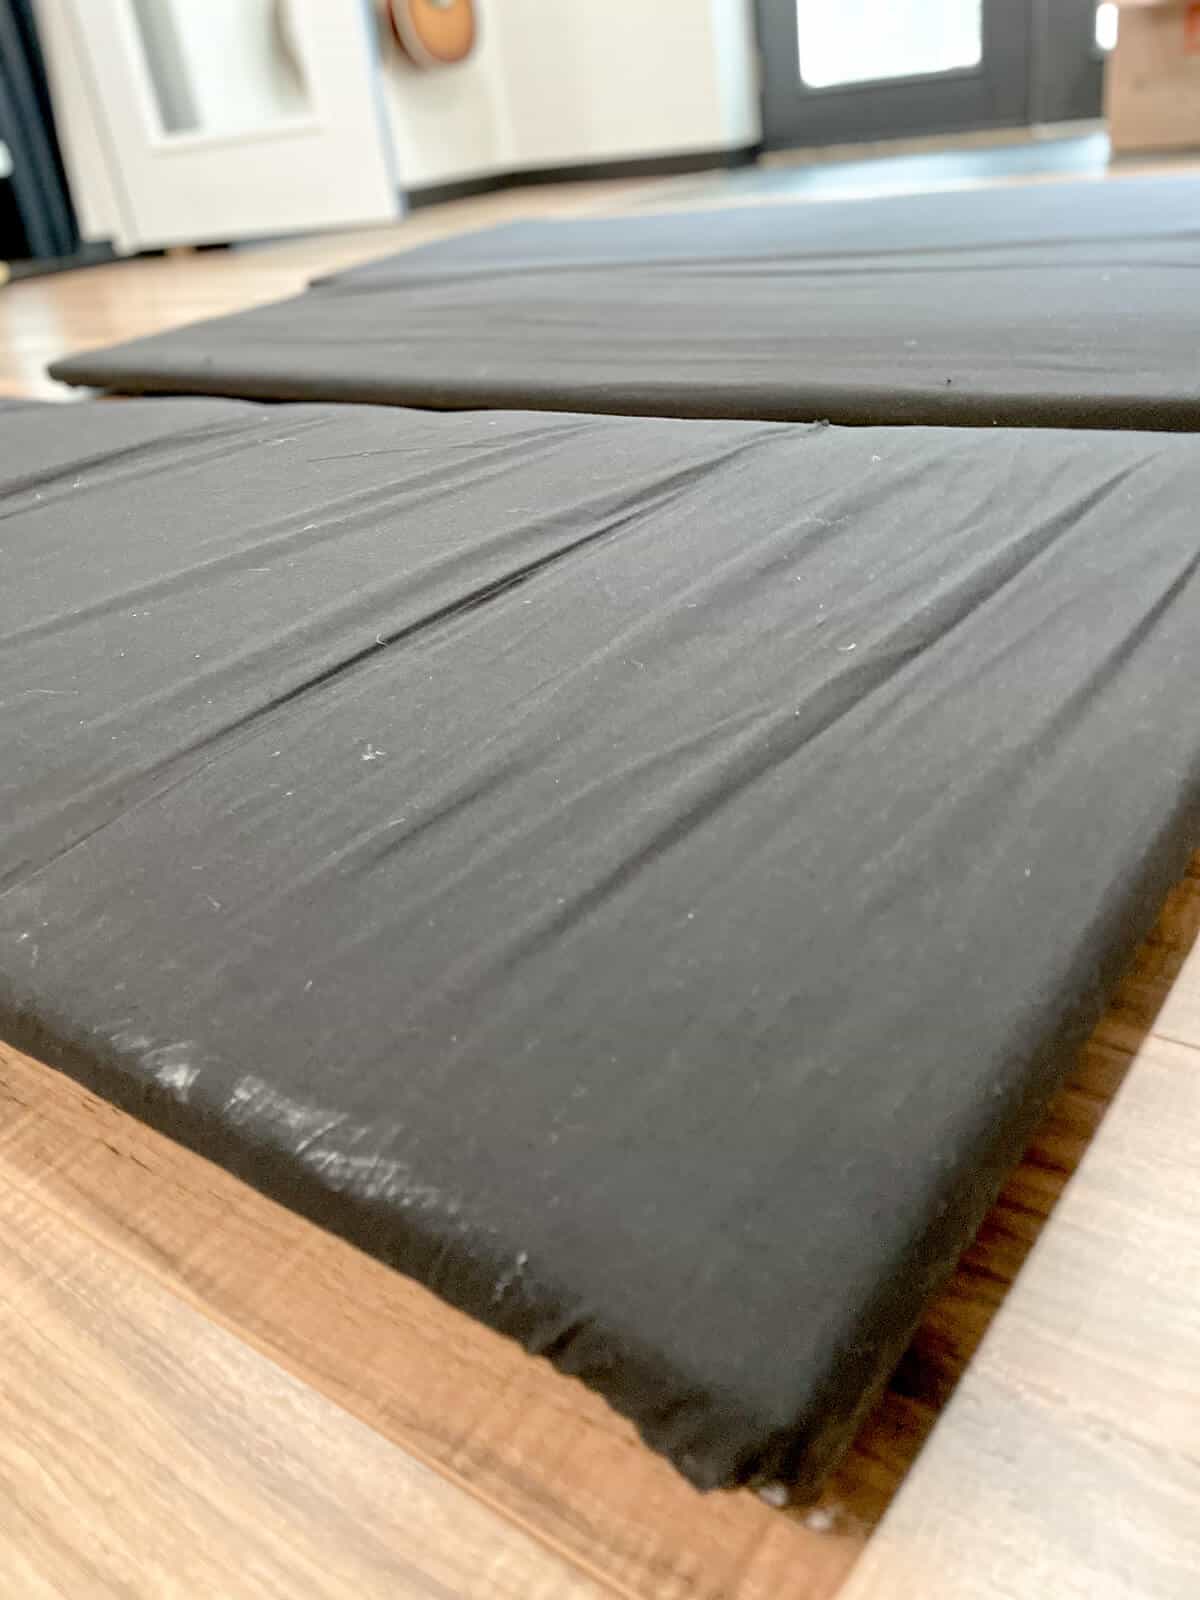
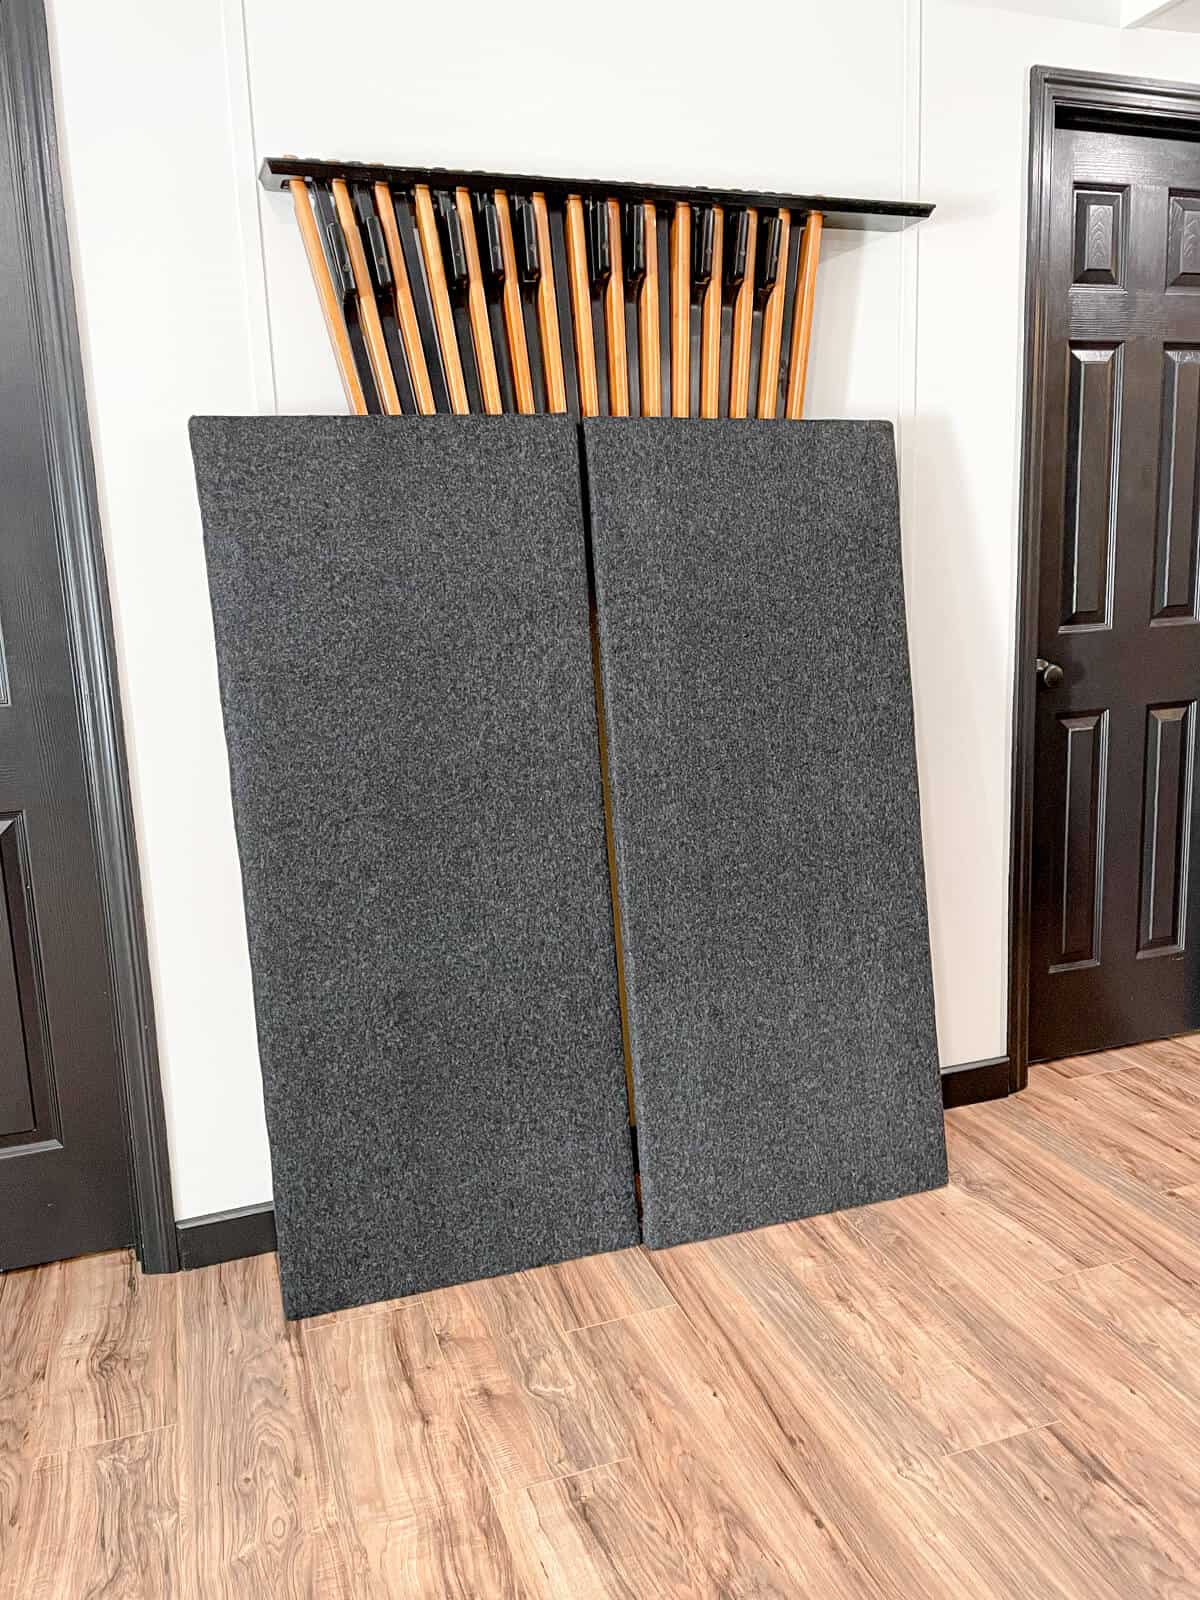
Now you can hang the panels as is and it has worked for us in the past.
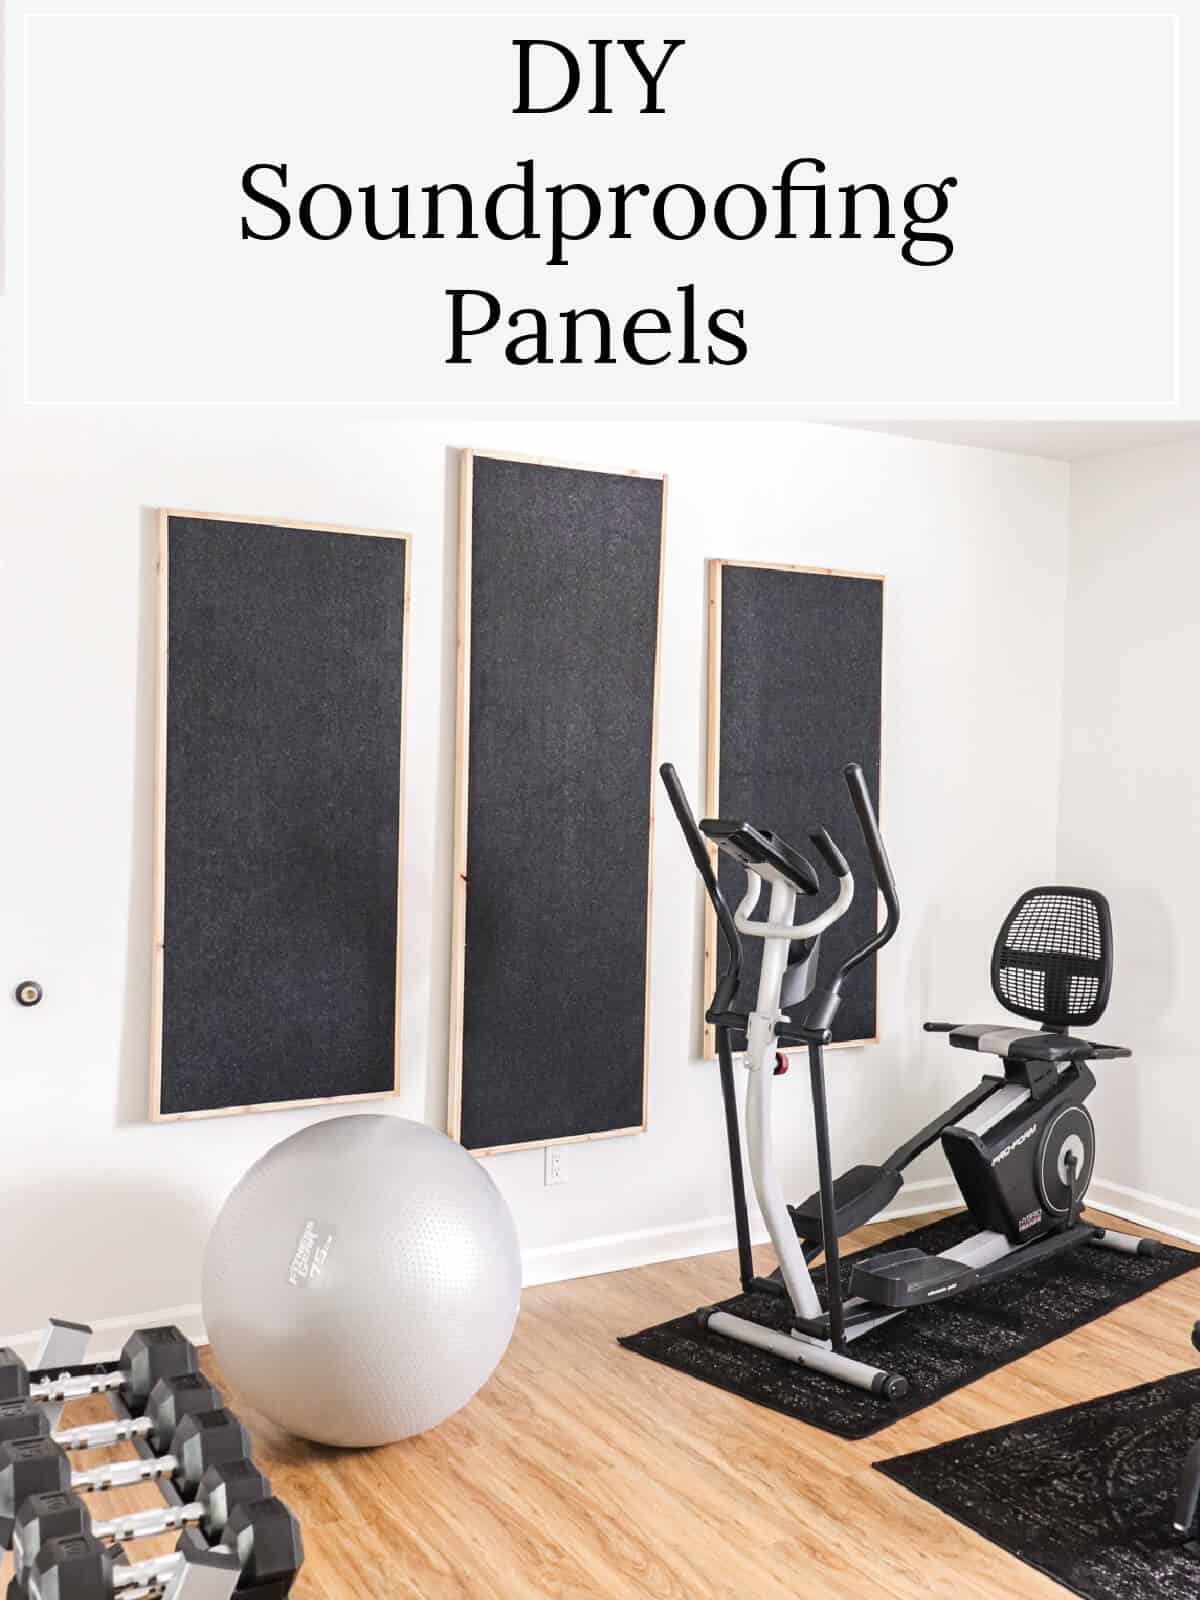
Optional Cedar Frame Upgrade
This time around, we wanted to jazz them up a bit.
So we opted for a cedar frame around the edge.
So we cut the 1×2″ cedar boards the length of the short side first and nailed those to the wood frame.
Next we measured the long side and cut the sides to create the same butt joint as before.
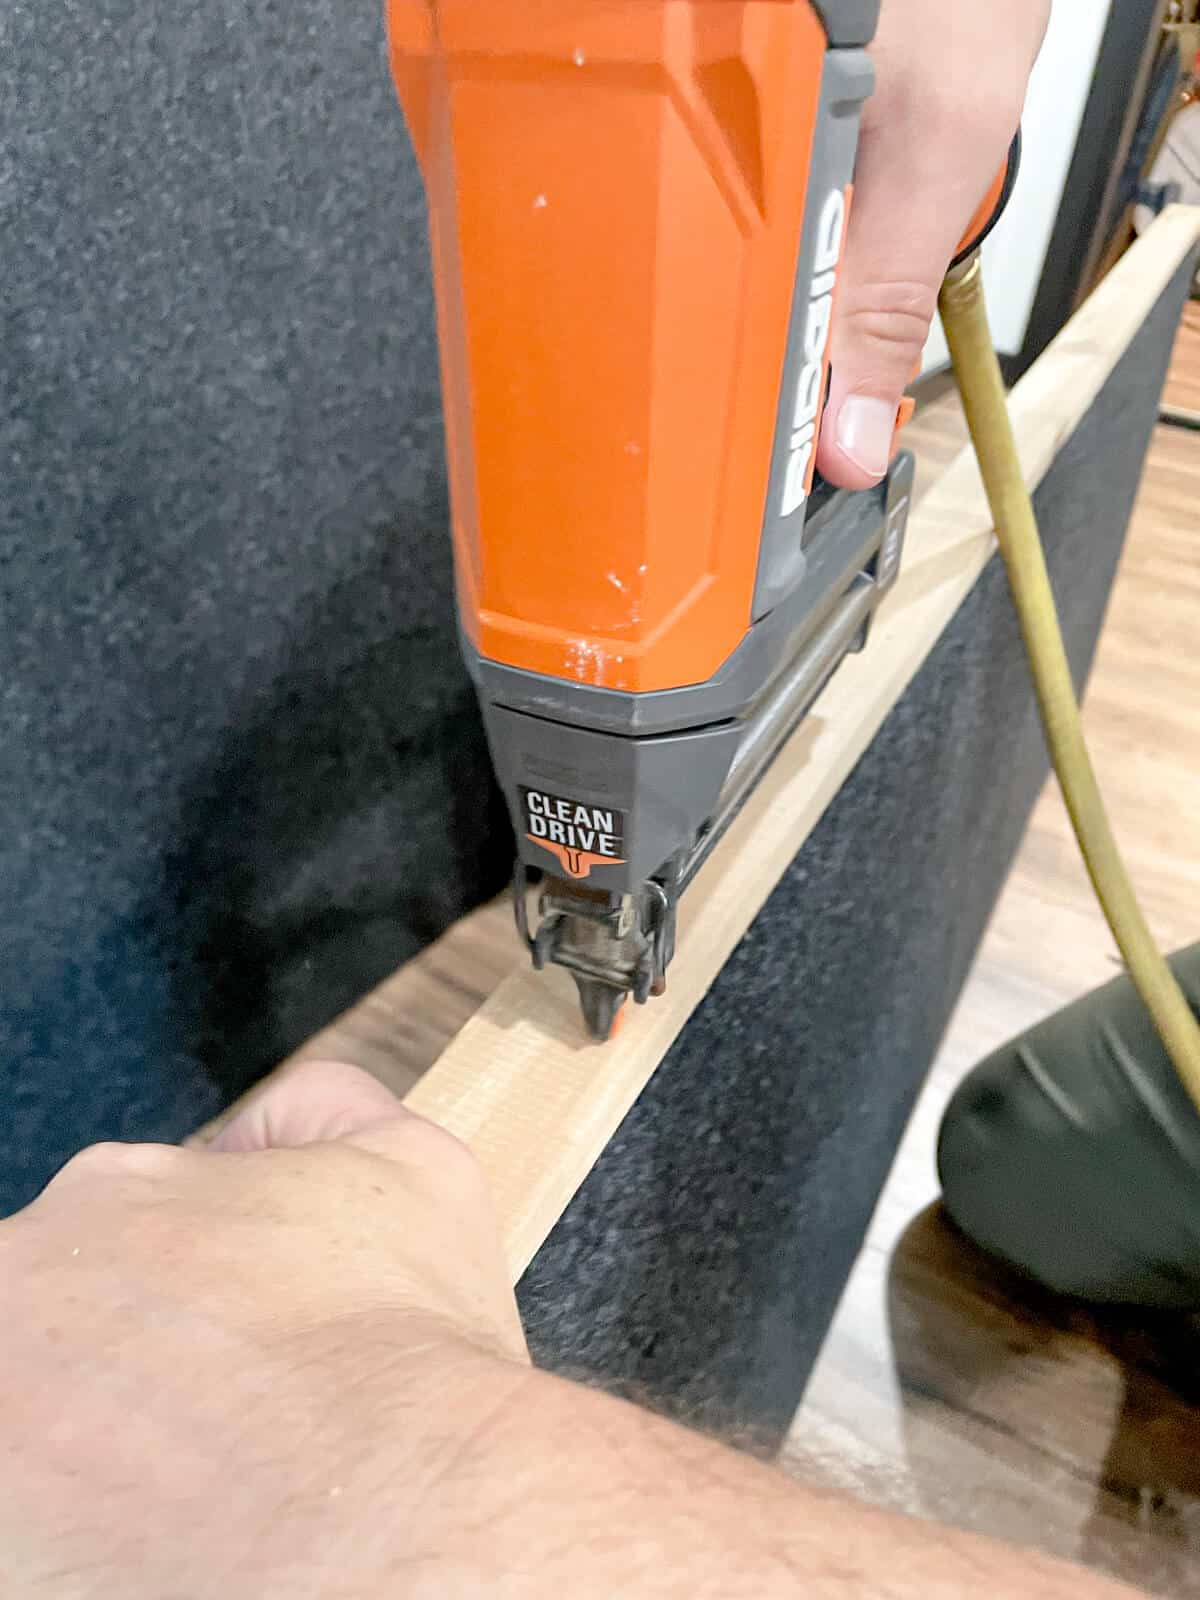
We used a pneumatic finish nailer and it went through the wood and fabric as well as the original frame.
And now we had beautiful panels to add to our home gym!

Adding the external frame definitely helps the panels pop.
And it didn’t add to the weight of the panels making them super easy to hang on the wall.

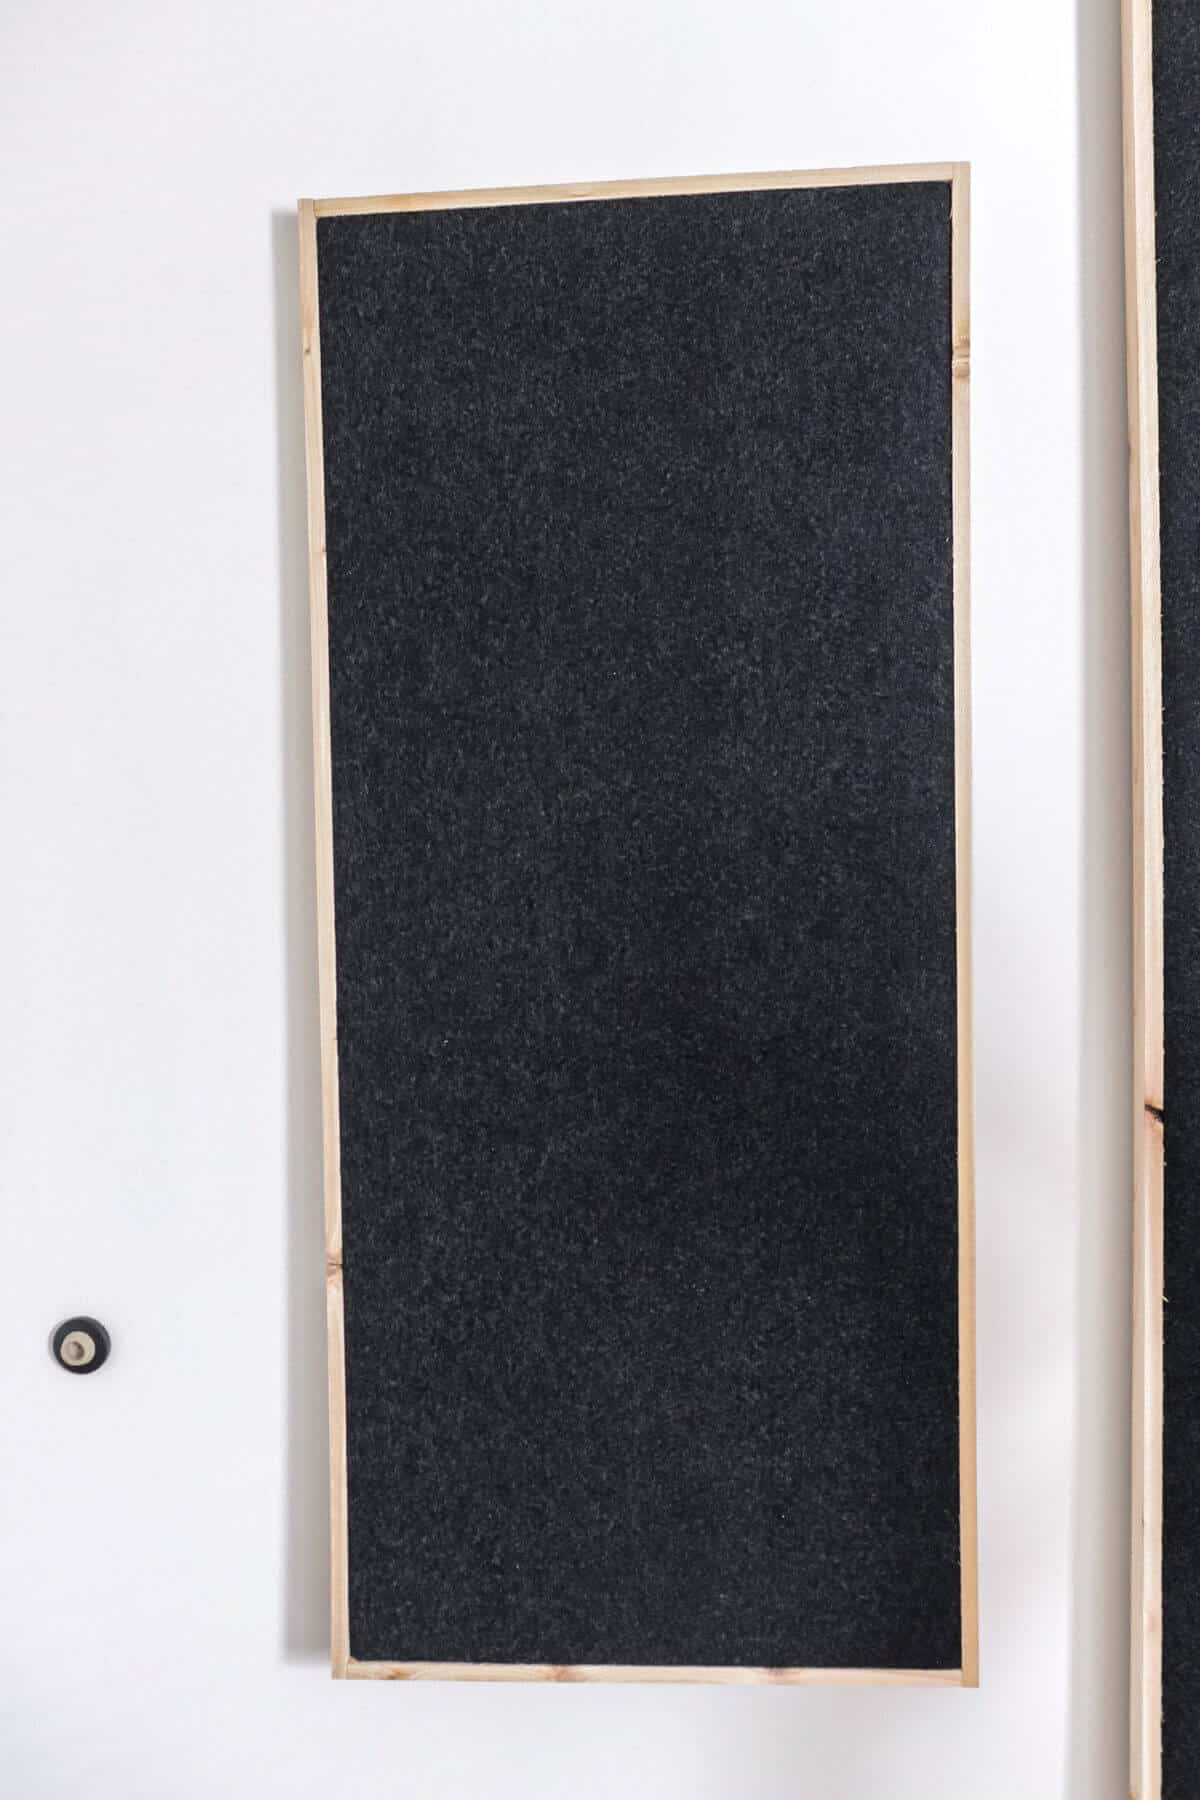
How We Hang Our Panels
We used two nails for each panel and hung it on the wall like a picture frame, but you could use picture wire attached to the back of the frame if you’d like.
Since our home gym is in the basement along with our music studio, I opted for a pseudo industrial vibe so that the rooms flow together.
I love the solid color with a few hints of texture that the felt fabric gives.
Here are few more ideas and frequently asked questions for you.
Frequently Asked Questions
What are Some Fabric Substitutions?
There are other solutions out there that can absorb sound waves. We’ve tried a few, but are still on the fence about some of these suggestions.
- Blankets and area rugs – if your space is temporary then you can improve the sound quality of a small room by adding a rug to the floor. You could also try hanging a few heavy blankets on the interior walls.
- Soundproof paint – I have never used this before, so I can’t give a definitive thumbs up to this method. But if you have good experience using soundproof paint, leave me a comment below! I’d love to hear from you!
- Acoustic tiles – there are lots of acoustic foam panels you can find on amazon. Personally, I find them pricey and prefer being able to create my own custom look for my home with these DIY soundproof wall panels.
- Sound Insulation – we installed rock wool, which is different than thermal insulation, to the ceiling of our Music room. That really reduced the high frequencies between our basement and rooms upstairs. No, we did not build a custom studio with a room within a room design, nor did we install a second layer of drywall with the magic green glue in between. That would require us to complete gut and rebuild our basement and that wasn’t cost effective. But the good news is that we measured the decibels and saw a HUGE reduction just by installing the rock wool.
- Acoustic fabric – another product I haven’t tried, so I can’t say from experience that these are the best materials to use. But this is specially made acoustical fabric that comes in lots of different colors and could be used to cover panels or hang curtains.
Do DIY Soundproof Panels Really Work?
After using these panels in multiple homes and recording spaces over the years, we’ve seen consistent results.
So I have to say a resounding yes!
Not only is Trent a professional drummer, but our youngest son attends a fine arts school for percussion. Adding to that, our oldest boy plays bass guitar.
So yeah, this momma needs some quiet spaces in her home and these soundproof panels have shown a significant improvement to the noise.
Where Should I Place Soundproof Panels?
We have hung our acoustic wall panels to our interior walls. But you can also hang them on an interior door – especially if it’s a hollow-core door.
The trick is to measure your surface area and that will help you decide how many panels you could use. We hung 3 panels, approximately 2 ft wide, spaced about a foot apart.
How Many Soundproof Panels Do I Need?
That depends on the size of the room as well as what you are soundproofing.
This may require a bit of homework for your own acoustic panels and the purpose you are using them for.
We installed 3 in our home gym and that was enough to soften the noise a little bit.
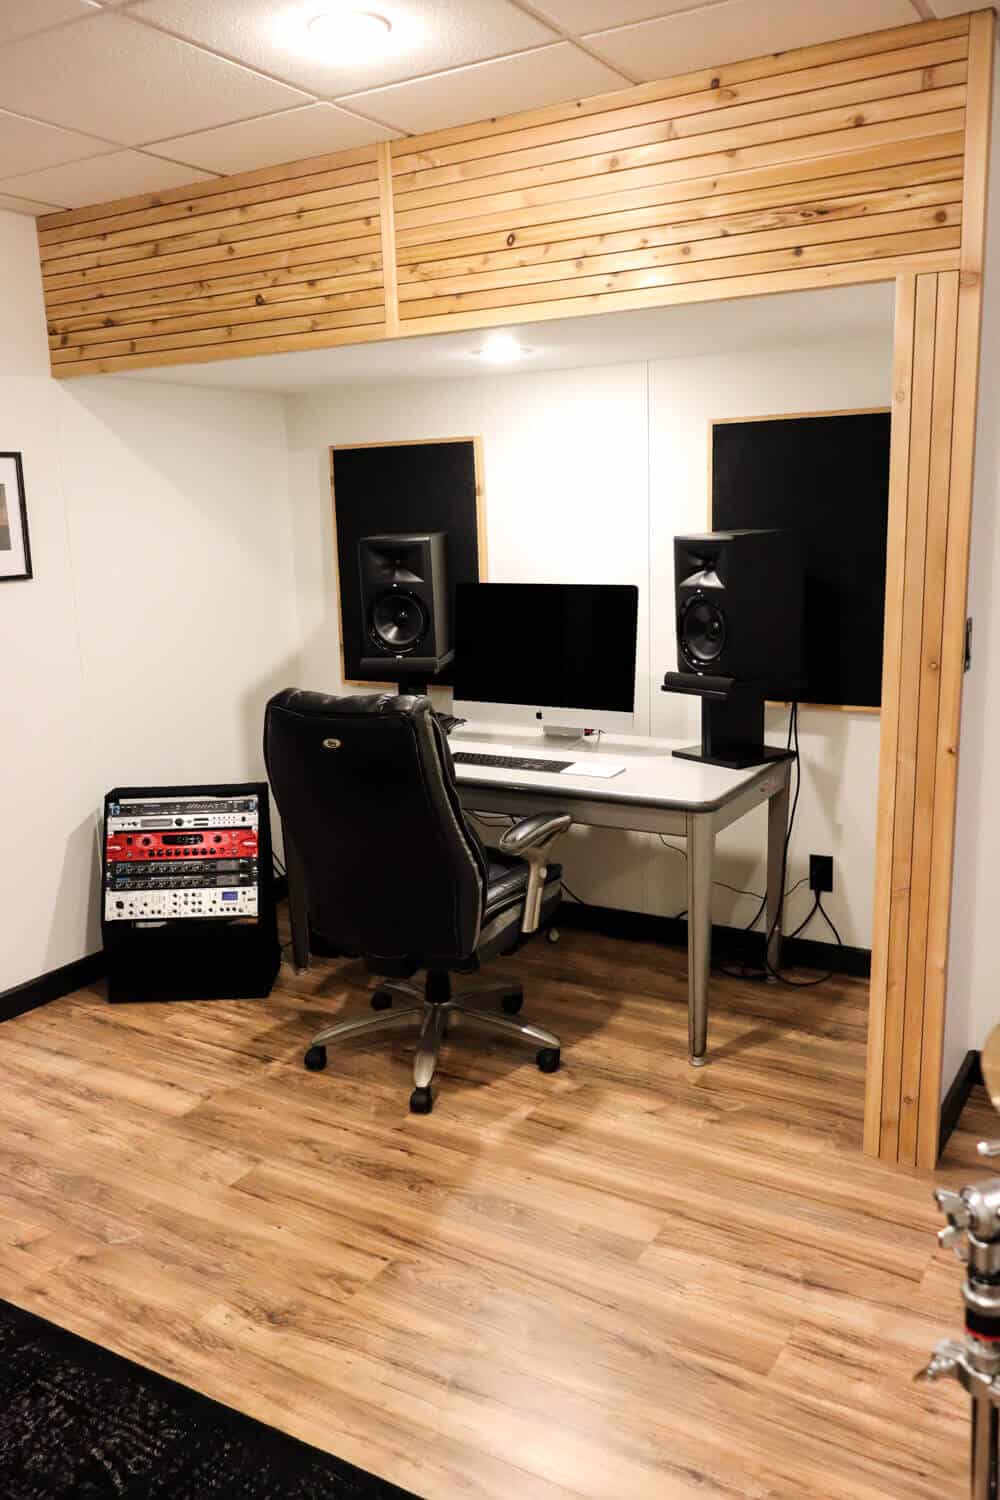
For our recording studio, we have many more in the control room. We also built these wood diffuser panels that help with the sound transmission.
The best way to control the background noise in a room, or maybe even loud music from your neighbor is by making these inexpensive panels for yourself. It’s so quick, easy and can be done in a day!
I hope this inspires you to build these for your noisy room.
The good thing is that you can use dozens of different colors and customize these for your own home theater room.
shop our favorite home items
shop now
More Music DIYs to check out
- The Epic Gift Guide for Musicians and Music Lovers
- How We Made an Old Piano New Again
- DIY Music Chalkboard
- Music Room Makeover Reveal
Updated Feb 22, 2026


Hey John – We are so glad you enjoyed this article and are glad you found it helpful and informative!
Good luck with your sound panels! Hope they work out great for your space!
Jen and Trent
WOW! Great article, and I don’t say that often (like almost never). This answered a lot of questions I had.
Hey Tom!
Wow – thank you for your… eh…kind words. 😉 Since this post was aimed at soundproofing multiple spaces and scenarios, we didn’t focus or dive deep into the science of the sound blockage. But since you asked – we’ll happily oblige and share what worked for us.
As far as the panels go, they stop the bouncing resonance of the room, which works perfectly for the application of using these for home gyms, theatre rooms, and other places where sound bounces off walls. Thus the mention of homework (one time), since each room/application is different. You may need just 2 panels to stop the sound, but with our studio – we have many more.
Addressing the number of panels – you see only three panels that we used in our workout room, and three panels behind the drums. However, in the rest of the recording studio, there are an additional 5 panels as well as wood diffuser panels we made to help deaden the sound. For our music studio, we installed rockwool between the floor joists to the house above to help with deadening the sound. If you want to read more about how we constructed our Music Studio – you can see all the details there. We did purchase a decibel meter and measured the drum sound before and after installing each element – which was quite fun!
For recording purposes, this is definitely a DIYers solution. We didn’t build a room within a room, isolating the sound as is recommended, nor could afford the $25000 acoustician fee to map out the schematics of this studio. After all our efforts, we reduced our sound leakage by 20-30 dcbls, which isn’t bad for a DIY solution.
Hope that helps to clear things up.
And lastly, we have to address the comment regarding our son. We never mentioned he was bright – just attending a fine arts school for percussion increasing the need to help control sound when he practices. You may want to reread that paragraph. 😉 Also, please keep in mind that we are musicians turned DIYers – not professional writers, but appreciate you taking the time to make sure we improve our writing going forward – you must have been an excellent teacher!
Did you guys happen to proofread this article prior to publishing? Because it didn’t read like you did.
You tell people they might have to do their own homework on a couple of your answers to questions. Isn’t that the intention of this wordy mess? I get that your husband is a drummer and your think your kid is bright but what does that have to do with the installation of acoustic panels? So why only three panels? How much sound blockage is a “heck of a lot”? You don’t seriously want me to believe that three panels quiets a professional drummer?
This wasn’t the worsf article I’ve ever read but I used to proofread term papers for the special Ed junior English class back in the day.
Hiya,
Thank you for sharing your experience with so many details !
I have 2 parrots and need to soundproof the rooms. Do you think it would be relevant? What could be the best solution?
thank you in advance
Barbara
You always have the best ideas and tutorials Jen! Thanks for sharing!