Music Room Makeover Reveal
When we moved into this house, the one space we fell in love with was in our basement. We created a perfect space in this music room makeover reveal.
We’ve been career musicians most of our lives.
Trent and I have moved from one side of the country to the other pursuing our dream but have now settled down in Birmingham. You can read all about our story HERE in this post.
When we were house hunting, we knew we needed a space to create music and this rec room was the perfect footprint for what we wanted with this space!
And this may be our favorite music room we’ve ever created!
But let’s start with the beginning.
Two separate areas that were just what we needed, except didn’t fit our style – at all!
We share all the details of the makeover process IN THIS VIDEO, also IN THIS POST, but I am so excited to show you how it looks now that it’s completely done!
Music Room Makeover Reveal
(Some affiliate links are provided below. Full disclosure here.)
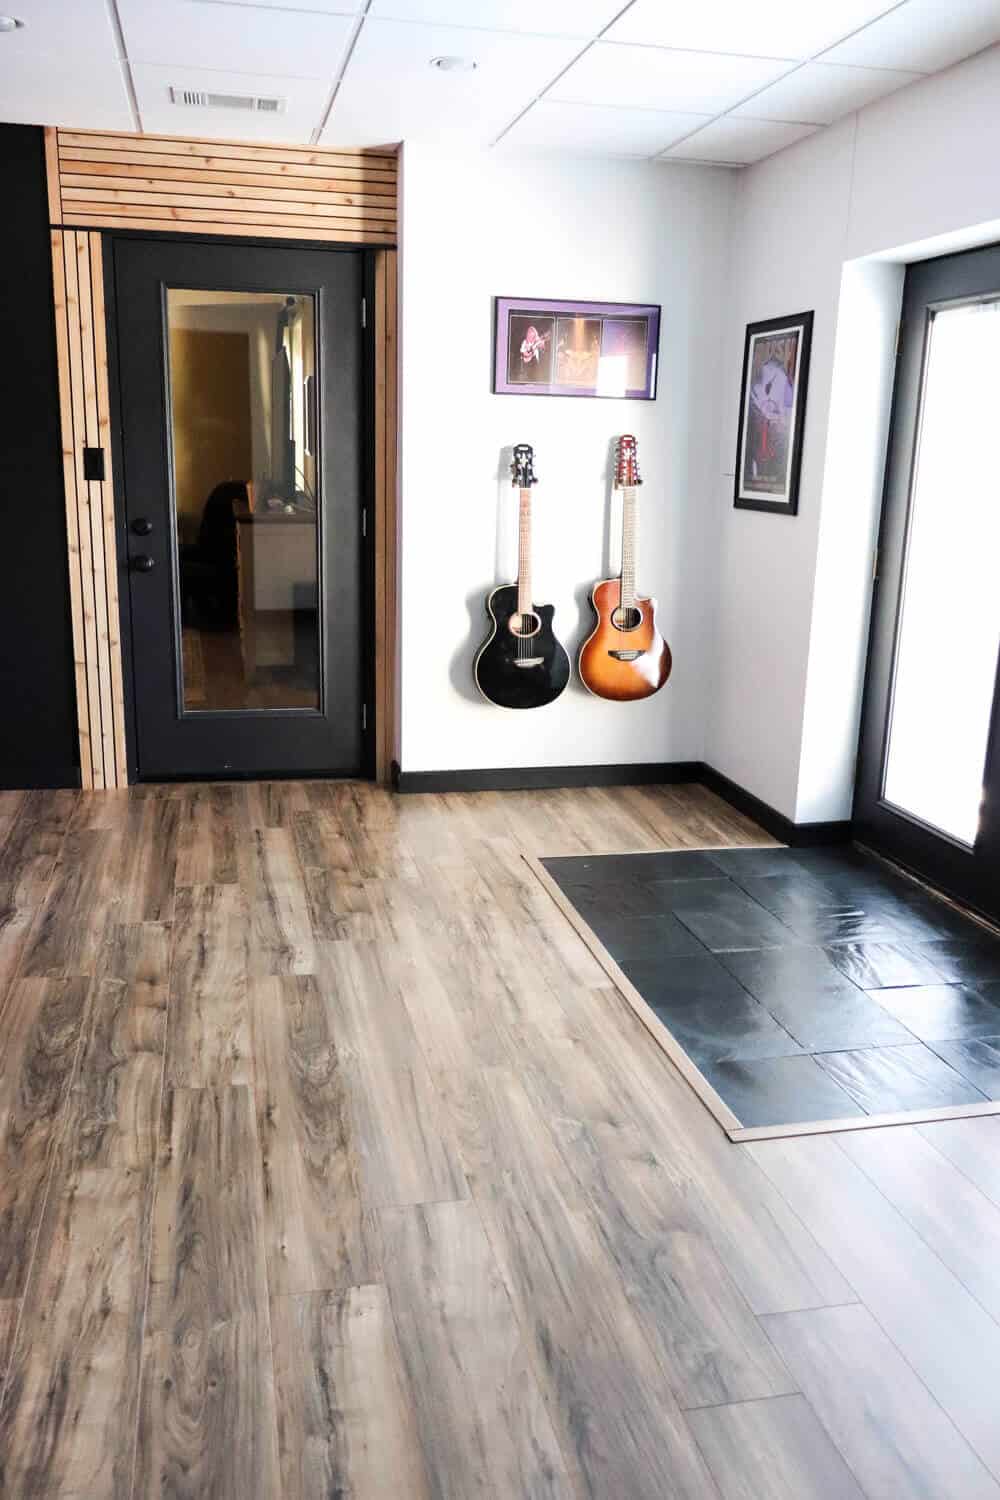
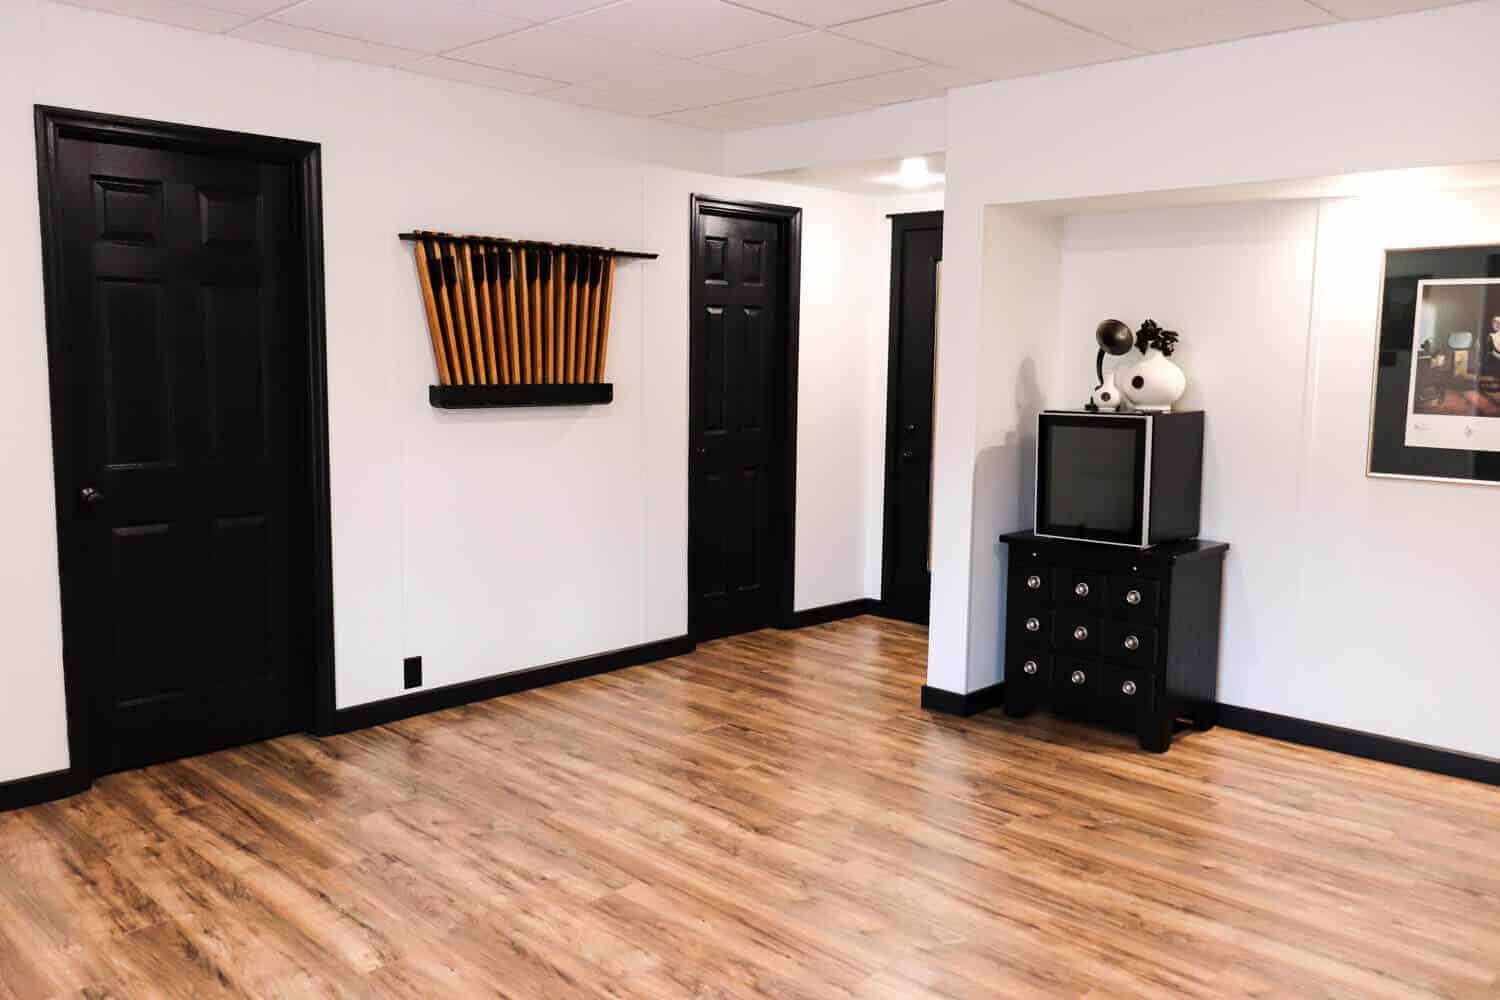
What initially drew us to using this room for our music studio was this separate entrance.
It’s perfect for lessons, rehearsals or band practice. Everyone can use this door while the rest of house remains separate.
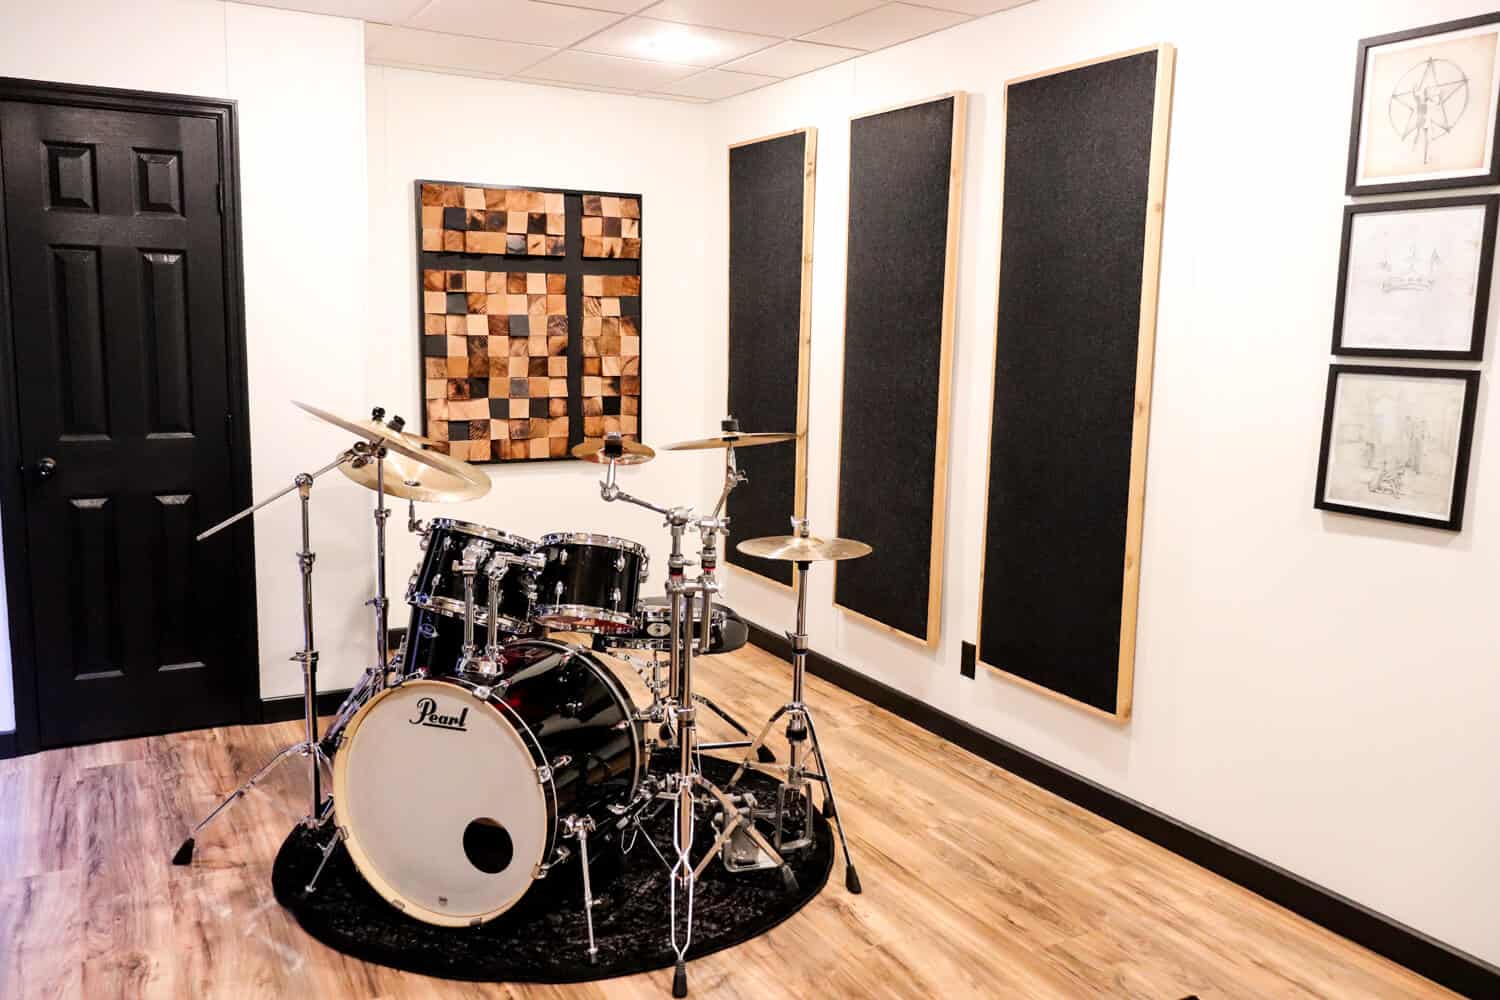
In fact, we installed a door and closed up the wall to the den on the other side to create a distinct separate space.
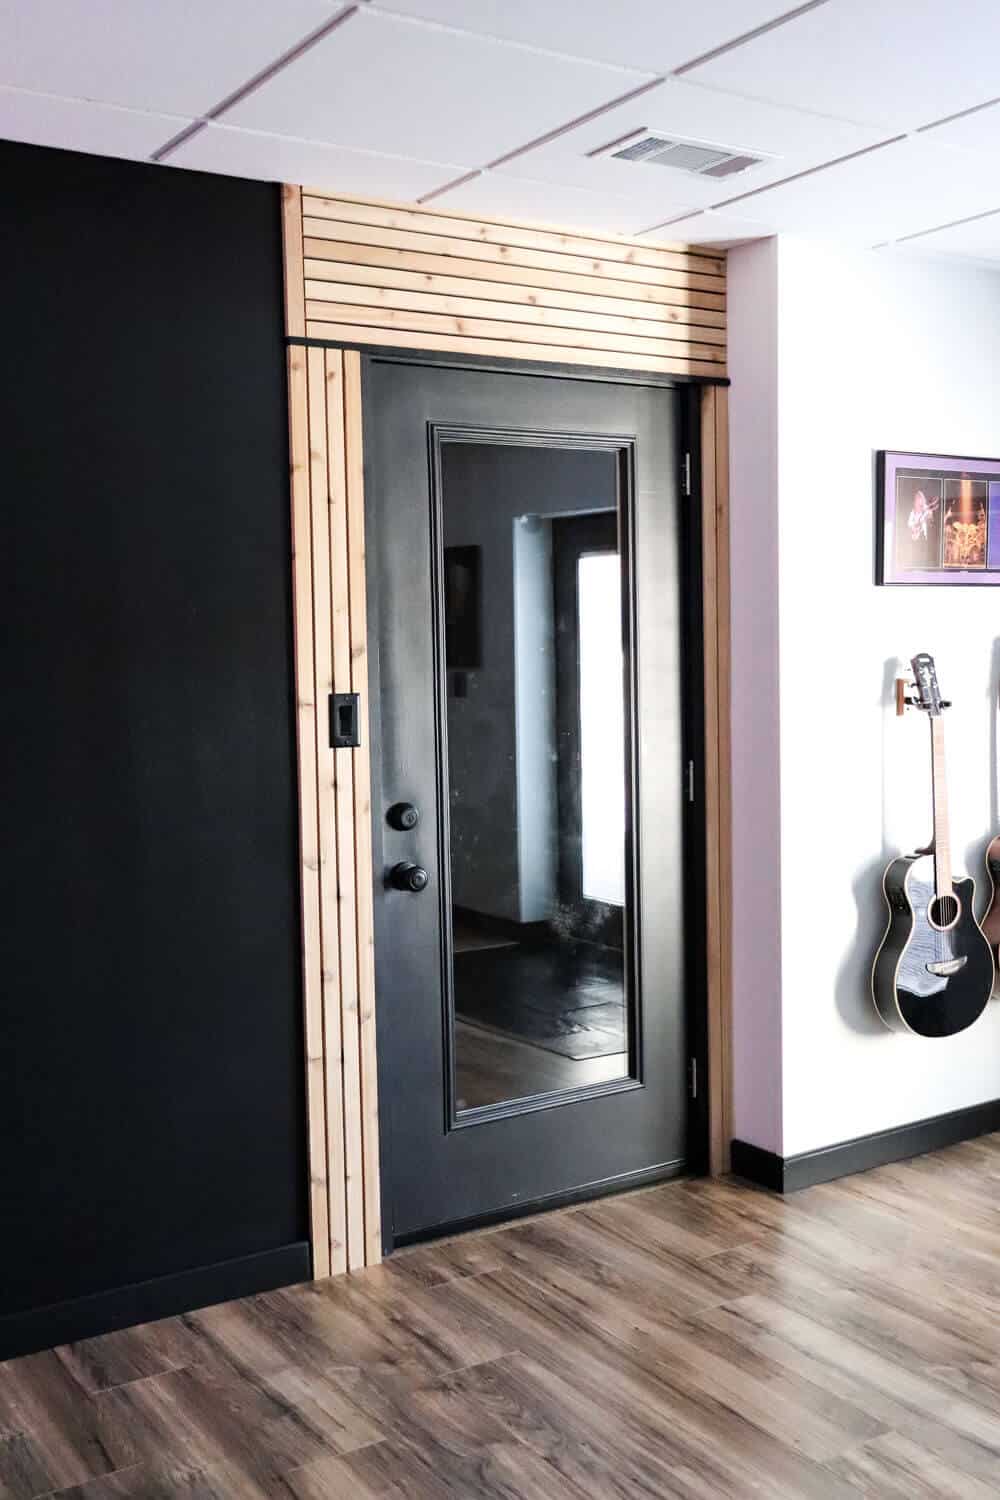
I love the cedar accents Trent added around the door.
He also added this really cool piece of artwork.
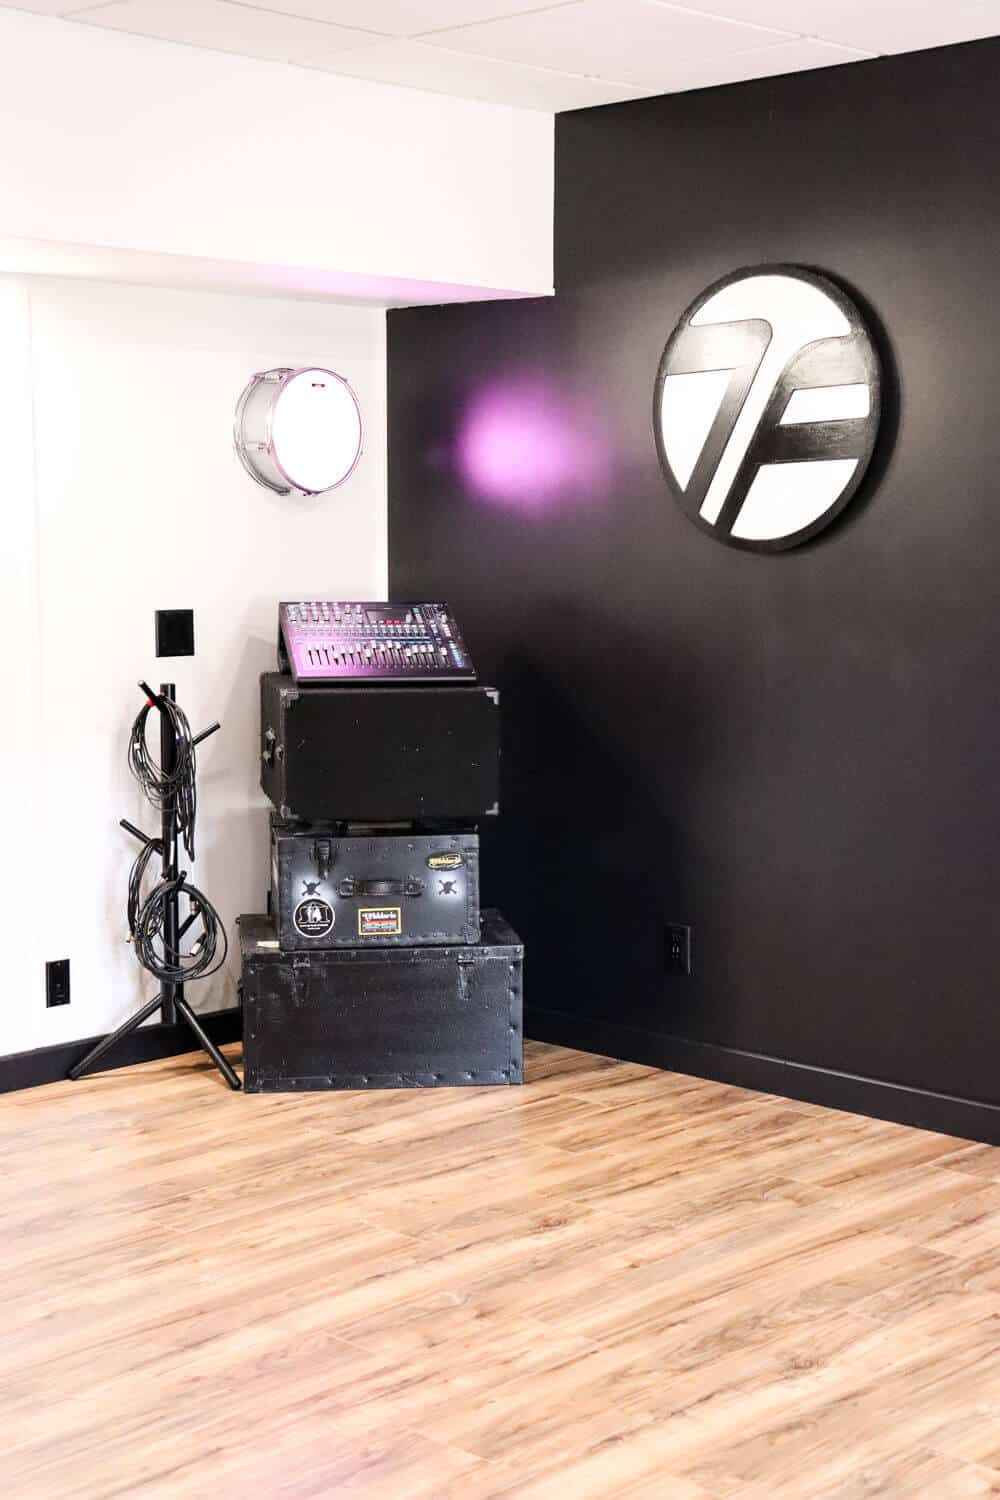
His parents owned a body shop which they recently sold. This was the logo on the sign, which is also the initials of Trent, his dad, as well as our 2 sons.
So he named his music biz, Time Foundry to fit the logo.
But having a piece of family history in here makes me smile everytime I see it.
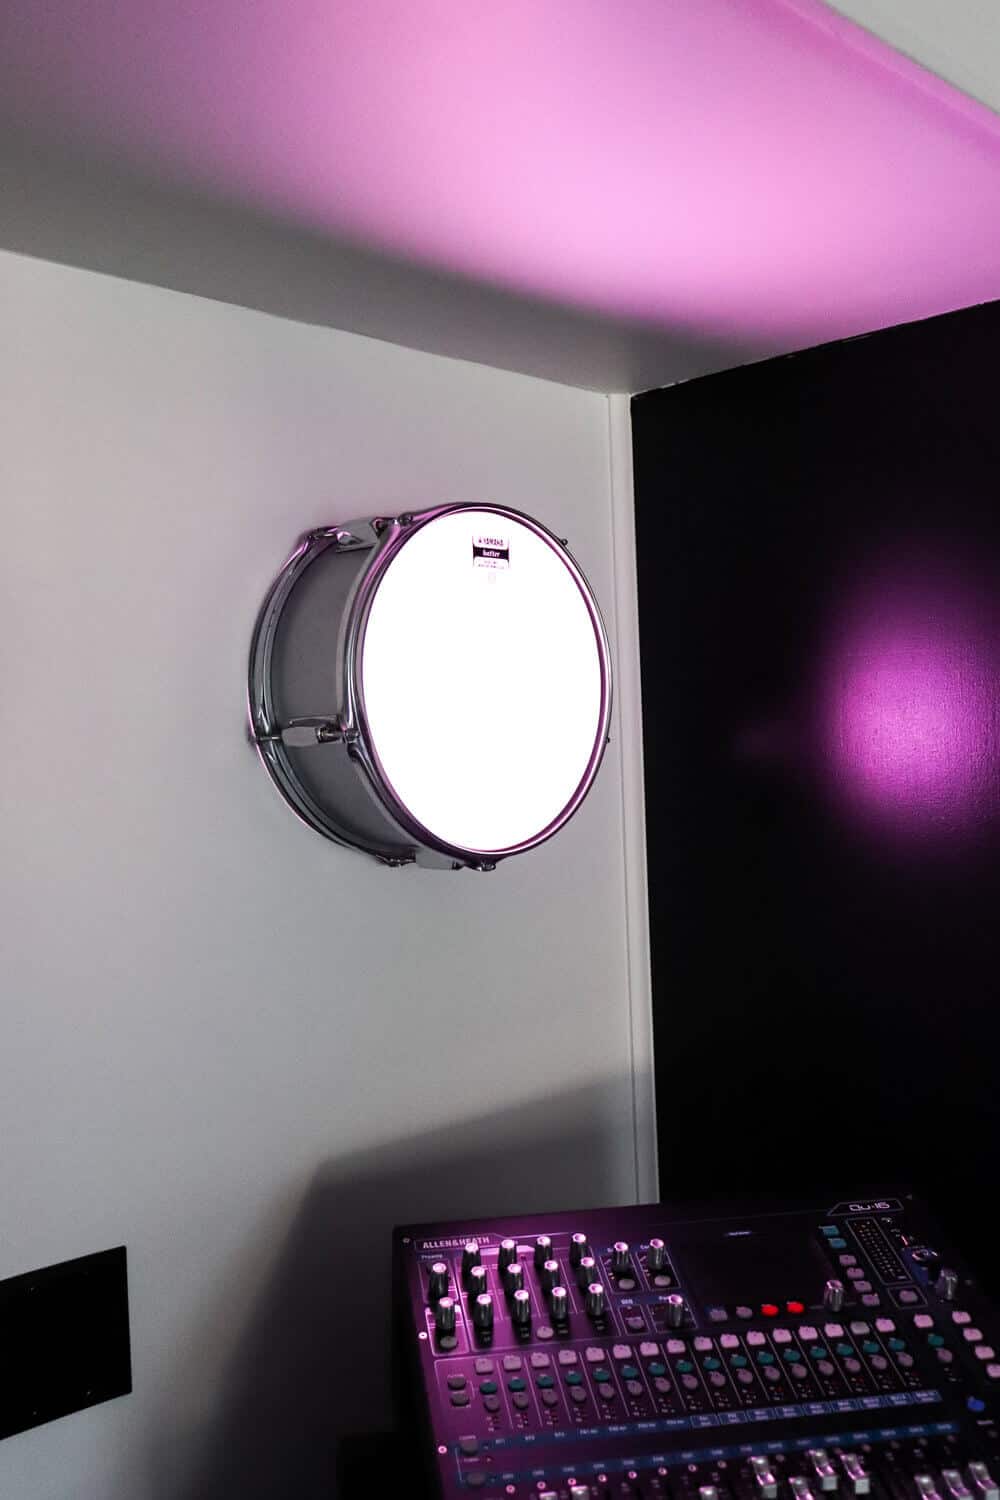
About a year ago, we found this drum on clearance.
It was actually a clock that had the glass broken out of it and it was just a few bucks.
We brought it home, Trent put a drum head where the glass used to be and removed the clock.
Now it’s a perfect light feature that ties in with the room theme!
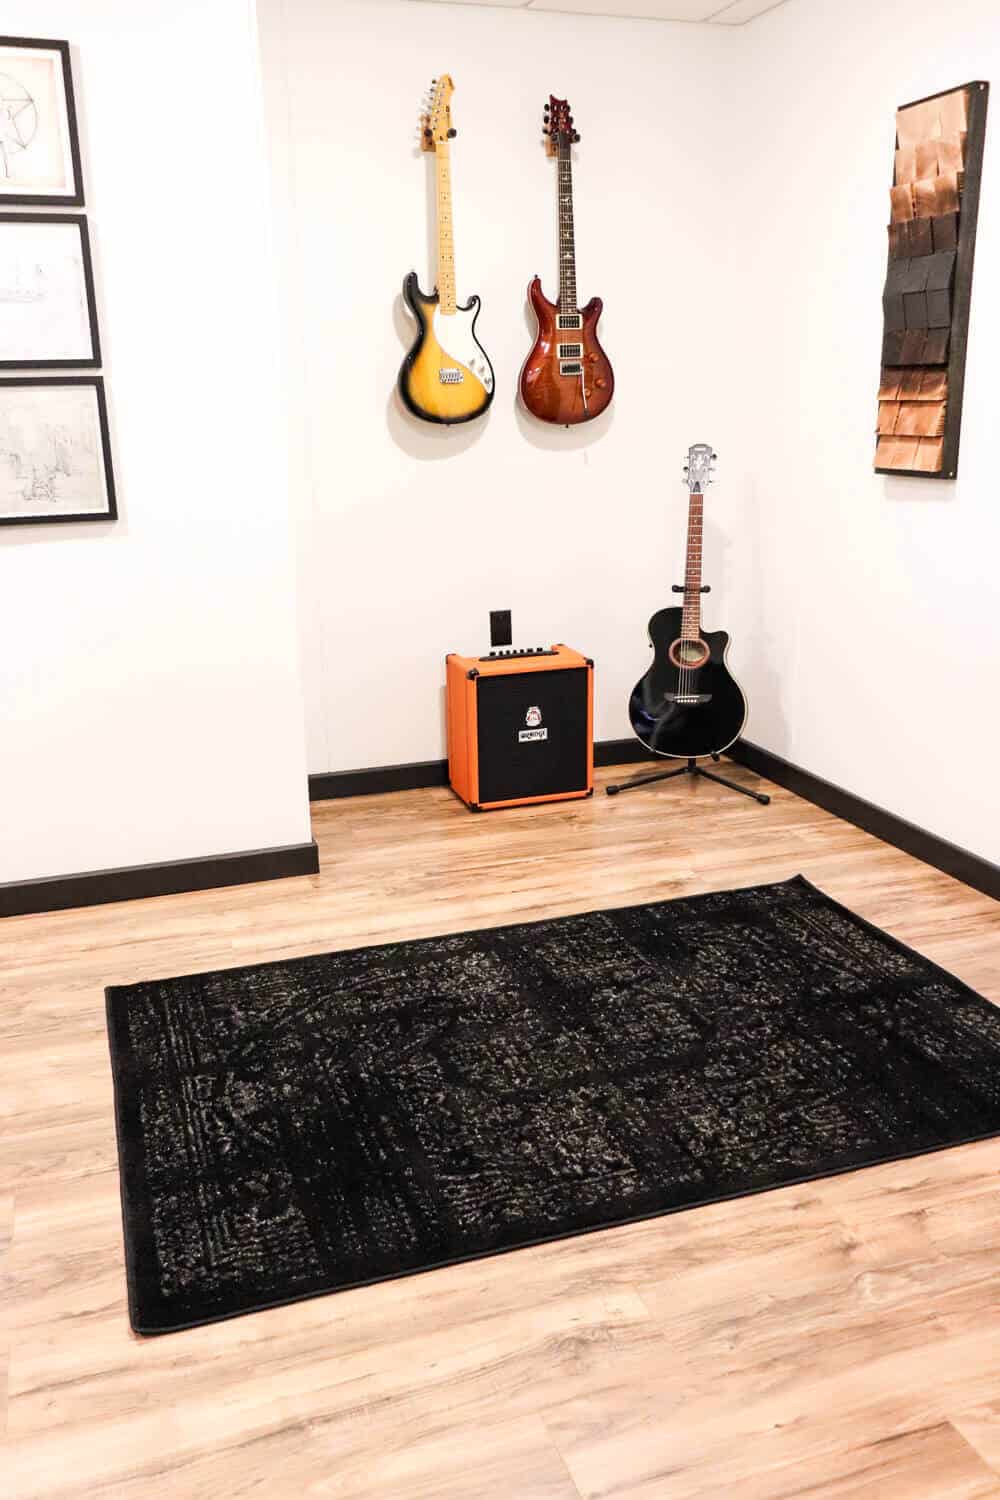
And speaking of cool wall art…
Back in TN, I found these organ pedals while junkin’ and I love how they look hung on the wall.
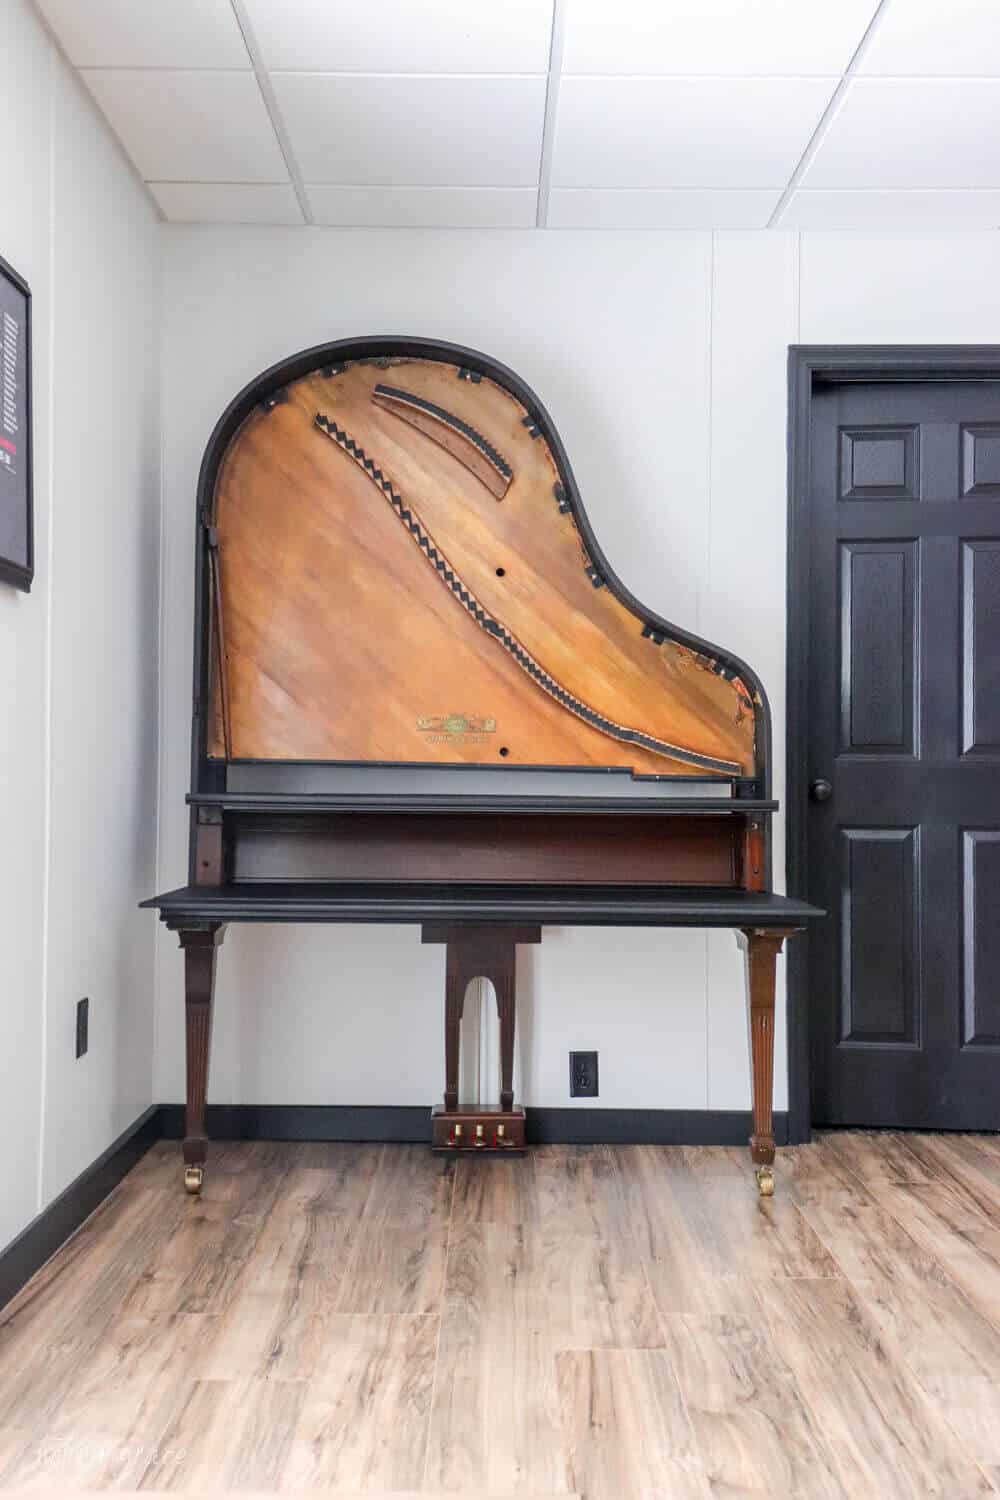
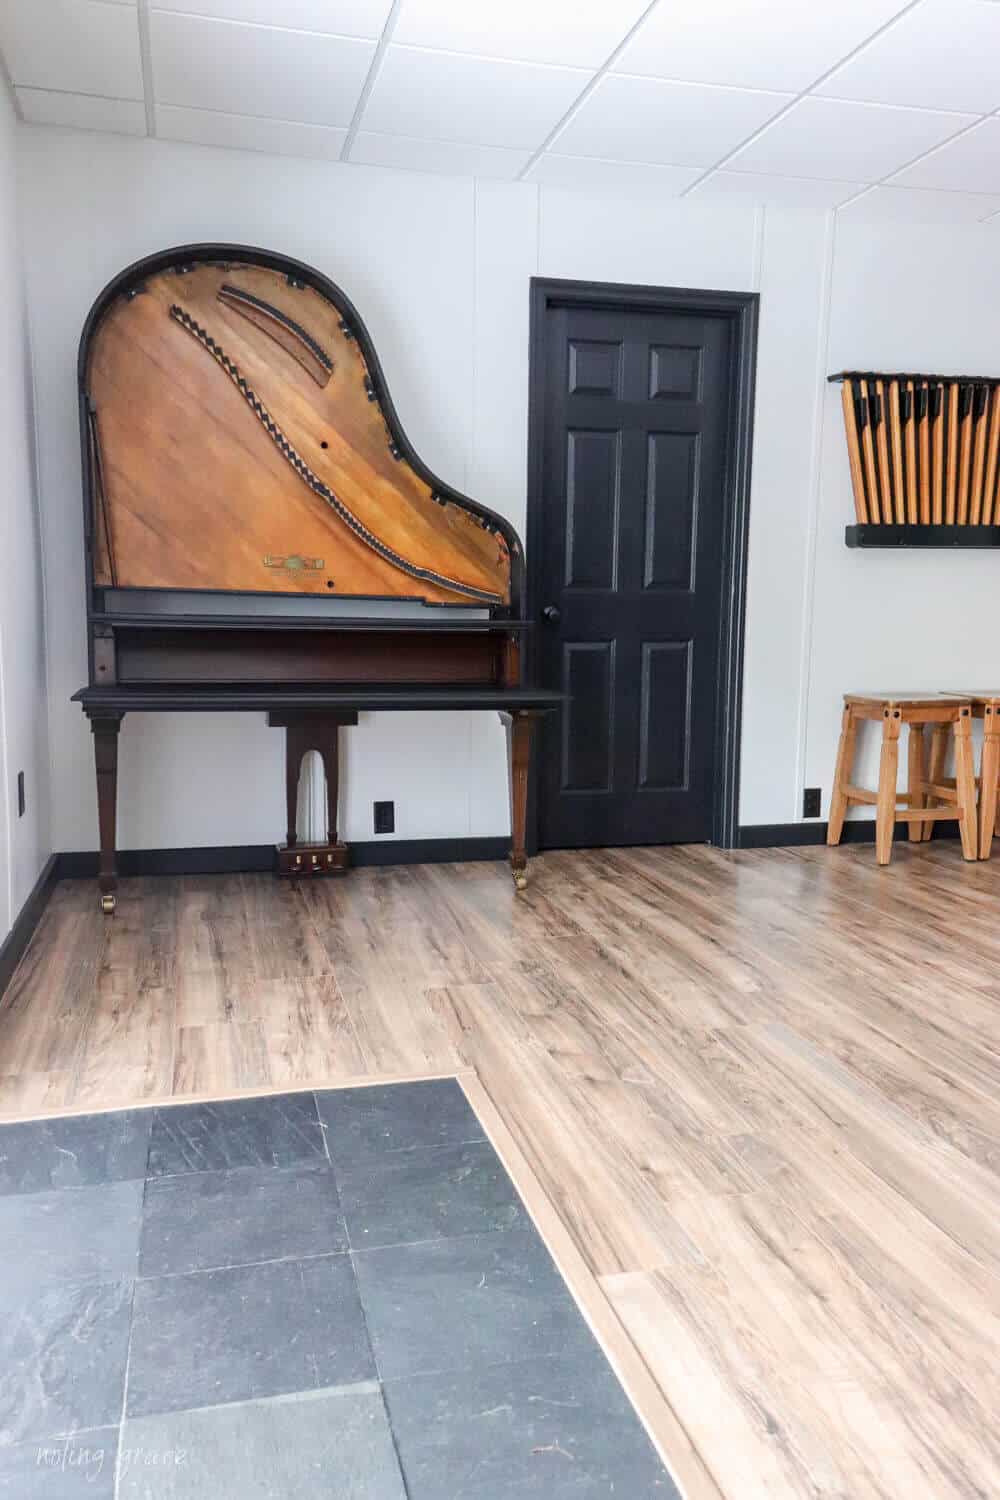
And this HUGE DIY project is our biggest and most creative DIY we’ve ever tackled!
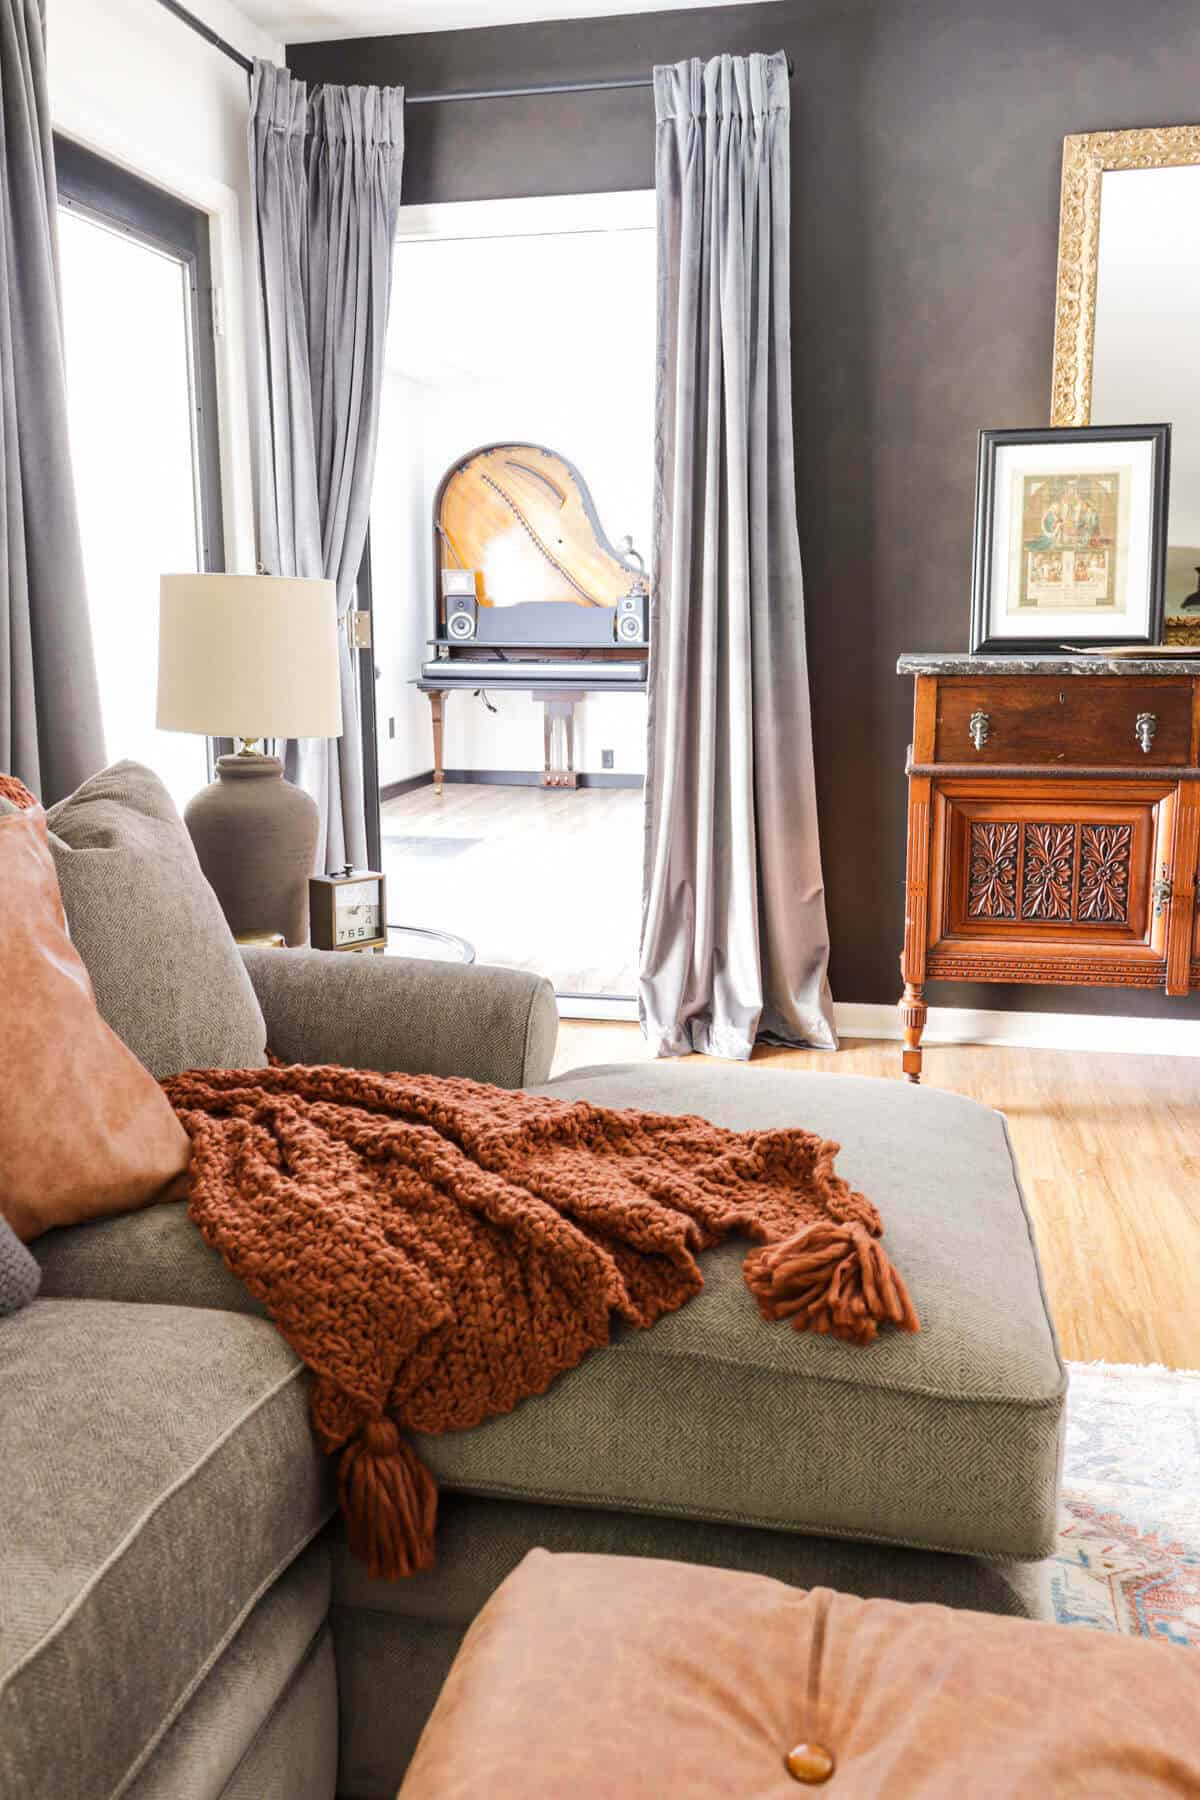
We transformed this old and unrepairable piano into a keyboard stand!
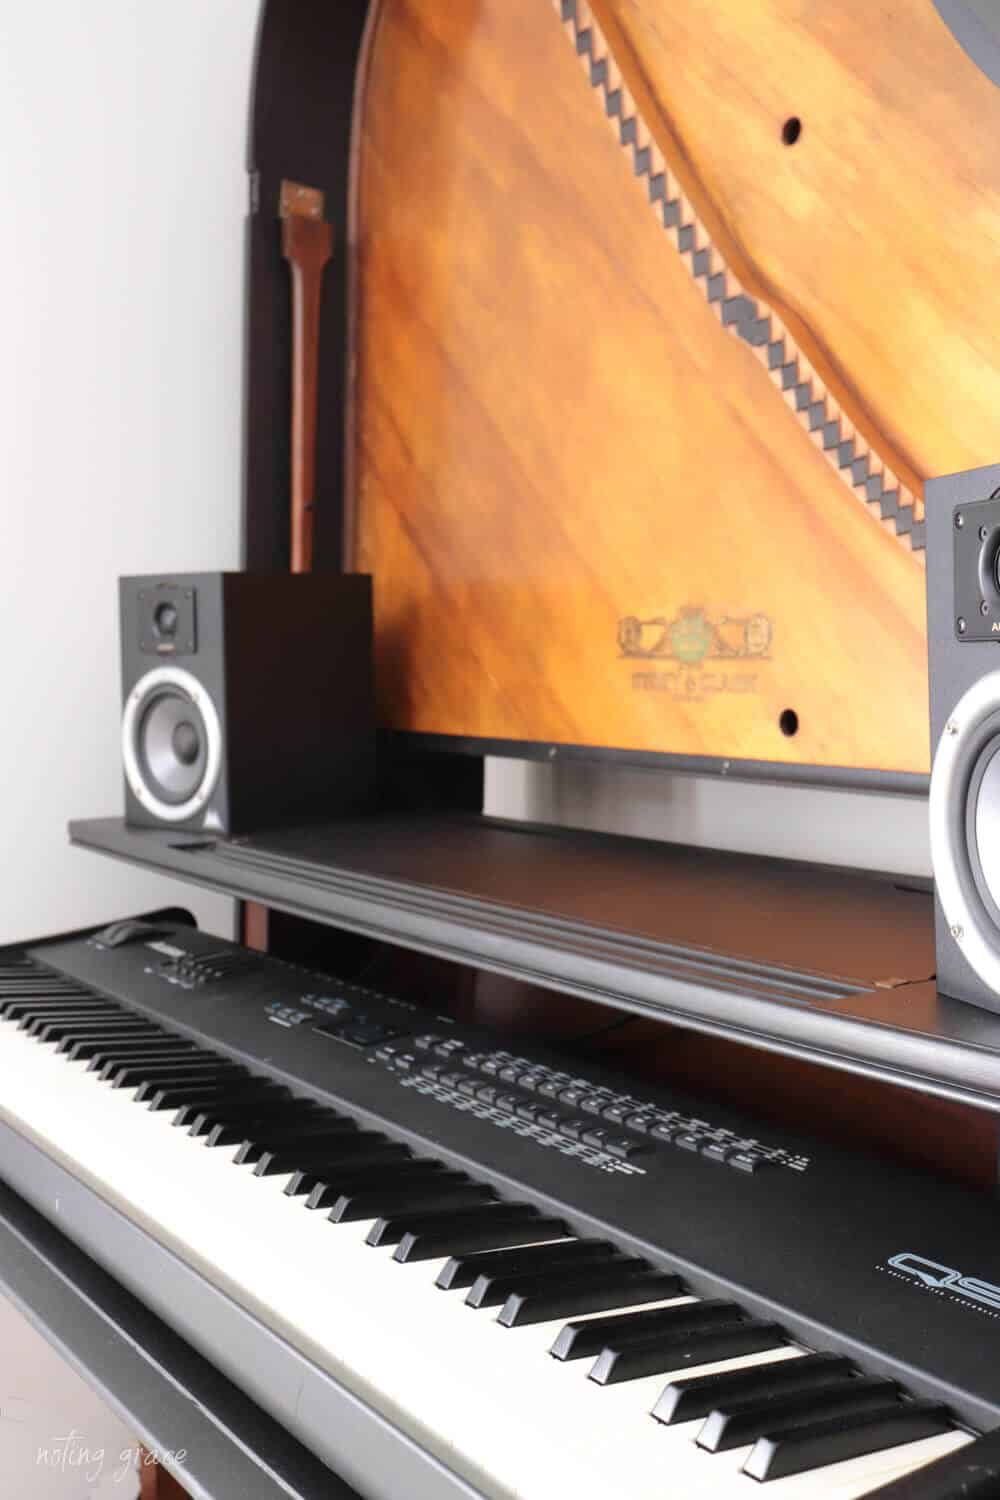
Head over to the original post to see how we were able to create this showstopper.
The flooring install was super easy!
We originally had a concrete subfloor under the carpeting, so we had to find a solution that would work.
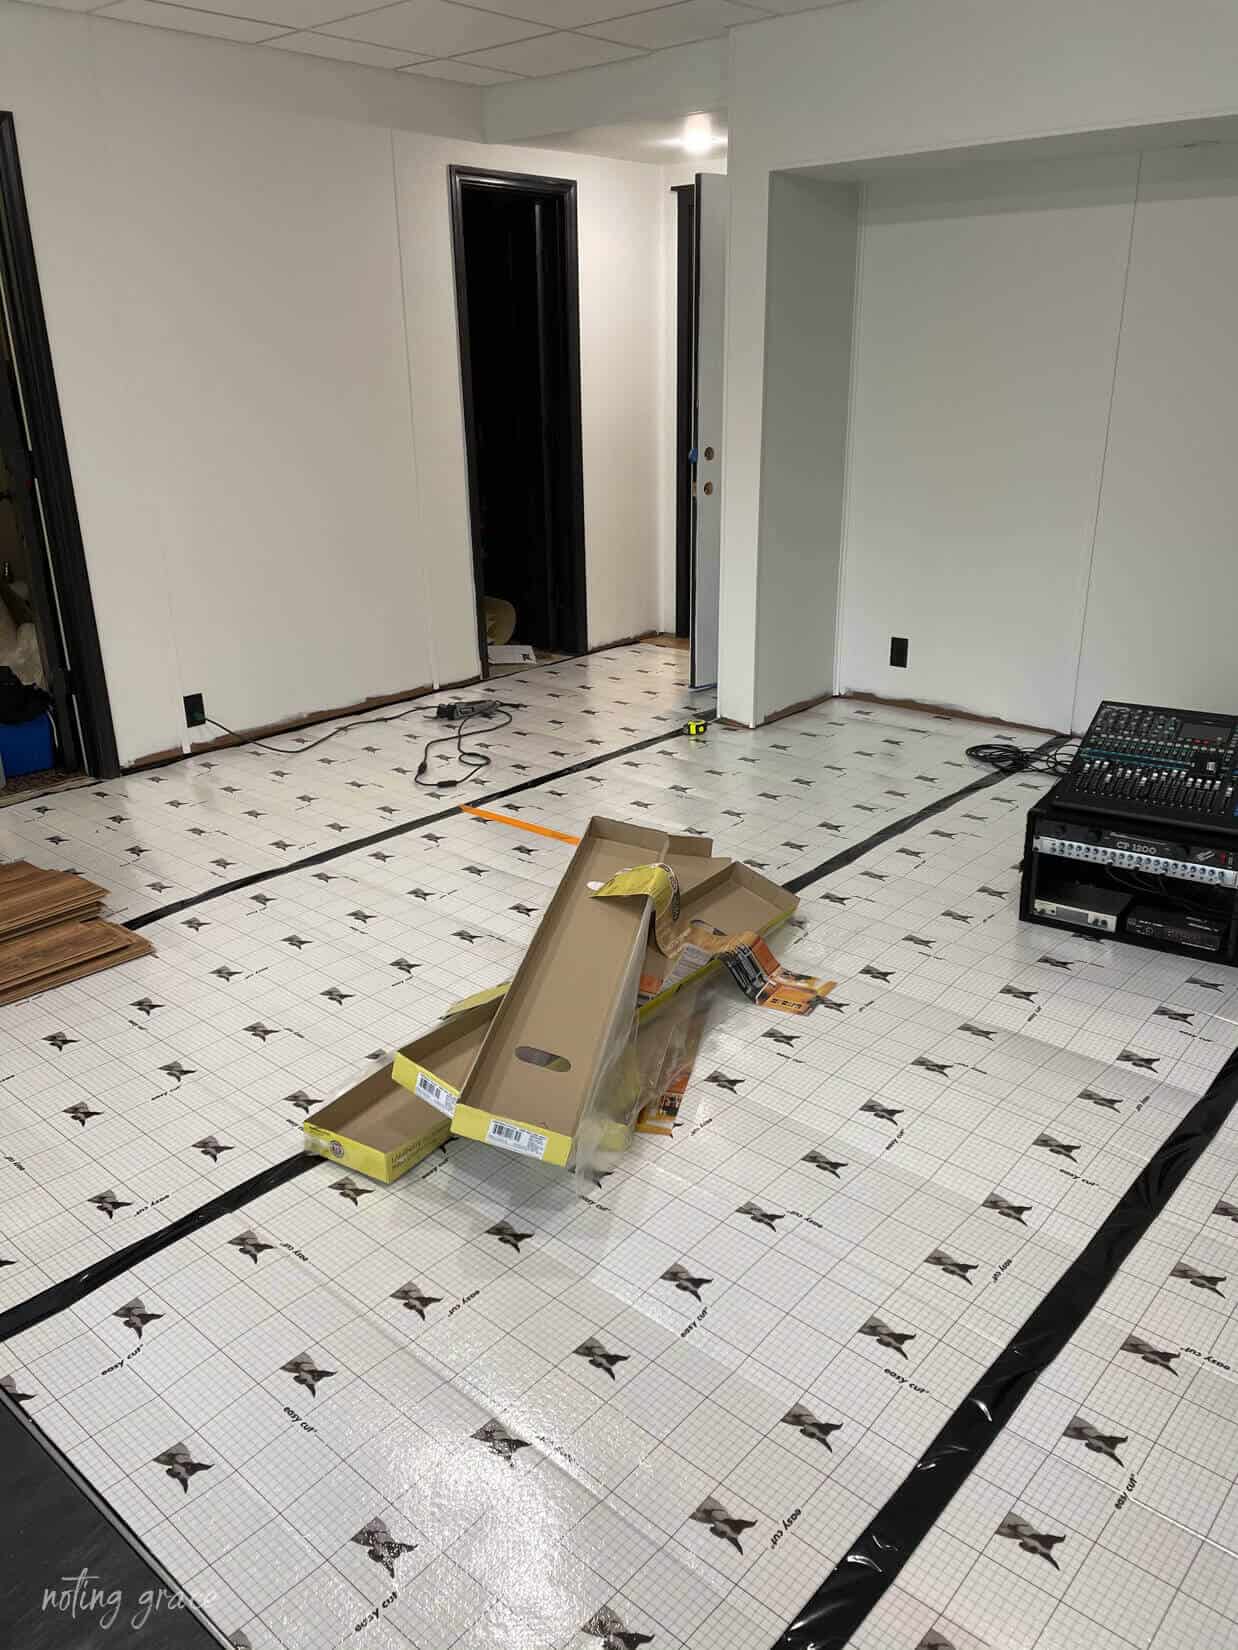
You can watch this Instagram Reel to show how easy this floor can be installed.
For more details, be sure to read How To Install Laminate Flooring Over Concrete.
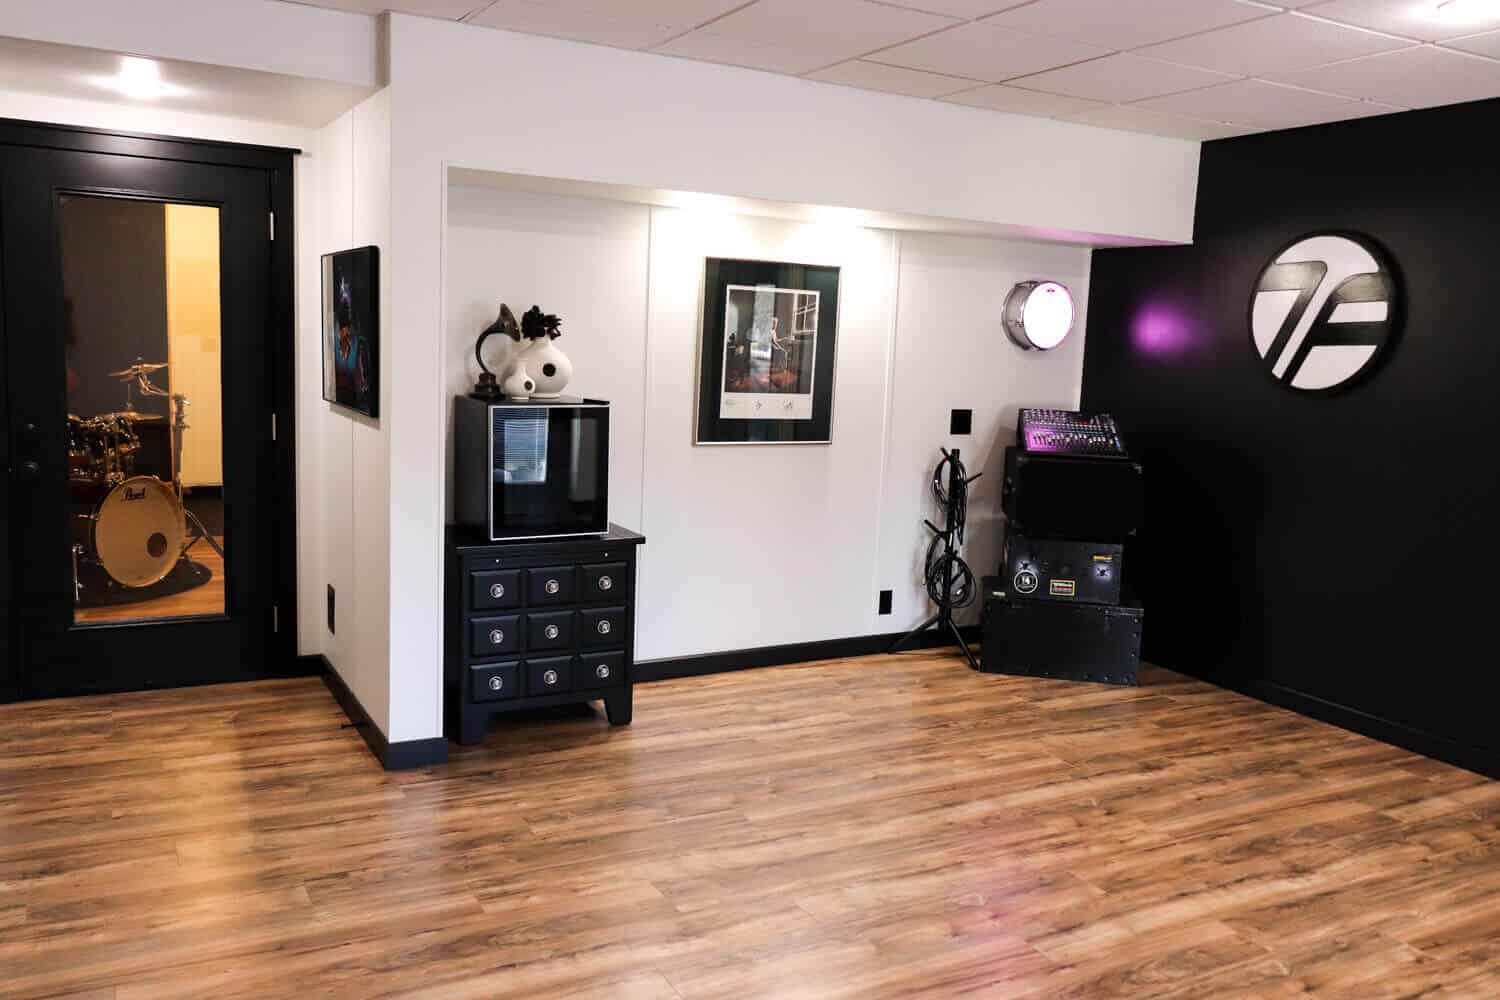
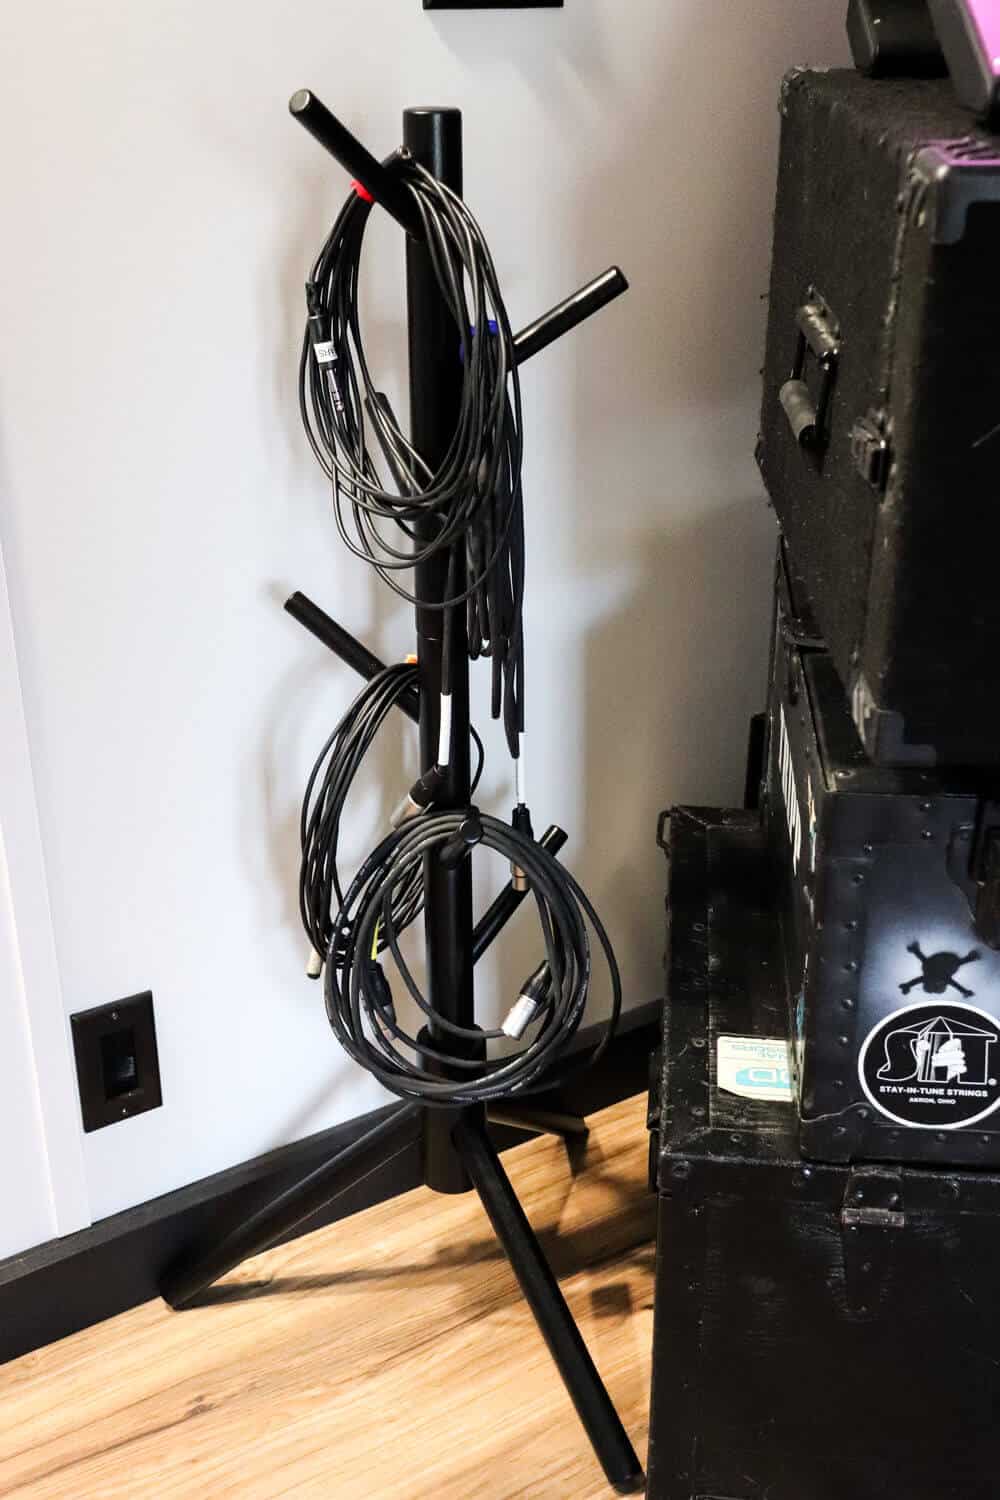
One thing that was a must for the rehearsal room was a way to control all the cords that seem to go ERRRvryWhere.
I can’t stand to see the music cords running across the room all haphazardly, so I knew I needed to find a solution.
This little cord organizer is actually a coat rack! It has parts to make it tall or short, so I opted for the shorter version which is perfect to keep the octopus of cords under control.
So we have a space that is large enough for rehearsals.
In fact, our youngest is planning a dance birthday party in this room with a few friends!
But’s lets move onto the other side of the room.
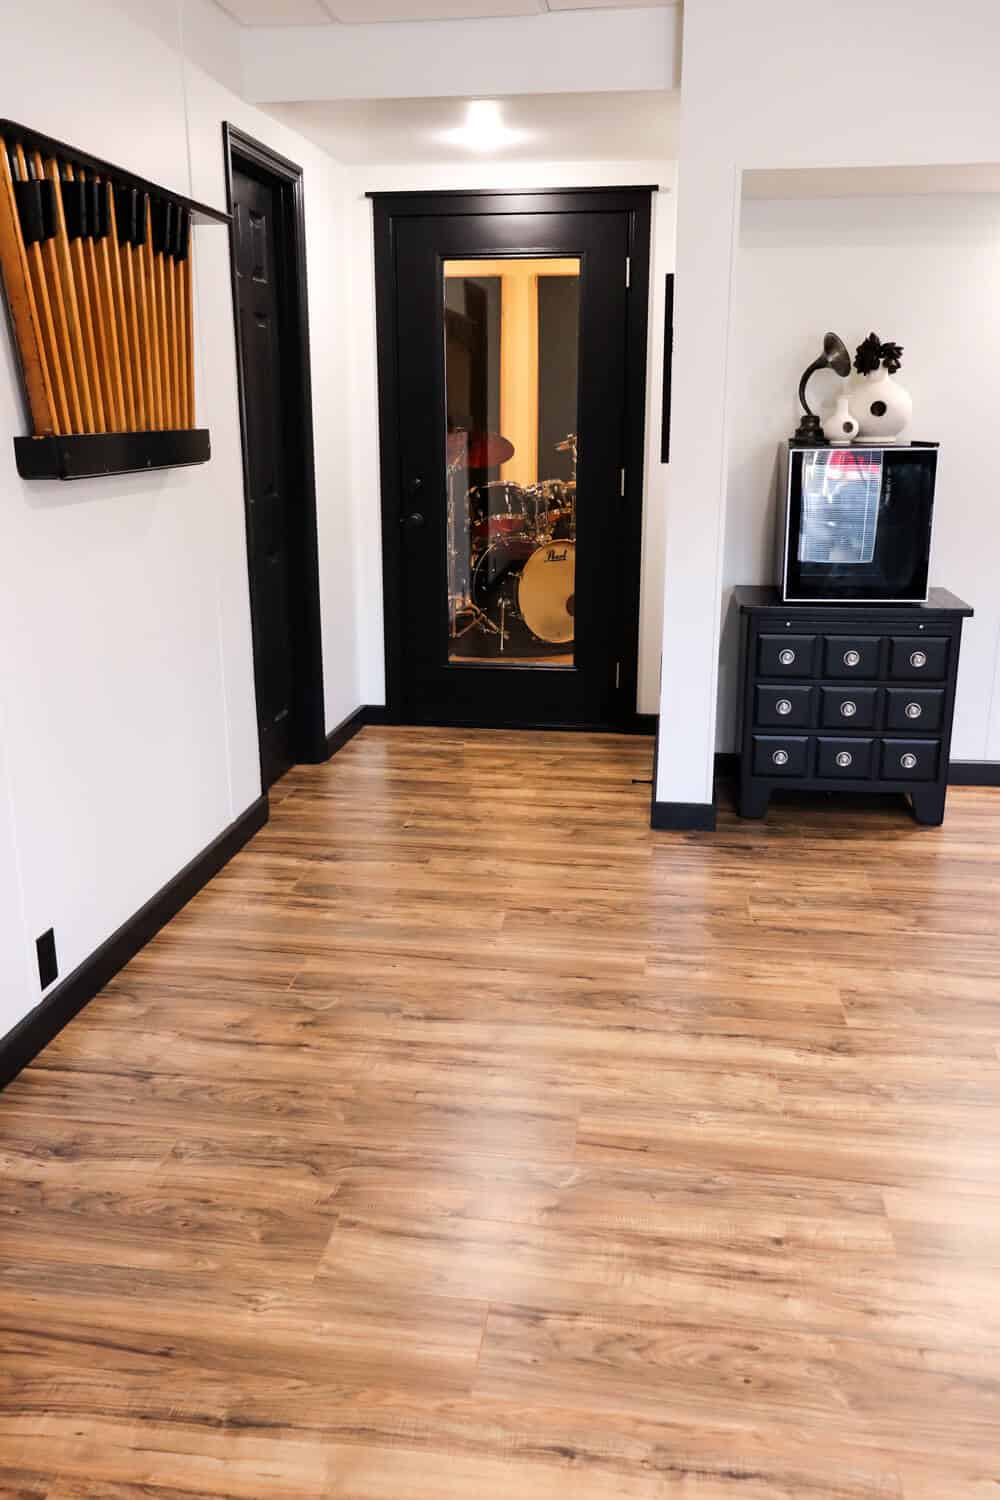
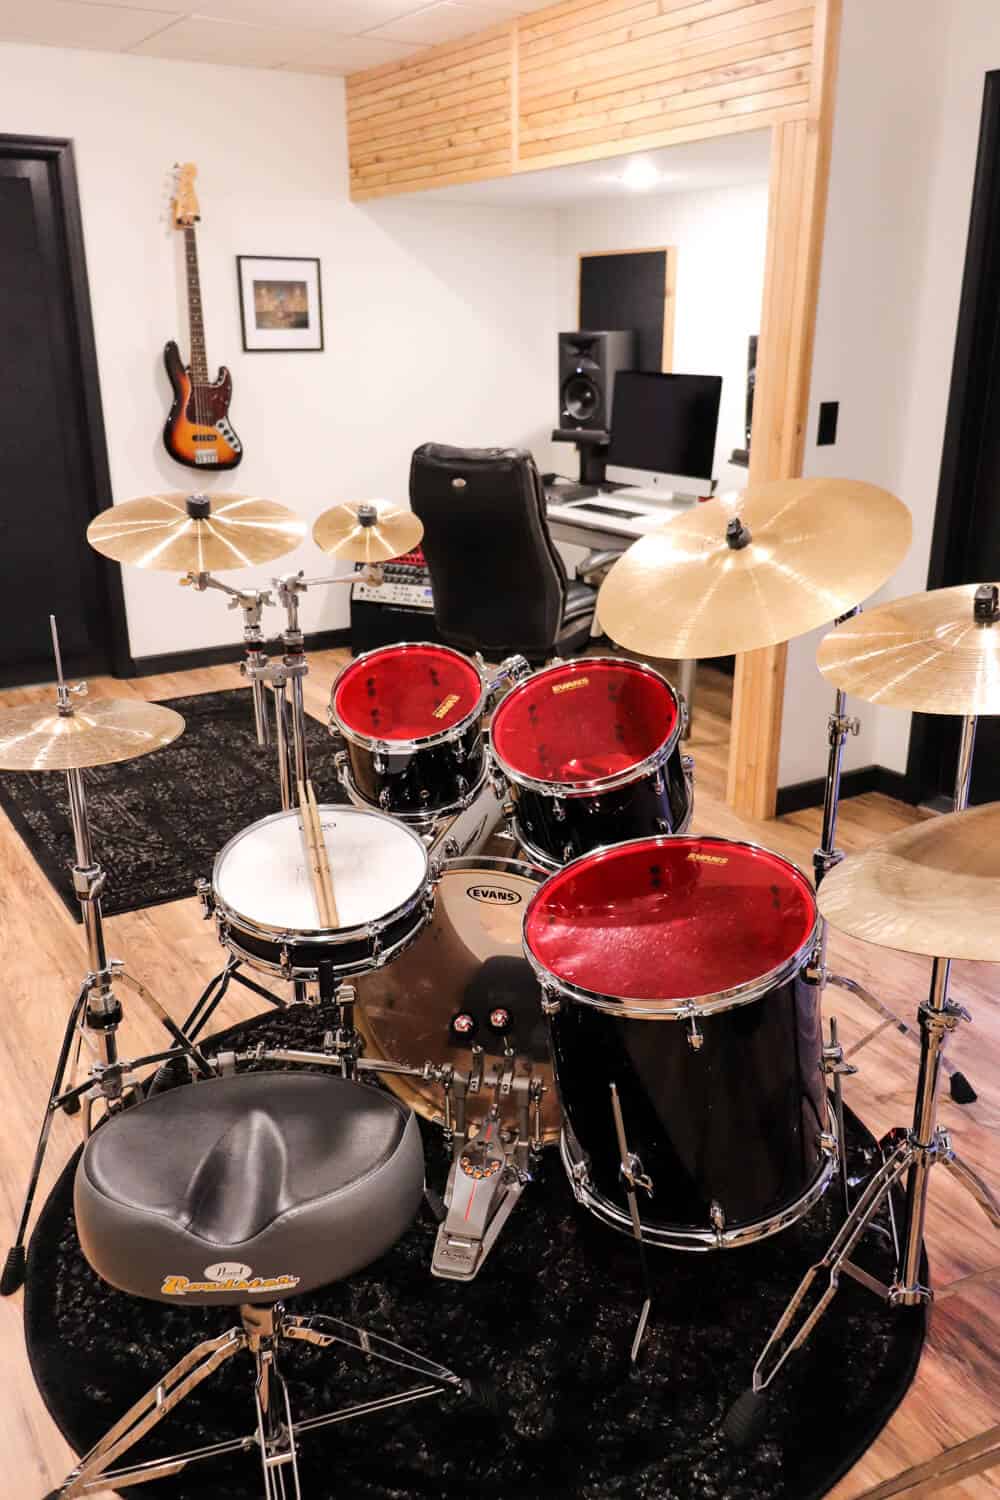
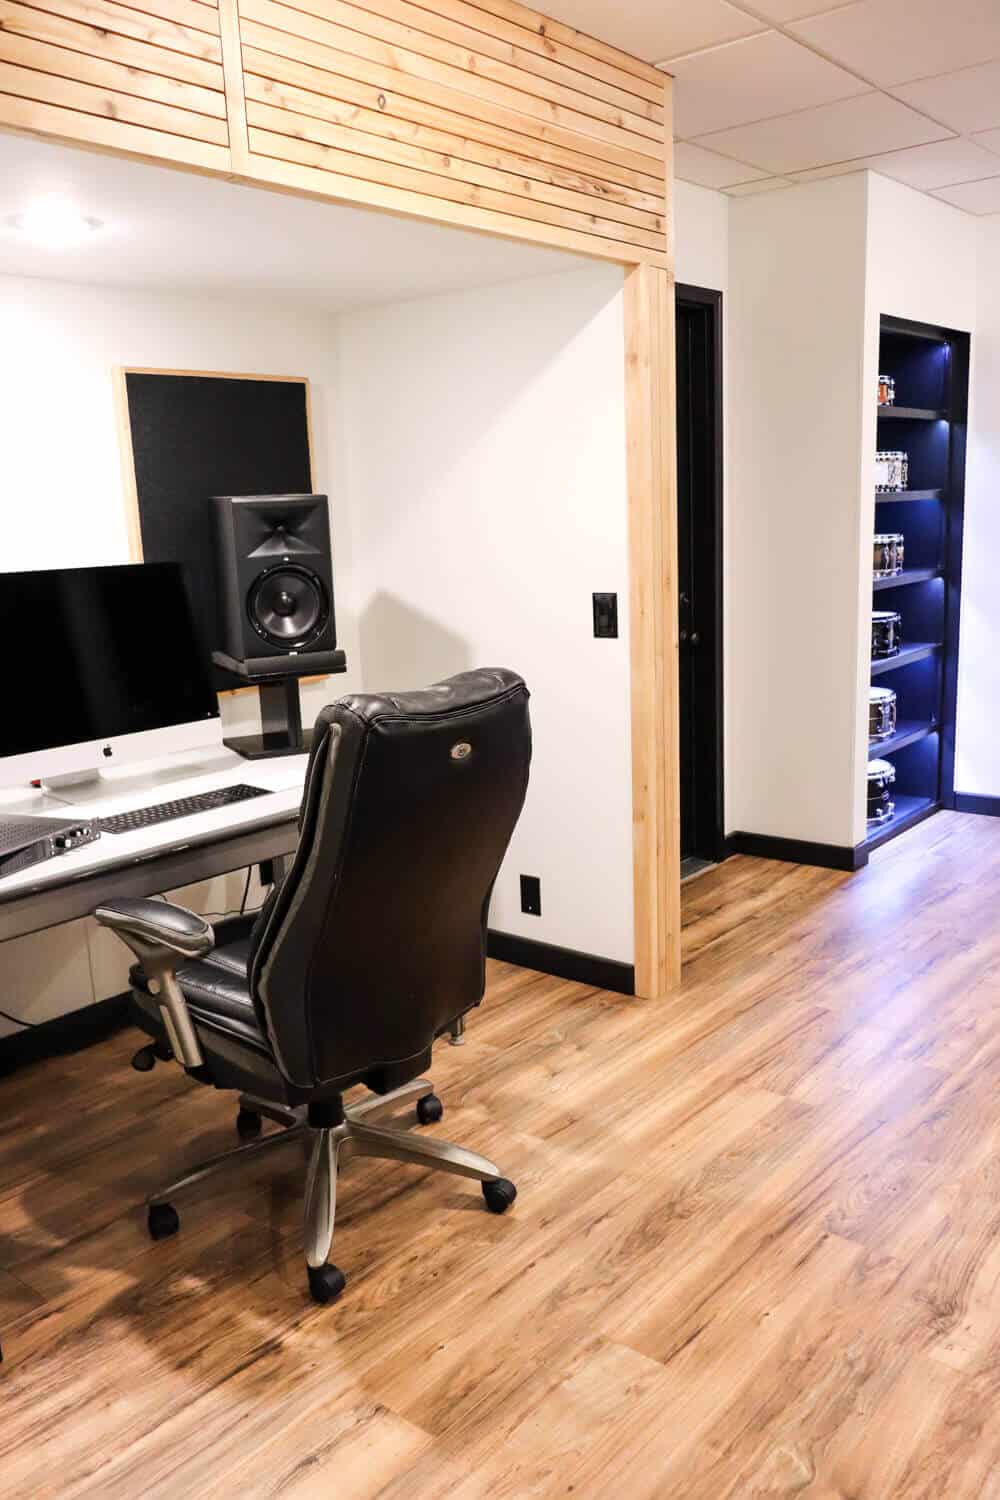
We installed this full light door to separate the rooms, but to also help control the noise from the drums.
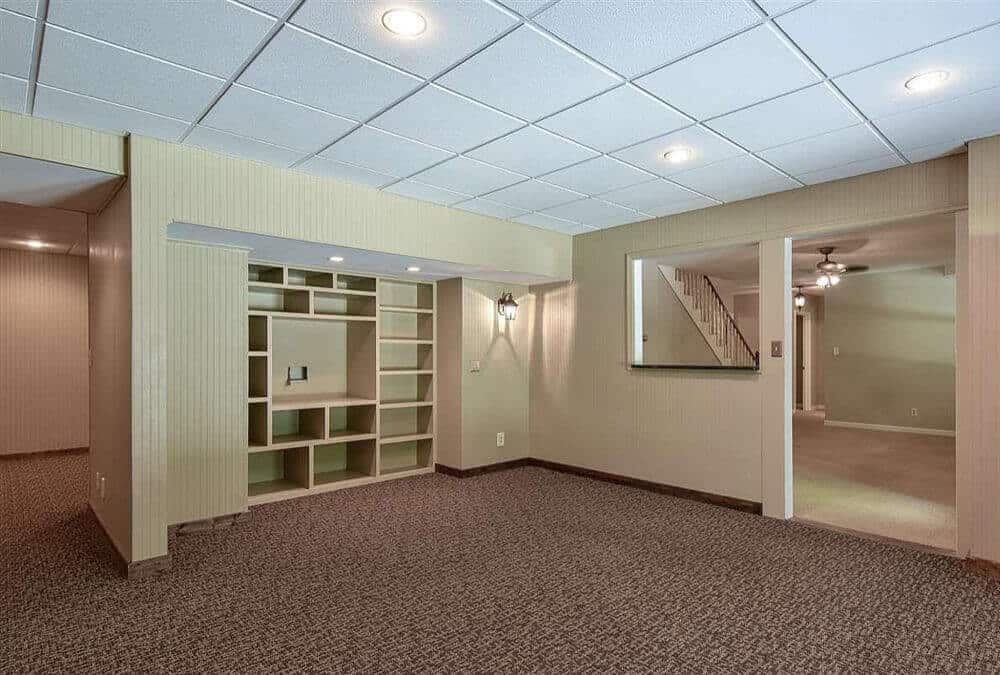
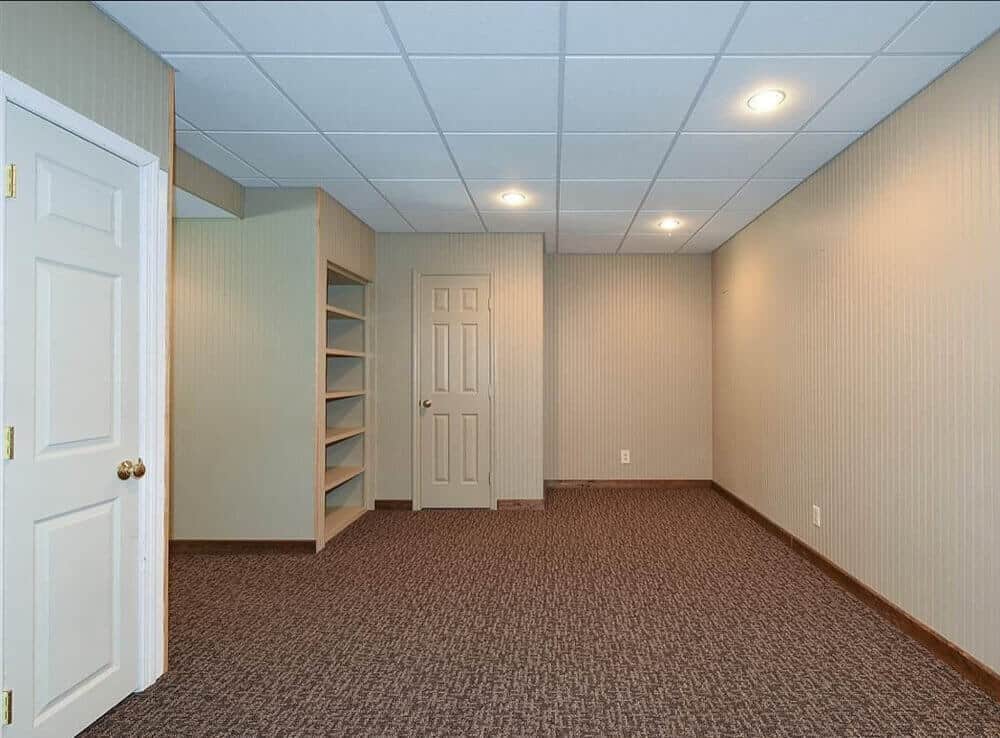
Before it was so dark and cluttered, and now it’s bright and open.
Here’s how it looked last fall.

And today:
We tore out a huge built in cabinet that housed those big tube tvs that no longer exist.
By doing that, we created a huge floorspace perfect for our studio desk.
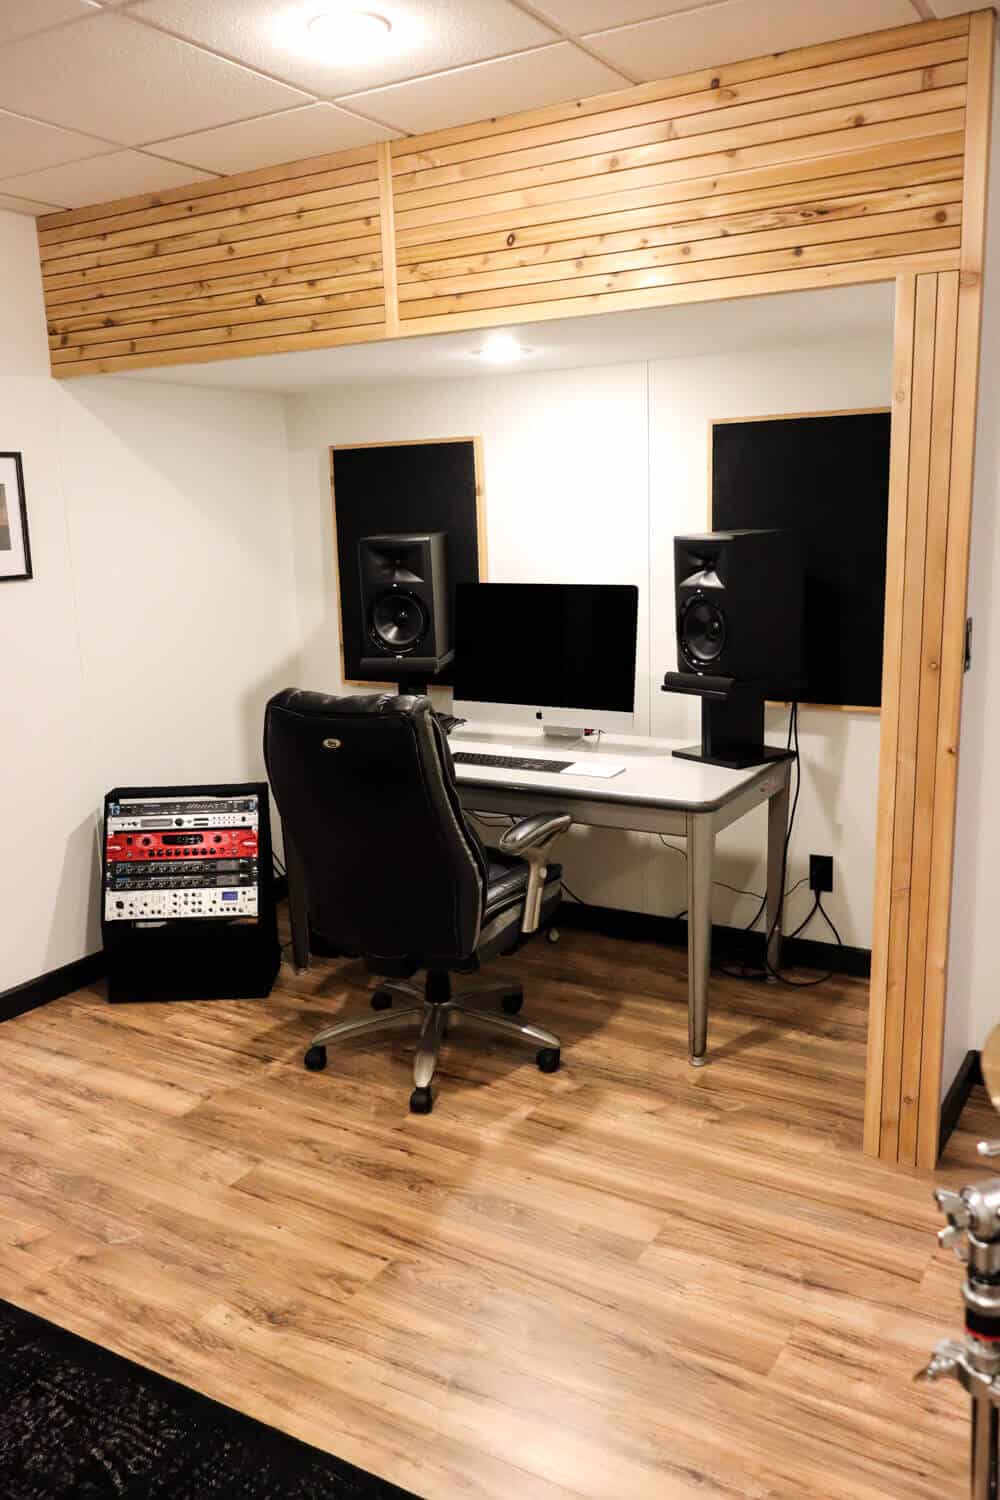
Trent repeated the same cedar accent wall around the desk and I think it’s so cool!
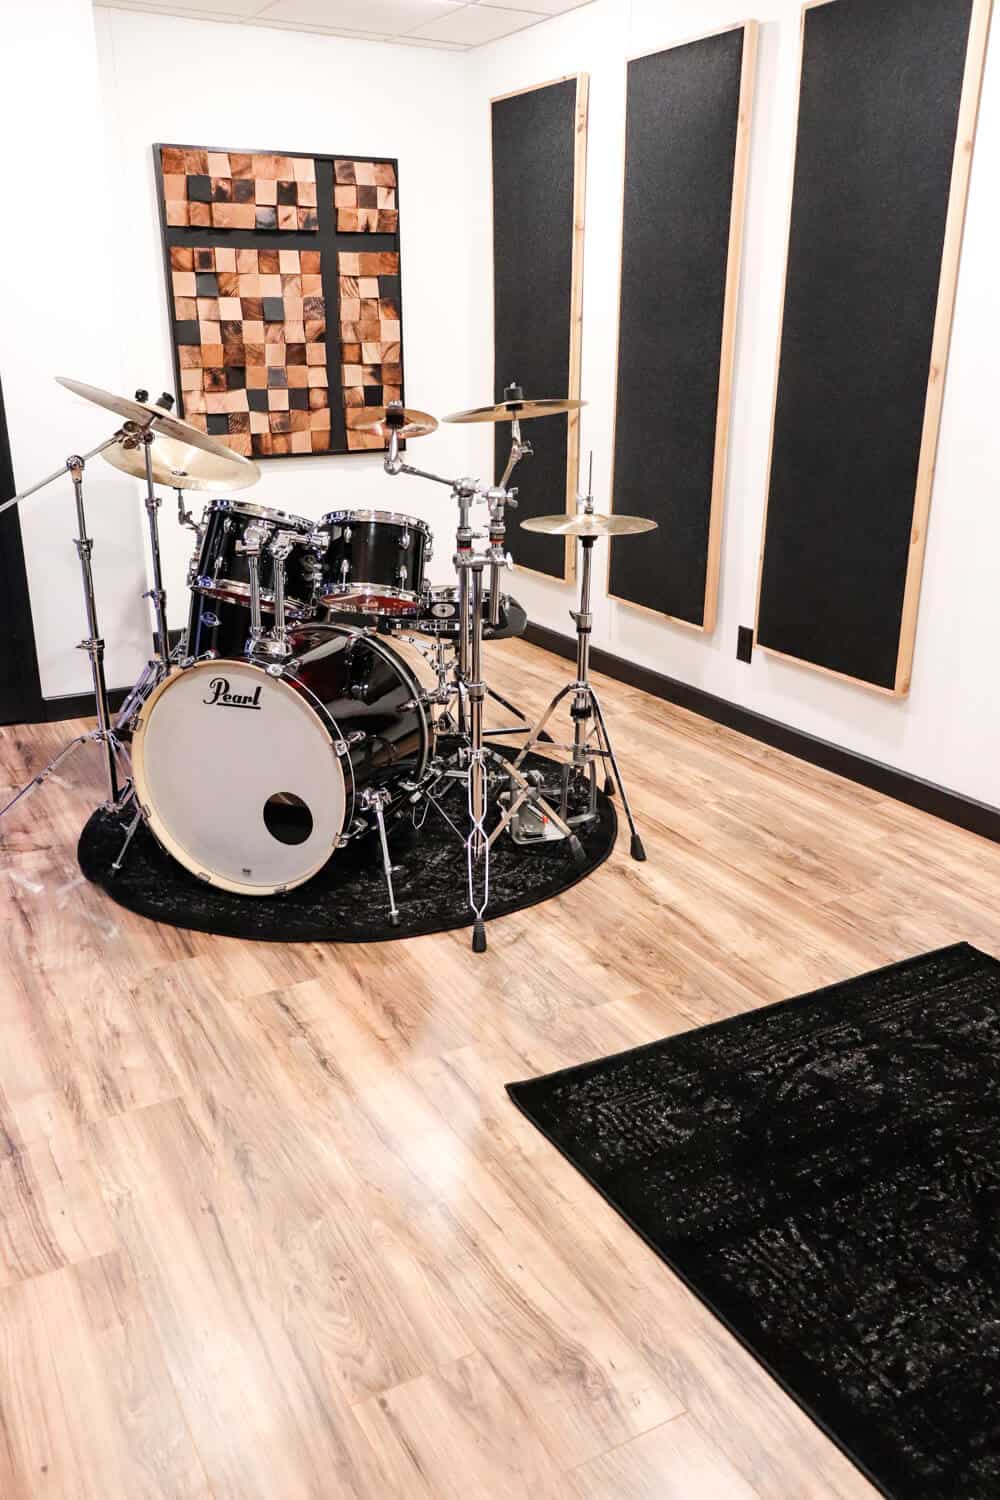
Now some of you may be asking what the black panels on the wall are.
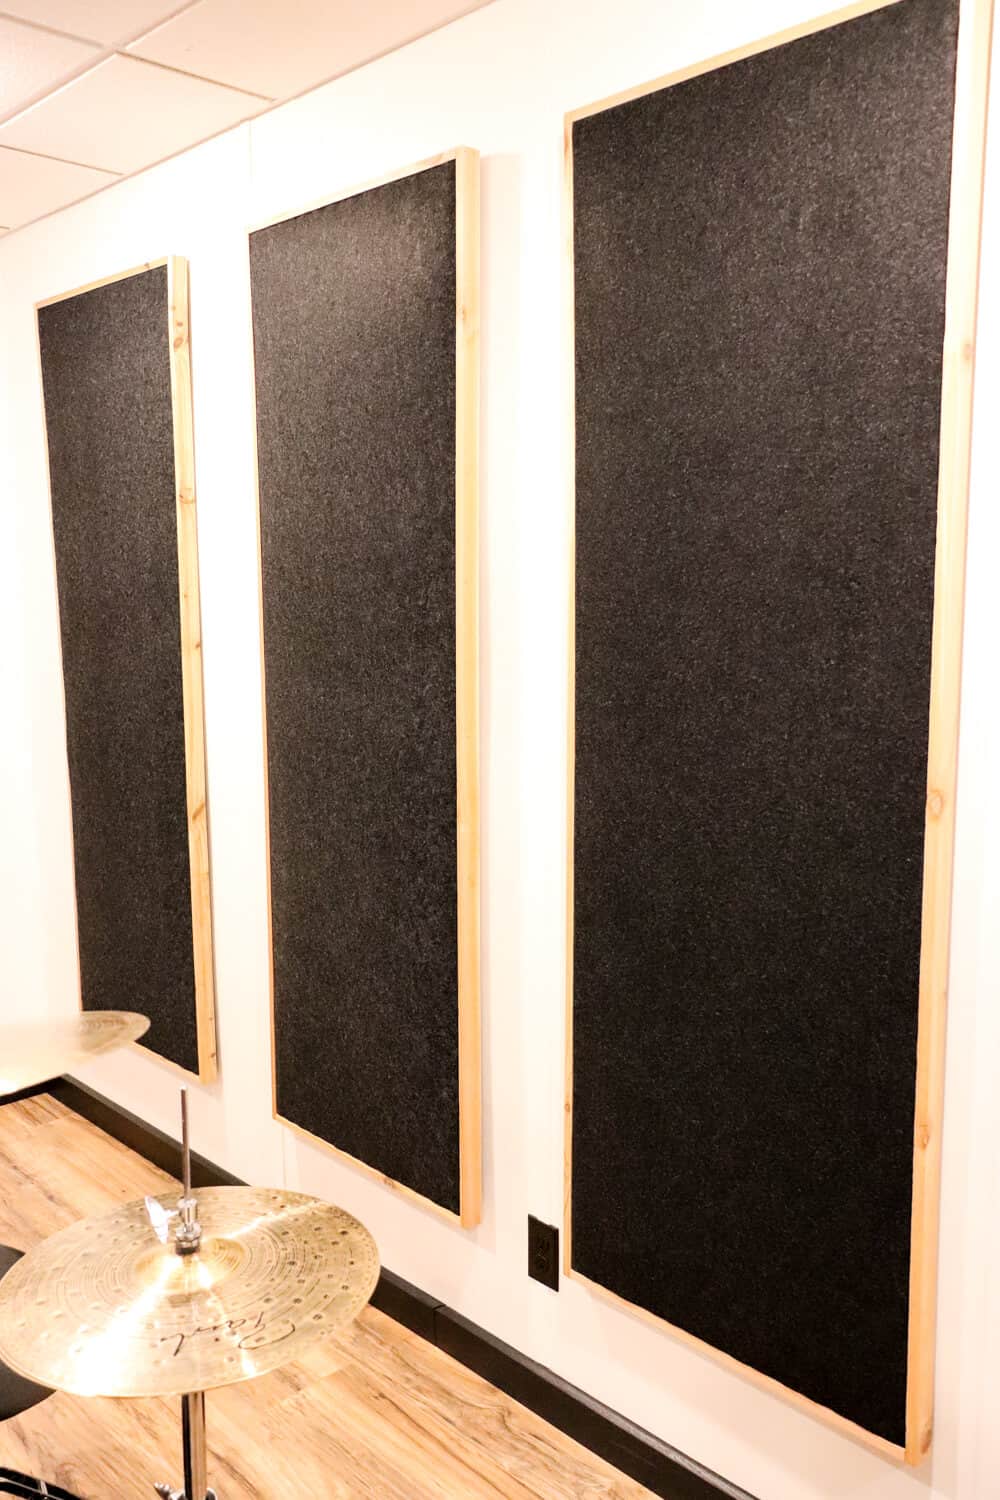
If you have a music room, audio room, or theater room, you want to absorb the sound so that it doesn’t bounce around the room.
These panels do just that.
We made wood frames to start. I wrapped batting around the frames and added felt to update the look.
Then Trent framed them out with the same cedar wood he used for the accent wall.
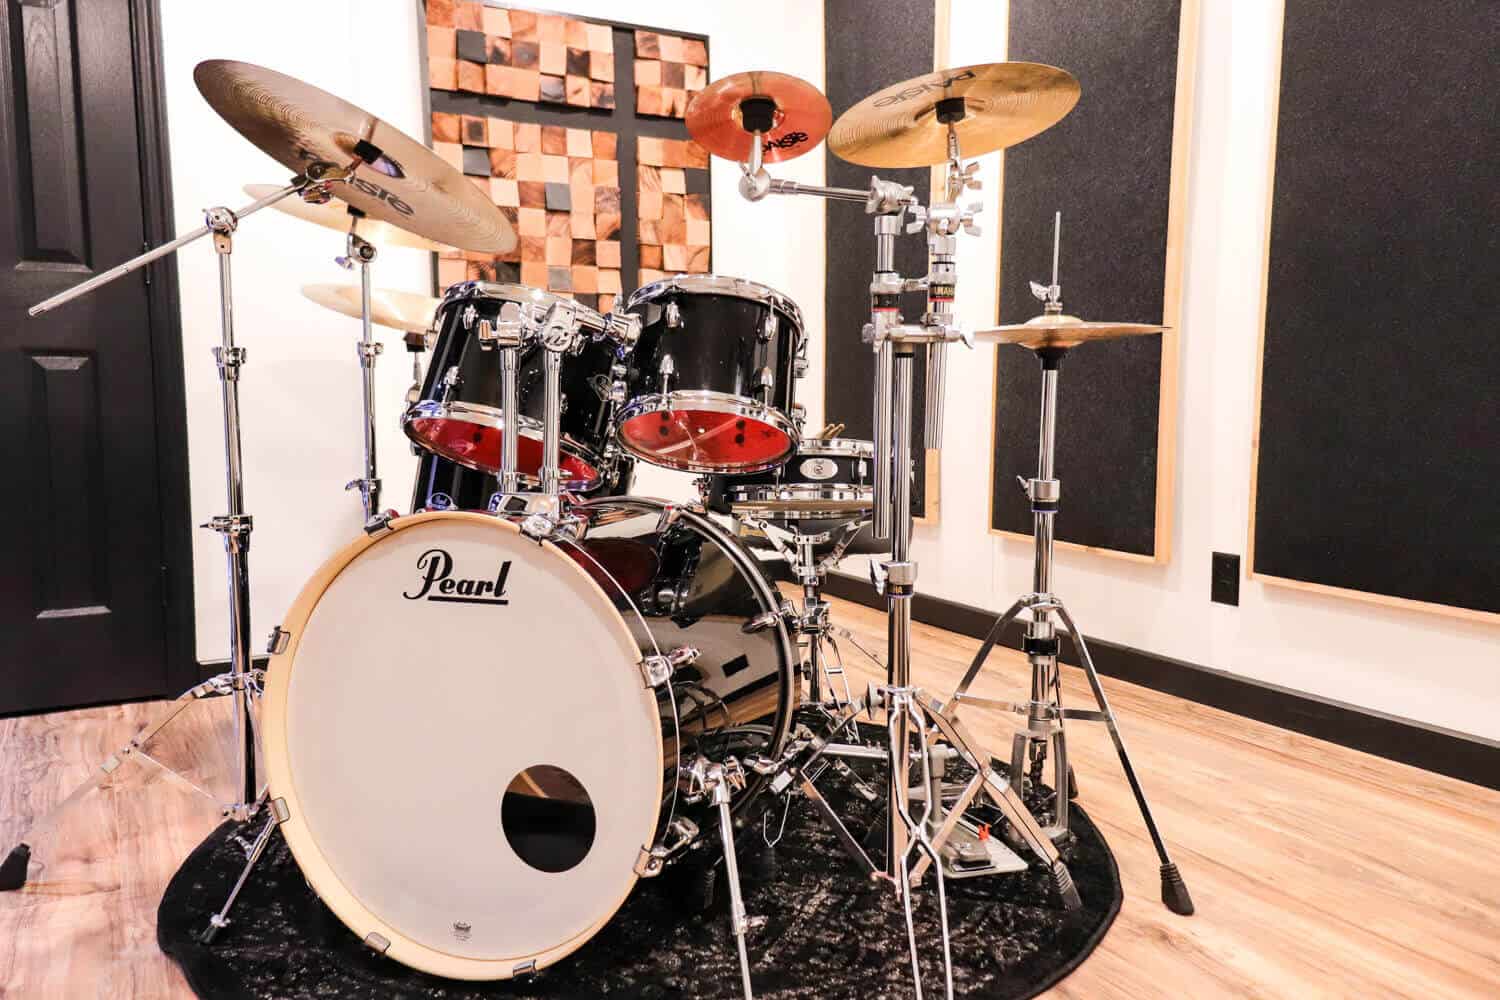
And Trent’s DIY Artwork looks super cool behind his drumset.
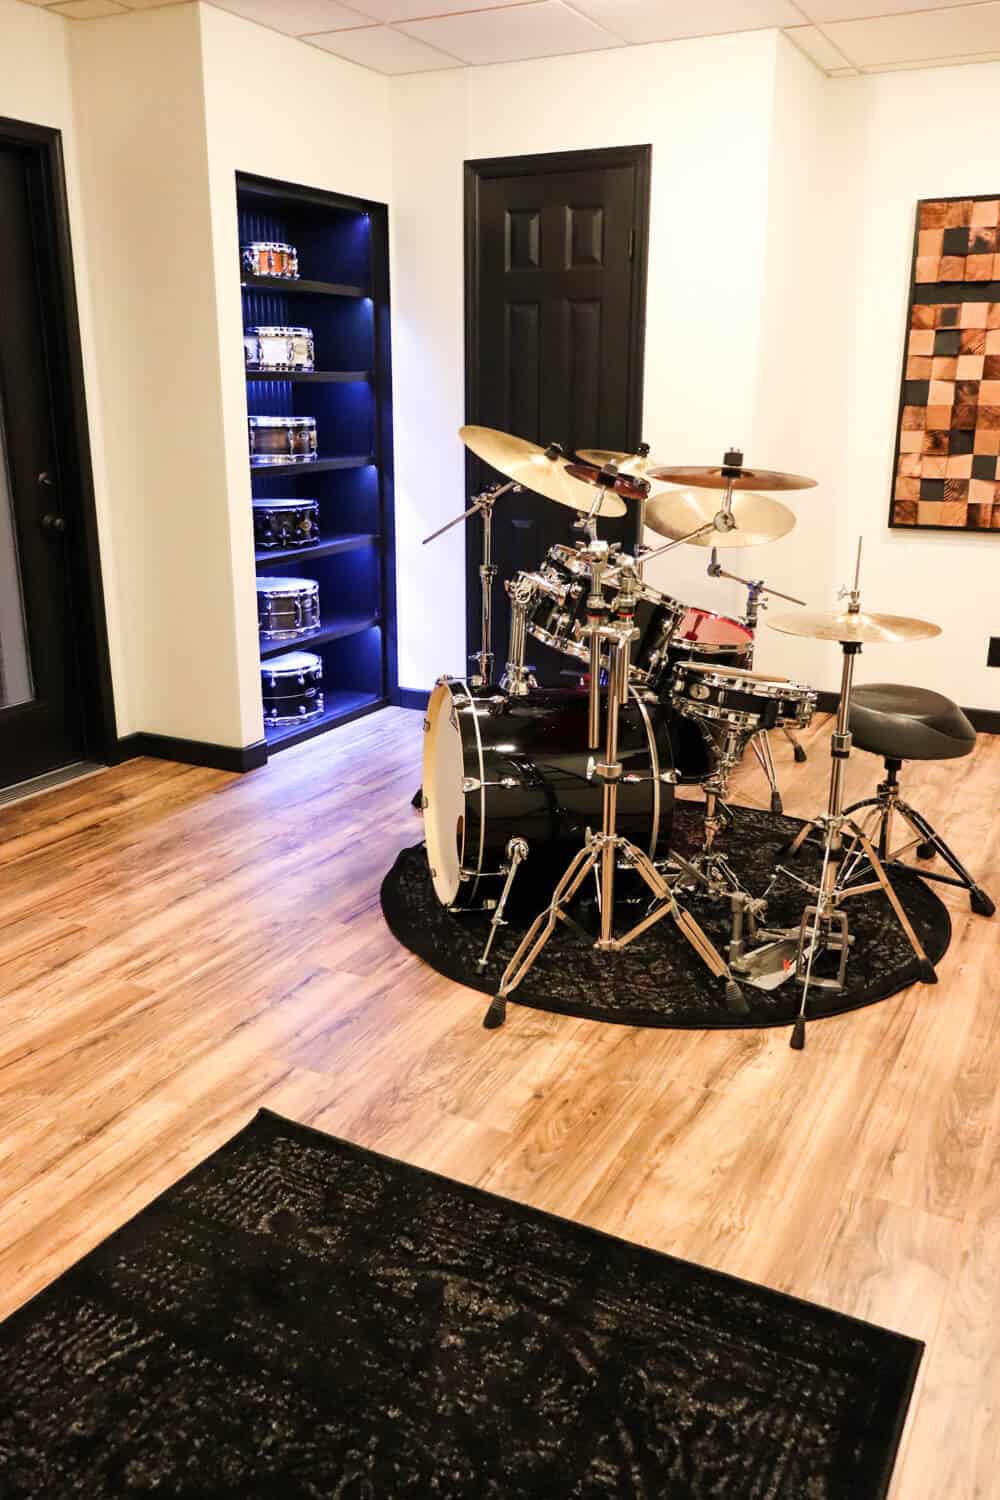
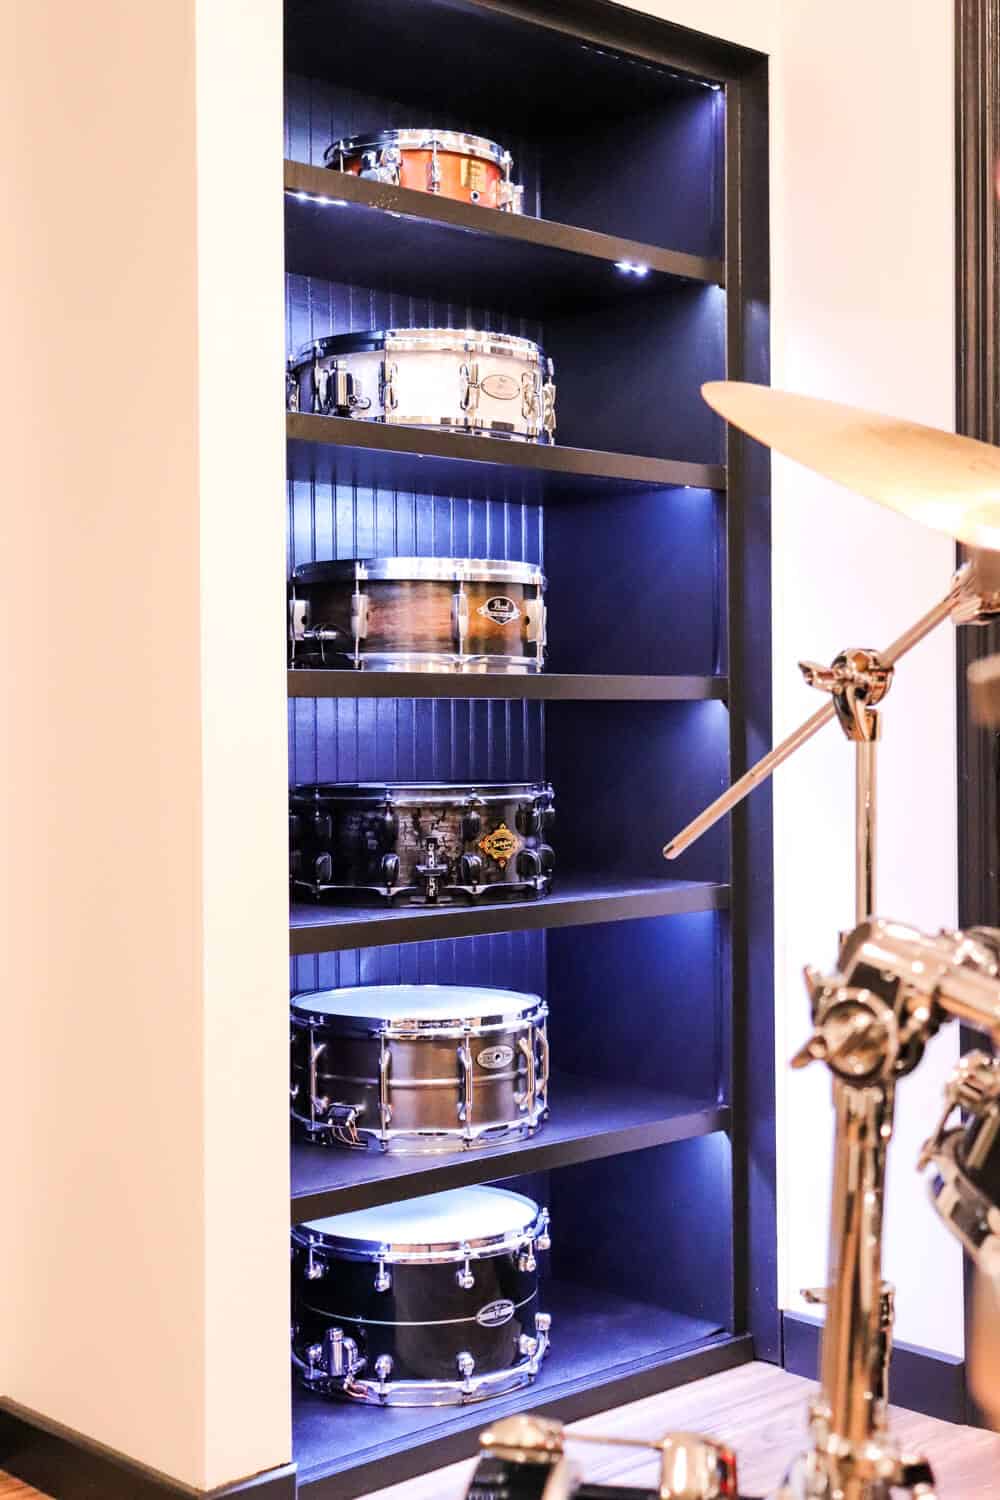
We kept one built in shelving unit and added some fun LED lights.
Then Trent added his snare drums and it’s such a cool room feature!
Music Room Makeover Reveal – Supplies
Here’s what products we used to makeover this space:
Soundproofing: Rockwool Safe and Sound
Wall Covering: Eucaboard – Primed and Painted
Paint: Walls – Paper Doll by Benjamin Moore
Doors and Trim – Tricorn Black by Sherwin Williams
Floor: TrafficMaster Vinyl in Lakeshore Pecan.
Cedar Accents: 1×2 inch strips spaced .25″ apart
Rugs: Granite Ring around the Rosette from RugsUSA.com
Mini Fridge: RCA
Sound Panels: Charcoal Felt from Walmart

Of course, I’m always planning ahead.
So, if we ever decide to sell this home, this room easily converts to a 6th bedroom in our home. Just add a closet and stage it and boom! Instant value increase.
But for now – it’s perfect just as is!
So if I have left out any details, leave me a comment below. I’m happy to share more details with you!
Thank you Linda!
Looks great!!
Jen you guys did an awesome job.