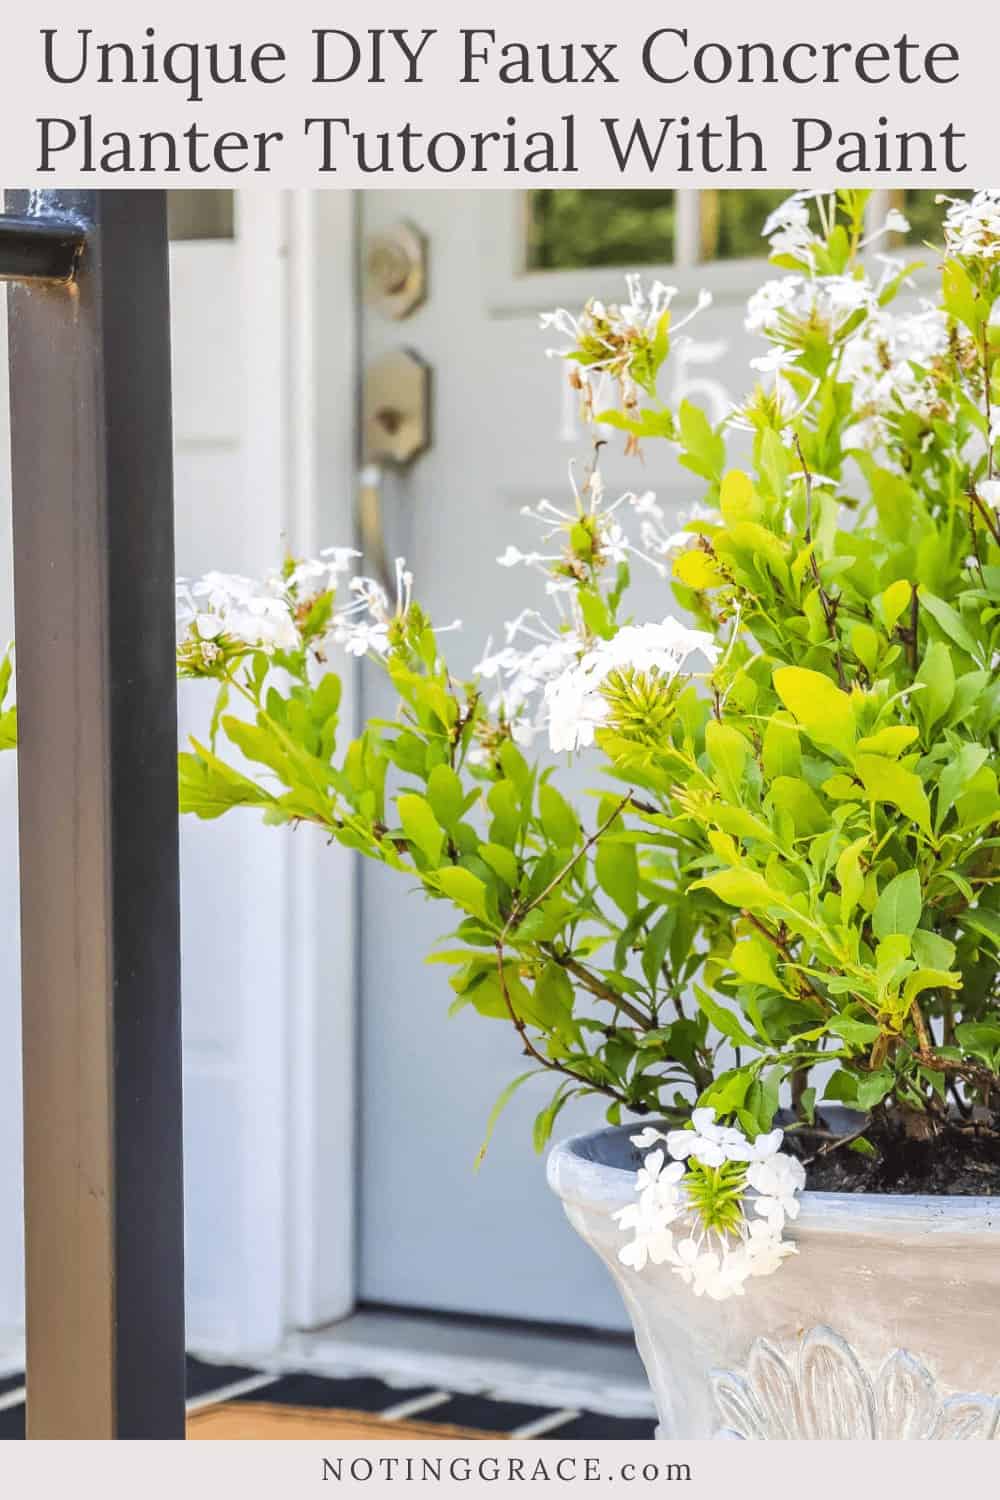
Unique DIY Faux Concrete Planter Tutorial With Paint 2024
Updated 2/5/2024
I was dreaming of beautiful concrete planters for my front porch, but my budget was tight. Here’s how to make unique faux DIY concrete planters with paint.
If you are looking for unique diy concrete planters that are super affordable, then friend, you found the right post!
We made these super easy planters using plastic planters and some acrylic craft paint. Here’s how we did it, but let me show you where we began.
Last year, we made some DIY Farmhouse Porch Planter Boxes from cedar pickets for our front porch and they still look great.
But I’ve been working on updating my back patio.
And since there is black furniture back there, I know these would be better suited for our patio.

So these planters need to be moved around back, which means I needed something new for our front porch.
Now you know I love DIY projects, but what I love more is saving time and money.
I first started looking at Home Depot for planters that had the look I loved, like this one and this one.
But check out those price tags!!
Uuhhhh – no thank you!
So my first thought was to just build another set of our Farmhouse planter boxes, but those beautiful, curvy urns were stuck in my mind.
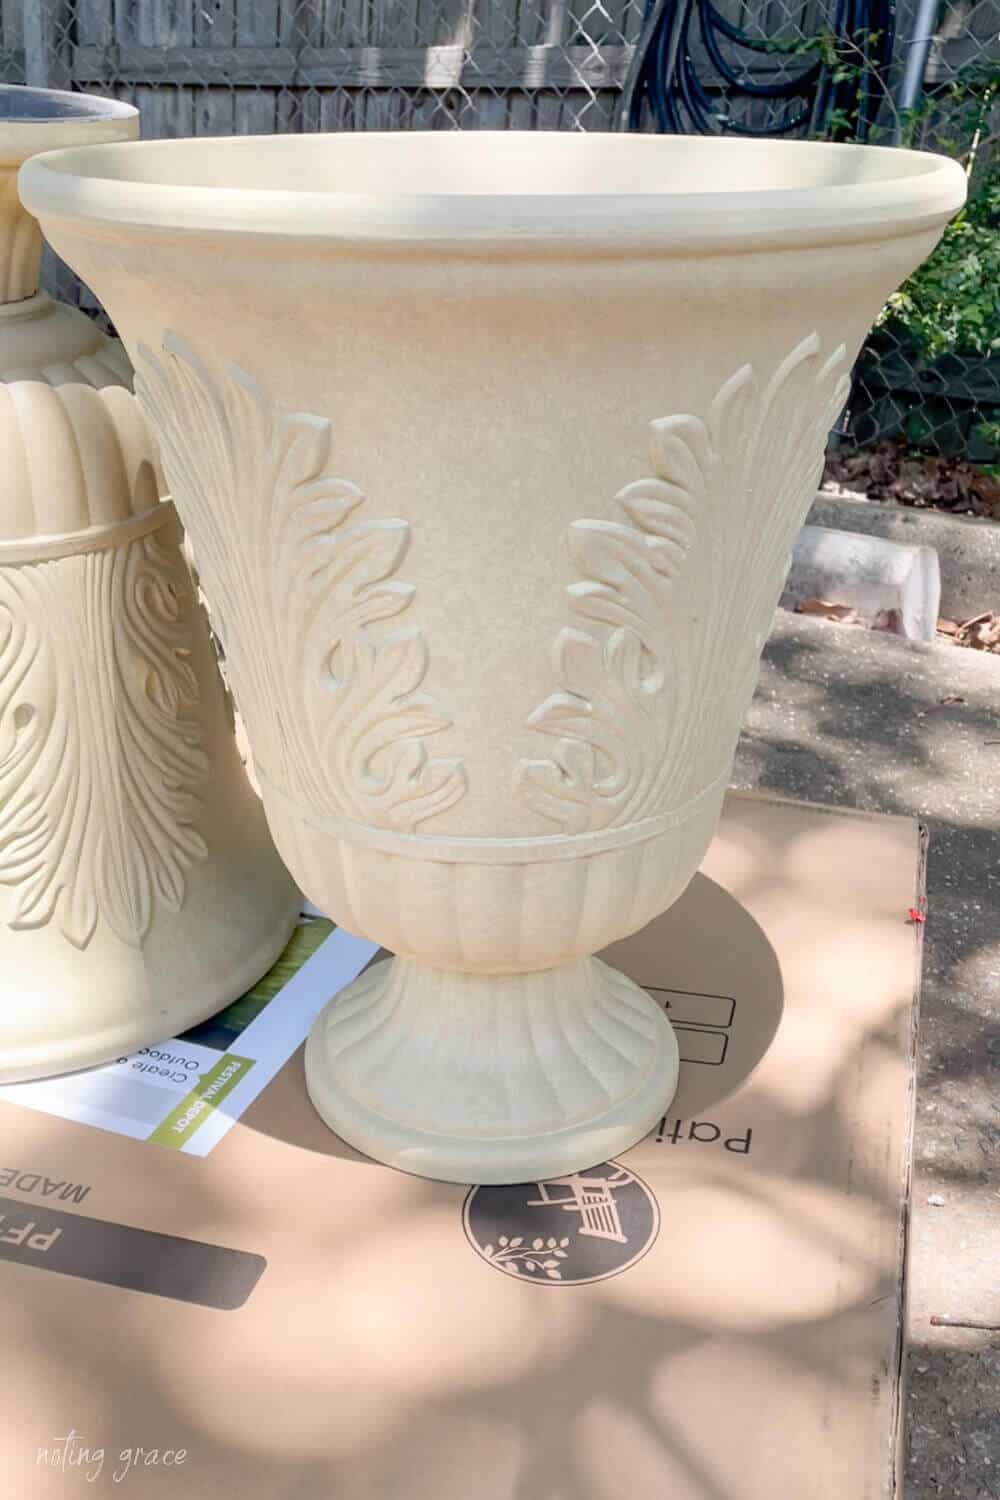
One day, while shopping at Aldi, I came across these big porch planters. They were either plastic or fiberglass and the color was…
Blech!
Can you say baby poop yellow? I think they just pulled them out of the silicone mold and then forgot to paint them.
I almost kept on walking, but then I saw the $30 price tag. That meant I could get 2 planters for less than the price of just one of those dreamy ones from the home improvement store!
But I definitely needed to update them to resemble the look of concrete ones that I found online.
Lemme tell ya, it’s super easy to do and is so much fun!
Here a step by step tutorial on how to get the concrete look – and you’ll love the end result!
How to Make Unique
Faux Concrete Planters With Paint
(Some affiliate links are provided below. Full disclosure here.)
Supplies Needed
Plastic Planters – you can find cheap ones at the Dollar Tree or a thrift store
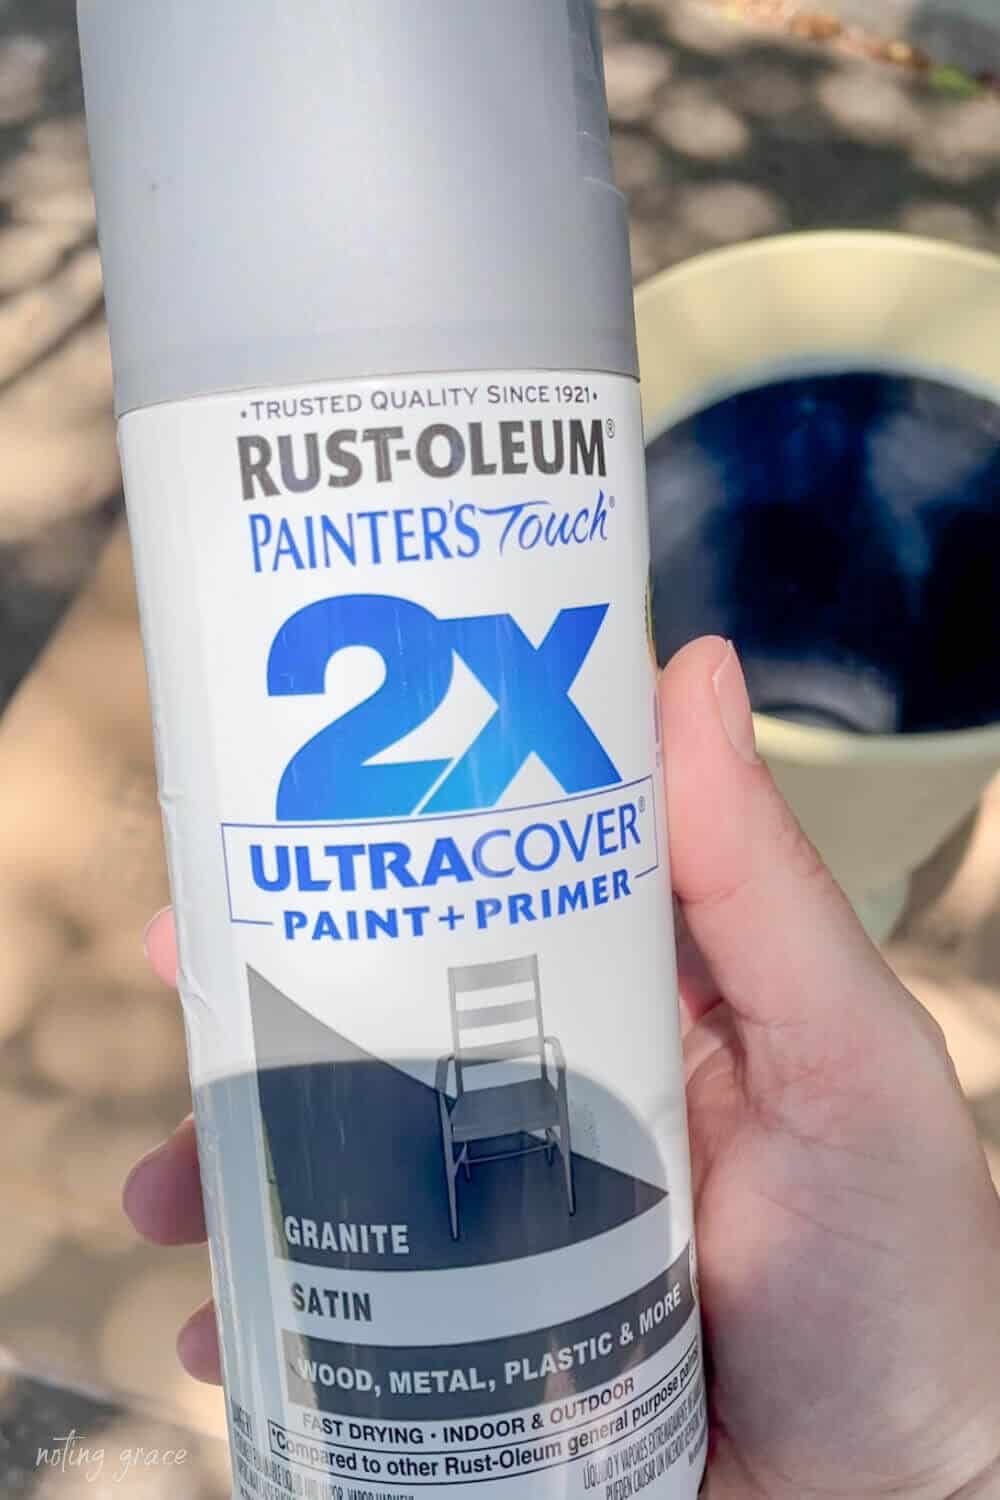
Spray Paint – I used Rustoleum Painters Touch 2X Paint and Primer in Granite
Acrylic Paint
Water
Handy Craft Pail
Paint Brush
Paper Towels
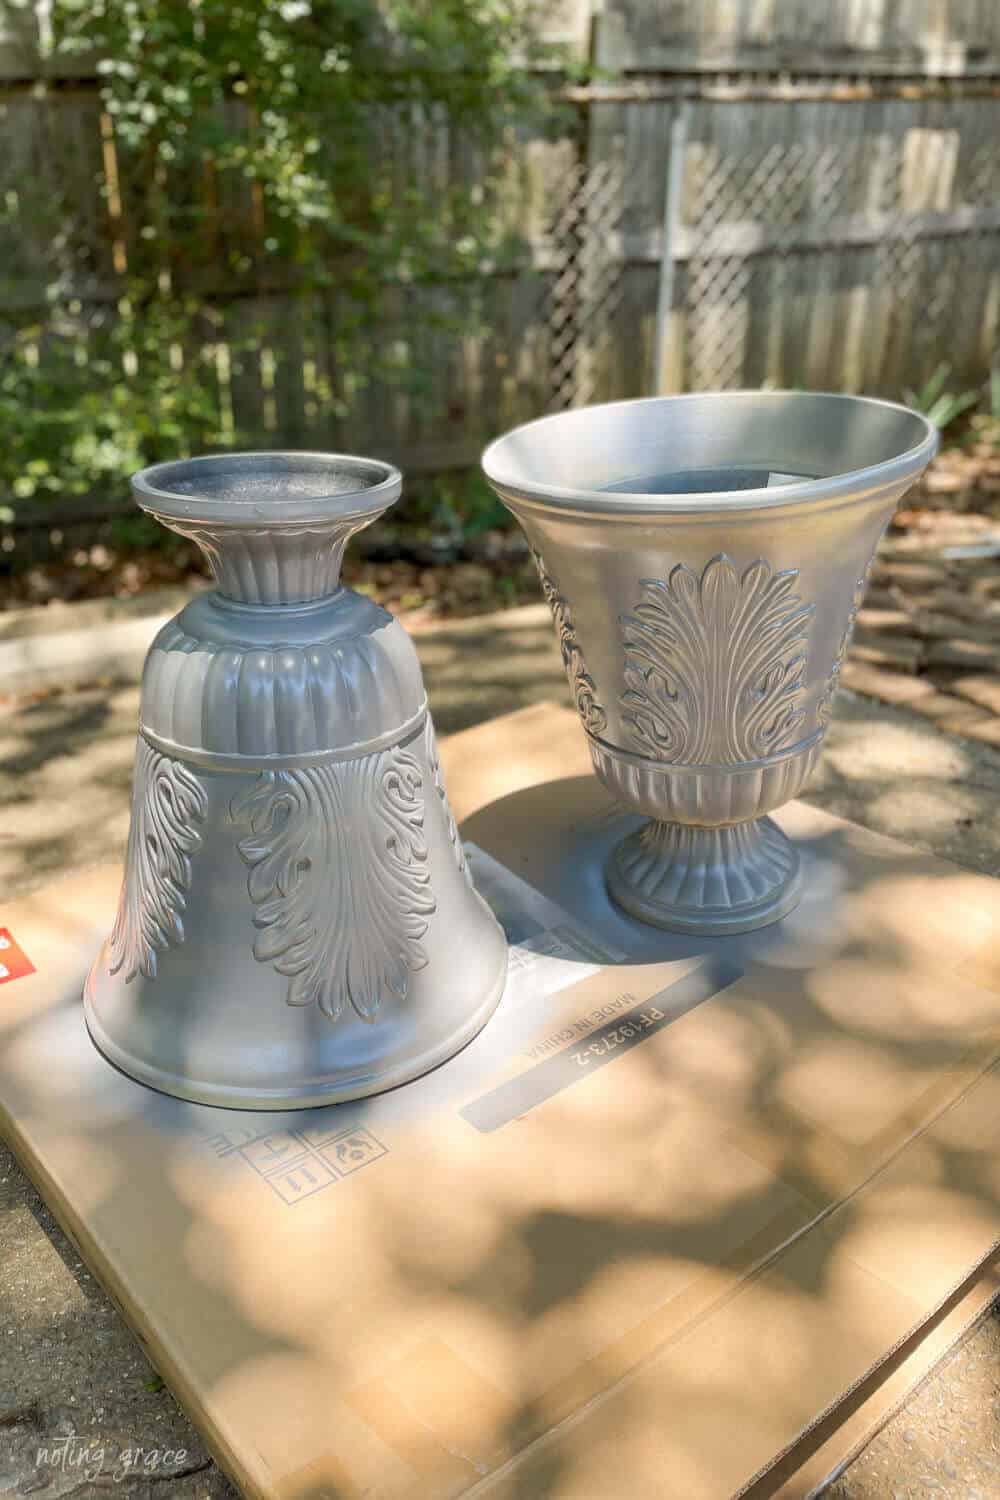
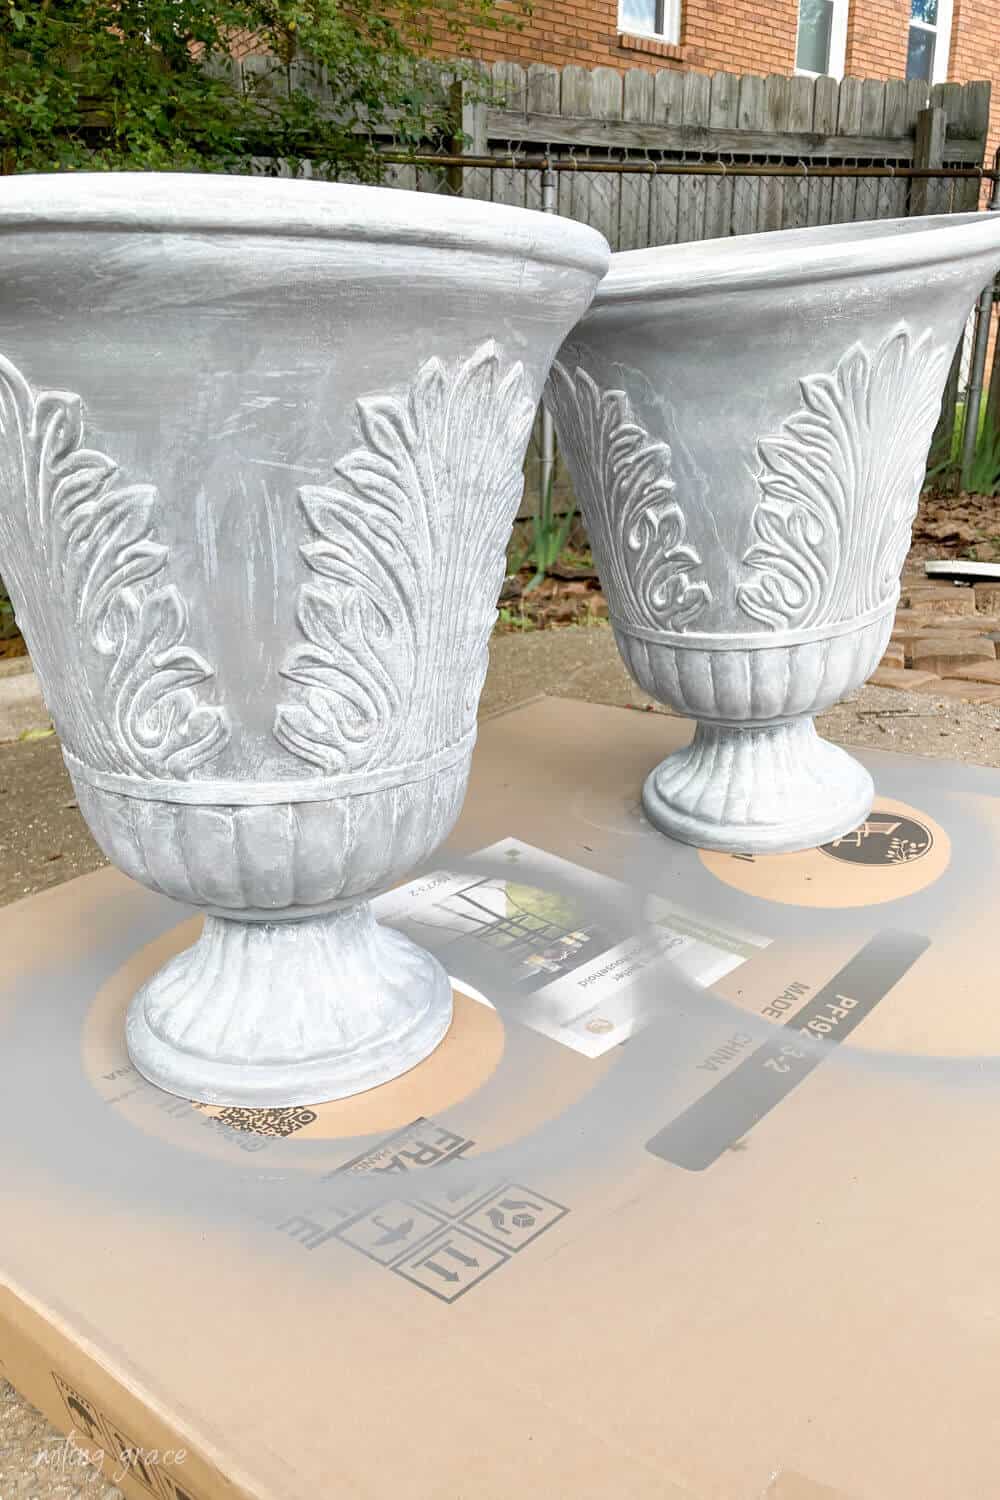
First I started with spray painting the first coat of paint on these big boys.
There are dozens of different options for color combinations, but if you are wanting to replicate a concrete pot, then I suggest starting with a medium gray color.
I love to save old boxes to use as makeshift drop cloths whenever I do projects – it helps catch any overspray that might happen.
I started with one coat using short sprays in a back and forth pattern on these faux concrete pots.
Those short sprays on the first layer help prevent any runs from happening.
Once they had dried about 30 minutes, I flipped them over and hit any spots I missed again using short, quick sprays.
You don’t really need a second coat of the gray paint and primer, since this 2X is supposed to create full coverage.
But if you are using a different primer or a darker color, make sure the first coat is fully dried before applying a second coat.
I left them outside to dry for a few hours and then brought them into the garage and placed them on a work table.
If you are looking for a great work horse of a table – you gotta get this one! It’s my favorite. We’ve owned it for years and use it all the time!
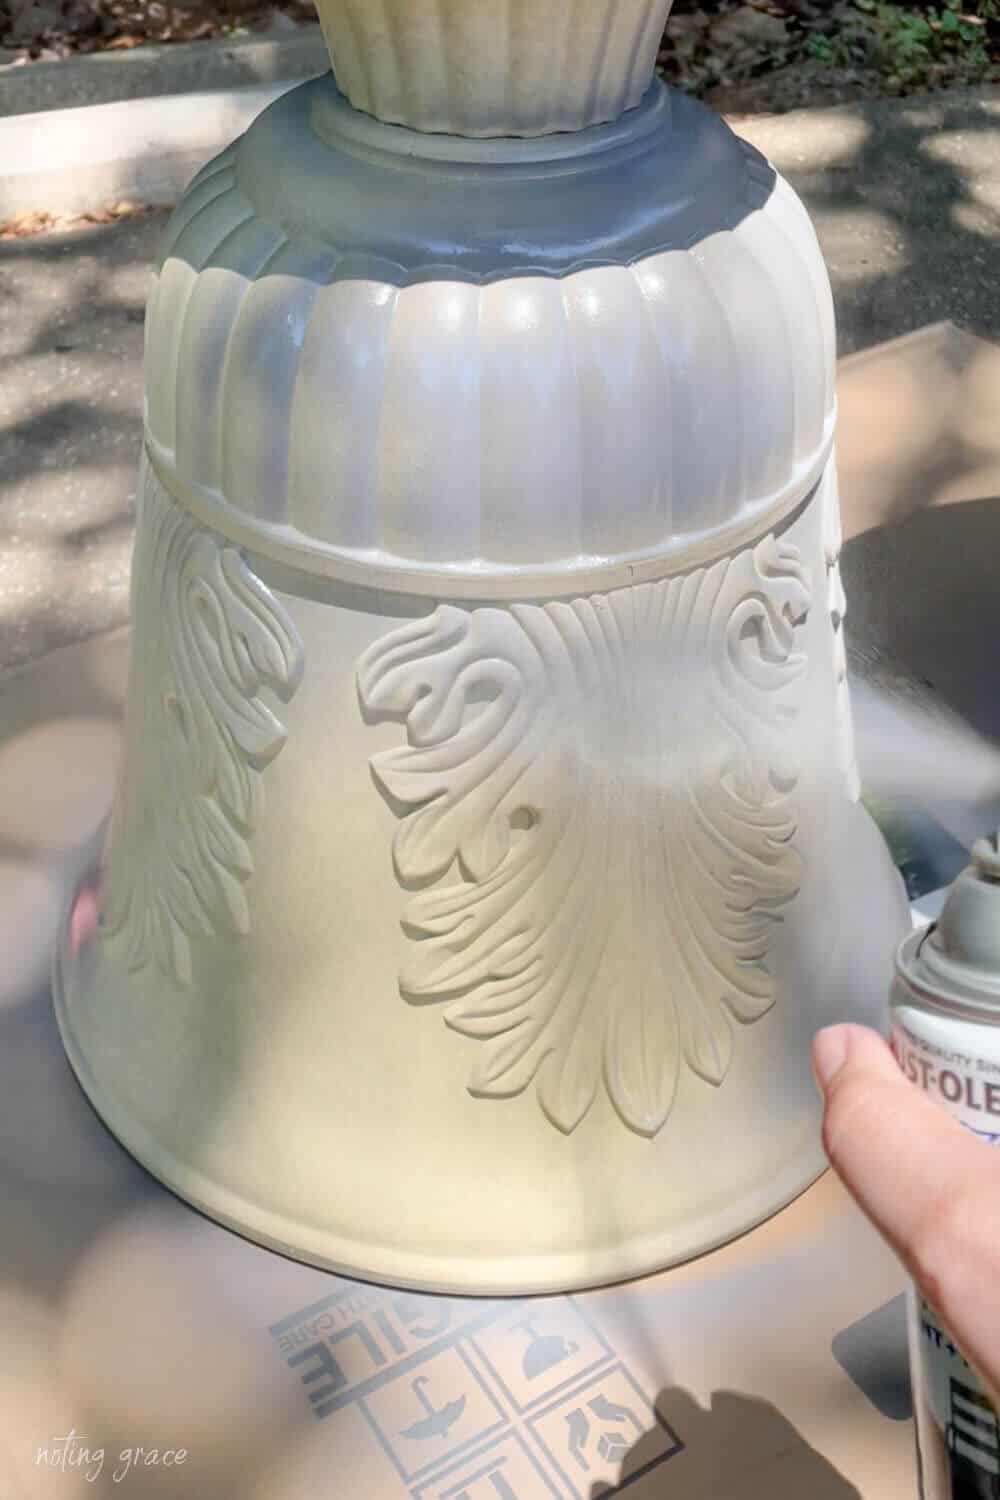
I took some white acrylic paint we had and poured a small amount into a container and mixed it with a splash of water.
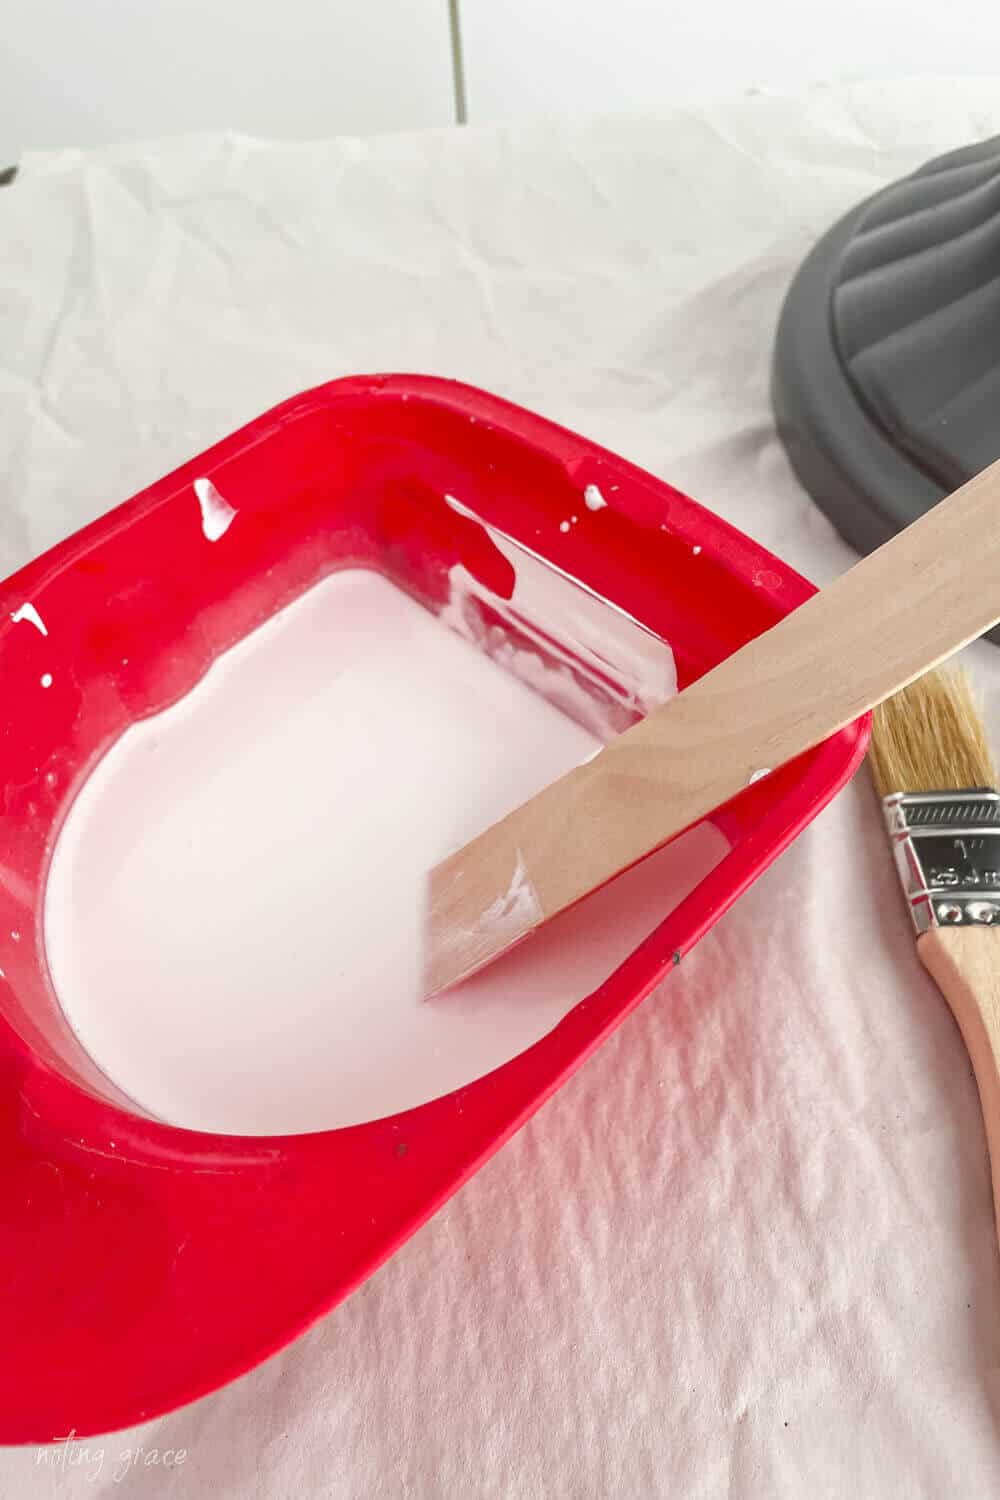
You want to make sure to fully mix the water and paint, so you may need to stir for a few minutes.
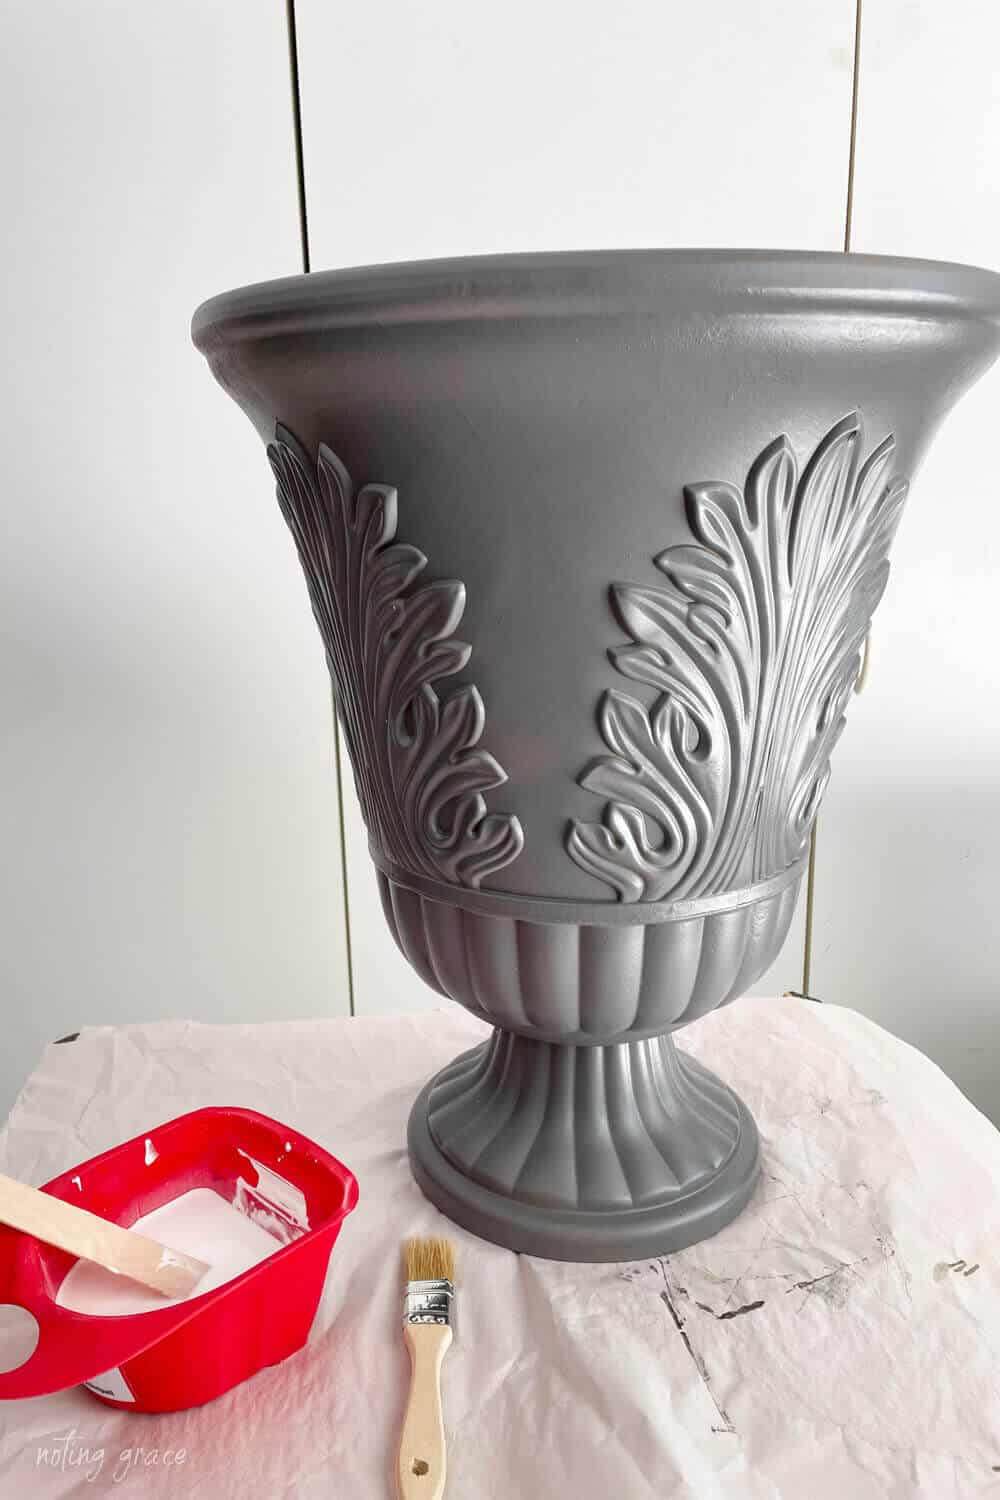
Once the mix is fully incorporated, start painting over the spray painted planter.
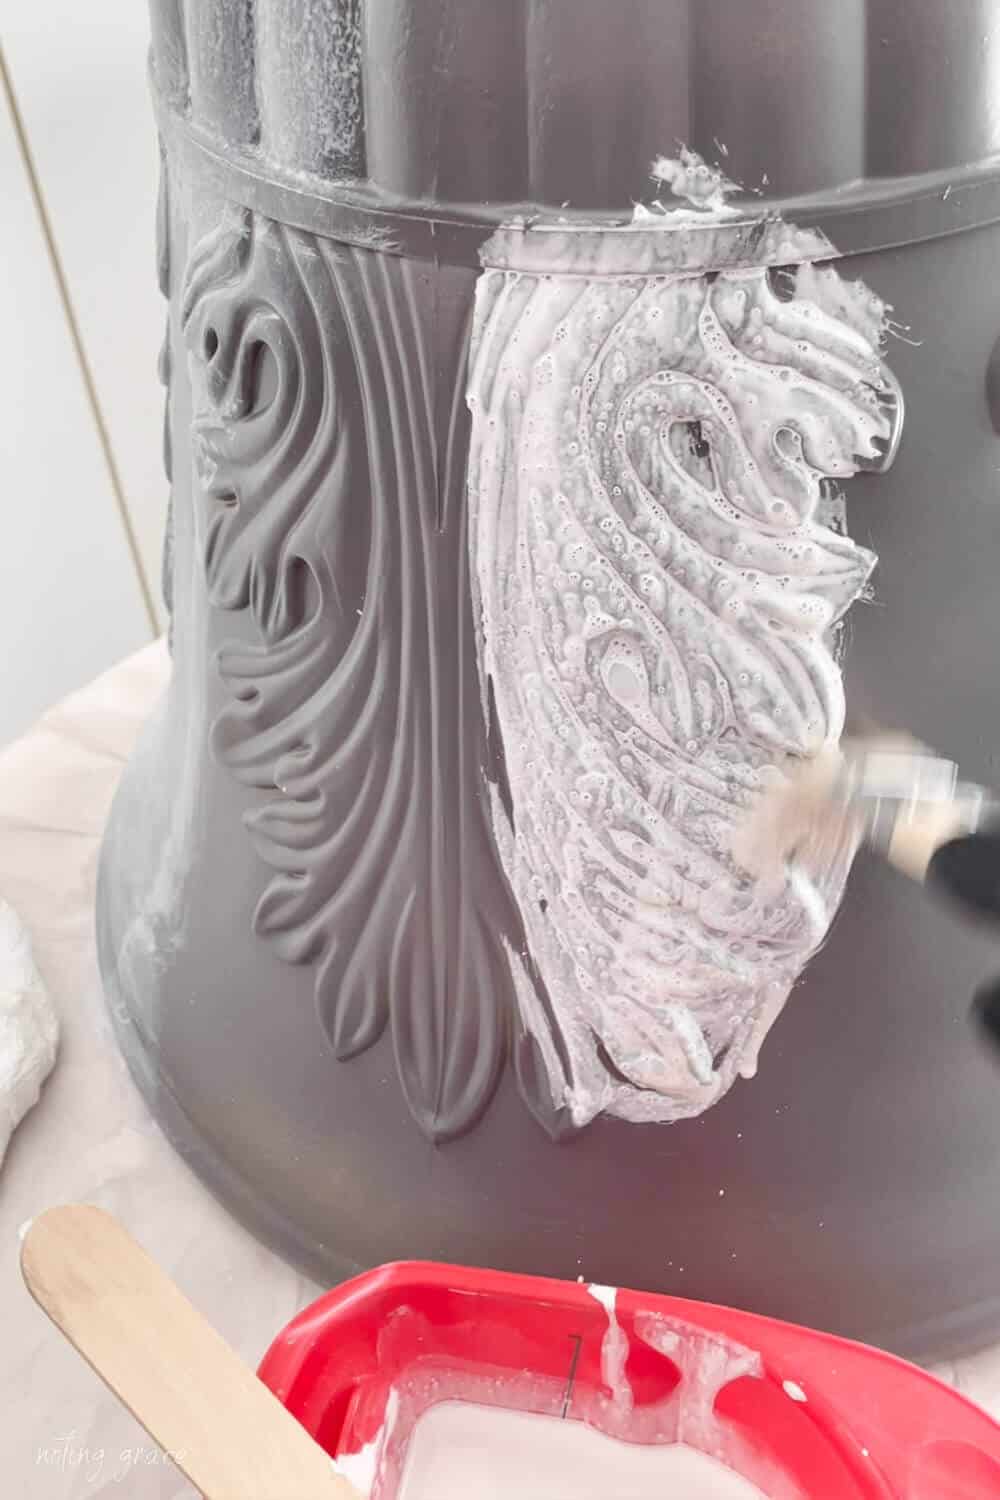
I love using these chip brushes because they are hearty, hold up to multiple uses and are super simple to clean.
TIP: You don’t want to load you brush with too much paint or you’ll be chasing paint runs.
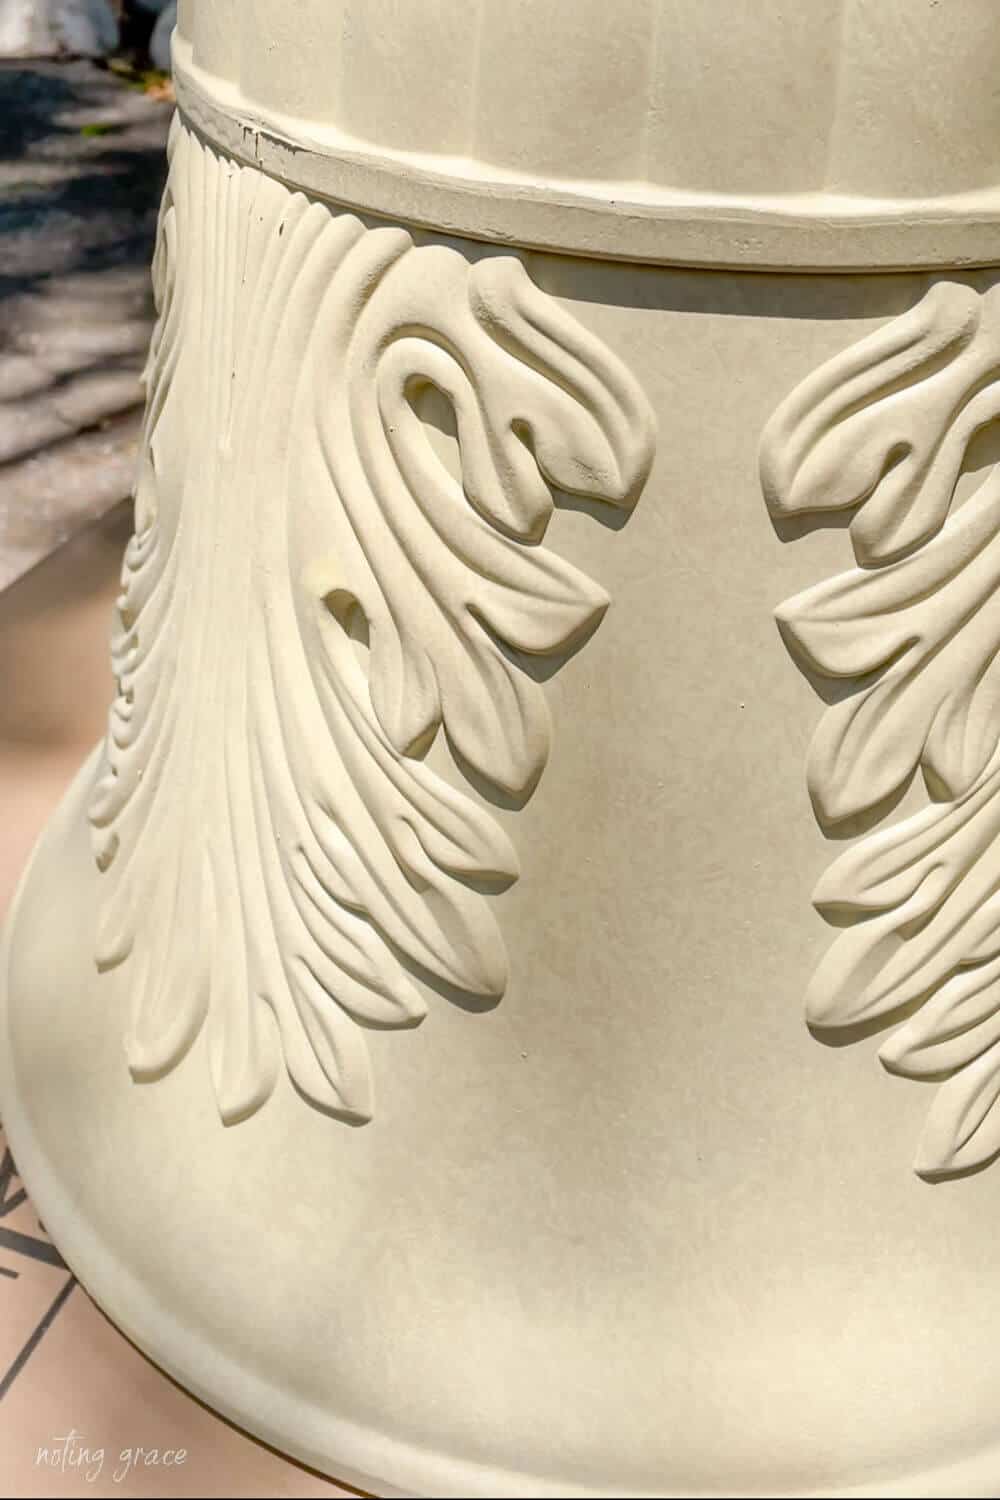
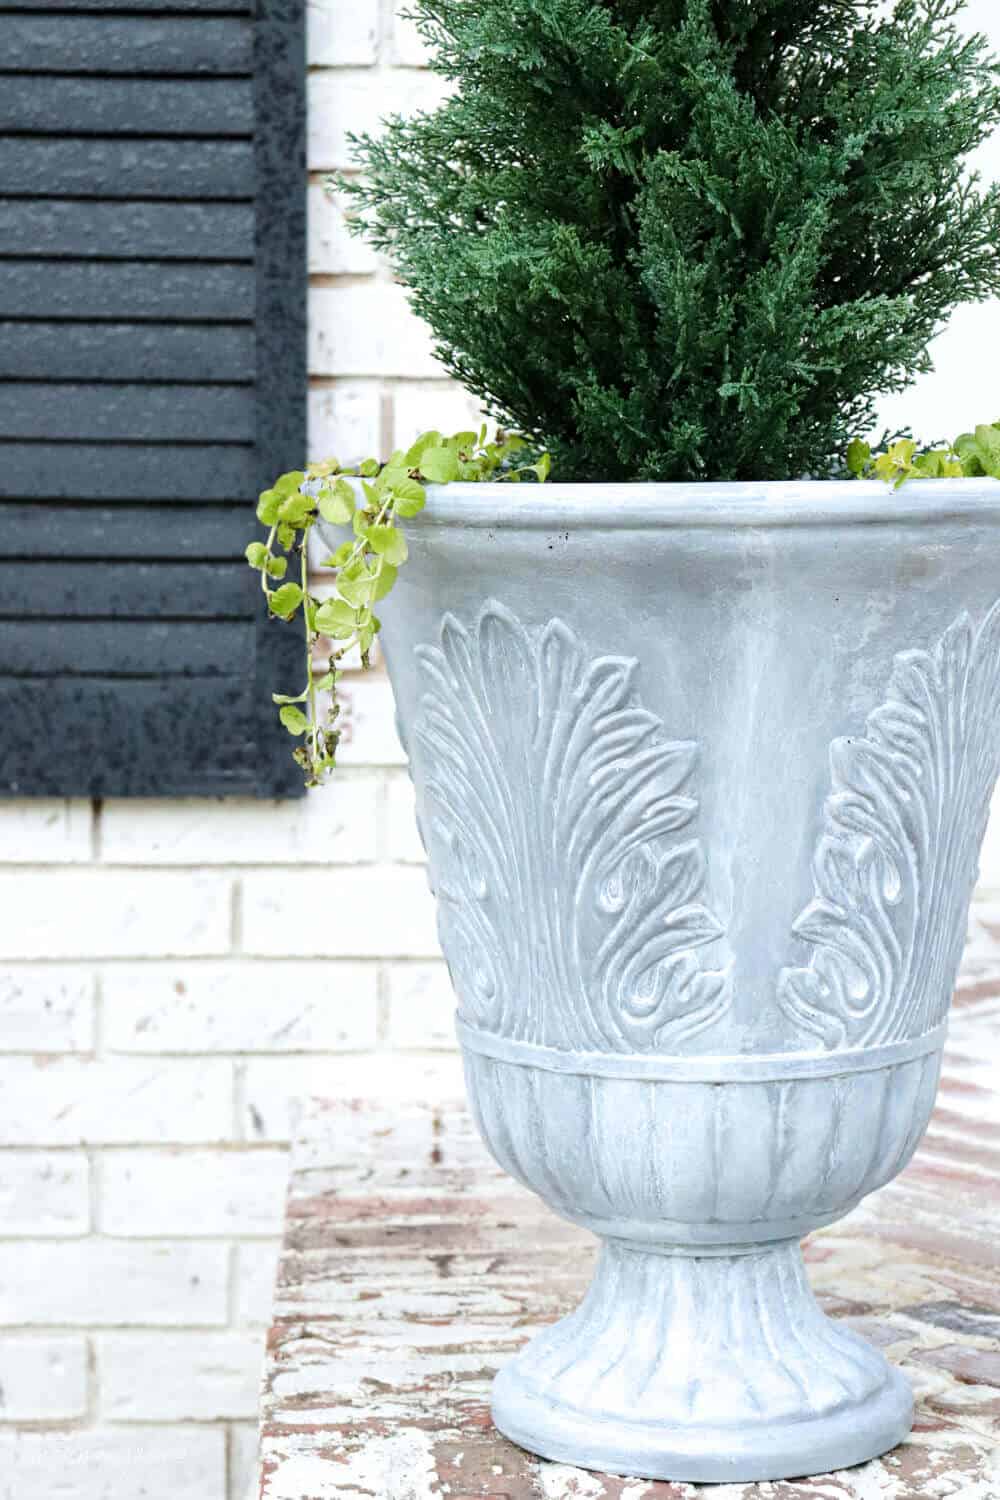
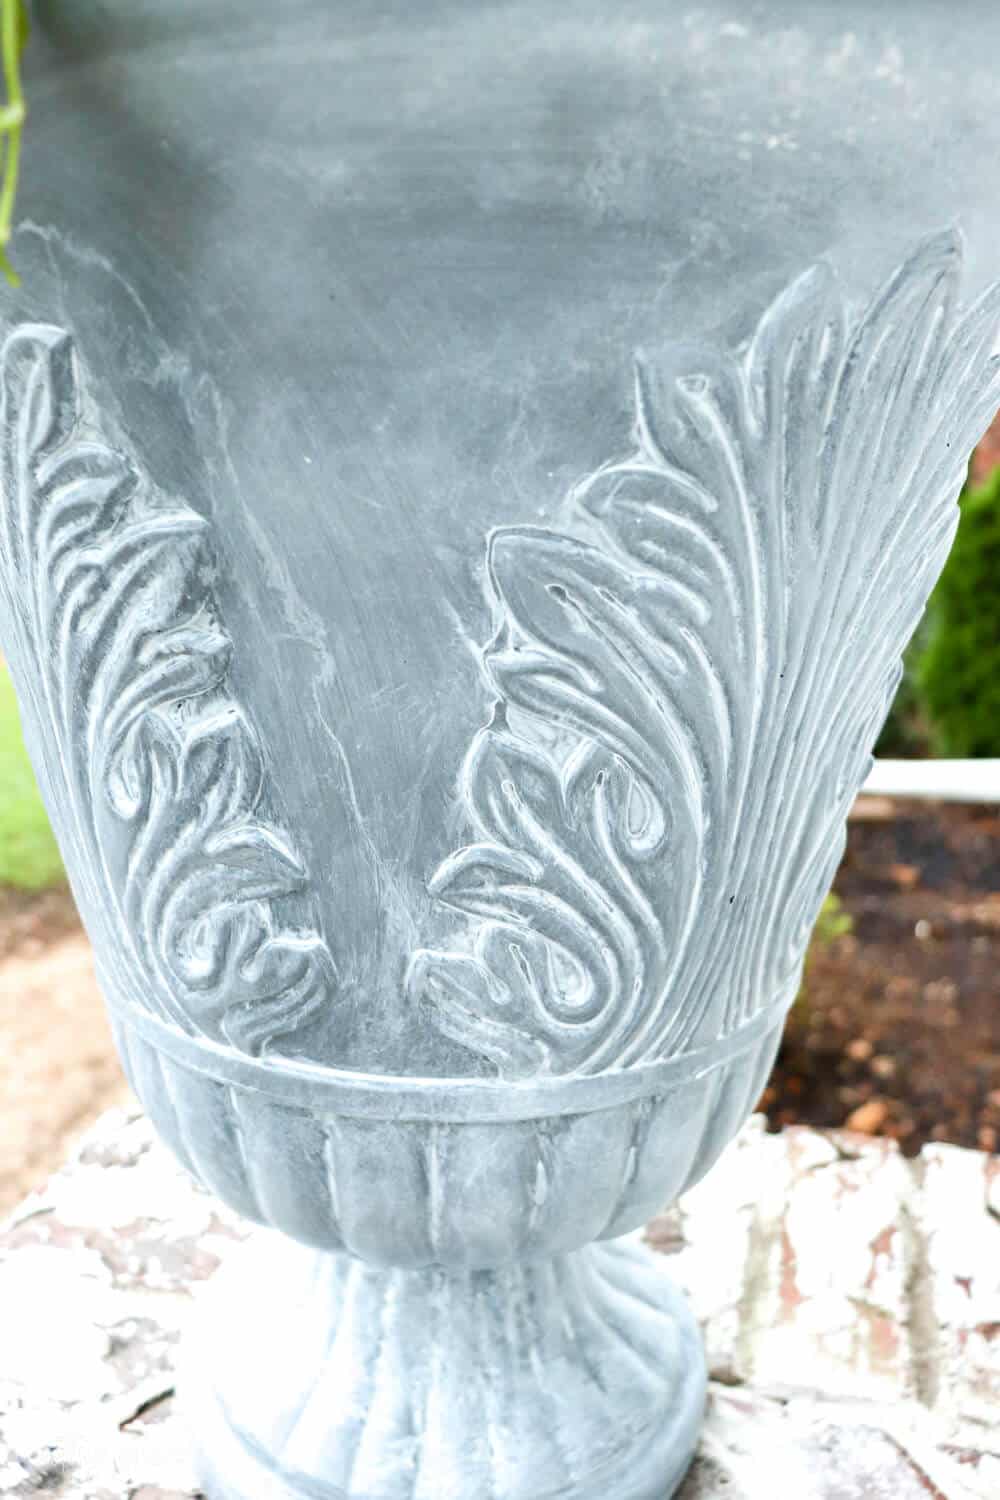
I started on the medallions on the side, focusing on making sure the white was in each of those crevices.
Then I moved onto the rest of the planter and the base.
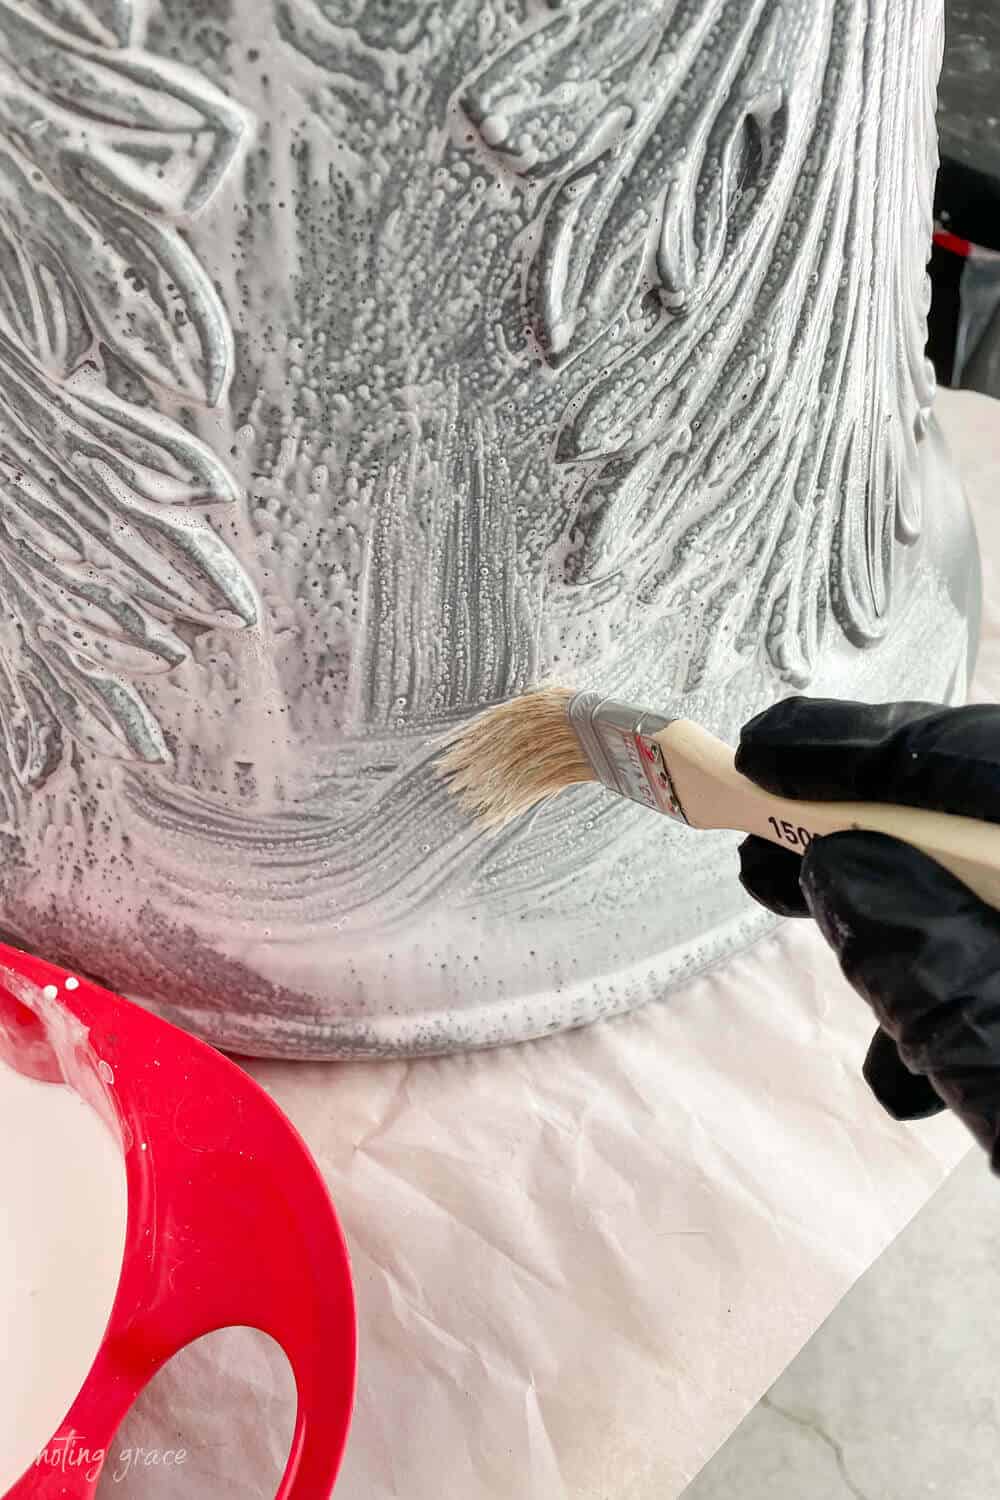
You want to let the paint sit for a few minutes. I worked in sections to help make the process quicker.
After a few minutes, take a paper towel and begin to lightly wipe away to expose the gray underneath to get that aged look.
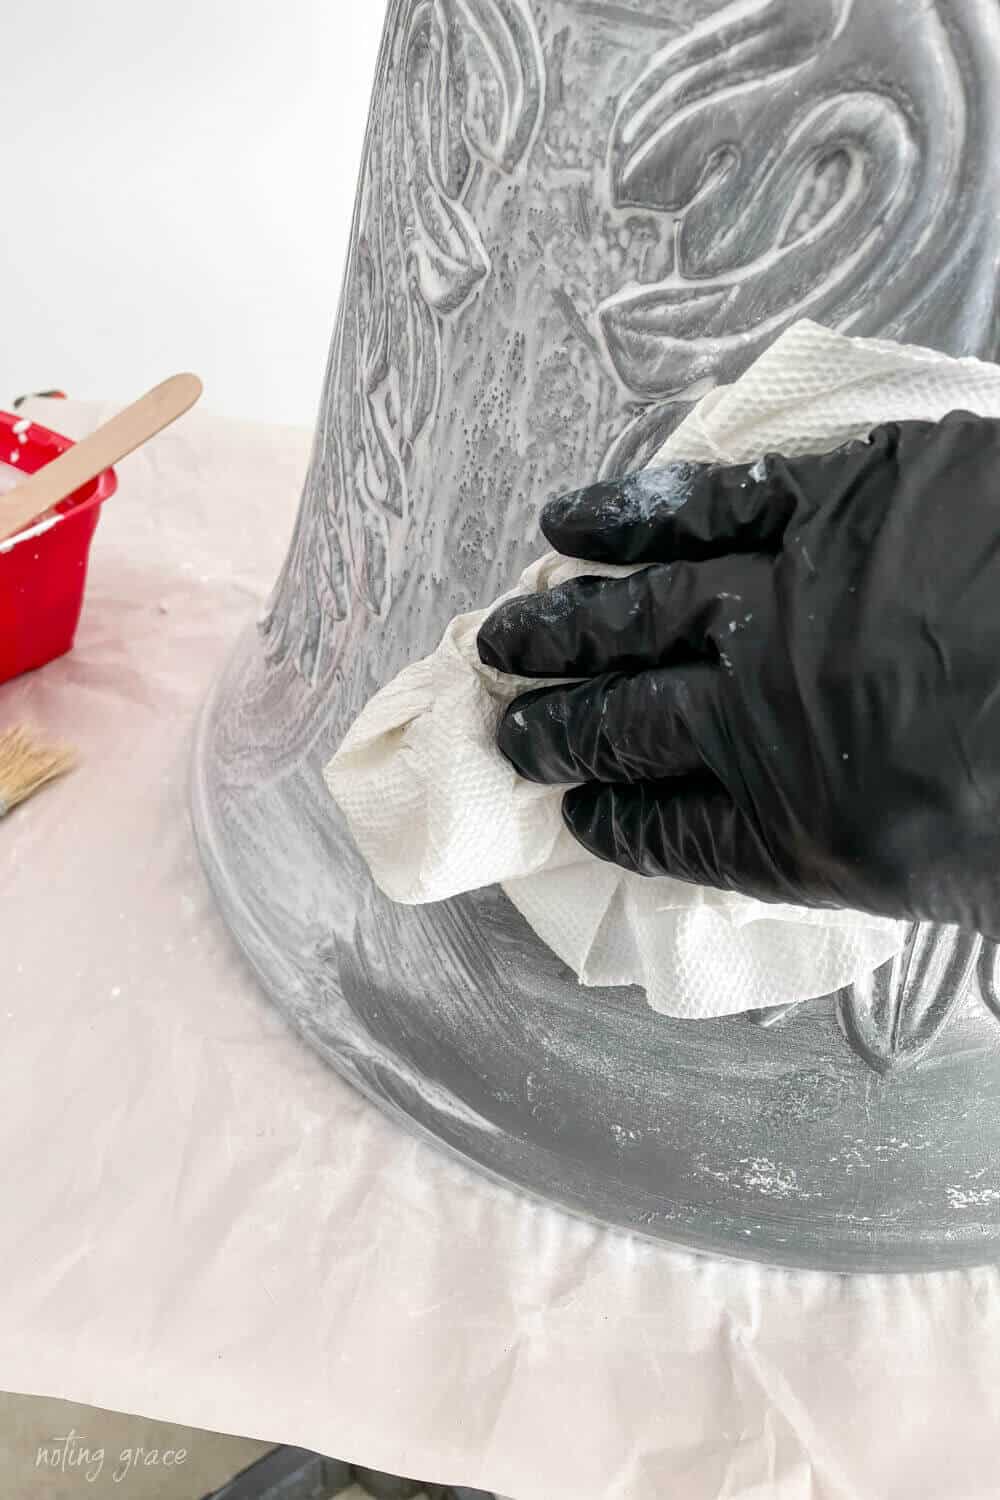
It will leave a veiled look with just hints of white while also keeping all those nooks and crannies filled with the white paint.
Here’s a side by side of the planters – one with paint and one without.
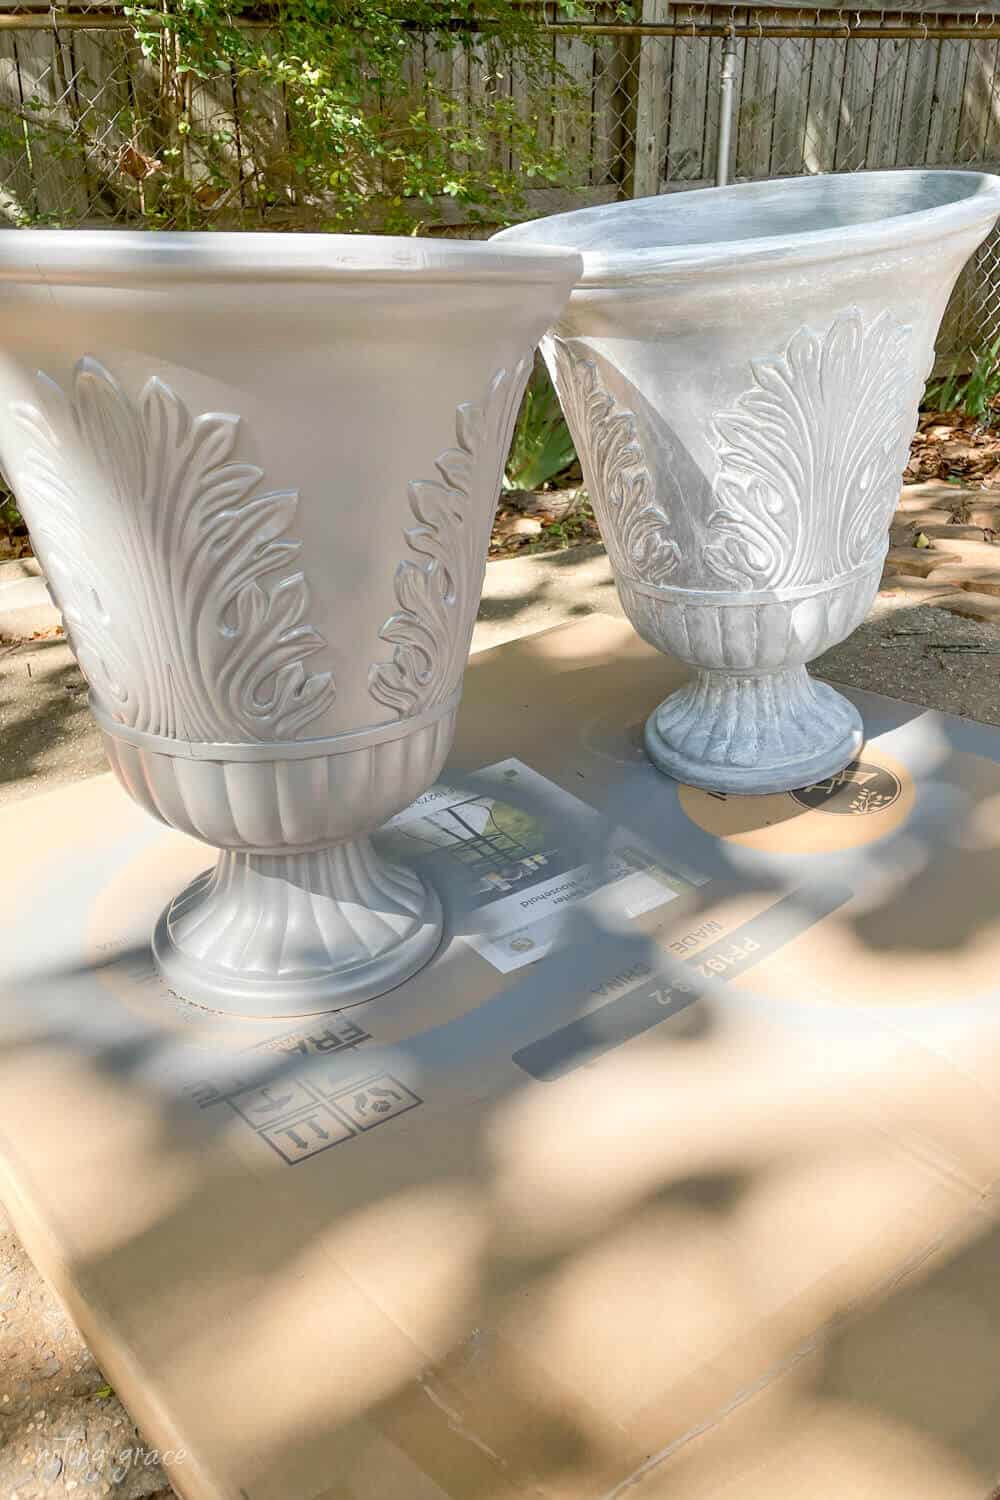
Doesn’t that look like the real thing?
I think the lighter color definitely give it a more realistic appearance.
Rarely do I get it right on the first attempts, but this was a one and done project!
That makes me super happy!
I let the white paint sit for an hour or so and started filling them with my plants.
Now, if you know me, I am definitely green thumb challenged. My problem is that I forget to water the plants!
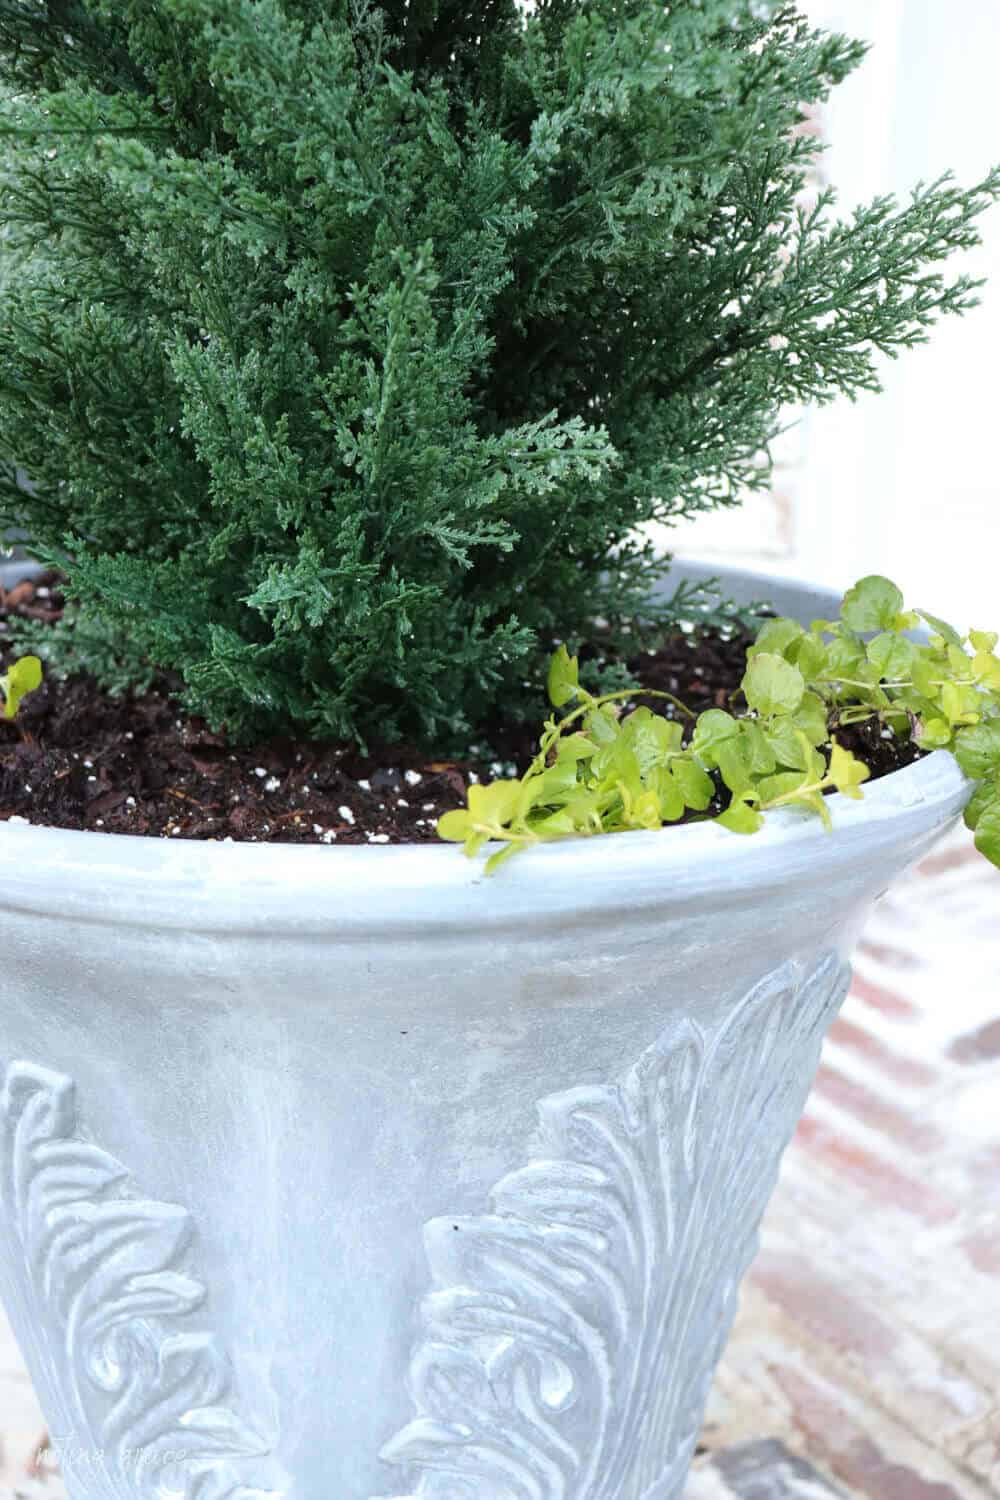
So I found these two artificial cedar topiary trees on Amazon. They were make for indoor or outdoor use and they weren’t too expensive.
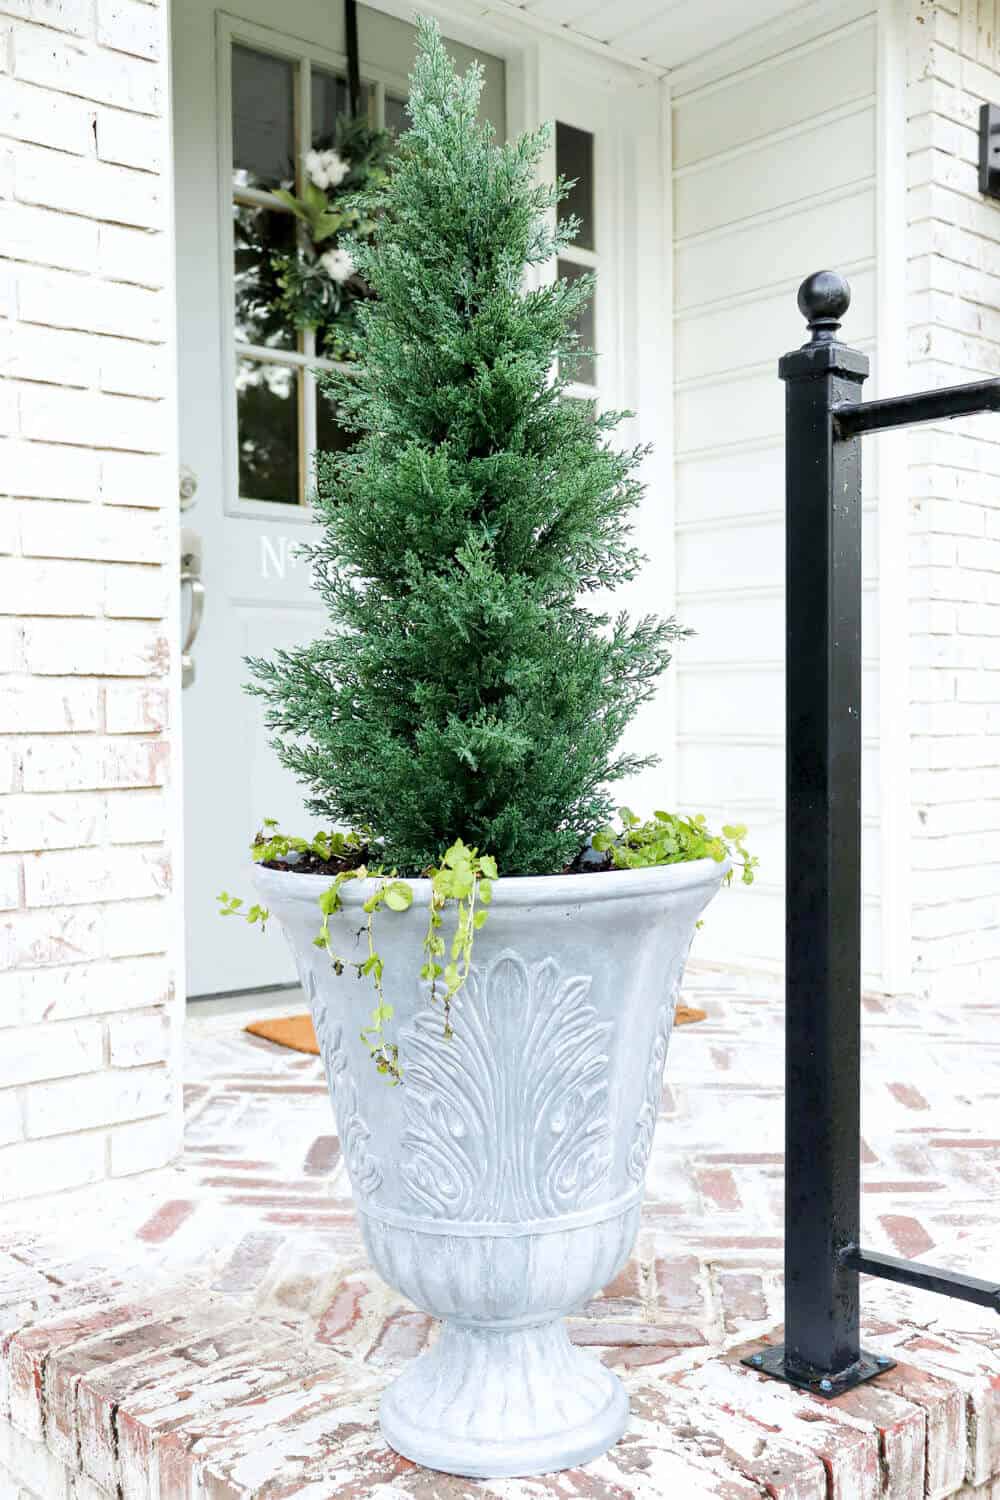
After reading the reviews, I decided to get these for my front porch plants.
I didn’t mind paying a few extra bucks knowing they’ll last years instead of buying new plants year after year to only watch them suffer.
They are about 3 foot tall and look very realistic!
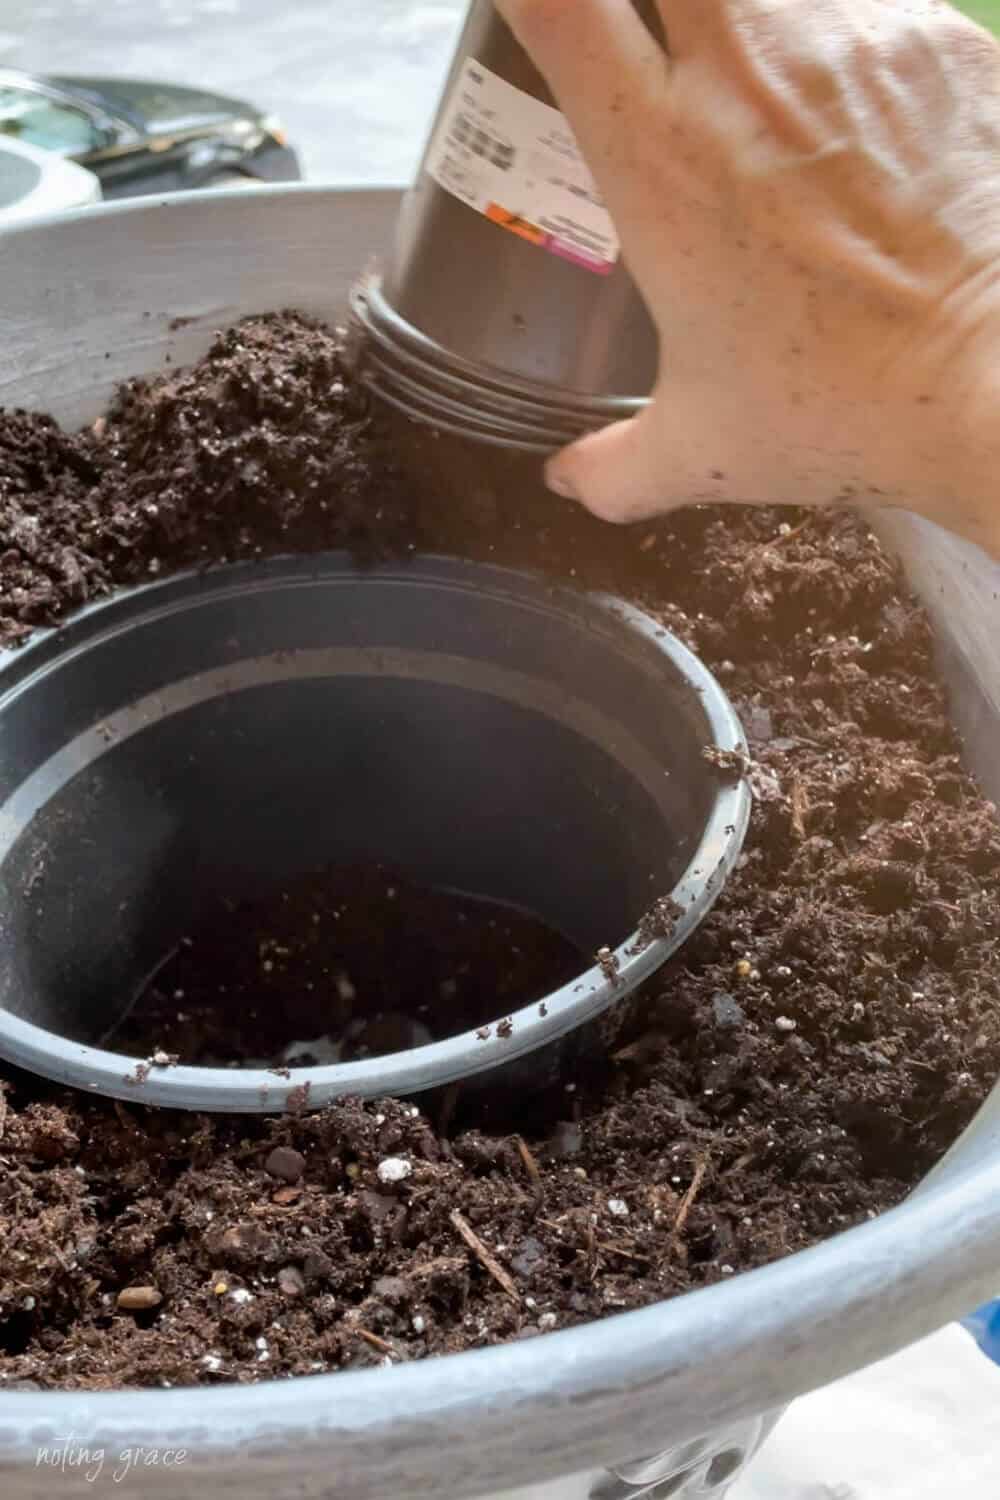
Since these planters were big, I saw someone share on instagram stories how they fill their pots.
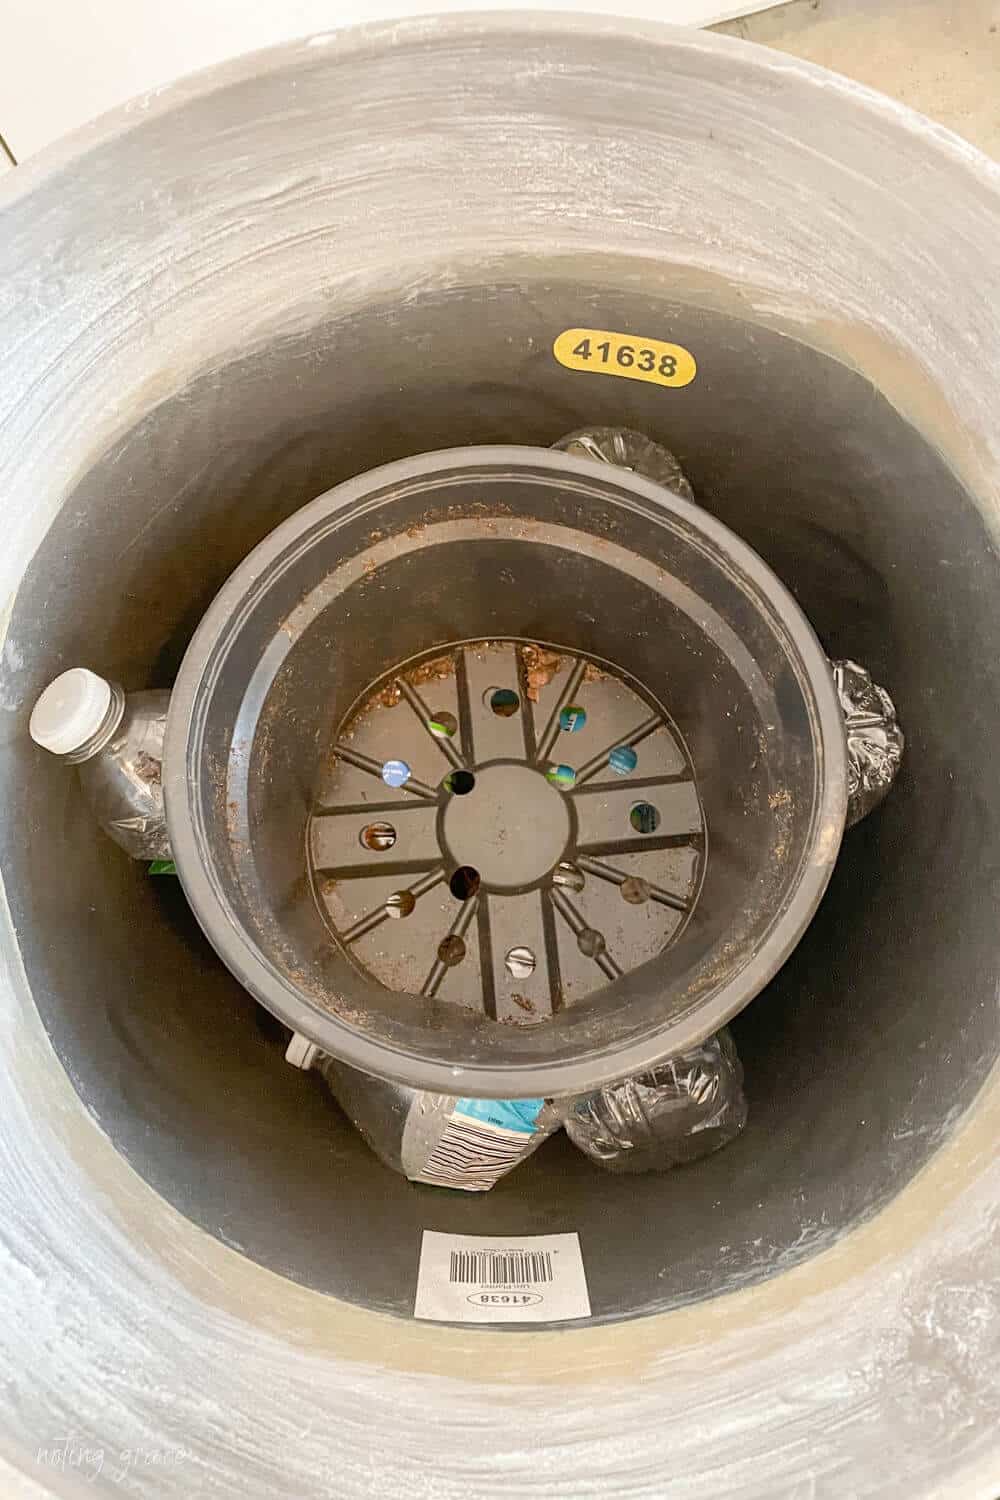
They use old water bottles or cut up pool noodles the fill up the space. I used to use rocks or dirt, but that makes the planters super heavy.
So I filled mine with old plastic bottles and then added some of those cheap plastic flower pots from some landscaping plants.
What a great way to recycle and item!
Then I purchased some potting soil. I got the kind geared toward over and under watering. I filled the container around the cheap plastic pots with the soil.
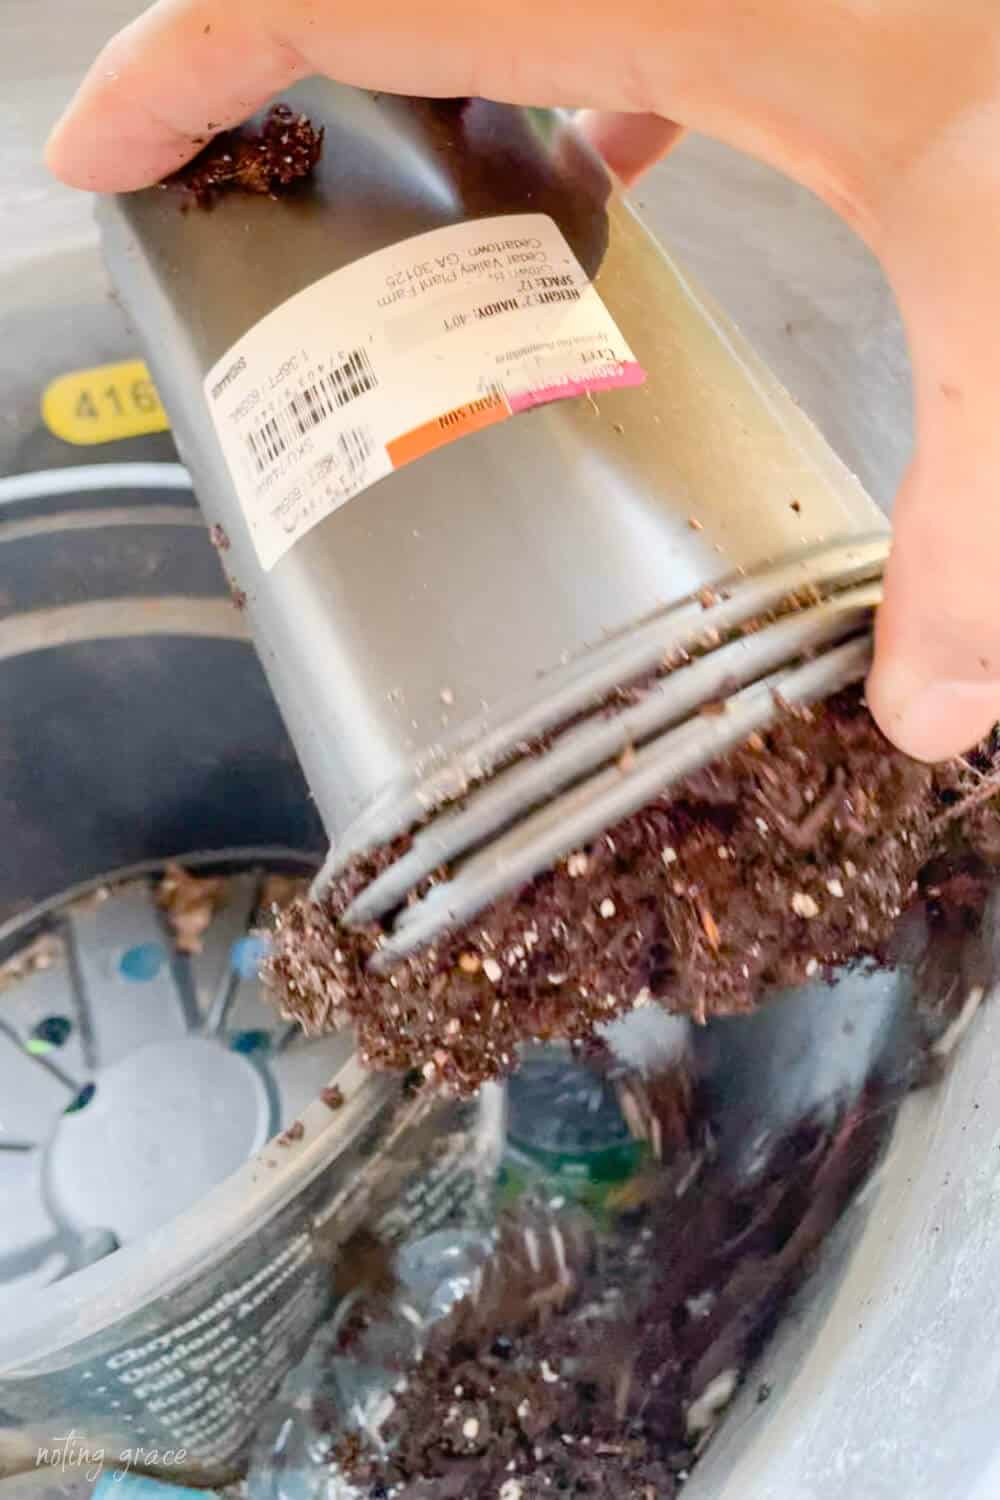
Next I added some Creeping Jenny to the container.
A trick I’ve found that helps make faux plants look real is to combine them with real plants.
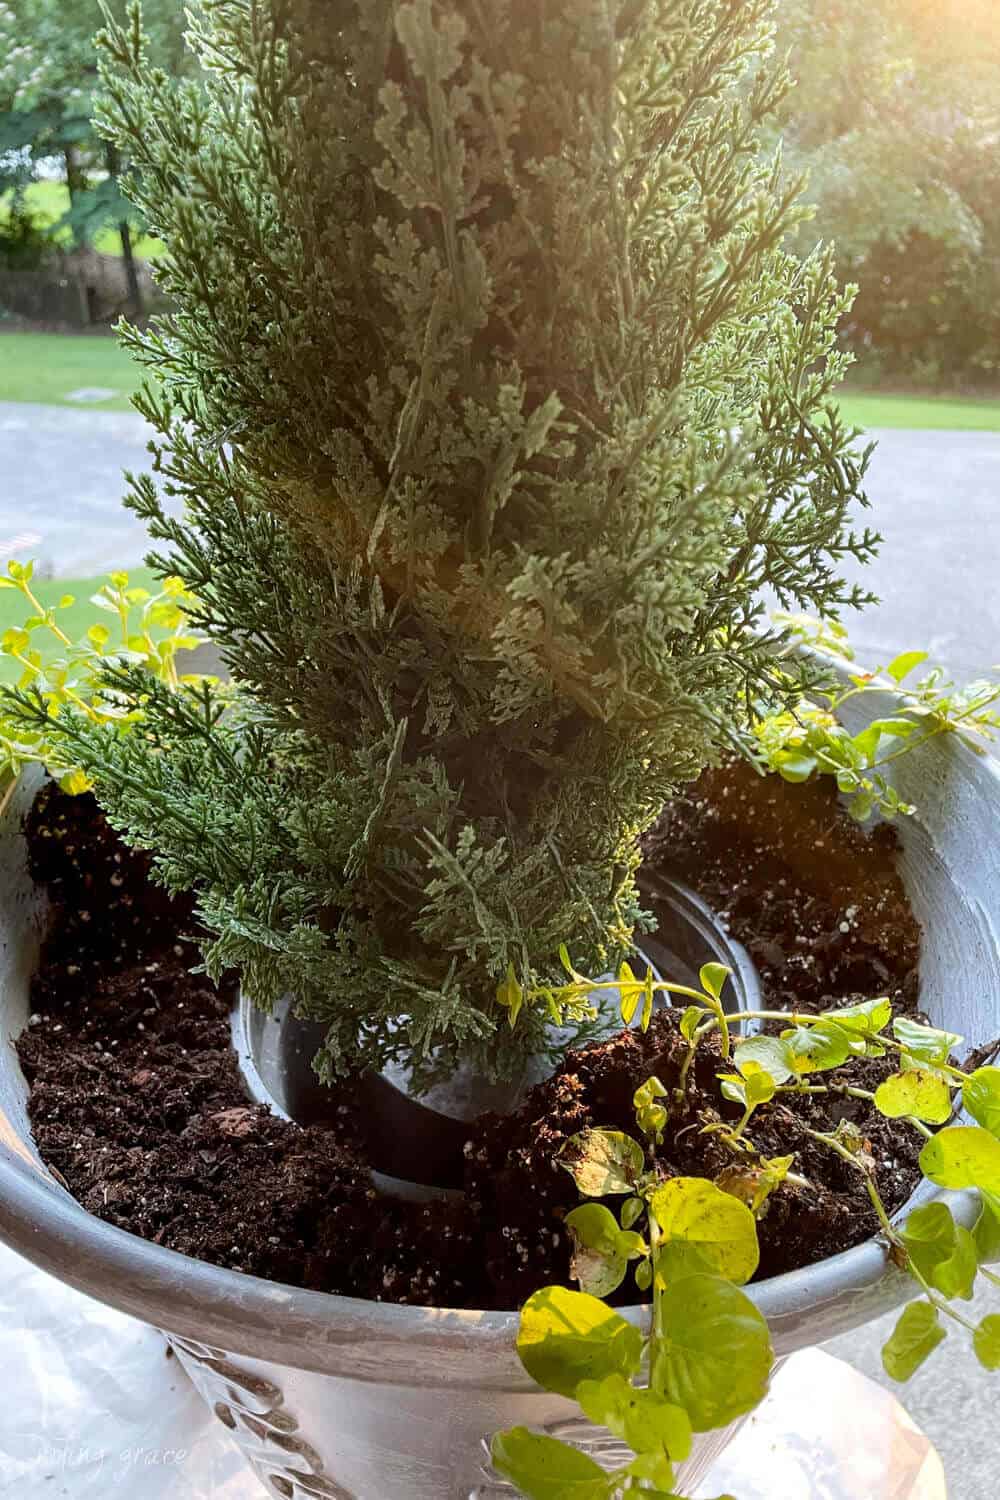
Plus, I can easily swap these out with each season!
After I added the creeping Jenny, then I placed my faux cedar topairies in place and filled the rest of the container with soil.
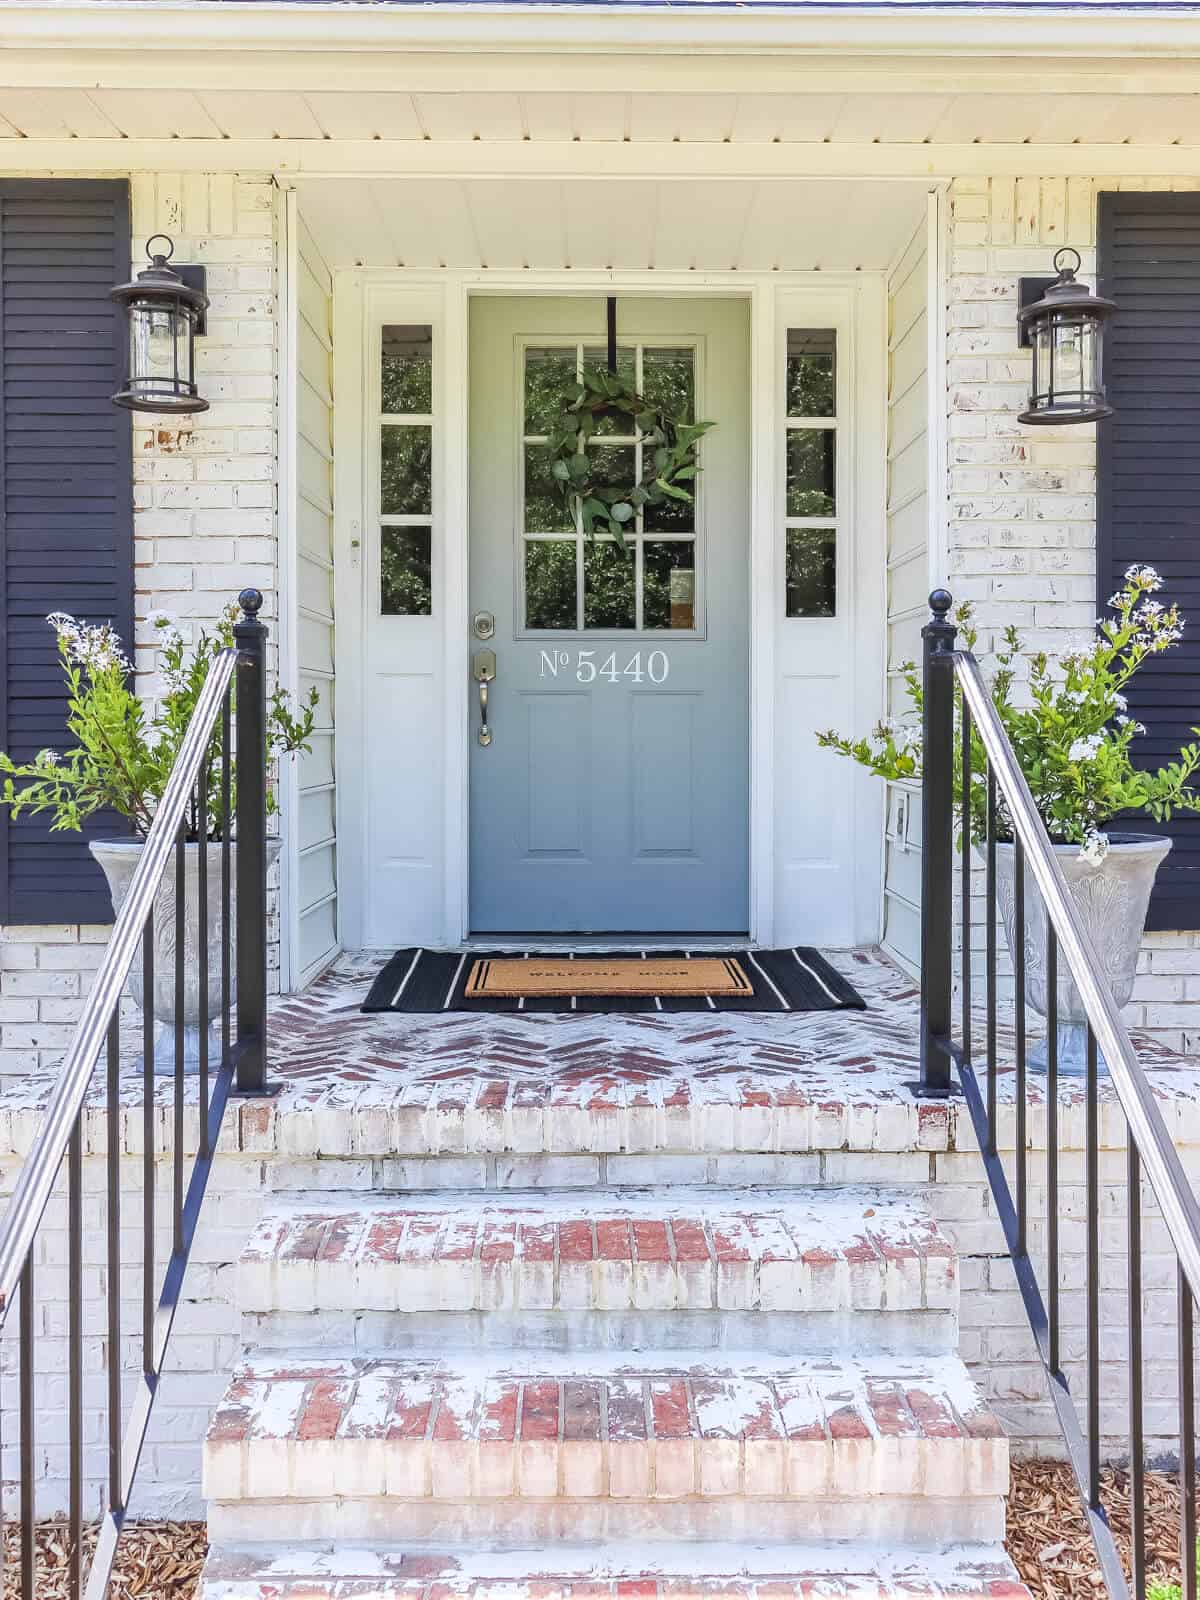
Ready to see how they look on the front porch?
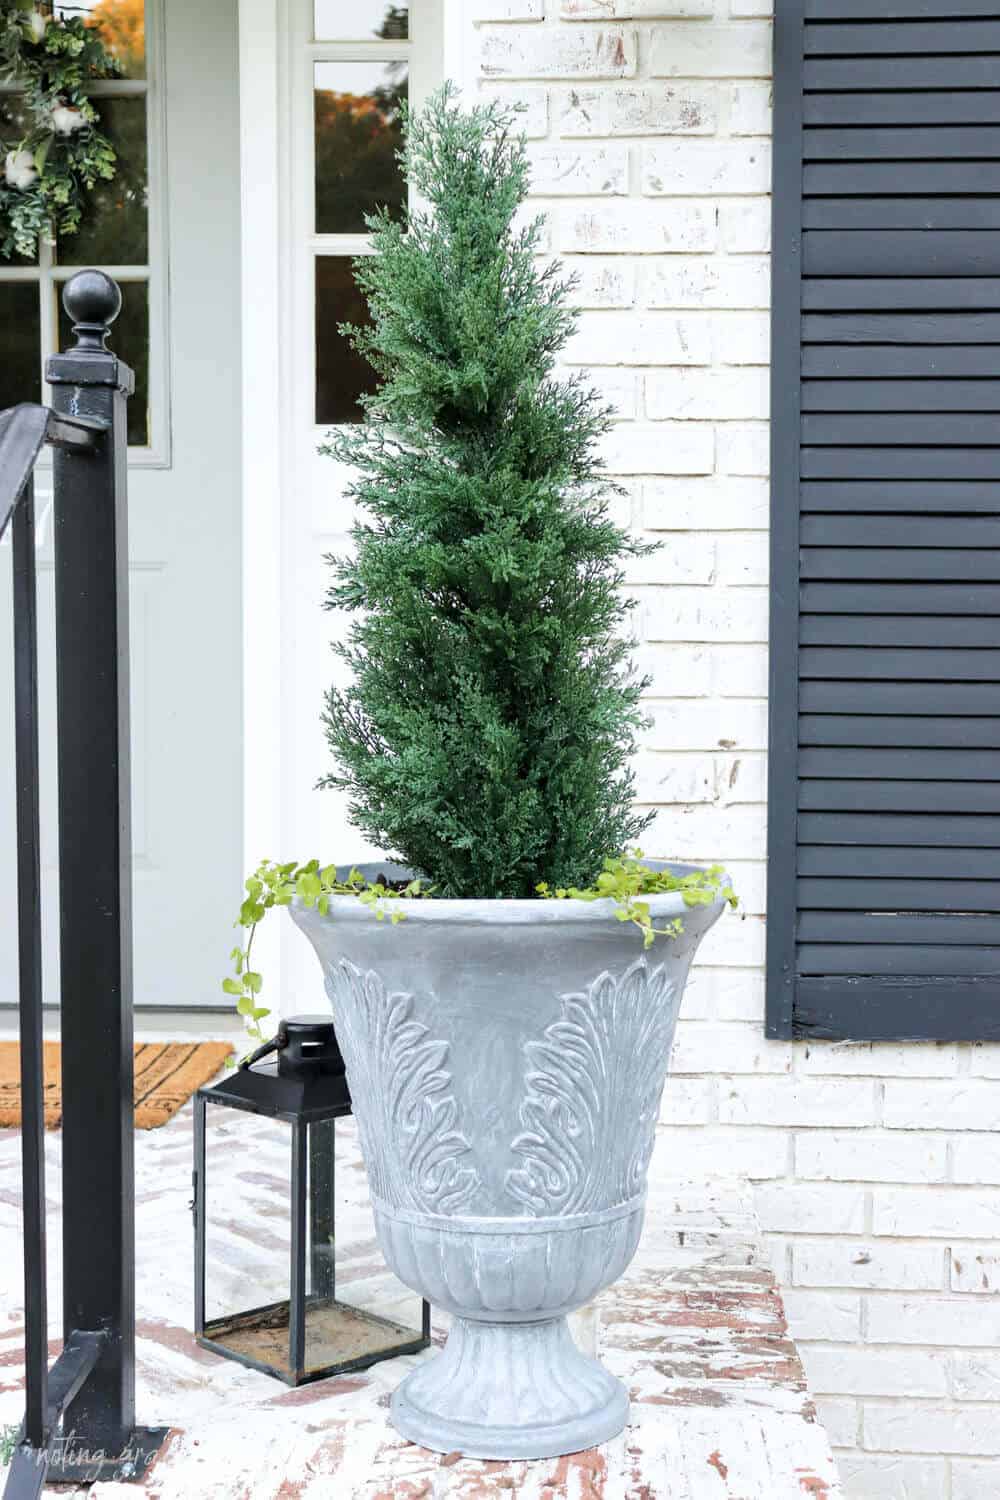
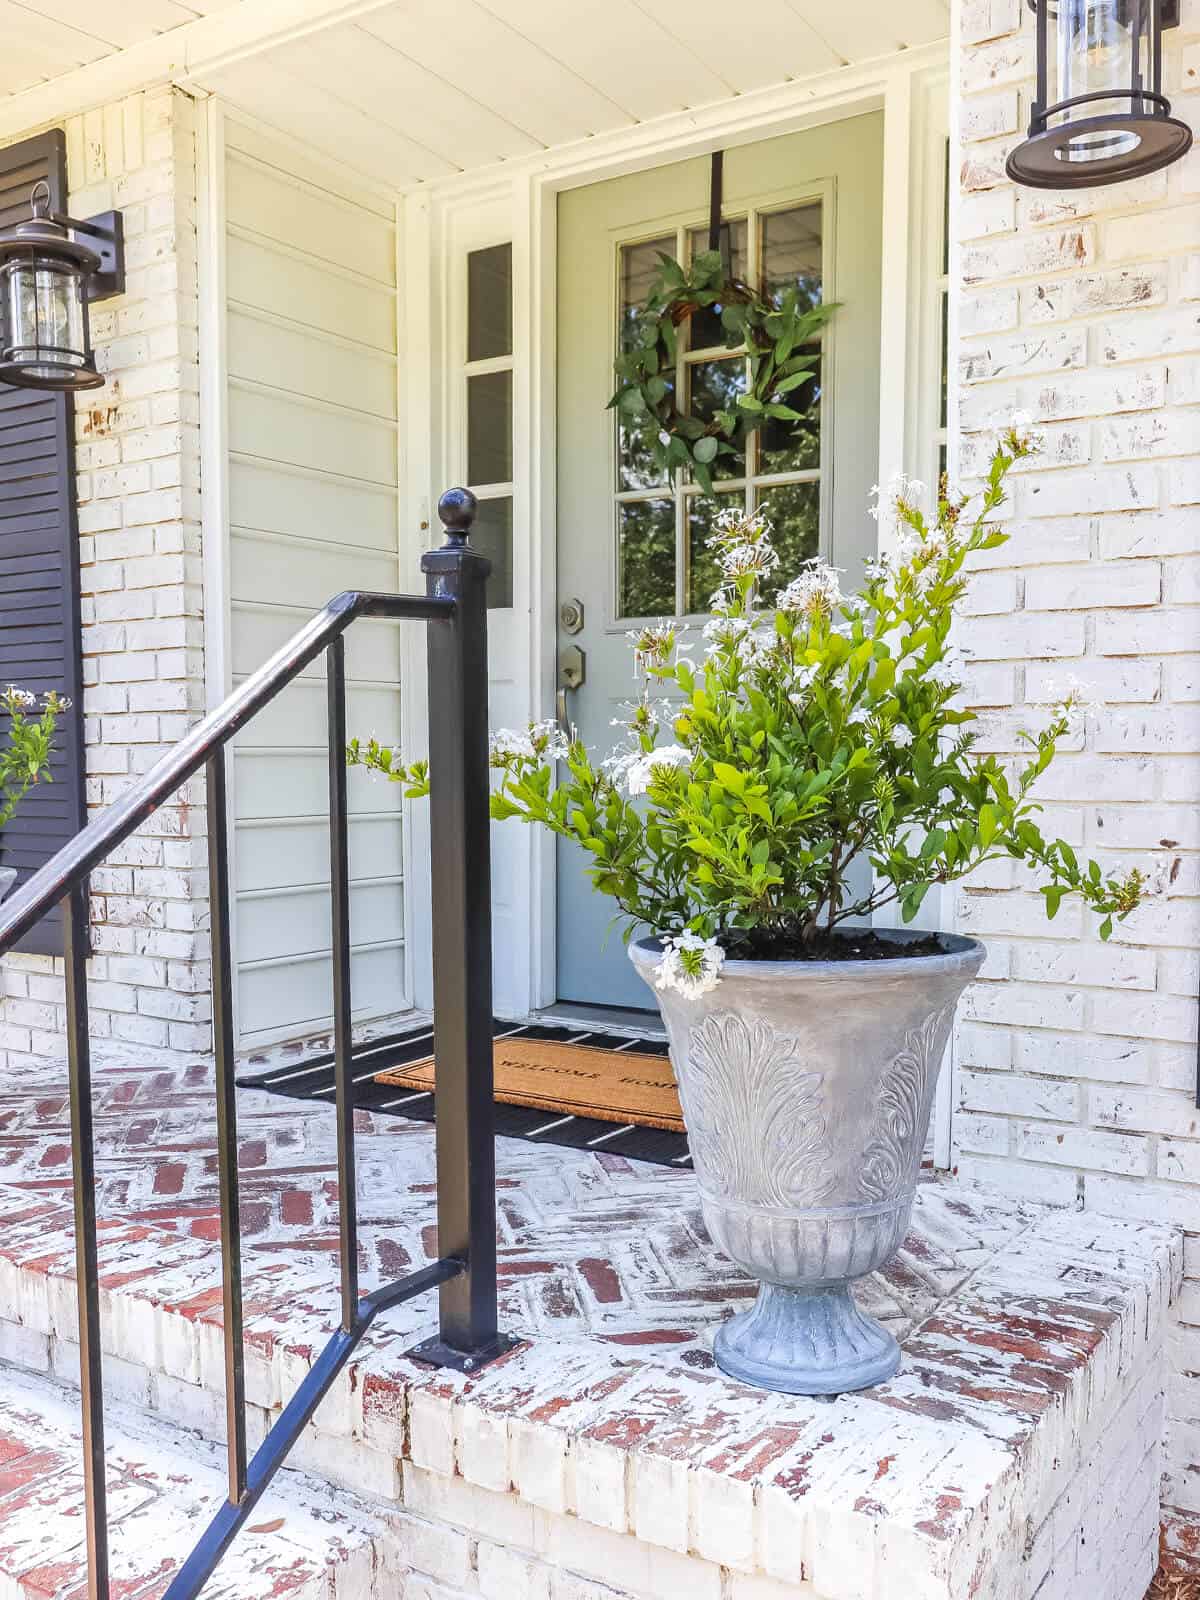
Don’t they look great?
They look like true concrete.

And they are still super light. I was able to carry them from my garage to my front porch with no problem.
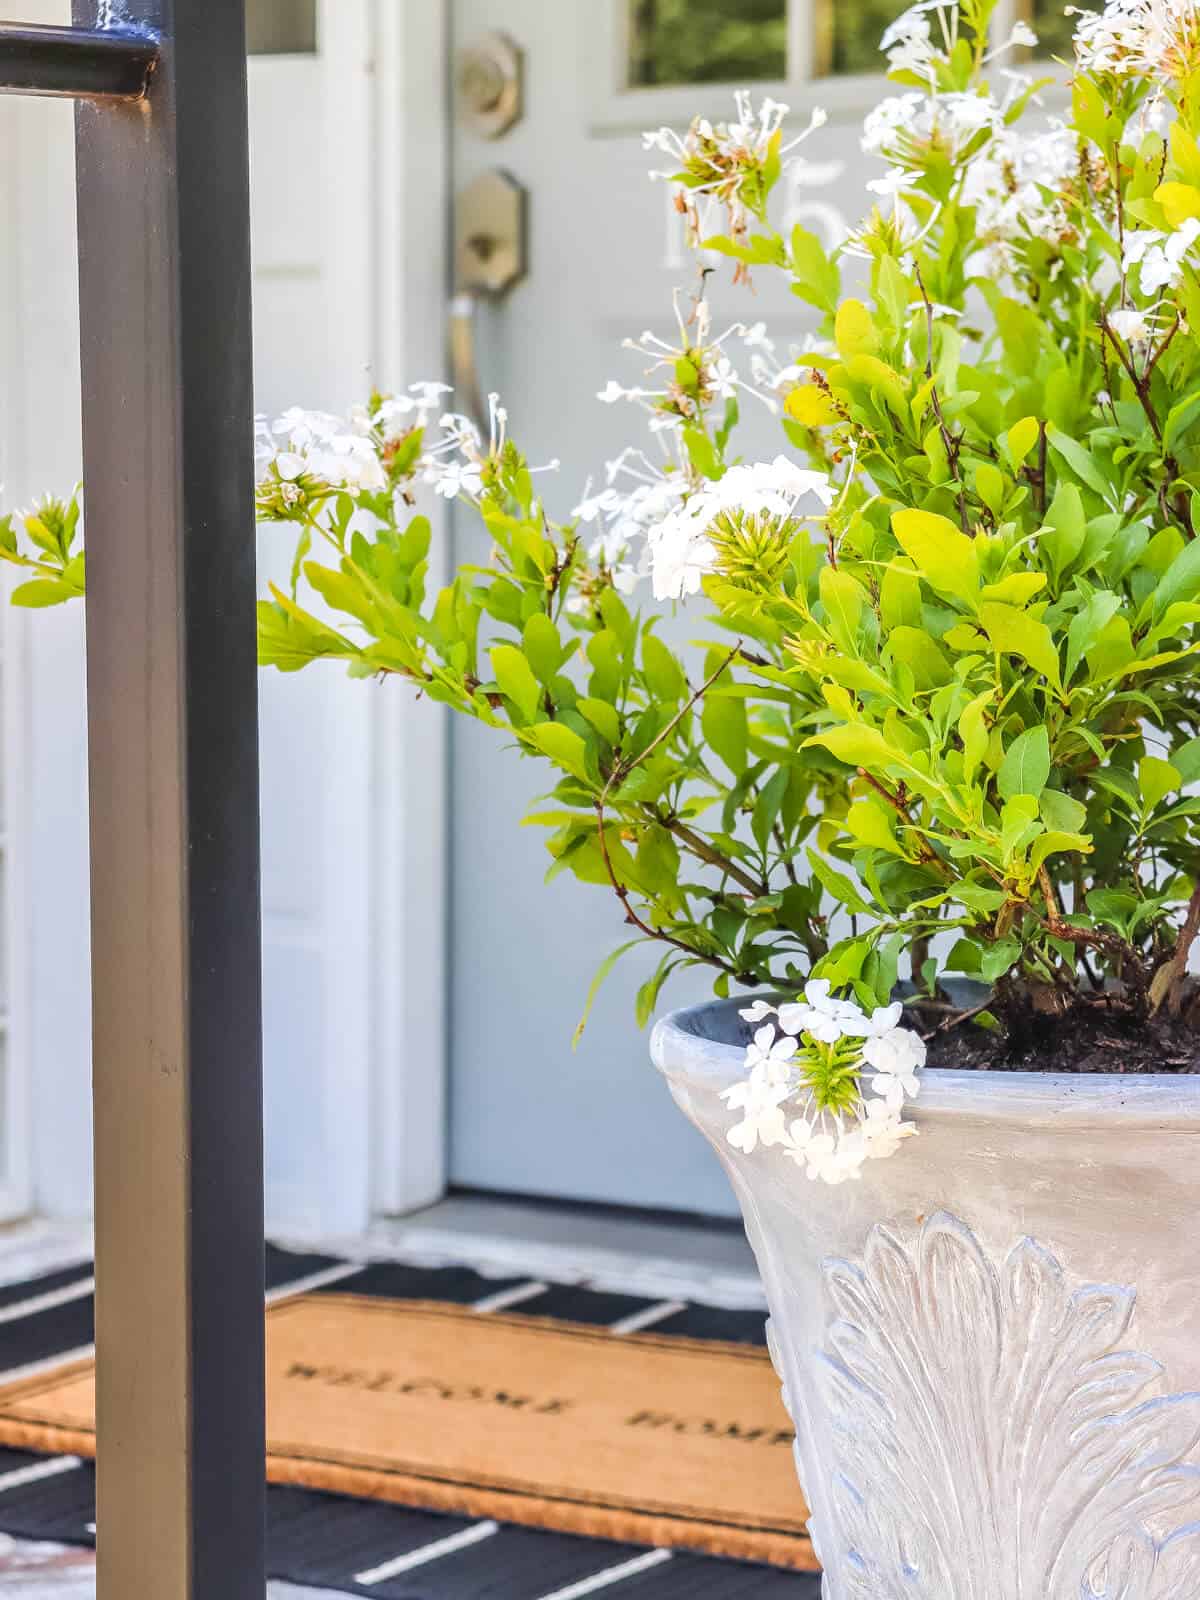
In fact, I updated the planters a few years later with some gorgeous Plumbago Plants that just scream romance.
Now if you are looking for ideas with more of a concrete texture, check out this tutorial from In My Own Style.
And there’s lots of DIY planter tutorials on how to use concrete mix or even get a different look using a hypertufa mix like this one from Jenna Sue Designs.
And there are even similar techniques out there using chalk paint or dry brushing for a faux concrete finish.
I wanted a smooth finish, so I thought this would be the best way to create this unique concrete planter.
I hope this inspired you to create your own diy faux concrete planter.
This is such a fun project and you can get the look of a cement planter without the cost!
And if this inspired you, be sure to sign up for my newsletter where you’ll get my latest posts as well as more home decor ideas!
Originally Published 6/17/21


Jen,
I love a good faux finish. These look amazing and I’m sharing a link on my Sunday, DRA. Have a great weekend.
I’m so glad you love this, Kim! It is such an easy DIY and they still look great after a few years!
Thanks for taking the time to comment, friend! Can’t wait to see your planters!
I’m loving this post, Jen! I have some black containers that look old and rundown. I am definitely going to try this and refresh them for spring. This is just what I needed!
You really did a creative and Classy Topiary. For someone that’s not a Florist or Horticulturalist You did great.
I work a a Formal Designer through College, it was a born gift and Creative Blessing. I never went to 1 day 9f Floral School, just 2 nice ladies showed me how to wrap a wire, make a bow, and make a corsage, the rest I just did. Fearless at that age, I knew I could do it and I didn’t want to go home for Summer and work 8n my parents restaurants, loathed the restaurant business, they both were professionals, and 9wned one 9r more all their life, even after divorce.
A business your married to 6 days a week 18 hr Day, they worked 12 hrs a day.
But I digress, stay 8n your Creative and Enjoy your Happy, it’s what creates our High Vibe Frequency and that Attracts our Dreams!
Best Successes everyday!
Beth
Thanks so much, Cindy! That means so much!
The planters are beautiful!!
Rgreat idea great idea
It looks beautiful. How does the paint hold up over time?