Faux Crushed Velvet and DIY Rust Ornaments
These Faux Crushed Velvet and DIY Rust Ornaments are an easy way to create your own ornaments this year!
I am so excited to share this fun little craft with you!
Today I am sharing 2 fun DIY Ornaments that you can make using what you may already have on hand!
Last week I went back in time and showed you 10 of my favorite DIY ornaments that I have created over the years.
But I wanted to go into more detail on the 2 ornaments that I have DIY-ed for our home this holiday season.
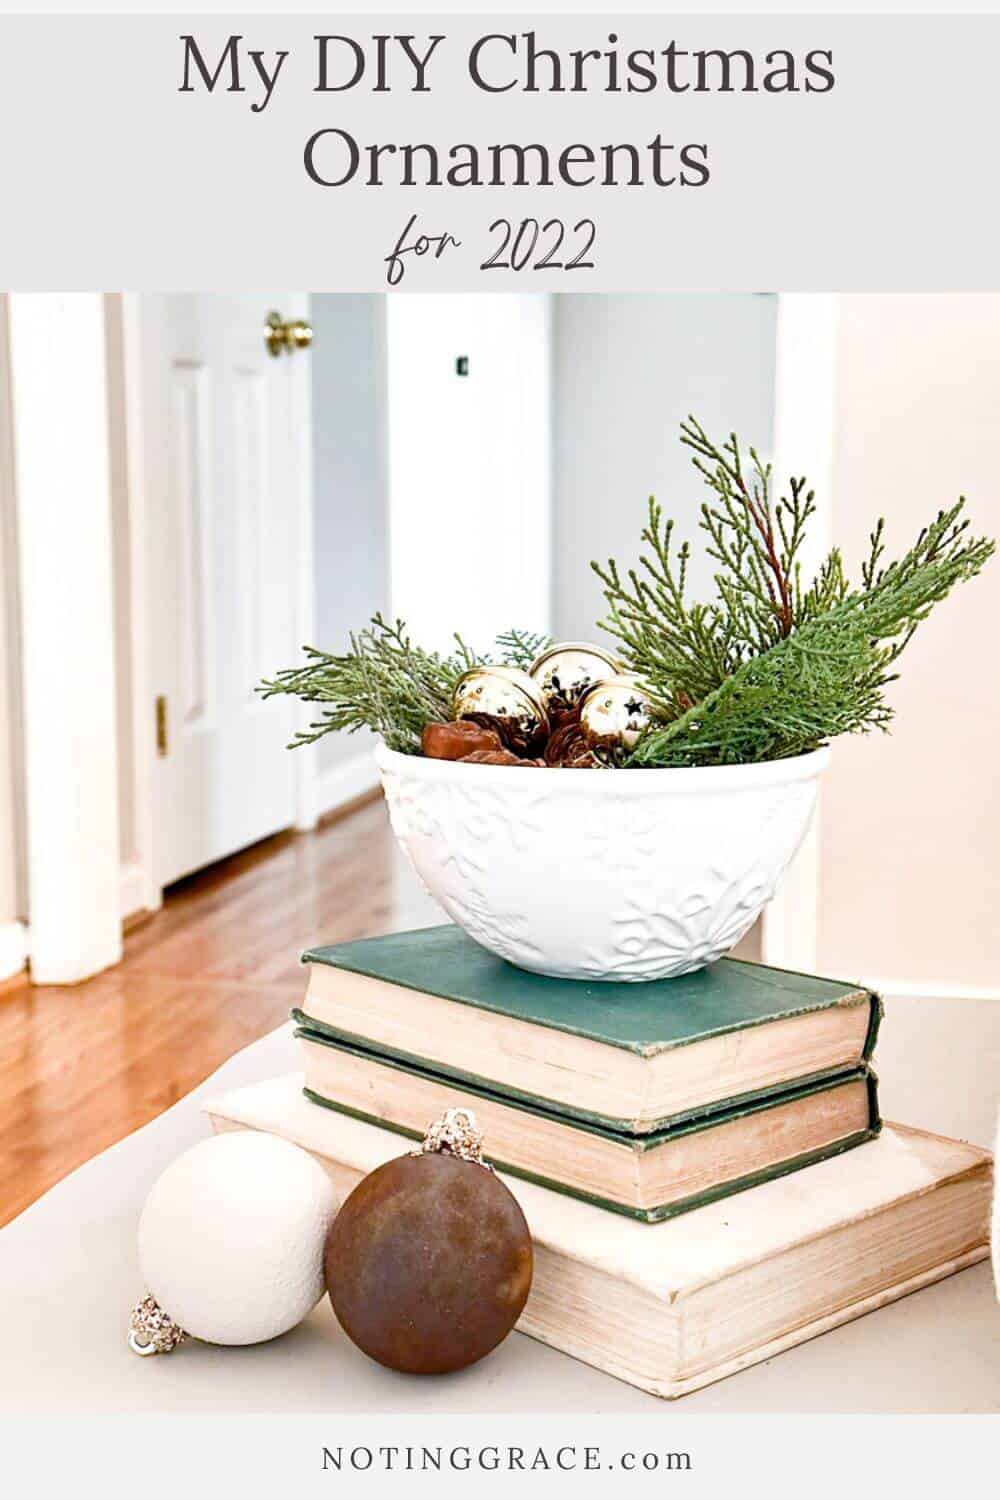
My DIY Christmas Ornaments for 2022
(Some affiliate links are provided below. Full disclosure here.)
So let me start with the supplies that you will need for this project.
You can find most at craft stores, but I’ll share some online links for you below.
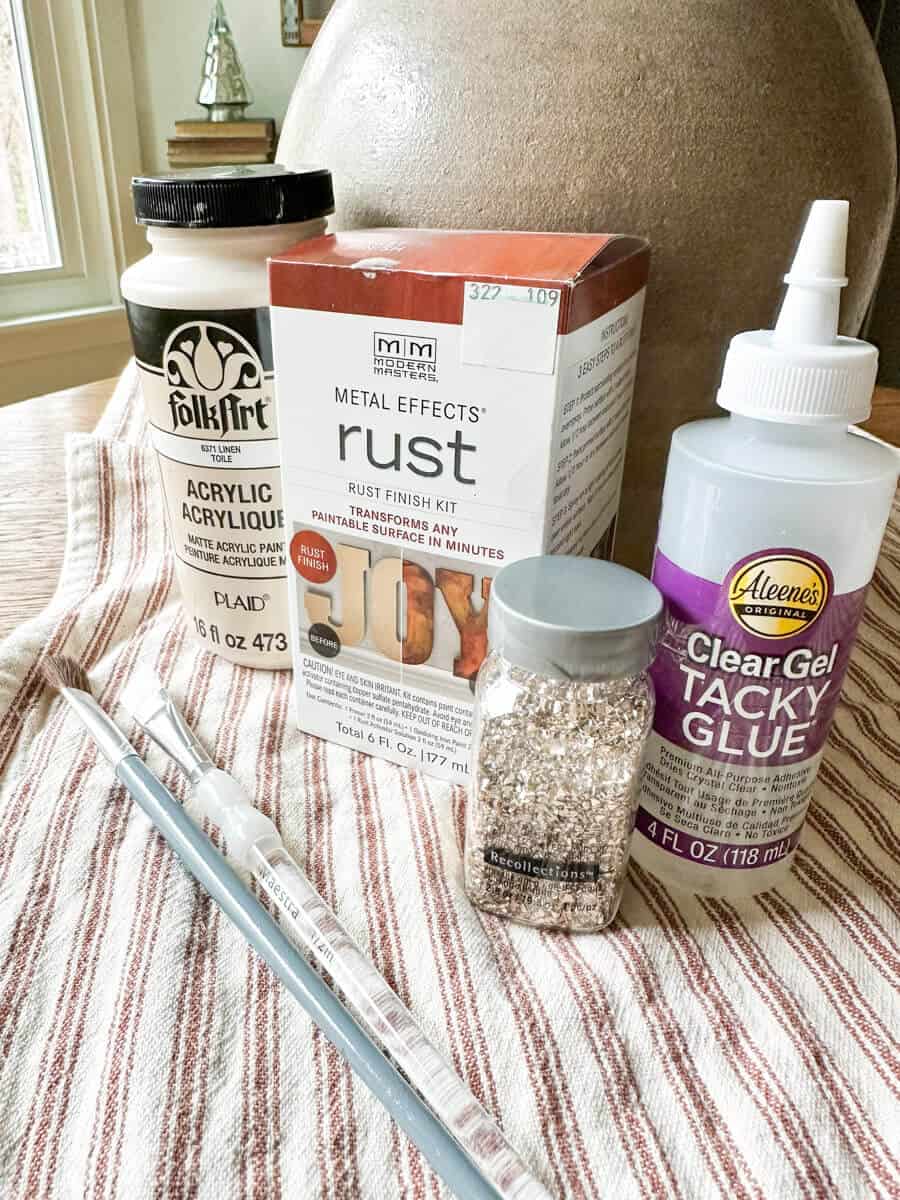
- Glitter Covered Ornaments
- Matte Acrylic Paint – I used Folk Art’s Matte Linen Toile
- Crafting Paint Brushes
- Modern Masters Rust Finish Kit
- Aleene’s Clear Tacky Glue
- German or Glass Glitter – I used Recollections Glitter in Vintage Gold
It’s a good idea to have some sort of drop cloth down to protect any work surface you are painting on.
I like to keep old packing paper from shipping boxes we receive. It works great for a temporary drop cloth. Aluminum foil would work, too!
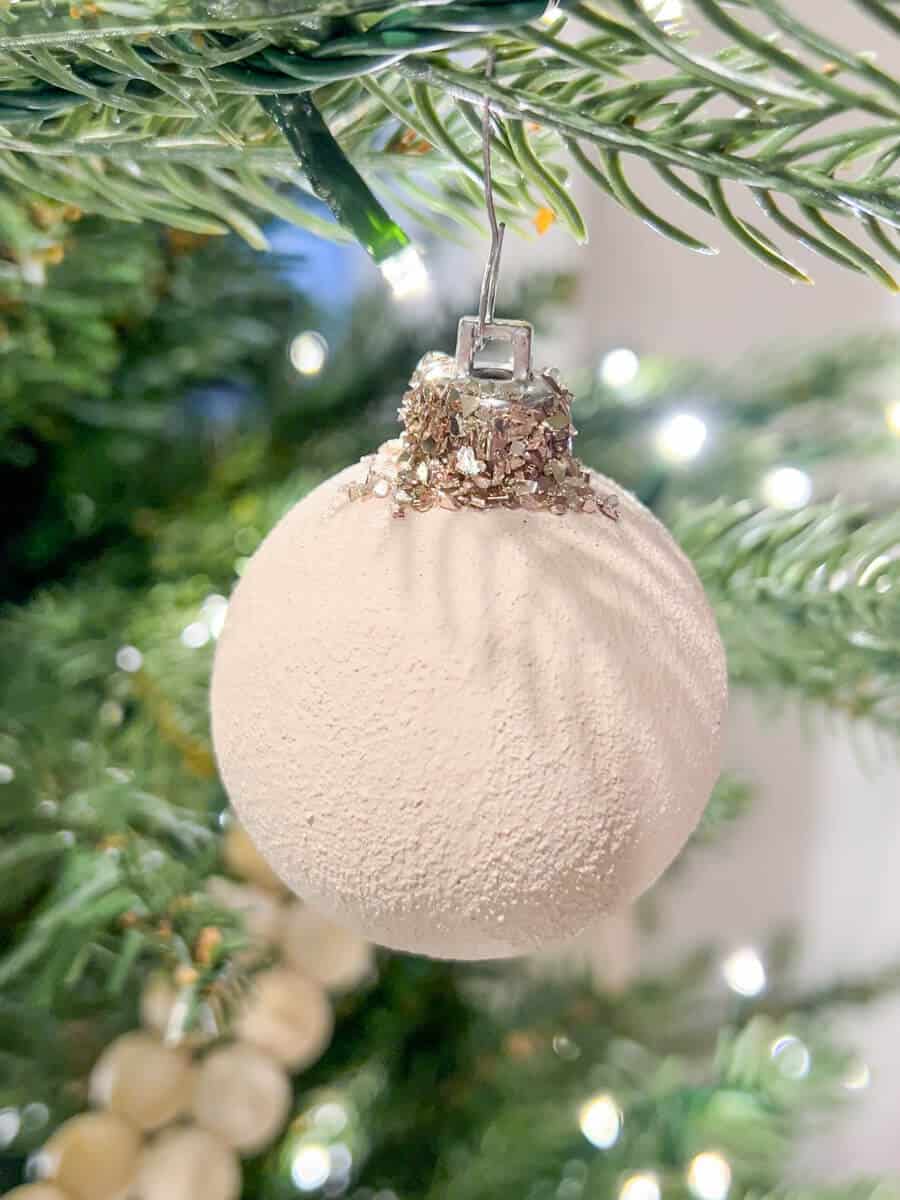
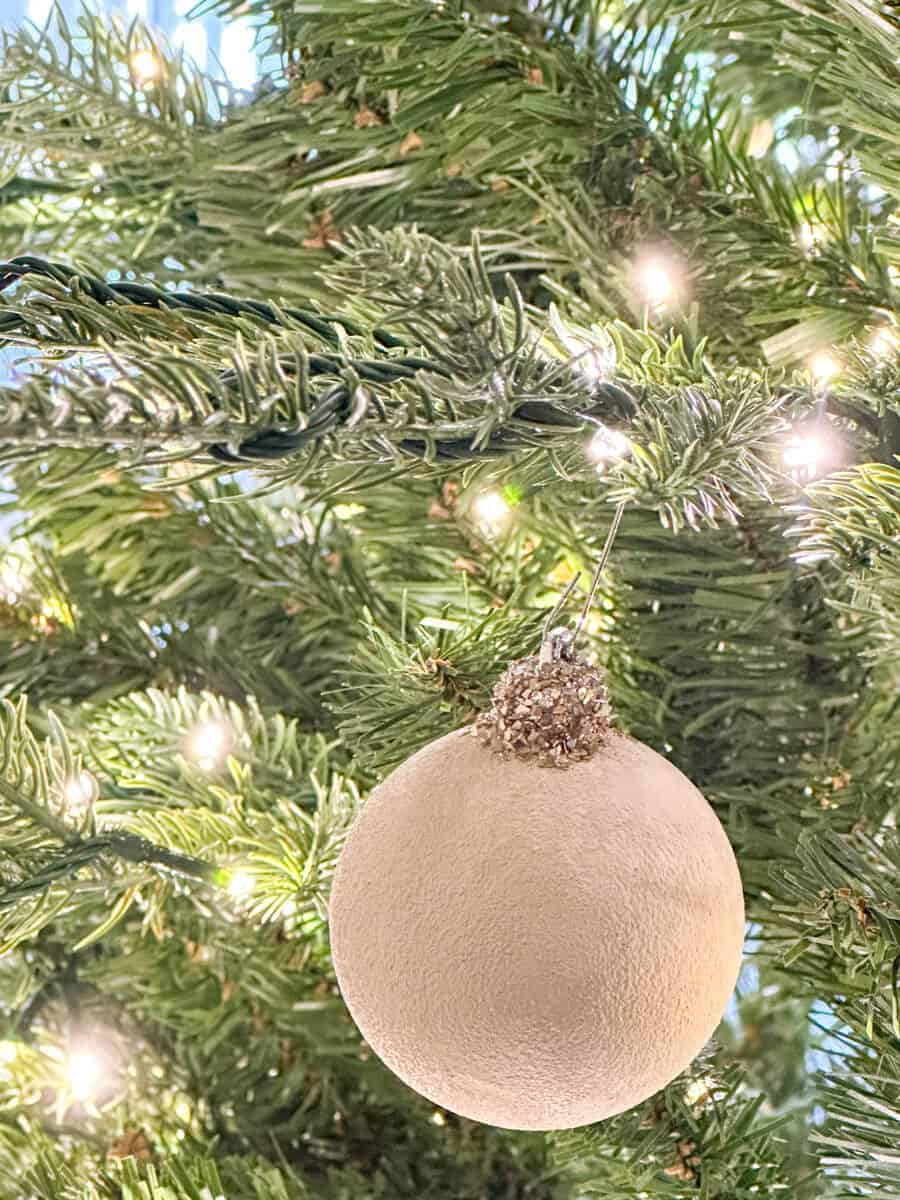
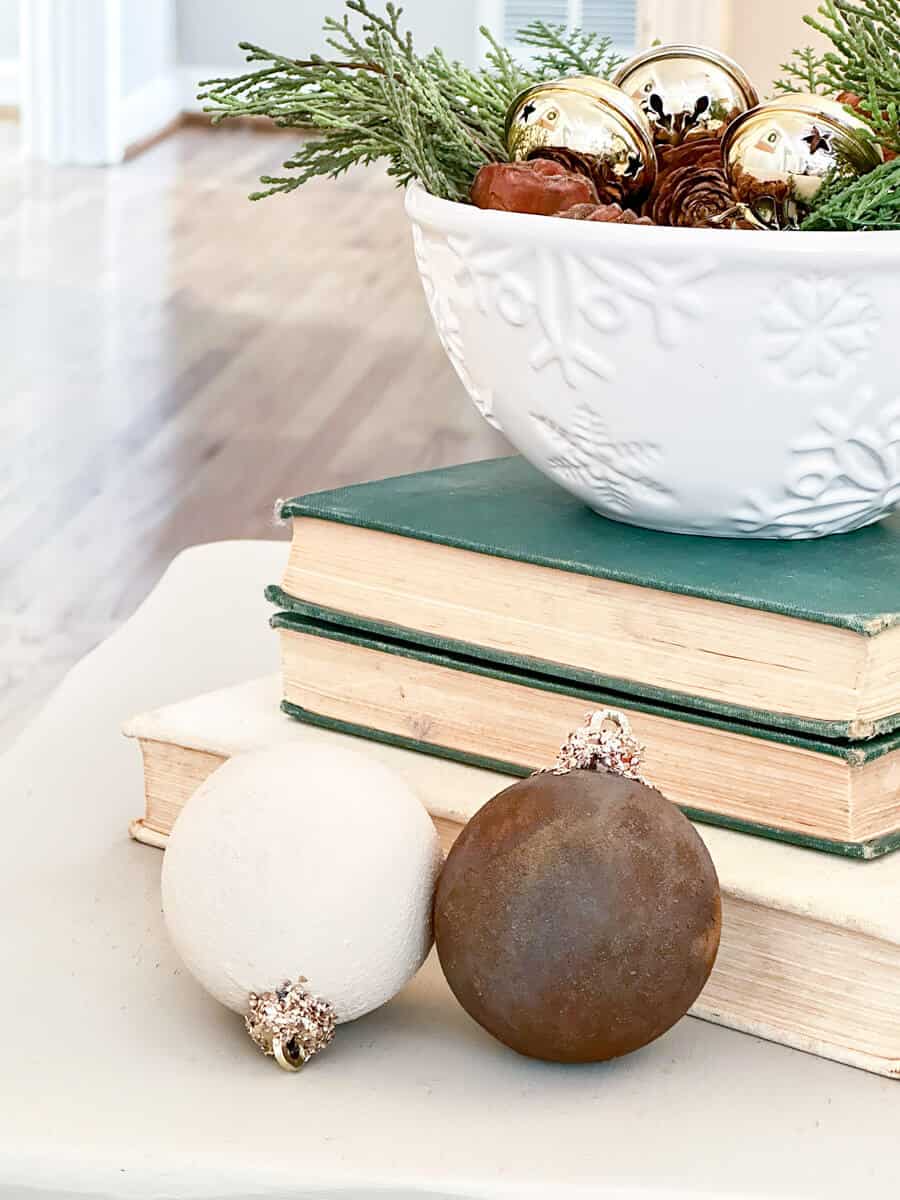
The first ornament that I’m going to show are these Faux Crushed Velvet Ornaments with a glitter-covered top that will certainly get you in the holiday spirit!
Faux Crushed Velvet Ornament
I probably need to come up with a better name for it but that that’s kind of all that I have right now!
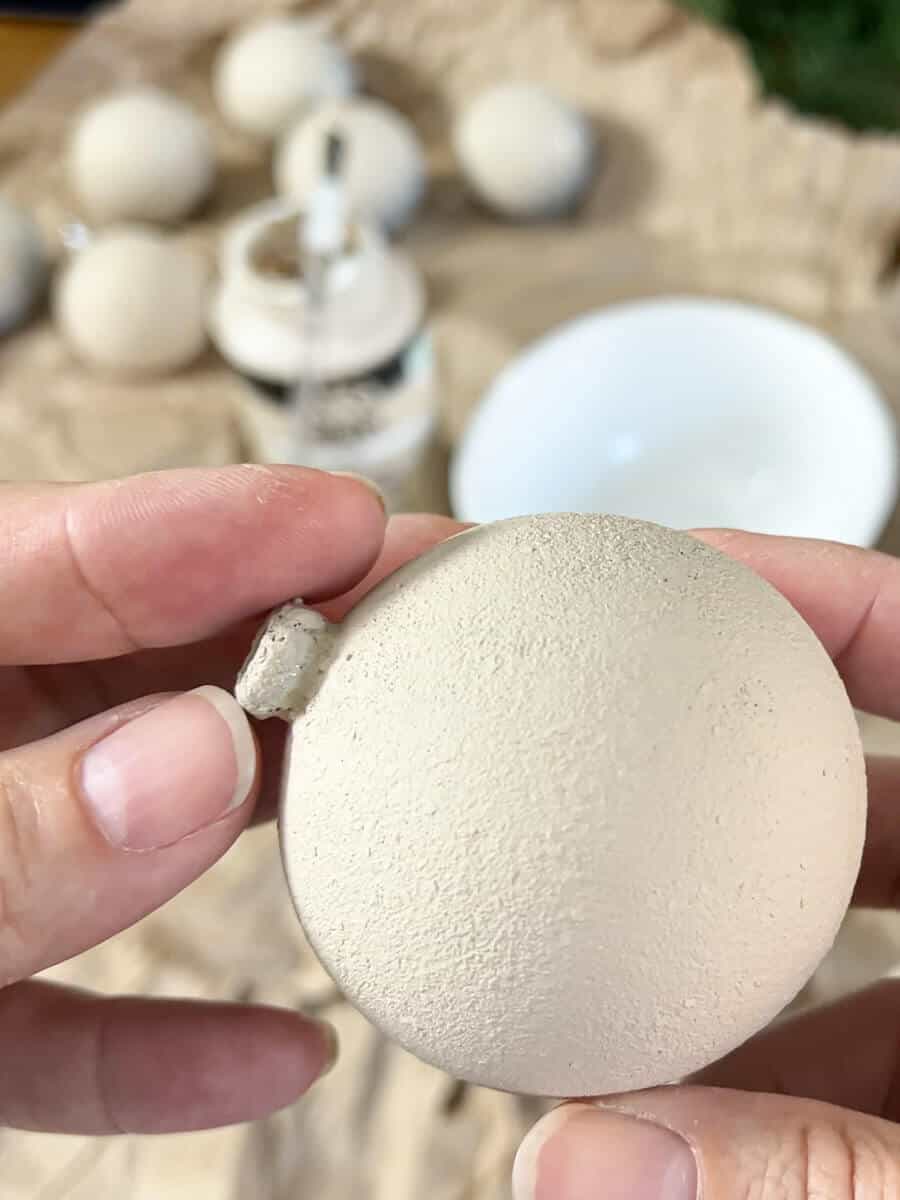
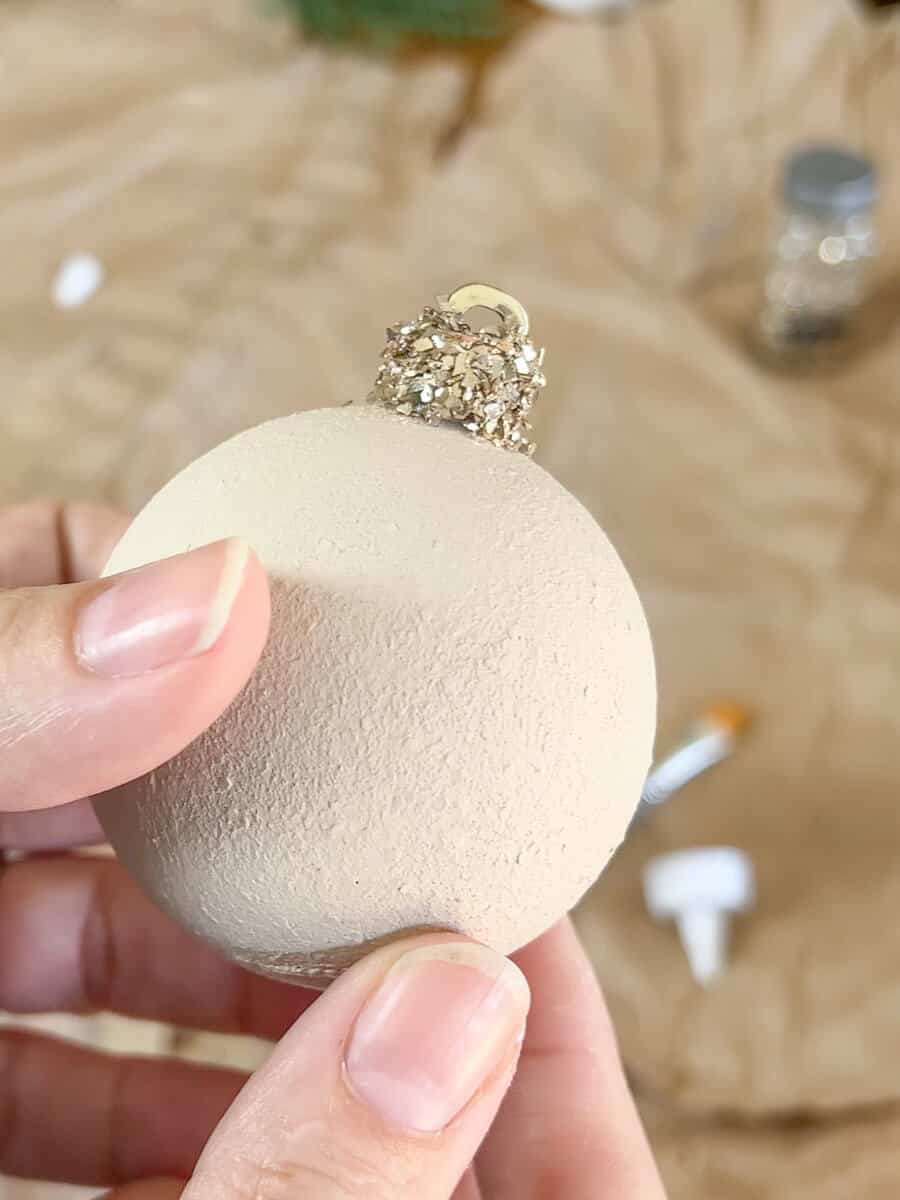
I started by applying some matte acrylic based paint.
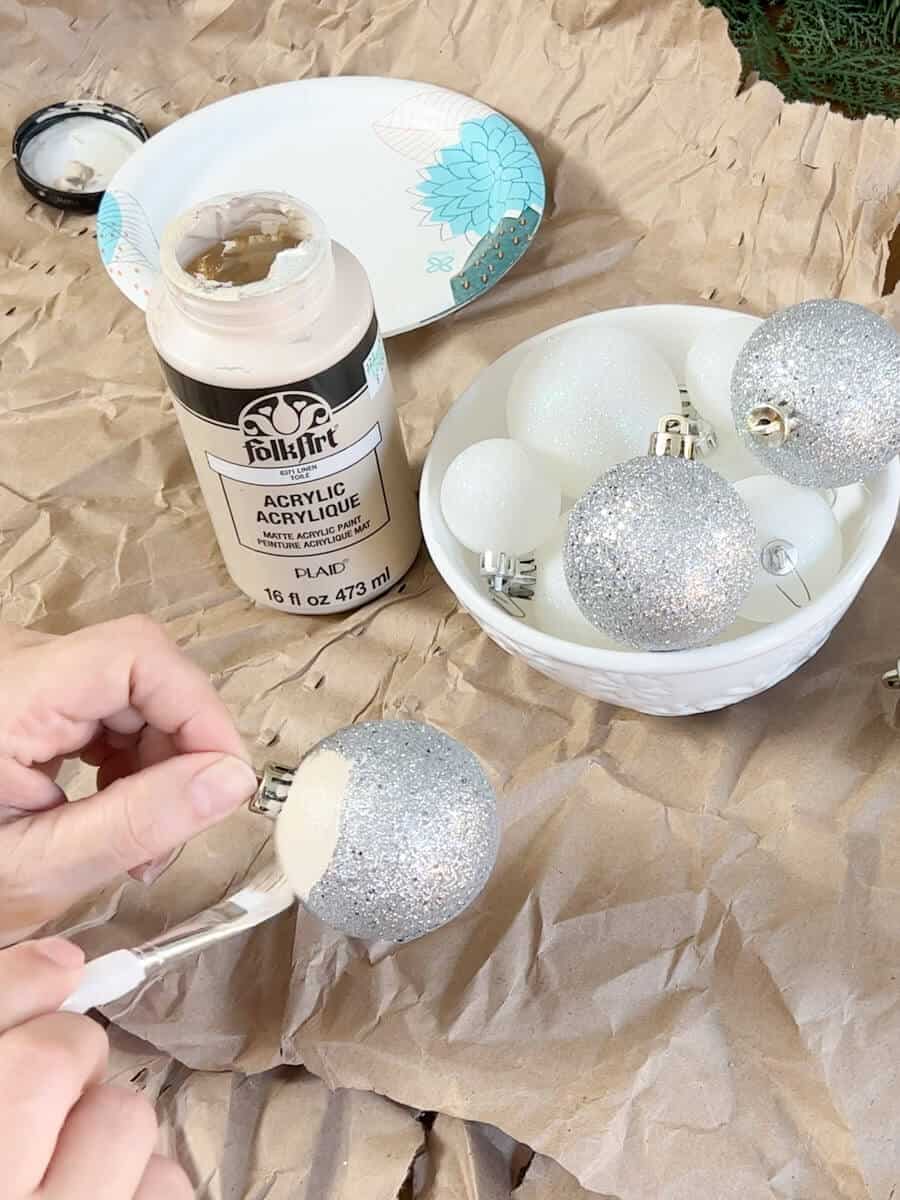
This paint made by Folk Art and the color is Linen Toile, which is a really nice neutral beige color.
I had some leftover craft brushes that I believe came from my boys art collection many years ago.
So you start just by holding the ornament by the top and then you paint.
That’s it!
It’s it really is super simple to do!
I applied two coats and love the result.
For the blingy top, I used glitter.
Now I know I’ve shared many times why I’m not a fan of glitter, but I finally found a different type of glitter.

This is called a glass glitter or German glitter.
It is a larger particle type glitter and it does not stick to you like the other glitter does!
I got this at Michael’s the color is vintage gold from brand Recollections.
But the reason why I ended up adding glitter is because I thought that by itself the ornament was a little bit too simple.
For this season, I wanted to have something reflect against the holiday lights that were on the tree. So I thought it would be fun to add this glitter top!
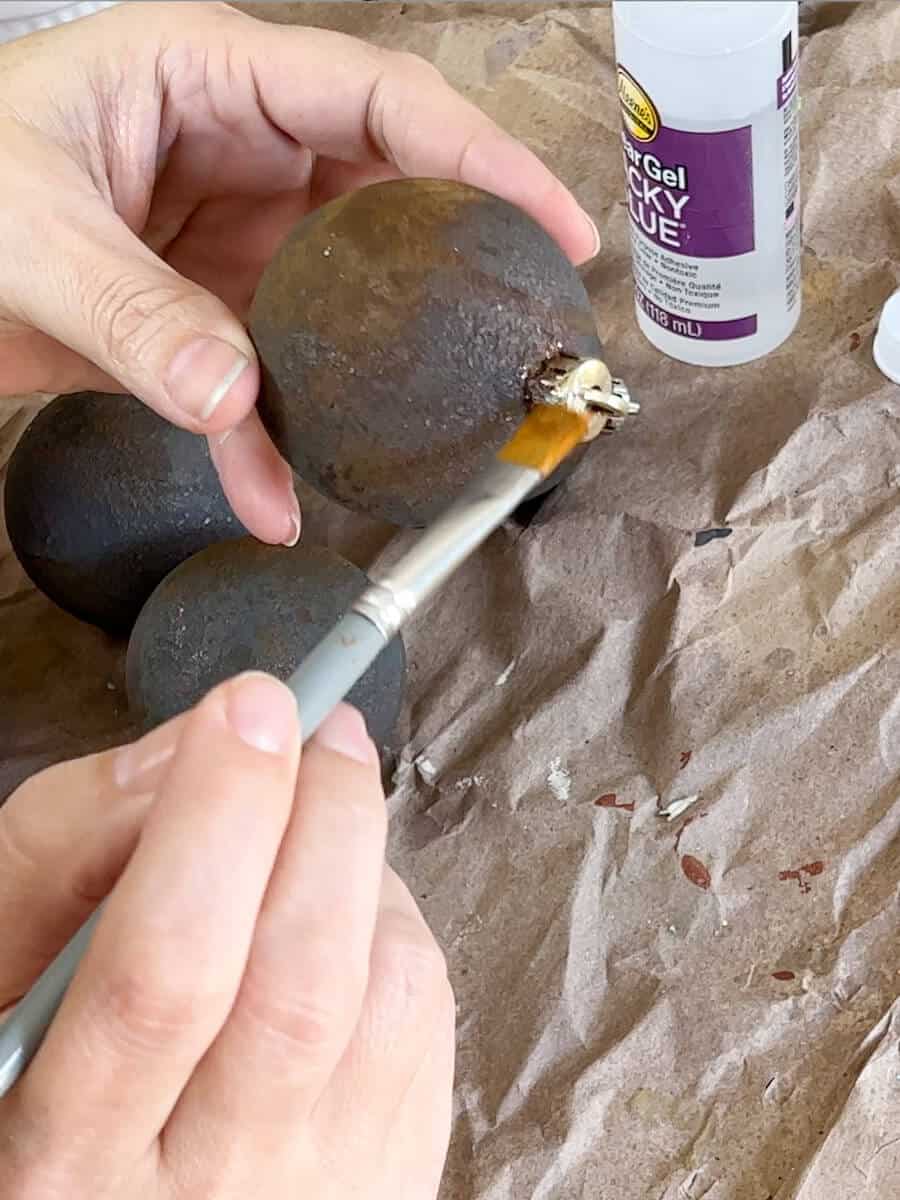
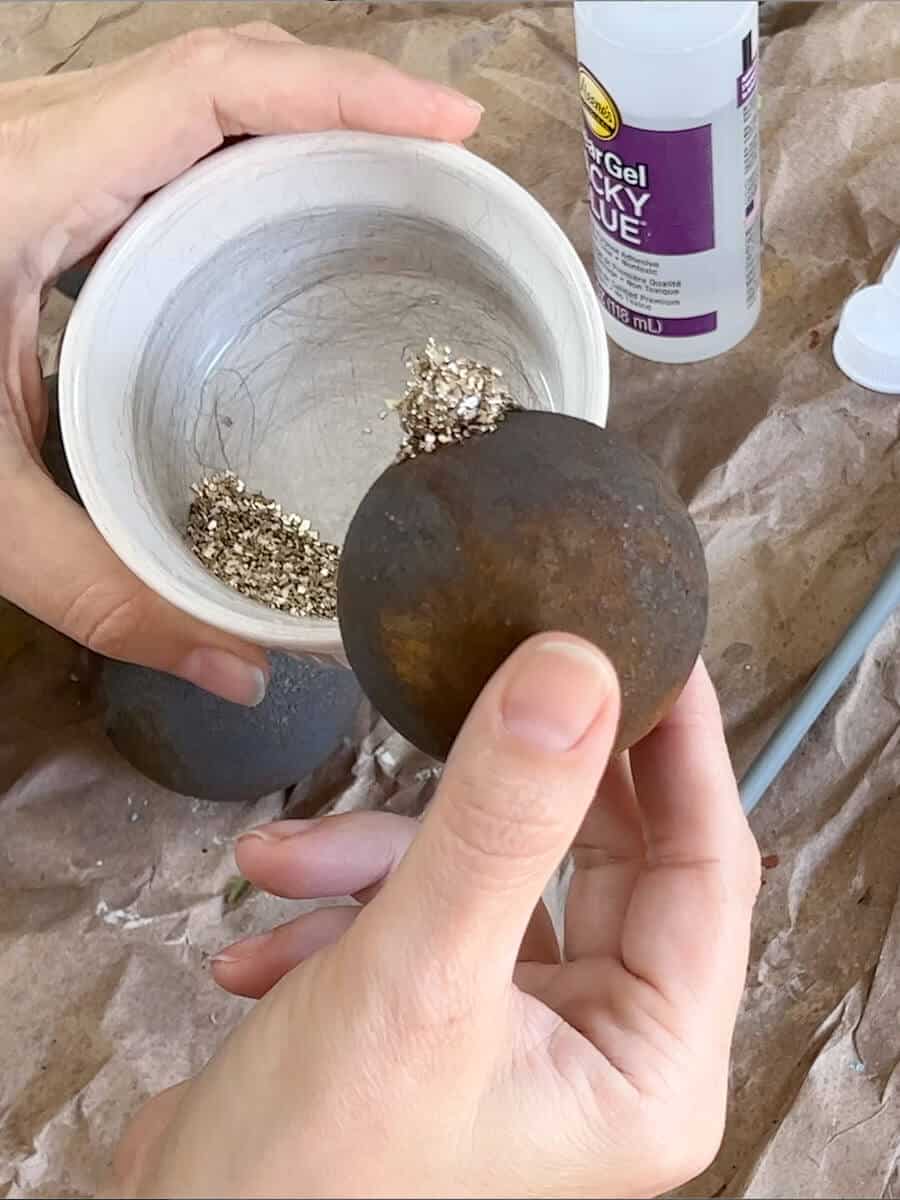
To add glitter to the top, I used some tacky glue. At first I started squirting the glue out, but after a while all that squeezing got a little tedious.
So I switched to using a paint brush and painted the tacky glue over-the-top.
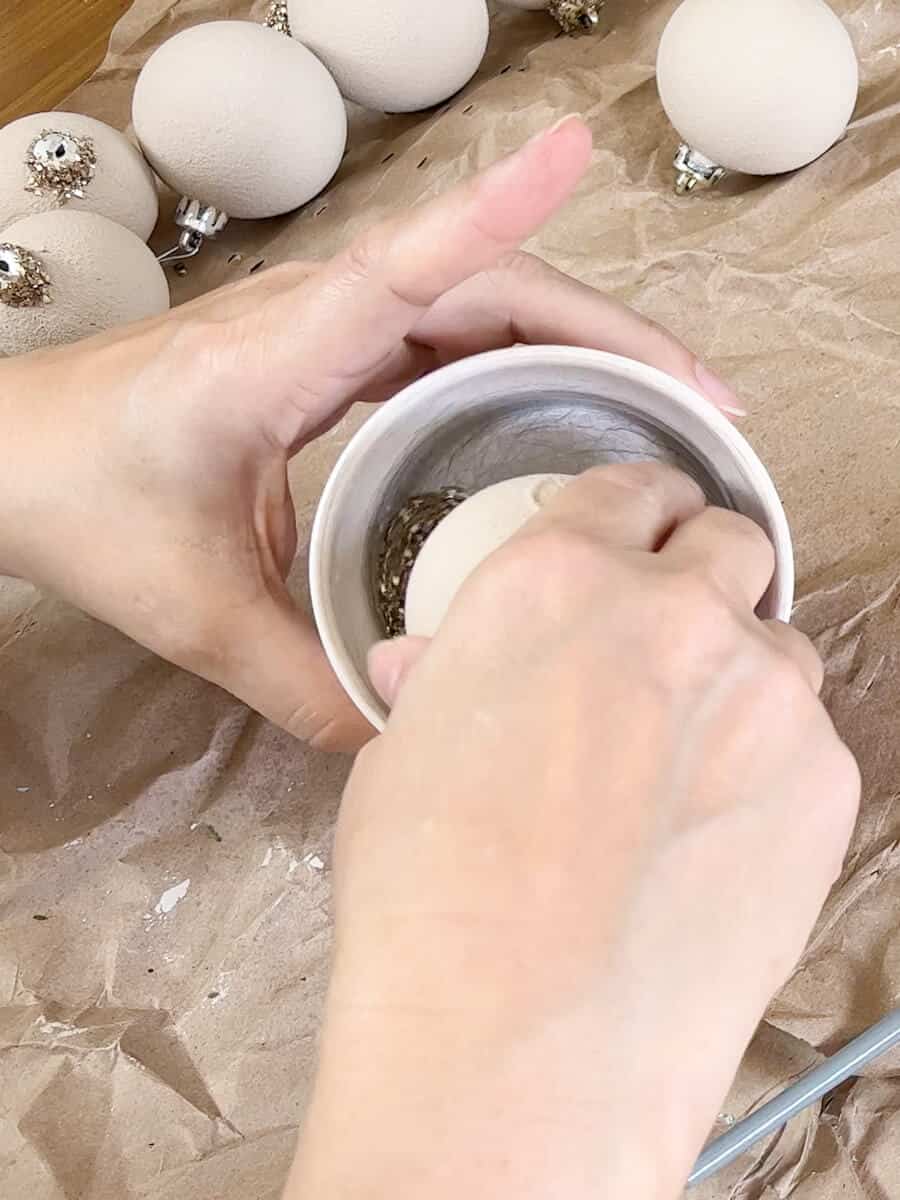
I poured some of the glitter into a small bowl and then just dipped the glued top down into the glitter.
Give the ornament a good shake to remove any excess glitter.
And this is the fun result!
It does it really looks like crushed velvet! And the whole thing took less than 30 minutes, not including dry time.
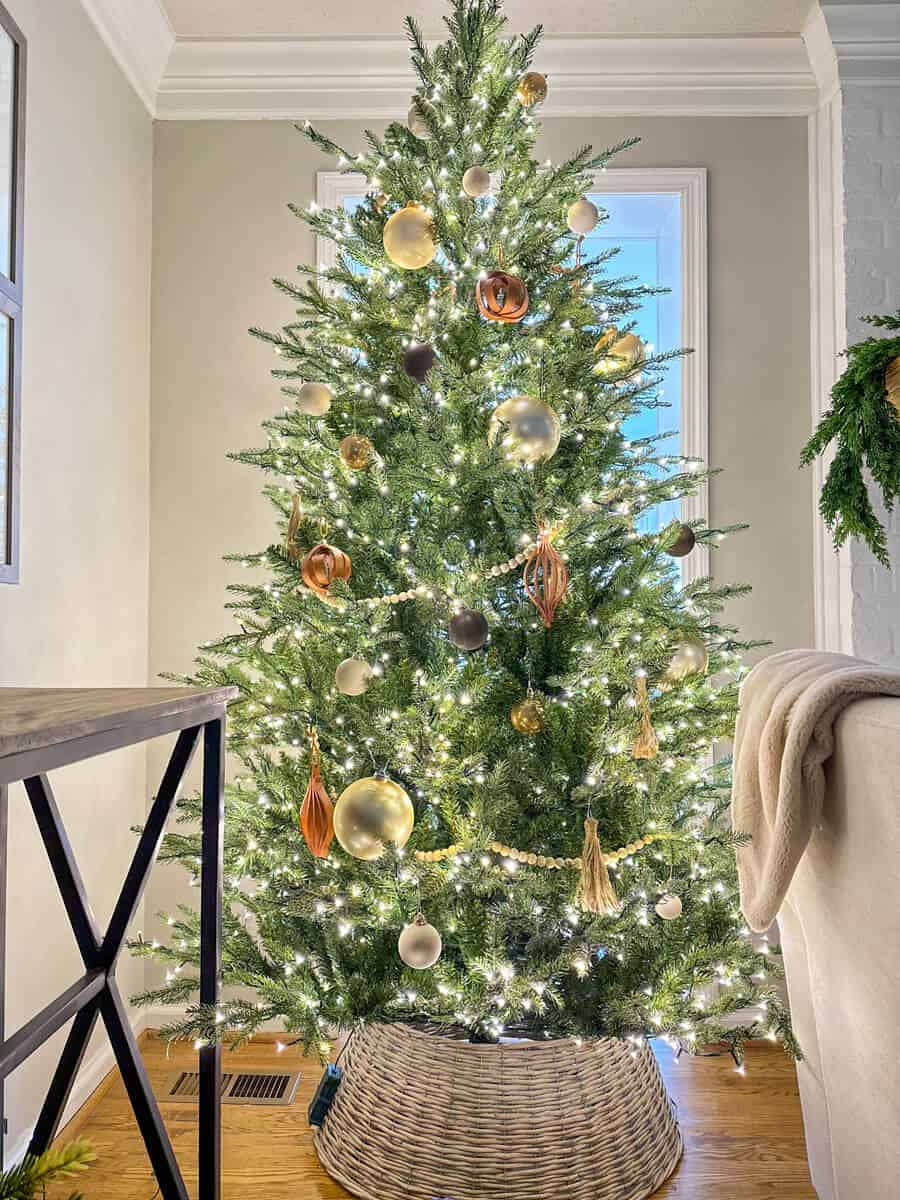
There’s a texture to the finish and on the tree they just look perfect!
Super quick, super simple, and a great way to get the whole family involved this winter season!
You can use any accent color to match your decor this year! And the best part is that it’s super affordable!
DIY Rust Ornament
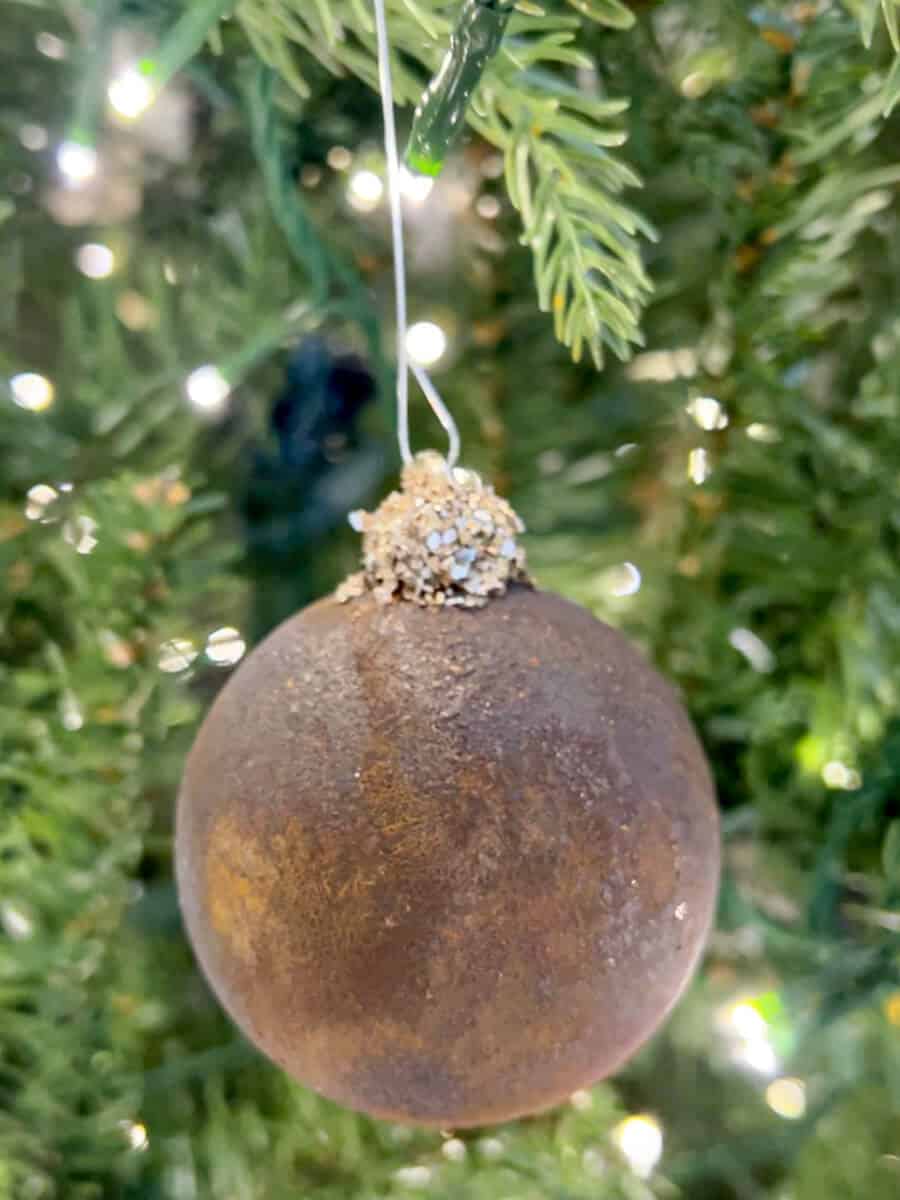
This next ornament that I DIY-ed is my favorite Christmas DIY that I have ever done!
The inspiration came from Studio McGee.
I went on their website to get some holiday inspiration and was looking at their holiday collection.
This year they have a couple of new ornaments out that have a patina finish or an iron oxide type of finish and they were just stunning!
But they were so expensive coming in at $14 for each ornament.
For this budget-minded mama, it just was too expensive. If I wanted 10 ornaments on my tree, I can’t imagine spending $140 on ornaments when you can make something similar for your own!
Now to get a similar look, I came up with a creative idea.
I used a product made by Rust-Oleum, from their Modern Masters line. It is the metal effects rust finish and can be applied to any type of surface.
I got our kit from Hobby Lobby, but you can also purchase it online. They also create a kit that creates a green patina spray you can try!
This is a three-part finish so it does take a little bit more time but leaves you with rusty ornaments!
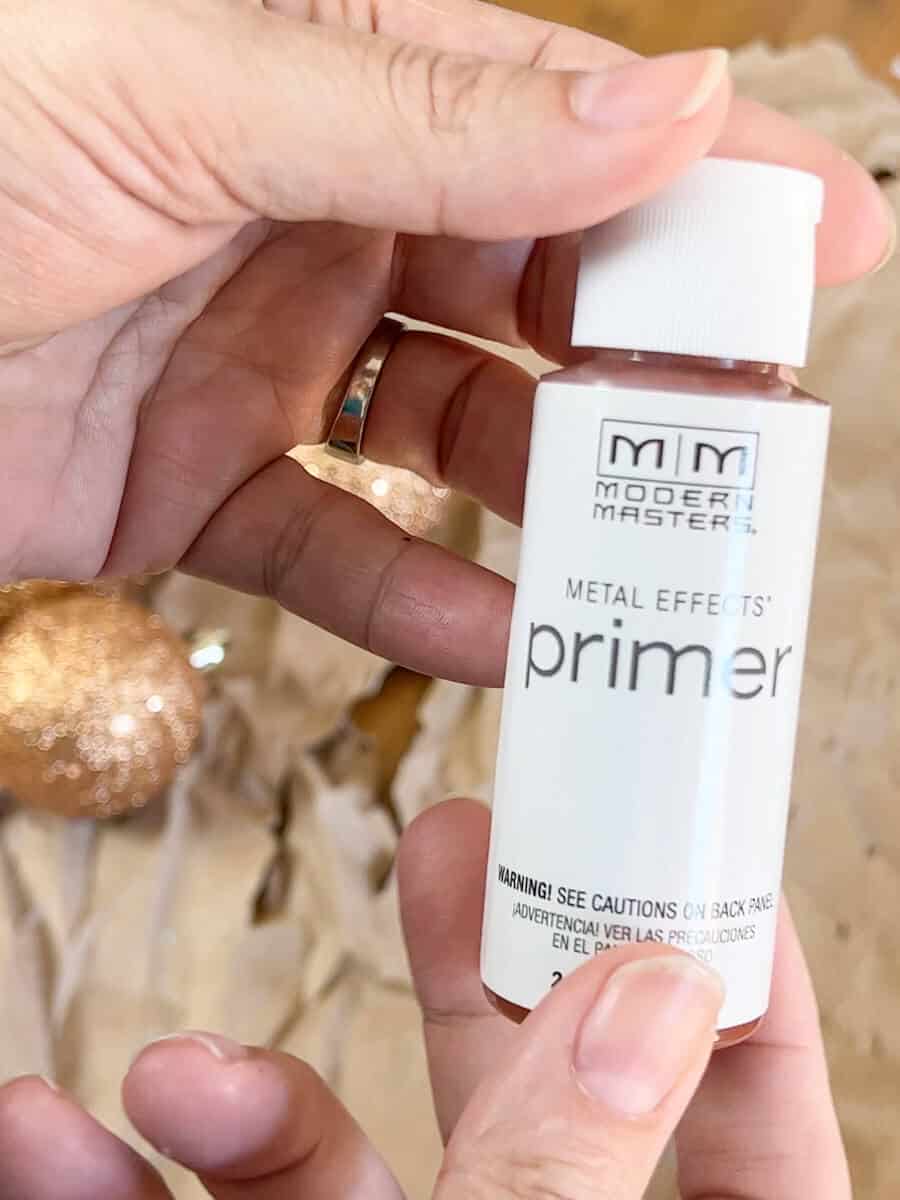
So to begin, you start with a first coat of the primer base paint.
The primer coat has a really cool burnt orange color.
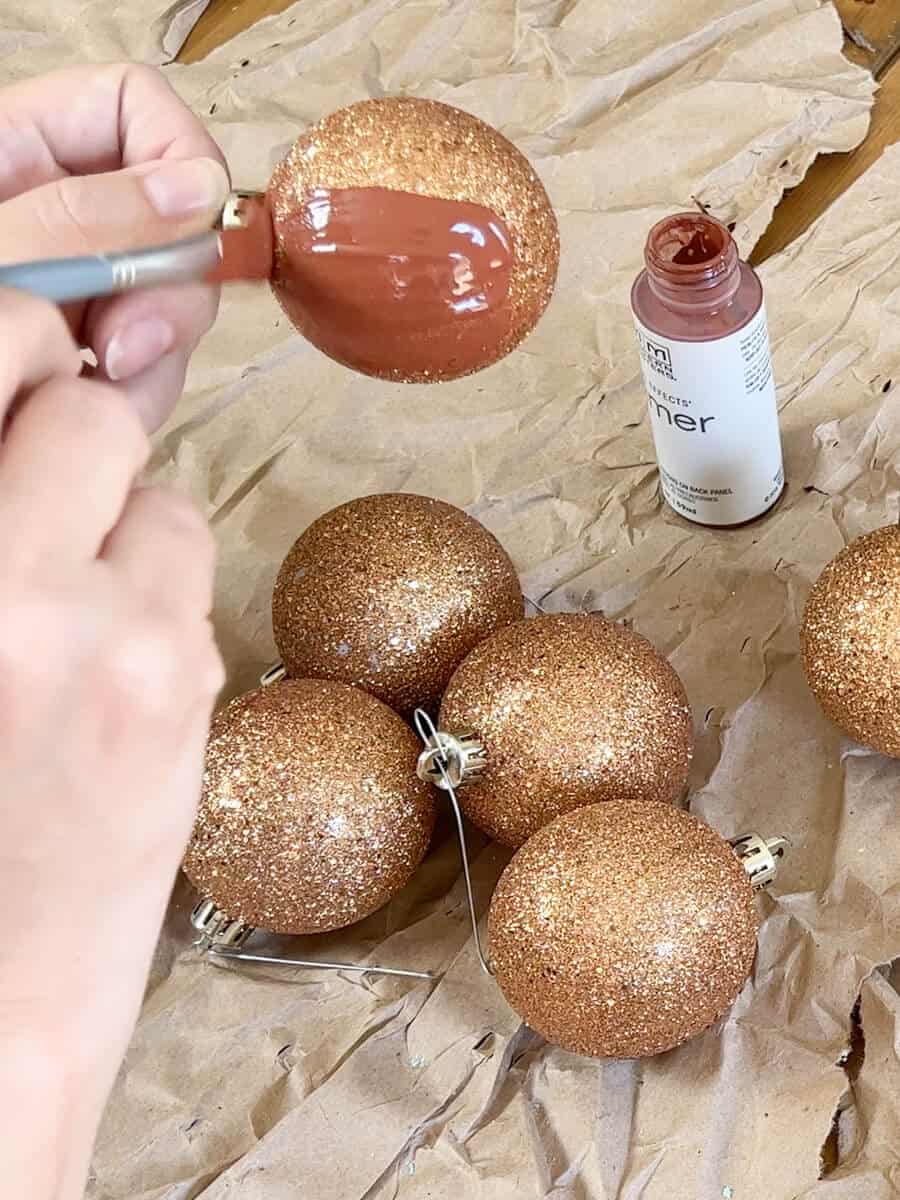
After I put on the primer coat, I then allowed it to dry, which took about 30 minutes.
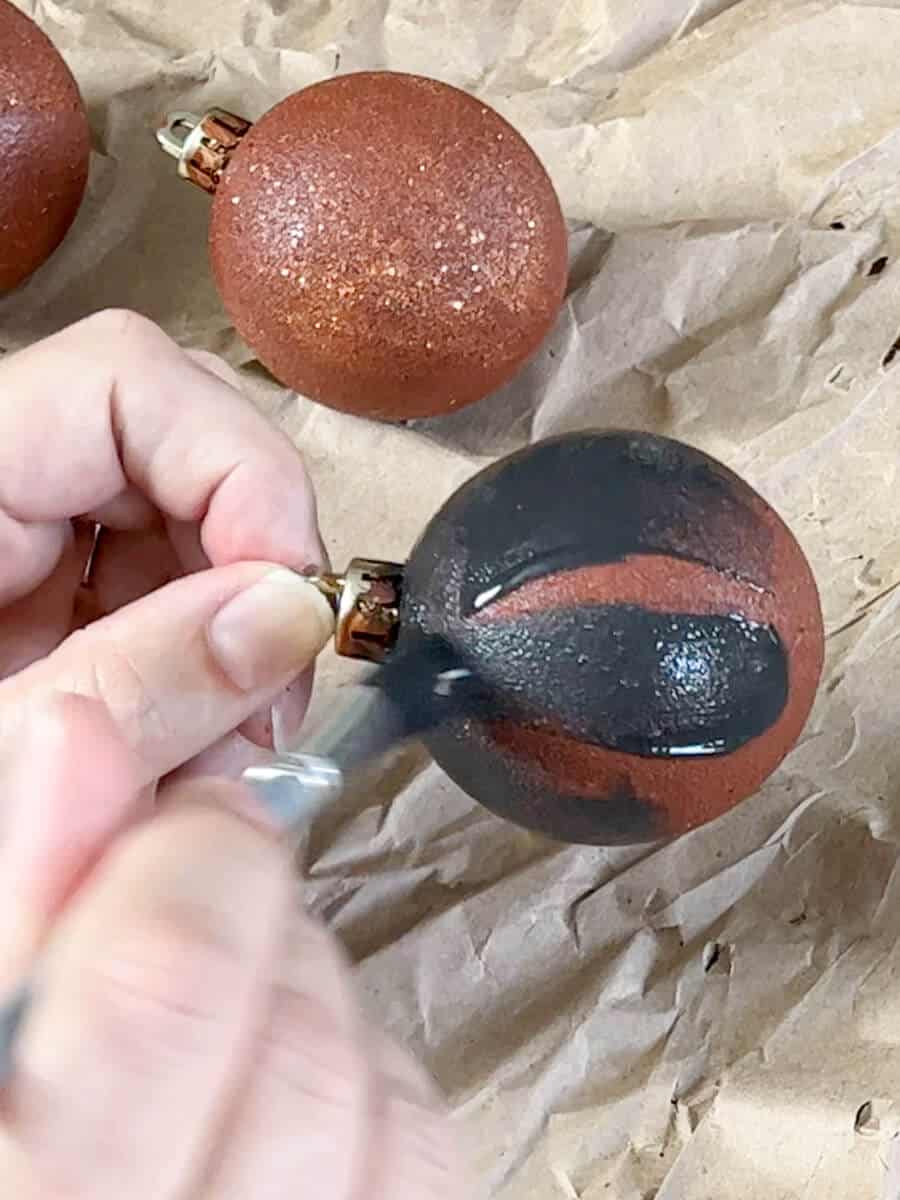
Then I applied a second coat of the iron patina paint.
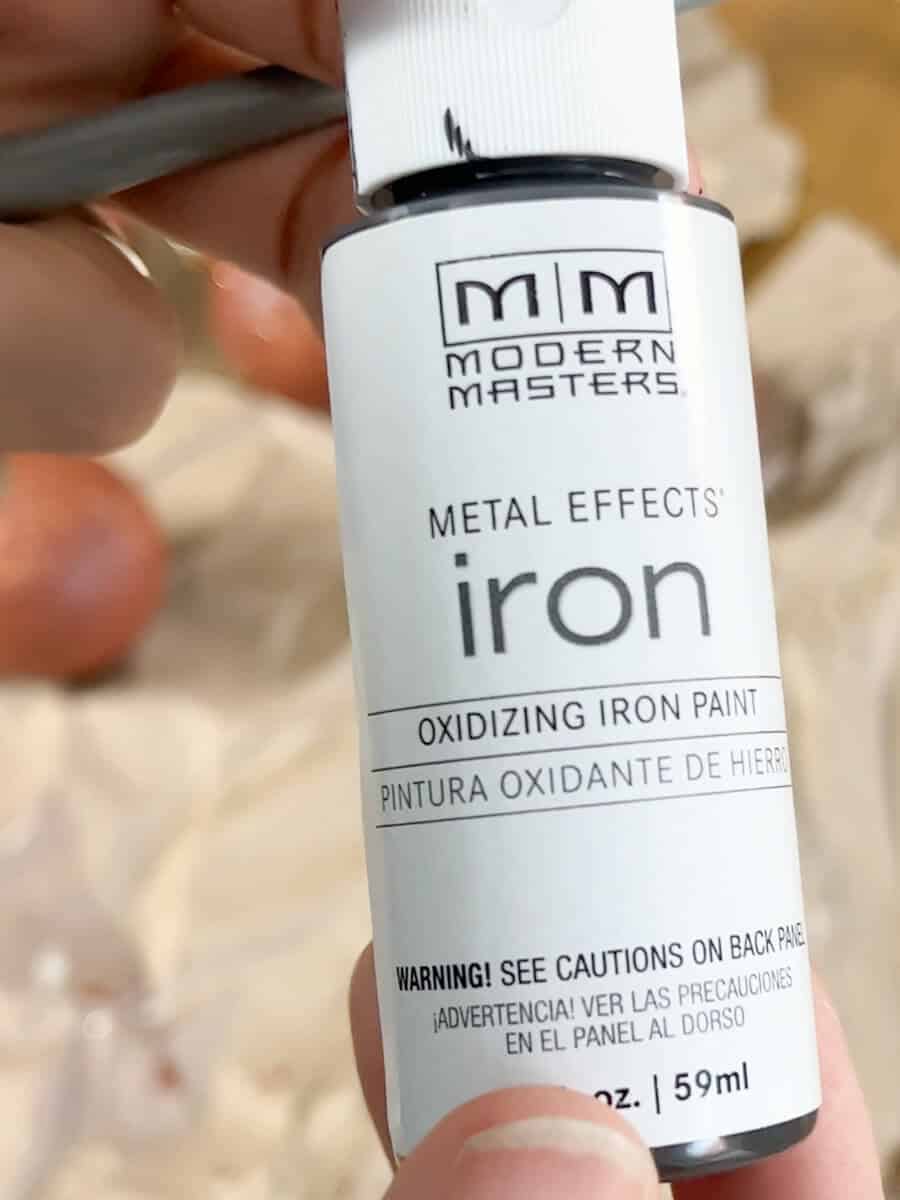
Again, I waited about 30 minutes for it to dry.
Now on the instructions, they do recommend that you use two coats of each finish.
But I used one coat each and I found the results to be really cool.
And then you do the fun part!
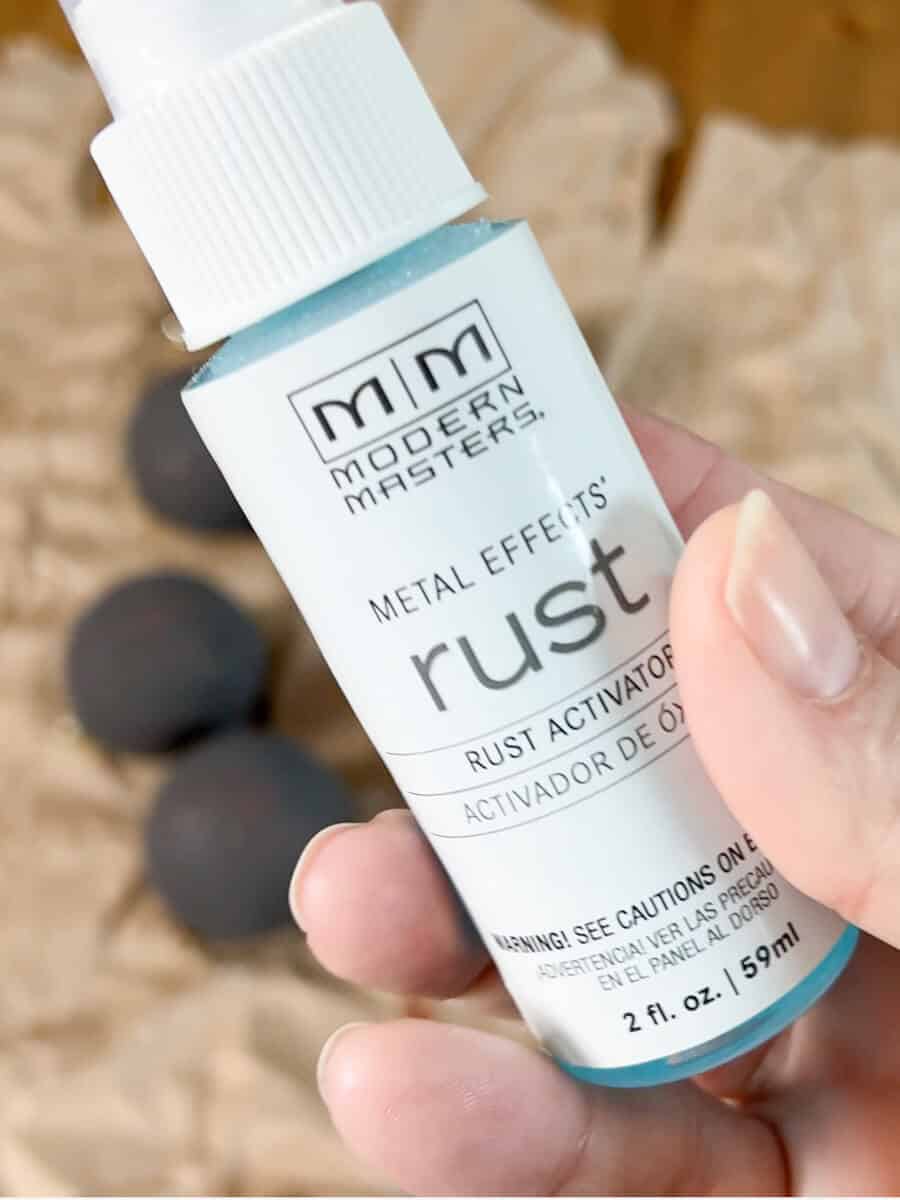
You spray on the rust activating solution.
It is a light blue solution that you put a pump sprayer top onto and you just lightly coat the painted finish.
You just wait a little time and the rusty spots begin to appear!
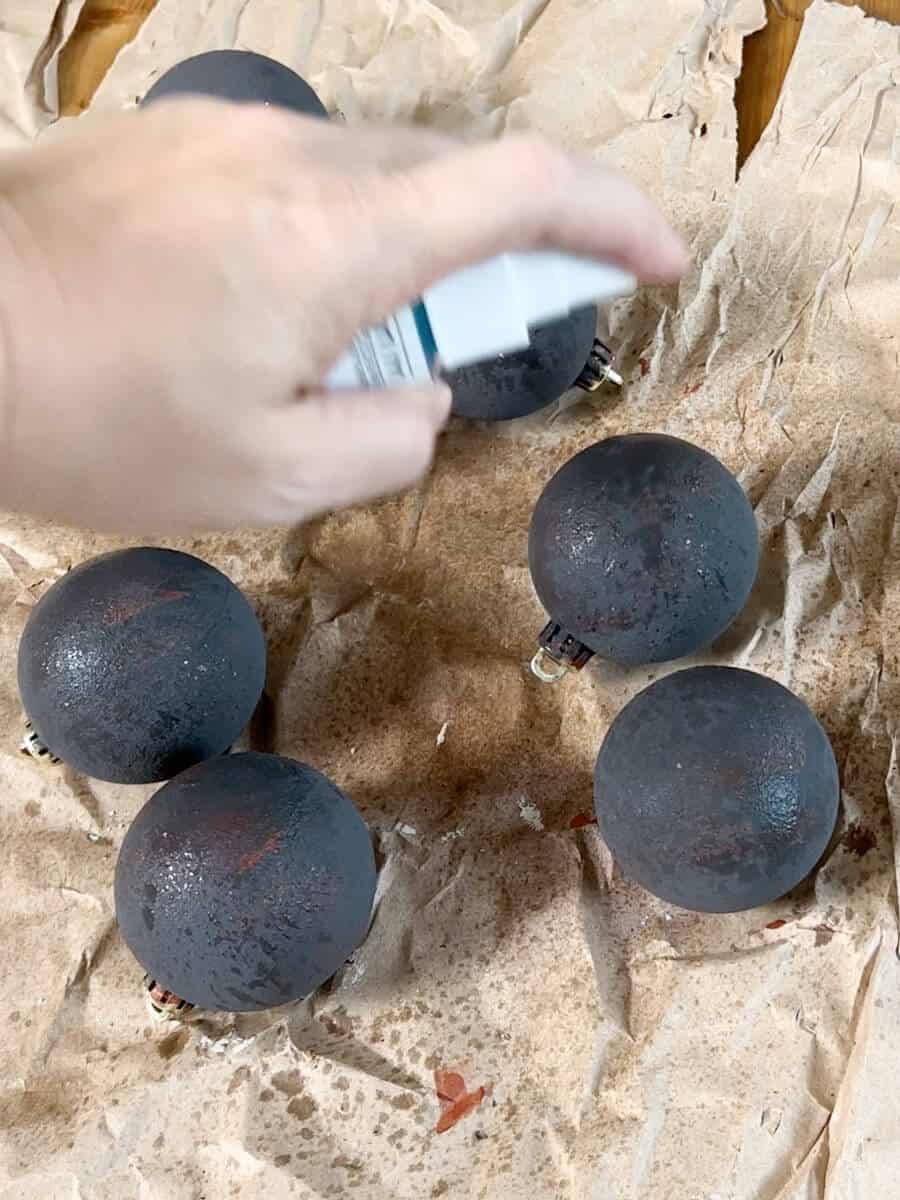
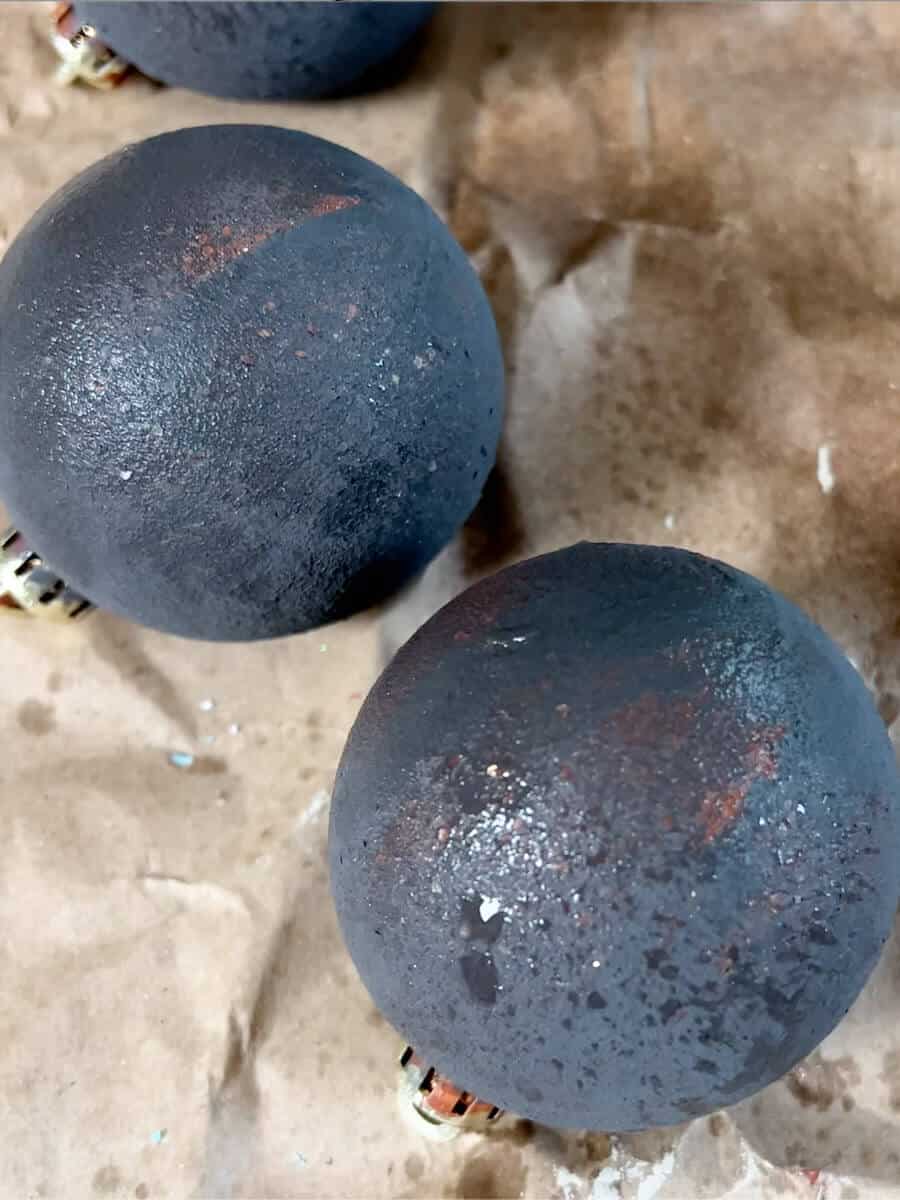
Some of them I coated just once and some of them I sprayed twice.
But either way you get a really really cool looking rusted area!
Each of the ornaments that I created all look a little different which is super cool!
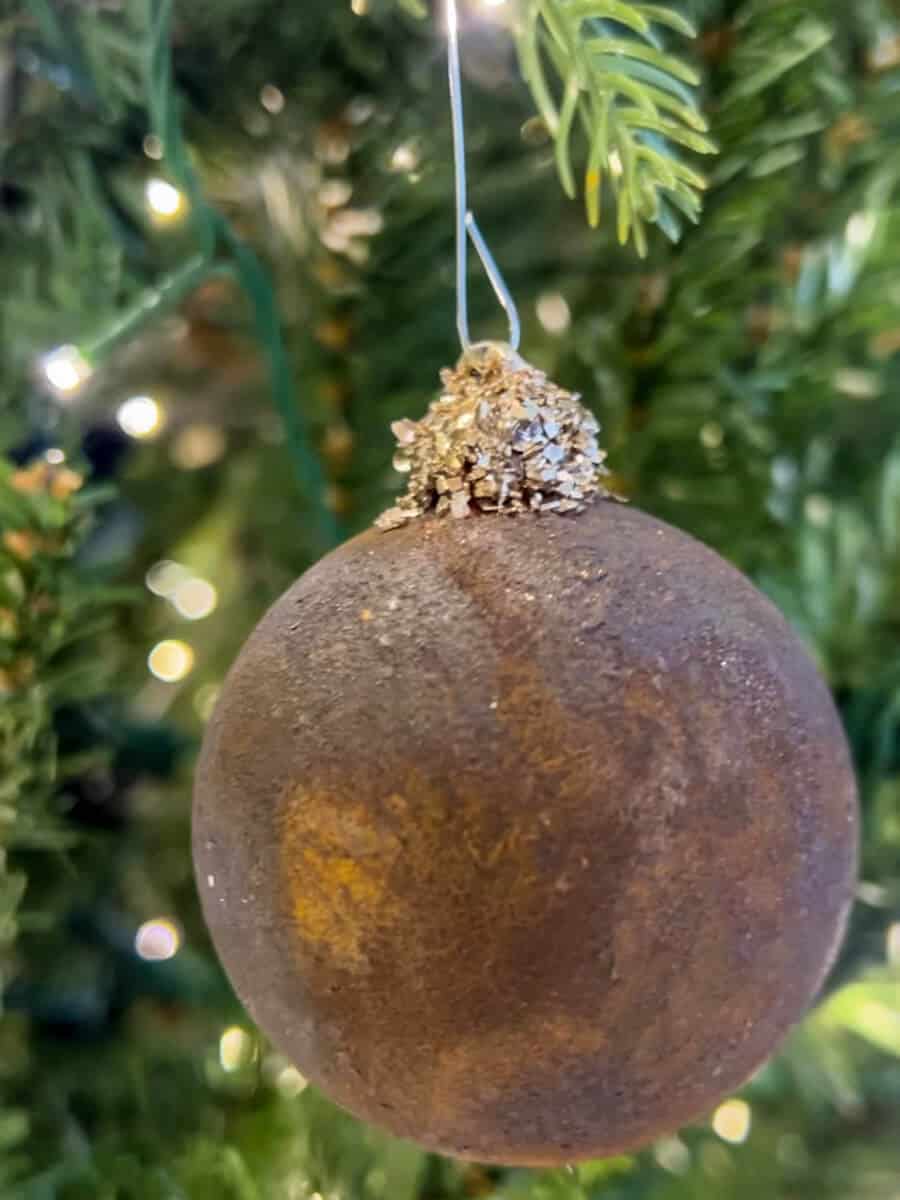
And again, I thought that the rust ornament looked a little bit too Industrial for my tree this year.
So I did the same application and added the German glitter to the top.
I absolutely love how they turned out! The end results are stunning!
Creating faux metal surfaces never has been easier!
Two new really cool homemade ornaments for our home this year!
They will go down as some of my favorite diy projects for Christmas that I’ve ever done!
So I hope that this inspires you to just add your own unique flair to your Christmas decor this season.
If you have any questions, please leave me a comment below.
Or send me a message with photos of what you created – I would love to see how your holiday decor tuned out!
And as always, thank you for always tuning in to see what we create next!
Join Our Community
Don’t miss the next DIY! Receive exclusive content, including behind the scenes photos, our favorite home decor DIYs and more!