How We Painted Our Bathroom Tile for Just $150 (& Loved the Results)
If your bathroom tile is stuck in the ‘80s, we want to gently stop you before you start tearing it all out.
You can paint your bathroom tile — and do it well — without spending thousands or hiring a contractor. We did it for $150, and it turned out beautifully.
TL/DR:
We updated our dated bathroom tile (walls and floors!) for just $150 using Rust-Oleum’s tile and floor coating systems — no demolition required.
This post walks you through the exact products, prep steps, and lessons learned so you can confidently paint your tile, even if you’ve never done a DIY project before.
It’s budget-friendly, beginner-friendly, and yes — the results really last.
JEN & Trent
The floor grout wouldn’t come clean—no matter how much we scrubbed.
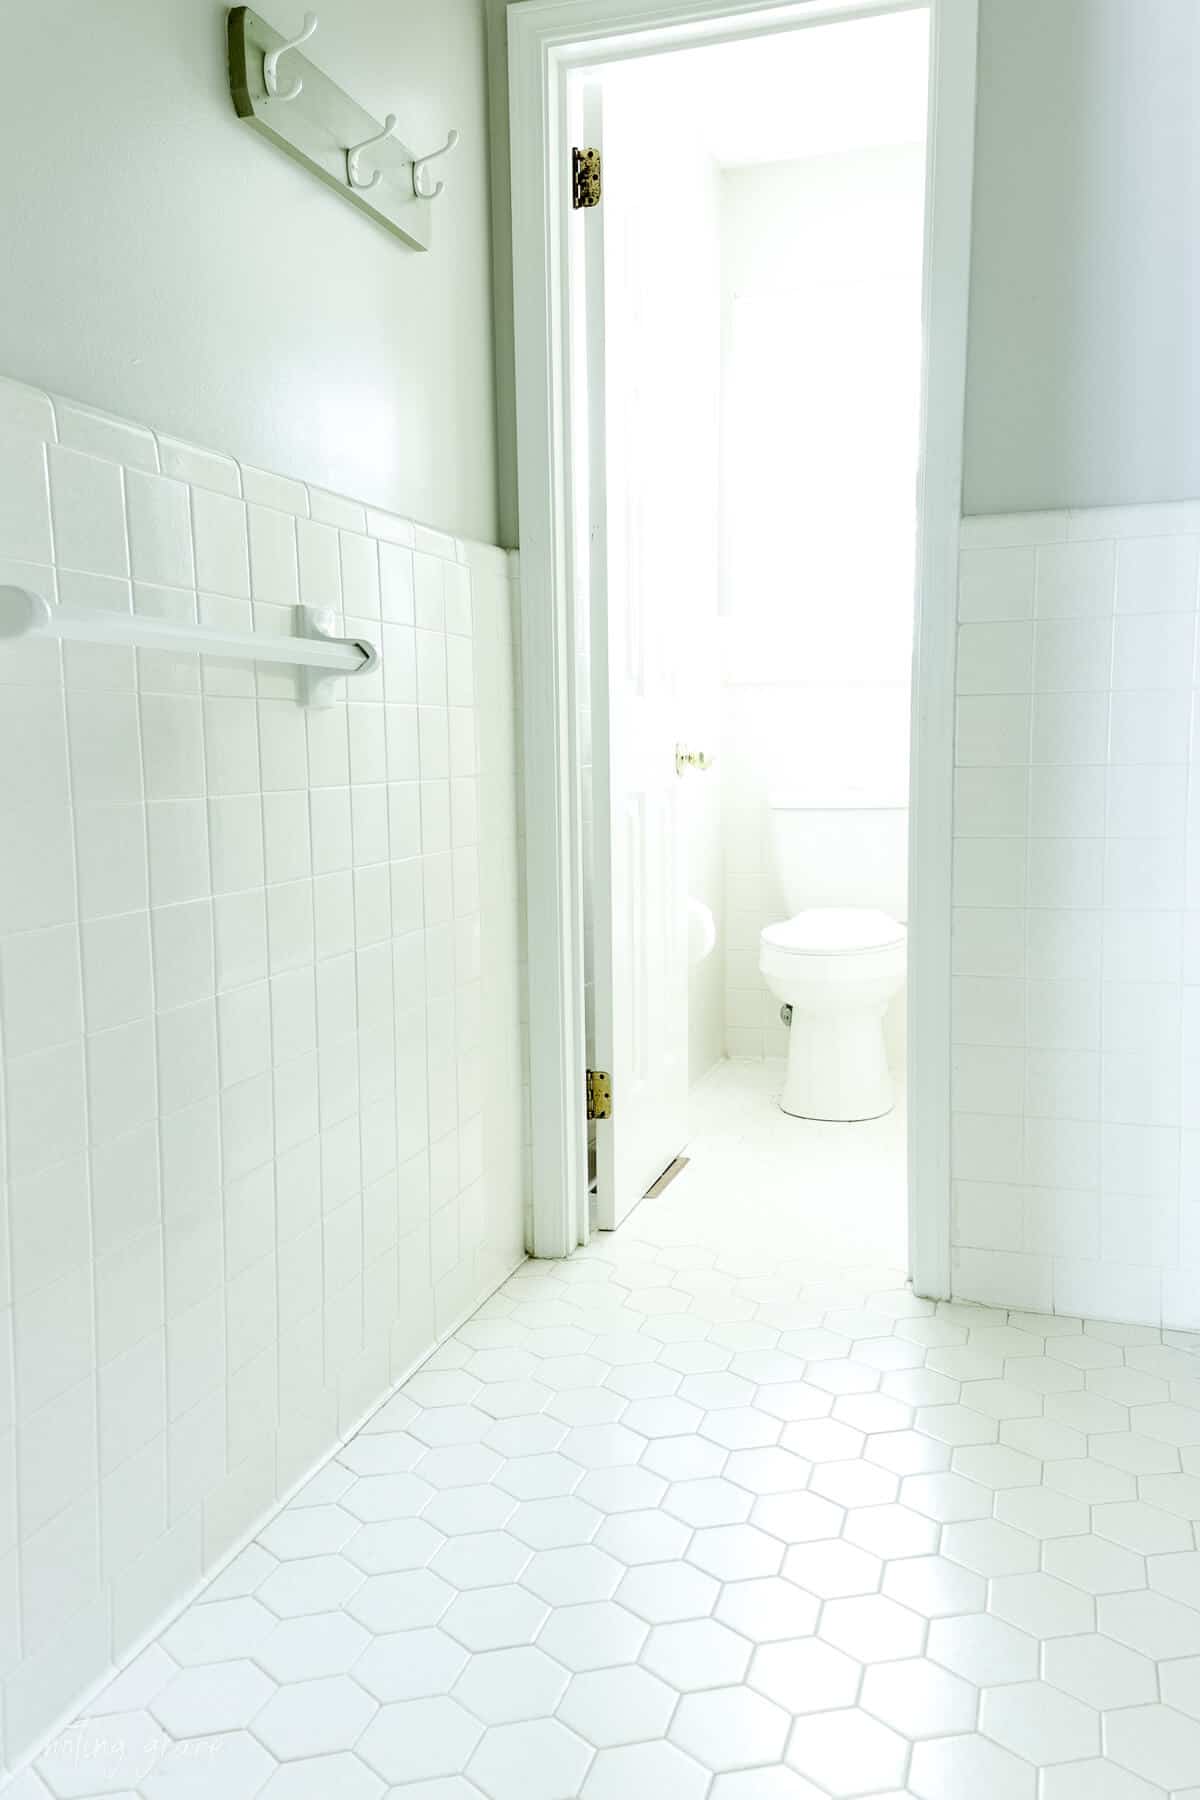
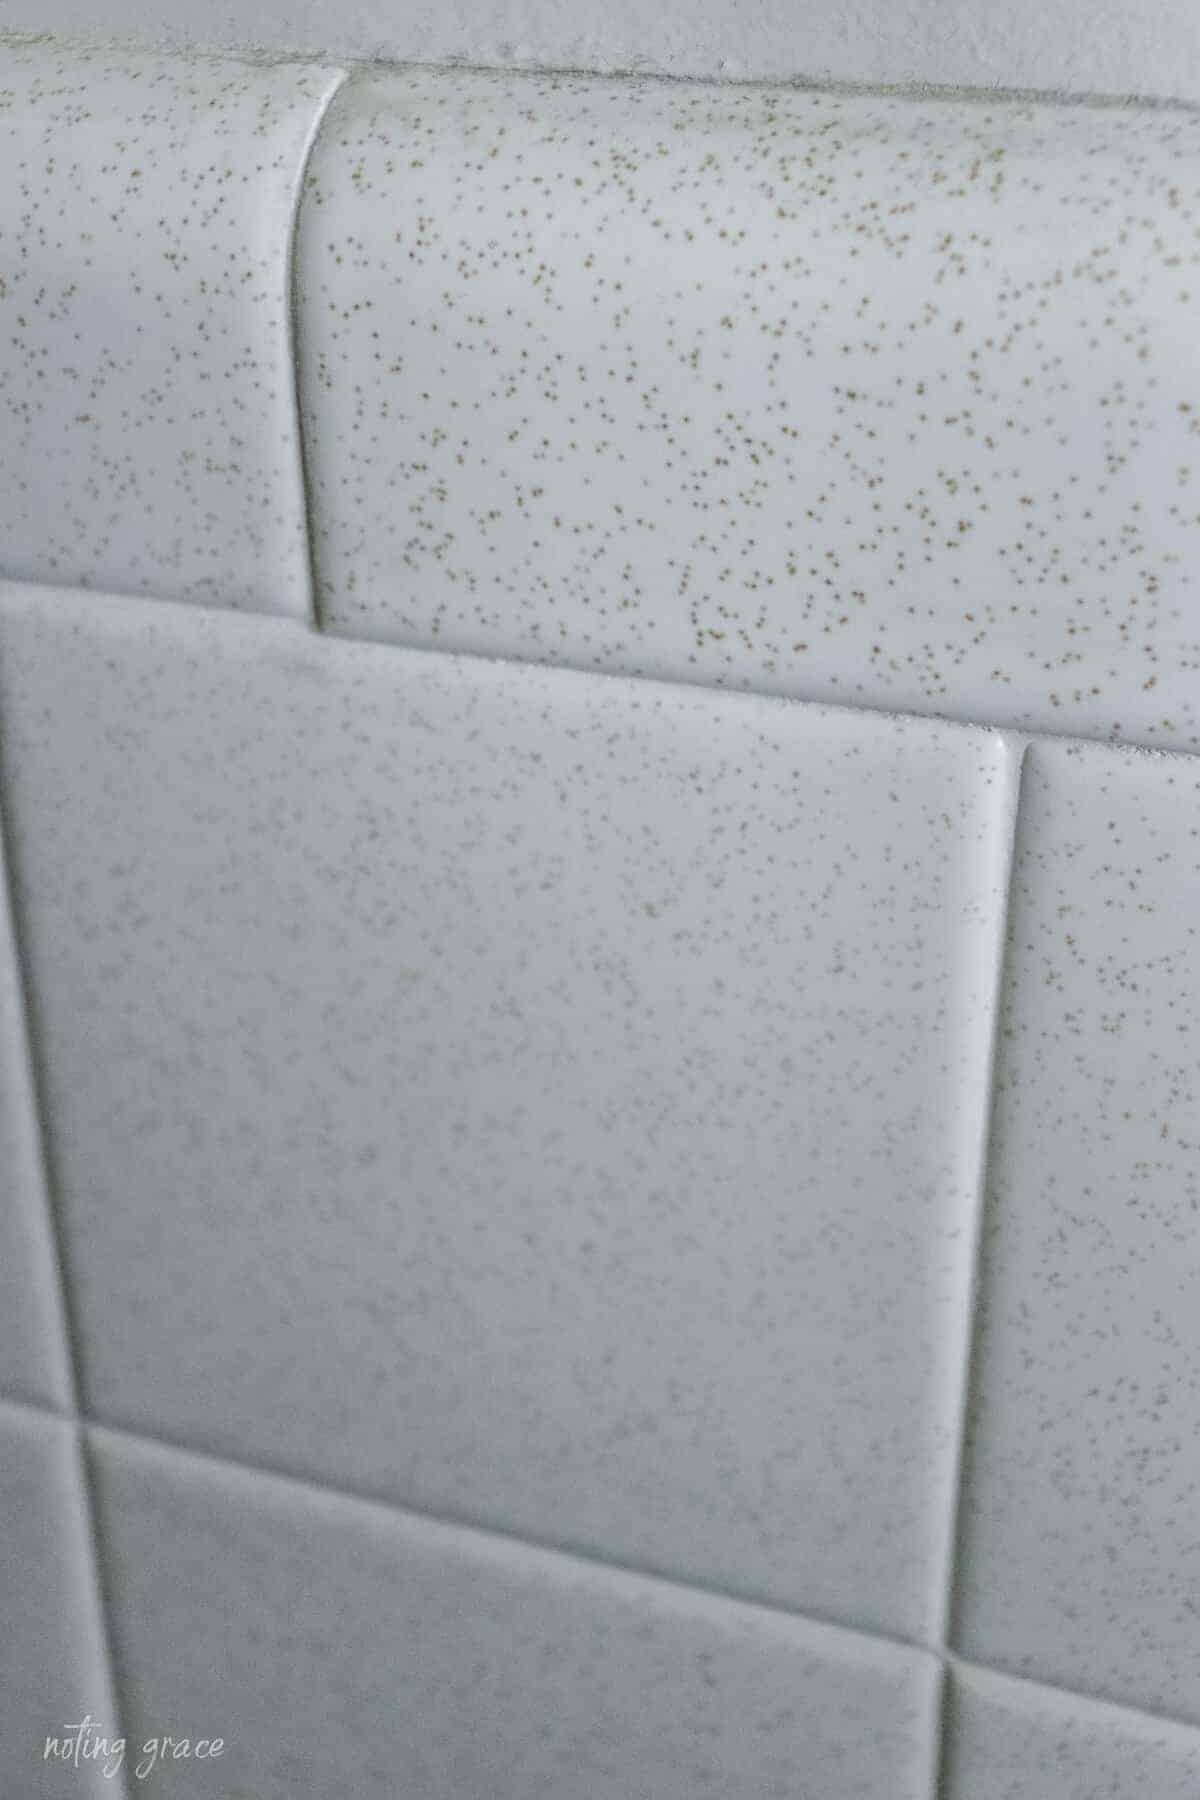
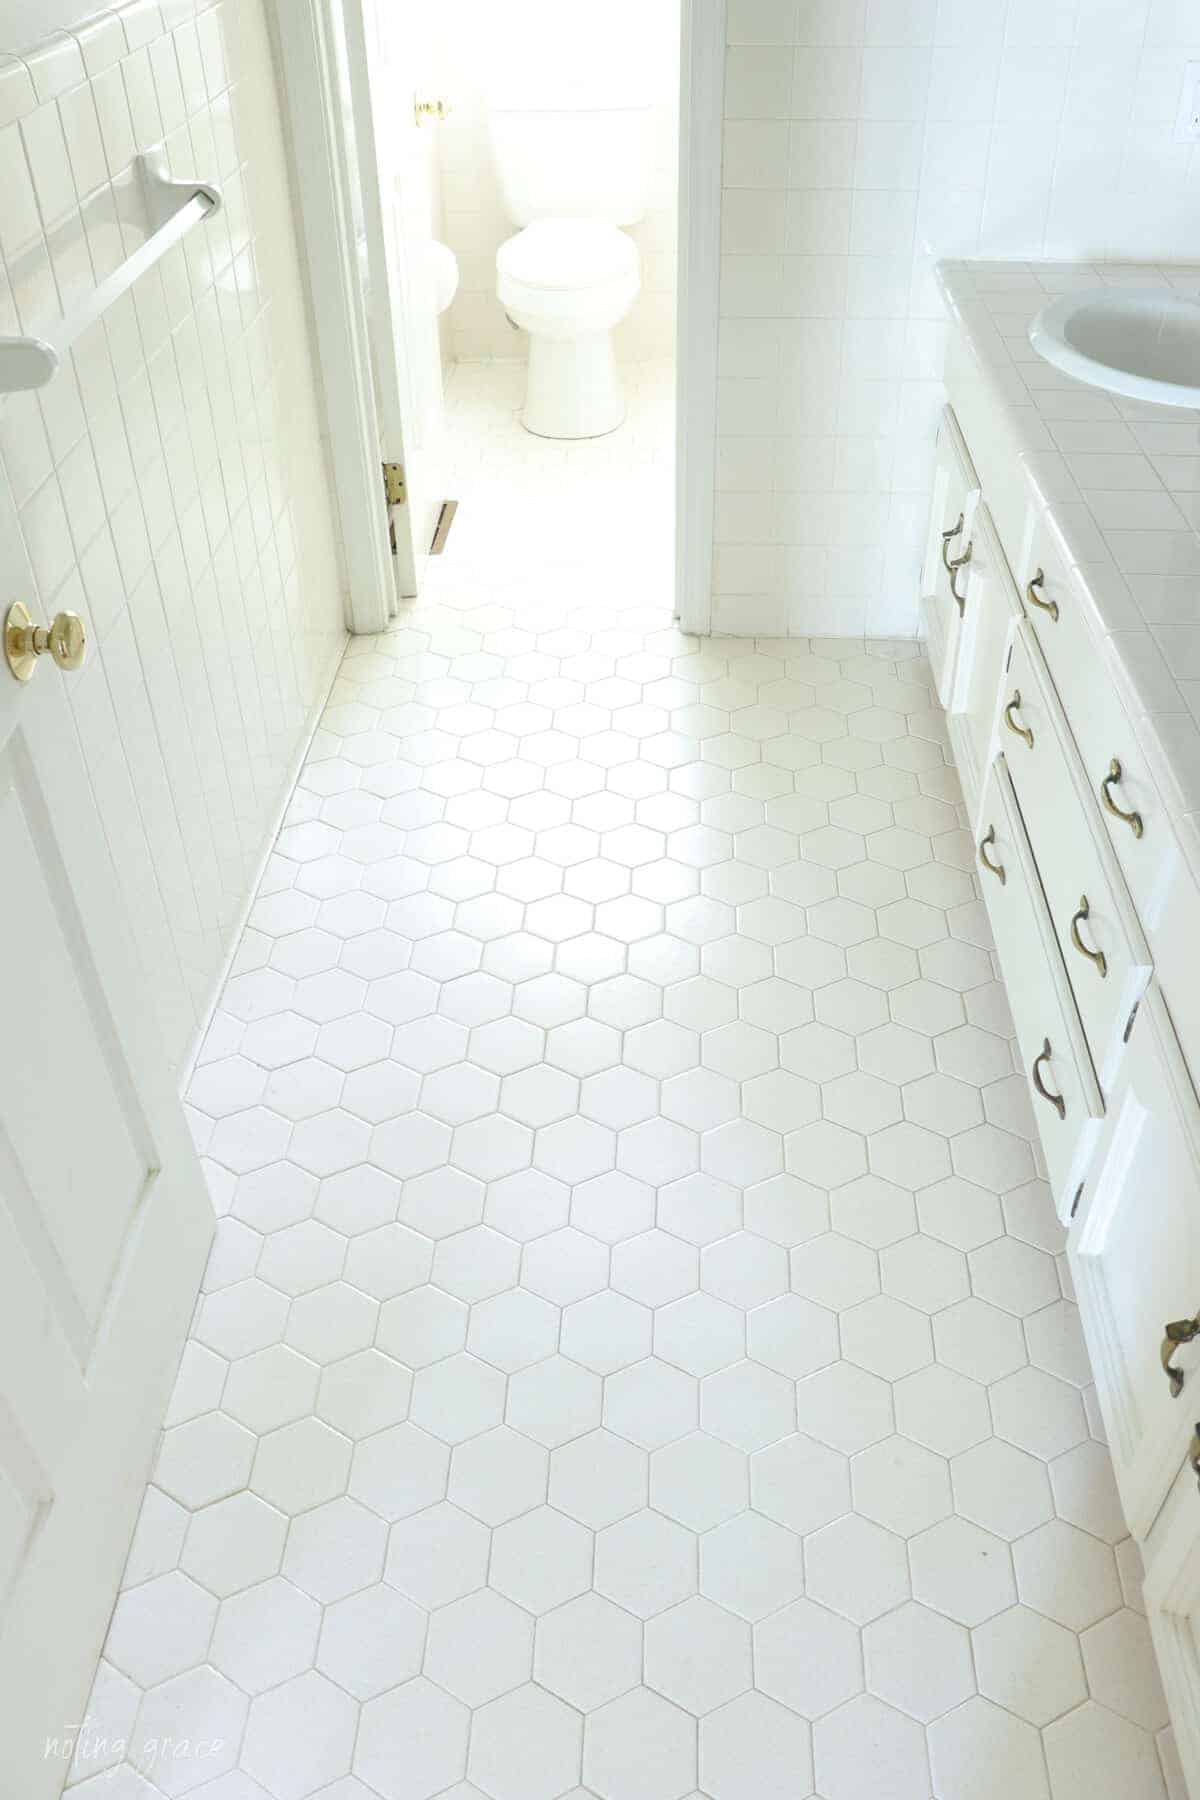
The walls? White speckled tile that hadn’t been stylish since Reagan was in office.
But gutting it? That wasn’t in the budget (or our bandwidth).
We needed a low-cost, low-dust, low-stress solution.
So we did something we never thought we would:
We painted the tile. All of it. For $150.
And it turned out to be one of the most satisfying DIYs we’ve ever done.
(Some affiliate links are provided below. Full disclosure here.)
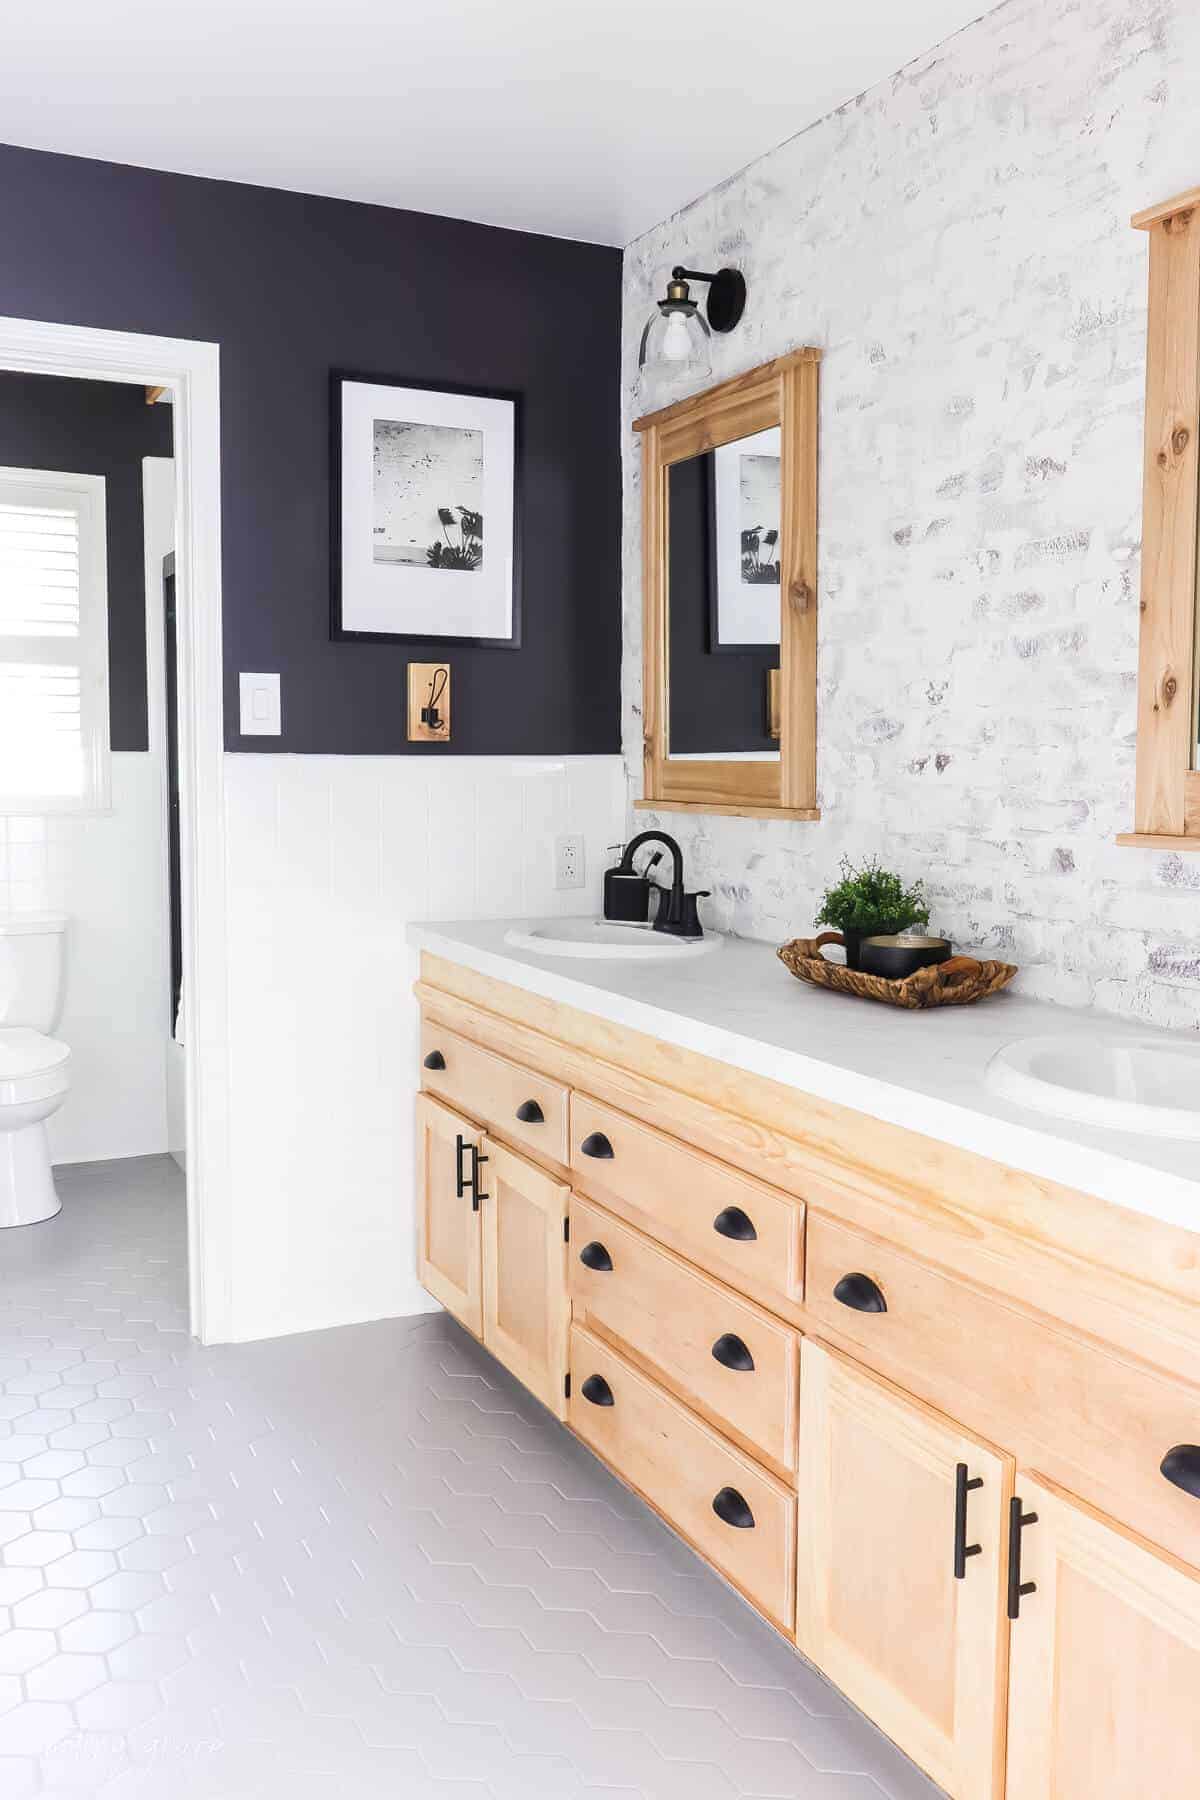
Our dated bathroom needed a major overhaul and needed to be brought into the current century.
No, it’s not magic.
Yes, it takes some work. But we promise, it’s doable. And it just might help you breathe a little easier every time you walk into your bathroom.
This post is here to walk you through exactly how we did it — start to finish — with all the supplies, tips, and honest moments included.
Why We Painted Instead of Replacing
- Budget: We set a $1,000 total budget for the entire room — tile, fixtures, paint, even the toilet.
- Energy: We were tired. A year before this project, we fully gutted our master bathroom. Tiles, fixtures, everything. We needed a quick win.
- The tile was in good shape — just dated. And painting it meant we could spend on things that mattered more: like better lighting and a taller vanity.
- And honestly? we just wanted to like walking into the room again.
But we also didn’t want to live with this:
So we asked the question we encourage every DIYer to ask:
“What can we do with what we already have?”
Turns out, quite a bit.
WHAT WE USED (SUPPLIES)
Here’s everything we used to paint both the wall and floor tiles:
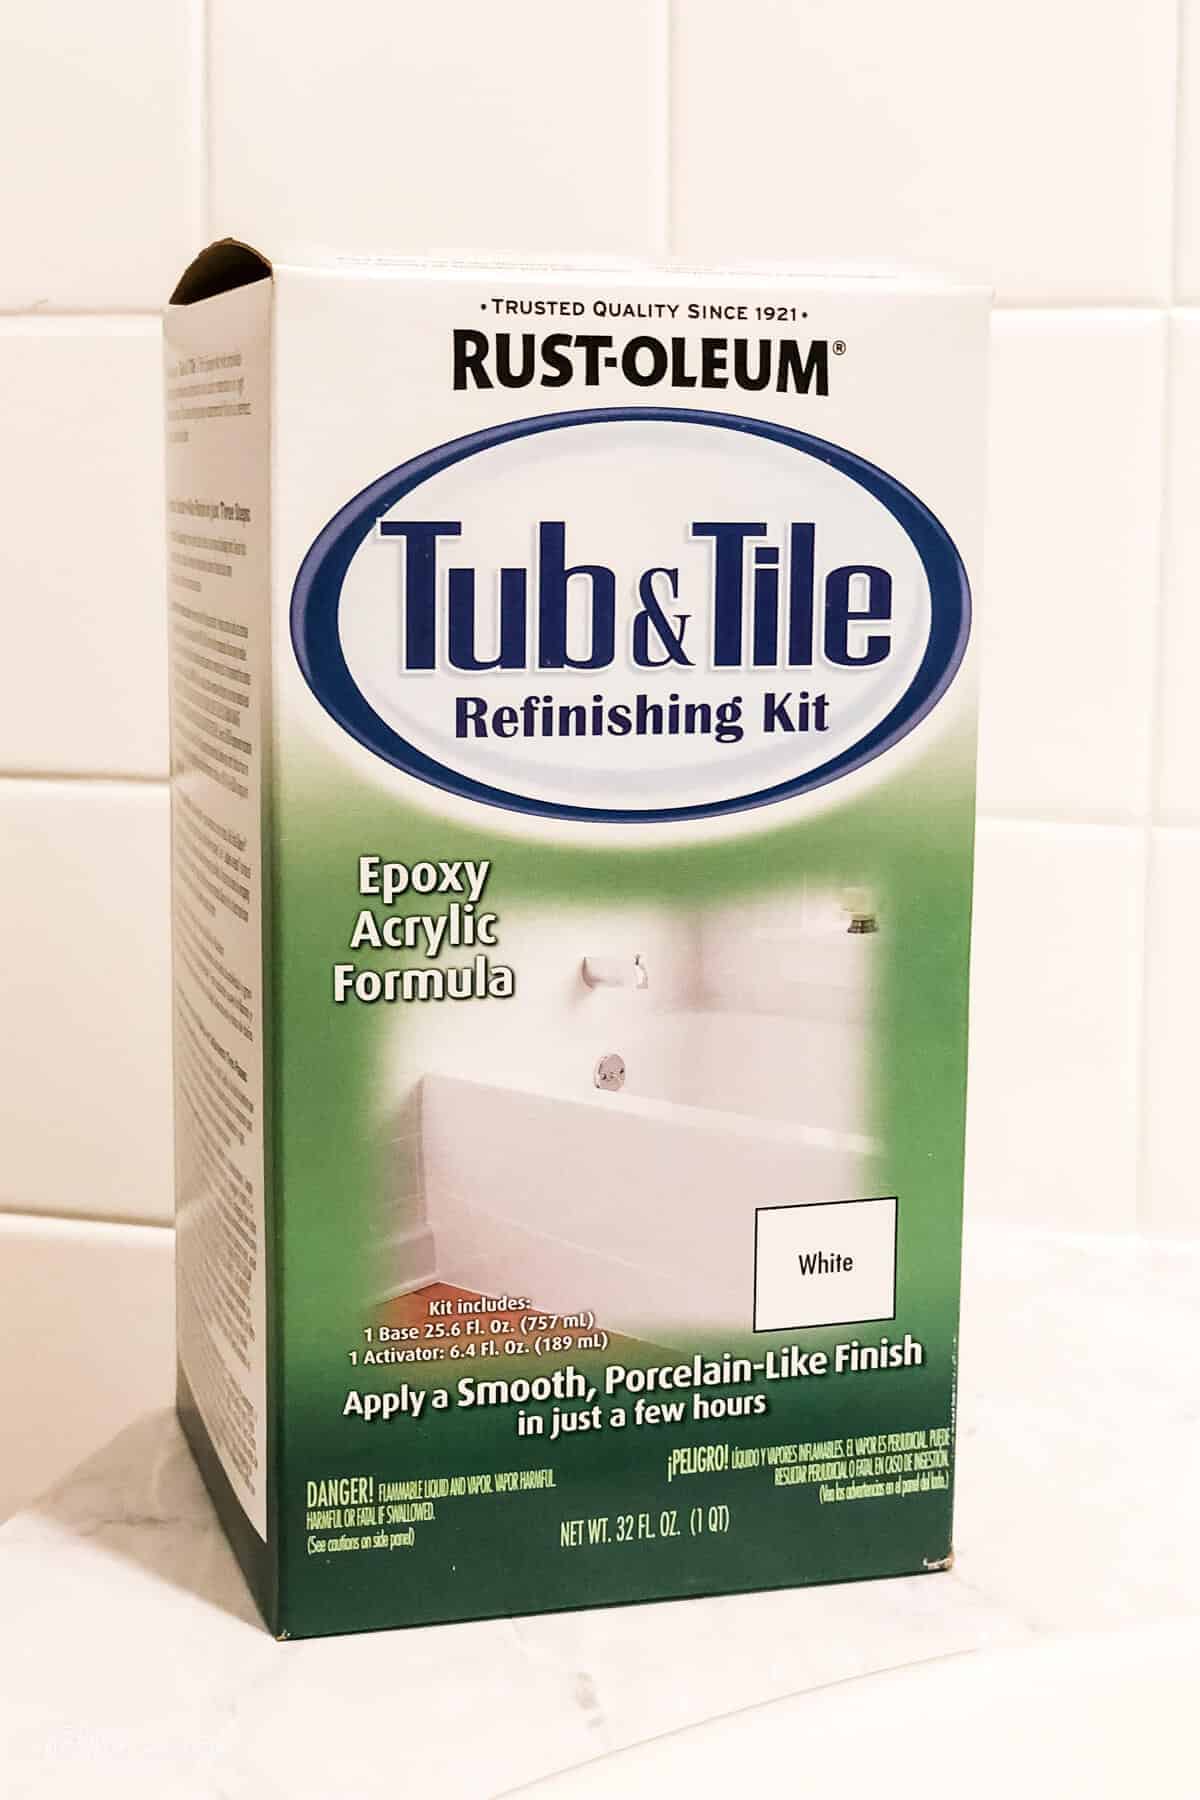
Wall Tile Paint:
- Rust-Oleum Tub and Tile Paint – available at Home Depot (we used white)
Floor Tile Paint System:
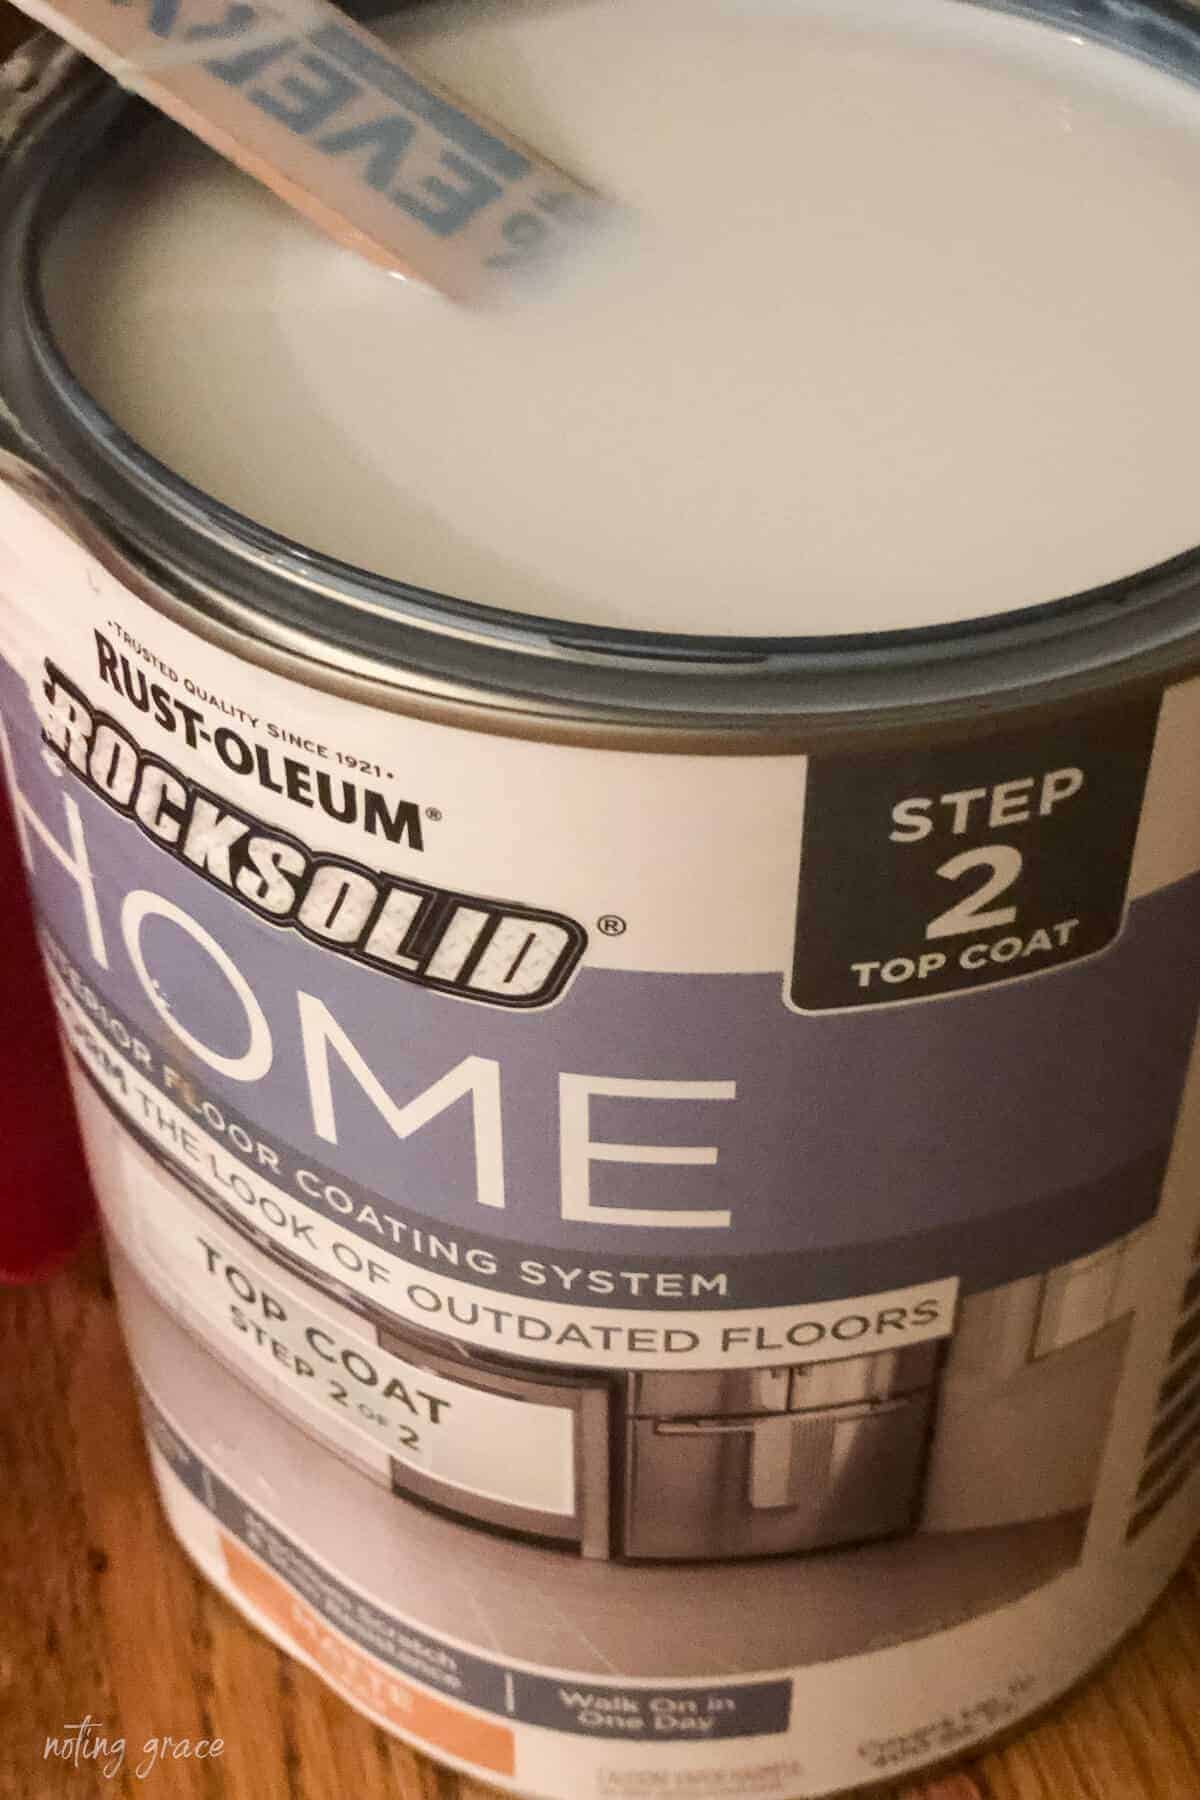
- Rust-Oleum HOME Floor Coating we chose the color Aged Gray
- And Rust-Oleum HOME Floor Coating Top Coat we opted for Matte Finish
Prep and Tools:
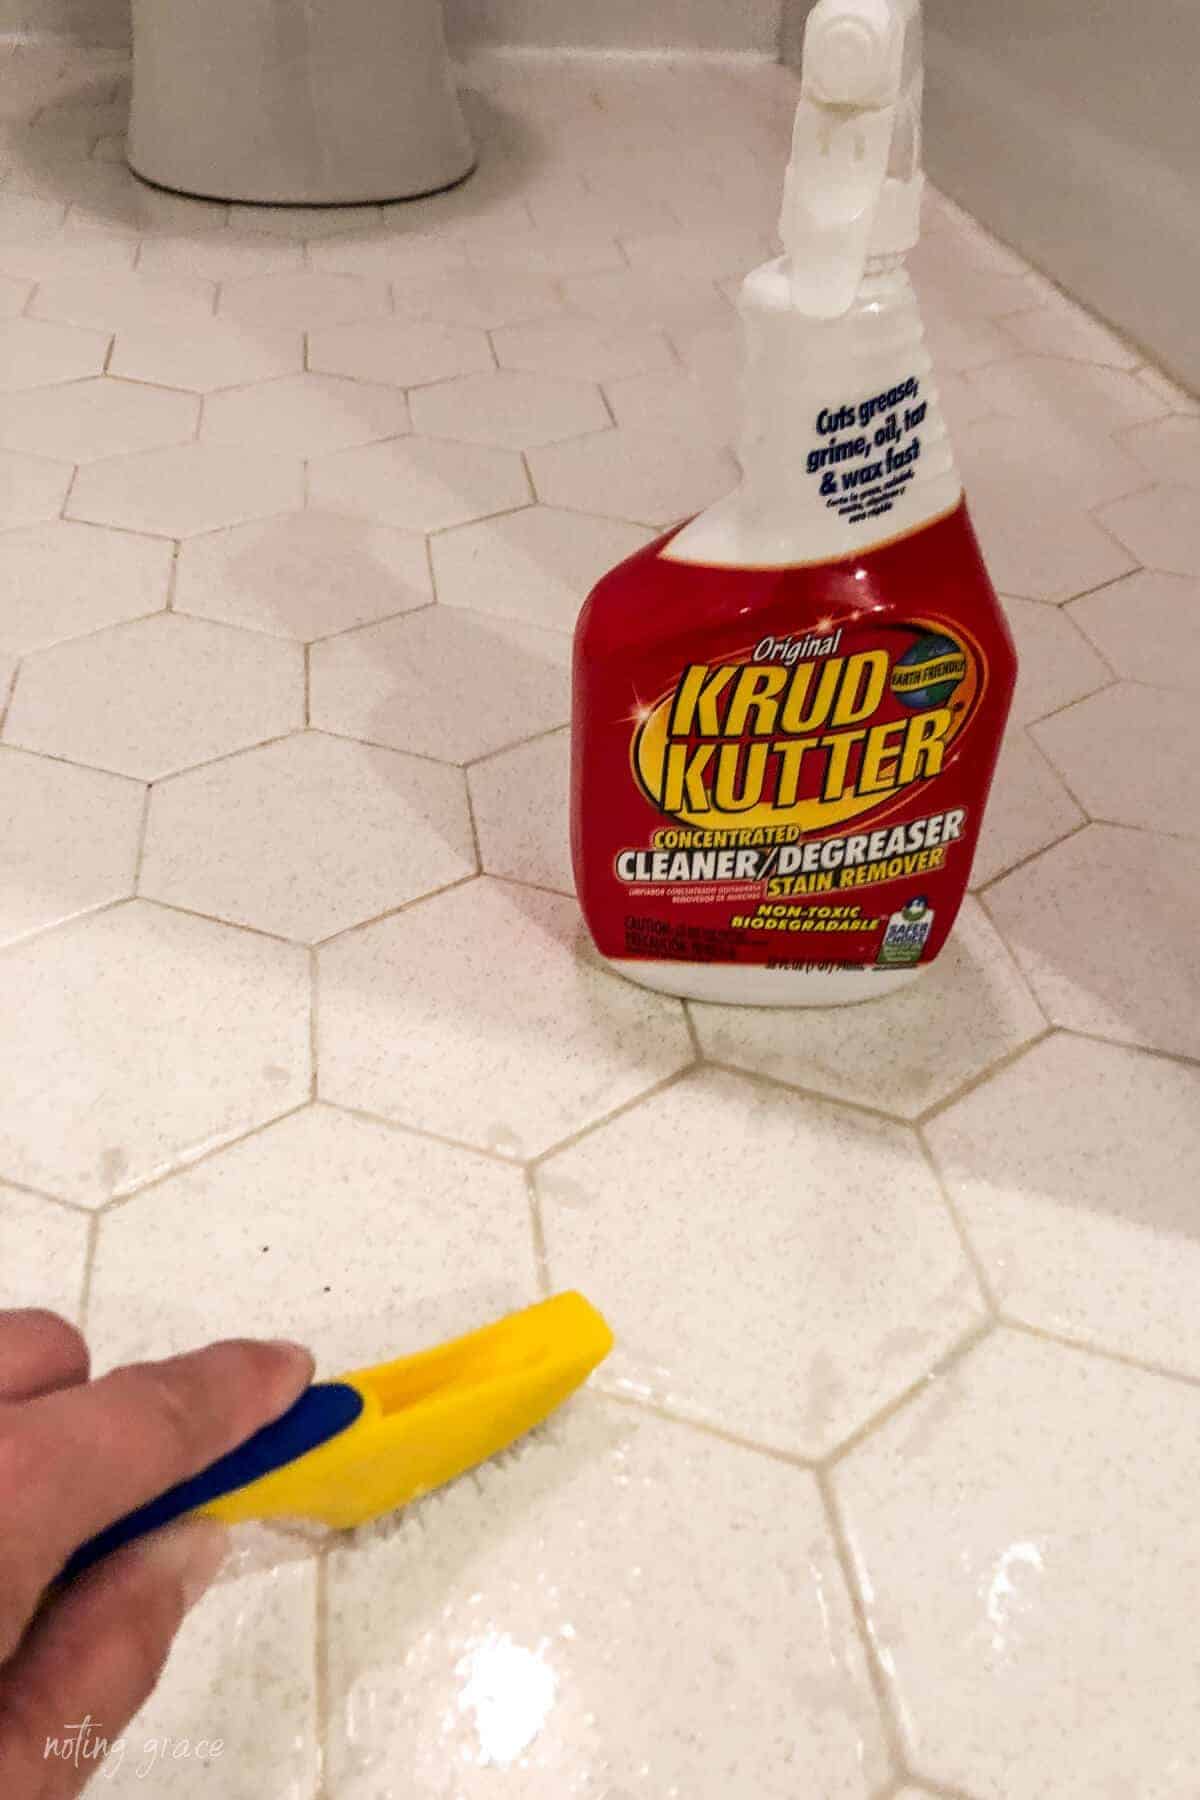
- Heavy Duty Cleaner – we used Krud Kutter
- Wet/Dry Sand Paper – 400 grit
- Tack Cloth
- Paint Stick
- High Quality Paint Brush
- Foam Roller
- Painter’s Tape
- Breathing Mask and Goggles
- Latex Gloves
- Portable Fan
Step One: Prepping the Surface (Don’t Skip This!)
We know – it’s so tempting to rush into painting.
But prep is the real hero of this project. Skipping it is like frosting a cake that hasn’t been baked.
First things first, make any needed repairs to the tile.
For this bathroom, the grout needed to be handled and I share all the details of that project in this post.
Here’s what we did to prep:
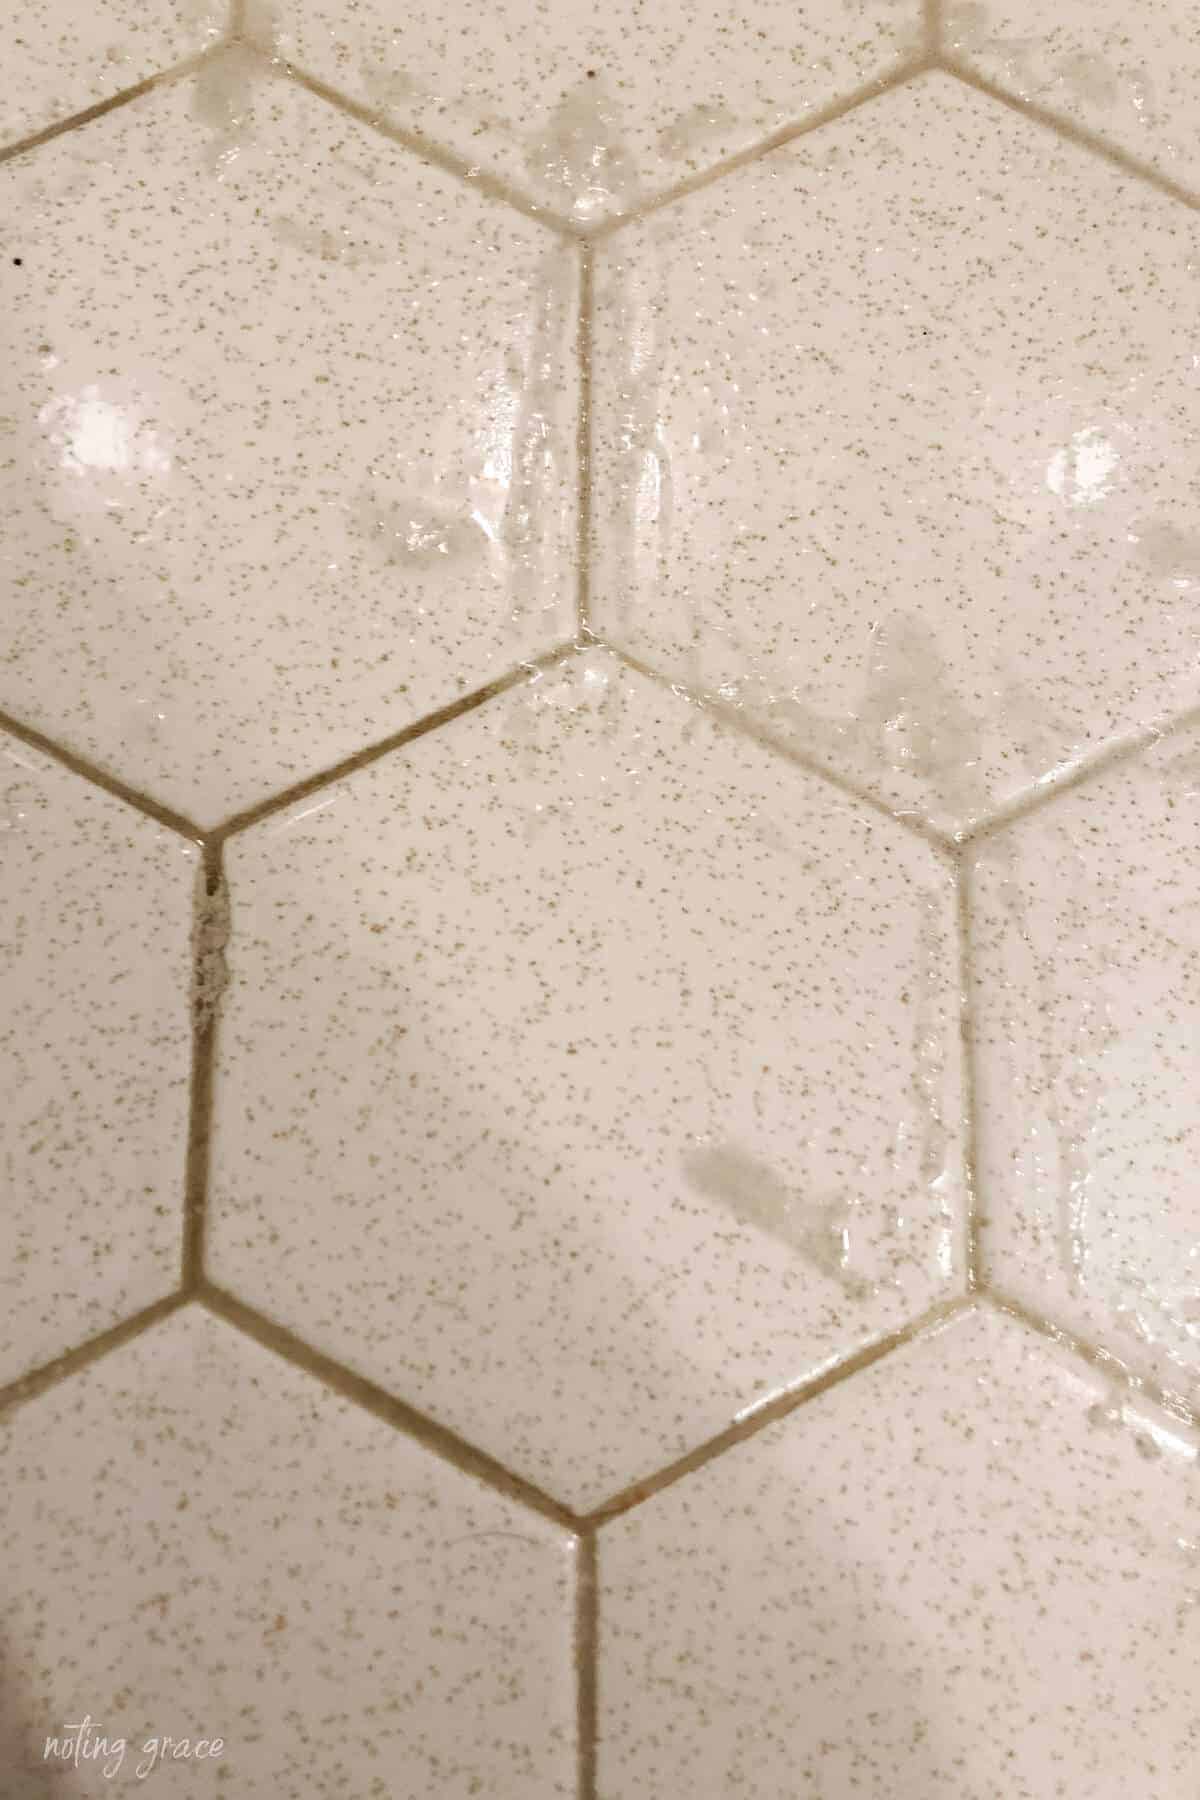
- Scrubbed all surfaces using Krud Kutter and a stiff brush. Our grout was so stubborn, but this cleaner really helped. You want to make sure the surface is very clean before applying the paint.
- Sanded the wall tile with 400-grit wet/dry sandpaper. Yes, tile is tough. Yes, your arms will feel it. But this gives the paint something to grip.
For the Tub and Tile Paint:
You will need to prepare the tile with an abrasive pad or wet/dry medium grit sandpaper. Make sure to hit each tile. It can be daunting scrubbing the entire space, especially if you have as much tile as we do.
TIP: We sanded in 2 different directions to ensure we hit each spot. Make sure to remove all the sanding dust once you are done.
Thoroughly rinse the walls and clean after sanding with the Krud Kutter and a scrub brush. It’s a hard working chemical without it being an abrasive cleaner.
For the floor:
Wet sanding isn’t necessary, but the clean surface is a great idea. Especially if your floors were like ours.
- Rinsed and wiped everything down with tack cloth to remove dust.
- Taped off anything we didn’t want painted – edges, caulk lines, walls, metal drains, shower head, knobs, bathroom faucets (especially if it’s a new faucet like ours).
- Ventilated the space with open windows and two fans. This is epoxy paint and has strong fumes — don’t skip the breathing mask, goggles, and gloves.
Once you are sure your surfaces are thoroughly prepped, you are ready to paint.
Step Two: Painting the Wall Tile
Before you open the paint cans, again, make sure you are properly ventilated. Especially if you have a small bathroom like ours. We opened windows and had 2 fans blowing the air out the window.
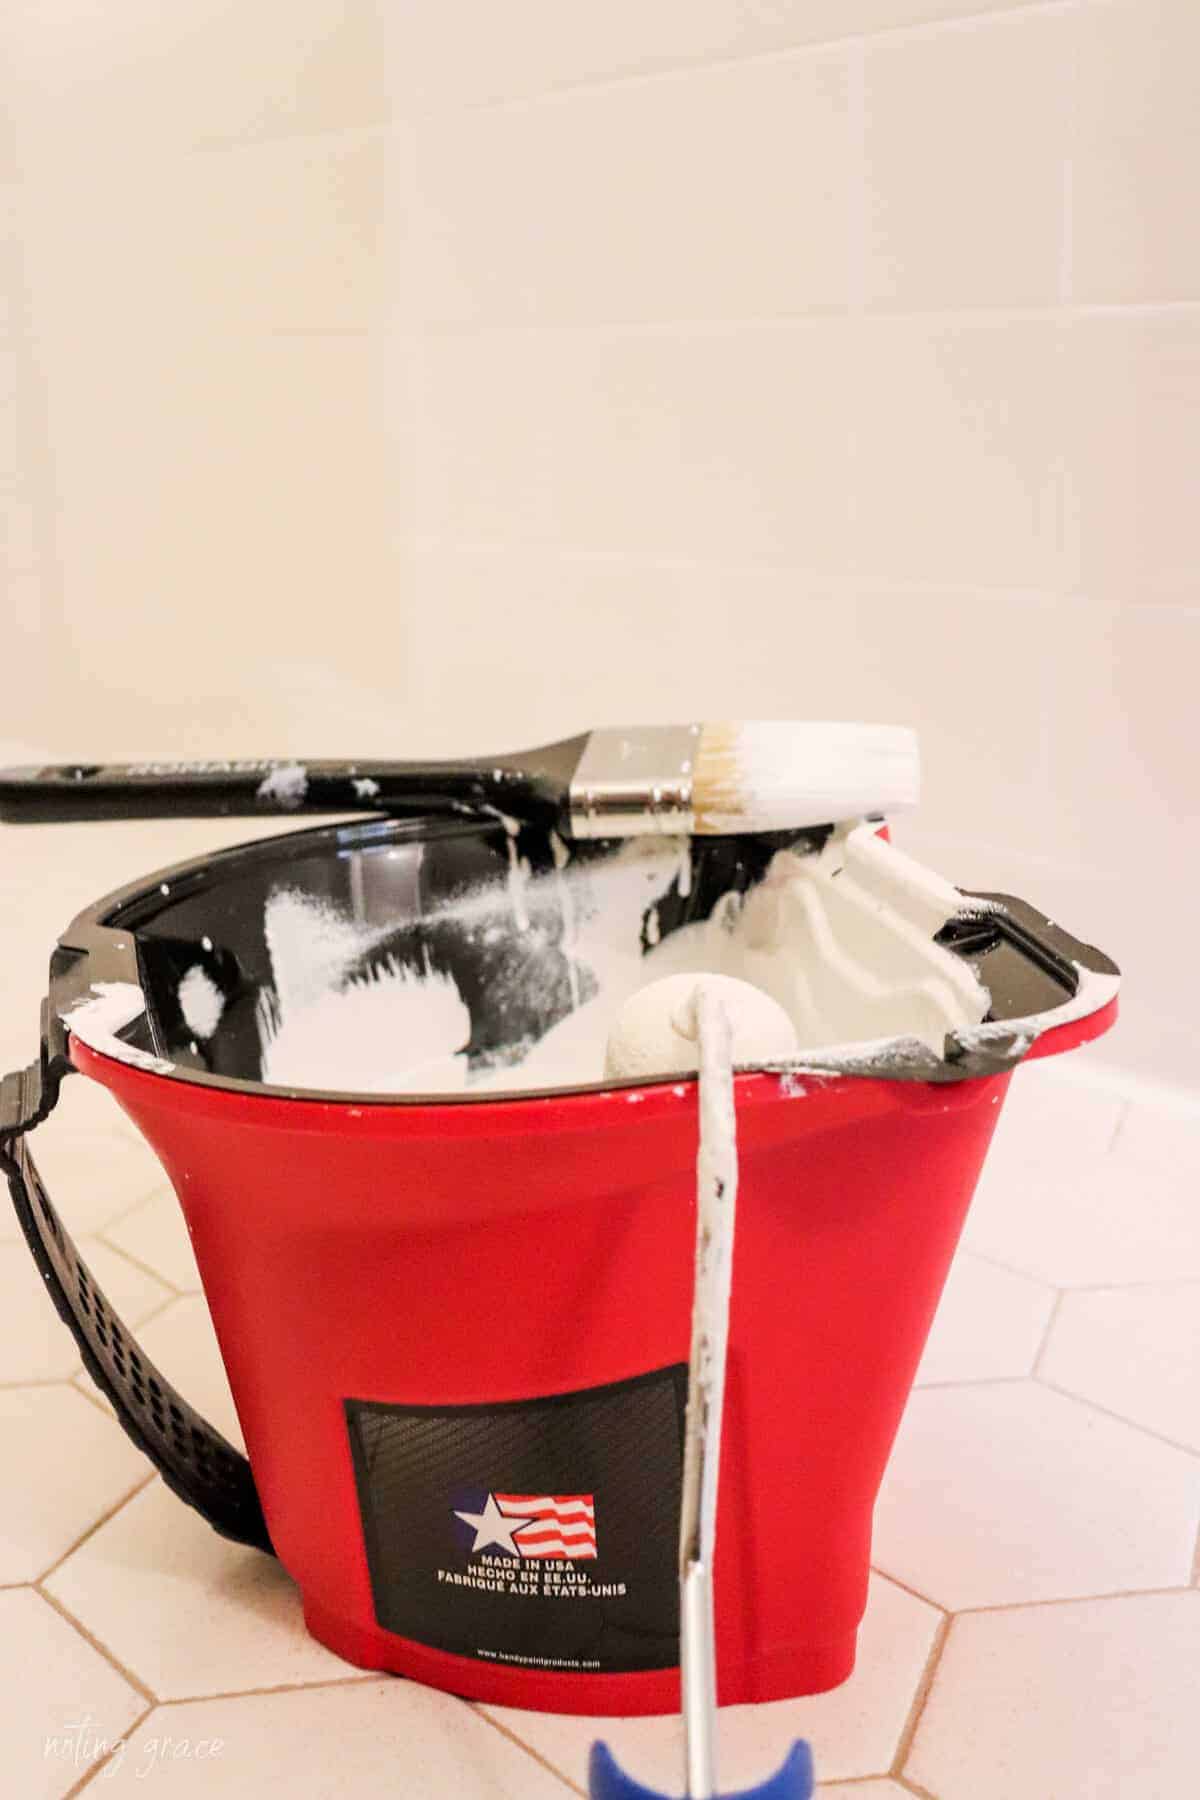
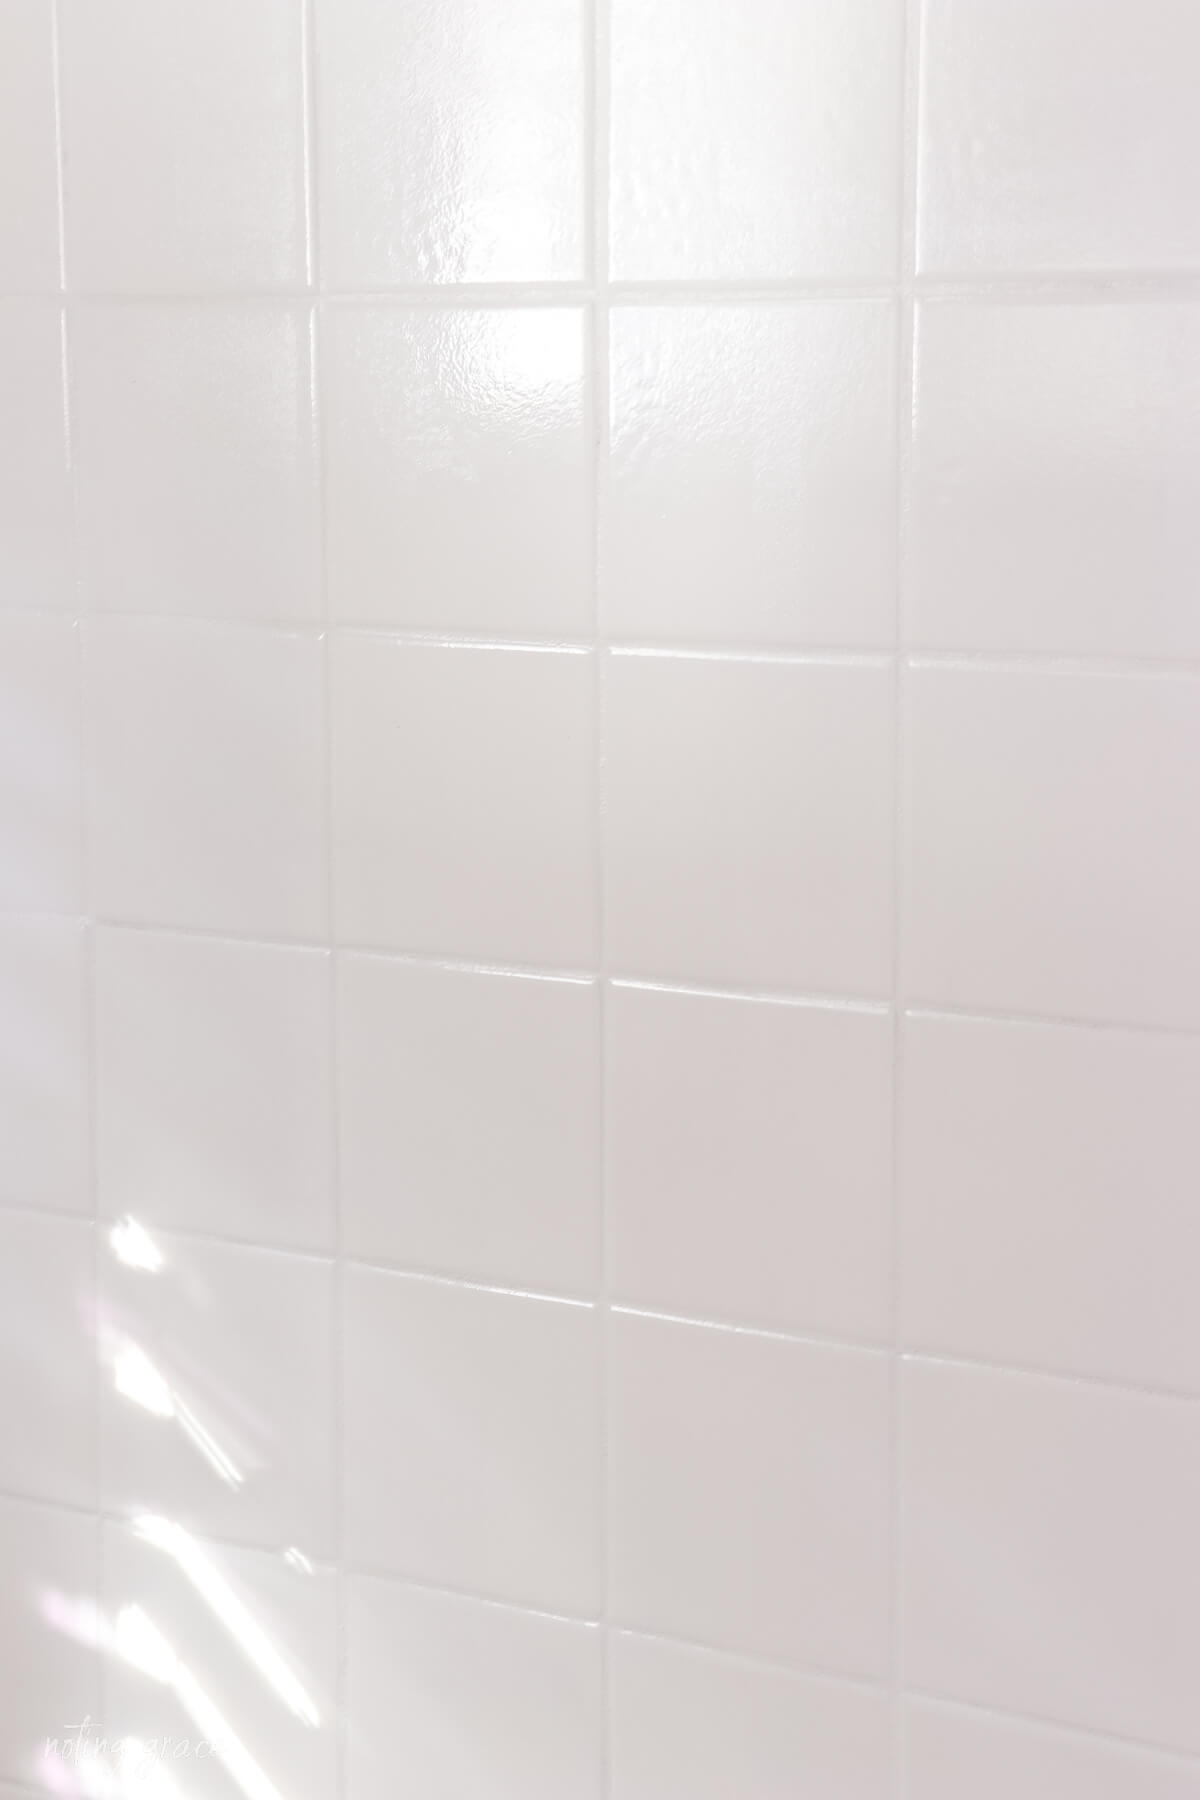
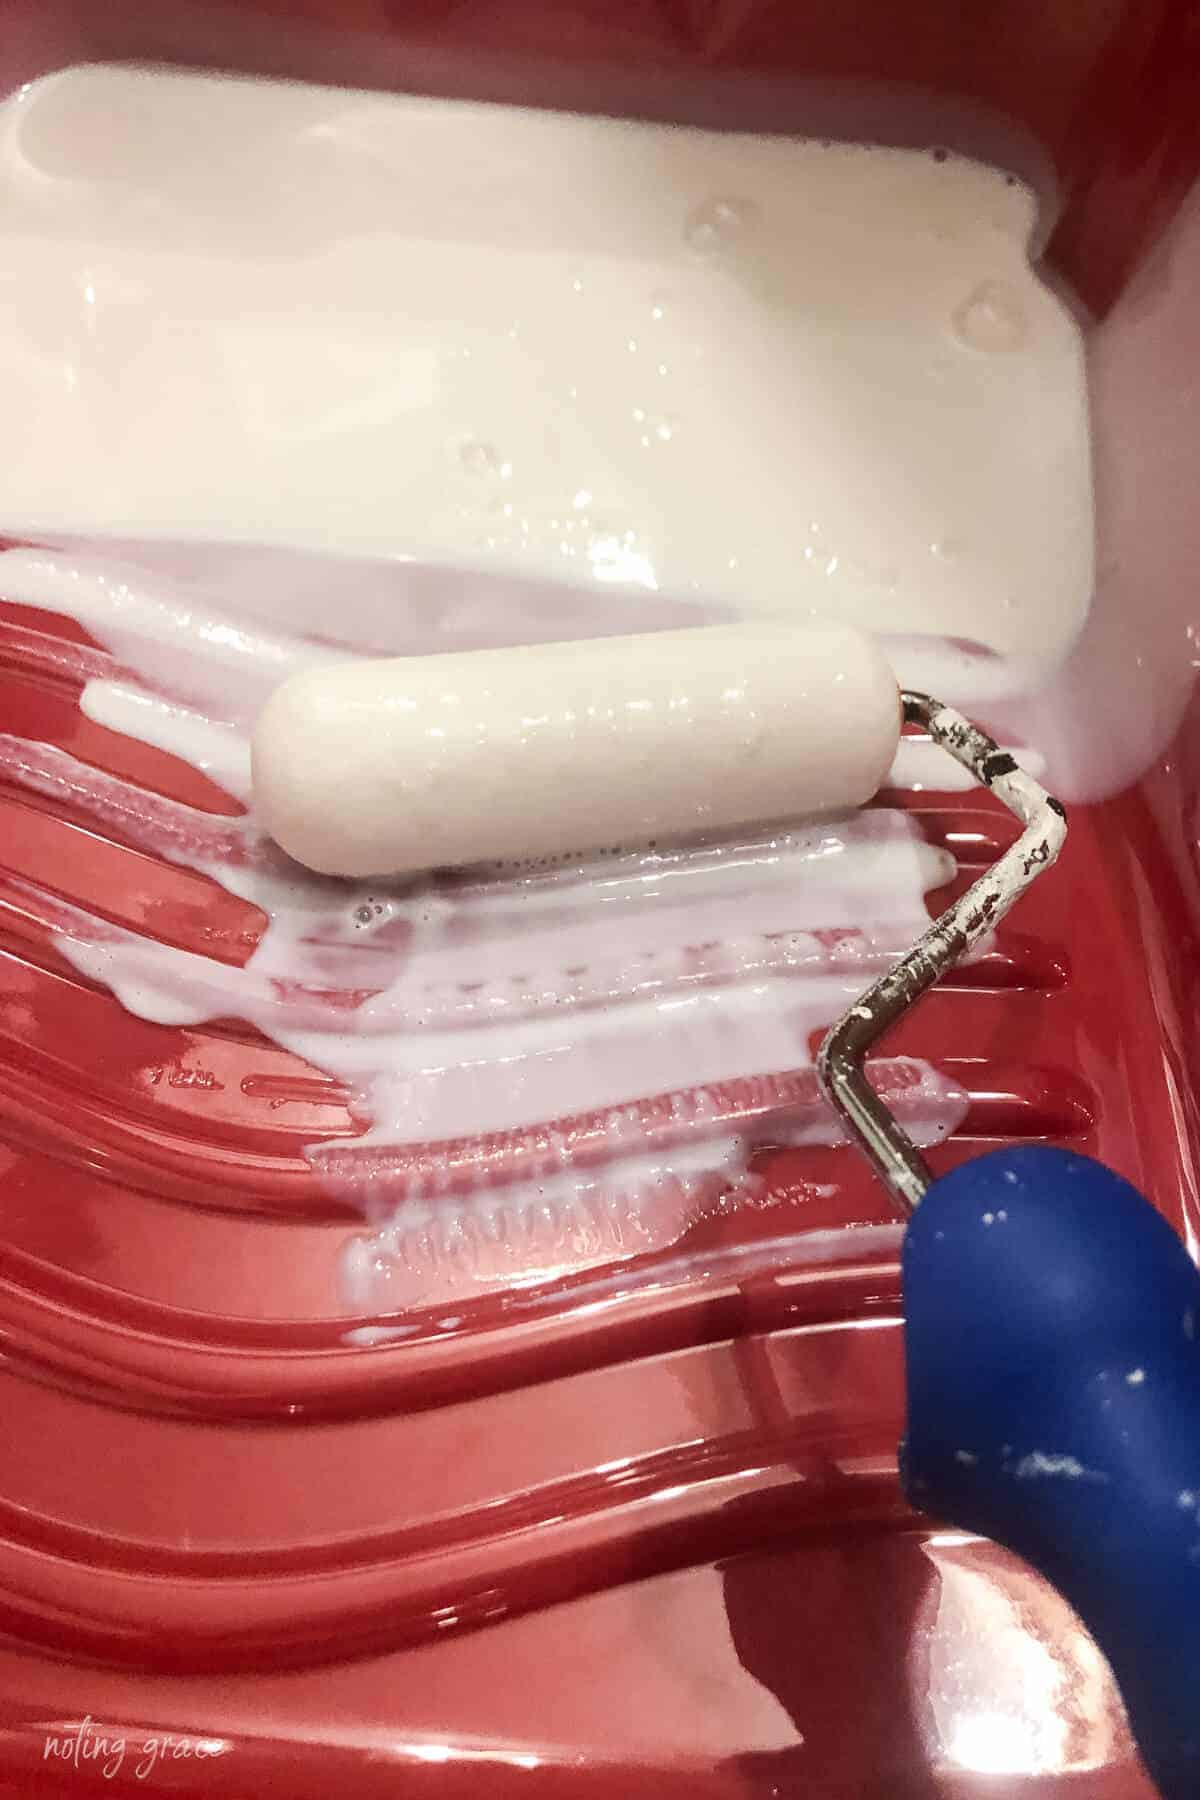
The Rust-Oleum Tub and Tile Kit comes with two parts you mix together. We used a small paintbrush for corners and a foam roller for large areas. Work quickly — the paint gets tacky fast.

- One coat gave us great coverage, but we did two coats total for durability.
- We allowed the paint to dry at least an hour between coats.
- We didn’t paint our bathtub (it was already in good condition.) But it would be an excellent option to make an old tub look new.
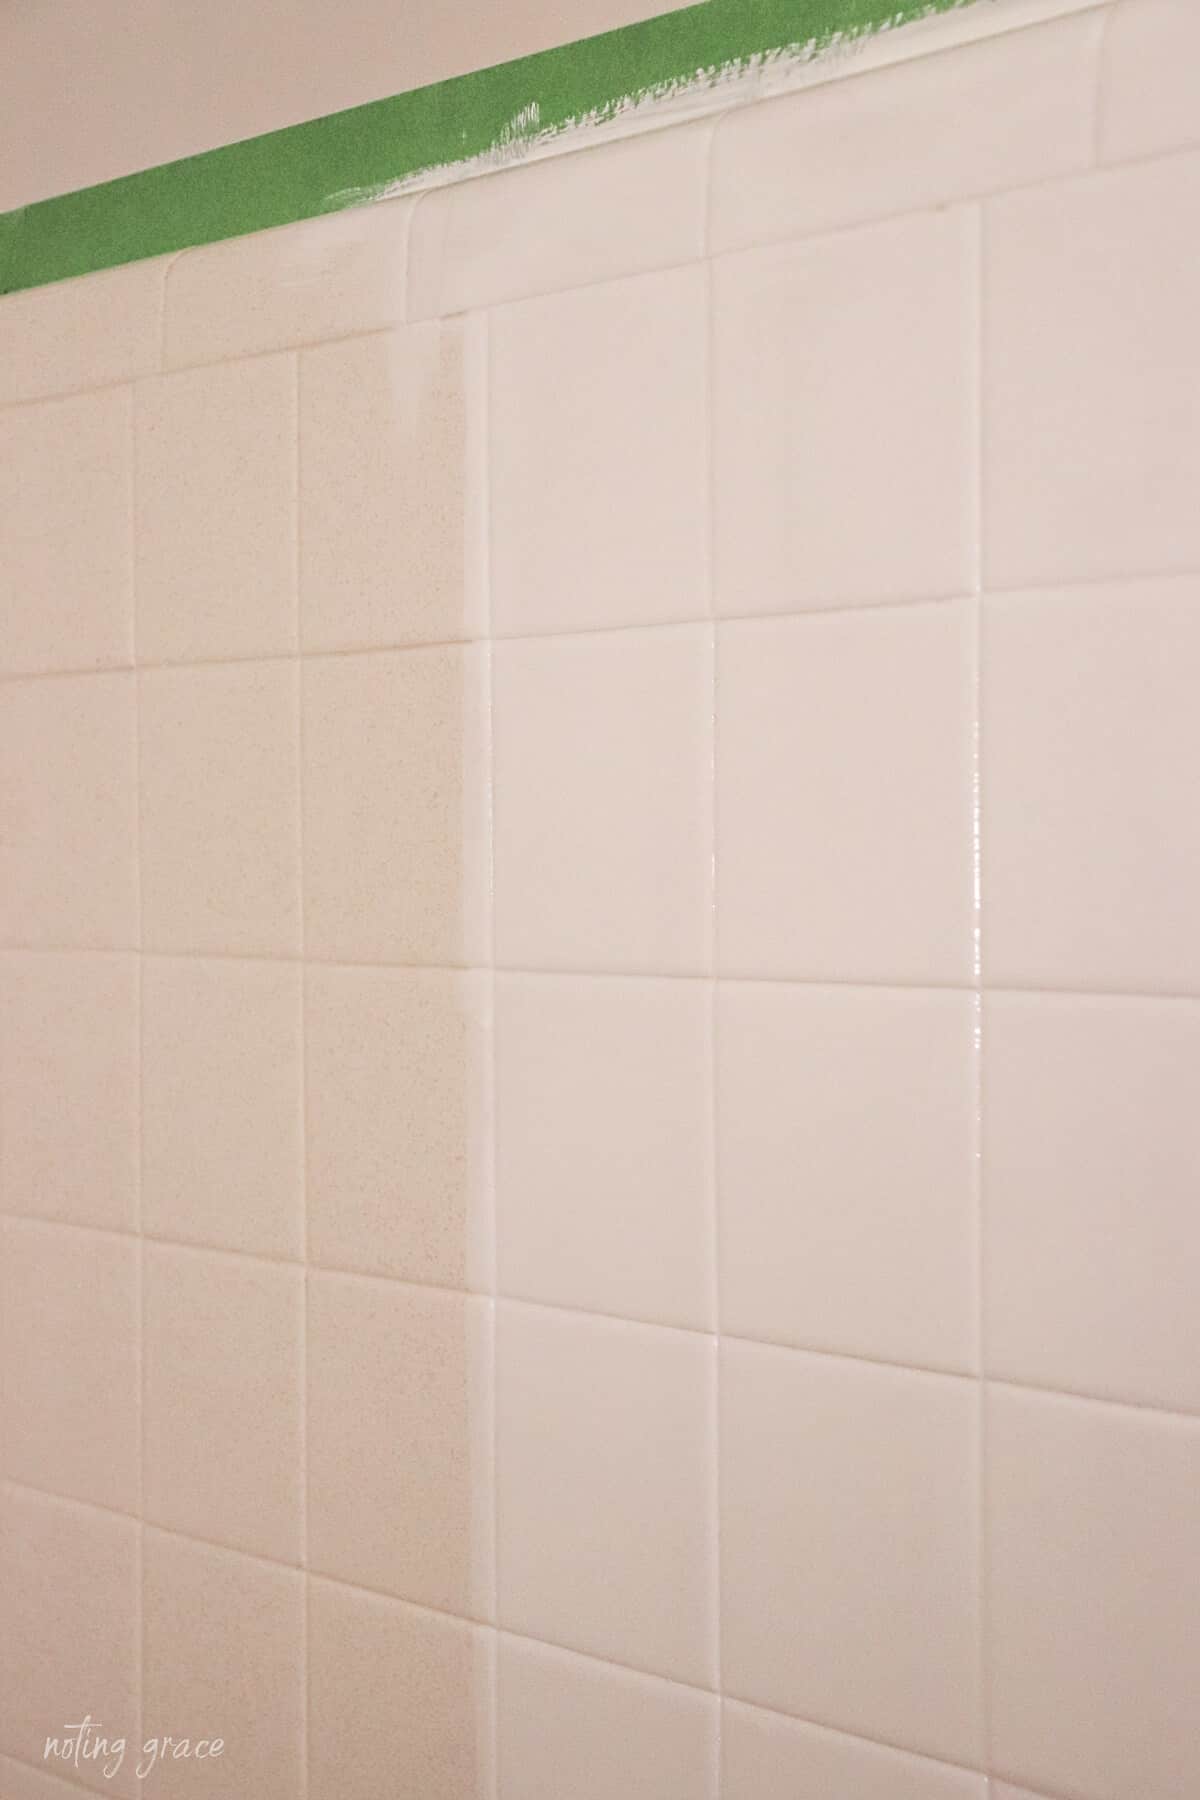
This stuff goes on super smooth. We had the first coat of all the wall tile finished in about 2 hours. That included the tub around the tile and all the tile on the walls of our bathroom – which was a lot.
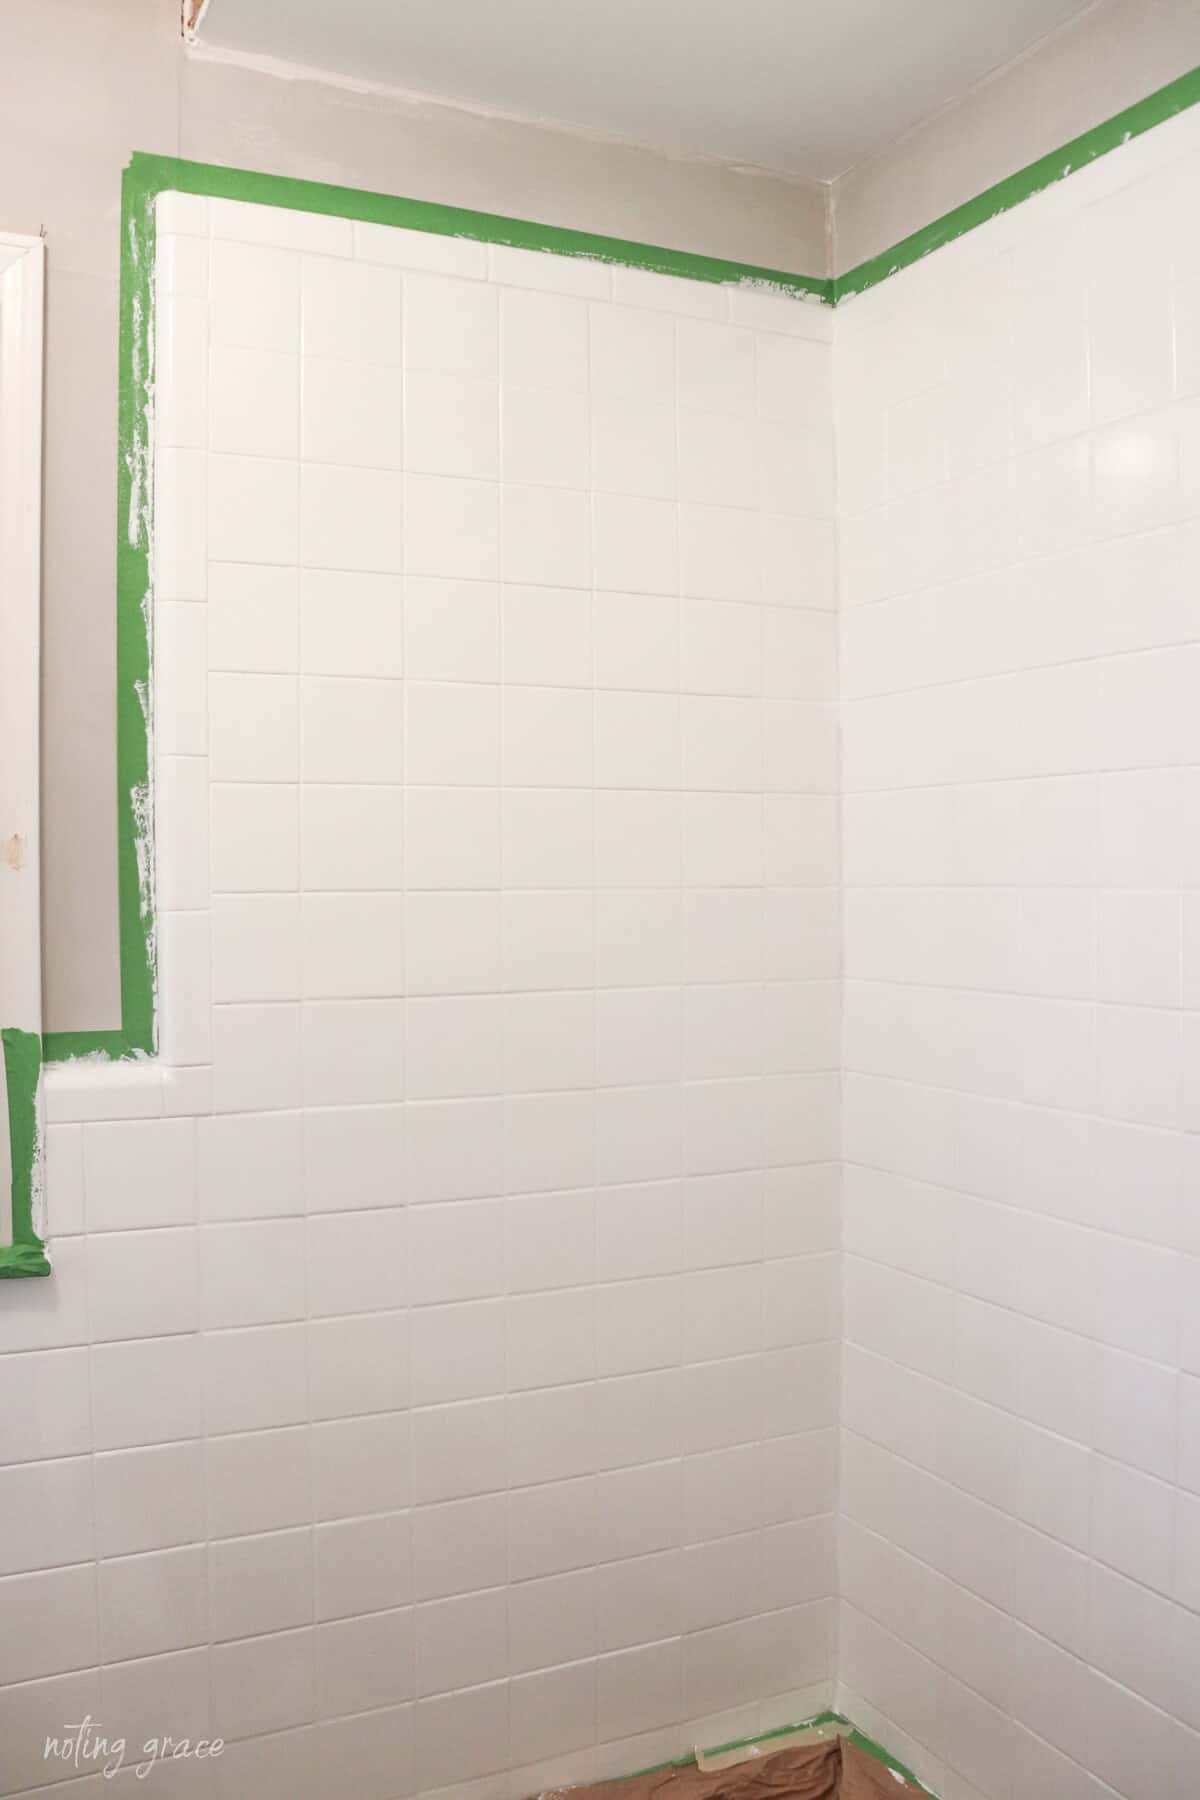
In one day, we had both coats finished.
It looks so smooth!
One package covers 110 square foot, which should work for 2 coats on an average bathroom.
We needed 2 packages since the tile extended into the double vanity area. And we had lots left over.
We suggest measuring the square footage of tile you have before purchasing. It’s a good idea to have enough product to finish the project.
TIP: Don’t overwork the paint. Smooth, even strokes are your best friend.
Step Three: Painting Floor Tile That Lasts

Honestly? This floor tile paint was what made the huge difference in this bathroom makeover.
We used Rust-Oleum HOME Floor Coating system:
- Base Coat: Aged Gray
- Top Coat: Matte
Again, take a moment to make sure everything is in good shape before starting.
Here’s how it went:
- We swept, vacuumed, cleaned and taped off the floors just like the walls. You have to have a clean surface.
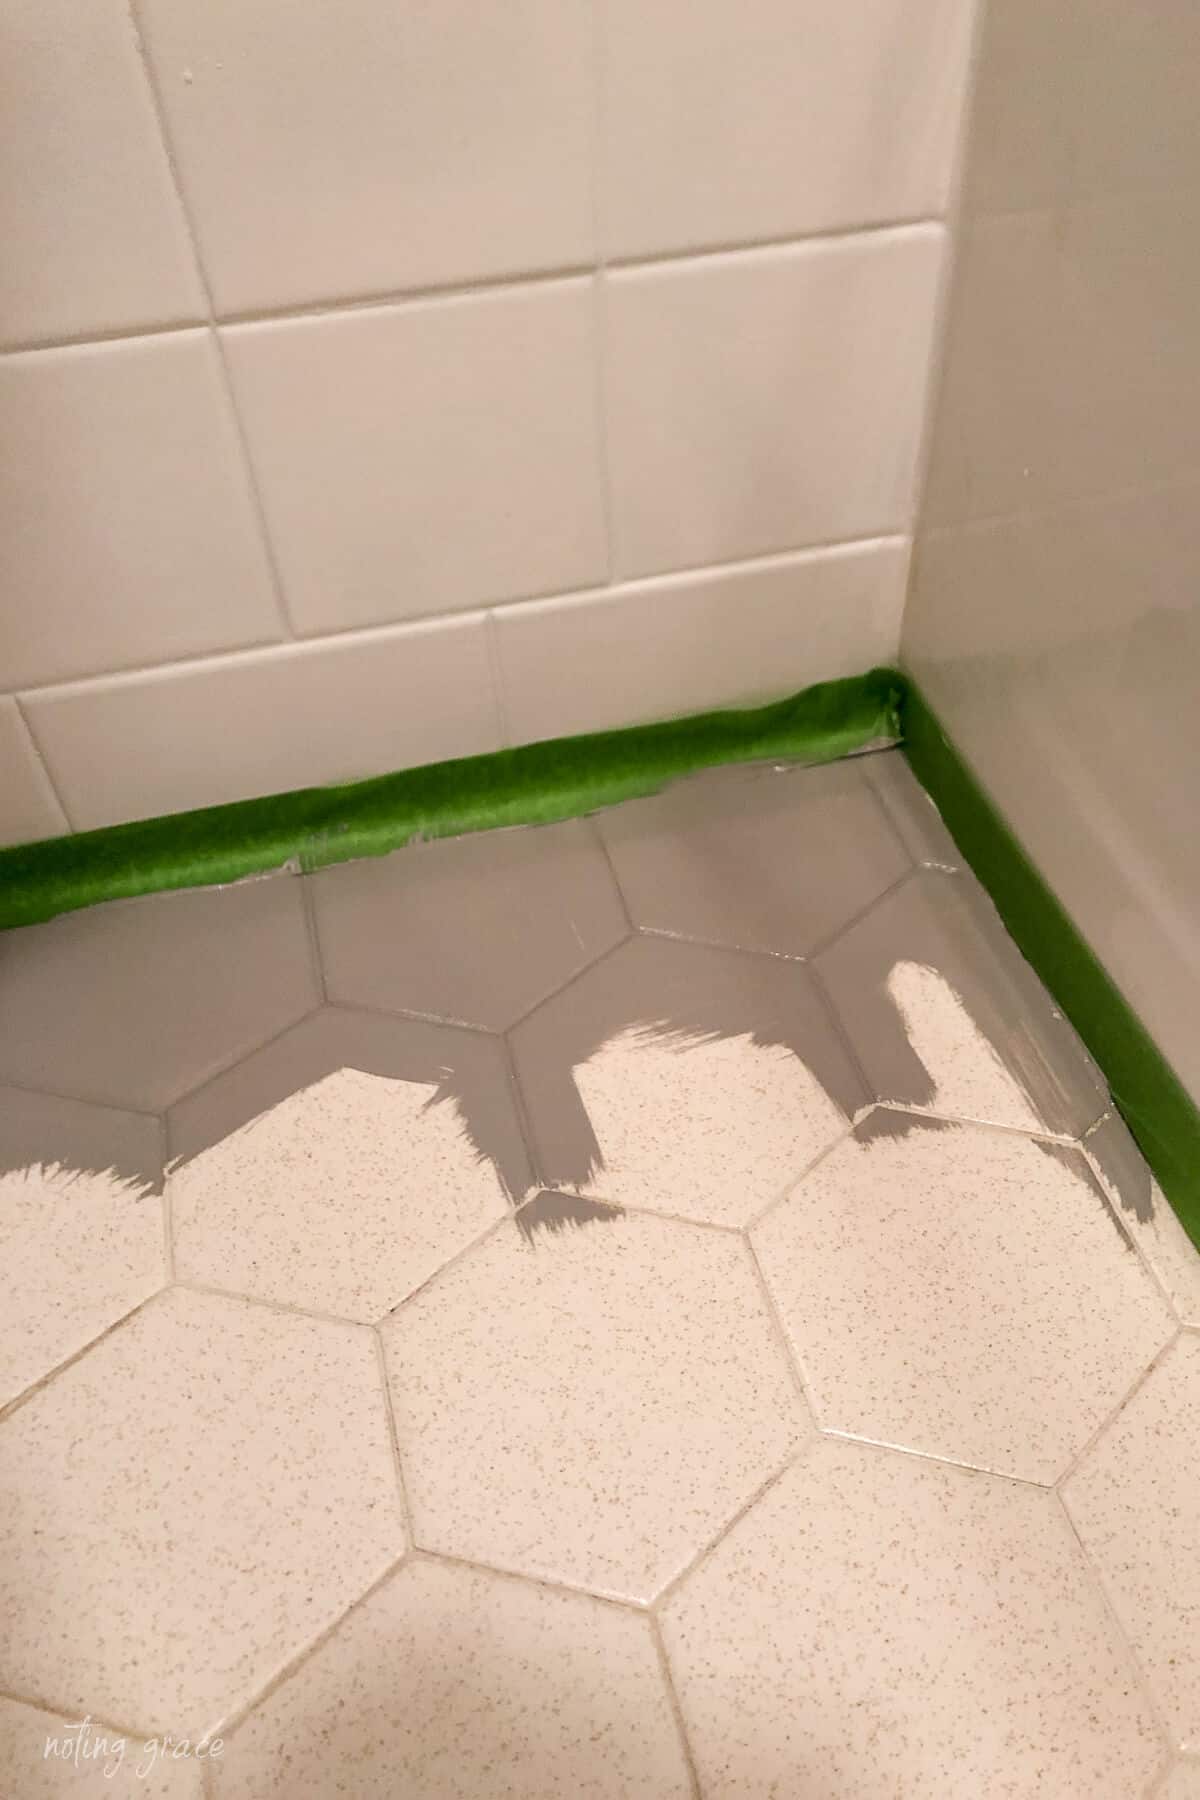
- Started in the far corner and worked our way out (you don’t want to paint yourself into a corner).
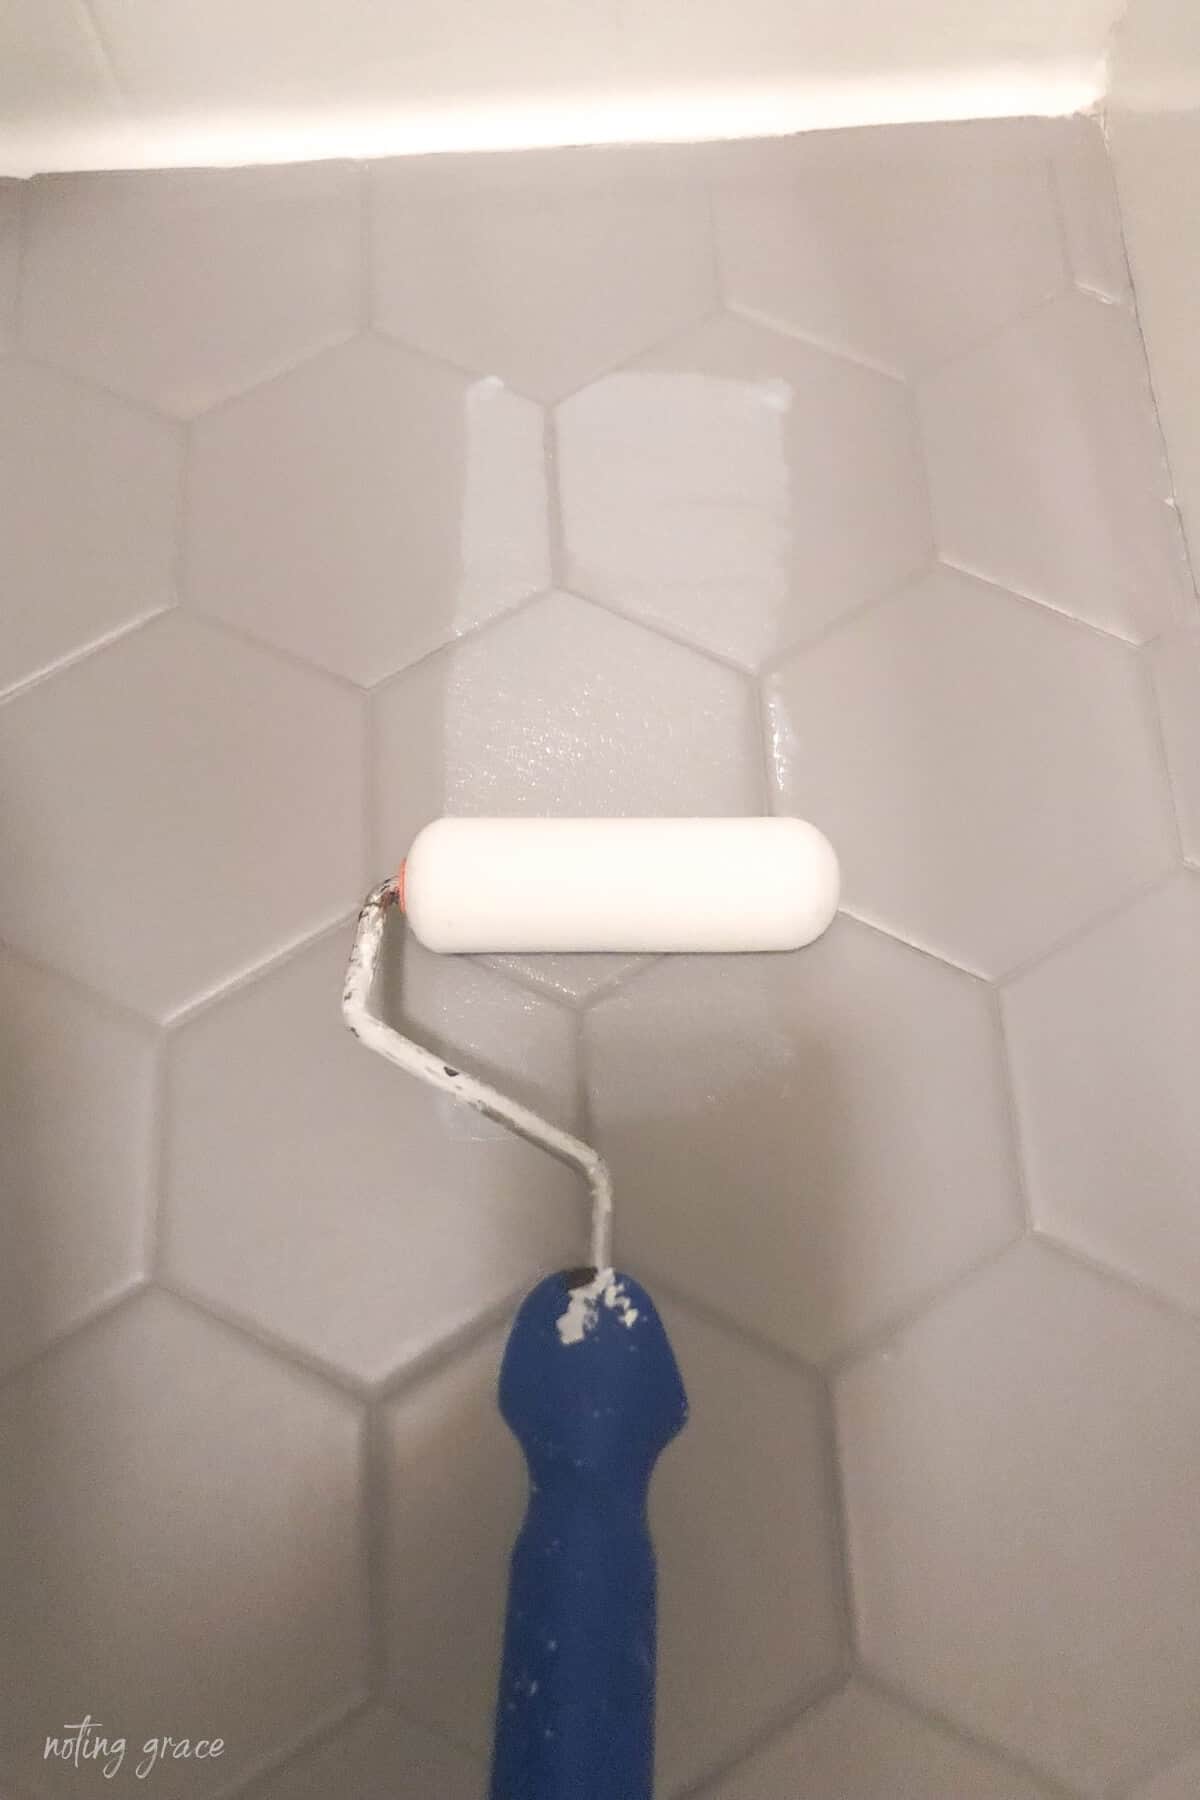
- Cut in with a brush, rolled with foam roller. Our hex tile made it tricky to hit the grout lines, so we did a combo of brush + roller.
TIP: Gently stir your floor paint well before applying, especially if you have a darker tint. Make sure all color is incorporated together. Settling and separation can occur which may show up.

- Let the base coat dry 6 hours, then applied the top coat the next day.
TIP: We also removed the tape as we went along checking for bleed through and cleaning if necessary.
The entire first coat process took just under an hour. We couldn’t believe how quickly it transformed the room.
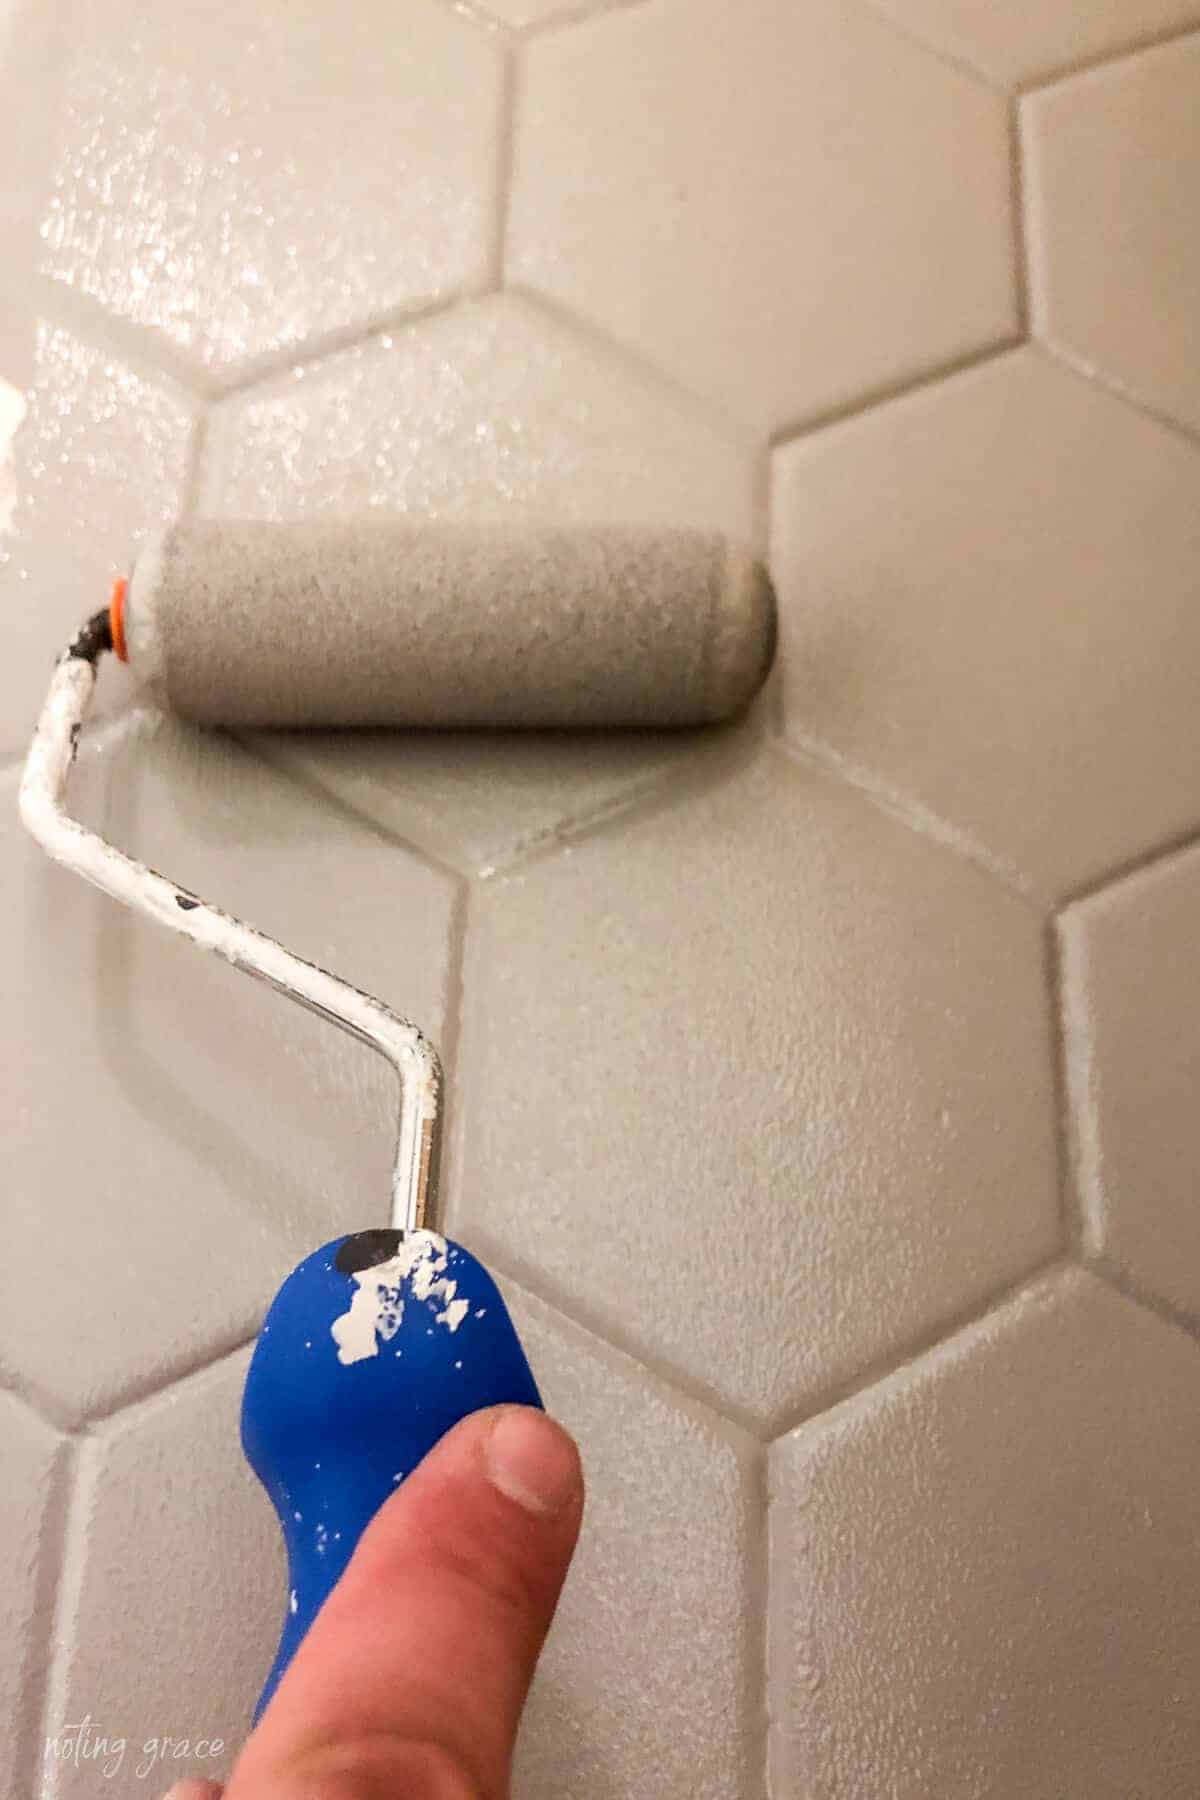
The top coat is a very milky texture and goes a long way and dried to a beautiful matte finish.
It sealed everything in and gave us peace of mind that our hard work would hold up.
We used the same technique as we did with painting the floor, combining the brush and roller to ensure it got into the grout lines.
You can see here how the roller alone wasn’t going to work for the deep grout lines.
Allow the floors to dry for 24 for a full cure before any foot traffic is on them.
The can does state that it takes up to 7 days for the floor to fully cure, so we kept the boys at bay until then.
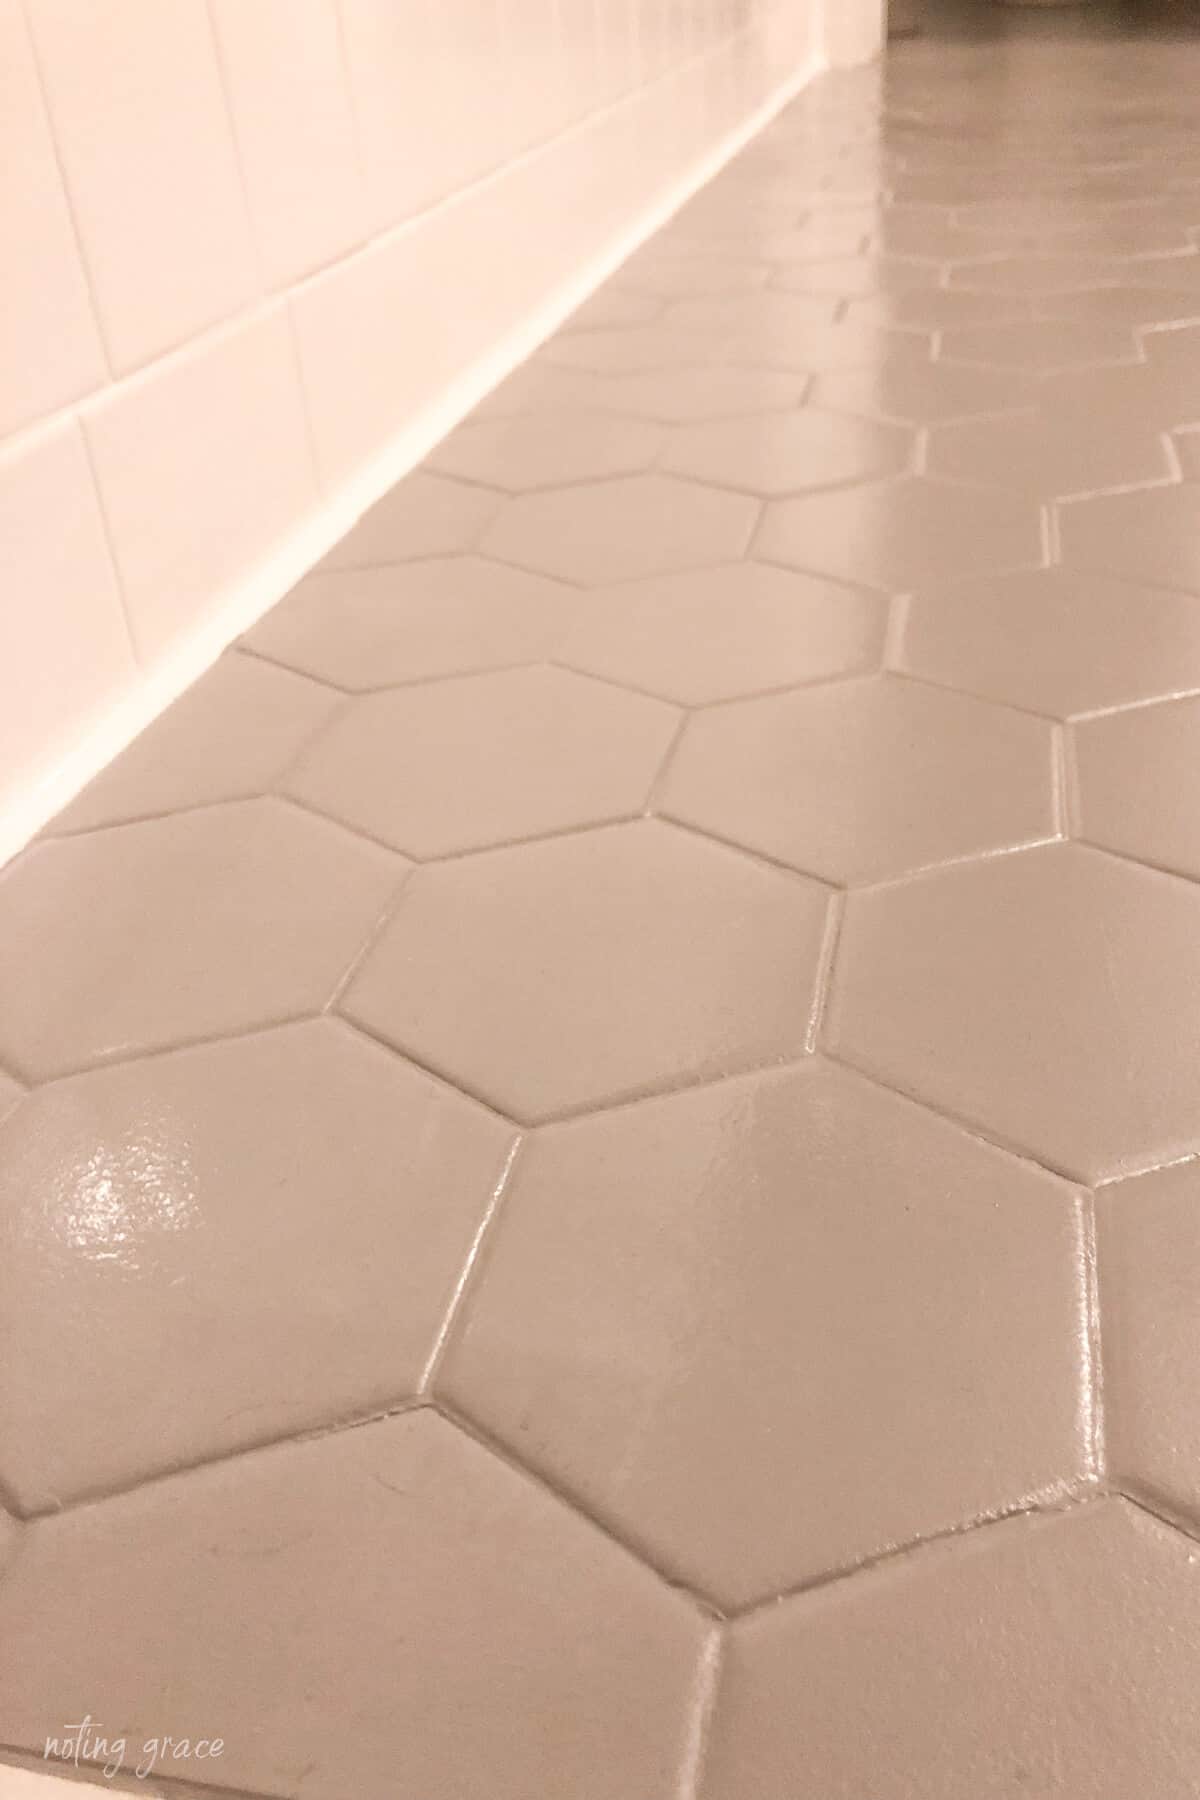
But just look at this huge difference in our bathroom floor!
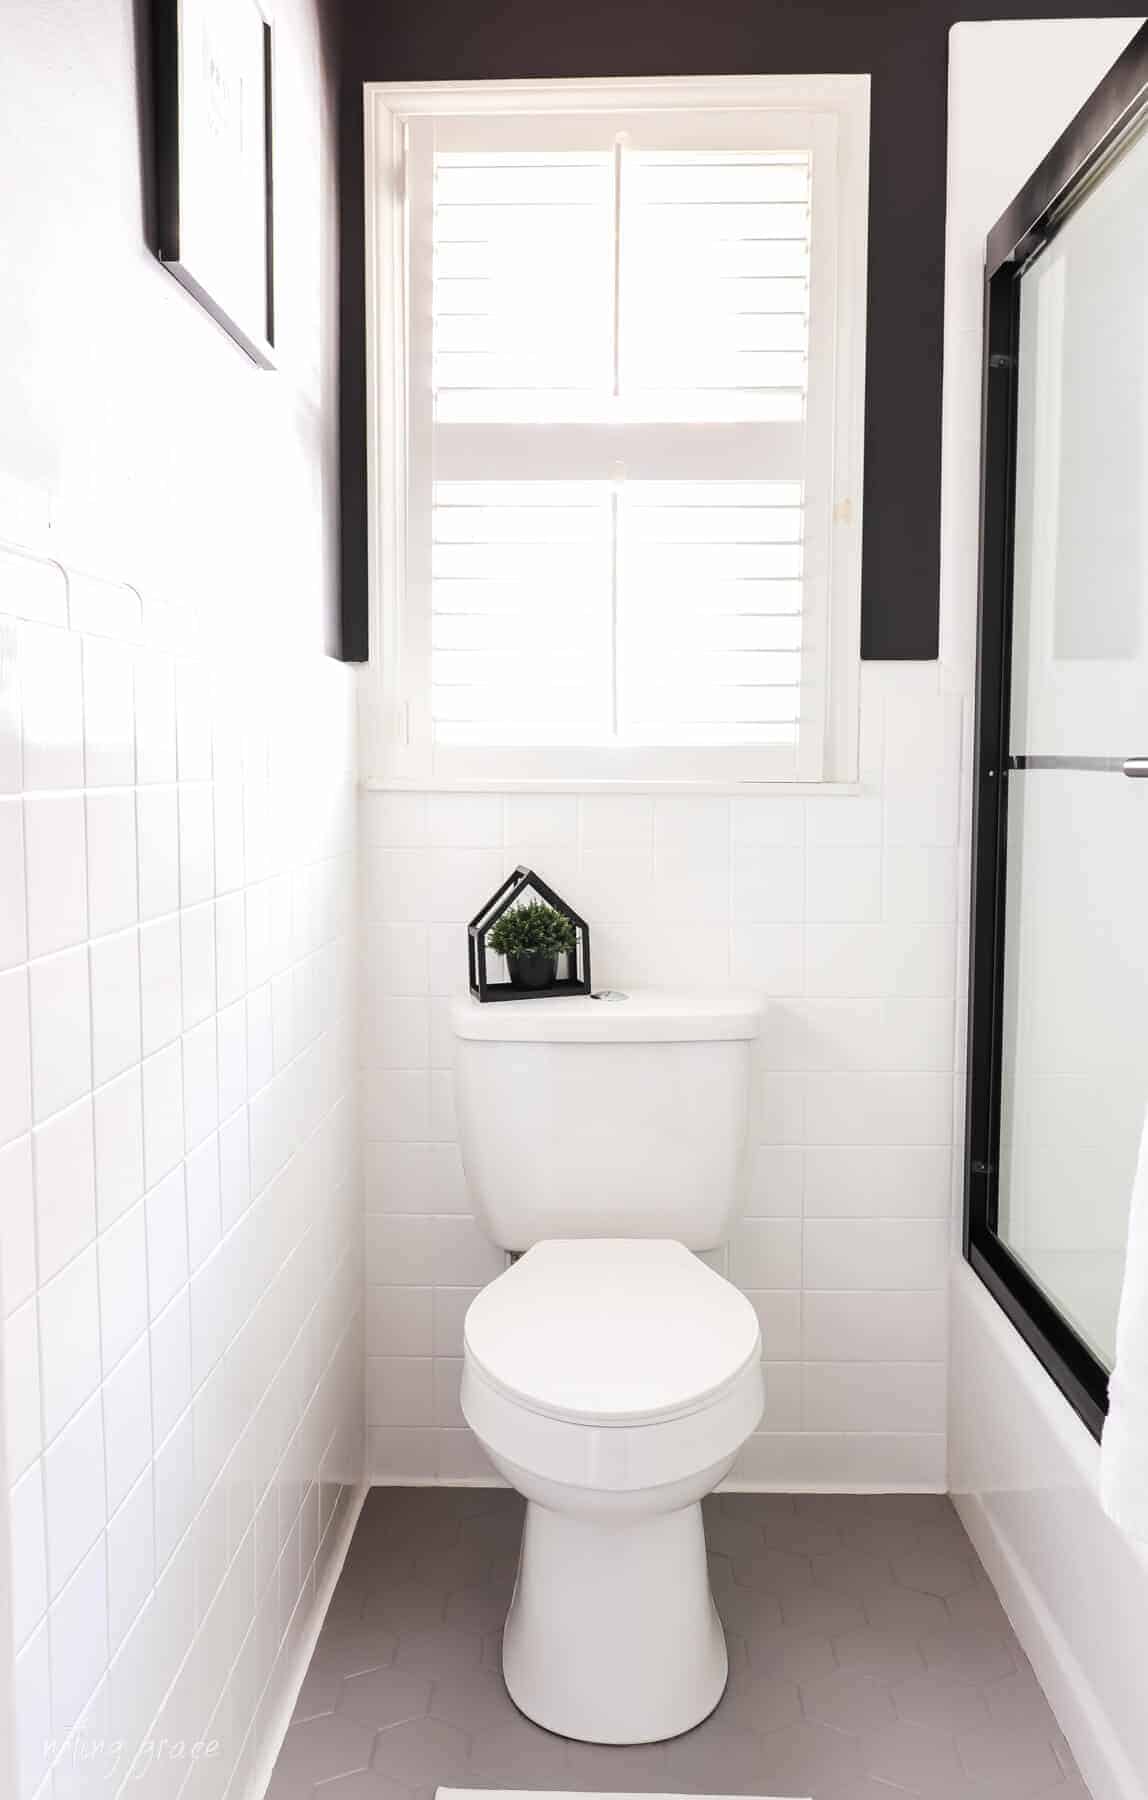
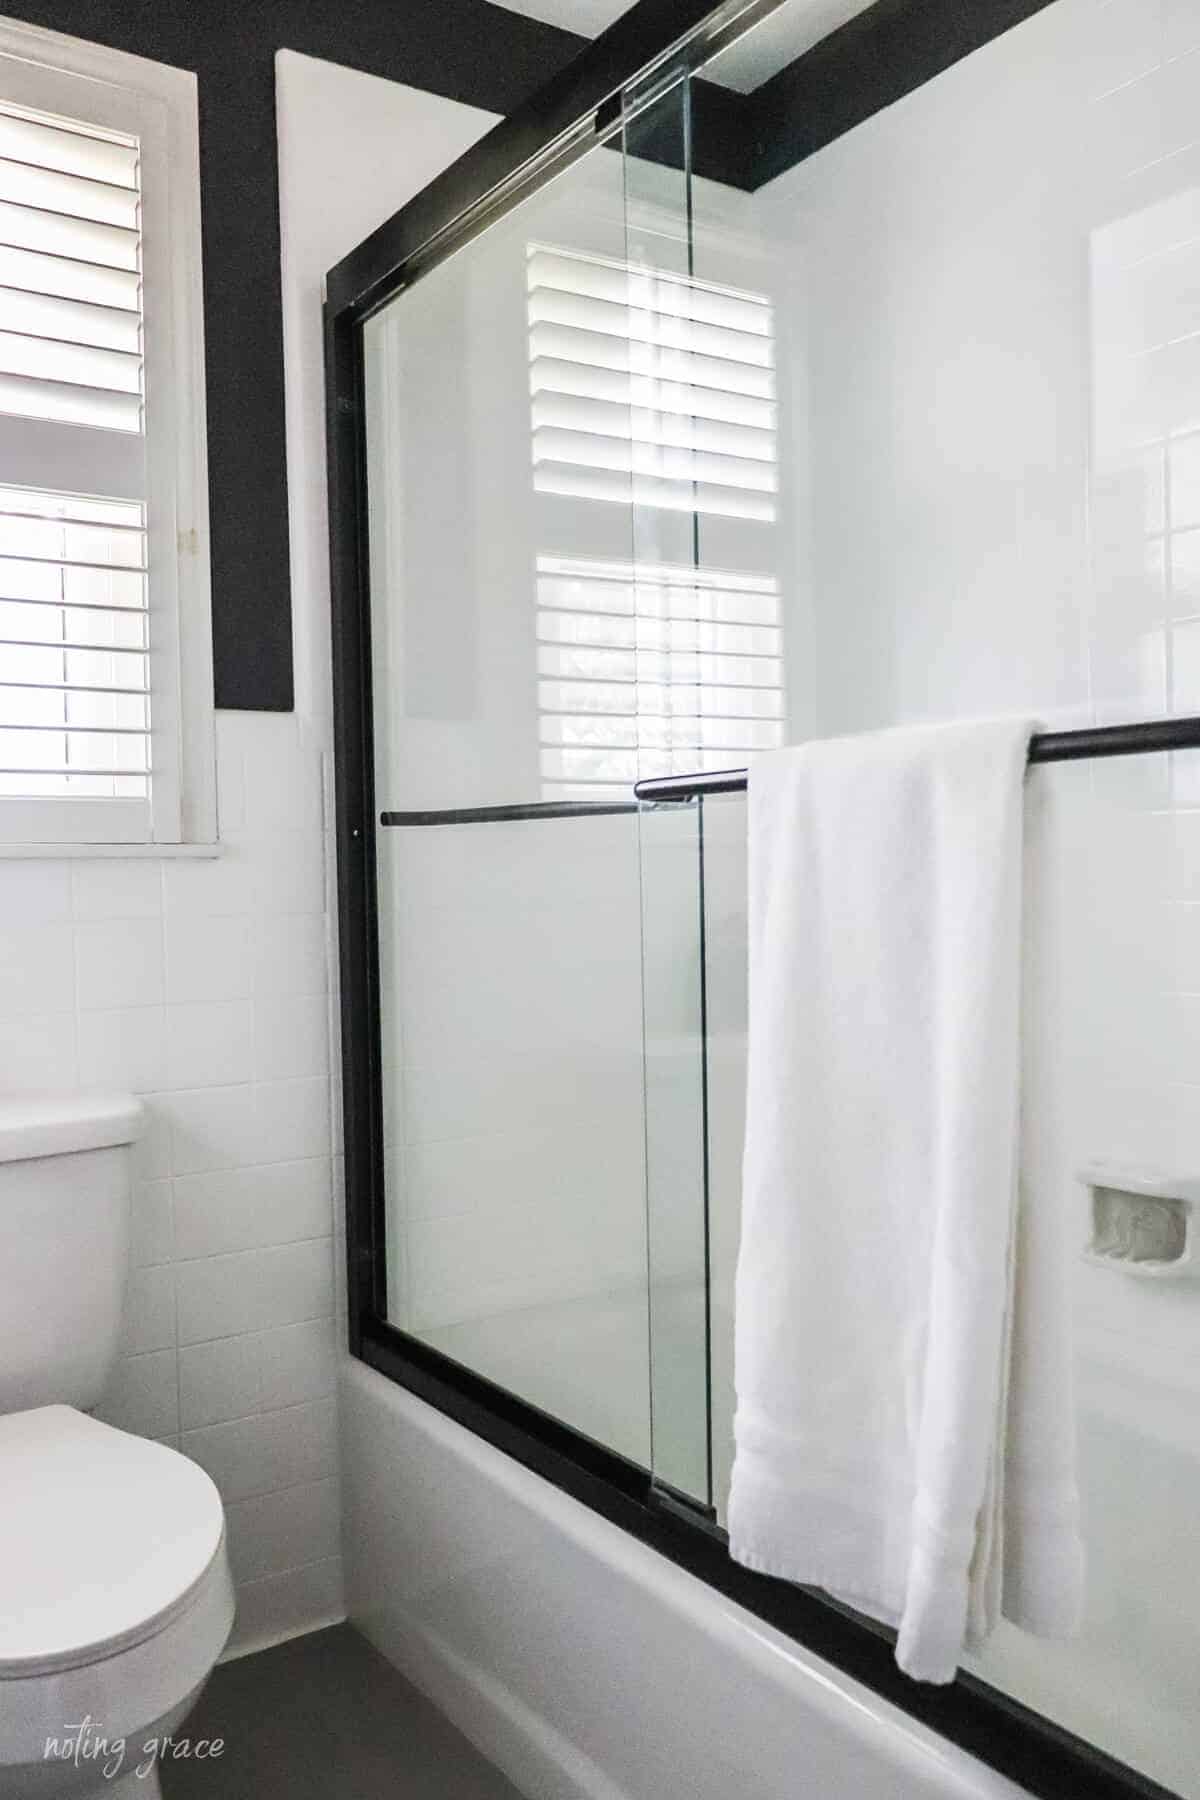
The Final Results (And Yes, It’s Holding Up!)
Y’all… it looks like we installed brand-new tile.
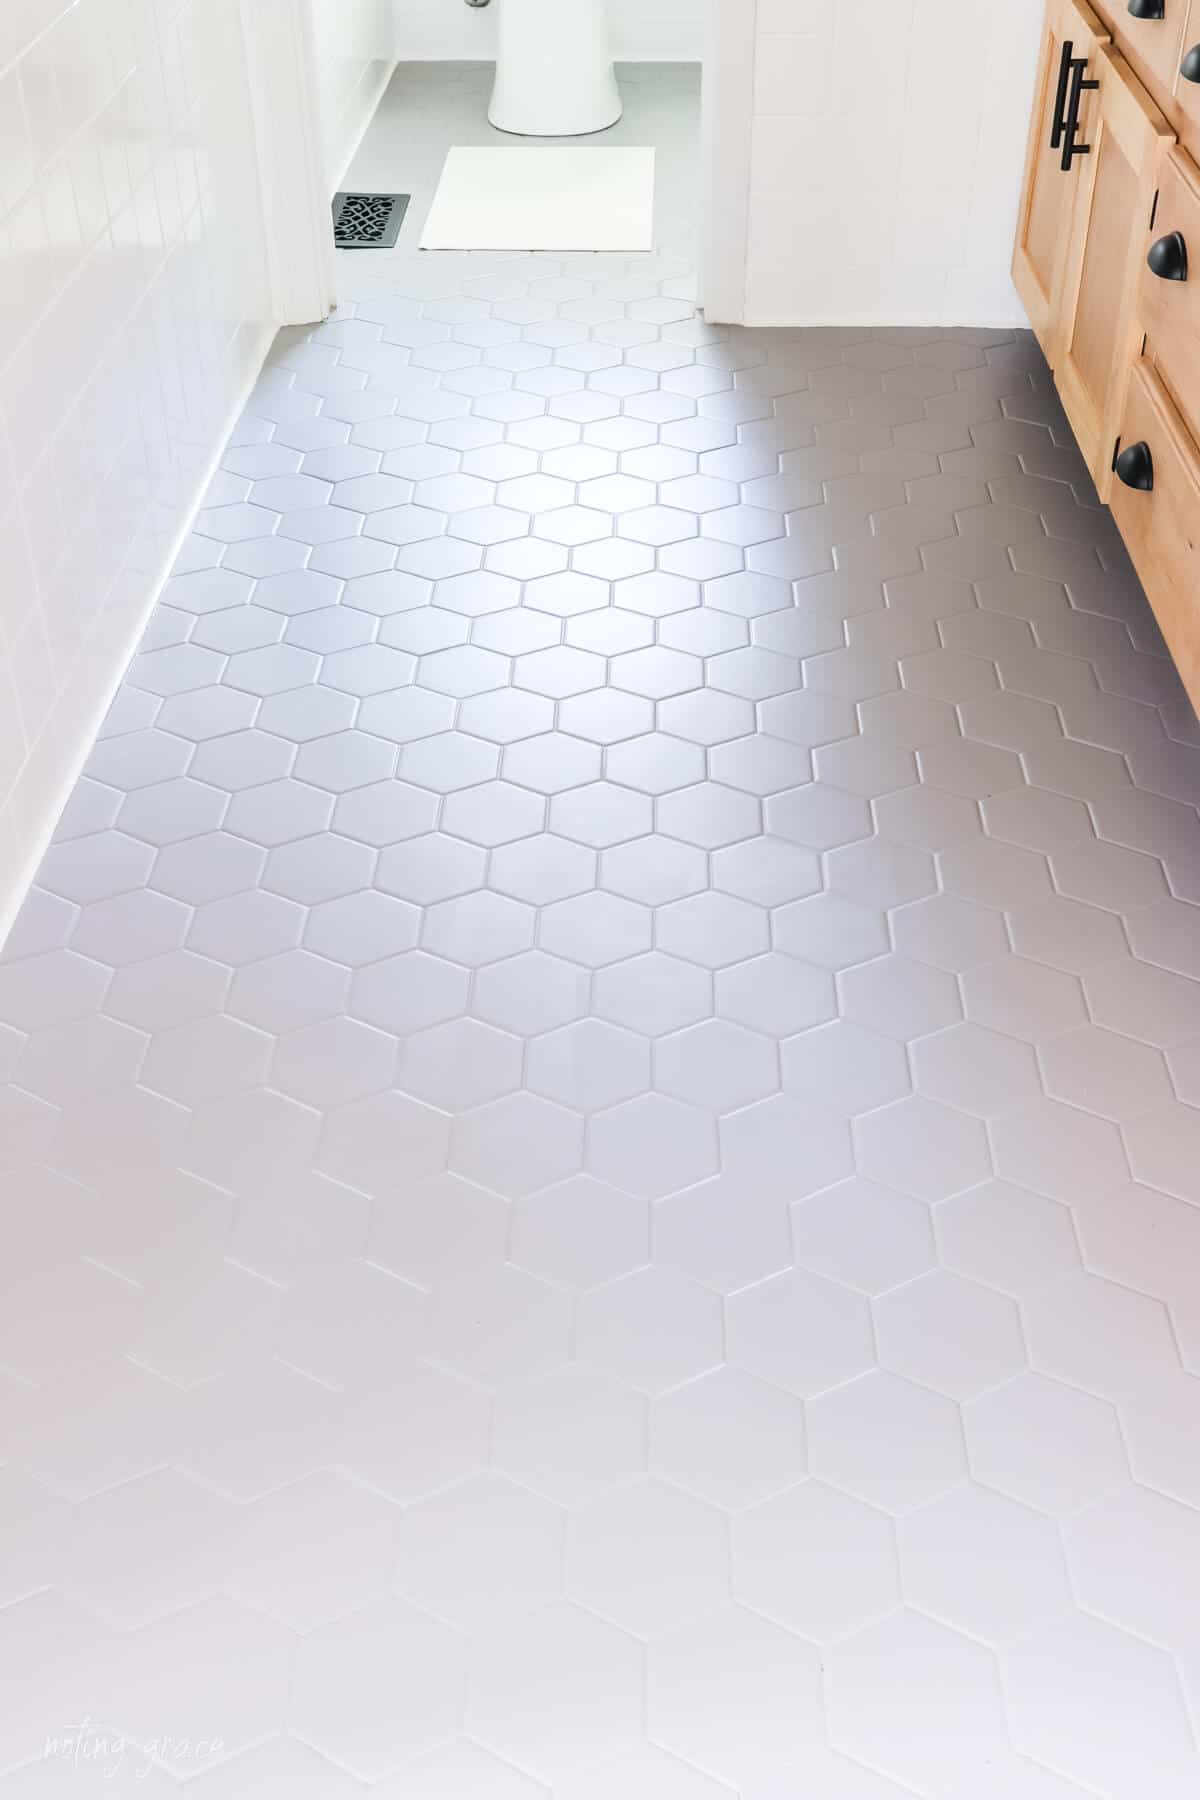
The painted floors are smooth and sturdy. The wall tile looks crisp and clean. The bathroom feels calm, updated, and ours — without the cost or chaos of demolition.
And yes – it’s lasted beautifully.
We shared a full two-year update on wear and tear here:
UPDATE: Do Painted Floor Tiles Last? Read our full review 2 years later!
If You’re on the Fence…
We get it. DIY can feel intimidating – especially when money is tight and mistakes feel costly.
But hear this: You don’t need to do it all. You just need to start with one step.
It was very DIY friendly and is one of the easiest and best ways to update an existing space.

So before you get your sledgehammer out and start tearing out your old tile, consider this diy job as an economical approach.
We changed the overall look of our bathroom tile for $150 bucks and just a few days and it looks amazing!
It took this room from drab and dated to fab and and new!
We are certainly glad we did!
Frequently Asked Questions about Painting Bathroom Tile
These are the exact questions y’all ask us in emails, on Instagram, and—let’s be honest—when they’re standing in a dated bathroom whispering, “There has to be a cheaper way.”
Can you really paint bathroom tile? Does it last?
Yes, you can paint bathroom tile—and yes, it truly lasts when you prep well and use the right products.
We’ve lived with ours for years now. It still looks smooth, sturdy, and clean. The key is proper cleaning, sanding, and sealing. Skip prep, and you’ll regret it. Do prep well, and you’ll be surprised by how durable the finish is.
What’s the best paint for bathroom tile?
We used two Rust-Oleum products because they’re affordable, widely available, and formulated for high-moisture tile:
Rust-Oleum Tub & Tile Refinishing Kit (walls)
Rust-Oleum HOME Floor Coating Base + Top Coat (floors)
Each has a specific purpose: the wall kit is an epoxy‑based refinishing system, while the floor coating is designed to bond to ceramic and hold up to foot traffic.
Do I have to sand the tile first?
For wall tile: Yes.
For floor tile: Not necessarily.
Wall tile is glossy and needs sanding to help the paint bond. We used 400‑grit wet/dry sandpaper and sanded in two directions to hit every spot.
Floor tile simply needs a spotless, grease-free surface. (We scrubbed with Krud Kutter until the grout stopped laughing at us.).
What if my grout is stained or cracked?
Paint will help disguise it, but it’s best to fix grout first.
We repaired ours before painting and it made a huge difference. If your grout is crumbling or uneven, address that first—paint won’t perform miracles on damaged tile.
Want More Bathroom DIY Ideas?
Want More Bathroom DIY Ideas?
Let’s Wrap It Up
Painting tile may not be glamorous, but it’s one of the most practical, peace-bringing updates we’ve done in our home.
It didn’t require a demo crew, a massive budget, or a perfect plan — just a willingness to try, to learn, and to show up with a little grit and a lot of grace.
Pin or print this post for later — and go start your own bathroom renewal.
And if you try it, come back and tell us how it went. We’re always just an email away.
Originally Published November 7, 2019 / Updated November 21, 2025
Cool….nice
Wow! Such a budget-friendly transformation—love how stylish and fresh the tiles look!
That’s a great question, Deb! We’ve been in tricky situations like that before and you do have to think creatively. With the Rustoleum HOME product, you do have to allow it to cure for 24 hours before you can walk on it. If you could afford a hotel, or stay with a friend, that’s an ideal option. But if the budget is really tight, like we’ve experienced many times, then you can utilize public bathrooms and washcloth off in the kitchen sink. But I’d try to cozy up with a friend or family member and offer to pick up a pizza and help them out with a project as a thank you!
Any ideas on how to do the floor in the bathroom if it is your only bathroom?
Hey Tracy – thanks for reaching out! I wrote a 2 year follow up on the tile and it held up pretty well. We are now officially at the 5 year mark and there is one tile in the shower that is peeling, but that’s likely due to poor prep since it’s adhering everywhere else.
As far as the floors, we did have to touch them up once and it held up great until something metal was dropped on one tile and there’s a small nick in the paint. But I’m willing to touch it up again since everything lasted so well!
Hope that helps!
Hey Judy!!
I say go for it! 😉 If you go with Sherwin-Williams, be sure to find an epoxy based product. It will help with any stains from splashed on the tile. Other acrylic based paints may not hide any stains and could lead to lots of touch ups.
Good luck with your project and I’m so glad this inspired you!
Hey, I loved it!!! Looks fantastic!!! My mom and dad’s house had that kind of tile on the wall and floor.
I’m wanting to paint my tumbled stone backsplash. It a natural stone color now but I would like to paint it white. Once I use the Krud Cutter would I do the same as you did on the wall or could I just go to Sherwin-Williams and get my paint……
How has the painted tile held up?
Great question! The floor tile has a satin finish and the wall tile has a gloss finish, but I wouldn’t call it a high gloss finish.
Hope that helps!
Looks great! Did you use satin or gloss finish?