Shower Renovation Raising a Low Ceiling
Welcome to how we are updating our boys bathroom – demo week. Today we are sharing tips on our Shower Renovation Raising a Low Ceiling.
Some say 7 feet is tall enough for a shower ceiling.
It’s functional because it keeps the heat in allowing for a warmer shower.
But they didn’t ask my 6’6″ son’s opinion.
So here we are at week 2 of the One Room Challenge – demo week – which is notorious for running into unforeseen issues.
Want to know how we fared? We were pleasantly surprised.
This week was all about demolition and raising the roof!!
Look at this low ceiling.
So as you can see, the shower ceiling in this bathroom was very close to the shower head, dropped down about a foot from the rest of the room.
When we renovated our master bathroom last fall, we were able to raise the ceiling and we hoped to do the same here.
So, how do you know if you can raise the ceiling to allow for more head room?
First, head up to the attic.
Before making any cuts, you want to make sure there aren’t any pipes, electrical, or HVAC ductwork in place. That low ceiling may have a purpose.
Once we found out there weren’t any structural hurdles, we cleared out all the blown insulation from that area.
We, being Trent, because I don’t do attics!
You don’t want to open up that ceiling and have all that insulation fall on your head, so go ahead and remove it before you cut it open.
Shower Renovation Raising a Low Ceiling
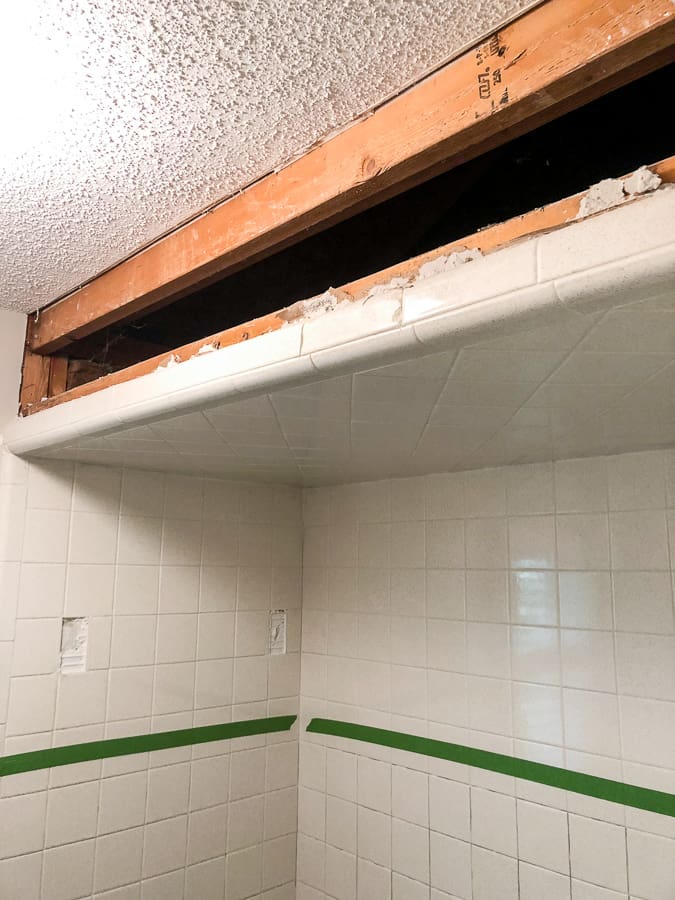
Next, clear away any drywall to expose the framing. It’s another way to get eyes on what you’re facing before doing any demolition.
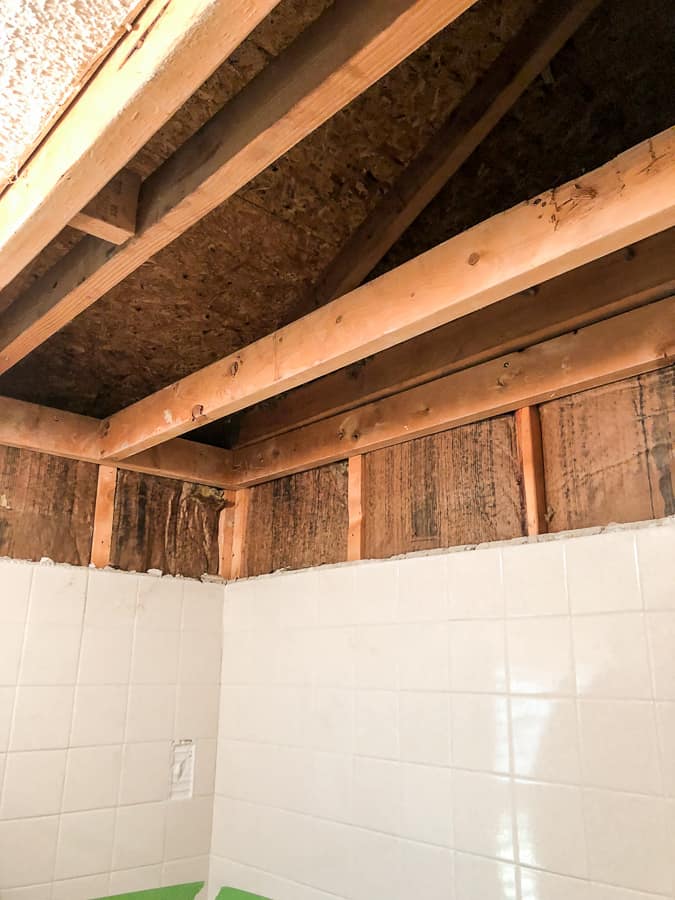
Trent was able to see the framing could easily be cut away and raised up a foot. No pipes, vents, or electrical issues to deal with!
Now we were in business!
But this next step got super-duper messy.
We lined the tub with moving blankets to protect it from damage.
Next, Trent covered his ears, eyes and nose to keep any debris or flying objects from hitting him.
IMPORTANT! Shut the door before you make any cuts. Dust will be flying everywhere, so I had a shop vac going while Trent made the cuts to control the dust.
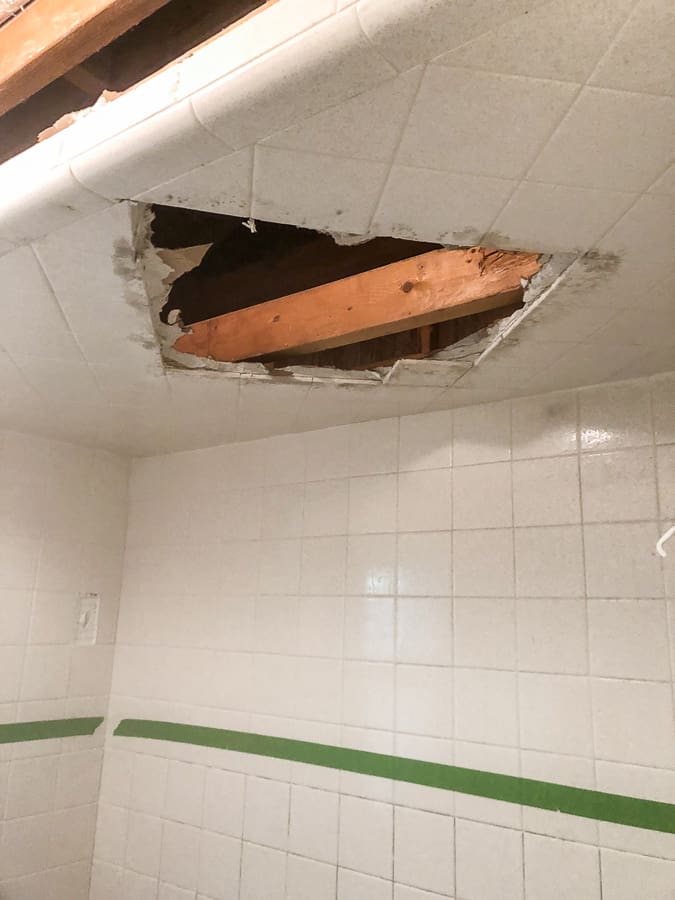
Using a tile saw and a spray bottle filled with water, Trent cut a square into the tiled ceiling.
After that, he was able to use a hammer and pry bar to remove the rest of the ceiling with minimal mess.
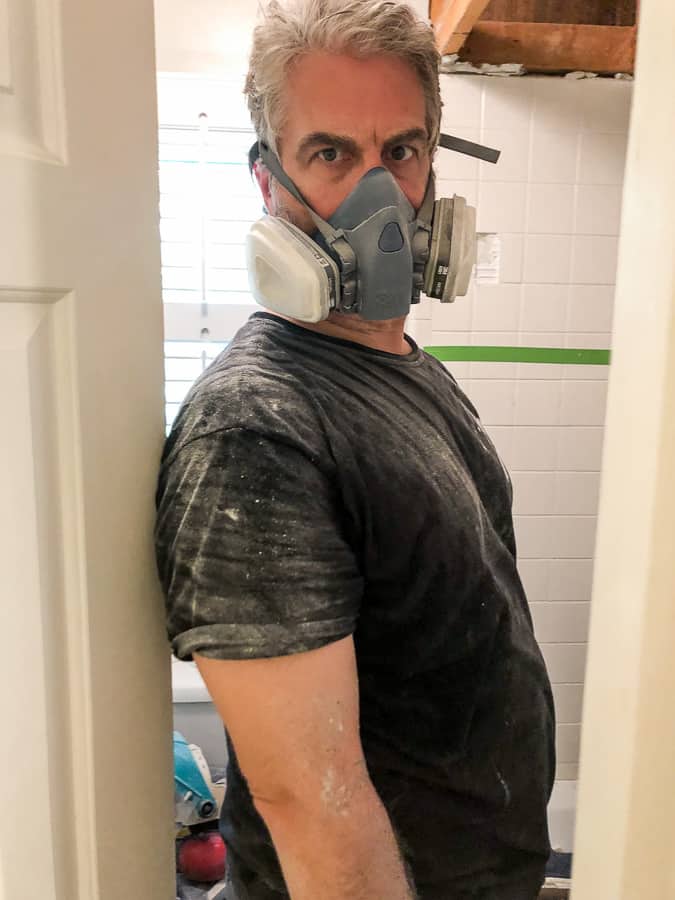

See what I mean! If you prep properly, you can minimize the amount of dust and debris that spreads to the rest of your home.
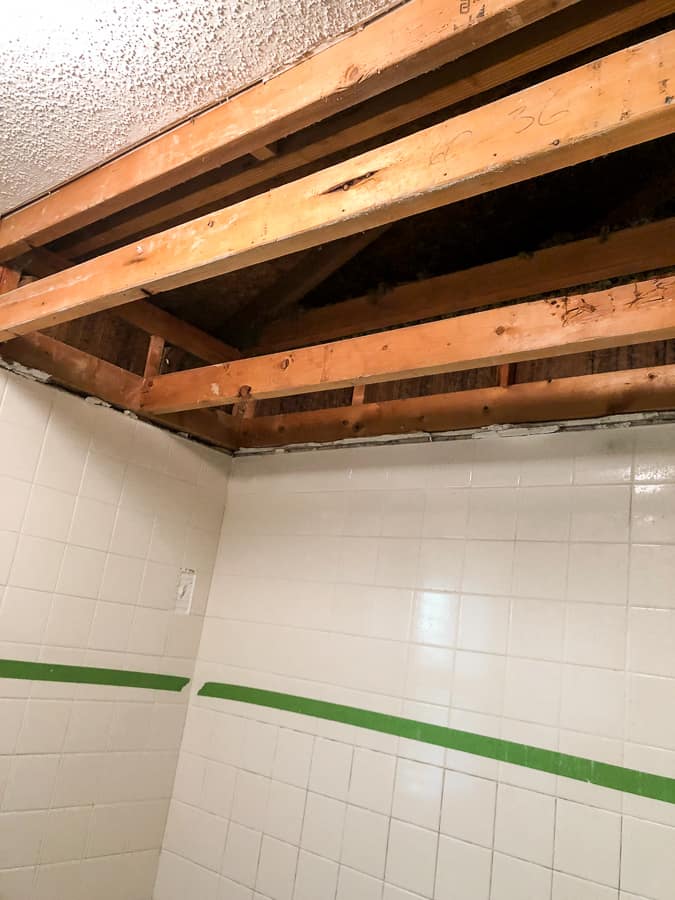
Now we could see the framing that we want to raise up a foot.
We removed the nails and used our Dremel Multi-Max tool to cut away any nails we couldn’t reach.
Now it’s as simple as raising that framing up into place and securing to the exposed studs.
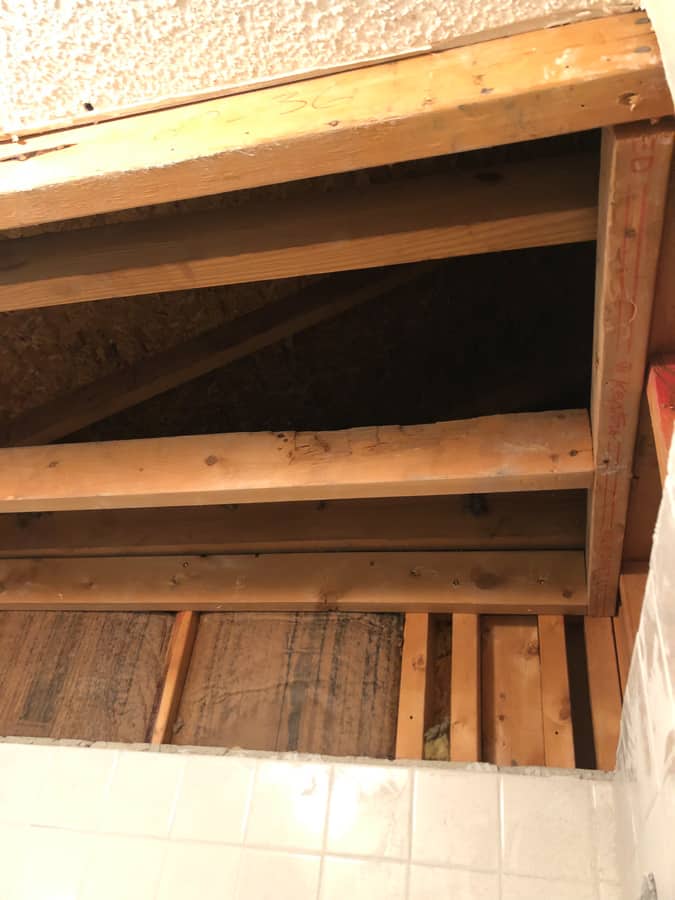
We gained about a foot of head room – which is perfect for our tall boy!
Using Green Board, we drywalled the ceiling in. Green Board is specifically made for moist environments.

This was the biggest hurdle for this room and we are so glad we could do this for our son and it wasn’t a huge task to figure out.
So that was the high five moment of the week! It couldn’t have gone better for us.
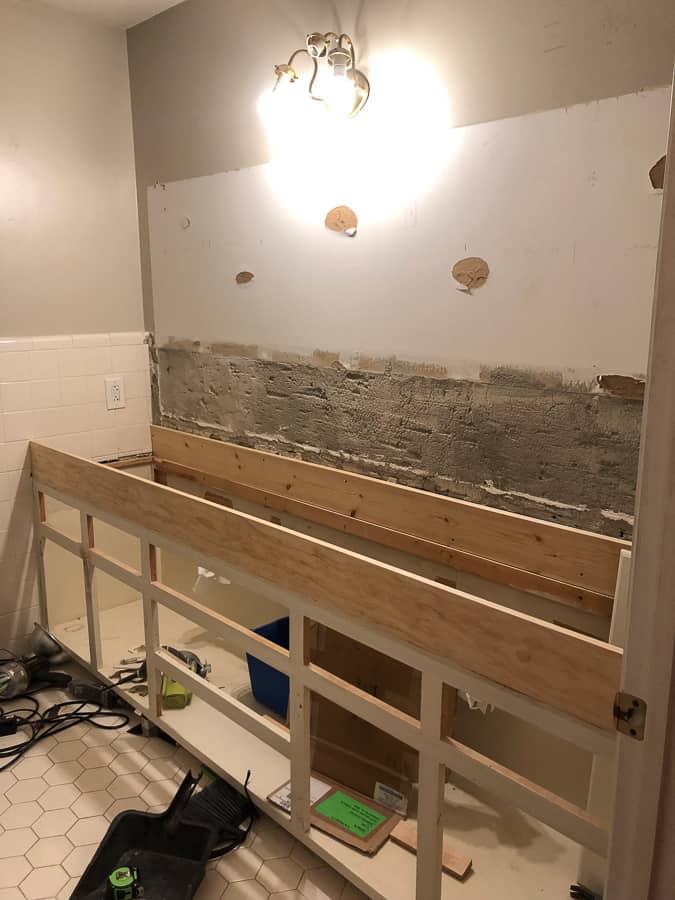
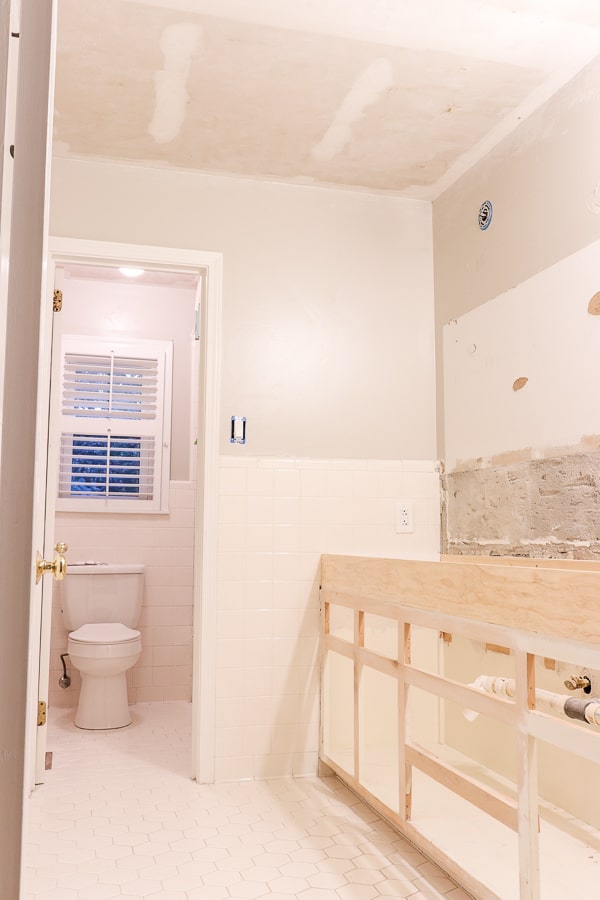
We also were able to remove the mirror behind the vanity as well as the countertop. We did find one issue that we had to change our design plan on.
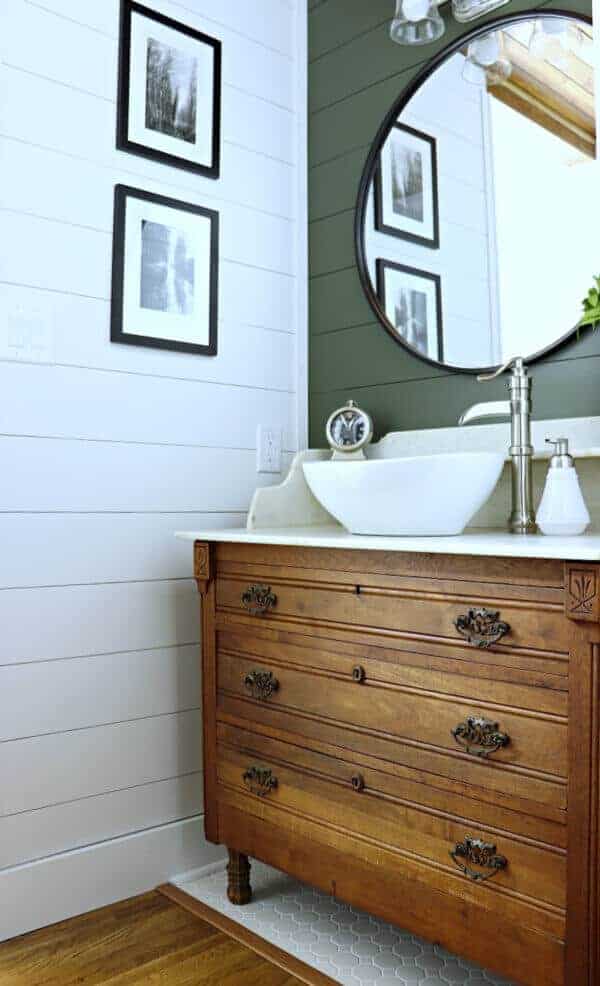
Our original plan was to raise the vanity up, however, after seeing how they installed it and tiled around it, we had to switch gears.

We built a frame on top of the existing vanity to increase the height.
And it was a pleasant surprise!
Had we gone with the original plan, we would have needed to fix the flooring underneath the raised vanity.
This option not only saved us time, but also money!
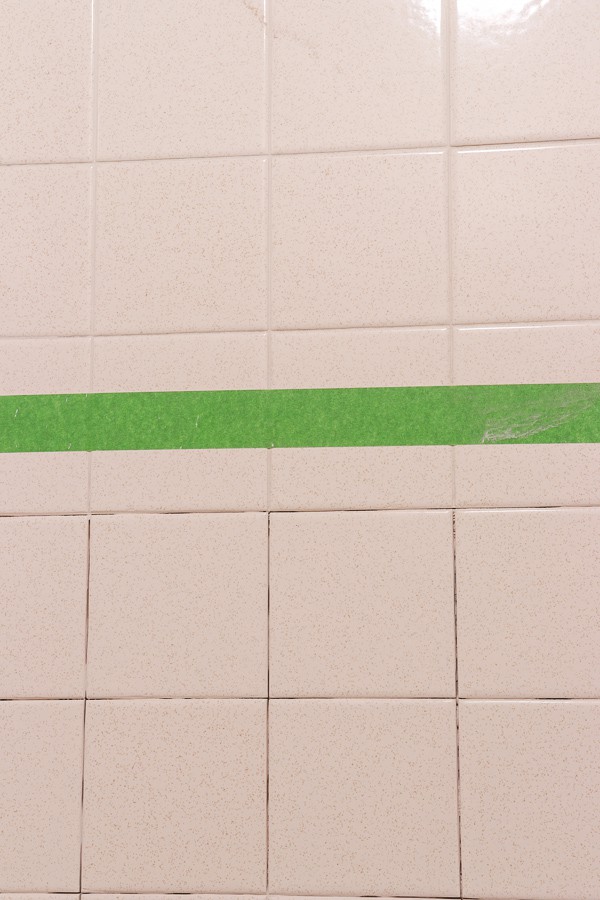
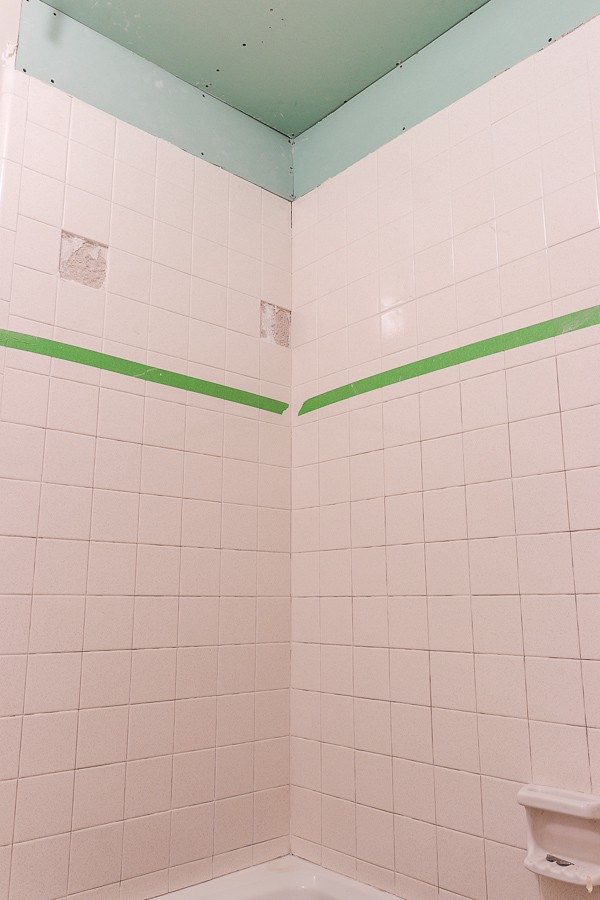
I was able to tackle the grout issues in the bathroom.
But, to keep things orderly, I taped off where the grout was in great shape and only removed the grout on the lower half of the tub surround.

I’ll be sharing tips later this week on how to easily remove grout and the secret tool to make it easy on yourself!
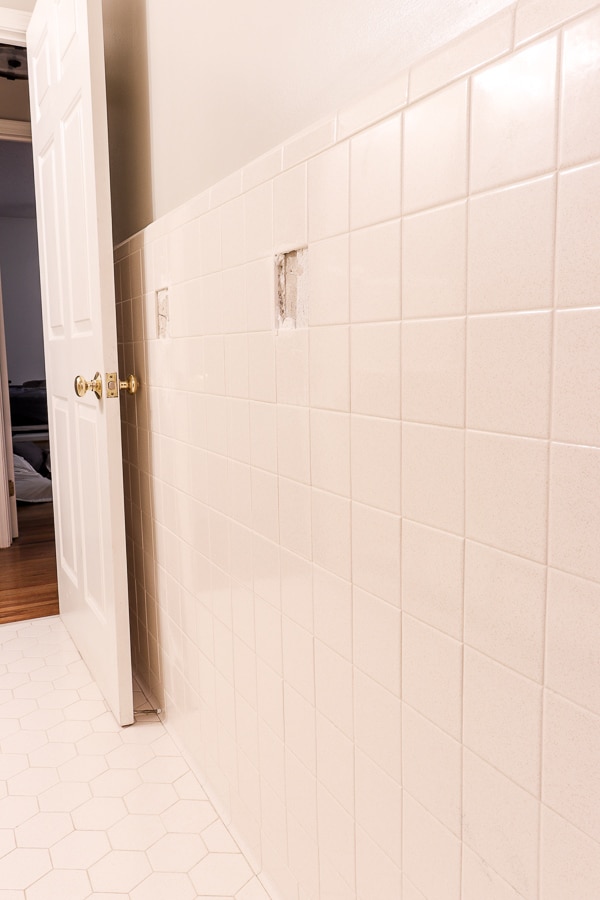
We also removed the old ceramic towel bars and toilet paper holders.

During the ceiling demo, we saved some tile to fill in the missing gaps from where the ceramic fixtures were.
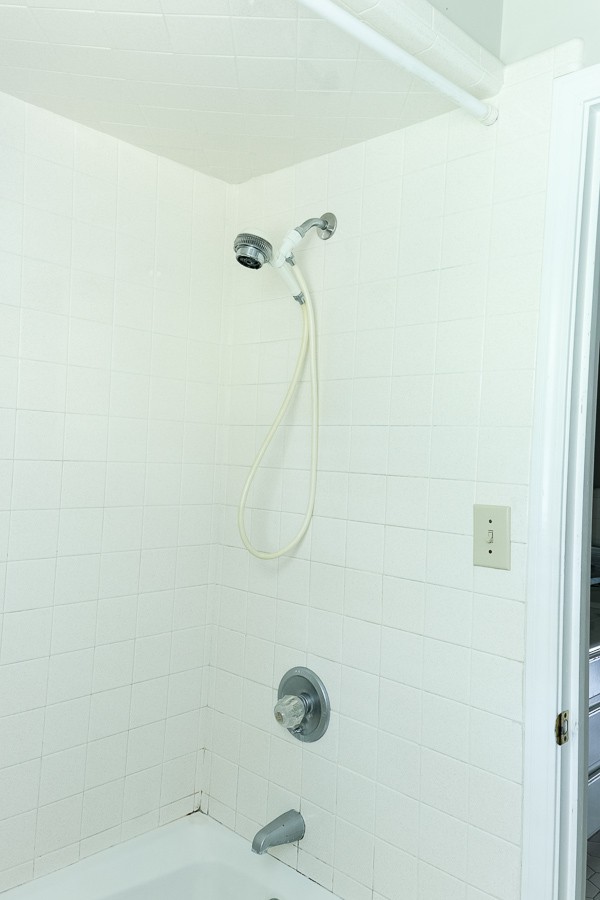
Another thing that got moved was the electrical!
Remember from last week where I showed that the electricity was IN the shower?
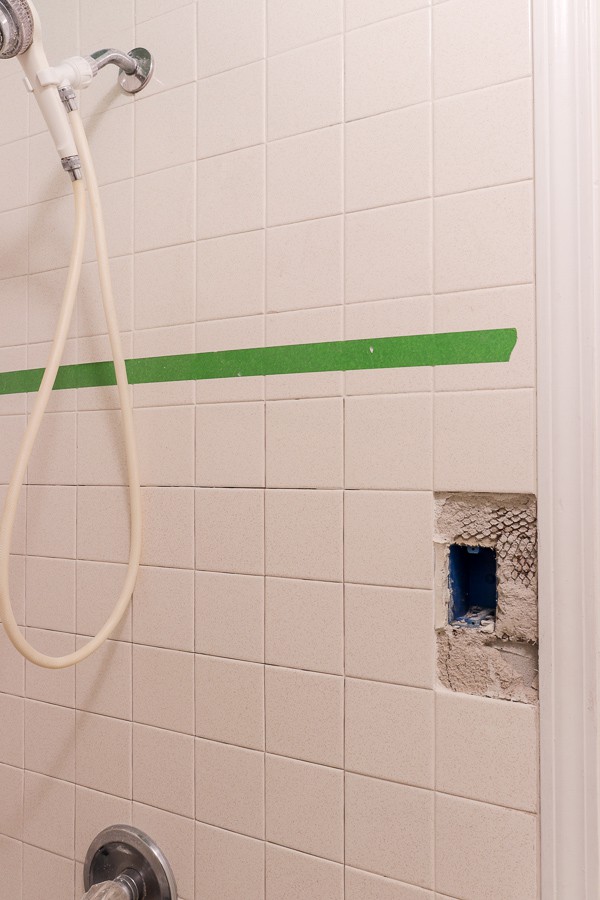
We removed that and swapped it to the wall on the other side.
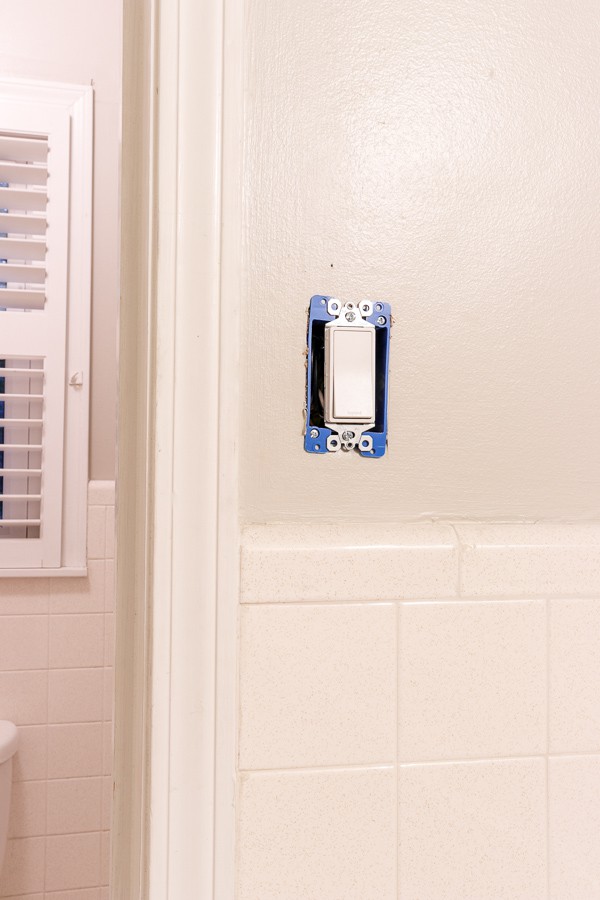
In other electrical news, Trent also prepared the wall for two separate lights instead of the single one in the center of the wall.

So I started sanding away the paint from the front of the vanity.
It was painted with oil, so it was a bit of a chore and stripper wasn’t cutting through.

And last but certainly not least, I was able to scrape the ceiling from all that ugly popcorn!
Not too bad for demo week. In the past, we have always run into issues that were game changers. And while we did have a design plan mishap – it ended up being in our favor.
So I hope this Shower Renovation Raising a Low Ceiling tutorial gave you some ideas!
Check out our finished to do!
ORC Budget Bathroom
Remodel To Do List
Remove Countertop- Build DIY countertop
Remove Vanity MirrorRemove Tub Grout problems- Re-grout the Tub Surround
Remove Ceiling over TubRemove Ceramic FixturesDrywall CeilingMove Electricity- Sand Vanity Base
and Add 6 inches Scrape Popcorn Ceilings- Paint all Tile and Floor
- Paint Walls
- Install Brick Accent Wall (This is something I am SOO excited about!)
- Find Used Shower Doors
- Cut and Frame mirror to 2 DIY mirrors
- Replace Light Fixture
- Replace Faucets
- Paint or replace door hardware and hinges
- Replace cabinet hardware
- Replace Shower Head
Update Light switches- DECORATE!

So, next week is all about prepping the tile for paint and grouting the tub, mudding the ceiling in the shower and adding tile around the top of the shower surround, and building the vanity top.
Don’t miss out on the other spaces my blogger friends are renovating. Over at the One Room Challenge, you can follow along with the 20 featured bloggers or the other guest bloggers like me. This year, there are close to 300 participants across blogs and social media.
You will definitely find creative ideas for any room you are tackling.
A huge thanks to Linda from the One Room Challenge and the sponsors listed below for giving me the inspiration I need to create a room for those I love!


Don’t miss the other posts
in this Bathroom Makeover!
THE BEFORE
RAISE THE ROOF: HOW WE MADE THE BATHROOM CEILING TALLER
DIY SHOWER DOOR UPDATE
HOW TO MAKE A BATHROOM VANITY TALLER
REGROUTING BATHROOM TILE
INSTALLING AND LIMEWASHING BRICK VENEER
DIY CEILING PLANKS FROM LAMINATE FLOORING
HOW WE CHANGED OUR BATHROOM TILE FOR $150
HOW TO MAKE CEDAR FRAMED MIRRORS
THE BIG REVEAL!


Ooh – that’s a great idea! I can look into putting together a tutorial on how to do that for you! Thanks for asking about that!
It all looks amazing!!!!
I need to know how to take down those huge full wall bathroom mirrors though…….
Looking good already. The extra head room will really be appreciated by your 6’6″ son! Can’t wait to see the progress. Love how you design on a dime!
Thanks so much, Tim! I so appreciate you encouragement. And yes – it’s a sneaky design flaw indeed!
great progress and what were they thinking to hide that extra foot in the ceiling? Yay to the extra head space and great solution to the vanity / floor tile situation. Looking forward to seeing what happens next!