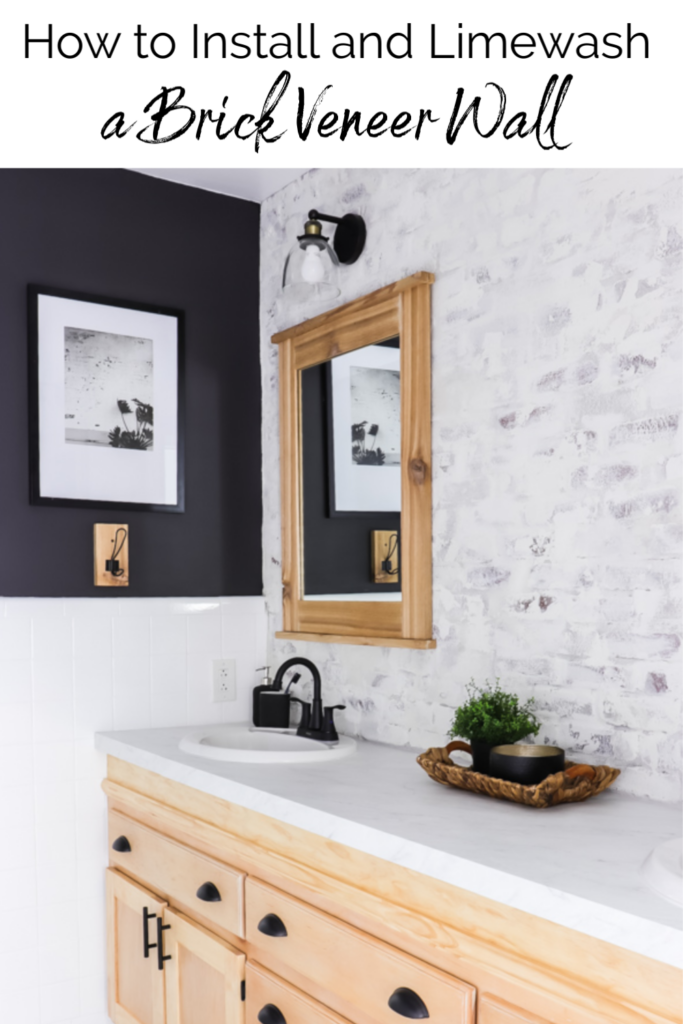
How to Install and Limewash Brick Veneer
When we made over the boys bathroom, I knew I wanted a showstopper. And when I had the chance to partner with General Shale and Romabio Paints, I jumped at the chance! Here’s how to install and limewash brick veneer.
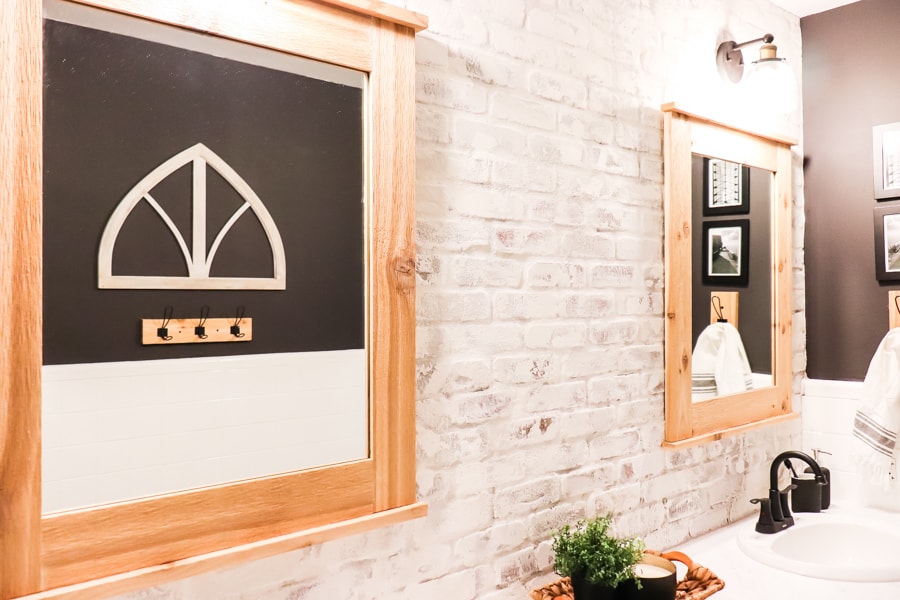
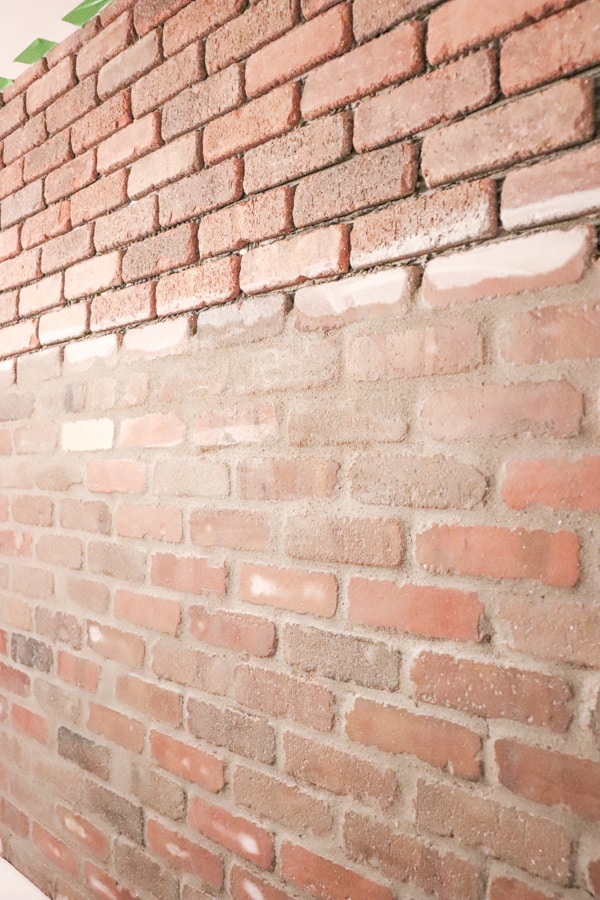
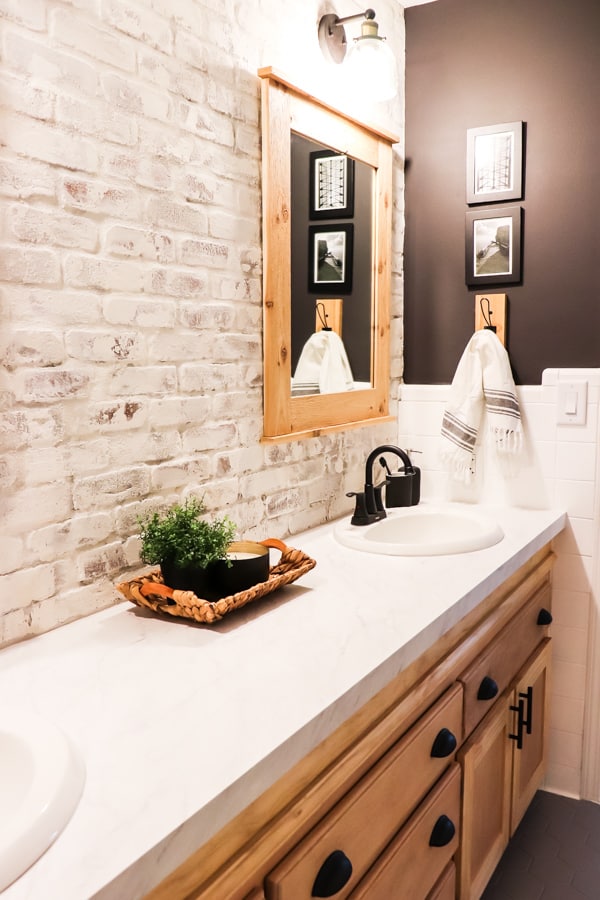
Just look at that wall!
It turned out so much better than I had envisioned.
And it was surprisingly easy to do!
You all know I’m a lover of all things vintage, and I dreamed of creating an antiqued wall as the focal point for our boys’ bathroom remodel.
This tutorial will have you picking out the perfect wall in your home to brick!
Let’s start with the supply list.
How to Install and Limewash
Brick Veneer
SUPPLIES
- General Shale Smokestack Thin Brick Veneer
- Romabio Paints Classico Limewash in Avorio White, Cristallo White and a custom lime wash tint of Silver Lining
- Thinset
- Tile Spacers
- Tile Cutter
- Marking Pen for tile cuts
- Mortar
- Paint Brushes
- Spray Bottle with Water
- Paint Pails
- Drop Cloths
- Level
- Sponge and Water
Installing the Brick
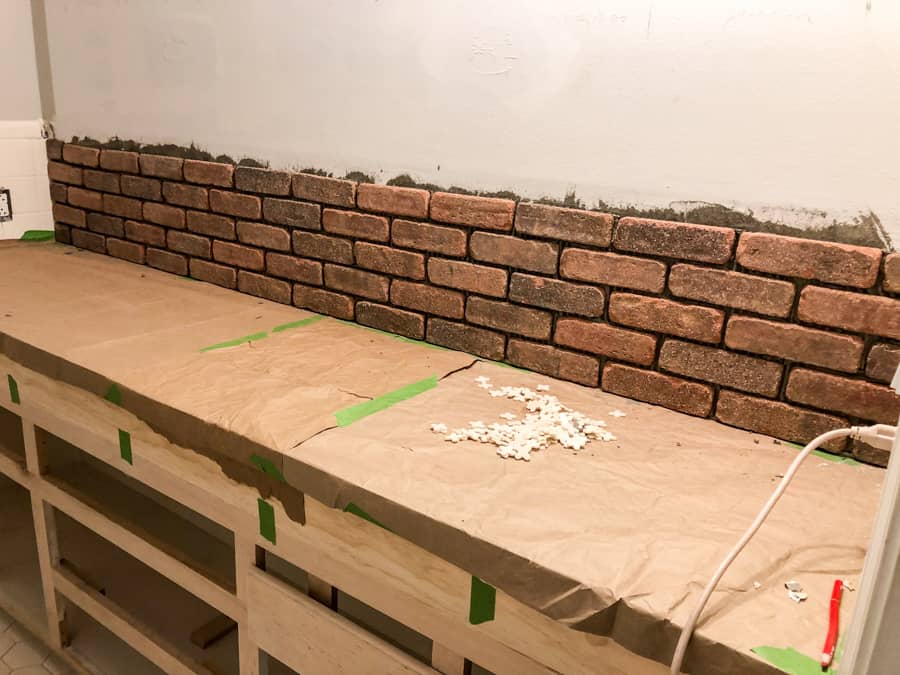
Prep your area by covering any surfaces you don’t want to get dirty. Thinset and mortar can sometimes be messy.
Start by mixing the thinset per the package instructions and applying to the wall. Trent always says the mix should have the consistency “of a Wendy’s Frosty.” FYI: He says it DOESN’T taste like one!
Working in small areas, apply the thinset to the wall using an 11 inch flooring trowel. We also back buttered the brick.
That basically means applying a small amount to the back of the brick as well.
We stacked the brick using 3/8 inch spacers.
You can watch our video below to see how easily this can be done.
Using a tile saw, we trimmed the brick to fit at the ends. The brick is thicker than most tile, so I recommend going slow with the tile saw to ensure a good cut.
TIP: You may want to mark the walls for alignment.

After we installed the first 5 rows of brick veneer, we noticed that our walls weren’t straight. News flash – most walls aren’t!
So we got out our laser level and drew lines on the wall as guides to keep our mortar lines as straight as possible.
This pic was taken after the last brick was installed.
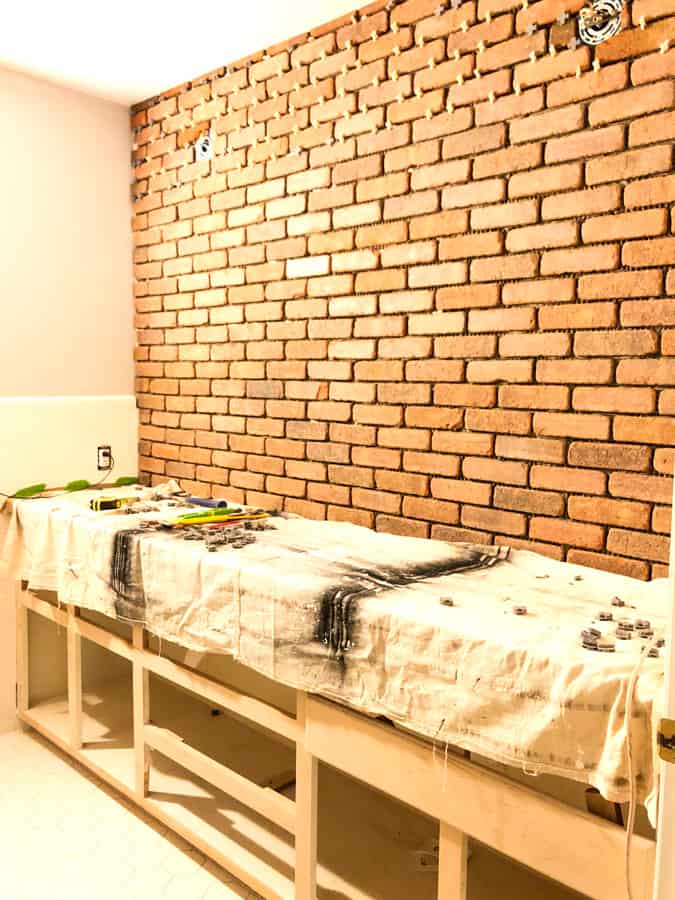
We let the thinset dry overnight and started to mortar the next day.
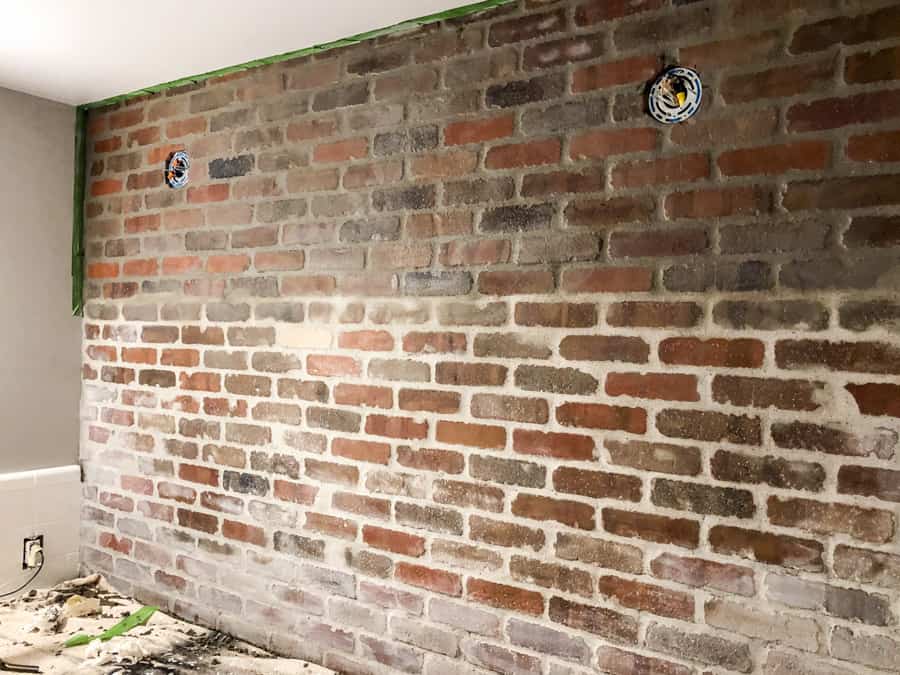
Mortaring the Brick
We used a combination of mortar bag, putty knife, and rubber float.
We found that the mortar bag was a bit cumbersome, so we stuck with the float and putty knife. In the end, we found the putty knife to be quickest.
You can see more details of the mortar technique in the video below.
TIP: It’s important to sponge off the mortar as you go along. You may even have to wipe it off a few times to remove the haze.
Just look at this finished brick!

It’s so beautiful!!
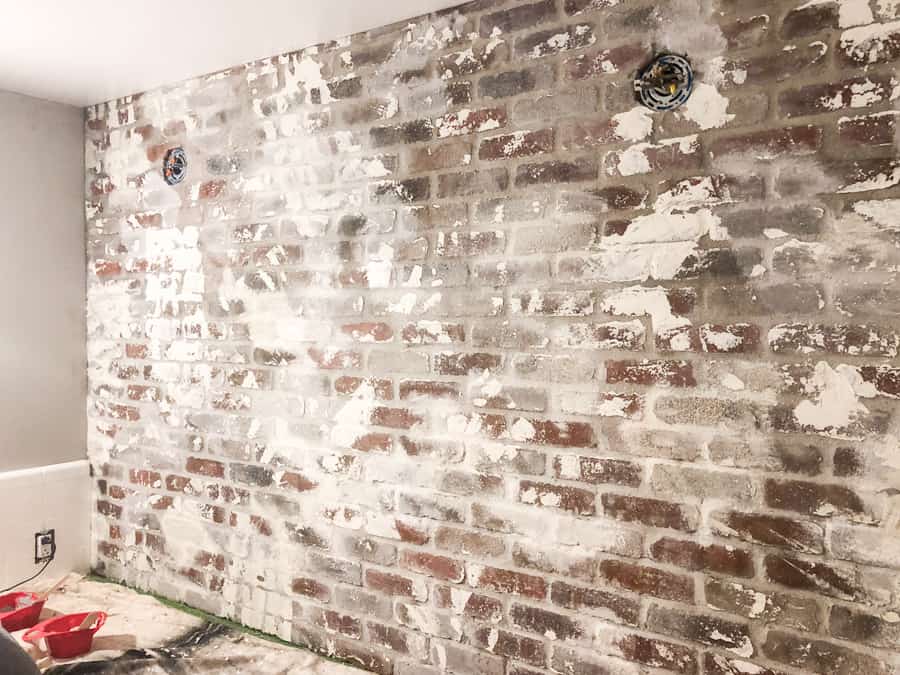
We purposefully chose the chipped bricks to allow the mortar to fill in those spaces. We wanted this wall to look as if it had been unearthed from years ago!
Again we allowed the mortar to dry overnight and started lime washing the next day.
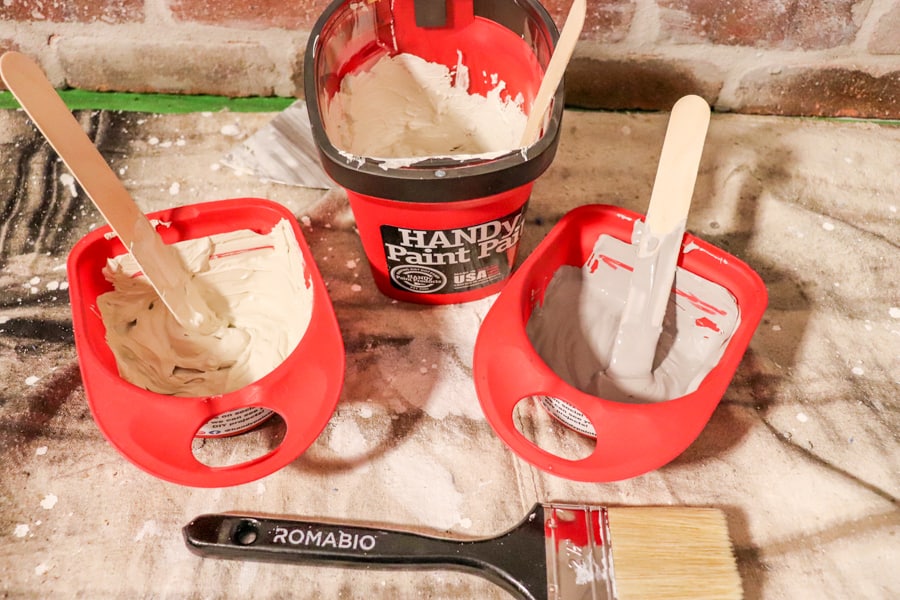
Lime washing the Brick
Using three colors, the base coat started like a spotted wall. The Classico Limewash colors from left to right are Cristallo White, Avorio White, and Silver Lining.
You first need to wet the brick with a spray bottle so that the Lime wash will adhere.
I painted the lime wash in varied spots to create a mottled look.
Then I used different sized mudding knives to apply thicker applications of the Lime wash.
After the base was done, I was ready to start brightening it up.
I feathered any thick lines with a brush to smooth and blend them together.
Then I applied the Avorio White as topcoat to fill in the spots.
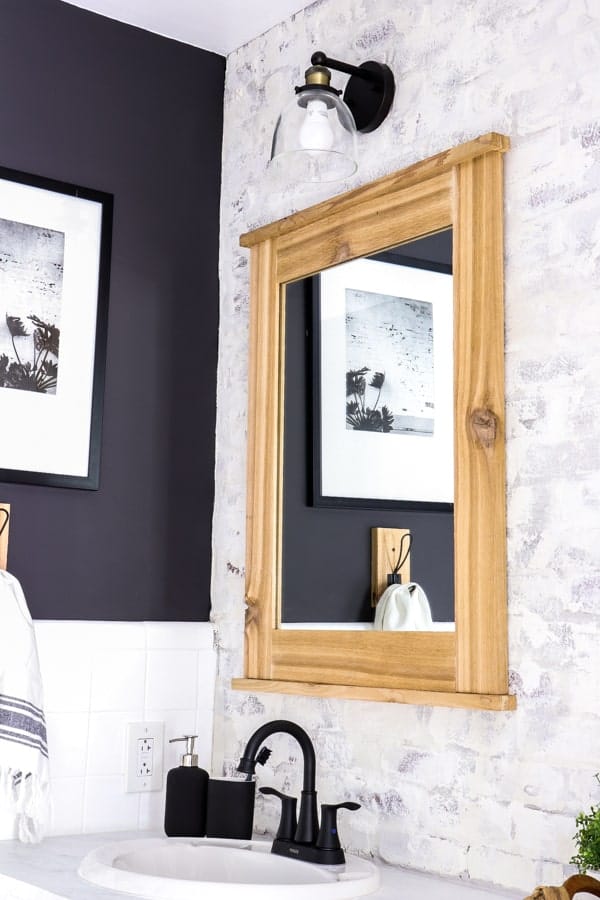
Here’s how it looks before we installed the lights and mirrors.
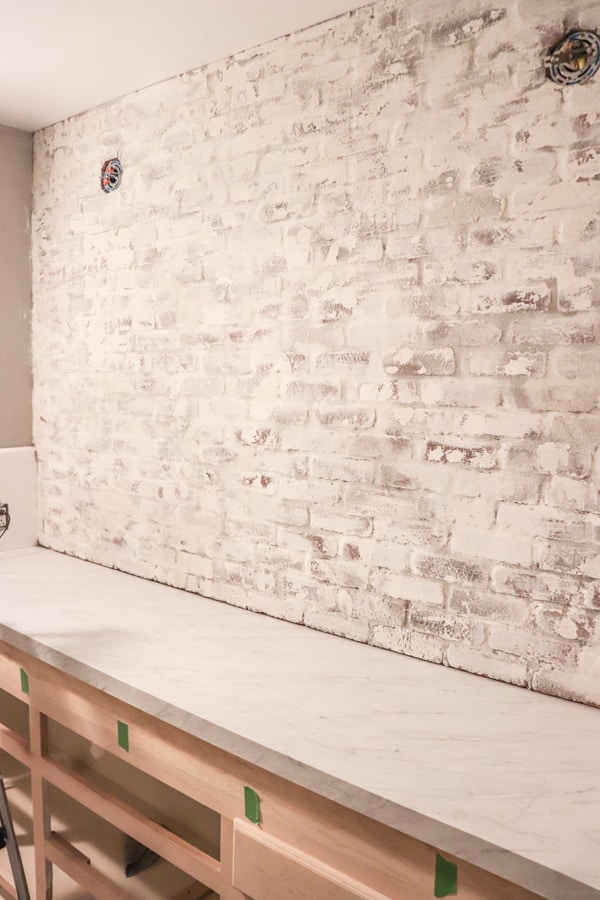
And just look at this gorgeous wall!
This was such a fun DIY to try!
We are looking for more walls to try to use brick veneer – it’s such a cool element that can easily be added to any existing drywall.
To see more brick veneer inspiration, you should visit General Shale’s Instagram page. There are new photos added everyday!
If you have any questions about how to install and lime wash brick veneer, please comment below – I’d love to hear your feedback!
Pin This for Later!
Don’t miss the other posts
in this Bathroom Makeover!
THE BEFORE
RAISE THE ROOF: HOW WE MADE THE BATHROOM CEILING TALLER
DIY SHOWER DOOR UPDATE
HOW TO MAKE A BATHROOM VANITY TALLER
REGROUTING BATHROOM TILE
INSTALLING AND LIMEWASHING BRICK VENEER
DIY CEILING PLANKS FROM LAMINATE FLOORING
HOW WE CHANGED OUR BATHROOM TILE FOR $150
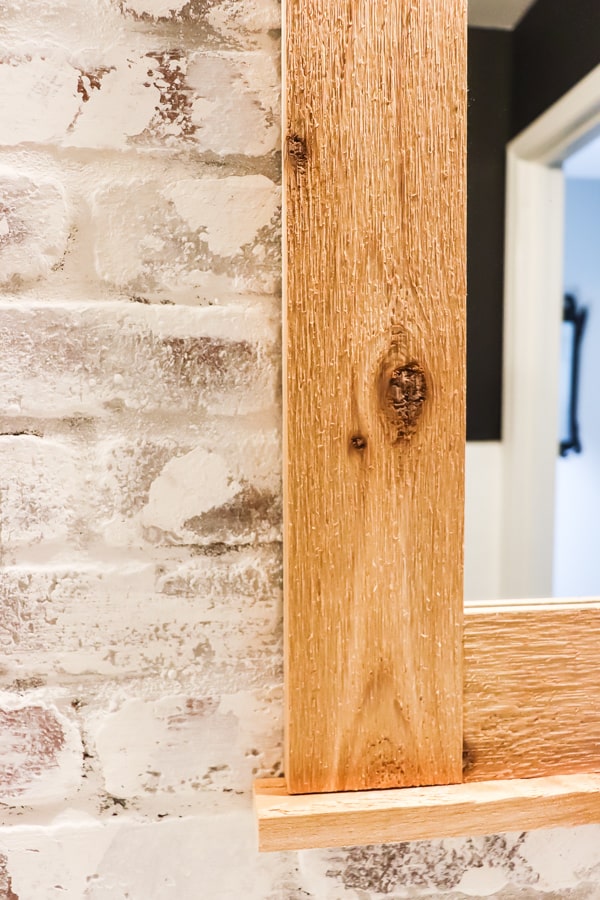
HOW TO MAKE CEDAR FRAMED MIRRORS
THE BIG REVEAL!


That would be amazing! Send me a pic if you all tackle this easy DIY!
Thanks Momma – now come see it in person!
This looks stunning Jen – a huge amount of work but the outcome is incredible! I am hoping to convince hubby that this could be a great holiday project for our lounge wall! 😍
Awesome! What a show stopper! 👍