How to Limewash Exterior Brick House with Riposo Beige
We have spent many years lime washing many homes and there is one thing we’ve learned. It’s definitely a diy project anyone can tackle! Here is how to limewash an exterior brick house with Riposo Beige.
After we limewashed 2 personal homes, we took the plunge 3 years ago and decided to become professional painters.
And we are so excited to be sharing our painting projects with you and this recent house is one of our favorites!
Hopefully this will help guide you and maybe answer questions you have!
For example, have you ever wondered if pink or salmon colored brick will look good limewashed?
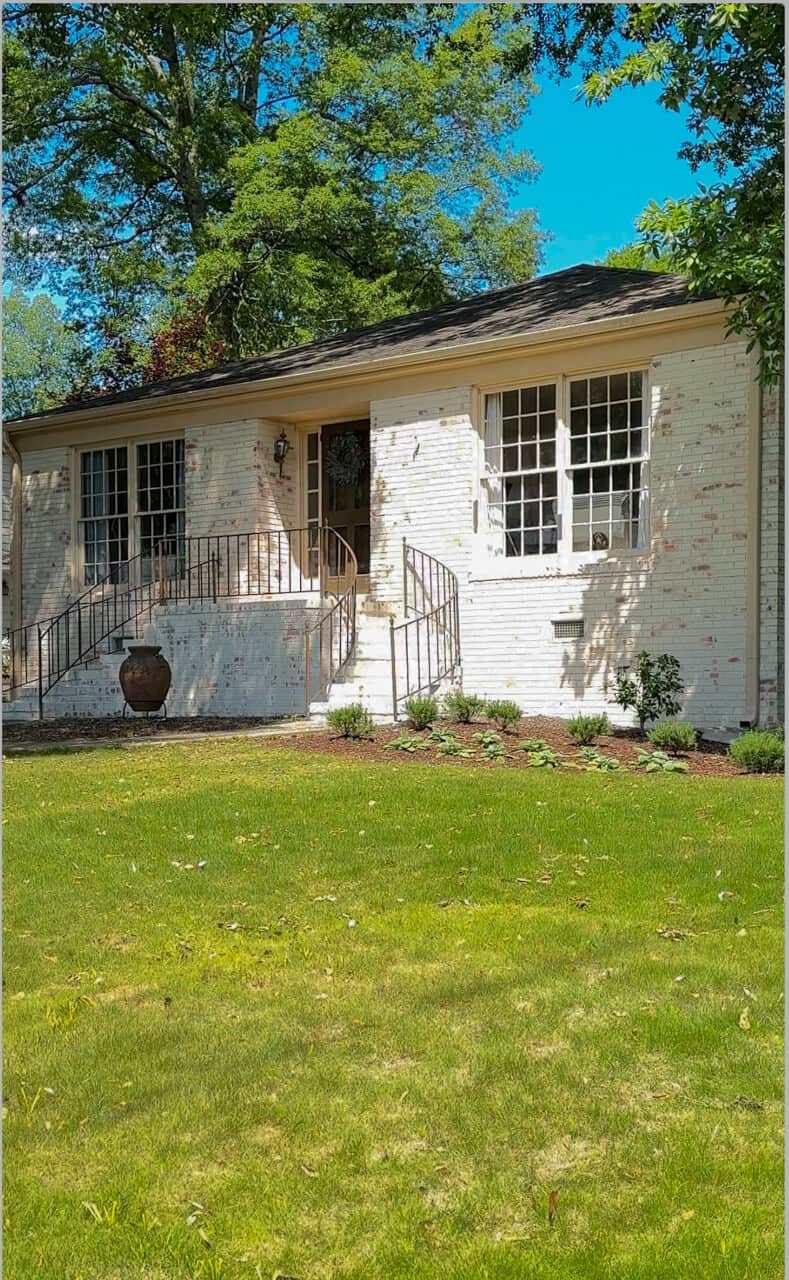
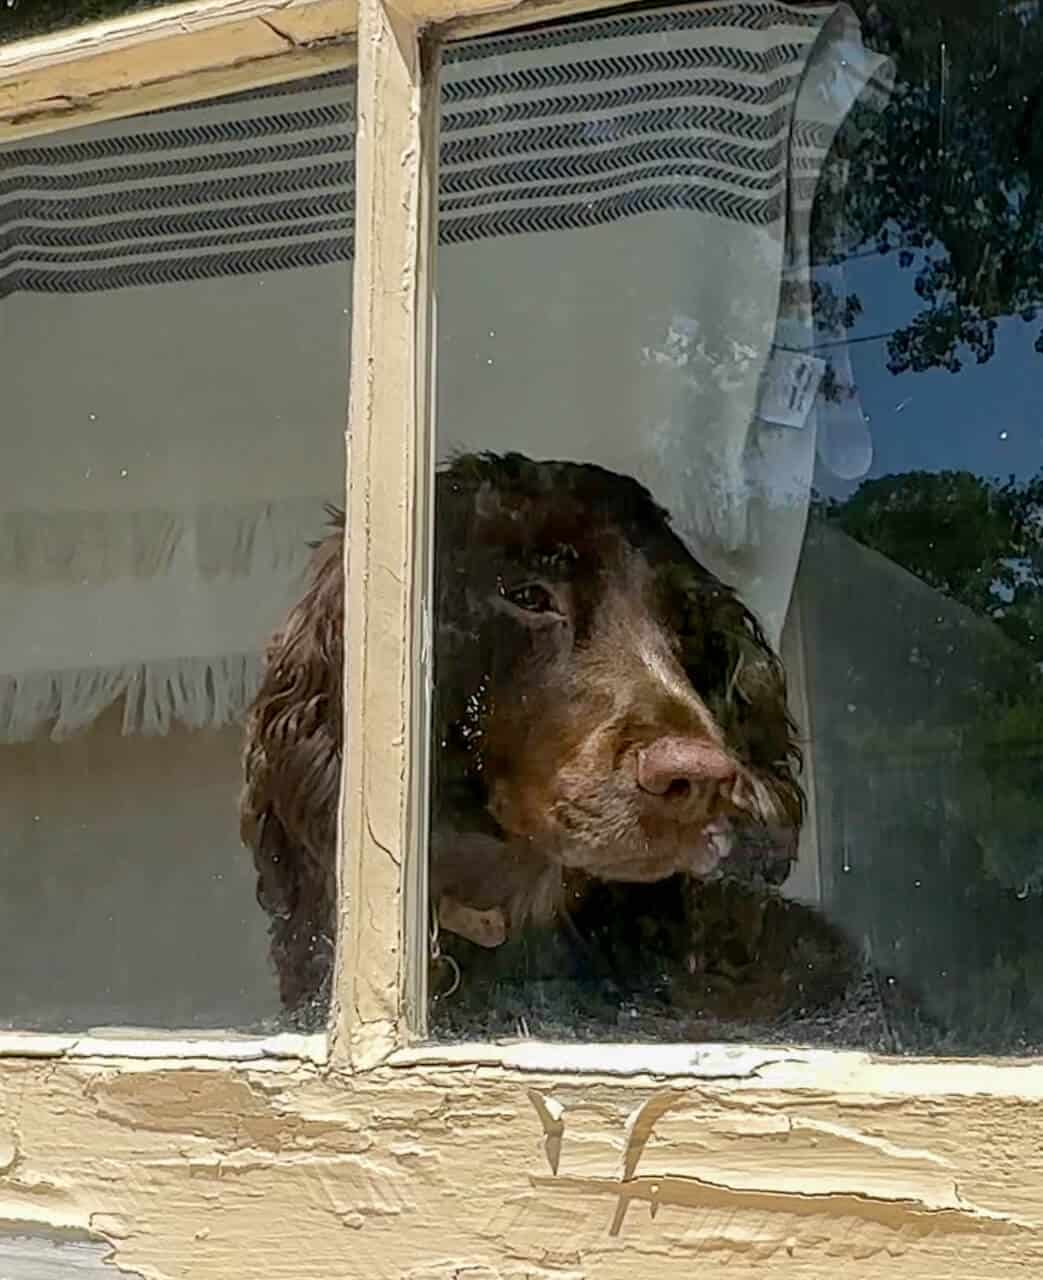
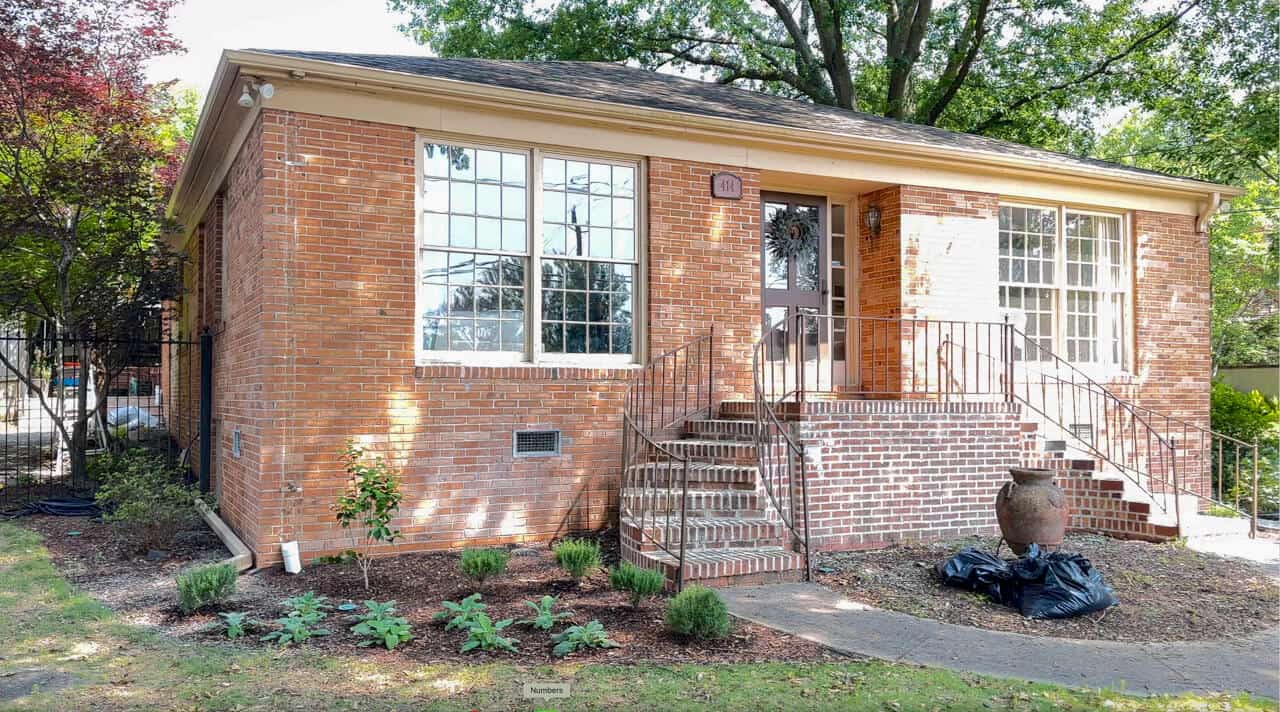
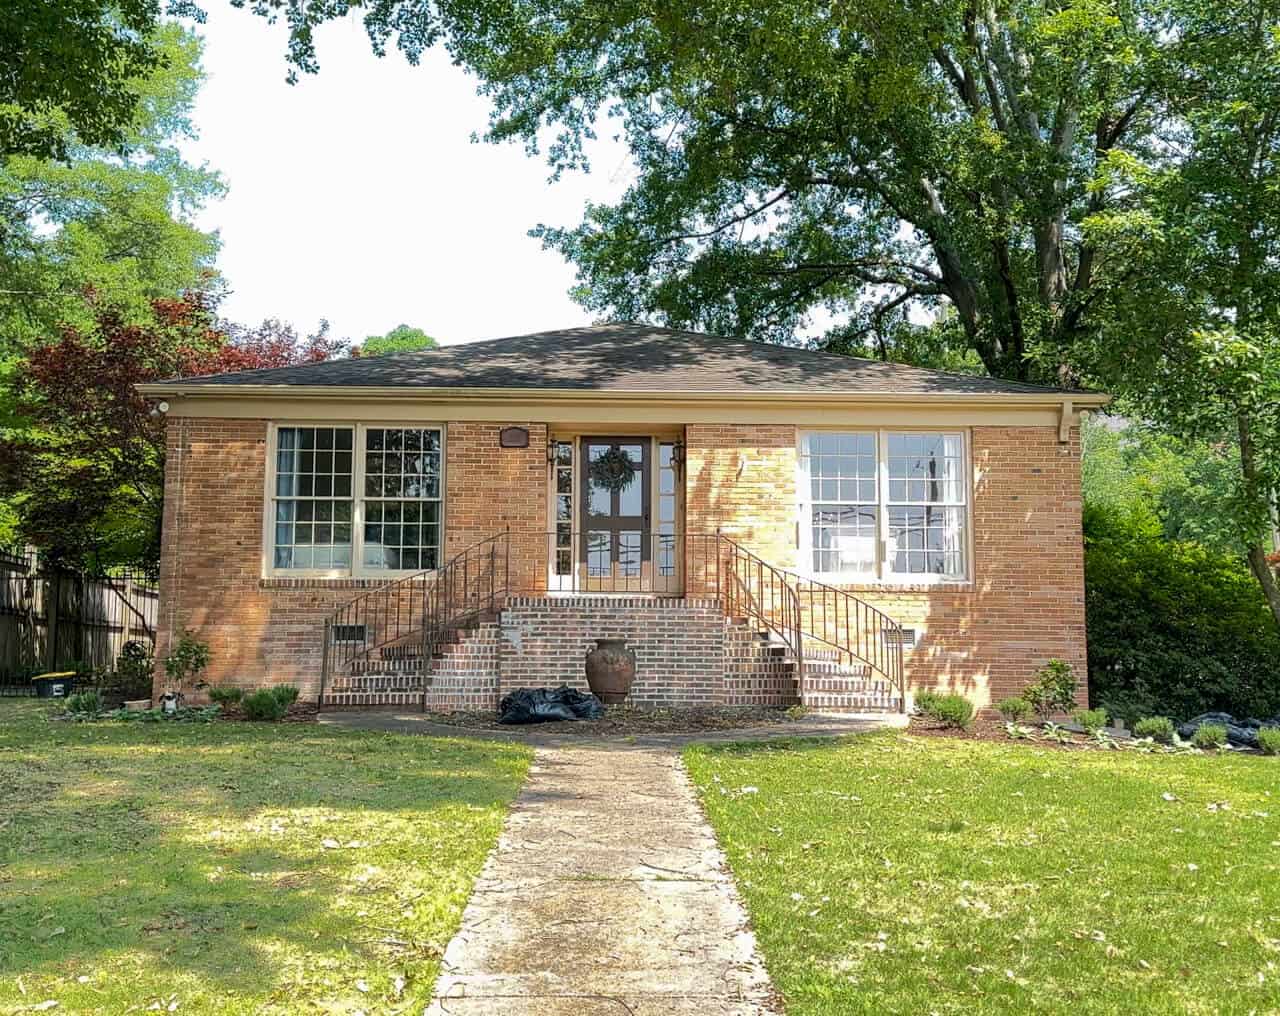
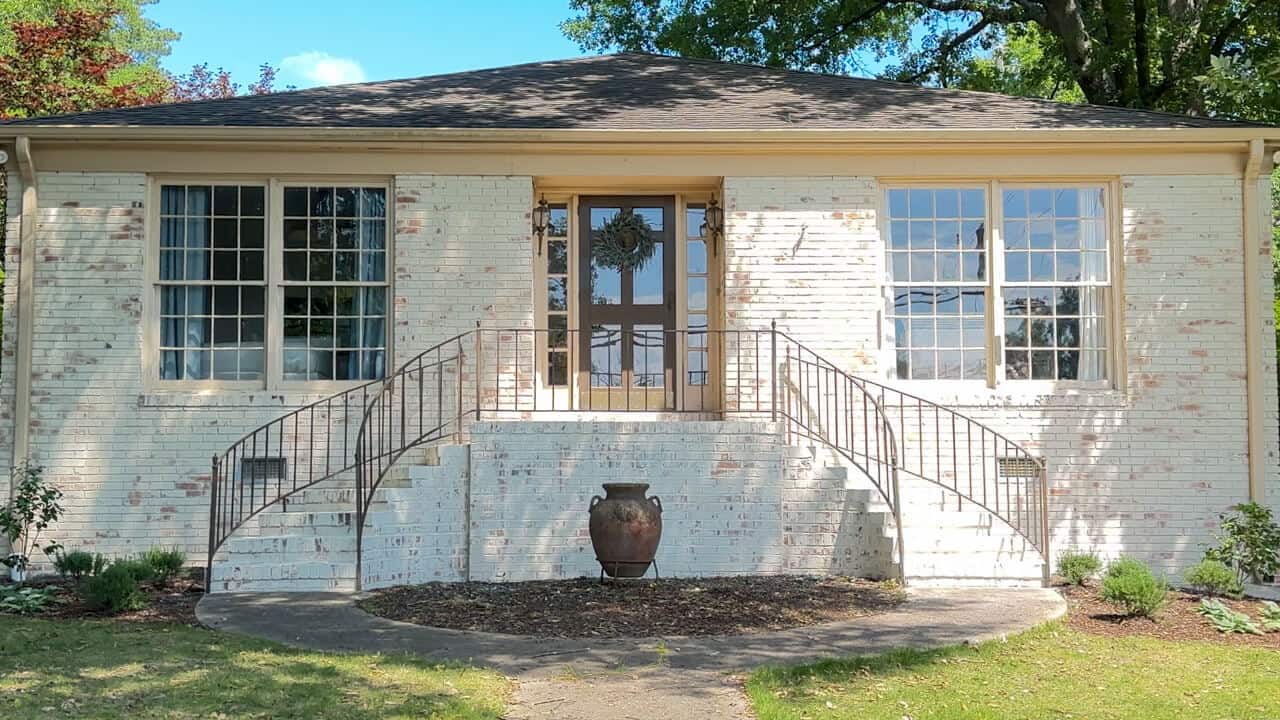
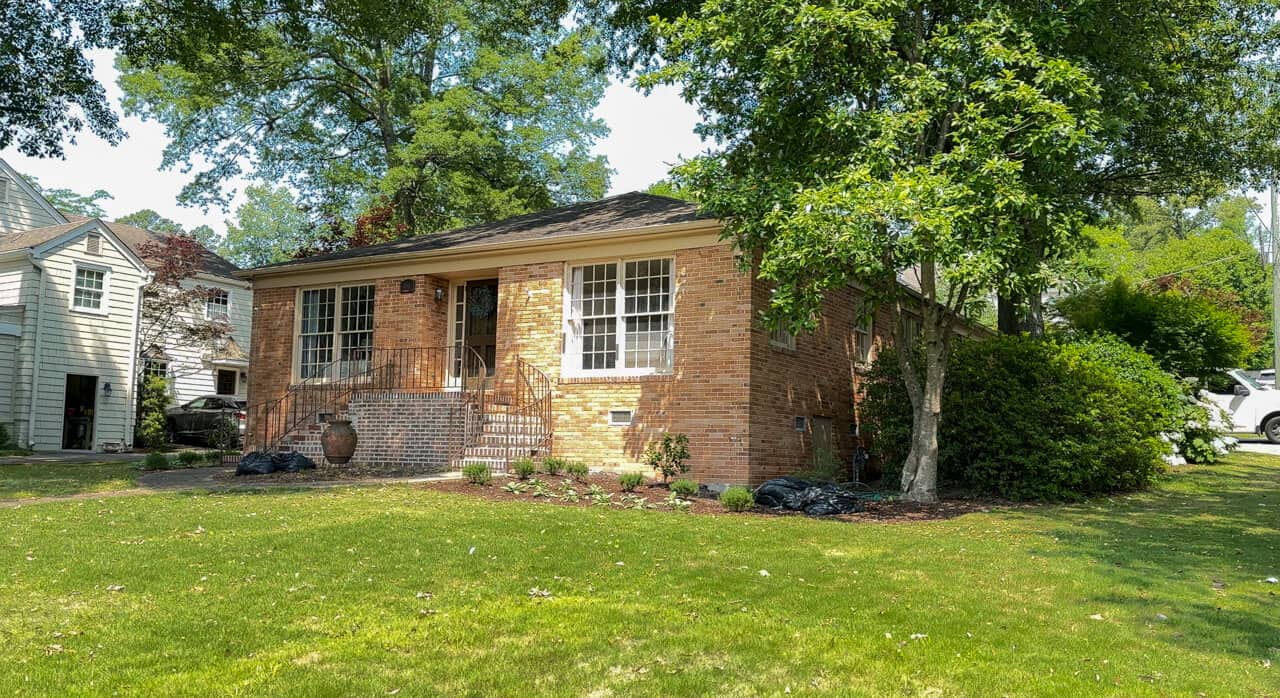
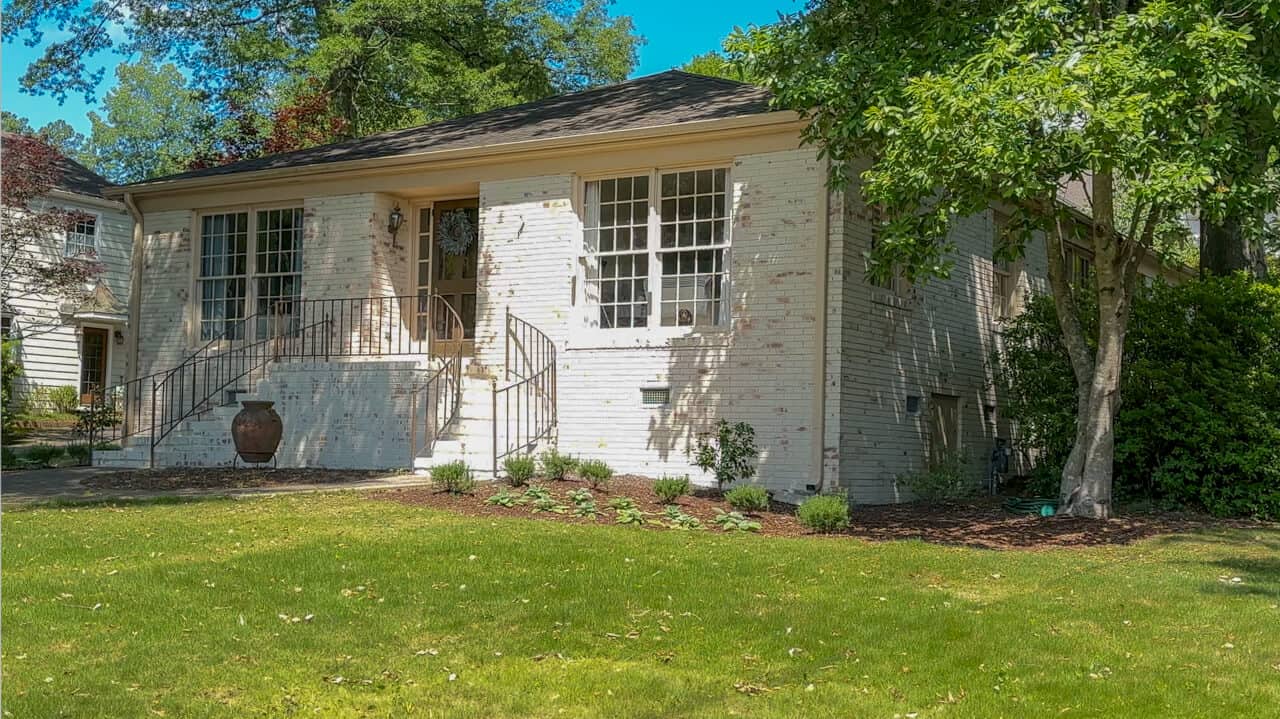
We tackled a charming 1950s home in a historic district of Birmingham, Alabama. We nicknamed this house Poppy’s house, for the sweet pup who was the best painting companion!
I want to show you that limewashing your home can be easy and the results beautiful.
Enjoy these simple steps to help you create a beautiful finish for your home.
Watch our YouTube video here.
How to Limewash Exterior Brick House
with Riposo Beige
We exclusively use Romabio products for our business and have learned a lot through the years.
Here’s a step by step guide of what you need to do in order to get the best results with your home.
Stick around to see a very cool time lapse of this exciting transformation.
Test the Brick
Before you begin, we highly recommend testing the brick.
Limewash paint adheres to the brick surface through absorption.
So you need to make sure you have porous surfaces.
A quick spritz with a spray bottle over the top of the brick will tell you the type of brick you have.
If you see the water fully absorb into the brick, then you are okay to proceed.
But if you see the water bead up, similar to water on your bathroom tile – then you have a sealant in place and the limewash will not absorb.
You will need to add Romabio MicroGrip Primer, which is a simple process, but it does add another step.
Prep the Brick
A great finished look starts with proper preparation.
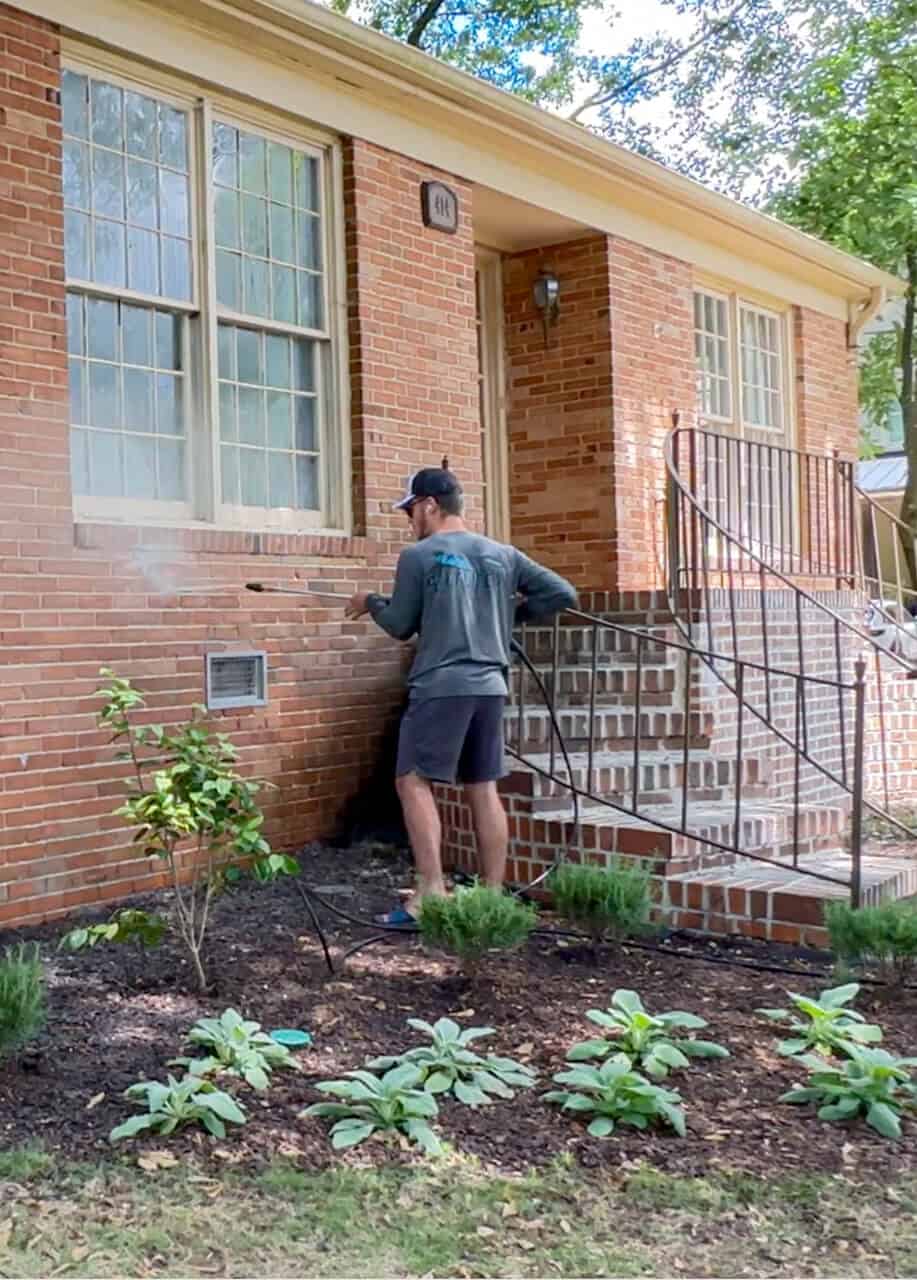
It’s important to have a clean surface for the lime wash paint to properly adhere.
It’s crucial to remove any organic material that is growing on the brick.
If it looks like the Hulk’s sinus, it’s gotta come off.
Fill a pump sprayer with Romabio Algae and Moss Cleaner and spray those areas letting it sit at least overnight to kill-to-the root.
You don’t have to scrub and it can be rinsed off a day or so later with either a garden hose or my preferred method.
A pressure washer is great for this step and our preferred method!
Power washing helps remove any dirt, algae or moss that grows on exterior surfaces.
PRO Tip: We often wear a dust mask to prevent breathing in any of the goop that’s been loosened from the brick.
Another step would be masking off areas you don’t want paint to get on.
We mask off doors and windows, remove gutters, and put a drop cloth over any plants you want protected.
But here’s the good news.
Unless the area is absorbent, the limewash won’t stick. Metal, glass or plastic will wipe easily with a mixture of water and white vinegar.
And it won’t hurt your plants if a drop gets on them!
Once the you have clean brick and your area is prepped, it’s time to start diluting your paint.
Diluting Romabio Classico Limewash
Romabio Limewash has to be diluted, and you would know that the moment you open the bucket!
It comes in a thick paste-y, peanut buttery consistency.
The whole process of diluting your limewash mixture can seem daunting.
But these are really easy steps.
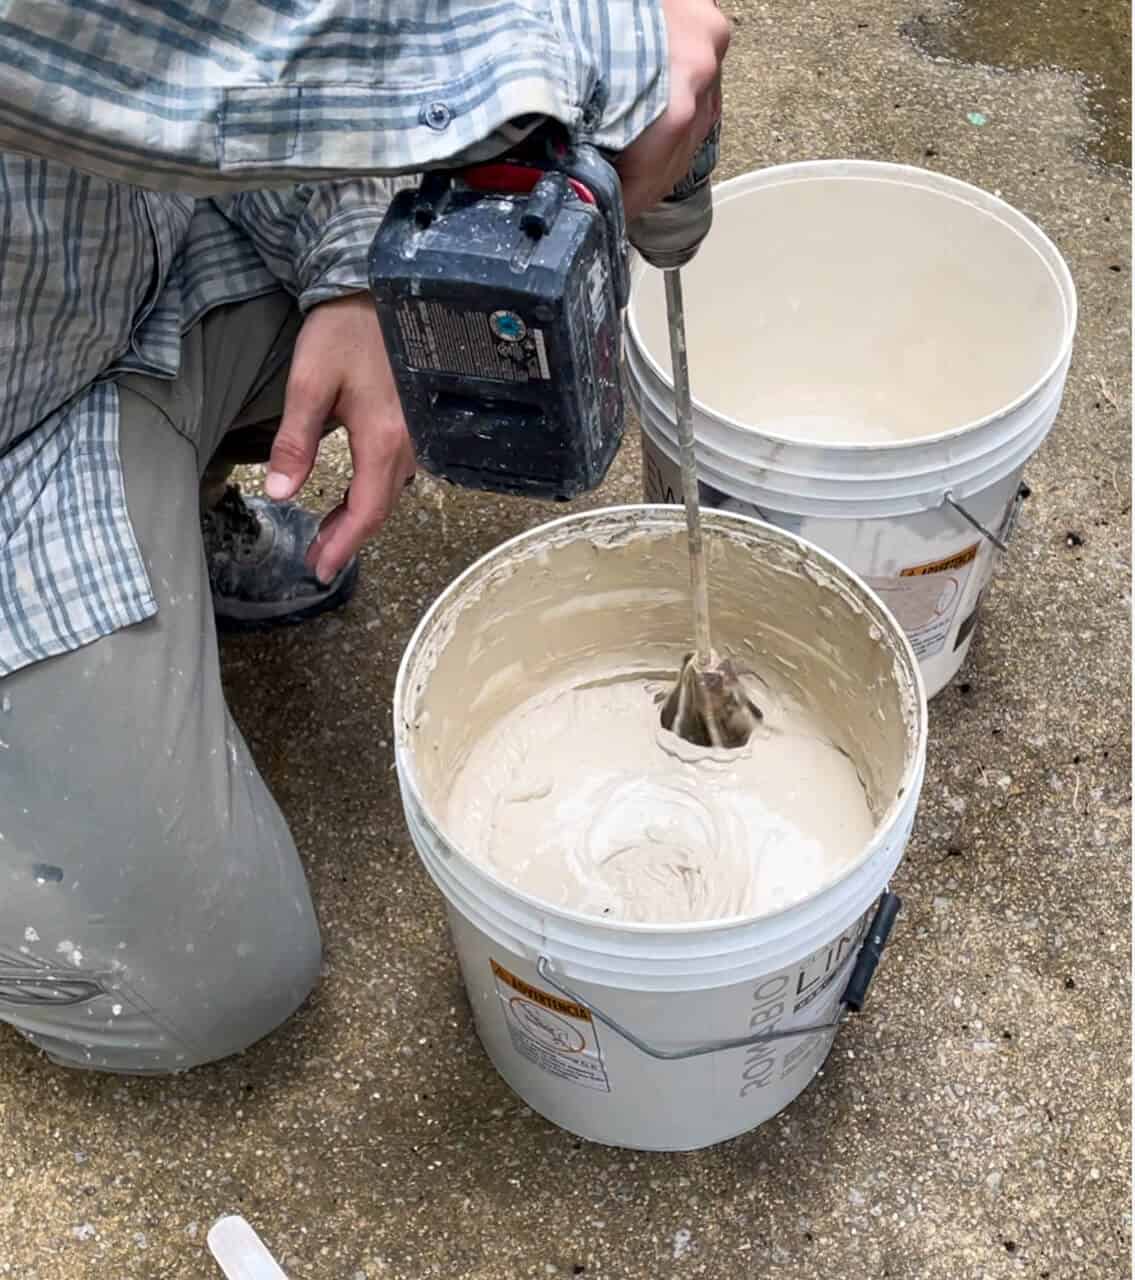
First, start by mixing the undiluted limewash until it’s an even consistency. This will help break up any clumps that may have formed.
Now, you can dilute the limewash 50% – 70%, depending on the look you want.
A good starting point is one part limewash to half part water and mix thoroughly.
Measure out the amount of limewash to start. A bucket with lines is a perfect choice for this step!
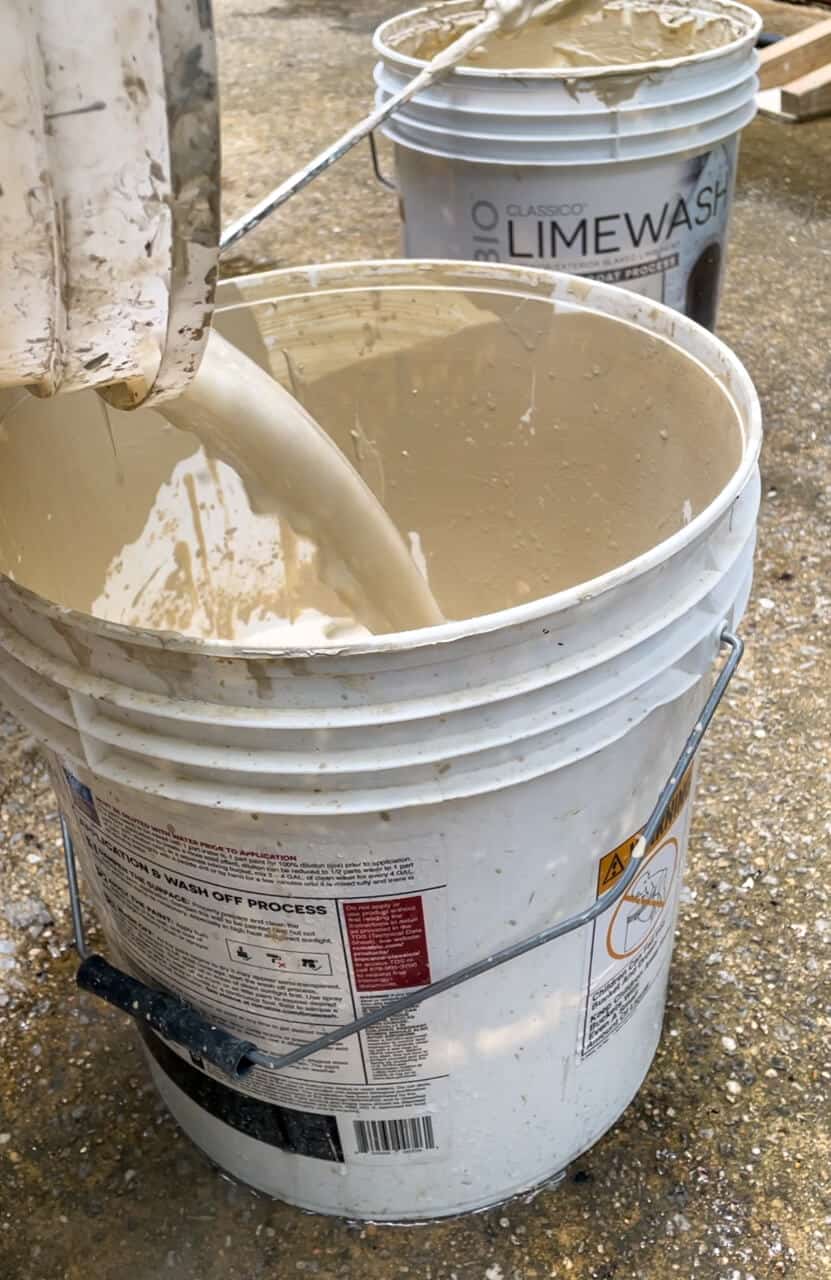
Pour it into a separate mixing bucket.
Next use 50 percent water, or half the amount you just measured out.
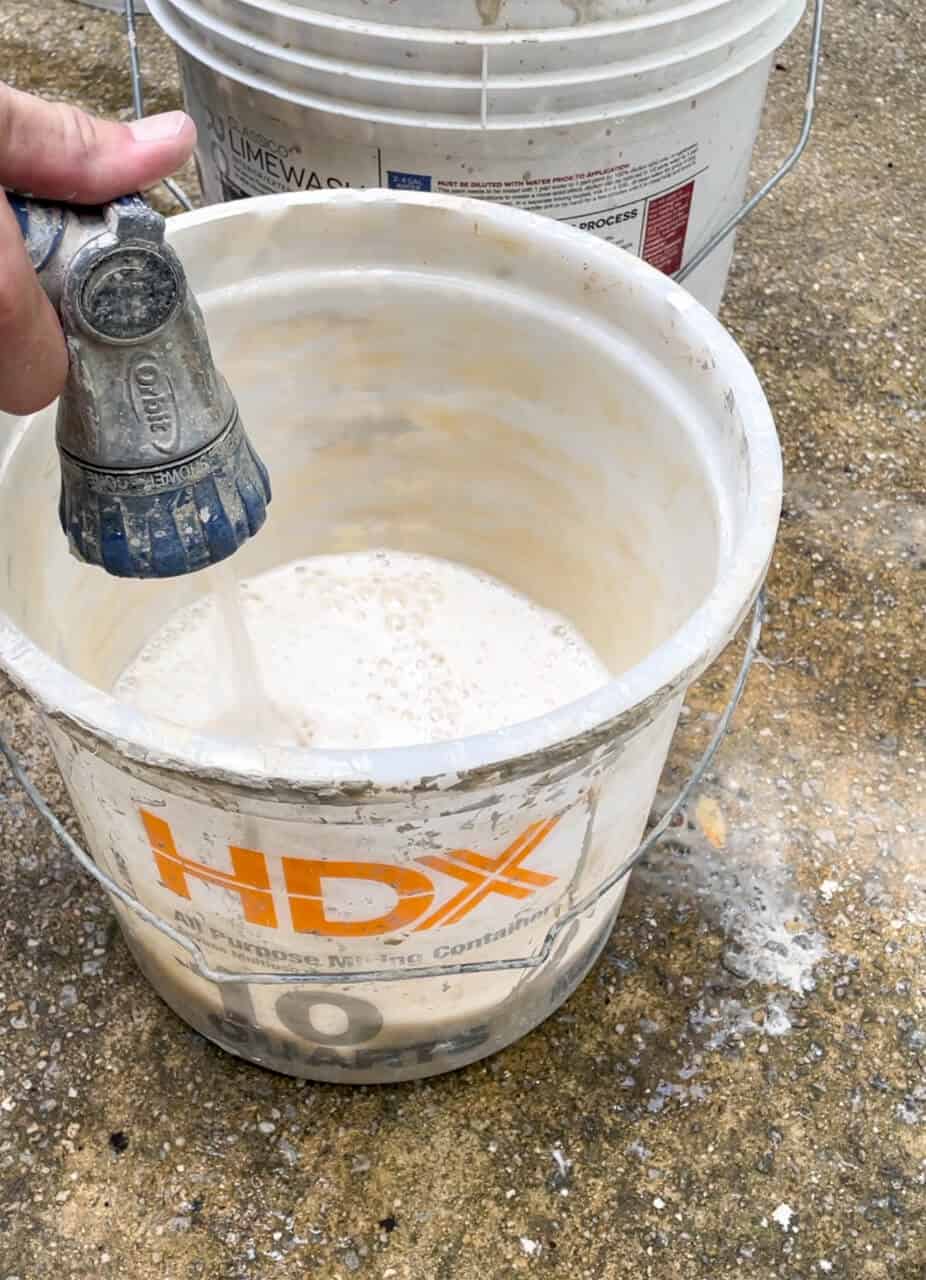
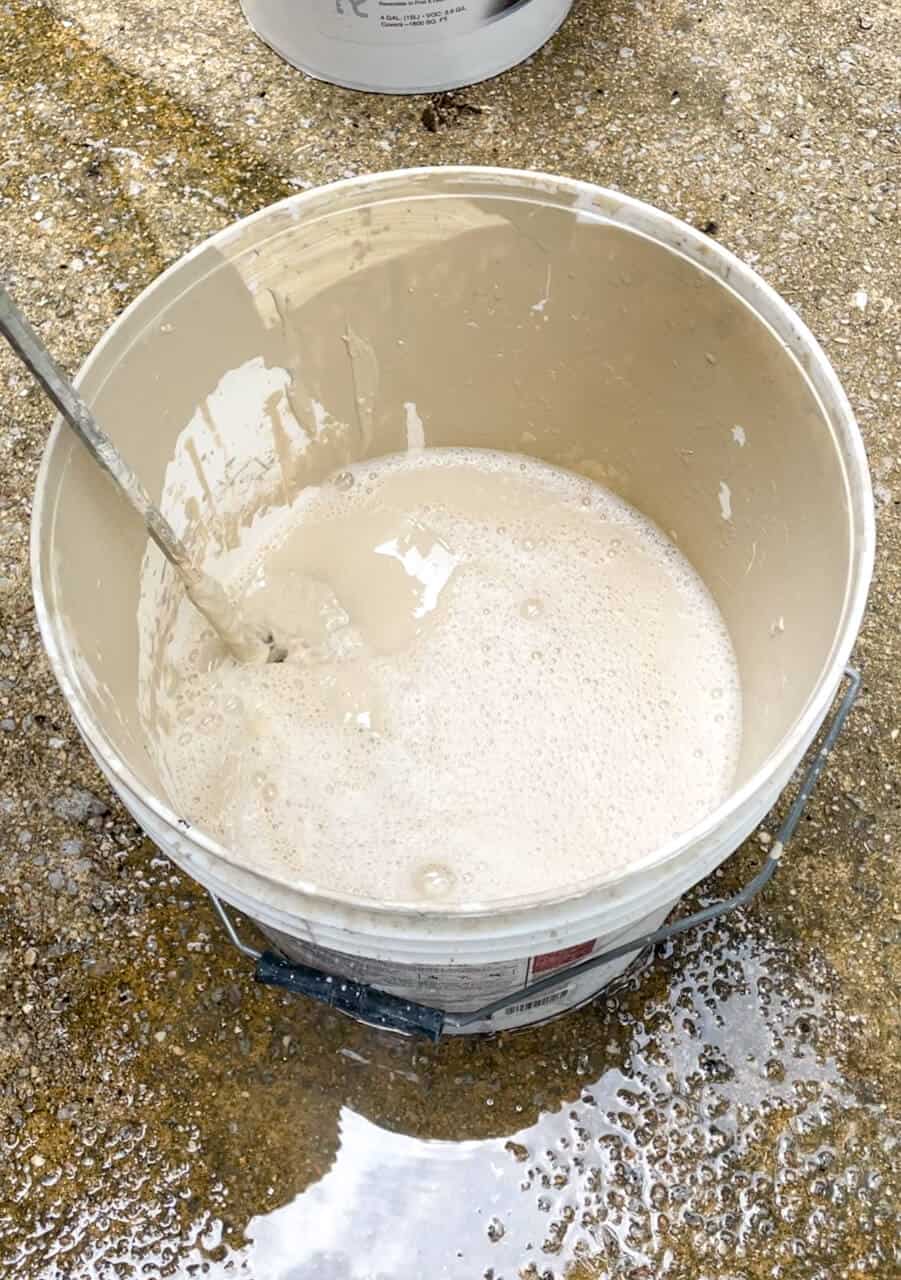
Then you combine the limewash and bucket of water and mix thoroughly.
We recommend using a painter’s paddle mixer attached to a drill. It makes the whole process that much easier!
If the limewash mixture seems too thick, just add more water. If too thin, add more limewash concentrate.
The end result should be the consistency of whole milk.
Now it’s time for slapping on the paint.
Applying Romabio Classico Limewash
Let’s talk about the gear you’ll need for an exterior brick painting project.
I like using a combination of Romabio’s large masonry brush and small masonry brushes alongside other brushes I use.
Stiff Chinex bristles work the best for me for those detailed cut ins.
You’ve prepped the area, cleaned the brick, mixed your paint, and gathered your supplies.
Then comes the easy part.
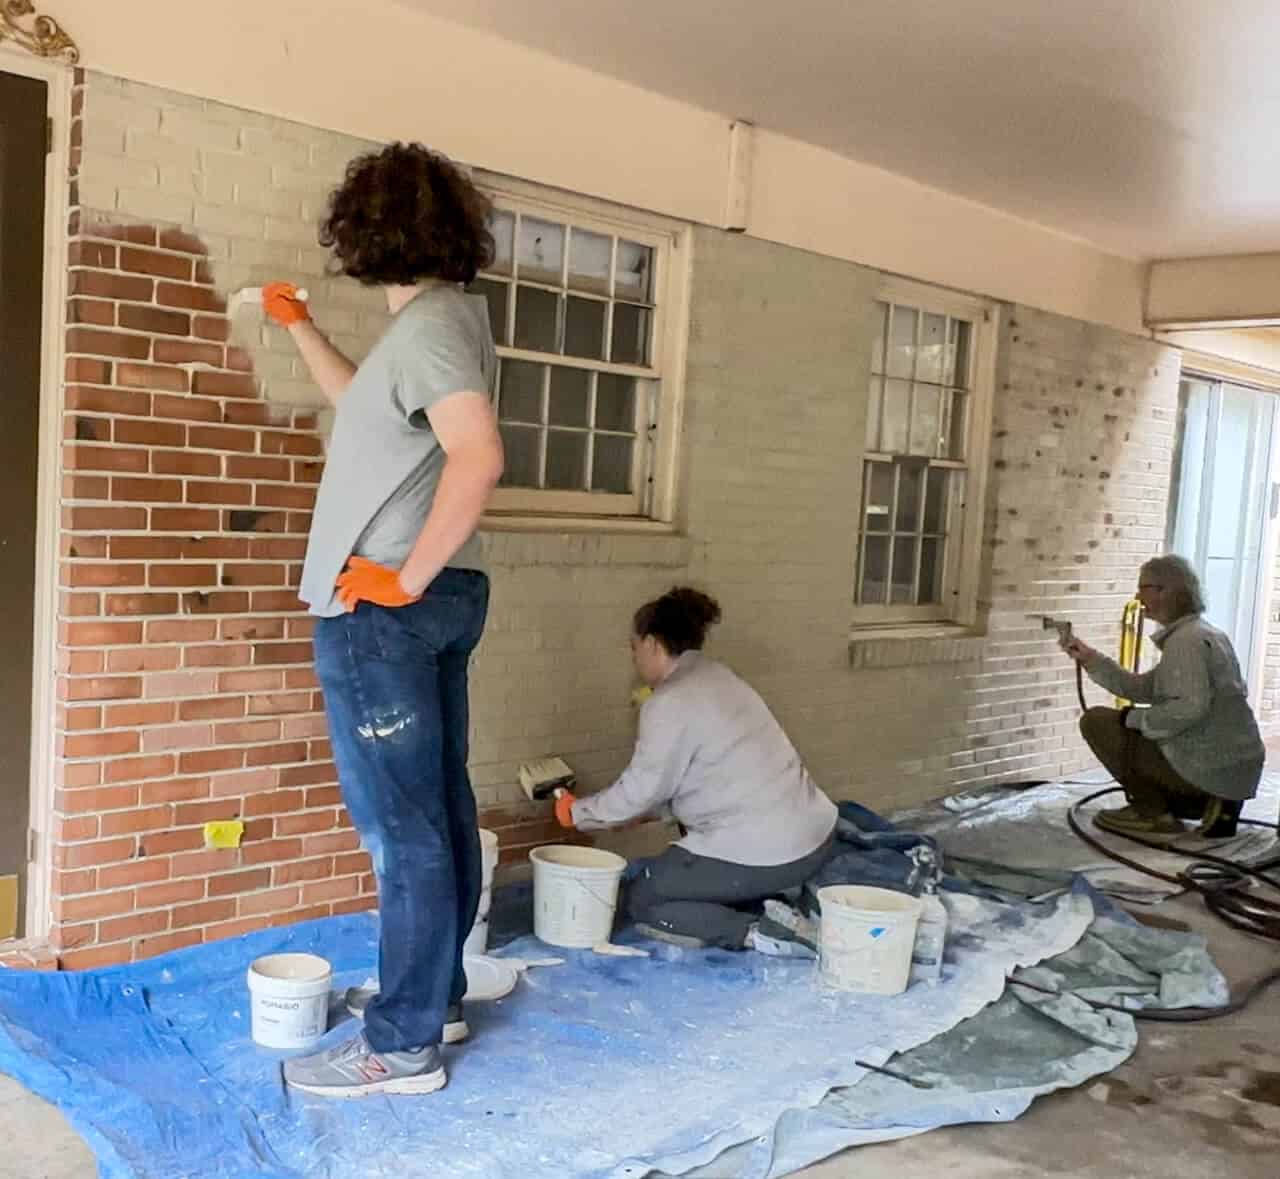
There are two ways you can apply the limewash solution. You can use a masonry brush or an airless paint sprayer.
The key with using a paint sprayer, you will need to have a larger tip to allow the thick mixture to go through the sprayer.
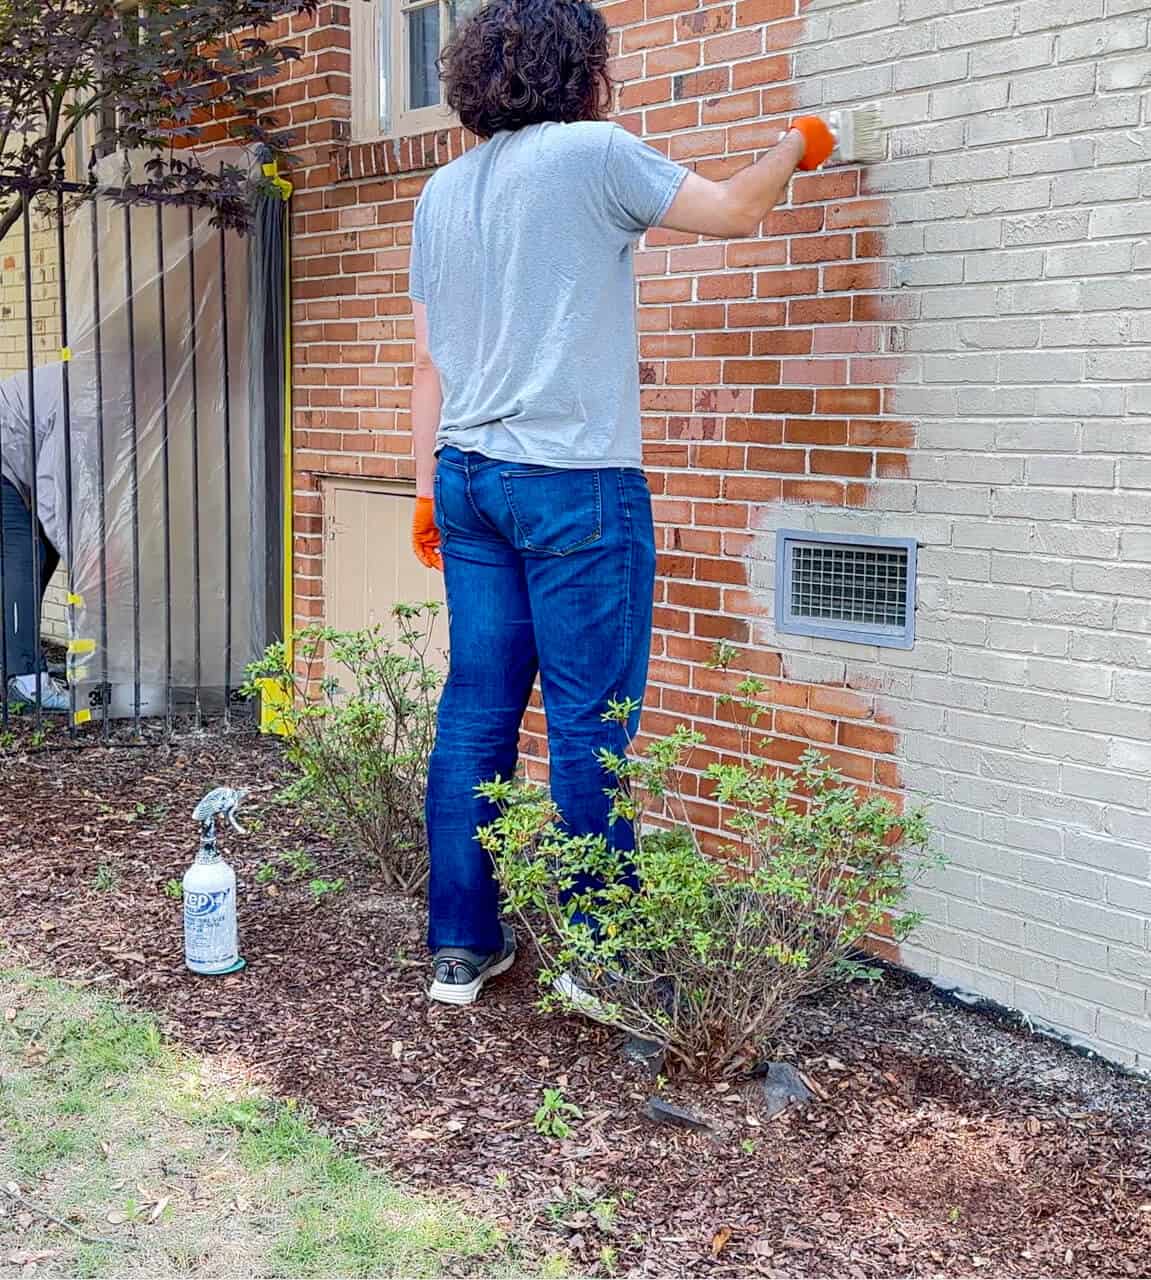
For this house, we opted for brushing the limewash on.
After a little mist from the hose over the wall section, load up the bristles with limewash and start a wipin’!
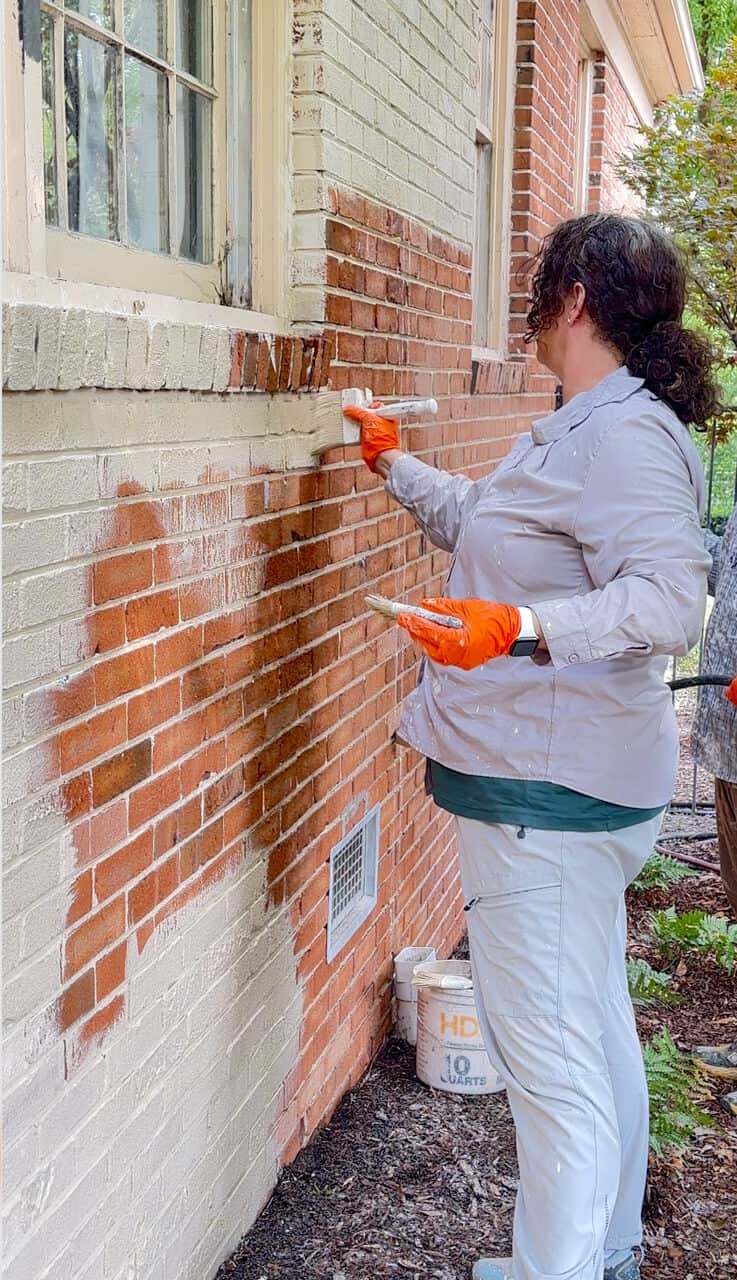
Here’s a PRO tip: Start with the ugly wall, like the air conditioning side, and take the time to learn your brick and limewash mixture.
Your mixture is going to be different for different bricks. You may have very porous brick that soaks up the limewash quickly.
Or your brick holds too much moisture and the dry time is longer than expected.
Work in small sections whether you have help or not, until you learn the dry time.
If you rinse too soon, you’ll rinse too much off.
Too late and you’ll need a pressure washer to remove it.
It may take a wall or two before you have it figured out.
The good news is: you can put more on or take more off.
That’s flexibility and forgiveness.
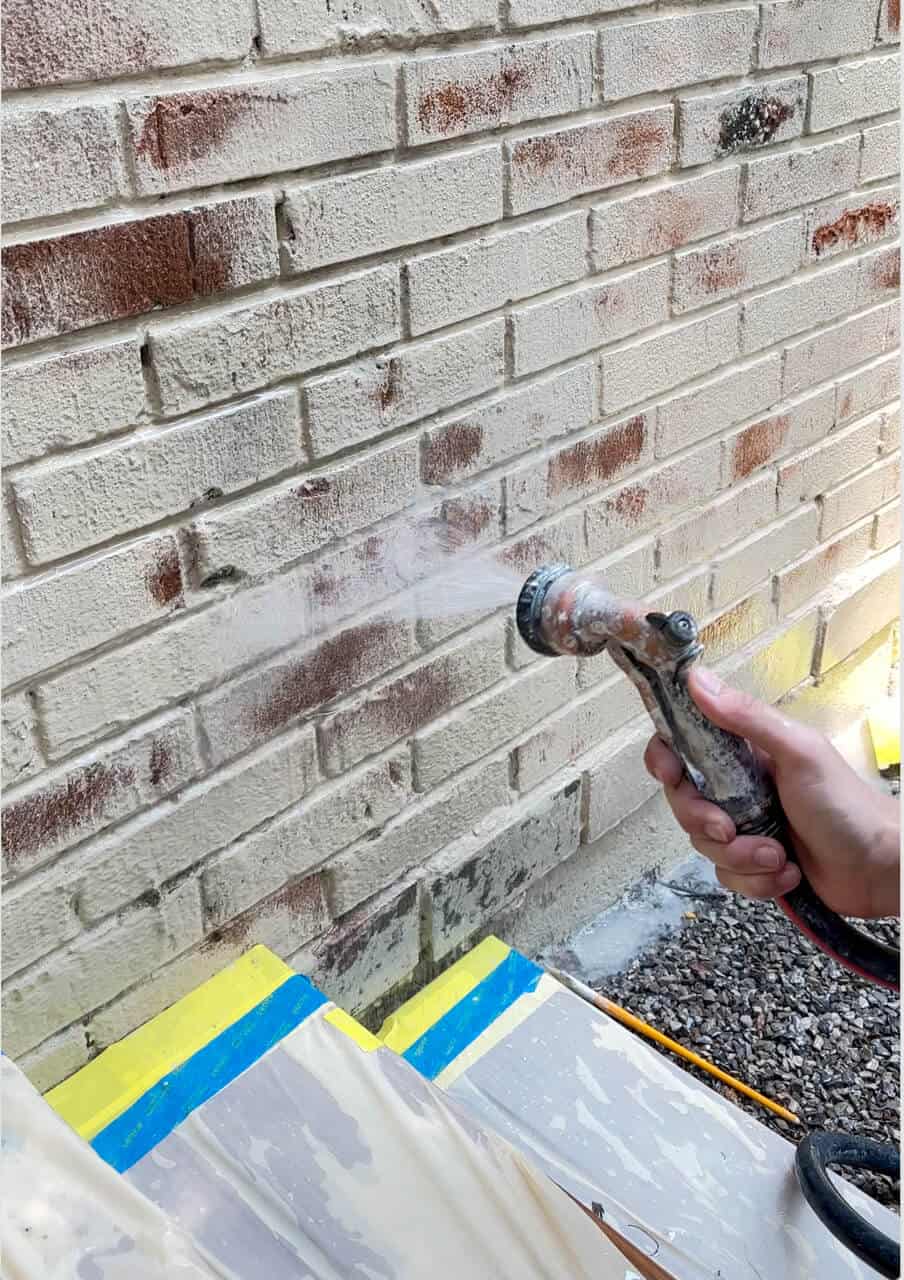
Distressing Romabio Classico Limewash
For the best results distressing, you have to watch how the limewash is drying and absorbing into the brick.
Now if you are wanting a more opaque finish, then you can apply one coat to the whole house and be done!
But here are some tips to get that perfect distressed look.
It’s all dependent on the weather, humidity, and sunlight or shade.
But here’s the secret sauce: wait until you see the painted brick start to turn lighter or into a chalky finish. That means the calcification has begun and you can start distressing.
This is the hardest part.
It may be tricky, but trust us – you can do it.
My personal preference is to use a garden nozzle that has a turn dial for different settings and a finger trigger, so you can more accurately control the flow.
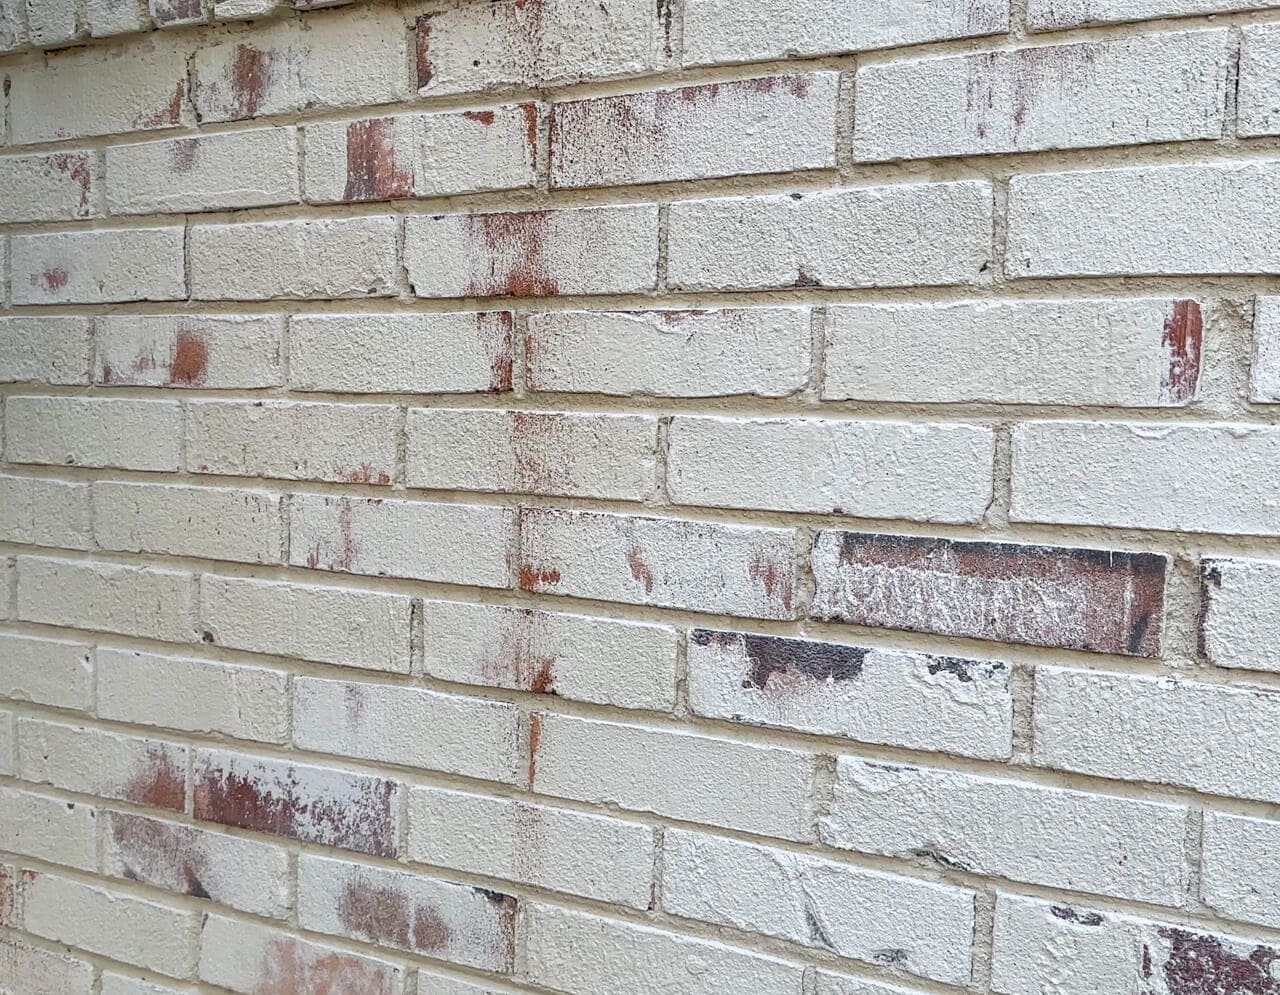
Some brick holds on tight to the limewash, refusing to let it go!
Others will be back to bare brick just for looking at it funny.
After the many, many houses we’ve completed, we can honestly say that each brick reacts differently, and the drying time varies.
So taking that time to learn your brick really is key.
More PRO Tips
We like to use the phrases chase the shade or if it’s cold outside, chase the sun unless it’s an overcast day.
The direct sun will dry the limewash quicker, so if you work in the shade or on a cloudy day, then you will good to go.
If the temps are on the cooler side, the sun will help with dry time if that seems to be taking it’s sweet time.
So let’s check out the before and after for Poppy’s House!
See if you can spot her in the photos. 😉
Now for the fun time lapse of us painting the front!
If only it went as fast as this!
Most Commonly Asked Questions
We get a lot of questions from all our exterior projects and have an entire blog post dedicated to your questions.
But here are the questions we get asked most.
What is Limewash?
Limewash is made from crushed dolomite lime. Romabio uses slaked lime from northern Italy.
Romabio’s limewash has taken an ancient process used since roman times and have created modern paints based on classic production.
Can you apply limewash over latex paint?
Yes you can.
But you will need to apply Micro Grip Primer first and it will definitely change the distressing options you have.
I am scared to take the first step. Any tips?
We get it. Swiping paint on the brick that first time is scary. But the best part about limewash is that it is reversible within the first few hours.
So if you apply the paint and hate the look of limewashed brick. Grab that pressure washer and take it off!
I’m wanting an opaque look. Do I need to apply a second coat?
Not at all! The finished product of one coat of limewash provides a gorgeous matte finish that fully covers the brick.
But remember, limewash is meant to weather and patina.
So if you are wanting full coverage for your brick forever, then we recommend 2 coats of Romabio Masonry Flat. It still has that same matte look, but lasts 20 years – guaranteed!
Should I dilute and mix all the limewash before painting?
We don’t recommend this. A lot of times, you have enough left over for touch ups or if you want to do a different project.
Once it’s diluted, it shortens the shelf life. So mixing larger batches isn’t a good option.
Helpful Tips and Tricks We’ve Learned Over the Years
- Use Sun Protection: Working long hours outdoors in the direct sunlight is a great way to risk a burn. It’s a great idea to wear sunscreen, long sleeves, and a hat with a brim.
- Protect Your Eyes and Hands: Crushed lime is caustic and it’s smart to protect your eyes and skin with goggles and disposable gloves.
We hope this helped you learn how to limewash your brick exterior.
If you have any questions, please reach out. We would be happy to help out in any way we can!


Certainly! I will send you a direct email! 😉
We are in Alabama and come to bham often. Can you please reach out to us about some additional questions we have. Thanks. Blessings
Those are great questions, Elaine! We recommend doing a water test on the veneer. If you splash some water on the surface, see if it absorbs. If so, you are good to go ahead. However, if it beads up like water does on tile, then you will have to apply their microgrip primer first.
And yes, you can tint to most colors as long as they work with a white base. Check with your local Romabio retailer to help you find the perfect shade that works. Romabio has a store locator tool that will help you find your nearest retailer.
Hope that helps!
Jen and Trent
Congrats on the new name! I love the limewashed look of brick and want to do this on my 1960’s home–but it has a stone veneer! Will this work on veneer, too? Also, I’d want a medium greyish blue color. Is it possible to tint it? Thanks!!