How to Build a Wall Mounted TV Cabinet
The big black box – it’s the dreaded design dilemma heard over and over again. Here is how to build a wall mounted TV cabinet in just one day and hide that eyesore.
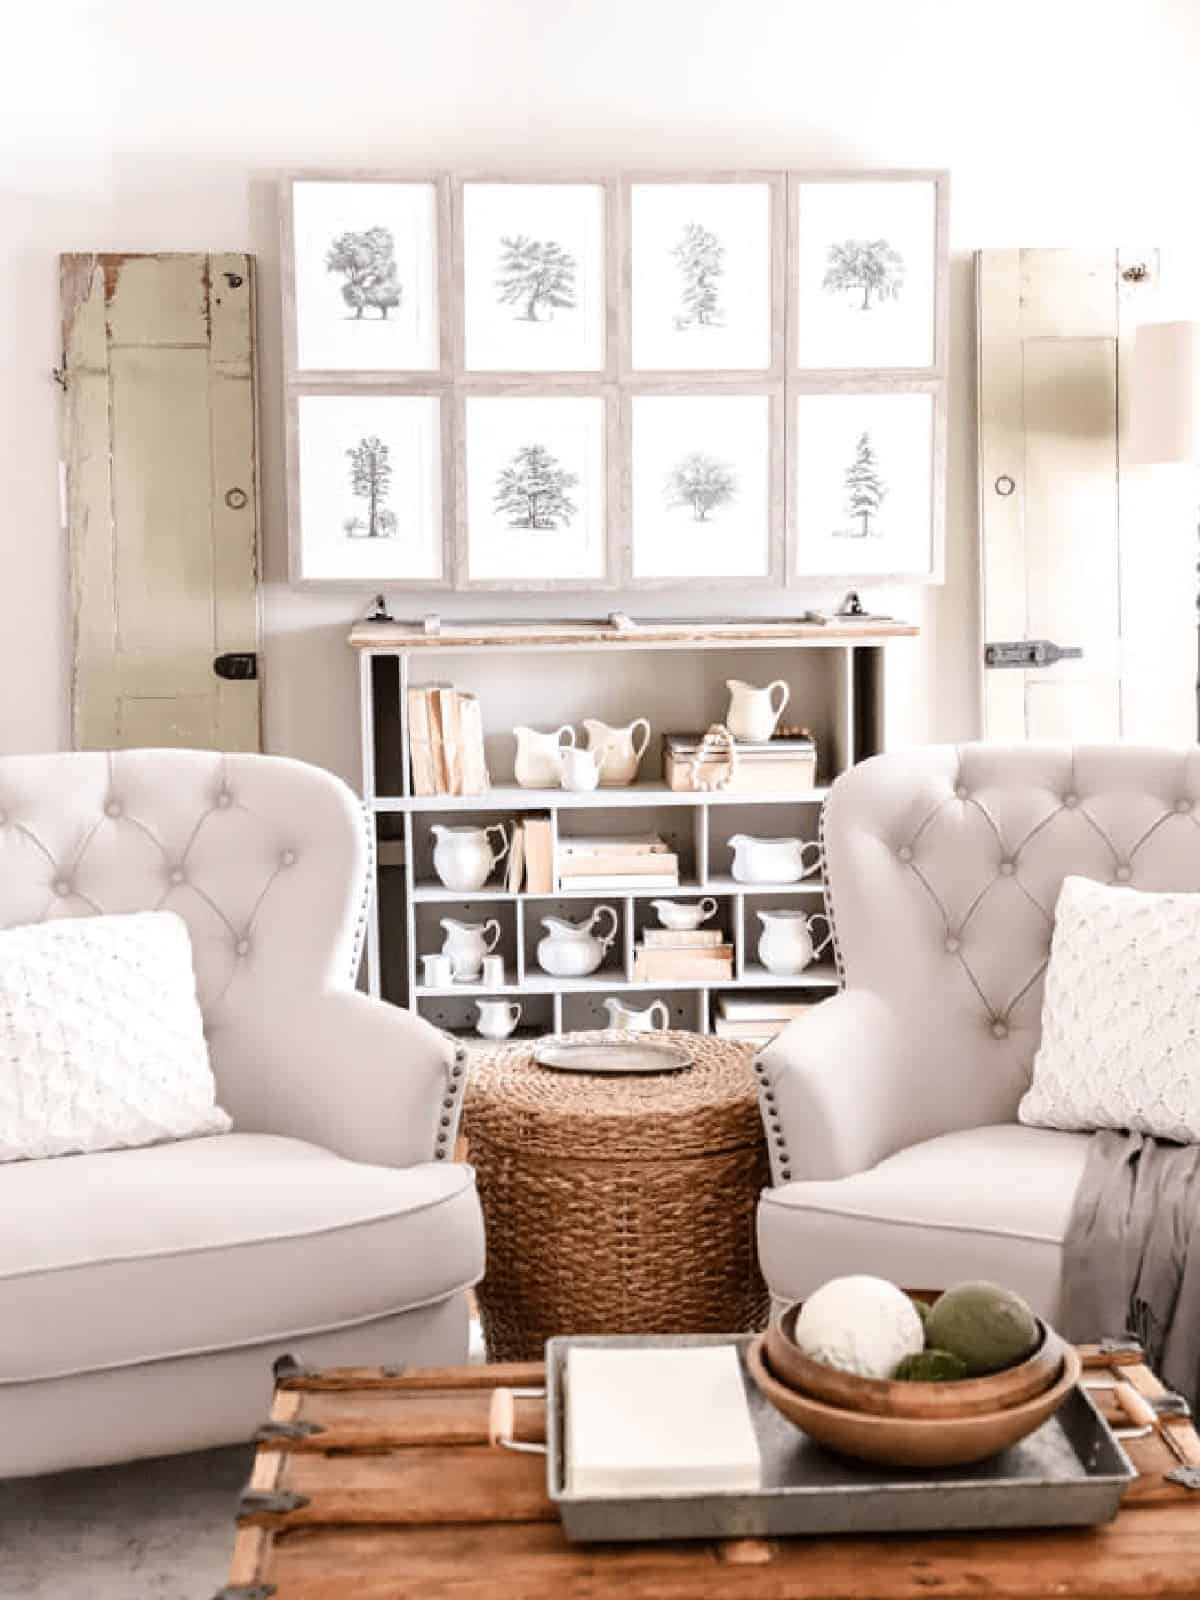
It’s not too often when you get things right – especially in the DIY world.
But this little box made me feel like a rockstar and got me some huge kudos from the husband – which always feels good.
When we moved to this new home, I was always battling the big black box, when I tried to take pictures of this room.
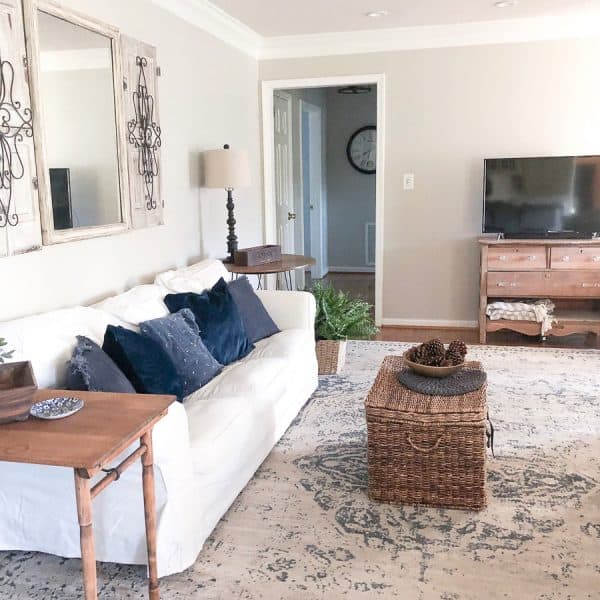
These days, the TV is a necessity in every home, but from a design standpoint – it’s not pretty to look at.
And while I dream of having one of those flat-screen TVs that display artwork, that simply isn’t in our budget at this time.
Plus I didn’t want to place a huge entertainment center in my living room.
I also didn’t want the flat screen TV just hanging on the wall.
I wanted a seamless look for this occasional room while also having the opportunity to watch TV when I wanted to.
So I had to come up with a solution to hide it and my inspiration struck in one little email from Michaels.
This perfect TV setup is a great way to solve both dilemmas!
So let’s start with the supplies you need.
How to Build a Wall Mounted TV Cabinet
(Some affiliate links are provided below. Full disclosure here.)
- Picture frames that fit the size of your TV – I ordered these from Michael’s in 11×14
- Wood to fit the depth of your TV – we used 1 x 6 Pine Boards
- Mitre Saw or Circular Saw
- Stain – I used Weathered Gray and Antiquing Glaze
- 4 Piano Hinges – ours were 30 inches long
- Wall Mount Kit
- Cord Hider
- 2 Metal Brackets
It was an end of the year clearance sale email from Michaels for their picture frames at 70% off if you ordered in bulk.
That gave me the idea to build this cabinet.
I had been looking for solutions to hide our electronic devices and there are plenty of storage cabinets and tv consoles out there.
But only a few actually hid the TV.
The cabinets that hid just the TV run from $250 for a small TV to $1500 – way too expensive for our tight budget. So a DIY solution was needed.
STEP ONE: Take your measurements
To begin with, I measured our TV.
You want to measure the height and width of your TV to determine the size of picture frames you’ll need.
Ours is a 43 inch TV measuring at 38 x 22.
Please Note: This tutorial is for a 43 inch TV, so you will have to adjust and customize the measurement for your screen size. This may also mean you need to find smaller or larger picture frames.
To cover the entire TV, I took the measurements from Michaels and made sure the picture frames would work.
I ordered eight 11 x 14 frames to cover the entire TV.
Next you want to measure the depth of your TV.
Take into account the measurements of the TV mount.

We bought this Wall Mount kit and Cord Hider from Amazon a few months ago and had the TV already mounted on the wall.
What I love is the Cord Hider. As professional musicians, we are always dealing with cable management, so being able to hide them away is amazing!
You cut out two holes in your drywall – one behind the TV and one directly below at the same height as your wall outlet. Just install these boxes and it hides your cords!
Next we took the depth measurement to find the size of wood needed to build the box.
So for our TV, we needed 1 x 6 boards to completely fit the TV and wall mount.
STEP TWO: Build your door panels
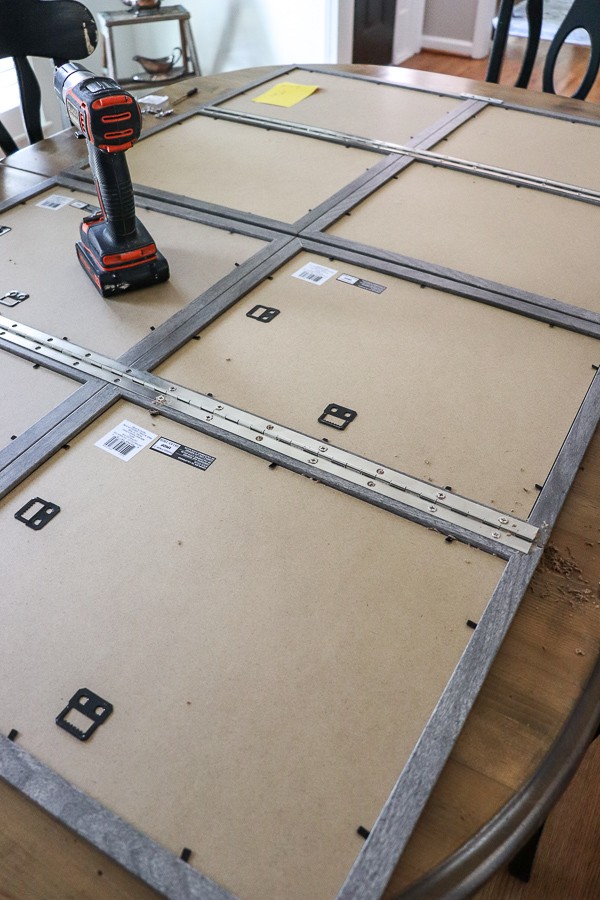
The goal is to make these picture frames seem like accordion doors.
You’ll need 4 piano hinges. The long hinges stabilize both frames without the need to glue them together.
Start by laying the frames out face side down and begin installing your piano hinges using the included screws to the center of each door as pictured above.

TIP: Pre-drill the pilot holes with a small bit before screwing them in. This will help prevent your frames from splitting.

It’s a relatively quick process with two people but it is a bit tedious.
Trent and I built one door together and it was a breeze with one person drilling/screwing while the other held the doors in place.
When I built the second door on my own, it was a lot of back and forth to make sure the ends were aligned properly. It’s not impossible to do this solo, but it did take more time.

For the inside panel, where the doors meet, you need something to stabilize the picture frames.
Without these brackets, you run the risk of the frames bending and knocking everything out of alignment.
We had these mounting brackets on hand, but you can get them for a few bucks at your hardware store.

Now that my door panels were built, I placed them side by side and measured the height and width of both panels together.
You will need this measurement for the next step.
STEP THREE: Build and stain your cabinet

This is super simple, but you need a miter saw or circular saw. Here are some of my favorite DIY must-have tools I recommend.
Remember the measurement you took of your finished doors?
Cut your wood the width and height of your finished doors – not the width and height of your TV. This gives your DIY doors a frame to sit against.
NOTE: This will not be a tight fit around your TV. There will likely be an inch gap or more between your TV and the wall cabinet.
Nail your box together. We used a pneumatic nail gun for a quick an easy build, but you could use 1 inch pocket screws for this as well.
Once assembled, you should have a big, square box.
Next you will need to add two boards on the inside of the box.
Adding a support pieces across the top and bottom of the box makes able to hang it into a stud. It will also help to keep your box square.
Attach the beam by nailing or screwing it into the sides as well as the top or bottom piece.
You can see the lower support beam pictured below. I’ll explain how we hung the cabinet later.

Next, I stained my wood.
For my box to match my weathered wood picture frames, I used Weathered Gray stain and antiquing glaze.
How do you get the stain to match the frames?
Wood does pick up different parts of the stain and sometimes you have to either apply less or more depending on what’s happening.
To get a good match, try sanding the stain down a bit and wiping it with a damp cloth. We took a few days to apply a few coats of stain to get the look we wanted. It’s truly about trial and error holding up the frames to the stain many different times.
In all honesty, our wood isn’t a perfect match to our frames. It’s just a bit darker, but you really can’t notice it.
STEP FOUR: Attach your doors to your box
This was the trickiest part. You will need two people to get this job done properly.
Mostly because it was midnight when we were trying to figure this out, but Trent and I sat there for a few minutes thinking this through. So here’s what worked.
Lay the box flat on the ground facing up.
Start by attaching the second set of hinges to each outside of the box first.

Next you attach the doors to the frame.
Using something to support the doors (we used pillows, but blocks of wood would work), attach the hinges to your DIY doors.
We went for a flush mount across the top with our doors, leaving a quarter inch hang across the bottom.
Here’s a full view of the back of the door.

I wanted hidden hinges while the doors were closed.
So I attached them to the inside edge of the box.
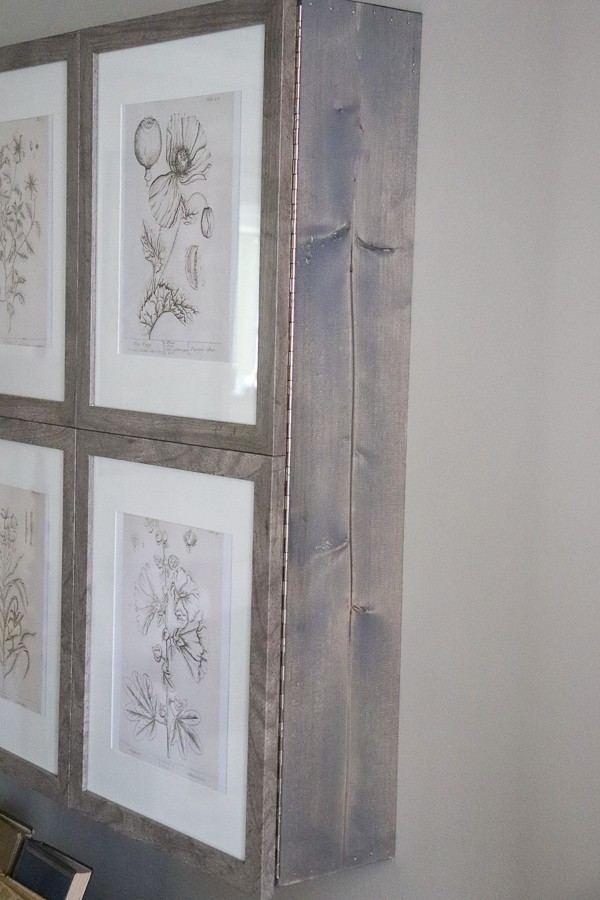
When it’s open, you see the full hinge, but it’s not that noticeable.
Now you have a bifold door that works!
Next it’s time to hang your box.
STEP FIVE: Hang your DIY TV Cabinet

Remember those support pieces you added to box? You can see ours clearly in the picture above.
This is how you will attach the box to the wall.
Get out your stud finder and level and make sure to attach your wall mounted tv cabinet to studs. We used a 2 inch screw to attach to our wall.
You will want to make sure it’s secure since you will be opening and closing the doors each time you watch tv.
Finally I added some easy DIY artwork.
I just love these vintage botanical pencil drawings! I have lots of free printables you can download!
Ready for the reveal?
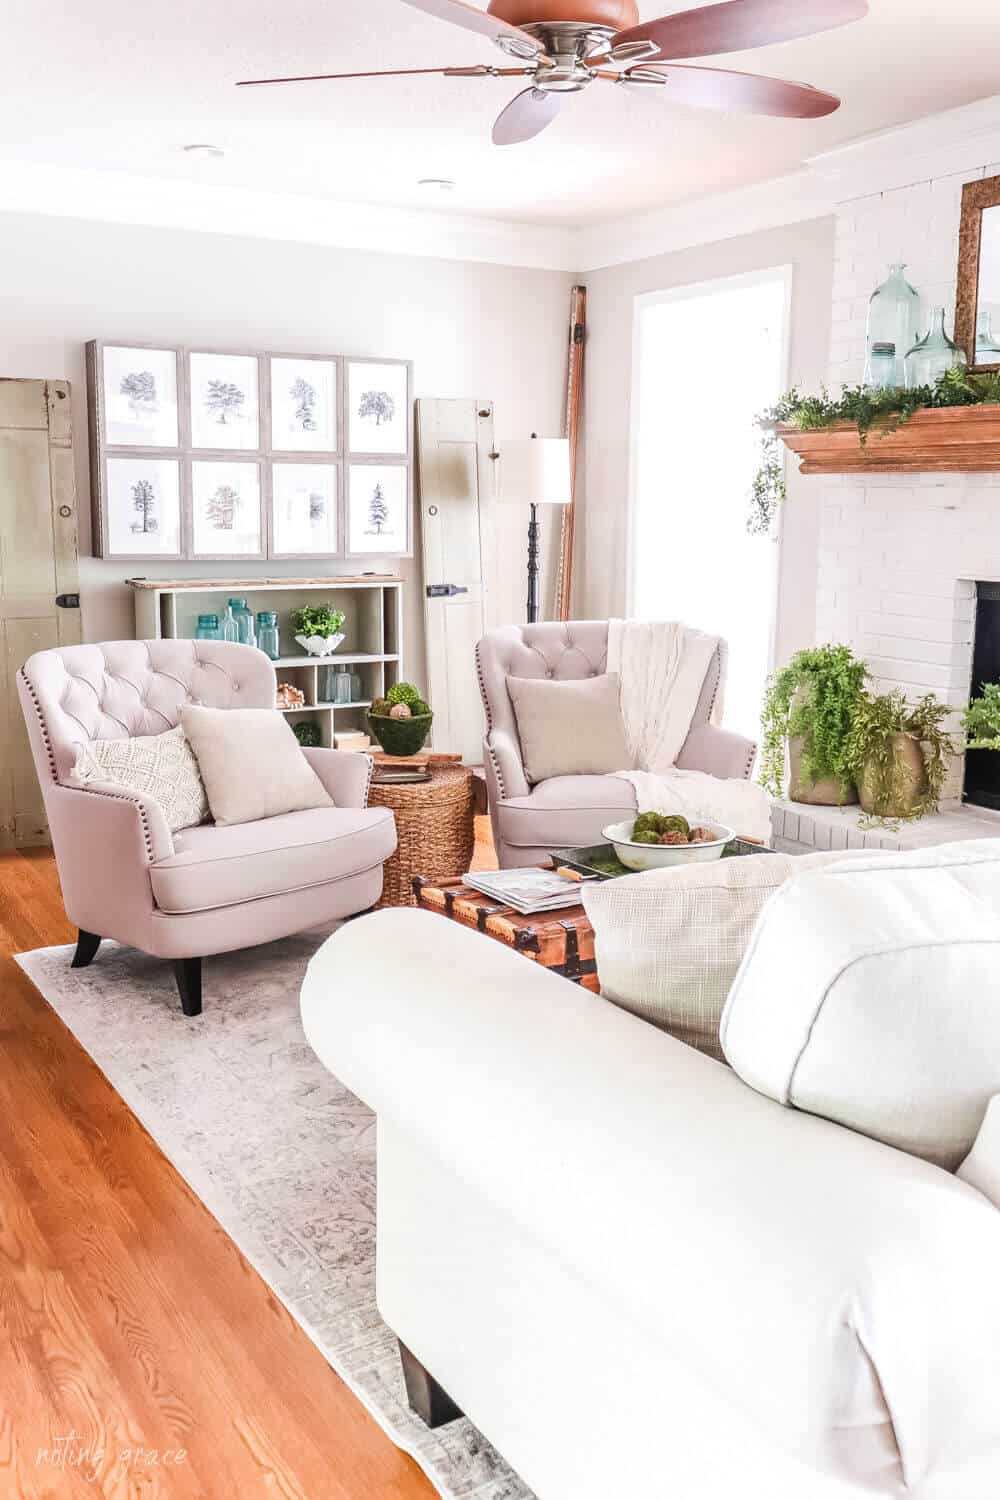
No more ugly black box!
This DIY Wall Mounted TV cabinet has taken center stage and is the perfect anchor for this room!
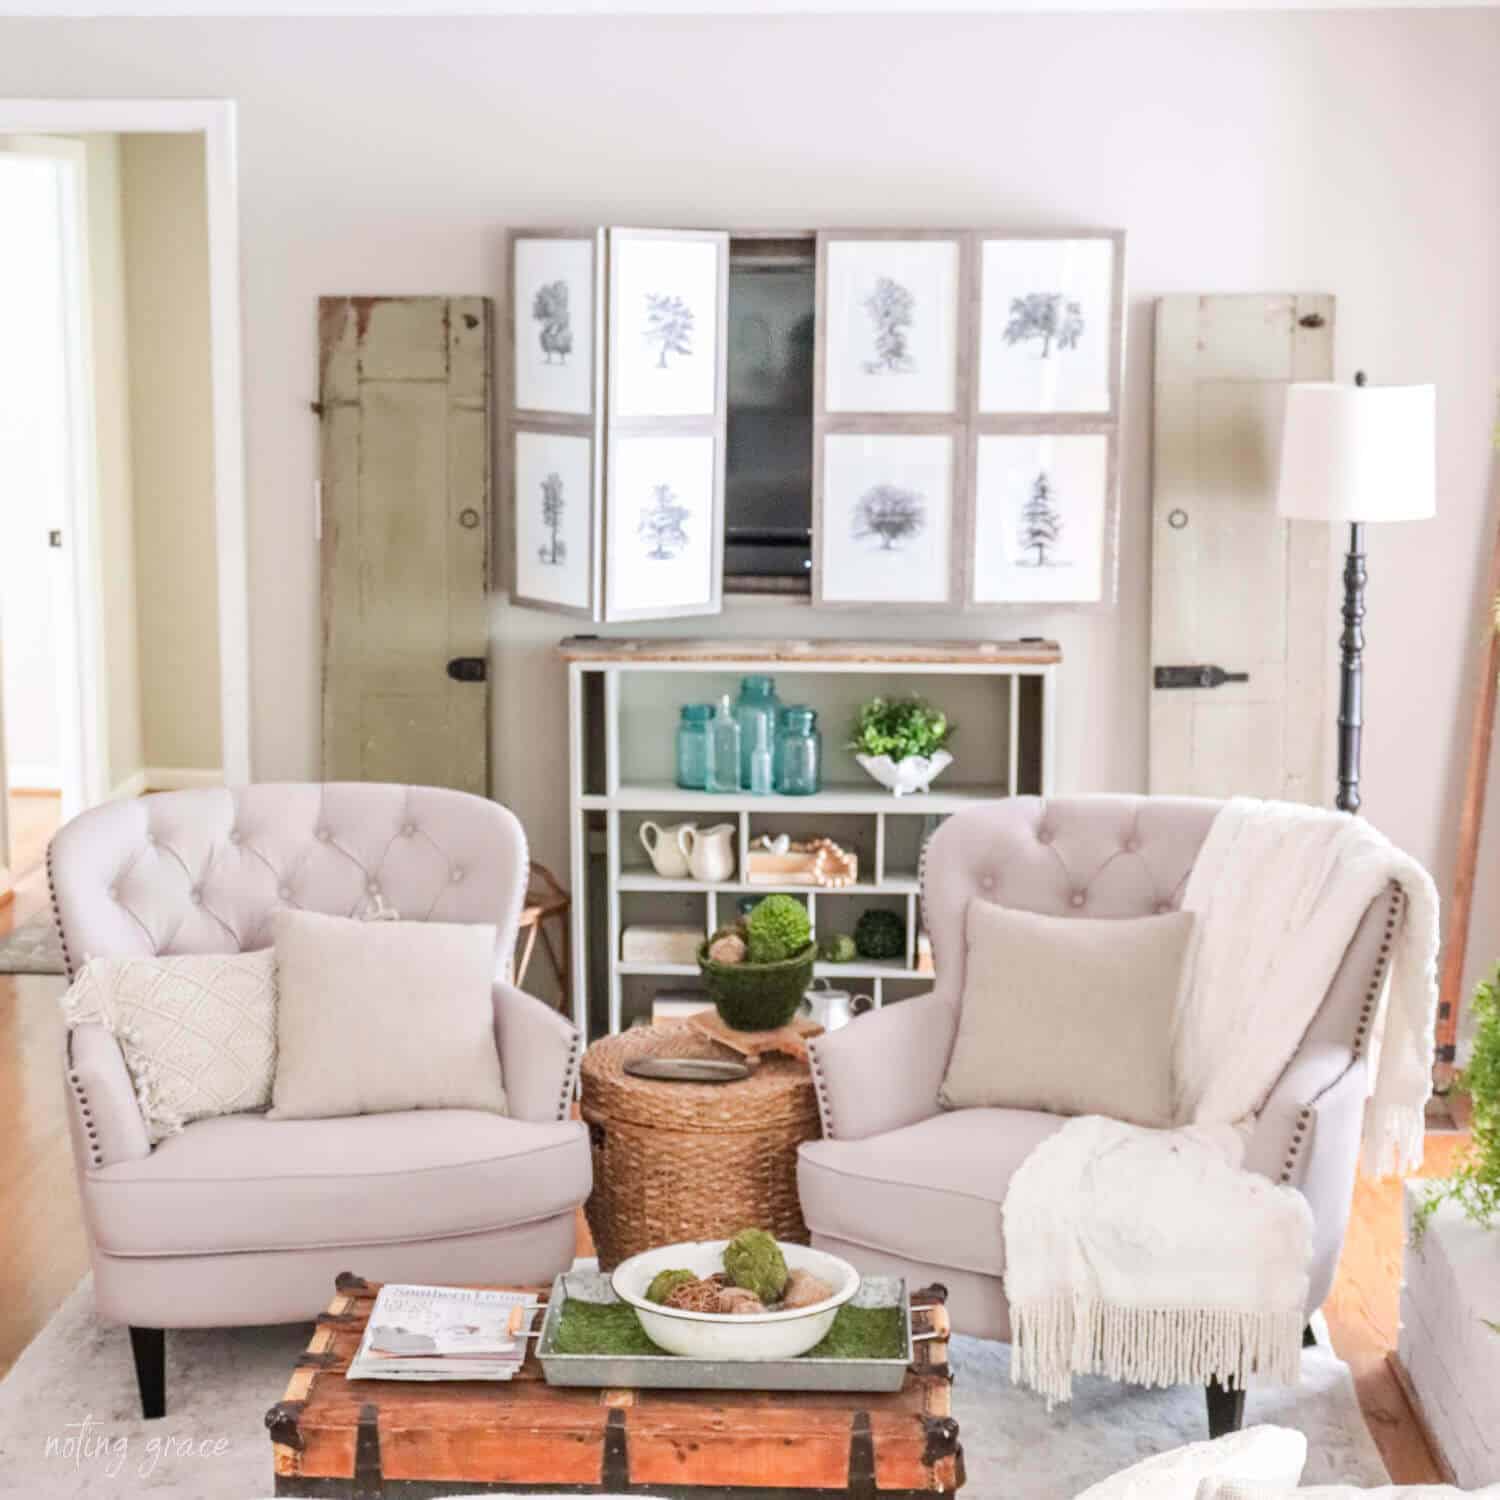
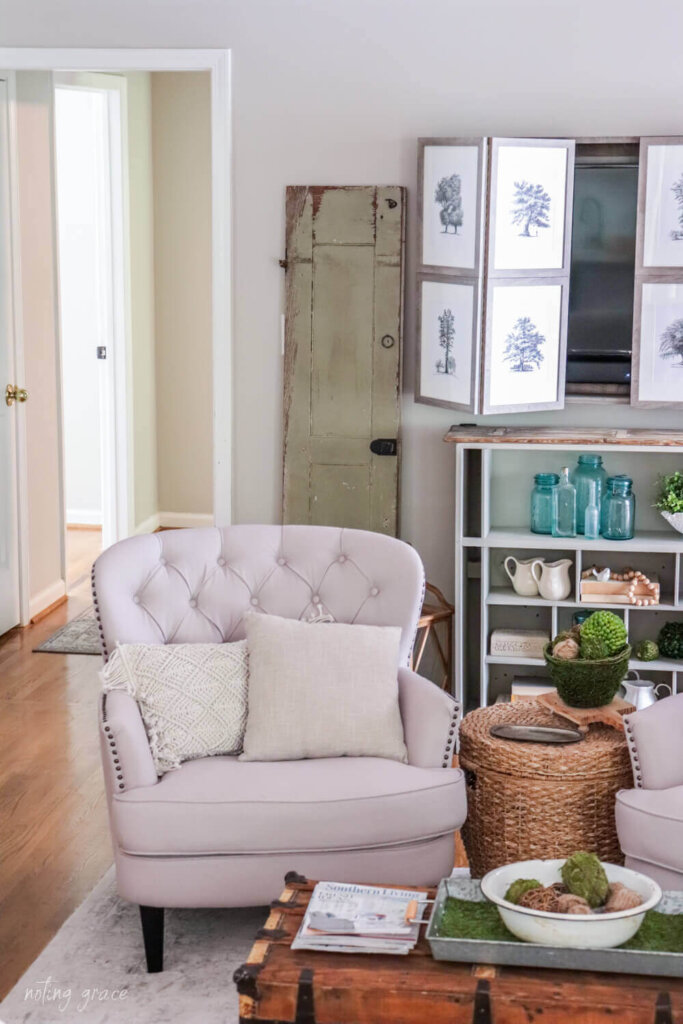
And so many people are surprised when I open the doors to reveal our hidden TV.
What I love the most about this is that while the doors are open, it is still framed by the artwork.
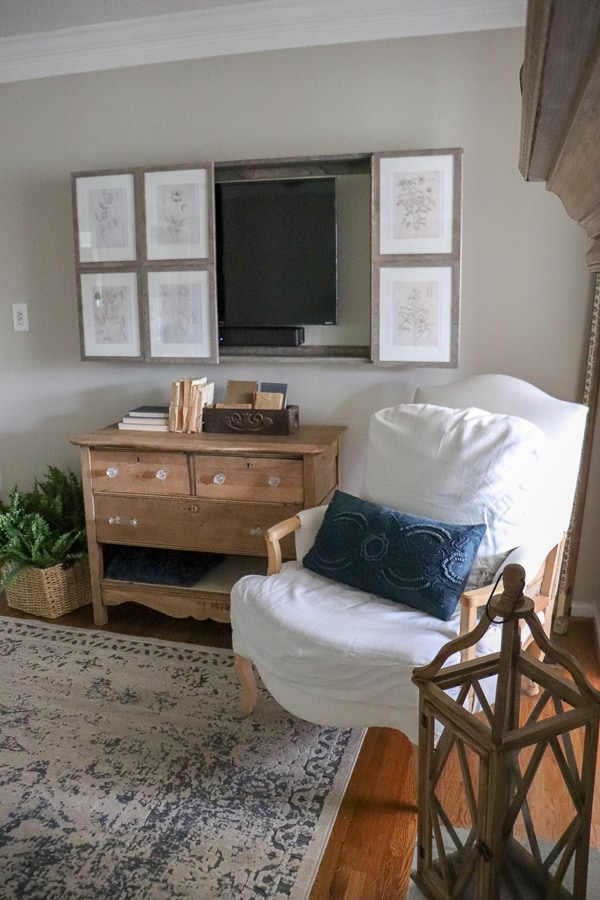
Do you know what else is awesome?
I have the ability to swap out the pictures to match the season, or if I change out the decor.
One Christmas, I added some fun seasonal trees to the frames.
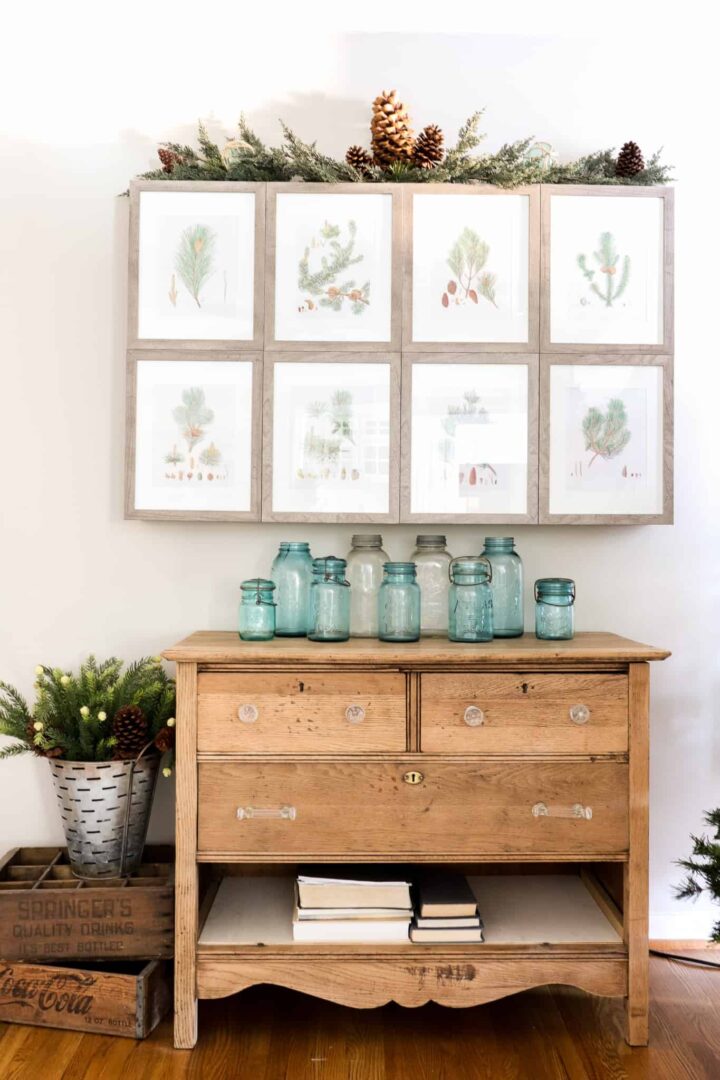
Once it was hung, and I moved those DIY Accordion doors for the first time, Trent told me he didn’t think this DIY was going to work and was amazed with how it turned out.
That’s the best compliment of all!
The total cost of this DIY was right around $135 – just right for our tight budget.
Other ideas for doors
If picture frames aren’t your thing, here are some other options to consider to use as door panels for your DIY Wall mounted TV Cabinet
- Cabinet Doors
- Barn Doors
- Old Shutters
I hope this How to Build a Wall Mounted TV Cabinet post inspires you.
This would be a perfect solution for small rooms that need plenty of space without the bulkiness of a giant TV cabinet taking up their living space.
So, think outside the box.
Don’t be afraid to try to create a solution for your design dilemma.
And listen to that spark of inspiration that may come from a passing ad or random email!
You May Also Like These Posts:
DIY Unfinished Natural Wood Dresser
Dropcloth Covered Deconstructed Chair
Artificial Ferns for your front porch
DIY Unbound Books





Hey Sandy! Thanks so much for reaching out!
If you wanted to swap out family photos, I would find a cheap place to take digital copies to get printed, like Walmart, CVS or Target. If you have a nice printer, you could even print those out at home, just make sure the photos match the frame size you choose.
Hope that helps and good luck with your project!
Jen
What would be another idea is switching out the art work with family photos.
Informative tips for cabinet wall mounting.
I’m so glad this helped you Andria! Good luck with the build!
Thank you so much for the simplicity of your directions!
My mom is downsizing to an Active Adult cottage and this idea will help so much!
I’m so glad this inspired you, Frances! Thanks for taking the time to comment!
Love it. I need this.
Hey Erika – thanks for reaching out! I love hearing how excited you are to start this project!
Wood does pick up different parts of the stain and sometimes you have to either apply less or more depending on what’s happening. Try sanding the stain down a bit and wiping it with a damp cloth. See if that helps with the match. And yes, we took a few days to apply a few coats of stain to get the look we wanted. It’s truly about trial and error holding up the frames to the stain many different times.
In all honesty, our wood isn’t a perfect match to our frames. It’s just a bit darker, but you really can’t notice it.
Hope that helps!
Jen
After a YEAR of all the supplies sitting in our bedroom we have FINALLY started this process. The stain doesn’t seem to be going so easy? Any tips? Did you do a few coats over several days like the paint suggests??? I had hoped we could do this all in one day 🙁 Also it’s hard to get the stain/paint to match the frames. Any tips?
Hi Jo – thanks so much for the question. Sorry for the confusion. When we built the box, we added two boards to the back of the frame that before we hung the box. Those were the boards we screwed to the studs. Hope that helps!
I love your tv box tutorial. You lost me on the step where you add a piece to screw into a stud. It seems like the tv would be in the way. I understand the rest but I’m lost on how you hung it on the wall
Love hearing that! Glad this inspired you!
Thanks for the idea. Mine turned out great 👍
That is a great question! I measured each frame and they are 12 1/2 w X 15 9/16 l. Hope that helps!
Hi! I love this idea! I have questions about the frames. I am working with a small space since we live in a tiny house and I have to be careful with my measurements. Are the frames actually larger than 11×14 when you include the outer perimeter (the wood) of the frame? When looking at the website I get the impression that the 11×14 measurement is for the glass only but they don’t say for sure what the whole measurement might be if it is. Thanks!
Hi Donna! I’m so glad this inspired you! We do have the TV mounted to the wall, so the box simply frames the TV. Hope that helps- let me know if you have any questions in the process. You can do it!
Is your tv wall mounted as well, or is it sitting on the bottom plank of the box? We are going to do this next week!
Hi Erika! I am so excited to hear you are going to DIY one of these! If I can do it, so can you! I went back to the post and noticed the link was broken, so I made sure to update both the glaze and cord hiders. The ones we bought were 15 dollars. But we had purchased those a few months prior to the project when we first mounted the TV. Hope that helps – let me know if you have any questions. I am happy to help out!
I am so glad this inspired you! Let me know if you have any questions about the build! I’m happy to help!
Thank you so much for this tutorial!! It is truly brilliant and inspired. Have all my materials (Michaels is having a 50% off frames right now, too! :)) and cannot wait to build it.
I am so excited I stumbled on this idea!!!! Our TV has been sitting on our bedroom dresser and it’s awful. I ordered the frames, the varathane and the mounting kit. But which glaze did you use specifically? Also, it looks like all the cord hiders are sooooooo expensive. Am I missing something? Our $150 budget isn’t going to cut it 🙁 Thanks again for the idea! It’s PERFECT!
So glad you love it, Anna! Thanks for taking the time to comment. Let me know if you have any questions about the build!
I have been looking for something to hide my dual monitors so that my shed space doesn’t look only like a workspace but also like a cute little she shed. This is totally brilliant!!!! Thank you.
So glad you are inspired by this post, Julia! I am so excited that you are going to tackle this! Please send me a pic of your finished project. I would love to see it!
I’m obsessed. This is the easiest set of instructions I’ve seen. I just ordered the same frames, and they are doing a buy 1, get 2 free sale, so I got 9 frames (1 extra!) for just $73 and free shipping! I can’t WAIT to do this. Just have to tell my husband the plan…
That is so wonderful to hear! I am glad you were able to fix the mismeasurement. We make those mistakes all the time and I like to call it character! 😉
I am so glad you shared this with me! Send me a pic or tag me if you share on social media!
Thank you for posting this! We had to get a new tv and my husband did not want it in the living room anymore. So this was a compromise. To hide it.
Had I read your directions fully, it wouldn’t have been so hard! I built the box and then put together the frames. I was off by about an inch and had to add another board to the end, but it worked.
But oh my! Getting the frames screwed on just right was tough! for me anyway.
In the end, it was all worth it and we have this beautiful piece of furniture to hide the big black box!
And also, something that I’m proud to have built all by myself! 😀
Great question, and thanks for reaching out. We used 3 different types of screws in this build. 2 inch screws to anchor into the wall, 1 inch screws for the wood base build, and the hinges should come with screws to use.
Hope that helps!
Hey there, we are hoping to build this. Ordered the frames, looks like I need to order the hinges now too. I’m wondering: What size screws did you use? Thanks
Thank you Tiffany! I love that I have the option to swap out the prints with the season if I want as well!
Oh Leanna! I never thought of it that way, but I can totally see that! The TV is a big bone of contention between couples. What a great way to put it! Thank you!
This is a marriage saver! There is nothing uglier than a large TV hanging on the wall, and you came up with a gorgeous solution. Pinning and I love it.
This is such great tutorial! I have seen a lot of creative TV cabinets, but this is the first one I’ve seen with art used. Such a good idea!
Thank you so much Kippi! I appreciate all the shares! Send me a kit if you make one! I’d love to see it!
I love this idea and I need to make one for my kitchen TV. Pinning it and sharing. Happy Crafting, Kippi #kippiathome
Oh my goodness, this is amazing! We have literally almost the same setup — our TV is on a beautiful old dresser just like yours, with a big old blank wall behind it. I am definitely doing this because I hate having the ugly black box be such a focal point in the room. Thank you thank you! Also, found you via the Homestead Blog Hop!
Thank you so much for your sweet words, Lacey! I am so glad this inspired you!
Beautiful cabinet! Thanks for sharing it at the Merry Maids link up party!
Your TV cabinet looks great! Thanks for sharing it at the Merry Maids linky party!
Thank you, Robin! I am so glad this inspired you. Send me a pic of the panels you make!
So glad this inspired you, Shirley! If you do decide to DIY one of these, send me a pic! I would love to see it!
Brilliant! What a creative (and beautiful) solution. So well done! (Our TV isn’t wall-mounted, but I now have the urge to create panels anyway!)
Ok I haven’t read the post yet but I am already loving this tv hider!! I hate a tv in my living room so hubby has his own room for that but I am now considering letting him put a tv in here and this would be brilliant for hiding it! Great job!
Thanks for pinning, Dori! That means the world! So glad this inspired you!
Thank you so much, Terri! You are so sweet!
Thanks so much, Tina! I can’t stop opening and closing them! We are so pleased with the results!
Lena – your kind words made me smile! Thank you so much for taking the time to leave such a sweet comment. I’m glad this inspired you – share a pic if you decide to DIY one for your home!
This turned out amazing. Love the look and the flexibility to switch out the artwork when you want. Great job as always. You are so creative.
I Love everything about this! It’s a piece of art that beautifully hides the dreaded black box. You both did a great job. I can’t thank you enough for posting this. I’ve been trying to come up with something that would fit in and look nice as well. This is perfect!
Thank you!
I’ve seen other DIY wall mounted cabinets, but this is the first using picture frames. I love the look! You did a great job, congrats!
Jen, that is beautiful. You are so gifted.
This is beautifully done. We aren’t sure this would work for our living room wall, as we have plaster wall from the 1930’s. Otherwise we’d do this project in a heart beat!
This is the best idea I’ve ever seen for hiding the TV. Thanks so very much for posting this! You two are brilliant! Just pinned it. 🙂