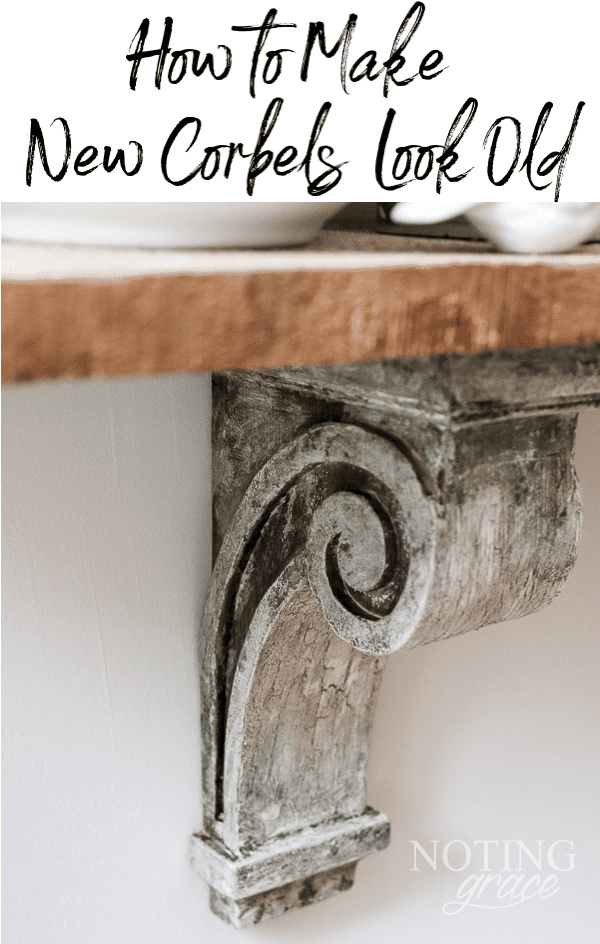
The Easy Way to Make New Corbels Look Old
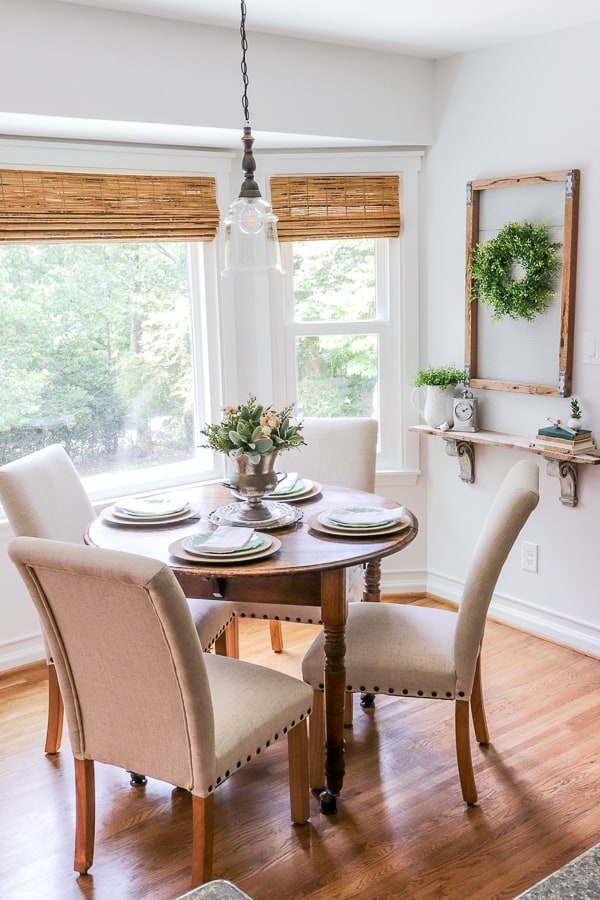
I created a quick and easy DIY shelf for my eat-in kitchen with this easy way to make new corbels look old. A simple tutorial with stunning results!
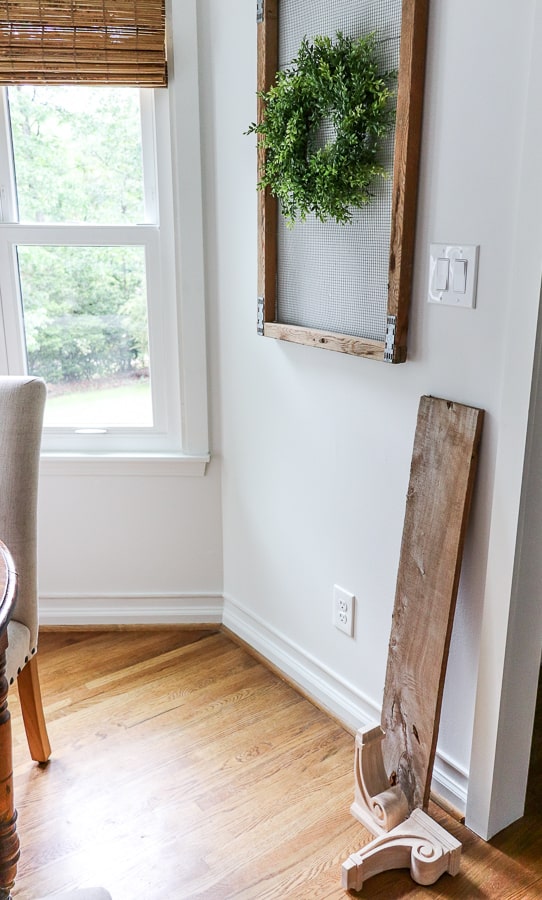
This sad and lonely wall was screaming for something.
My mind rambled.
Would a piece of furniture fit in this teeny eat-in space?
Of course not!
Then, I stumbled upon this Recycled Wood Shelf from Antique Farmhouse, and fell in love with it!
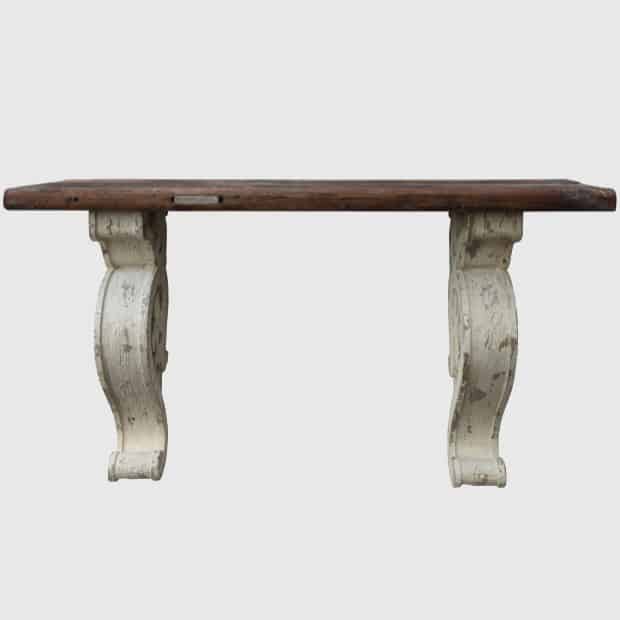
It was perfect! But there was one issue!
The only issue was the price – right around $200. Yikes! So, yeah, that was too rich for my budget.
When we made over our Kitchen, we updated an old post with rough cut lumber.
I was gifted this perfectly aged piece of cedar that would be an excellent fit for a small shelf.
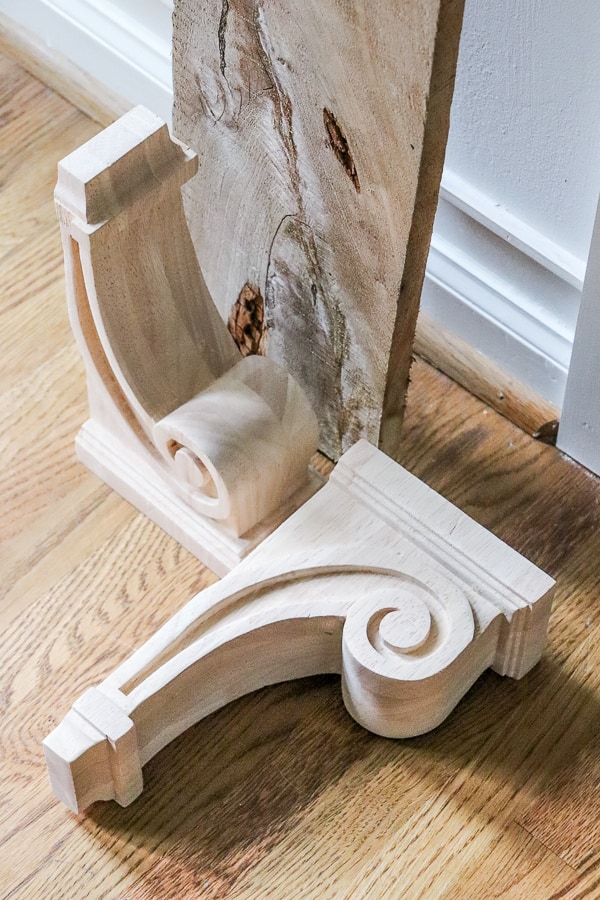
I was missing those old looking corbels, so I ordered these from Amazon for $29 for the pair!
Much more afforable, doncha think? So here’s how I made them look all old, chippy and crusty!
How to Make New Corbels Look Old
Supplies:
Corbels – you can find them at big box hardware stores or online.
Sand paper
Stain – use old stain you have one hand.
Craft Paint in various colors
White Paint
Crackle Glaze
Antiquing Glaze
Gloves
Rags
Brushes
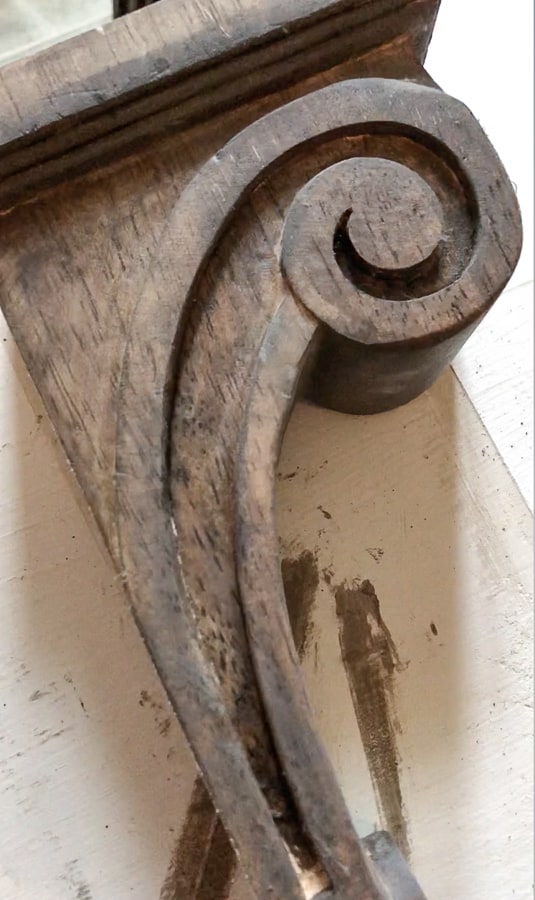
To begin, I started by lightly sanding down the edges of the corbels. The idea is to make them look weathered, so the more distressed you can make it, the better.
Next, I applied a coat of stain. Use what you have on hand. You’ll only be using a small amount, but the idea is to darken the corbels.
I applied some dark walnut.
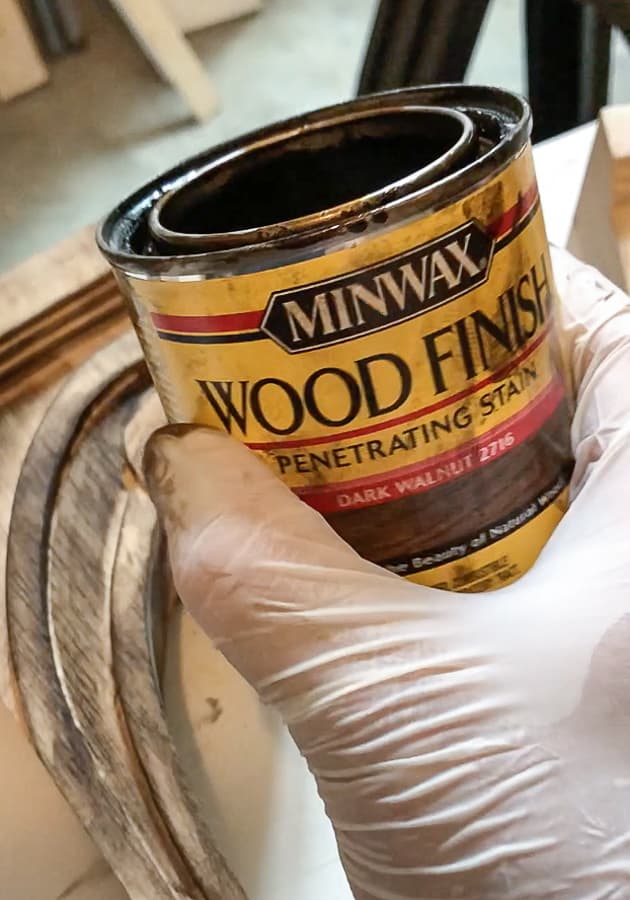
I applied it with lots of hits and misses. It doesn’t need to be perfect.
Let that dry.
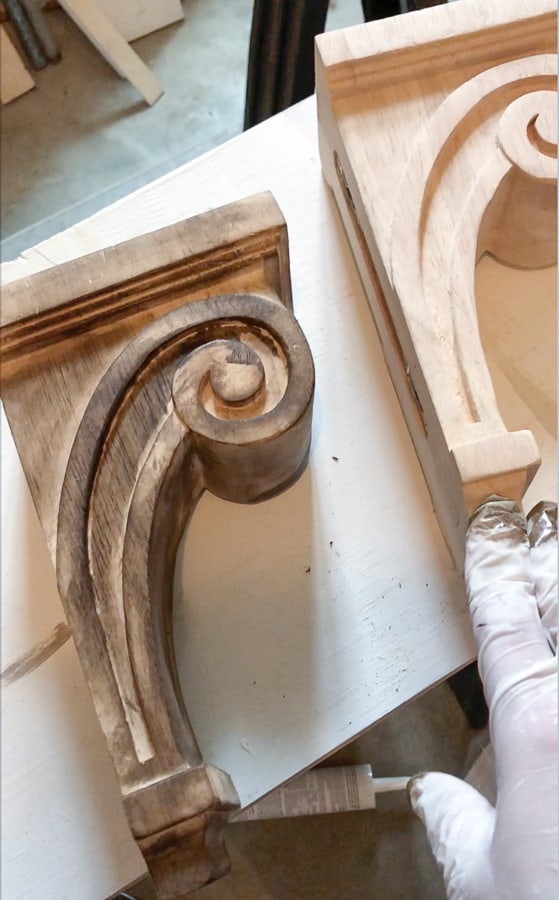
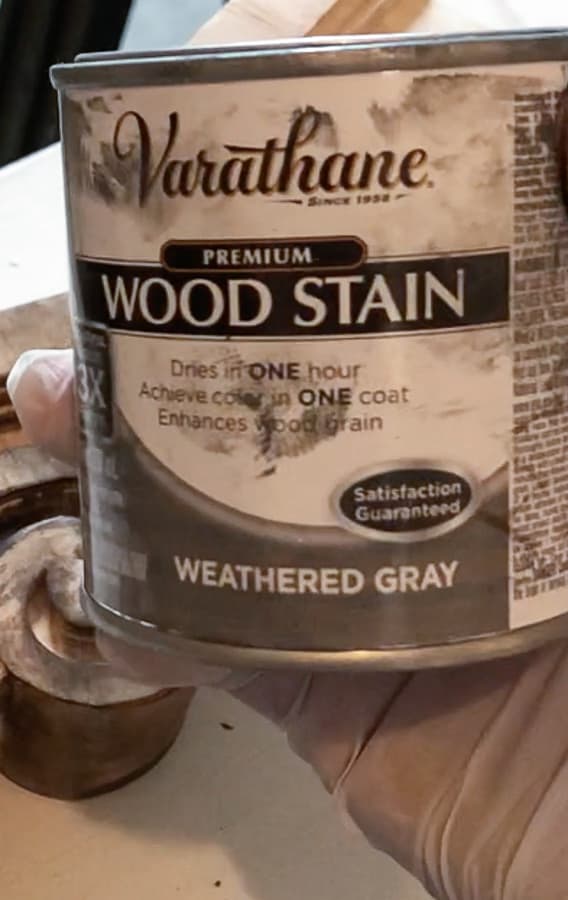
After that, I used a different stain to age it a bit more.
I had some weathered gray that I used for my Wall Mounted TV Cabinet left over.
Let that dry.
I filled in any unfinished wood with this stain to create a mottled effect.
After that, I used come craft paint in various places to make it seem as if it had been painted many times over the past 100 years.
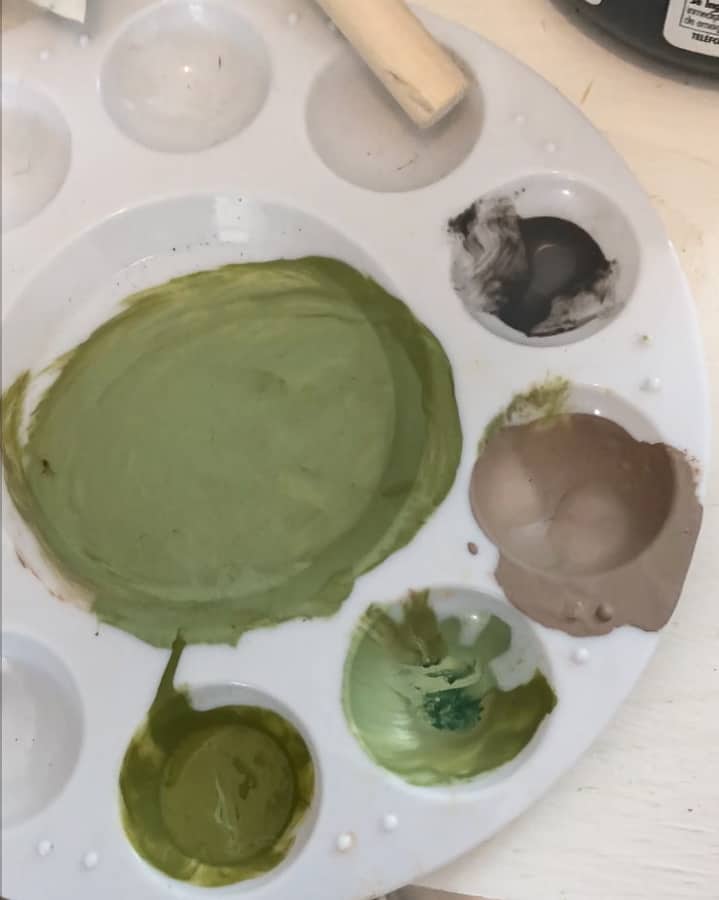
I didn’t get a pic of the craft painted corbels, but just imagine a stained corbel with green, beige and gray spots like a dalmation and you’ve got it!
After that dried, I applied a coat of the crackle glaze.
After it sits for about an hour , you paint on your top color.
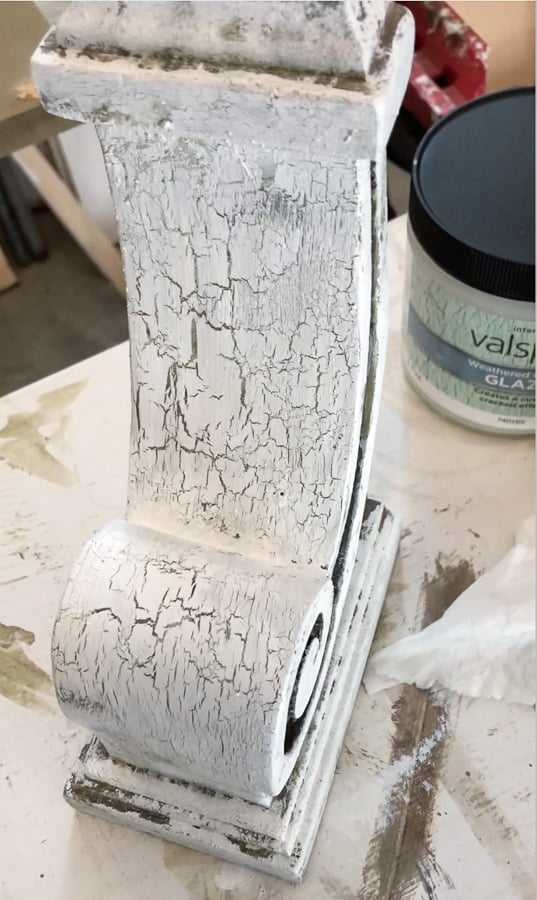
I painted mine white and watched the crackle finish appear almost immediately!
It’s so fun to watch!
After that fully dried, I then finished the corbels with antiquing glaze.
So here’s a side by side of the difference between the white and the antiqued corbel.
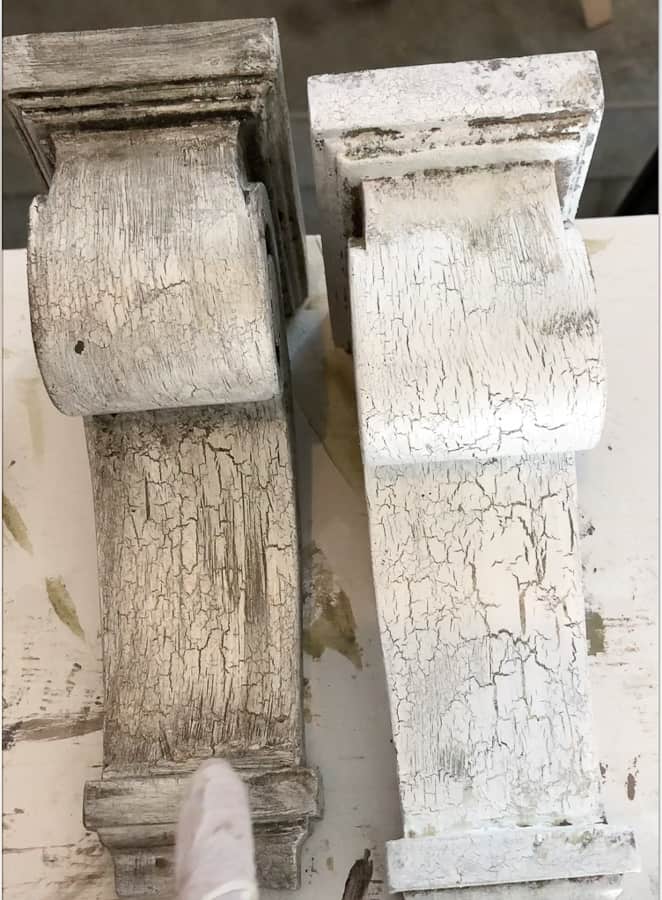
It just gives that aged look perfectly!
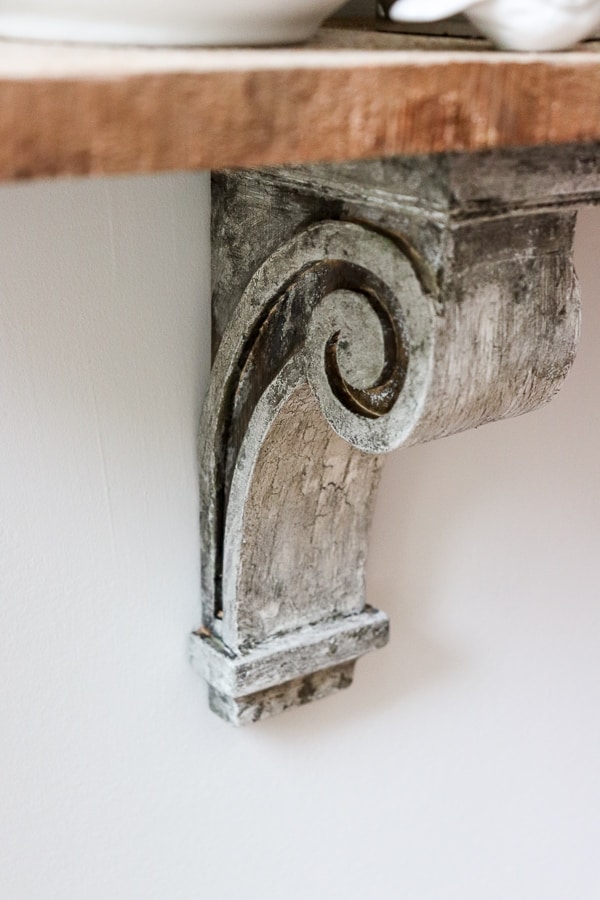
I let them sit for about 30 minutes and then hung them on my wall.
All in all, from start to finish, I would say these took 2 hours to complete including drying time.
This way to make new corbels look old is such an easy DIY that you can certainly try on your own!
Finally, I put the piece of cedar on top of my corbels.

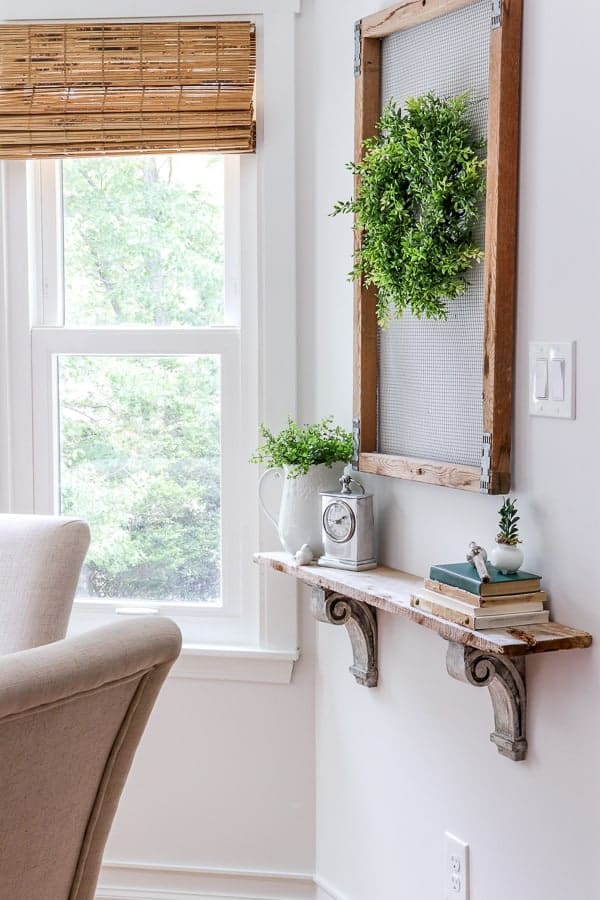
Oh, and I love how it looks!
It’s like they were meant to be together! And all it cost was $30!
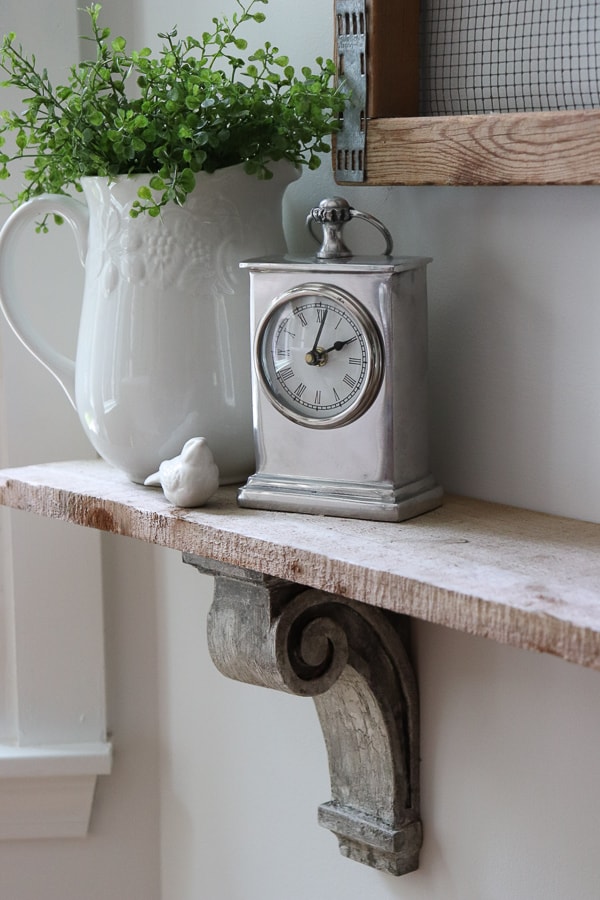
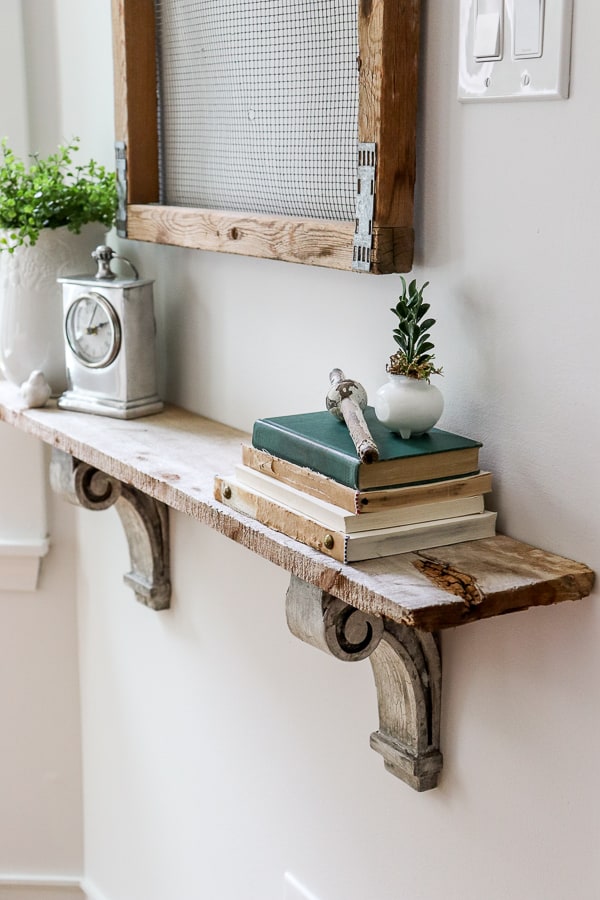
I gathered some decor items from around my home to adorn the small shelf.
It’s a perfectly understated piece for the room!
Pin this DIY to Try!

Yay! I’m so glad this inspired you! And it’s so much more affordable than purchasing the real vintage ones!
Thank you for this informative post! I loved the way your corbels actually look vintage, so many people try but it just looks fake. I have used your technique on a pair of resin corbels I had that came from At Home. I first stained them with a gel stain so they would look like wood and then went from there. They turned out beautifully, and I’m so glad I tried your method. Thank you!
That’s a great question! It’s harder to see in the photos, but to the naked eye, the different color stains show up beneath the crackle paint. If you didn’t paint or stain the wood underneath, the crackle paint would expose the natural looking wood which appears new. The glaze is to color the white crackle paint, not to fill in the gaps the crackle paint creates. But you could try it that way to see if it works. That’s the awesome thing about DIYs! There’s no wrong way to create a look you love.
Thank you so much for reaching out and for reading my post!
Hey Becky! I used this glaze: https://amzn.to/3MB6FNs (aff. link). The color is called antique wax and I got it on Amazon. Hope that helps!