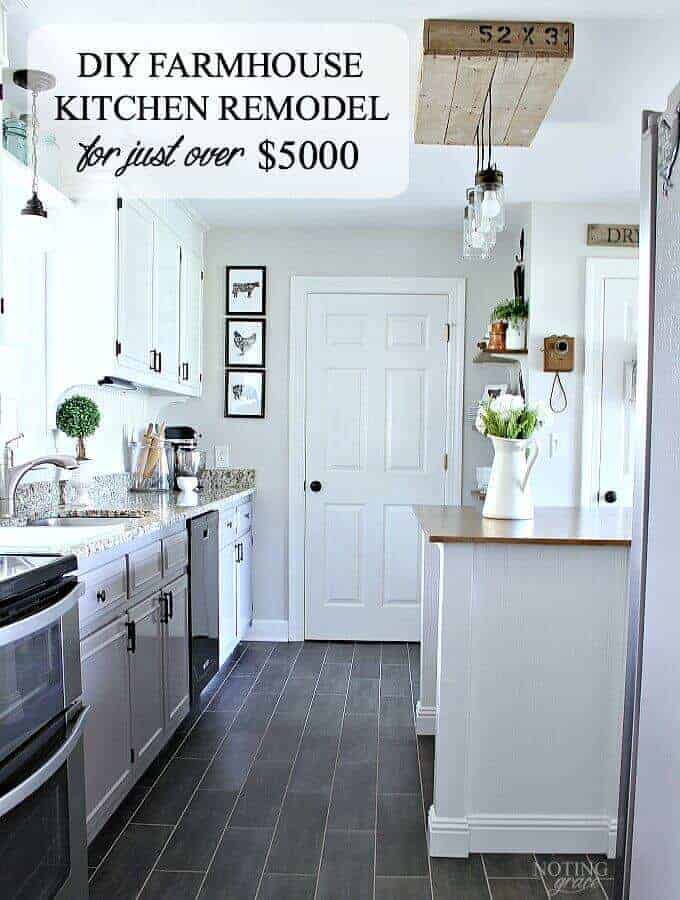
DIY Farmhouse Kitchen Remodel for just over $5000
This is a story of the little kitchen that could. The ugly duckling of a kitchen that patiently waited to turn into a swan. This is how we created our Farmhouse Kitchen Remodel on a budget. First, it took time. A long time.
It took almost 6 months.
6 long months of living in a broken down kitchen, 6 months of eating out way too much, and 6 months of living with a mess. We are so excited to share with you the final reveal of our Farmhouse Kitchen Remodel! We were able to create a new kitchen, including appliances, for just over $5000. As a result, we raised our home’s value by TENS of THOUSANDS of dollars!
If you haven’t followed along on the progress, you can go back and check out each stage. In Part One, we showed the demoing process and our plan to brighten our dull, dark kitchen. Part Two talked about how we opened up a load bearing wall to bring in more light from our gorgeous bay window in the Dining Room. Lastly, Part Three was all about our Coffee Bar that we created using left over flooring for the countertop.
But I know you’re ready to see how it all came together as well as the bottom line for costs for our Farmhouse Kitchen Remodel.
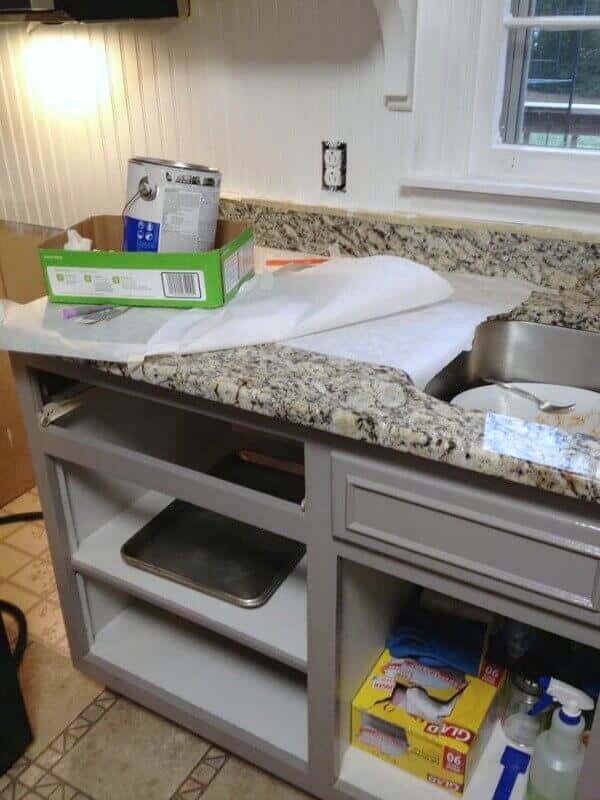
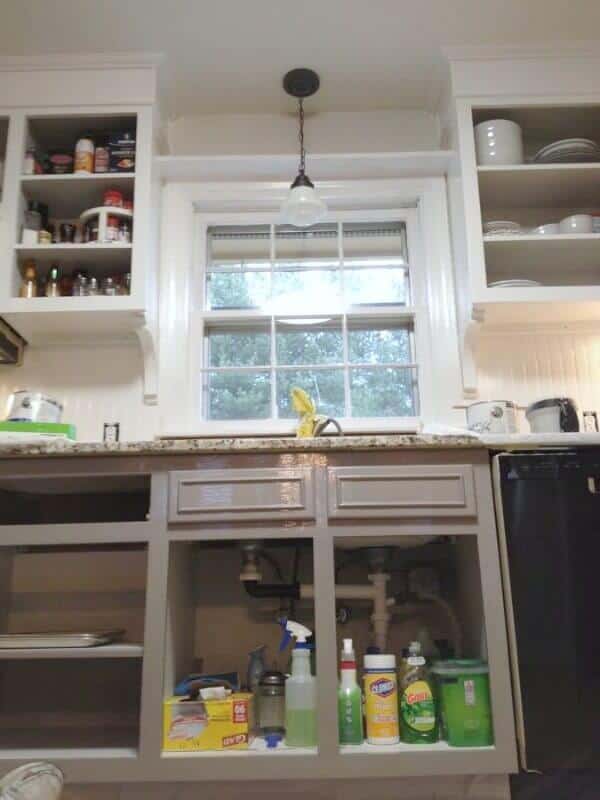
First, The Demo Process
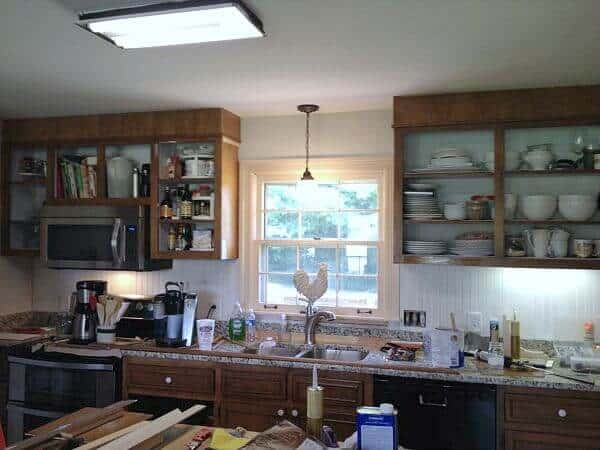
UGH!
Looking at this makes my OCD go crazy. The reality of it all is that our kitchen looked like this for a LONG time.
(Too long, like 6 months too long – wait, have I said that?)
The biggest part of the money saving process is doing the work yourself, just as we did with our Hardwood Floors. But by doing it yourself, it takes much longer than you would hope. It takes patience to see you through to the final vision as well as keeping you motivated, but it’s so worth it!
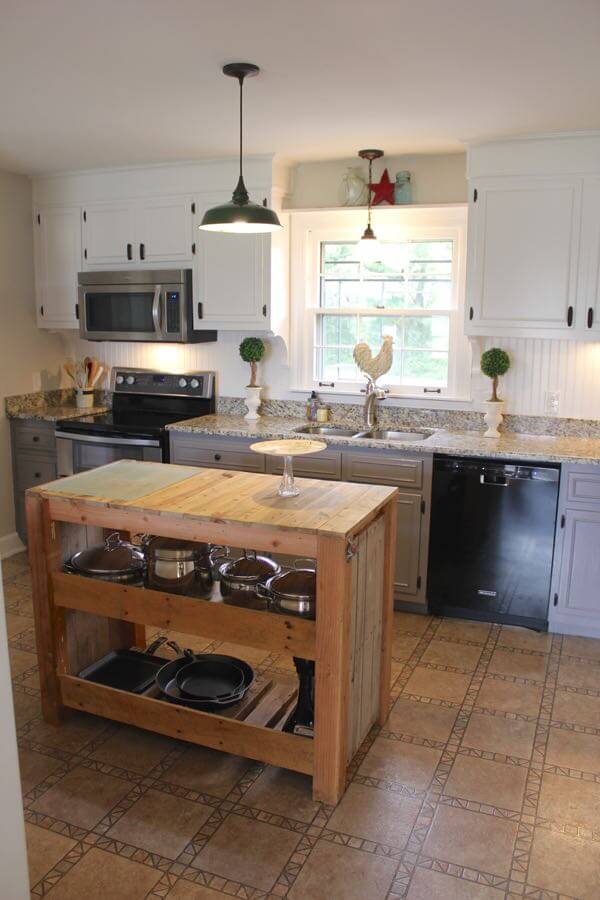
Just Look!
Yay!
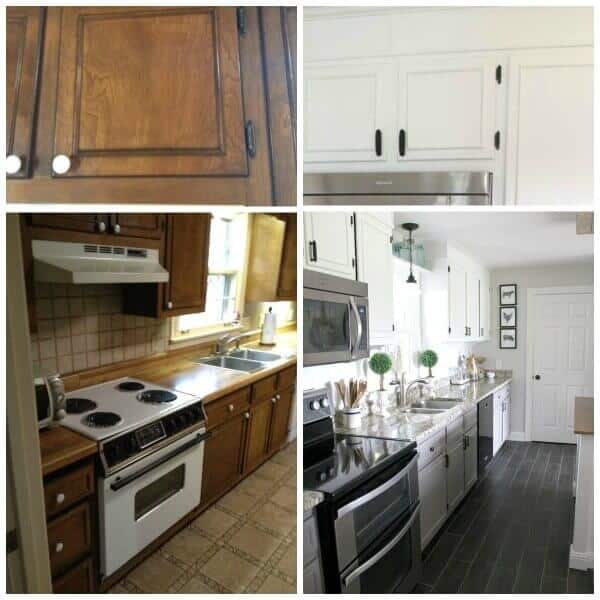
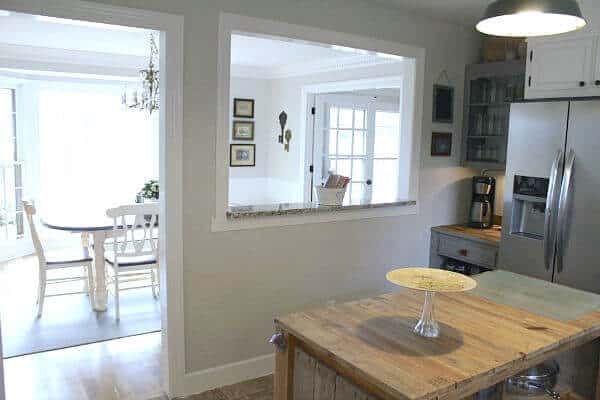
Here is a side by side Before and After.

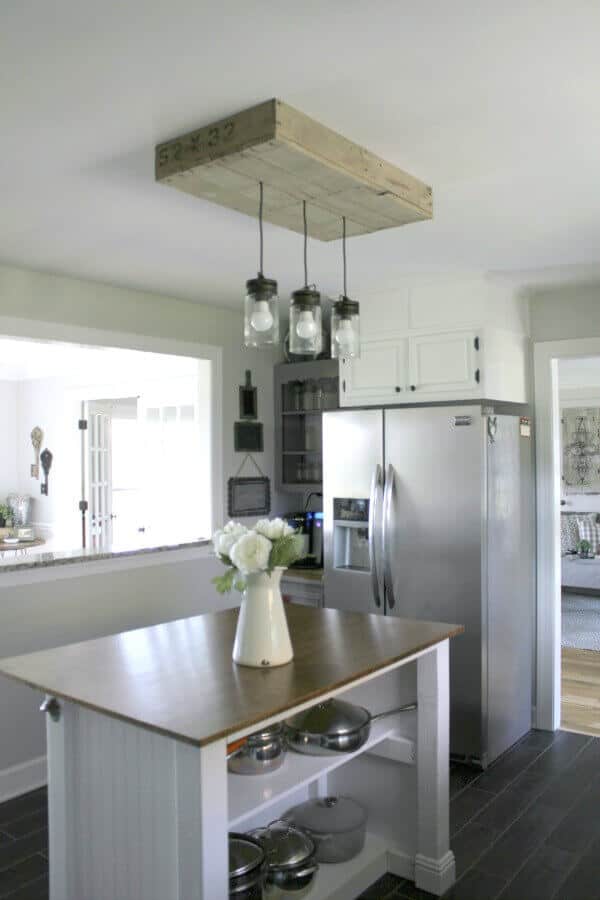
With opening this wall with a Pass Through, look how that light now spills in!
No more darkness!
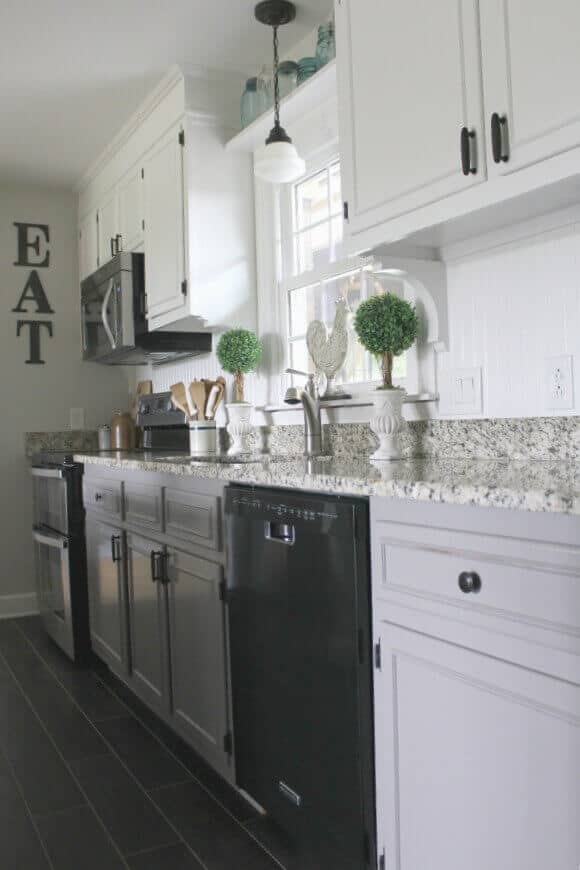
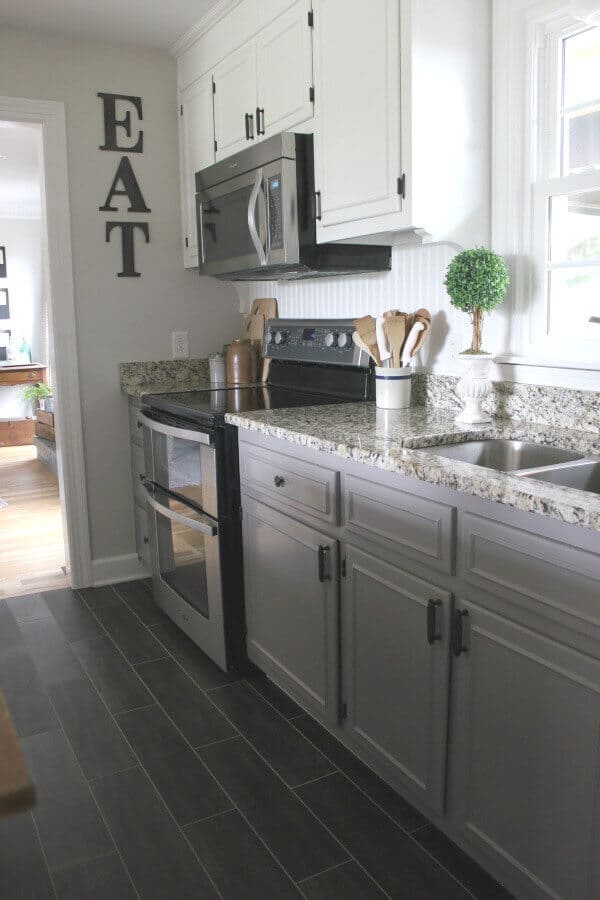
By raising the cabinets, the kitchen seems larger allowing the light from the window over the sink to come in.
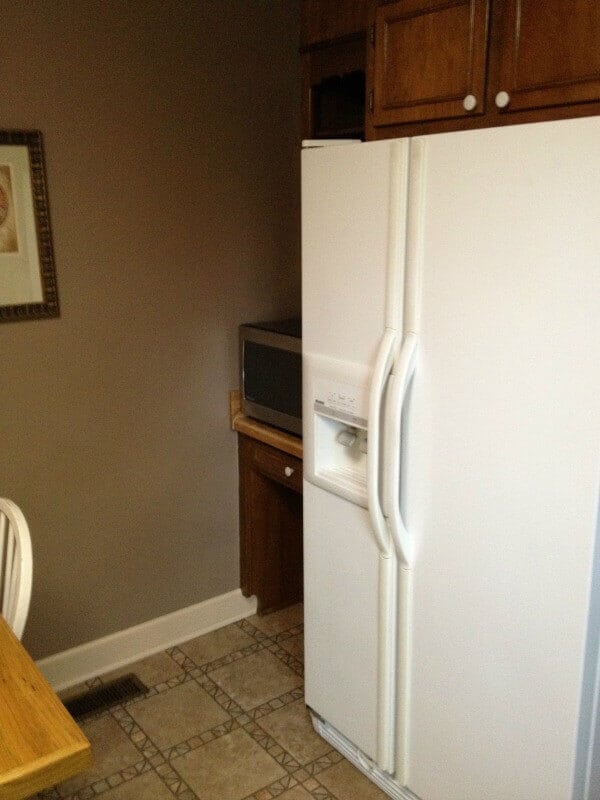
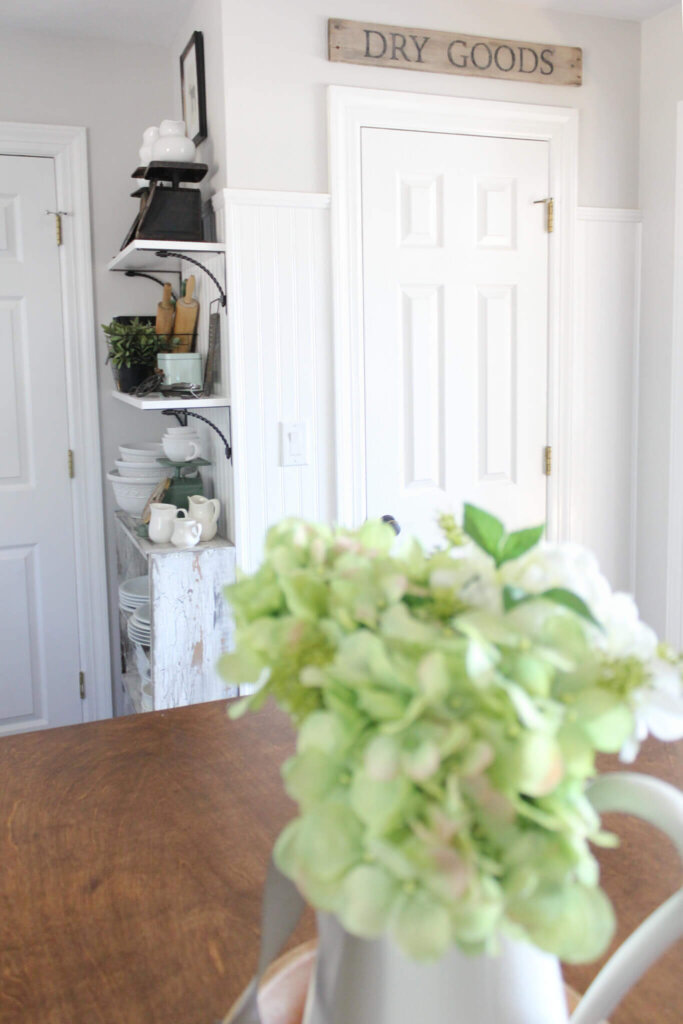
The former desk niche was tiny, dark, and next to the refrigerator, so we opted to create a look that made the niche look more like a stand alone hutch than a built in cabinet.

By the addition of a shelf under the drawer, we added more storage.
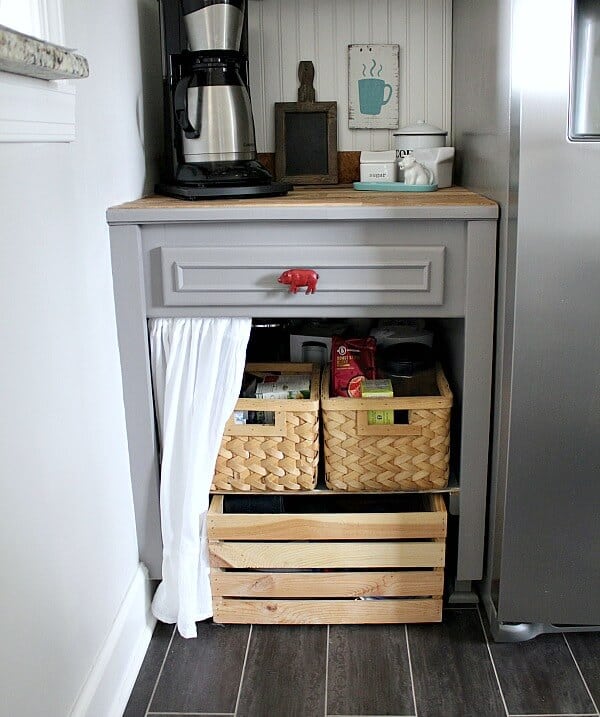
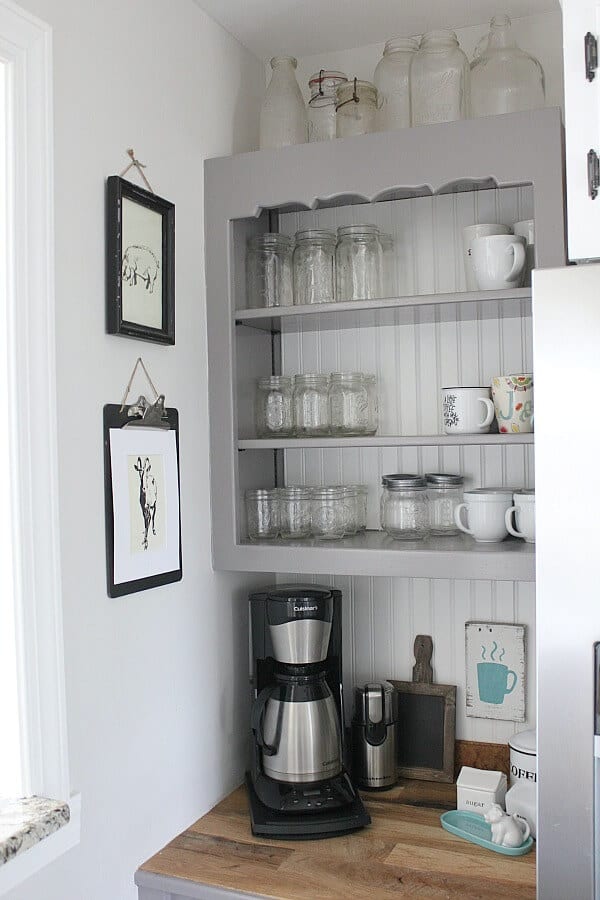
Click here for more details of my cute, little coffee bar!
The Painting Process
So I went with oil paint.
Now before you balk at oil, let me explain. The previous owners painted all the trim in peach oil. The whole house!
Since there would have been so much prep to paint over the old oil with latex , the rep at Sherwin Williams strongly suggested repainting with oil.
Painting with oil can be a bear if you’re not used to it.
The cons: It drags differently with the brush than latex and is extremely messy. Be sure to have LOW ODOR Mineral Spirits on hand for easy clean up.
The pros: It flattens out nicely and is VERY durable. A must in my house full of boys!
As I showed in Part One, we primed the cabinets since they were in a high traffic area coupled with lots of cooking residue and smells. The insides of the cabinets and wall were painted the same color.

The only prep on the cabinet doors was sanding. Tons of tutorials show how to get a smooth, factory finish to your cabinets by sanding in between coats. We tried that with one door, but, honestly, it didn’t make much difference.
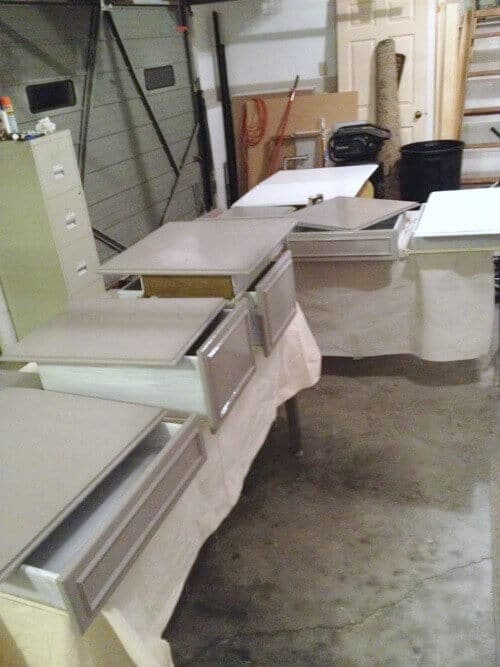
And, I actually preferred the paint lines.
That is so opposite my OCD tendencies, but this house isn’t a factory finish house.
I LOVE vintage, chippy, rusty and old and didn’t think a smooth cabinet finish would match that worn, weathered feel I was trying to achieve. I wanted it look as if it had been painted and repainted again and again as if it had been there for years.
The painting process was EXTREMELY slow. One hard lesson we learned is when you are painting with oil in the damp, cold winter –it isn’t a fast process.
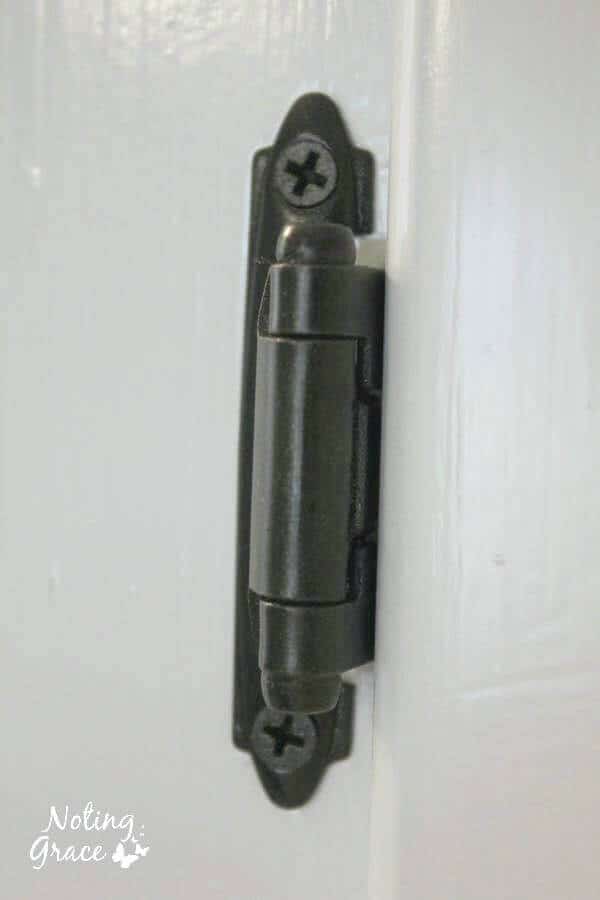
The Details
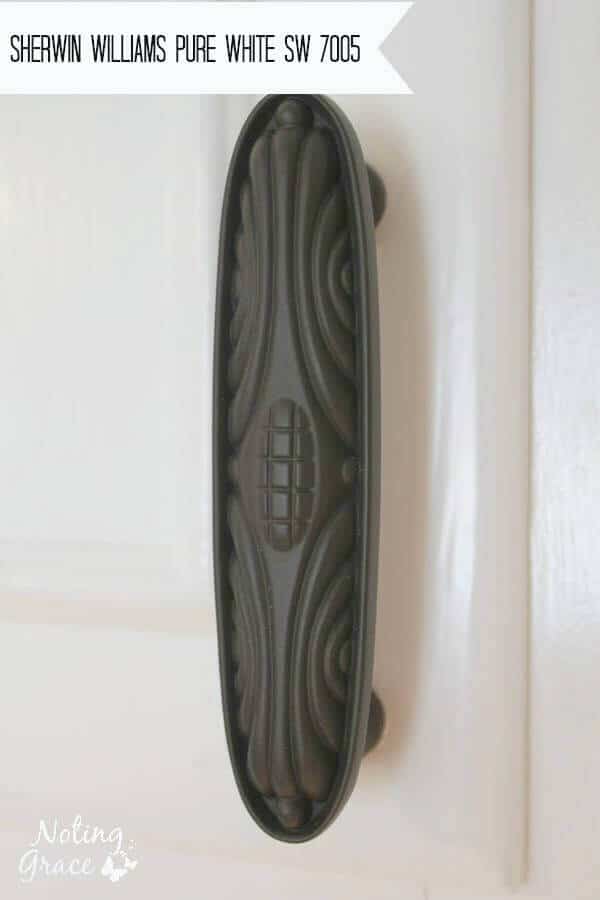
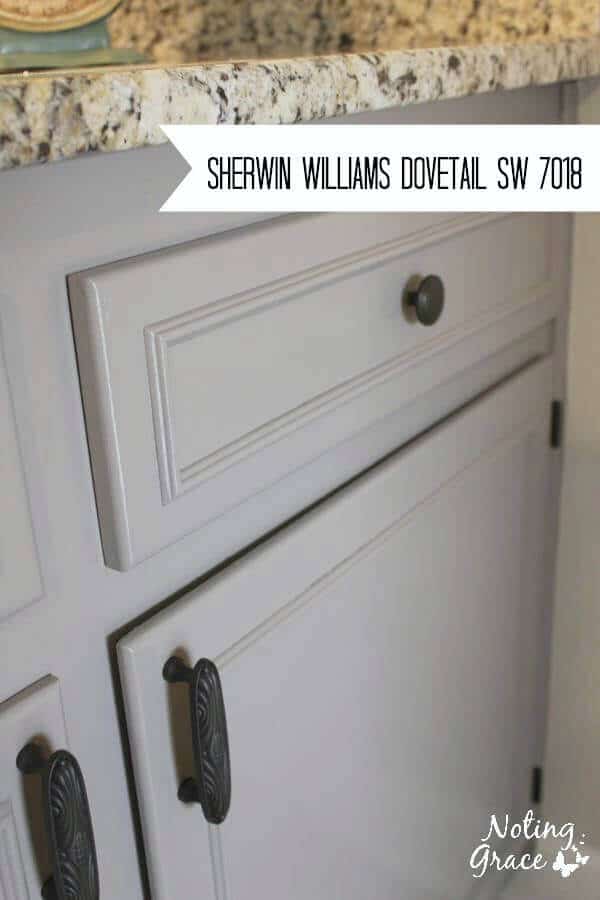
In keeping with our budget, we spray painted the existing hinges with Rustoleum’s Oil Rubbed Bronze, as well as the door and window hardware instead of replacing them. Another way to save costs on hardware, I used knobs I had on hand for a few years from a sidewalk sale at Lowe’s – they were only 38 cents each.
First, in Part One, we talked about raising the cabinets and adding corbels underneath. The corbels help tie this Farmhouse Kitchen Remodel all together as well as break up the space from raising the cabinets.
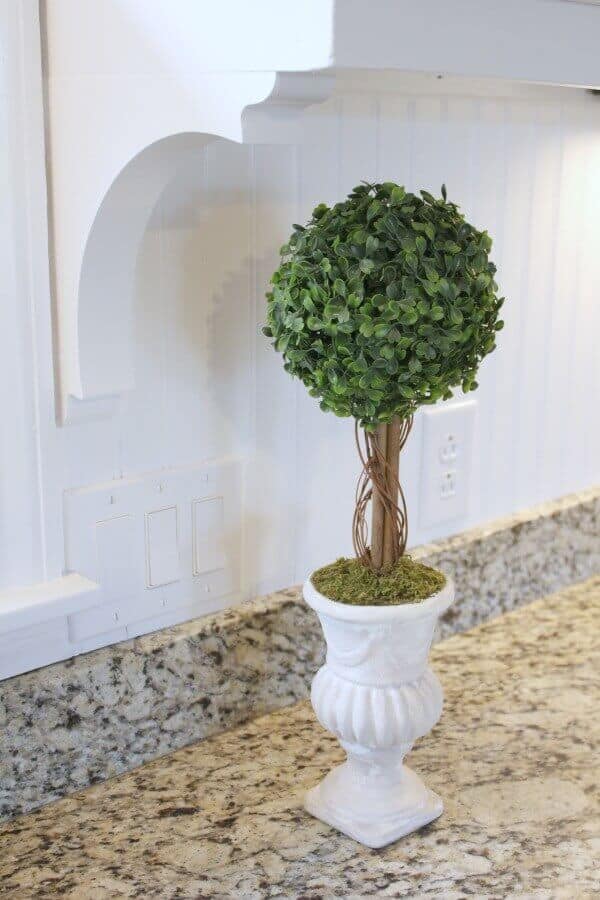
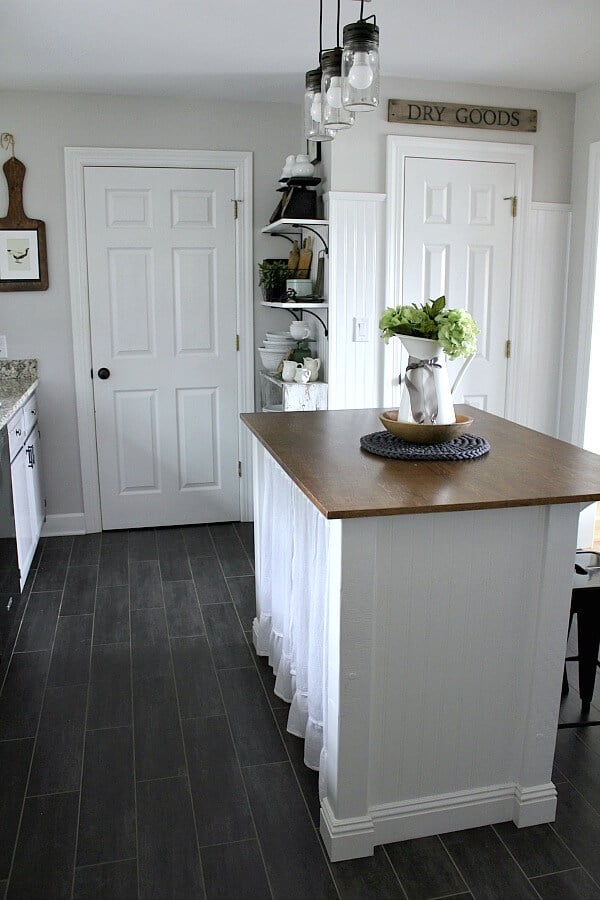
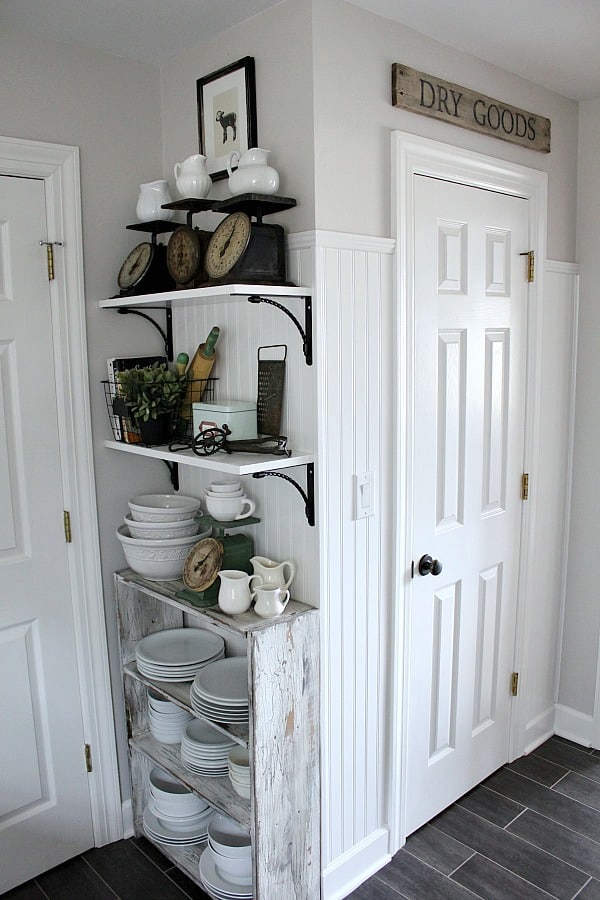
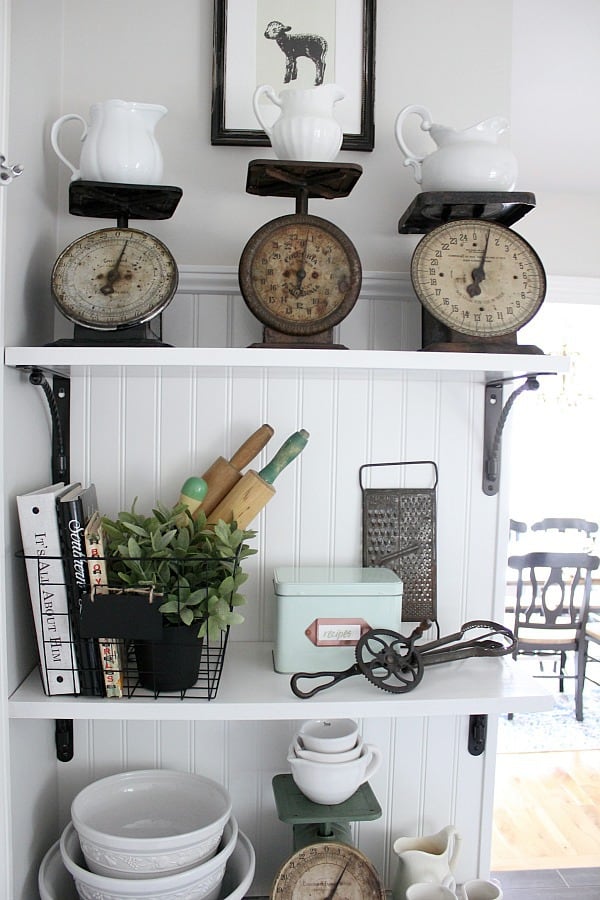
One of my favorite additions, besides the coffee bar, is the little shelf over the kitchen window. Now, I can use that space to change out my decor or add pops of color without changing the entire room or repainting.

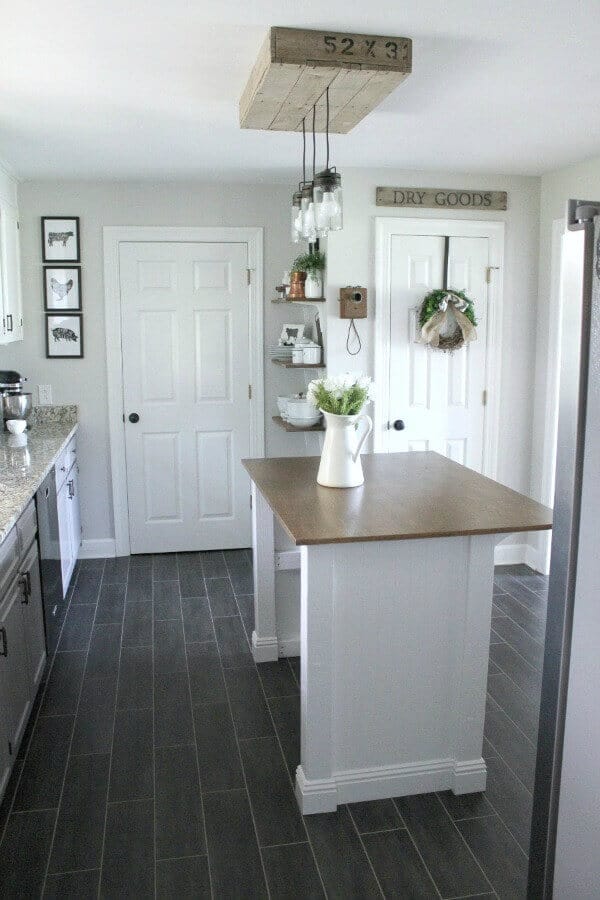
We also replaced the old florescent lights and added the schoolhouse light directly over the sink as well as this vintage enamel light over the Pallet Kitchen Island.
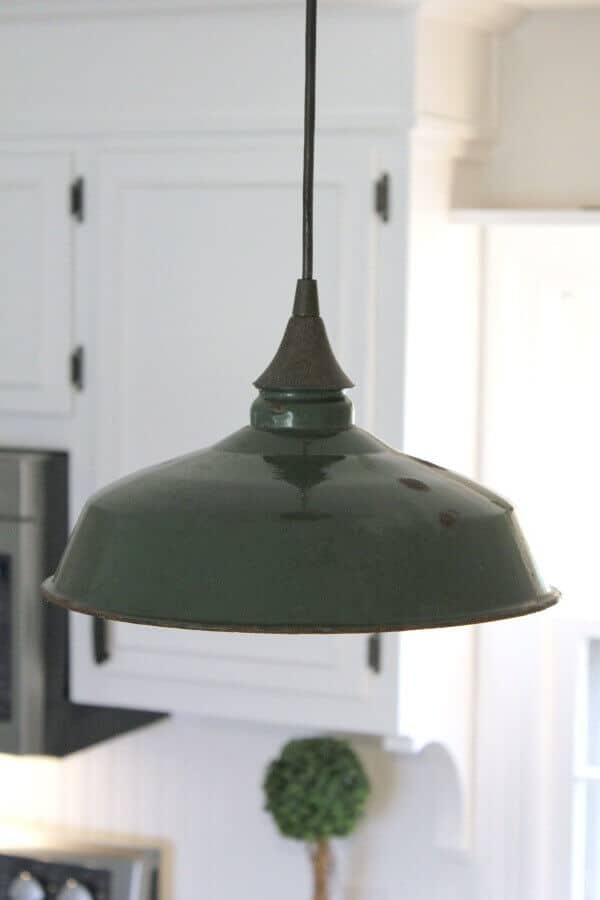
Here is the tutorial on how we switched out the old florescent light with this beautiful enamel light.
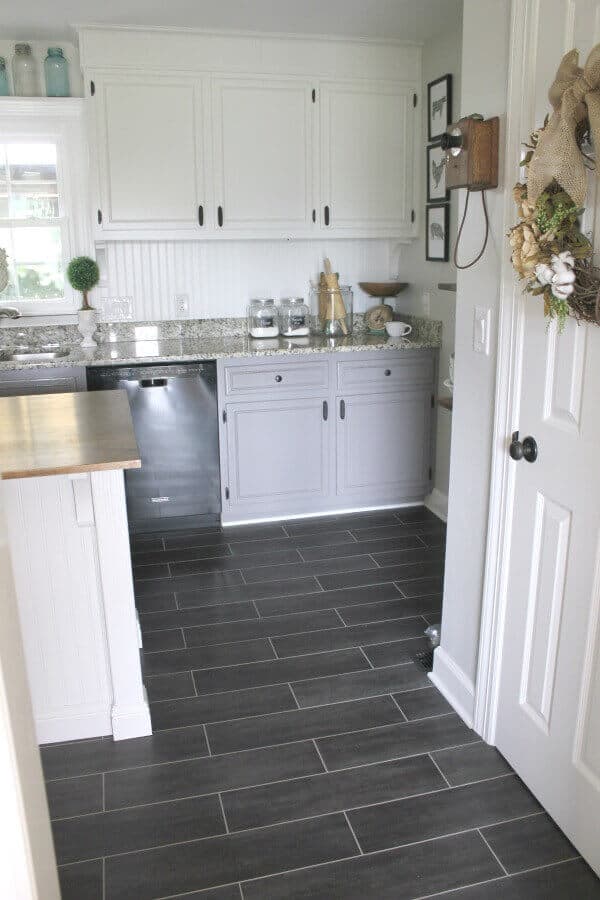
The Floors
The picture above is what we lived with for almost 18 months. Initially, we made a slight change to our Pallet Kitchen Island. Originally, it had a front made of pallet wood to hide the unsightly, extra storage we needed while we were living in our rental where we built it. Since light was the issue in this house, and not storage, we took off the front panels and allow the light to pass through.
Then, I reached my breaking point over the floors. Our first budget didn’t fit replacing the flooring, so we had to save. For 18 long months I lived with this floor that was dated, stained, and impossible to clean. The texture prevented us from painting them without it looking like a cover up job. We finally installed Luxury Vinyl Tile on top of this floor and we are over-the-moon pleased with our results!
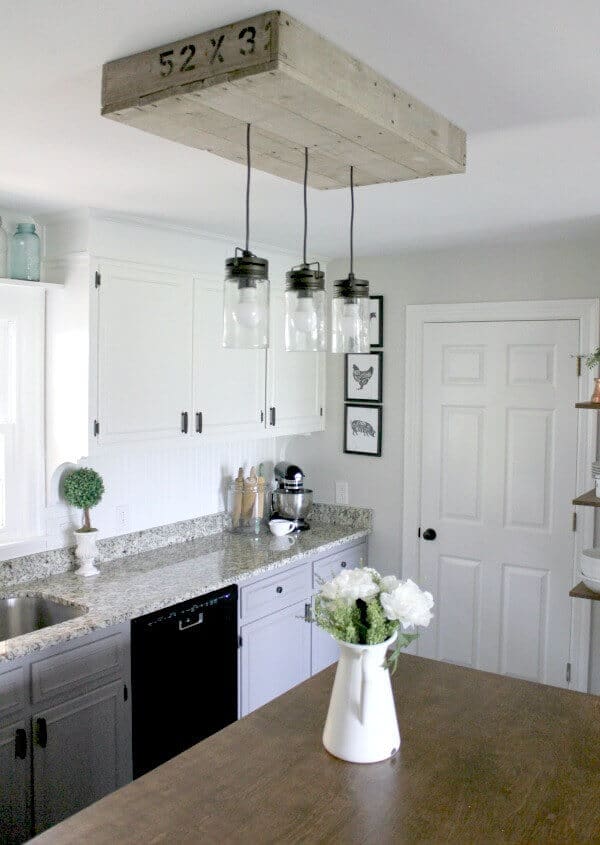
While I loved my enamel light, it wasn’t working, especially at night. Unfortunately, the light cast too many shadows. We also updated our kitchen island, so we used the leftover pallet wood from to a DIY Pallet Light Box for our Kitchen Island and we love it!
By reusing and upcycling old pieces, it can be an awesome way to save money!
Here’s what it looks like now!
Now, finally, the numbers!
Affiliate links provided for your convenience. (Disclosure)
Cost Breakdown for our
Farmhouse Kitchen Remodel
(Trent should do a drumroll here.)
$5840 – including new appliances!
-
- Appliances – $2915
- Frigidaire Counter Deep Refrigerator $1206
- Whirlpool Double Oven Range $1066
- Kitchenaid Dishwasher $439 (open box return)
- Whirlpool Microwave $205 (open box return)
- Countertops, sink and faucet – $1950
- Granite Color: Napoli (3 cm with rounded edge)
- Lights, Paint and supplies – $330
- Pass Thru – $150
- Flooring – $380
- Updating the Pallet Kitchen Island – $115
- Appliances – $2915
The cost would have been $975 if you take out the appliances and countertops – that’s less than $1000!
By subcontracted this type of renovation out, it could have cost us twice as much, if not more. Sticking with a budget and tackling this ourselves, not only saved us a bundle, but we also added value to our home! In fact, we recently refinanced our home and the appraiser increased our home by $30000 for the kitchen alone!
If you plan, and have patience, then this is a very doable task that anyone can accomplish.
If you have any questions for me, comment below and I’ll be sure to give any details I missed as soon as I can. I would truly love you hear what you think!
To see behind the scenes of our DIY shenanigans – head over and follow us on Instagram.
We’ve updated our Pantry! Check it out!
For more details about our Farmhouse Kitchen Remodel, check out these posts:
PART ONE – THE DEMOLITION
TEARING DOWN THE WALL – PART TWO
PART THREE – THE COFFEE BAR
INDUSTRIAL METAL LIGHT INSPIRED BY BALLARD DESIGNS
DIY PALLET LIGHT BOX FOR YOUR KITCHEN ISLAND
DIY KITCHEN SHELVING FOR $20


Hi Kathie! I’m happy to share! We used Sherwin Williams Crushed Ice on the walls and it was a perfect light color with a hint of gray.
Hope that helps!
Your home looks lovely,
I am wondering if you are willing to share the paint name/ number on the walls?
Thank you.
Kathie
I just love the character of the kitchen remodel. There is no “box store” feeling at all; rather a look that says it is original. I am in the planning stages of a kitchen remodel myself. I was wondering what your thoughts are on your counter depth fridge. Do you miss the space that comes with a standard depth fridge?
Hmmm… I haven’t switched to anything and tried pulling up the post on 2 different web browsers. May I ask which browser you are using?
Would love to see the pics from the redo, but when clicking on the links you provided above, the page resolves, but the pics are all white squares with nothing shown in them. Don’t know if you switched something since 2015?
Thanks for asking! You can find all the details of this flooring install along with each product we used in this post.
Would you share the name of the flooring you used? Looking for the this color/style but cannot find it in vinyl
this ia absolutely beautiful and so welcoming! I love every part of it!!
It is antique. It’s not very valuable since it’s missing it’s earpiece, but I love it nonetheless! Thanks for noticing!
Call me crazy, but I love that little antique phone. Is it a replica or antique?
Hi Katherine! Thank you so much for taking time time to comment and ask your questions. This is actually a 2 part answer. We build the kitchen island for our rental when we lived in there. You can read all about that tutorial here. But when we moved to our Tennessee home, that style didn’t quite fit, so we upgraded that one for this newer farmhouse style one, so you can read part two here.
I hope that helps and if you have any more questions after reading those tutorials, feel free to contact me anytime!
Hi, I love what you did to your kitchen. My question is the island. Did you purchase that, or make it? If you made it, could you let me know where you got the plans for it. Thank you.
Hi Belinda – our flooring was super easy to install. It’s peel and stick tile from Stainmaster. You can read all the details of the materials we used and how we did it on this post:
https://notinggrace.com/changed-kitchen-3-days-less-400/
Hope that helps!
What brand of flooring did you use and was it easy to install?
I found that almost 10 years ago at a garage sale – wish I had a link to share with you!
I just want to know where you got the chicken in the window
Thank you so much Dotty! I am so glad you stopped by and took the time to comment!
Hi James!
Thanks so much for reaching out and asking your questions! The tile is called Casa Italia from Stainmaster. You can read all the details on the install on this blog post:
https://notinggrace.com/changed-kitchen-3-days-less-400/
I have seen cabinets that go all the way to the ceiling and they look beautiful! One option instead of raising your cabinets to add small cabinets above your existing cabinets. I’ve seen some installed with glass doors that are stunning. It may be another option, but cabinets to the ceiling are a great idea – especially for small kitchens.
Absolutely amazing. The floor was the perfect addition for your kitchen. Looks like a professional designer job. Congratulations!
1. I’m interested in your kitchen flooring: Luxury Vinyl Tile. What is the brand name and “model”?
2. Do you think it would look fine–if you had replaced the cabinets–to install taller cabinets that actually reach the ceiling for extra storage in an even smaller kitchen; I have no room for an island.
Hi Amy! Thanks so much for stopping by and taking the time to comment. The color we used is called Crushed Ice by Sherwin Williams. I love it because it’s light and close to white, but with a hint of color. Hope that helps!
Hi Jennifer,
I was wondering what color you painted the walls in the kitchen? 😍
Hi Michelle,
The granite color is called Napoli. According to the invoice, it’s 3 cm thick. As far as the edge, we opted for a rounded square edge. I hope that helps!
Can you give details on the countertop…name-color? Thanks
Hi Kim! I’d love to share – they are from Stainmaster and we did a specific post on how we installed them including the colors all the supplies we used. I hope that helps! Let me know if you try to DIY this yourself – and send me a pic! 😉
Can u share the brand and name color of the floors? Beautiful!
Thank you so much Kendra! Your sweet words made my day! I appreciate the pin love!
Your kitchen is stunning Jen! What a difference! I love the flooring and the color of the cabinets! The results of DIY and hard work still amaze me each time! Pinning!
Great transformation! I like the benchtop design, nice introduction of colour/texture into the kitchen.
Oh my goodness, your kitchen turned out amazing! The light from the window made a huge difference as does the white paint. Thank you for sharing it, your cool vintage light and front door makeover at What We Accomplished Wednesdays. Blessings, Deborah
holy moly you did a great job! I adore what you have done so far and how dramatic the change is just by doing little things. A few years ago I painted my cabinets with counter top paint. It is thick durable and I clean off is a breeze. I never thought of using oil based paint though. The counter top paint is not cheap lol. My next project is doing wood plank counter tops! I have been wanting to do it since my eyes saw them on grand ole pinterest lol. I just love the farm house kitchen look with a mix of vintage and shabby chic. And your kitchen makes me want to come over for coffee and chit chat lol. see you soon haha.
Jess @liverandomlysimple
Holy Moly that is an amazing kitchen makeover! All your hard work really paid off! BIG TIME!
Thanks so much for sharing on Show Me Saturday! Your post has been pin, Facebooked, and Tweeted! 🙂
I can't decide what I love the most! The coffee bar? the pass through? the cabinets? You, my friend, are my hero! our kitchen is a lot like yours was with a load bearing wall that would be amazing if it just wasn't there. I love doing DIY projects, so I'm glad you were able to tackle this one. Very inspiring!
Thanks for sharing your remodel post at the party. Your post will be featured at this week's party. Our remodel is taking a lot longer. We still have the cabinets, counter tops and painting to do. But, have finished the floors and updated the appliances. It's a WIP for sure! Good luck with your floors btw. Can't wait to see. Hope to see you again at this week's linkup party! Theresa @DearCreatives
We are so excited to have this first HUGE phase done! Now we're brainstorming exactly what floors we'll be using when we replace them this summer! Thank you so much for the feature!
Thank you Jann!
Thank you Sue! I love my chippy green light – you know the saying… great minds think alike! LOL.
Amazing! Even more amazing when you consider how big of a chunk of the budge the countertops and appliances were. It looks beautiful and I'm sure that you are happy to have it done. Kitchen remodeling can be stressful, especially when it is done over time. This post is one of my features tomorrow at Your Turn to Shine. Thanks so much for sharing with us!
What a fabulous makeover! Love how clean and fresh it all looks. The corbels give it such a wonderful farmhouse style. Thanks so much for sharing it with Share Your Cup. I will be featuring you this week.
hugs,
Jann
I love how it turned out!! Way to go, Jen!! I think we have the same light 'fixation'. Or something very similar. I have 3 of the green hanging fixture like yours. Mine were formerly in some industrial warehouse. I used 2 of them on the porch and one over my desk area. I just love them!! Thanks fro sharing your kitchen makeover on the #TotallyTerrificTuedsayLinkParty
Thanks Alice! We are so glad to be finished (for now, until we tackle those floors), and are going to enjoy cabinets with doors on them for a while! 😉
We used warm LED light strips we purchased from Lowe's. One light was a replacement that was hard wired, so I left that for Trent's alter ego, 'Sparky', to do! LOL I installed the one for the coffee bar. It just plugs in and screws to the top cabinet – easy peasy!
Good luck with yours and thanks for your sweet words!
Jen, you and your husband did a fantastic job! I love the colors you chose. You both should be very proud! Smiles, Alice
Hi Jen, I love your kitchen. How did you do the under cabinet lighting and what did you use? This looks a lot like my old kitchen but my cabinets are stained. first I have to take old wallpaper down. Ugg. Look forward to seeing more projects. Pam
Thank you Isela!
Thanks so much, Betsy!
Thanks Danny!
Thank you so much! Can't wait to see how your project turns out!
Looks amaizing Jen you guys did a great job!
This is my kind of remodel! You did such an amazing job. A real labor of love, but well worth all the time and effort. Thanks so much for sharing at Vintage Inspiration Party.
Beautiful job Jen! I love what you've done with the space! When the floors are done it will look and feel amazing!!
-Danny Memeo
that looks amazing! i love the pass through and the opening up of the island. we just took down a big part of our kitchen wall-and i'm waiting on the pass through, though ours will have to be smaller, but this is making me want to get going going going! enjoy your new space!
b