How We Added a Pass-Through in a Load-Bearing Wall (DIY + Pro Tips!)
Cutting into a load bearing wall can be a scary DIY to tackle, especially when you think about the ceiling joists holding up the floor structure of the upper floors!
Here’s our first hand experience on how we were able to add a pass through to a load bearing wall and conquer those fears to create an open concept between our kitchen and dining room.
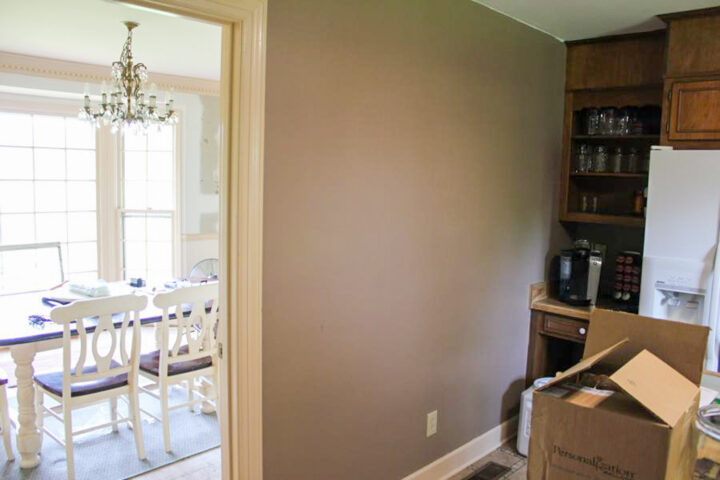
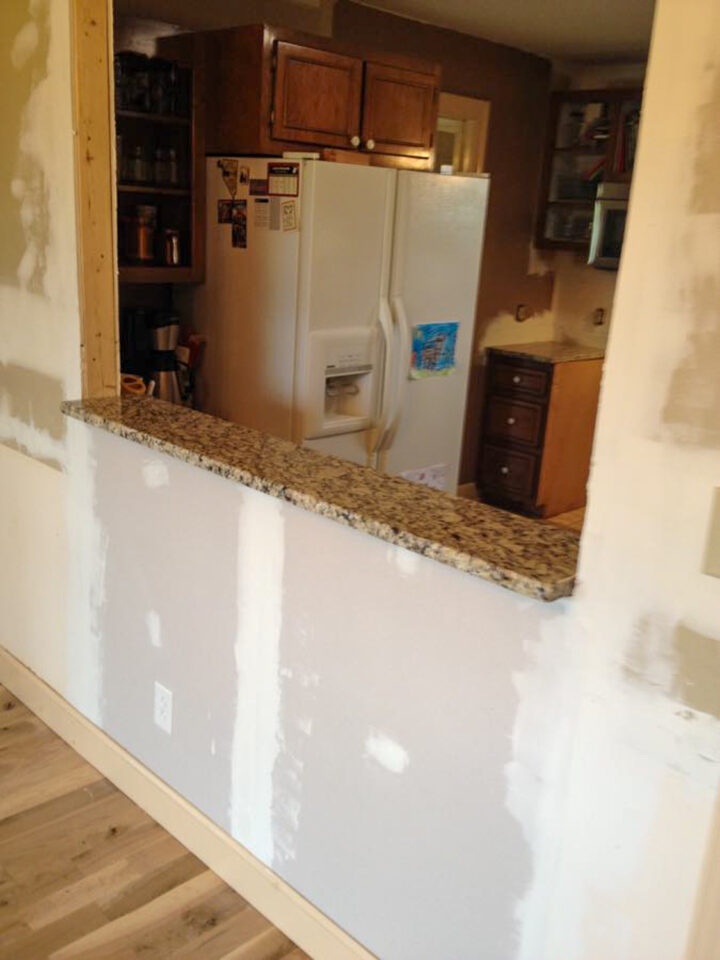
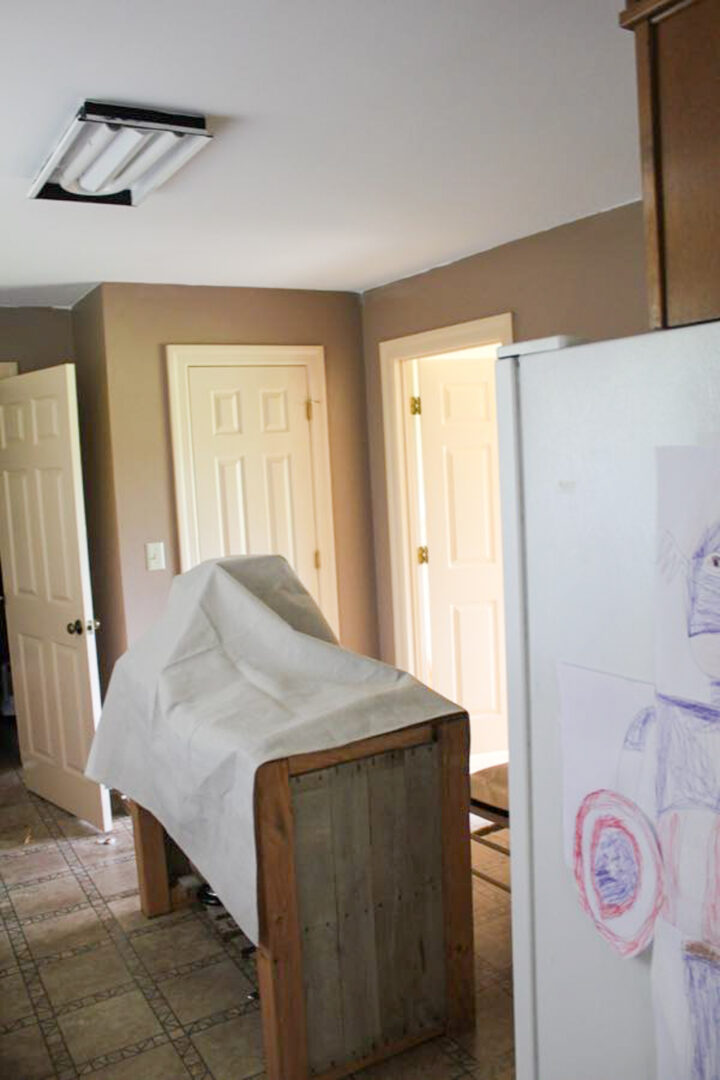
When we were making over our Kitchen, the biggest issue I had with this was how dark and dreary it was.
And when I say dark, this kitchen was VERY dark. Here’s a before so you can see what I mean:

This is at the brightest part of the day and the room still felt like a dungeon.
Especially with that dark color the previous owner had chosen.
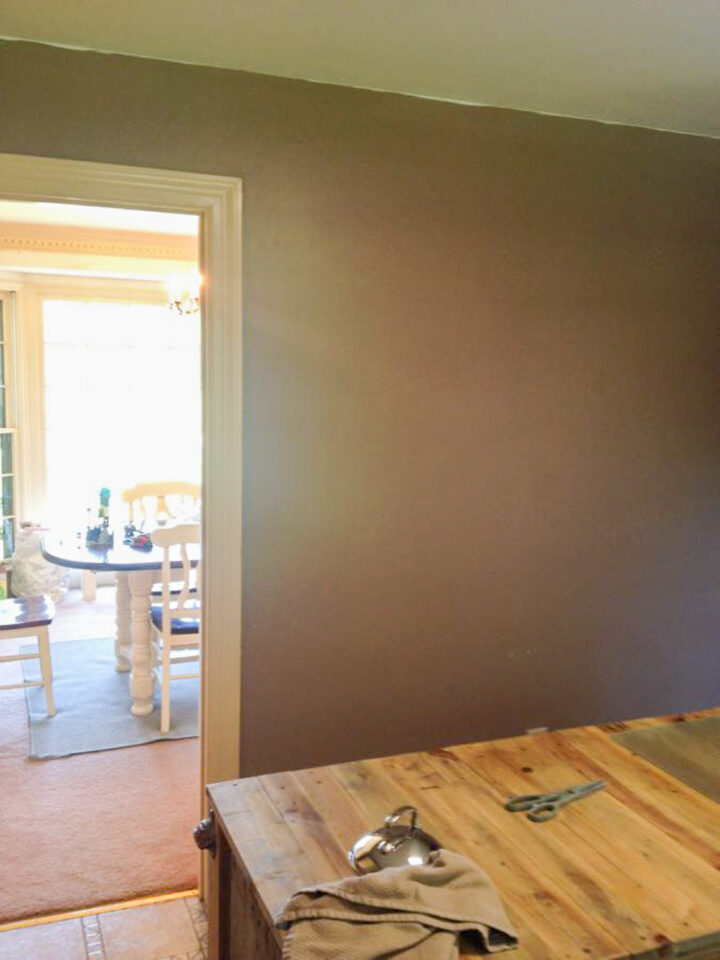
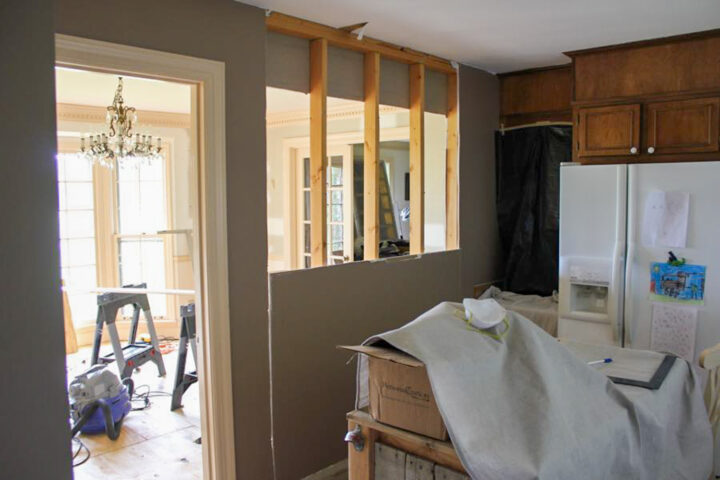
But when I stood at this spot 👆🏻 in our kitchen, I noticed the natural light coming in from those floor to ceiling picture windows. All I could imagine was if that light that was pouring through the dining room wasn’t blocked by this wall.
So we got to researching how to create a kitchen pass-through bar type of opening on an interior wall.
Pass throughs are a great option for small spaces like galley kitchens like we have.
By creating a new opening, it gives the feel of a more open floor plan.
But it has to flow with the rest of the house without it looking like a concession window or those 60s folding kitchen pass-through windows.
So I had a design plan in place and was ready to pull the trigger.
But a problem very quickly arose.
It’s a load bearing wall!
What is a load bearing wall?
(Don’t worry – I had to look it up.)
Basically, a load bearing wall is a structural wall of a building holding all the weight of the structure of anything above it, like a second floor, the attic and roof, etc.
A non-load-bearing wall doesn’t support any structural integrity of your home except for the wall itself.
How did we know it was a load bearing wall?
When we replaced the ceiling light in the living room, we noticed the direction the ceiling joists ran, which was from the front of our house to the back of our house.
This dark, dingy ran from one side of our home to the other, instead of front to back.
But I wasn’t giving up that quickly. So I sleuthed around to see how to open it.
As avid DIY-ers, when structure gets involved in any home improvement project, it scared us, A LOT.
This is an ideal time when a DIYer turns into a DIFM – Do It For Me!
So we found a General Contractor! He was awesome! (and licensed). And he indeed confirmed that this was a load bearing wall.
We’re sharing how we opened up the wall to our dining room to create a brighter kitchen by adding a pass through to a load bearing wall and when we passed it off to a professional.
We’ll share what we learned, how you can approach this project for your home, and how we’d do it differently today.
Adding a Pass Through to a Load Bearing Wall
The first step you need to take is to try to determine on your own if you have a load bearing wall.
The best way to check that out is to find a way to determine which way the ceiling joists run. If they are perpendicular to the wall, the wall is load-bearing, as it’s bearing the weight of the ceiling joists.
When the contractor came out to inspect our project we asked if there was a way to get any sort of discount if we were willing to help.
He agreed that if we assisted him and provided all the supplies (wood, screws, etc.) that he would only charge us half his rate since we would act as helpers!
TIP: When hiring help on renovations, if you have some sort of knowledge or skill, offer that as a way to get a discount on any home projects you are doing.
With his knowledge and skill combined with our ability and willingness to be his helper, we were able to open that wall affordably with peace of mind that the top floor would not crash on top of us!
To save even more on costs, we asked if did the prep work first, tackling the removal process the dry wall where we wanted the pass through to go, so that it would a be a quick and easy job for the general contractor.
The Demo
STEP ONE – Chose a side of the wall to start.
Locate and mark your wall studs as well as any electrical.
Since we removed our wallpaper on the dining room side, we easily found our studs from the dry wall mud marks. But you could use a stud finder if your wall is painted.
For any electrical, we recommend using a stud finder that can read electrical wiring as well as studs.
Here are some of our favorite tools we used for this process:

We definitely wanted to keep the dentil moulding in our dining room intact. So the contractor told us to cut the drywall a foot below it.
STEP TWO: Turn off your electrical.
Practice Safety First!! If there is any electrical, be sure to turn off the power at the breaker box before making any cuts.
Be aware of any electrical wires and make sure NOT to cut them!
And if you are working in a kitchen, it’s a good idea to think about any possible water pipes as well.
STEP THREE: Mark off where your opening will be and begin removing the drywall.
This is a great time to carefully remove any trim and baseboards you plan to reuse. Make sure to mark them and set them aside so they don’t get tossed by accident!
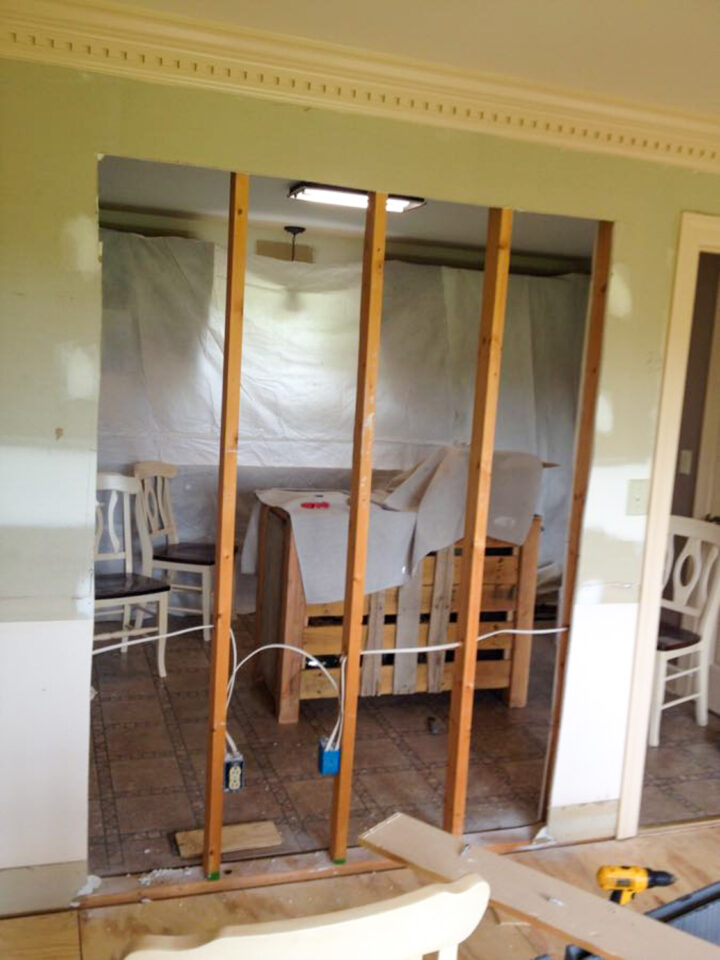
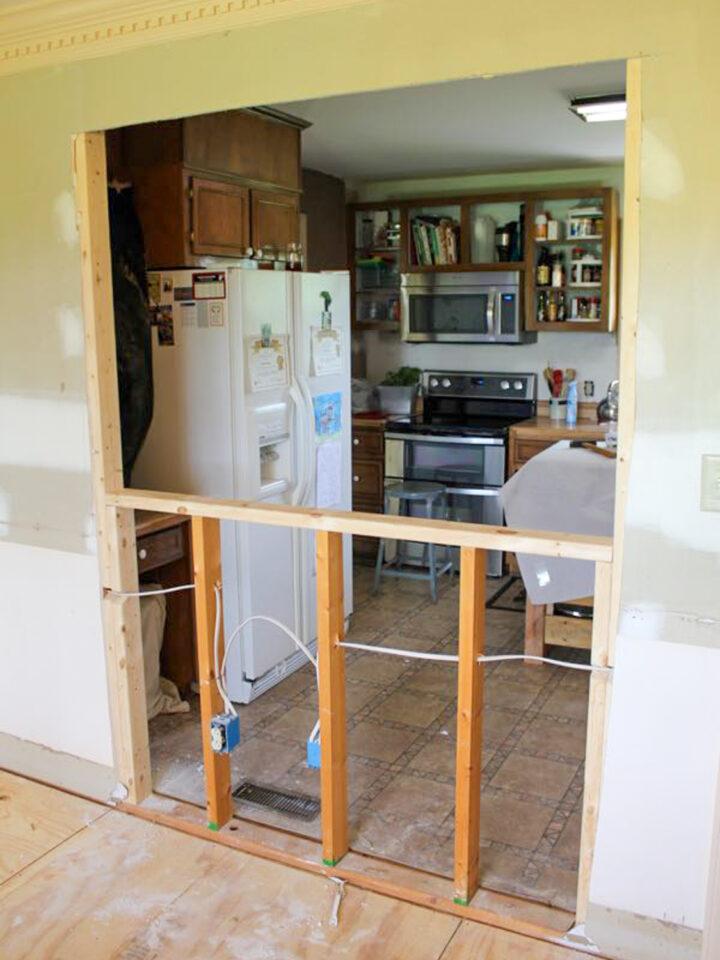
For kitchen pass throughs, you need to have stud on either edge of the opening – typically called the king stud.
According to our contractor, we needed to open the drywall to the edge of the stud.
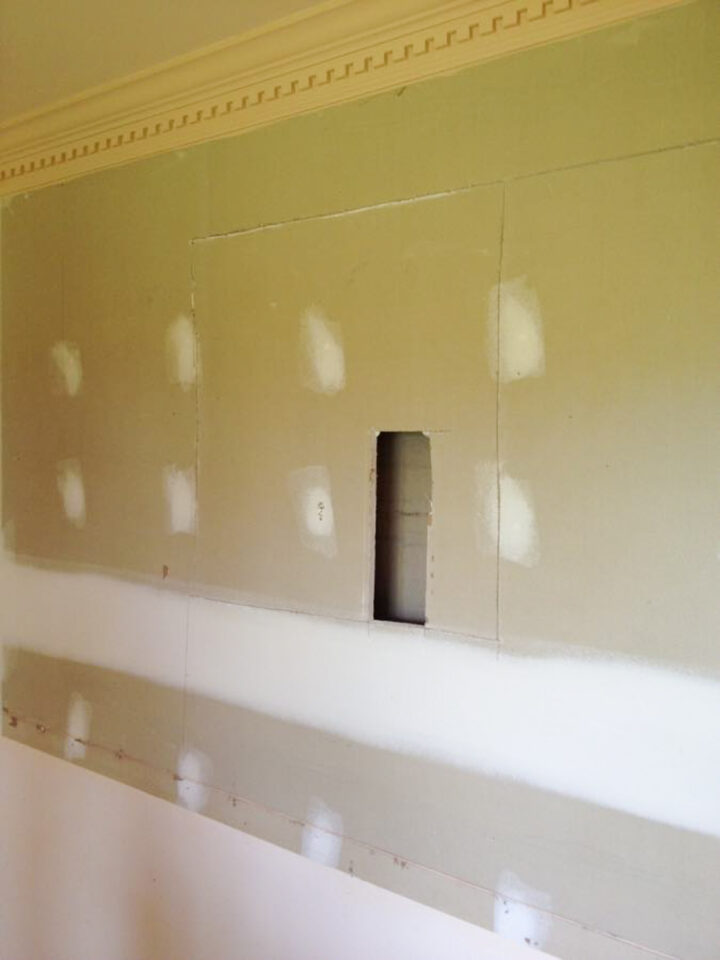
This helped decide how wide our opening would be. We marked off that measurement and scored the line with a razor blade.
You can see on the left side how our drywall is flush with the stud.
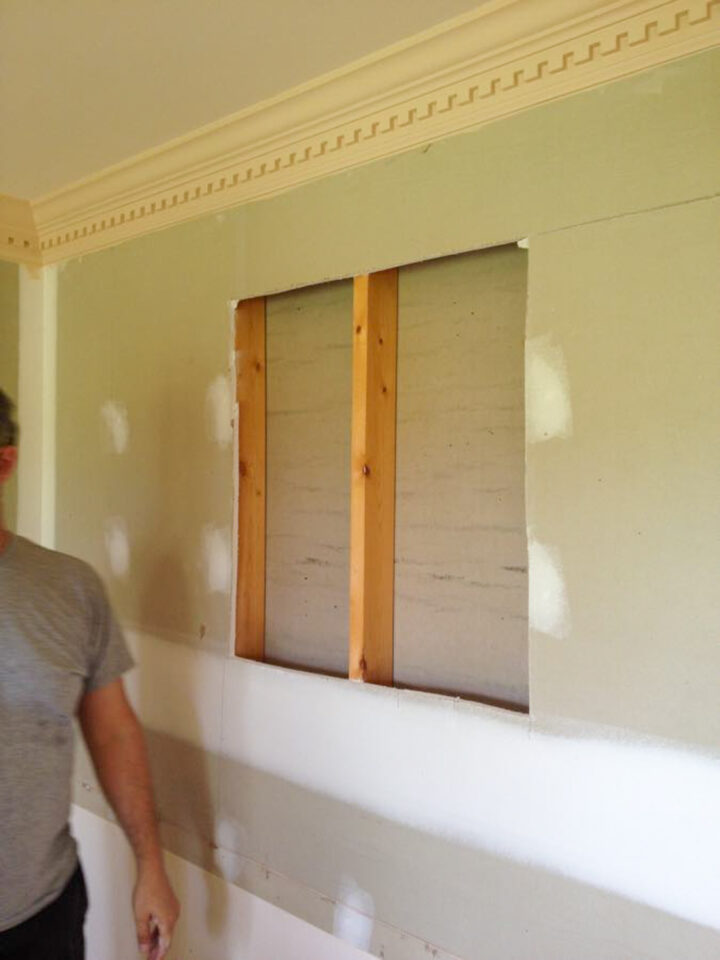
To open the drywall, we used an oscillating tool and a shop vac.
TIP: Cutting drywall or sheet rock is a messy process! Have a helper hold the shop vac under the tool while you make the cuts. Using a shop vac while you are cutting helps keep down on some of the dust mess.
As you can see, we removed the drywall from stud to stud as well as all the way to the floor, per the contractor.
Next came the kitchen side.
We followed the same methods for the other side.
However, since there wasn’t any molding we were saving like we were in the dining room, we could remove this drywall to the ceiling.
This was a necessary step to install the support header.
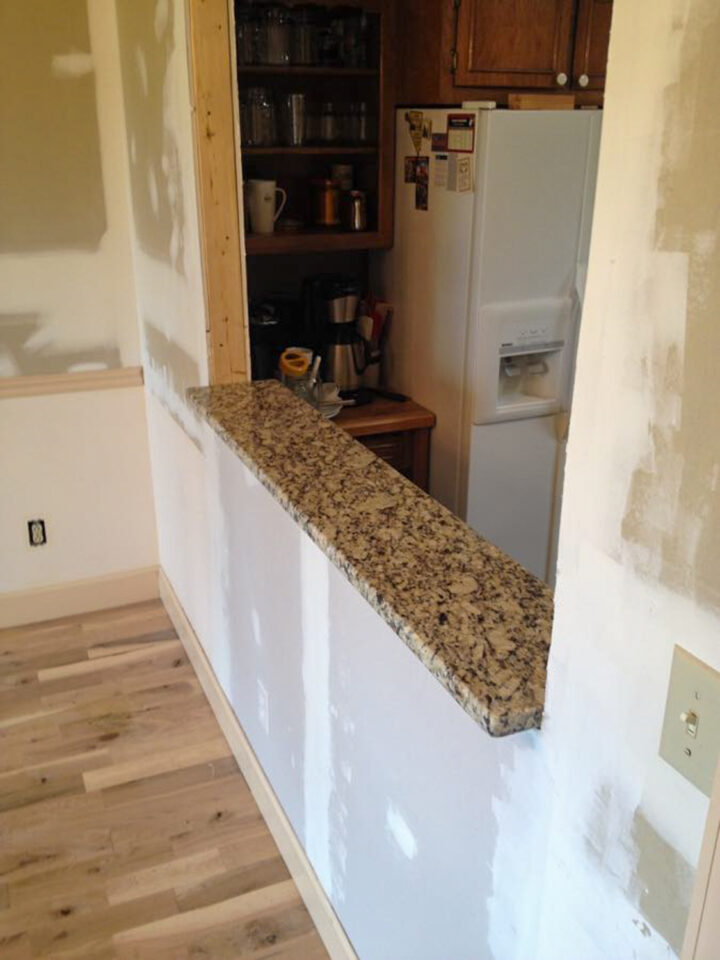
Here was our sneak peek at the how the pass through would look before we removed the rest of the drywall for the entire opening.
Now we were ready for the contractor to come in and sure up the wall.
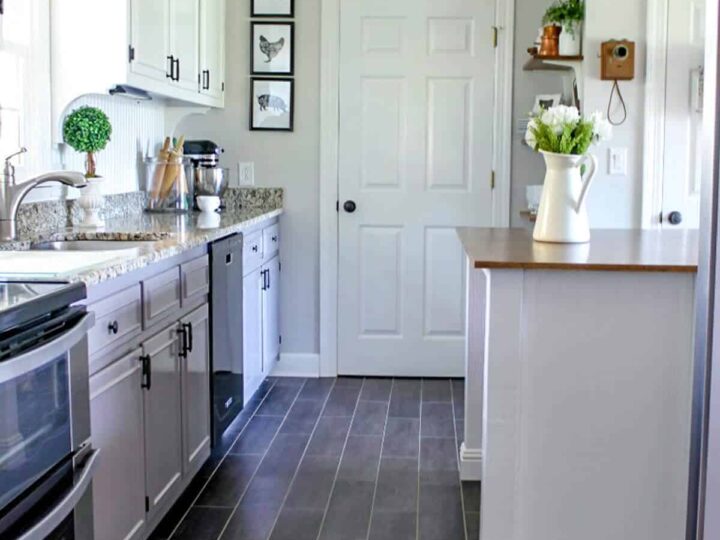
One thing to note – we did not have any kitchen cabinets on this side. If you are wanting to open your wall, you will have to keep in mind any cabinetry that covers your wall space.
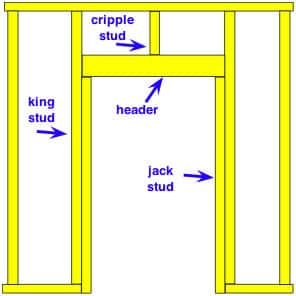
Now before we move on to the next step, let’s take a moment to discuss what is happening and some terms.
When you have a load bearing wall, you have to have proper side supports and a header.
There are two types of side support studs. The king stud, which runs from the floor soleplate to the top plate at the top of the wall. For the opening, a jack stud is added that the new header will be attached to.
The header is made of two or more wood beams, securely attached together and used to transfer loads above openings and holds up the structural support of the ceiling above. Headers are used to create openings for windows, doors, and interior passageways.
Here’s a great diagram that explains this.
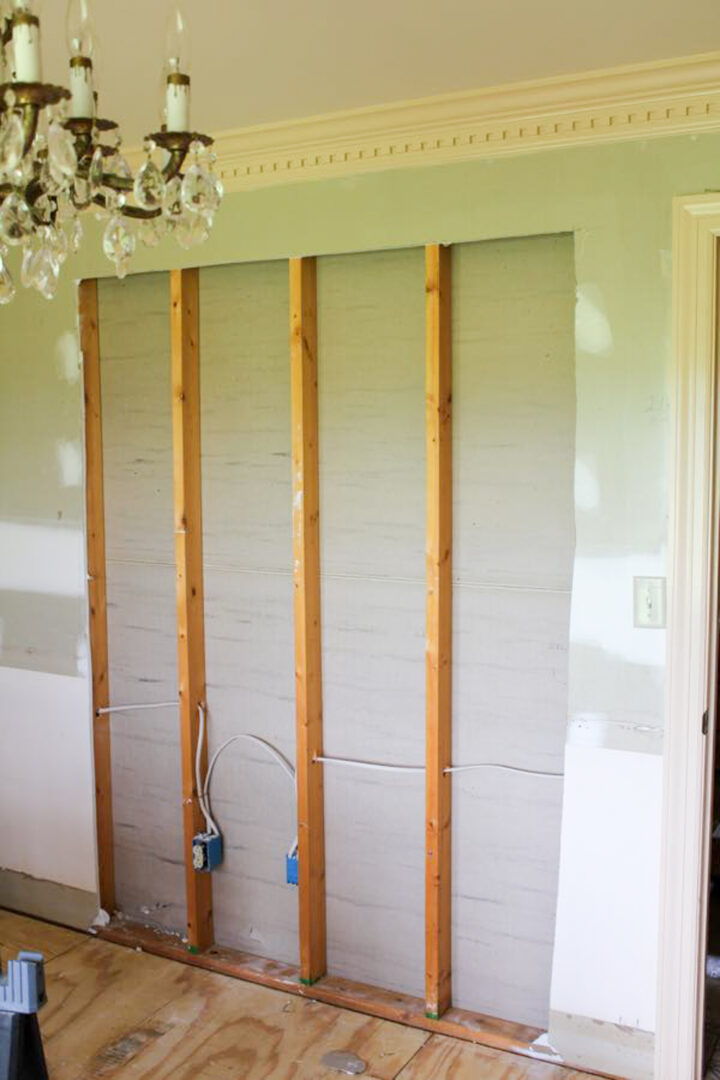
This is why we needed to expose the wall from top to bottom for the contractor.
Contractor Time – Hiring Help
We were very eager for the contractor to show up. Not only to get the project finished, but to also hear his professional advice and learn from his decades of experience!
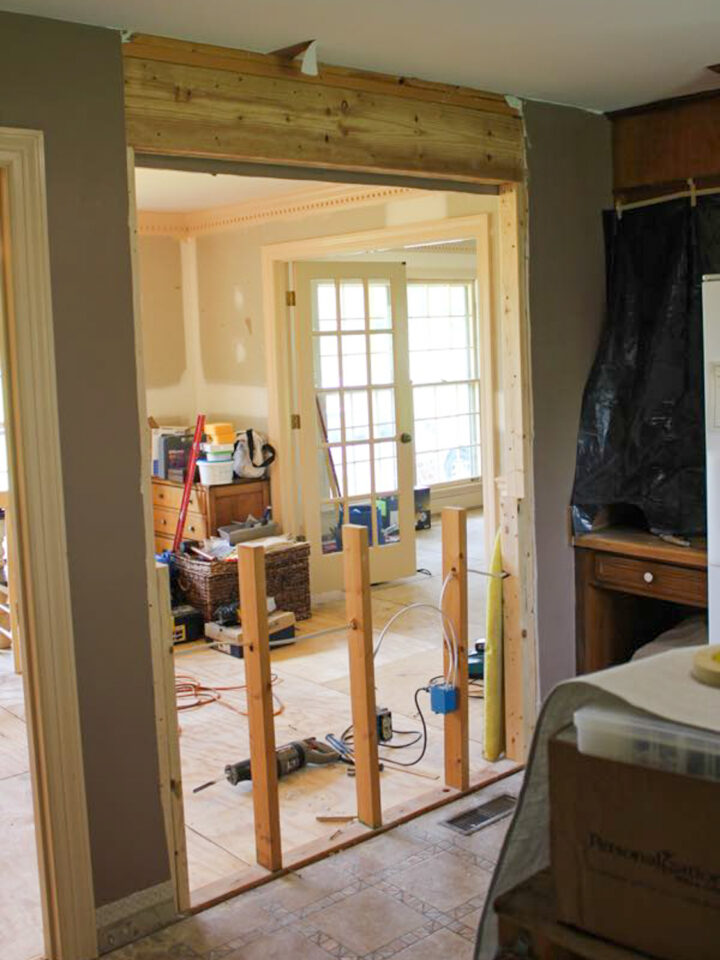
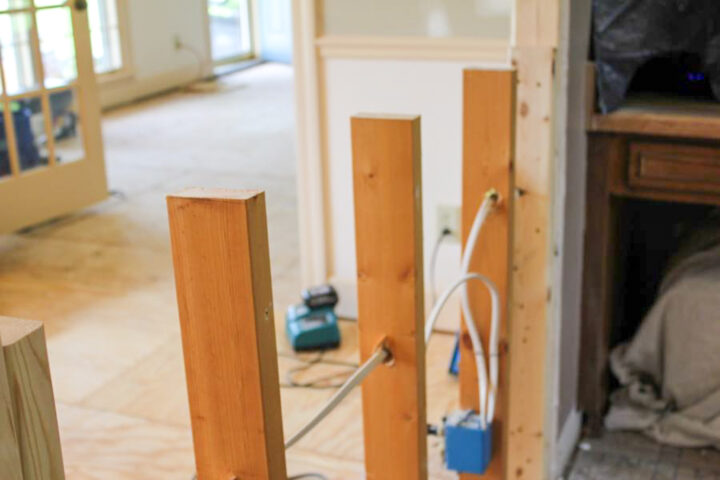
STEP ONE: The first thing he did was build two temporary walls out of basic pine boards both in the dining room as well as the kitchen.
This is to give enough support to hold the weight of the ceiling and keep the load bearing wall in place while working on the kitchen pass through.
STEP TWO: After the alternative support system was in place, he could cut through the existing studs of the old wall at our desired height.
Our pass through was at a bar height, which was about 41″ – 43″ from the floor.
TIP: If you have electrical wiring running from floor to ceiling, you will have to rewire that before cutting the joists. If you aren’t comfortable with this step, consult a licensed electrician.
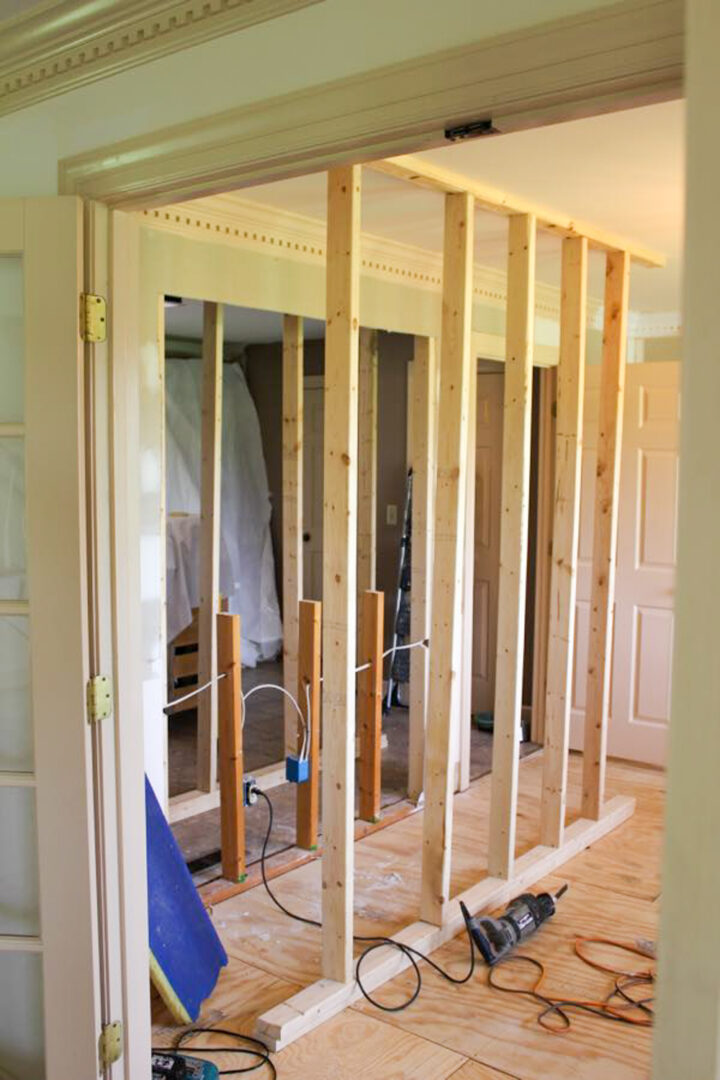
STEP THREE: Now it was time to rebuild the structural elements that would hold the support beam.
He installed jack studs by securing them to the two king studs that were left in the existing wall.
STEP FOUR: Next came the header which is a continuous board spanning each jack stud.
The header is made up of two 10×2 boards sandwiched together.
Using construction adhesive and a nail gun, he assembled the header before installing it.
And FYI: The header is HEAVY!
Here’s the difference between the before wall without a header and the after.
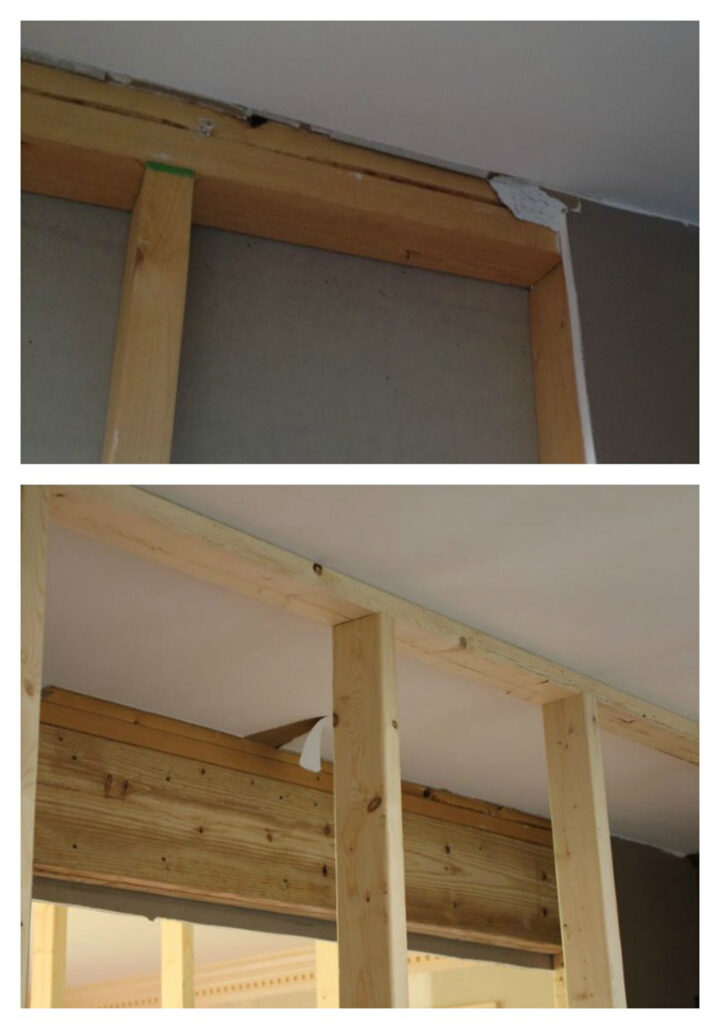
The header was installed above each new jack stud and toenailed into the top plate as well as each jack stud.
Here’s a great article talking about toenailing if you don’t understand that DIY term.
Once the header was in place, we could start removing each temporary support wall.

With those temporary walls gone, here’s where you can clearly see the header sitting on top of each jack stud.
Zoom in to see the details of the jack stud holding up the header.
Ah! Look at all that light!
STEP FIVE: Cap off the old wall studs.
The final step the contractor did was to add a board to the top of the half wall studs.
He capped off the the cut boards with another 2 x 4 and was finished.
By leaving the work finish the project with drywalling, we saved a lot more money than if he did the job for us.
The entire process took the contractor less than two hours. We were there to hand him any boards or tools and he was kind enough to answer any questions we had throughout the process.
Rebuilding the Wall
Once we finishing taking in all that gorgeous natural light, we got to rebuilding the wall.
We covered the studs with drywall and added back the baseboards and trim that was carefully removed before on both sides of the wall.

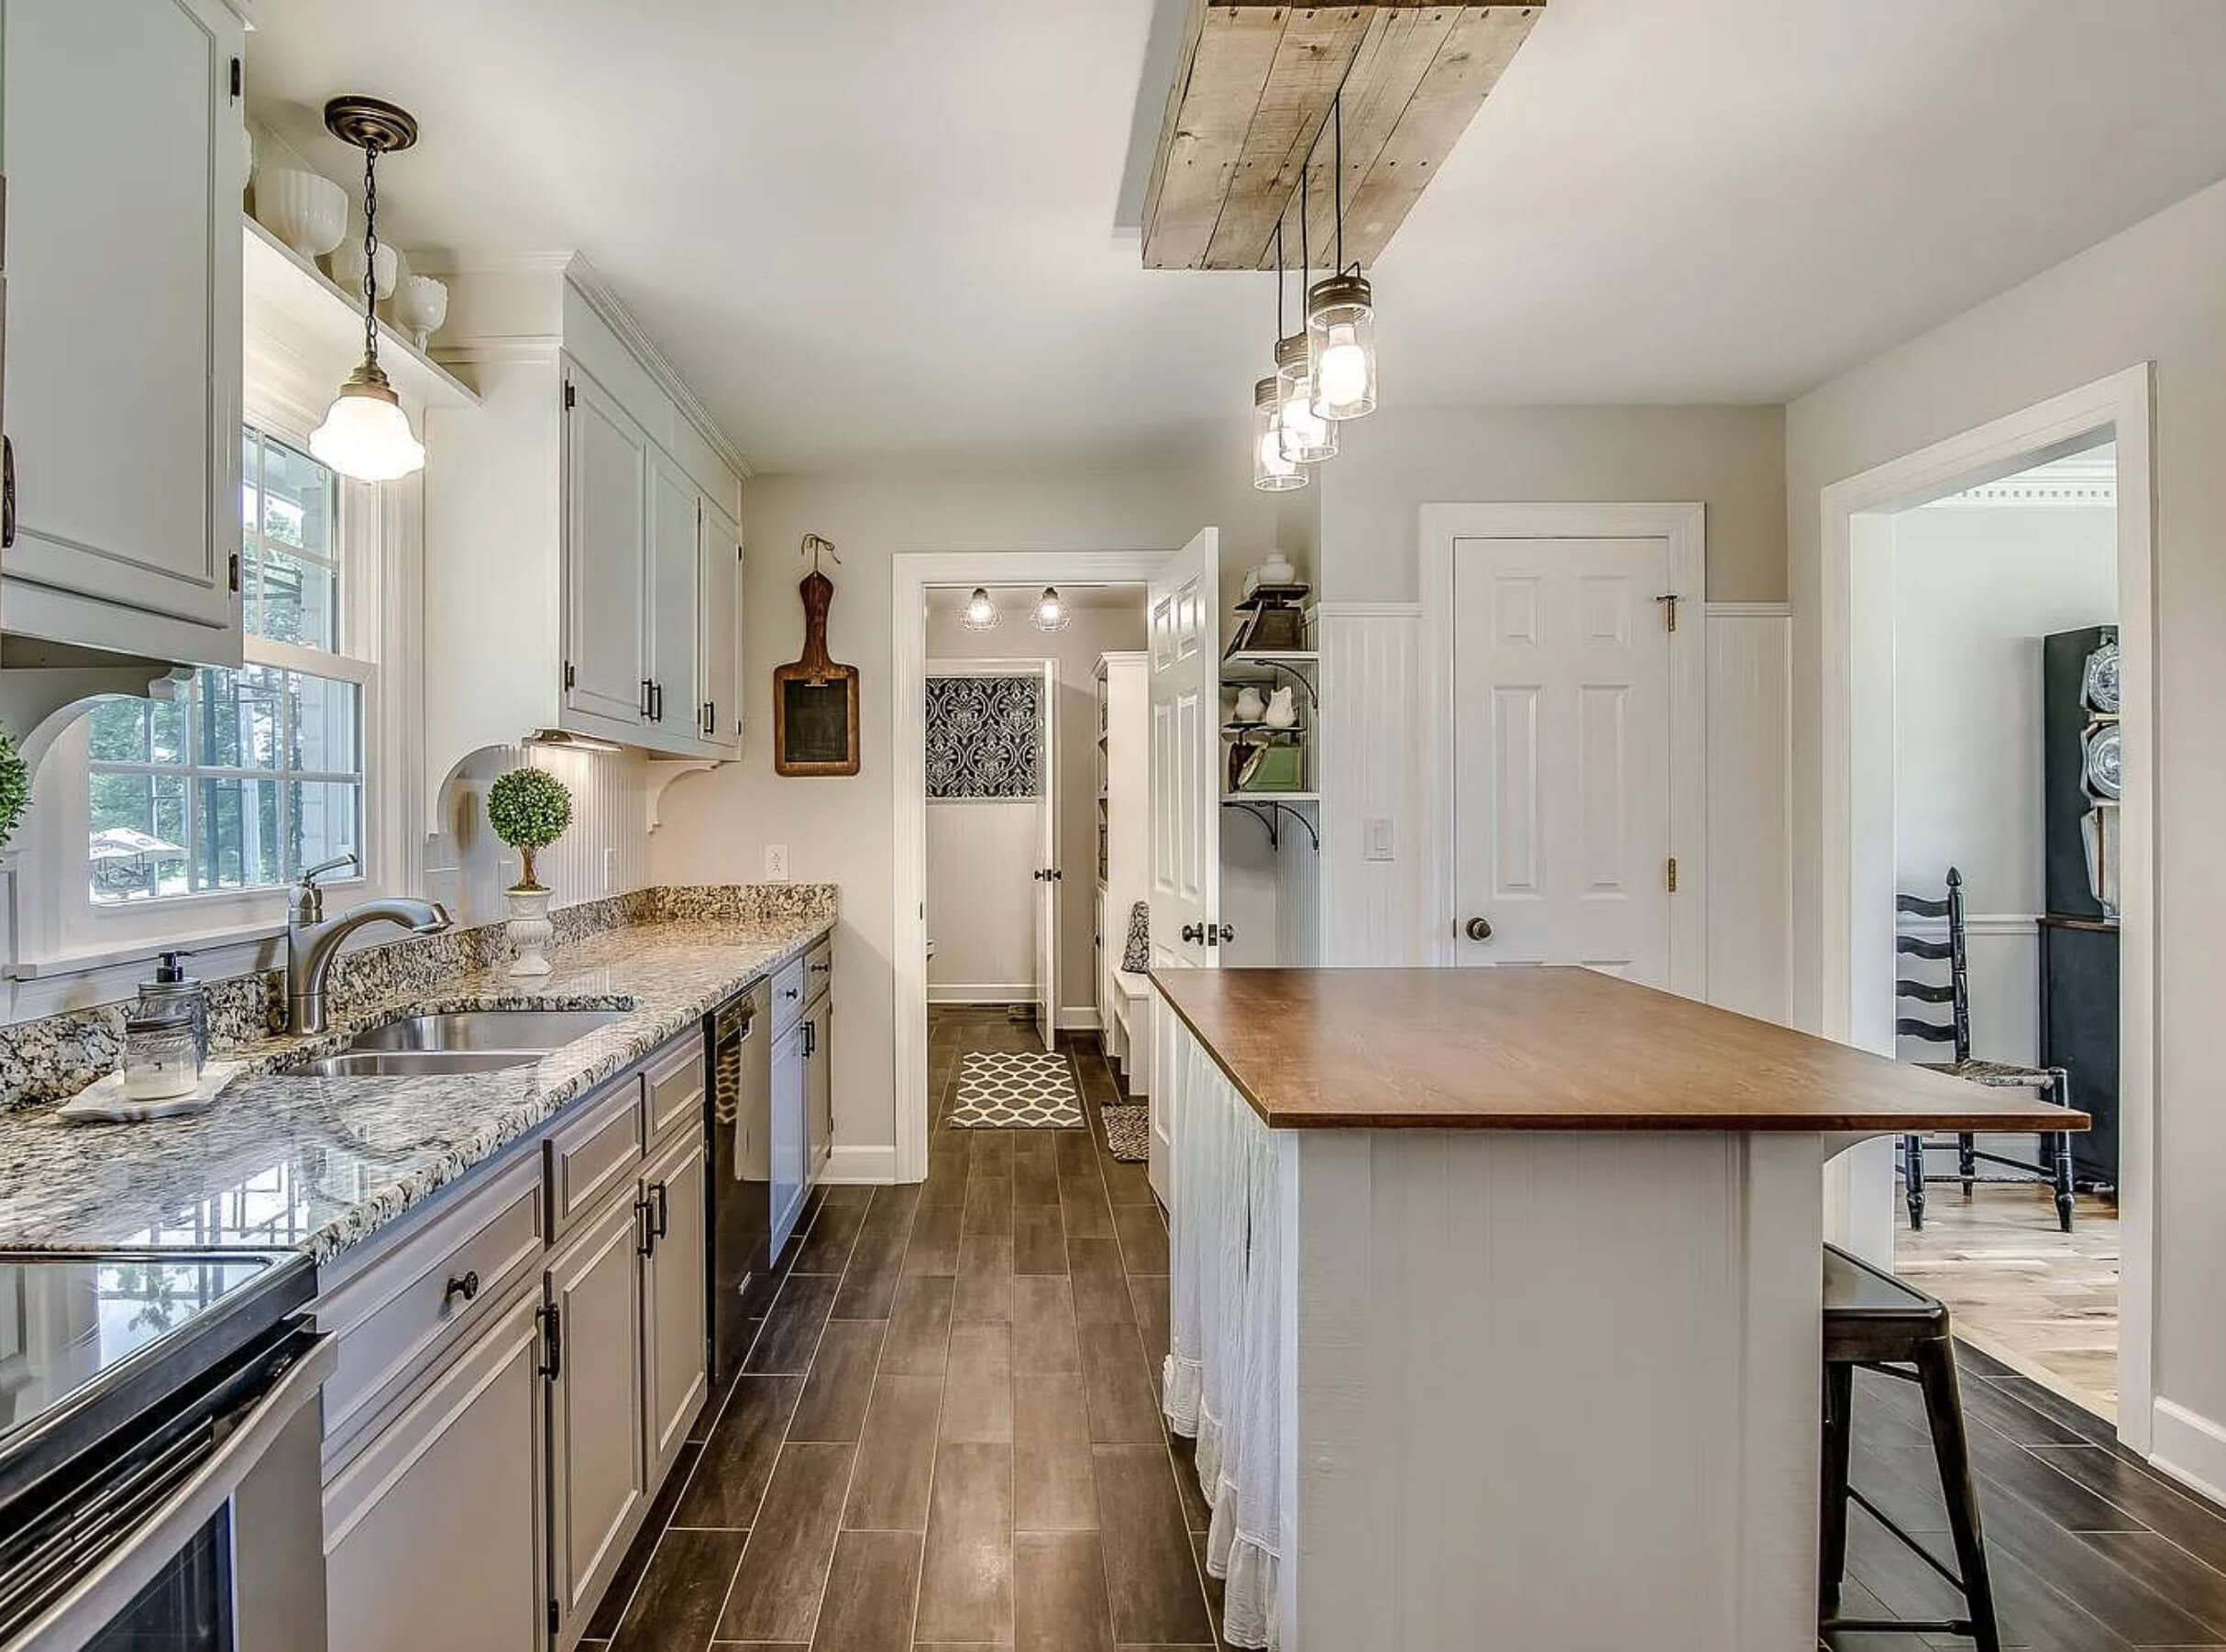
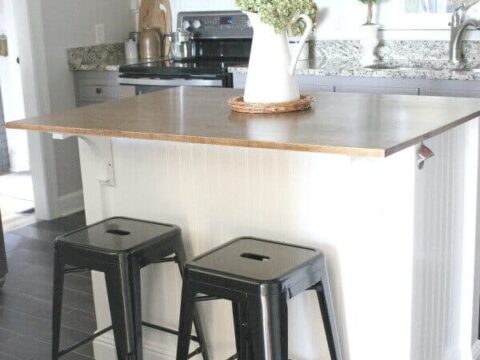
Installing the granite was the next step.
We got such a steal on the granite that we opted for a small bar-type feel for the pass through.
After the granite was in, we added trim around the framing to finish it off and painted all the trim white.
Now we were ready to finish both sides of the load-bearing wall.
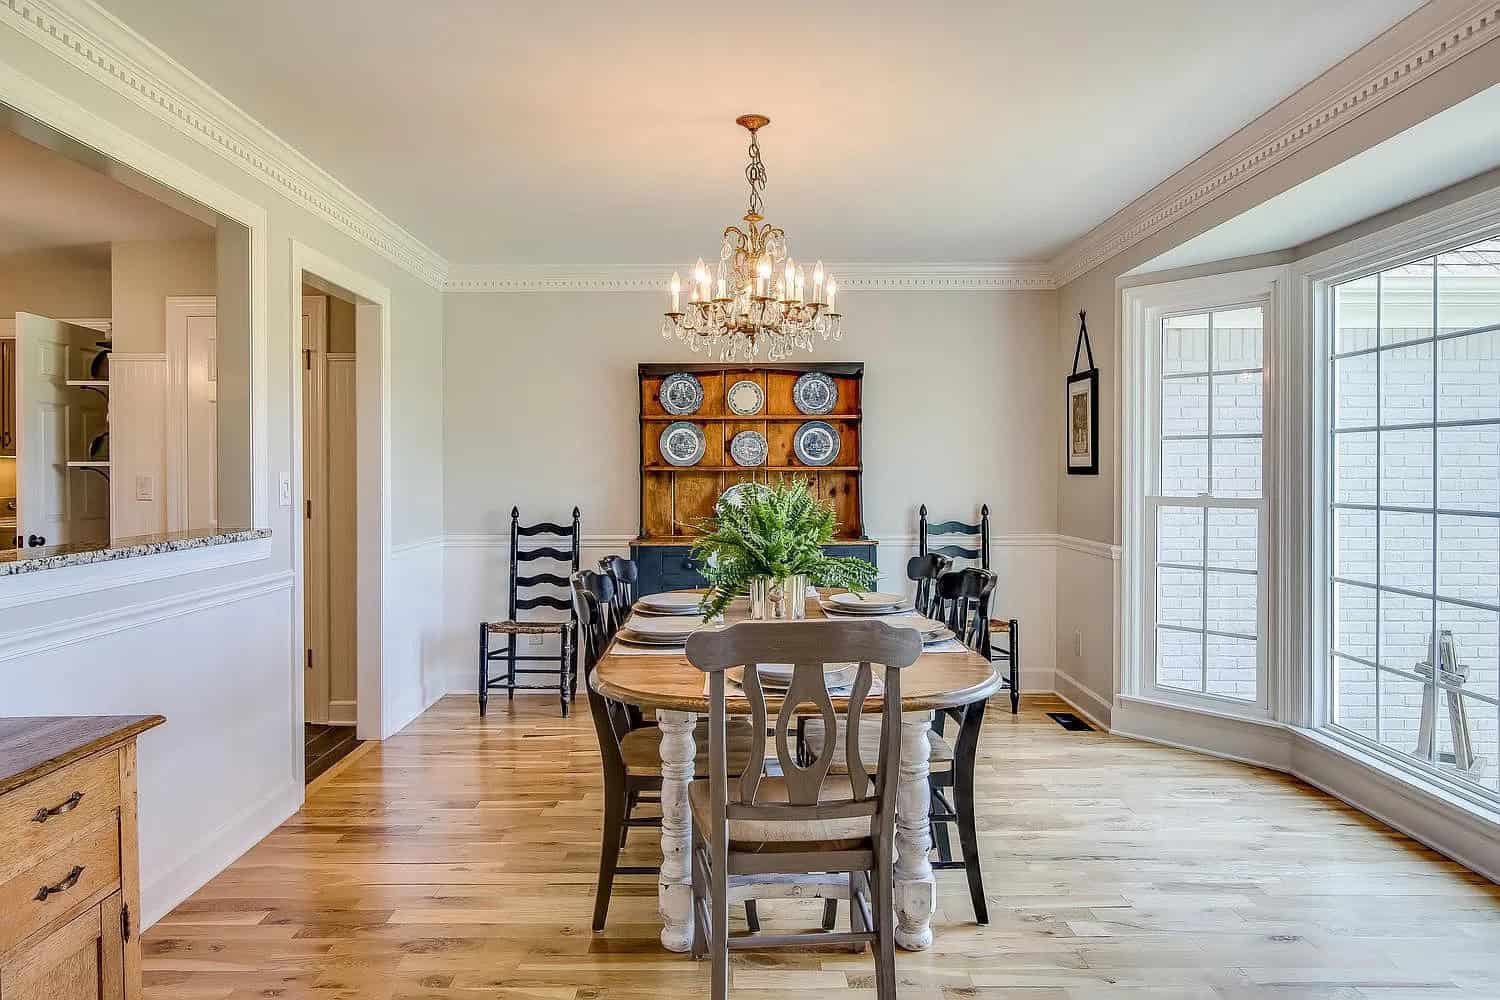
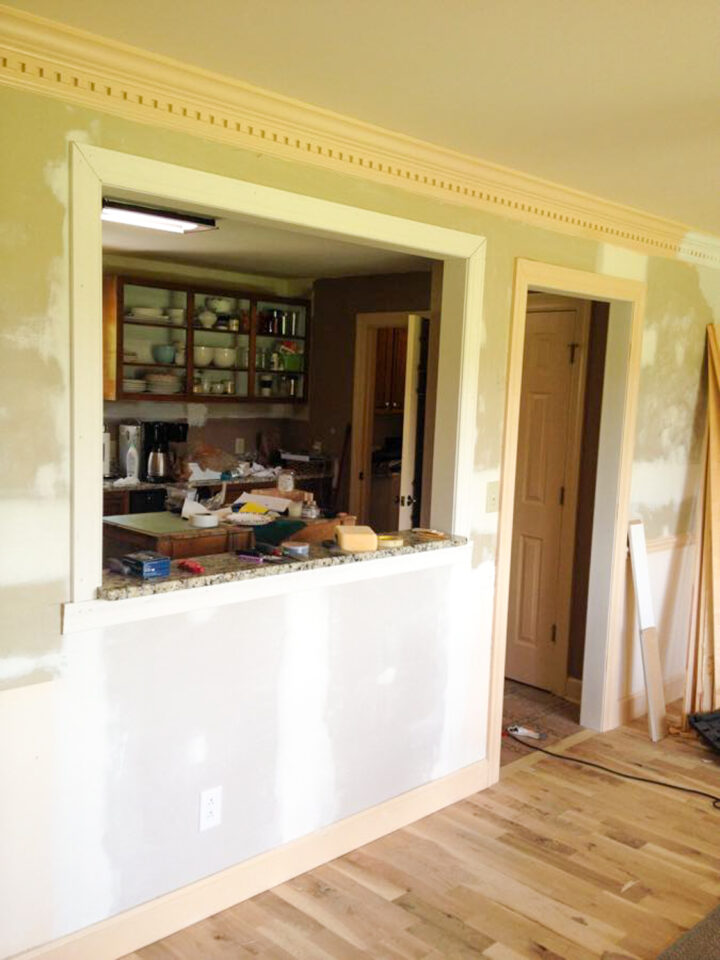
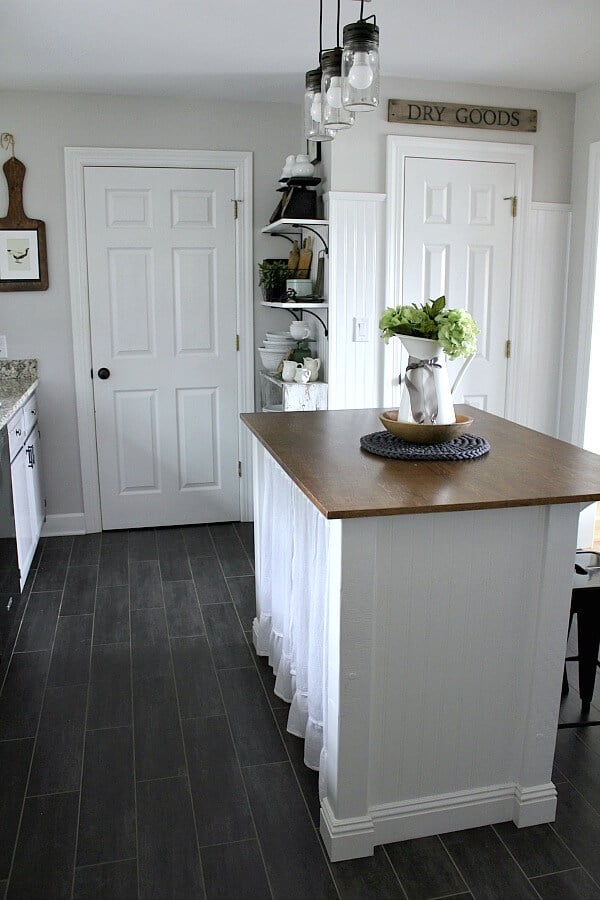
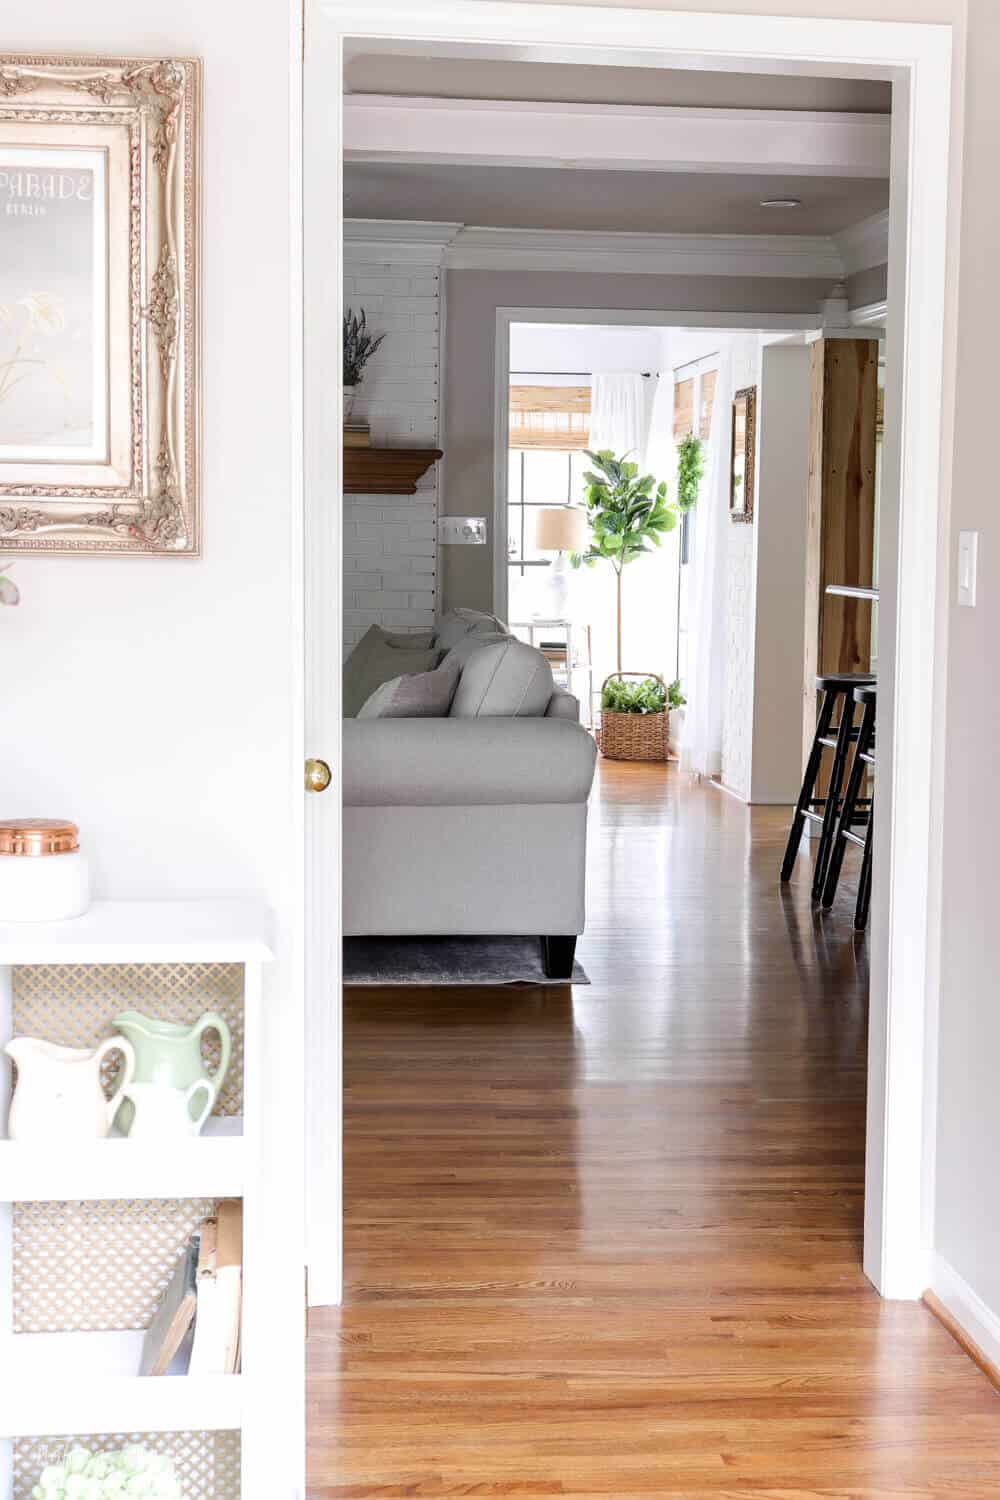
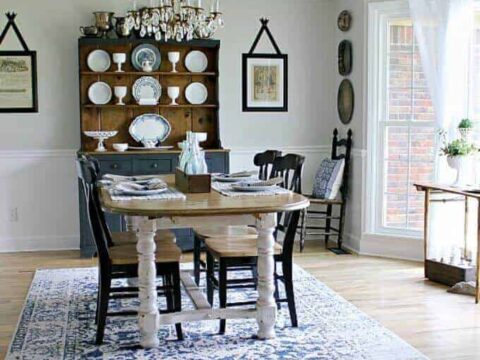
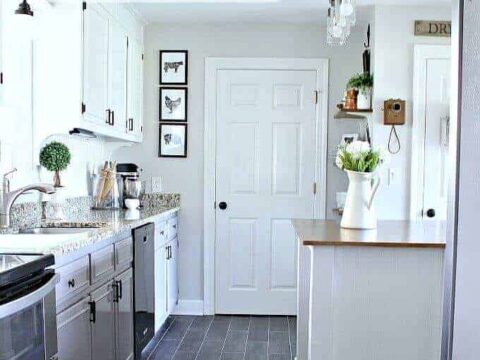
Here’s how it looks after!
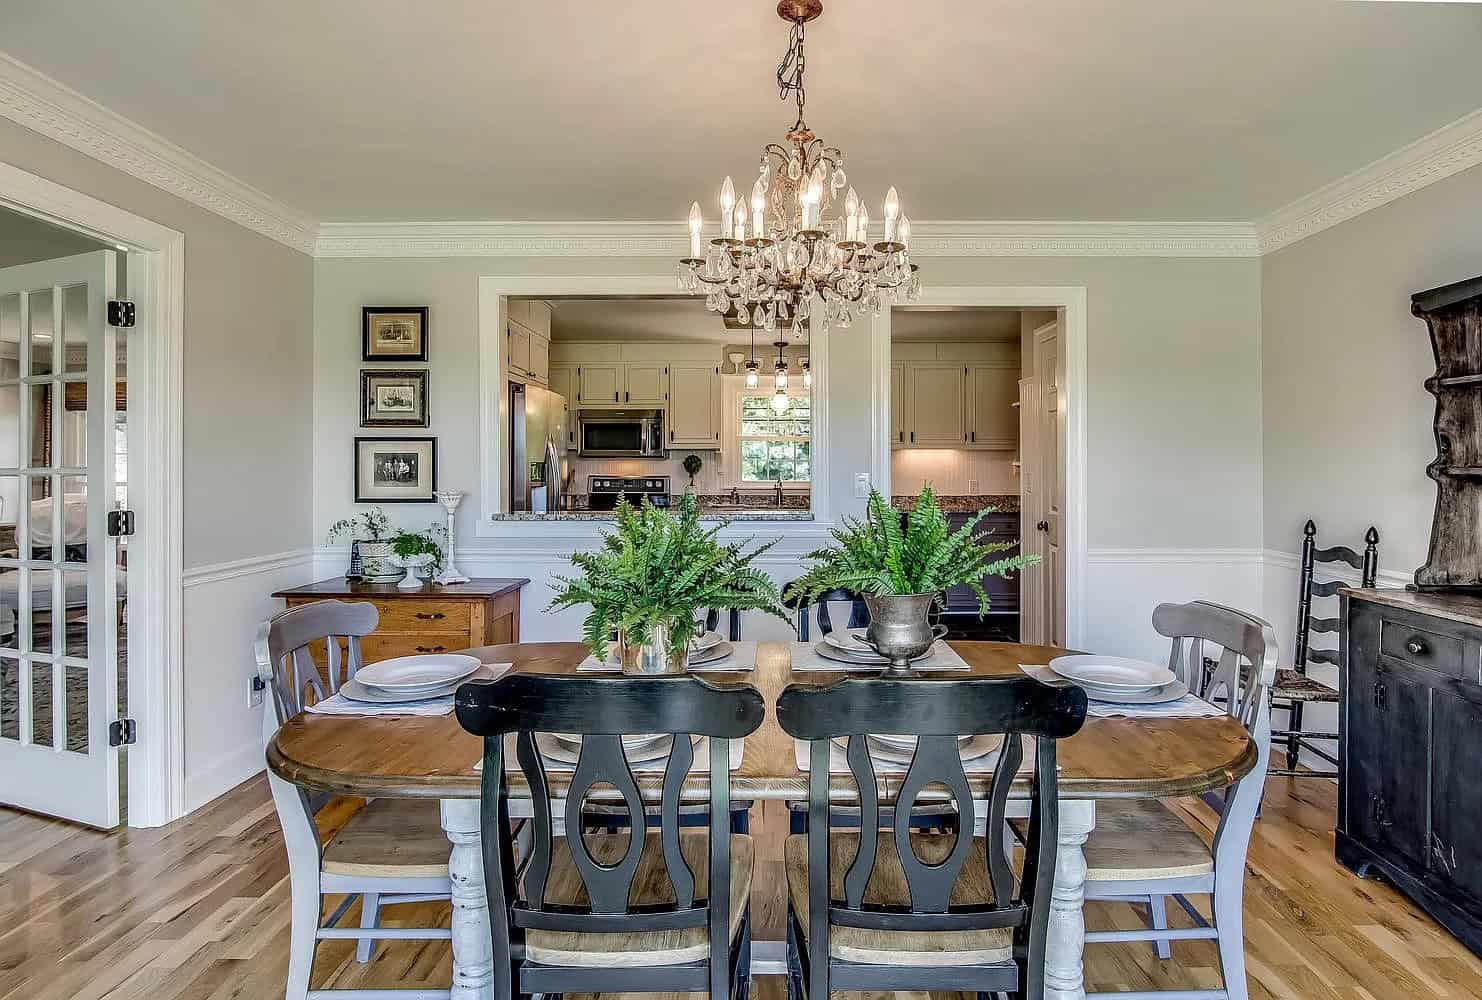
Now we have a flawless open floor plan look that allows light to come in
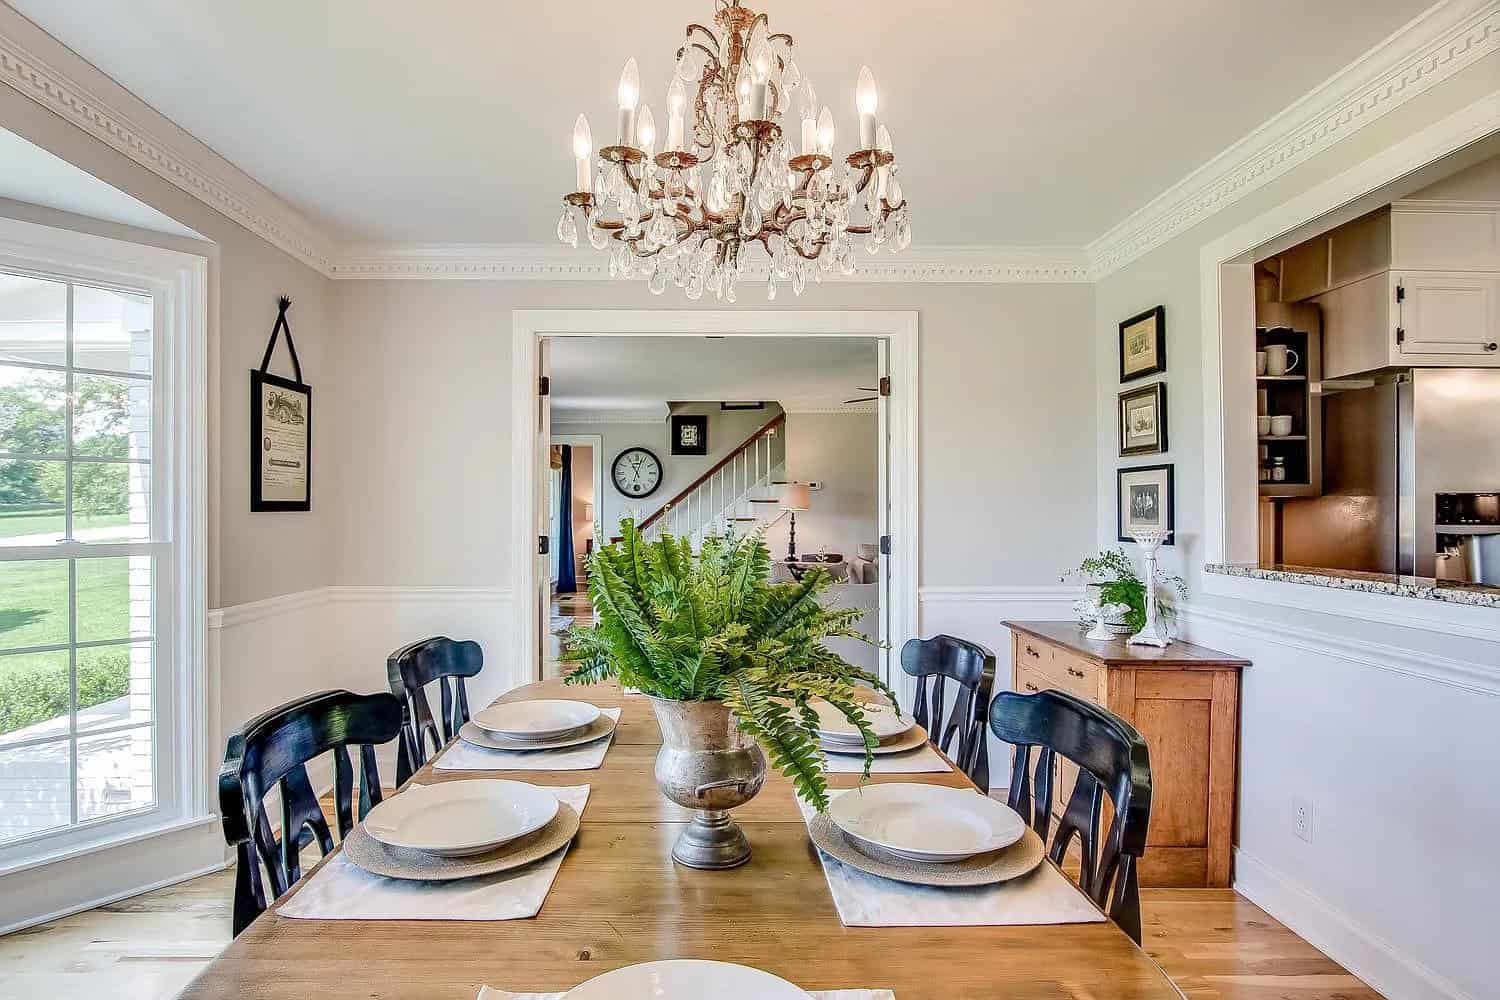
And notice the before and after of how brighter our kitchen is! No more dreary dungeon!
So this was relatively simple, especially with the help of the contractor we hired.
But we knew our limits and weren’t afraid to hire help for the things we weren’t comfortable with.
What We Learned
The biggest thing we walked away with was a boldness to ask for a discount!
Having the courage to offer to do some of the work to offset the costs saved us so much money in the long run.
We used this tactic when we had our Hardwood Floors installed and saved thousands just by doing some of the work ourselves.

The shop vac trick when removing the old dry wall was another thing we learned and we still use this today on every messy project we take on.
How You Should Approach This Project
If this were a non-bearing wall, we wouldn’t have had the same fears and hopefully you feel confident to do the same.
But if you are like us, and have any doubts whatsoever – then contact a general contractor or structural engineer.
Structural beams are there for a purpose and partition walls may be more than just a divider for each room.
Be sure to take into account the number of floors above. If this is an interior space in an unfinished basement and there are two levels above you, then thinking about load requirements and size of beam is something to consider.
And lastly, we live in an area where local building code requirements allowed us to to this without the need of a building permit. It’s worth doing your homework ahead of time vs having to repair your work if you ever decide to sell your home and it’s not up to code.
Would We Do Anything Differently
This process was such a game changer for us and gave us confidence to tackle DIYs like this.
Many times, we said to each other – we could do this ourselves!
In fact, we widened a load bear wall in our current home to allow light from our front door to brighten our living room.
We followed the same methods from our contractor and approached that wall removal the same way.
But would we have done this project on our own.
Probably not the first time.
Educating yourself on how to do something properly is worth it’s weight in gold.
The knowledge we had on the other side of this project from that contractor and the key steps in opening these types of walls are invaluable.
FAQs
What are the dimensions of your opening and how deep is your granite slab?
We worked with the existing studs that were in the wall, so ours ended up being about 5 feet wide.
The dimensions of the granite piece was the width of the opening and it was about 14 inches deep. I wanted it to be deep enough to set a serving platter on in case I hosted a potluck. 😉
Did you have to get a structural engineer for this project?
We posed that same question to the general contractor and where we lived, a building permit was not required for this type of project. Some cities are strict with their code. Other cities, like our current one in Alabama, require permits based on the cost of the job being completed.
It’s worth a call to your local building department to check!
How much was the total cost with you assisting the contractor?
We were able to have the structural part completed for about $300.
By offering to remove the dry wall before he arrived and also purchase the wood for him, we were able to work a deal.
Trent also offered to work as his helper while the contractor was on the job. That meant he didn’t have to bring his helper with him. Without the help and purchases, it would have been double that.
Would You Do This Project?
After reading the details of our personal experience with opening a load bearing wall, does this seem like something you feel confident to tackle?
Hopefully, our process offers you some additional support if you were searching for answers to questions you had.
And please reach out anytime if you have any other questions! We’d love to help you out!


WOW- what a big difference. Well done. GREAT advice, thank you! Have a question not related to this specifically – but wondering what the name and brand of your light grey wall color you used in those spaces is, please – ? If you could please shoot me an email privately so I don’t miss the response on your post, I’d sure appreciate it. THANKS so much!
Thanks Crystal!
We worked with the existing studs that were in the wall, so ours ended up being about 5 feet wide. So the dimensions of the granite was the width of the opening and it was about 14 inches deep. I wanted it to be deep enough to set a serving platter on in case I hosted a potluck.
I hope that helps! Let me know if you have any more questions – please reach out!
Jen
Kitchen look great. I wanted to know what are the dimensions/measurements of how big your pass through is and you small granite top.