How to Replace an Undermount Kitchen Sink

Wanting to upgrade your boring kitchen sink? Here’s how to replace an undermount sink without damaging your counters.
When we were updating our basement kitchenette, we knew we needed to add some bling to this room.
When I spotted this copper sink from Sinkology – I instantly fell in love!
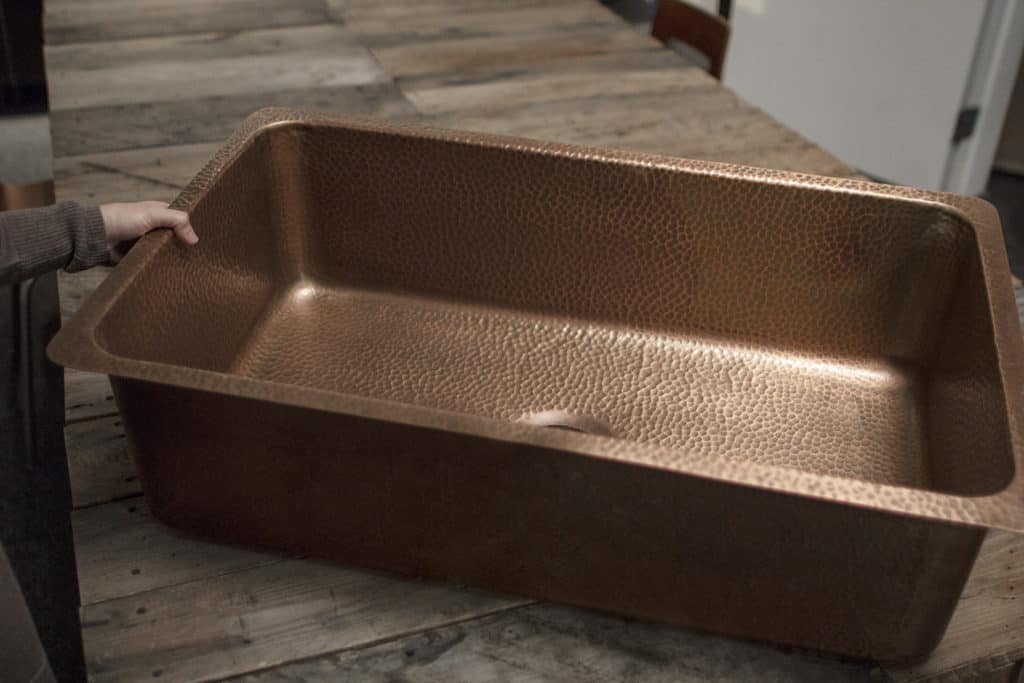
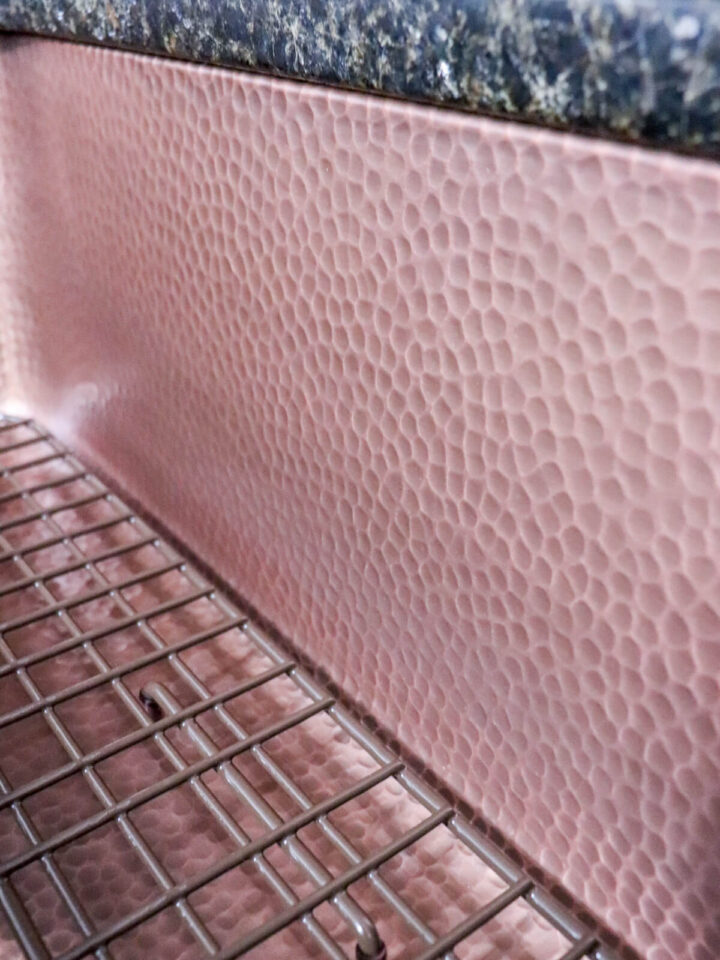
That hammered finish had me swooning.
And since we already have a Sinkology Apron front sink in our kitchen, I know how durable they are as well as being easy to clean.
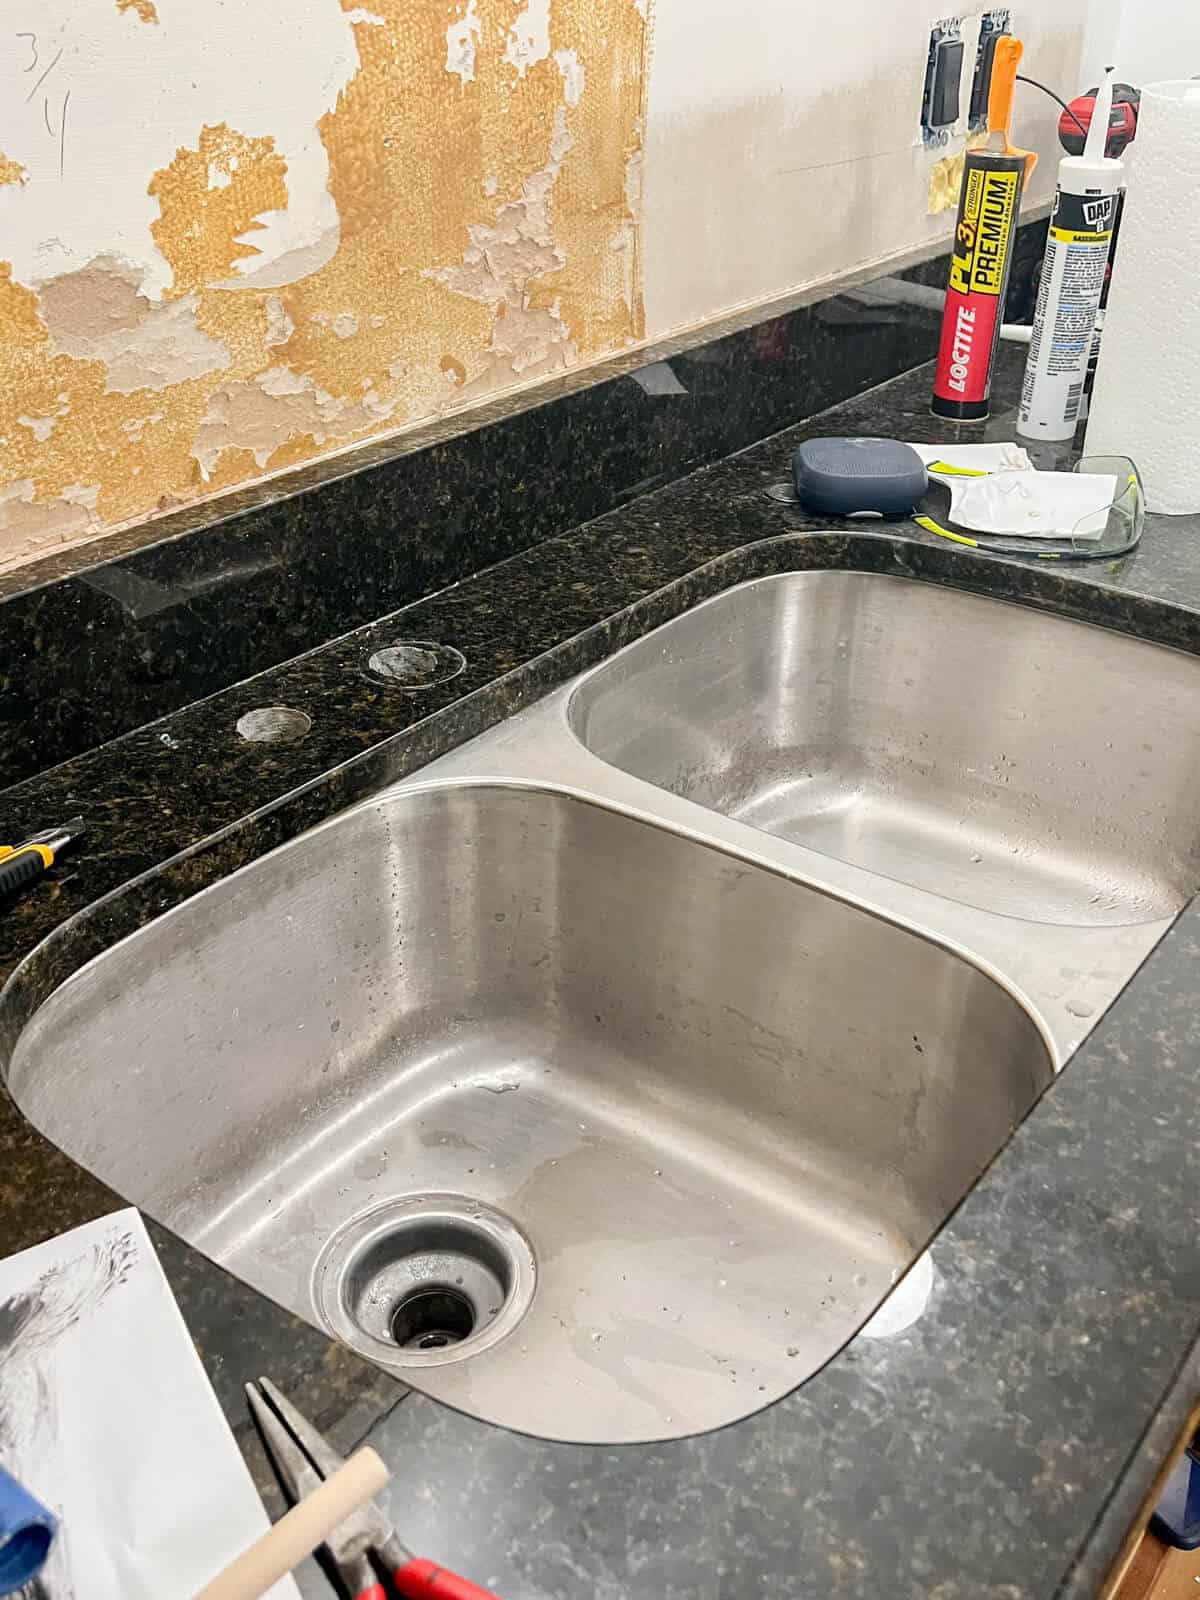
But first, we had to remove the old sink from the granite.
Which I know can be a bit daunting and scary, but on this side of it, it wasn’t a difficult DIY!
Here are our replacement steps!
How to Replace an Undermount Sink
(Some affiliate links are provided below. Full disclosure here.)
These are the supplies you’ll need for this project.
- Undermount Sink – we got this 31″ Rivera All in One Kit
- Tools for plumbing
- Utility knife
- Acetone
- Razor or scraper
- Caulk gun – we just got this one and love it!
- Silicone caulk
- Plumber’s Putty
STEP ONE: Inspect your old sink
Before you begin anything, the first thing you should do is take a moment to look under your old sink. You want to see how it is attached as well as inspect the plumbing you will need to disconnect.
Most likely, your undermount kitchen sink is attached by mounting clips, or silicone adhesive. Maybe you have both!
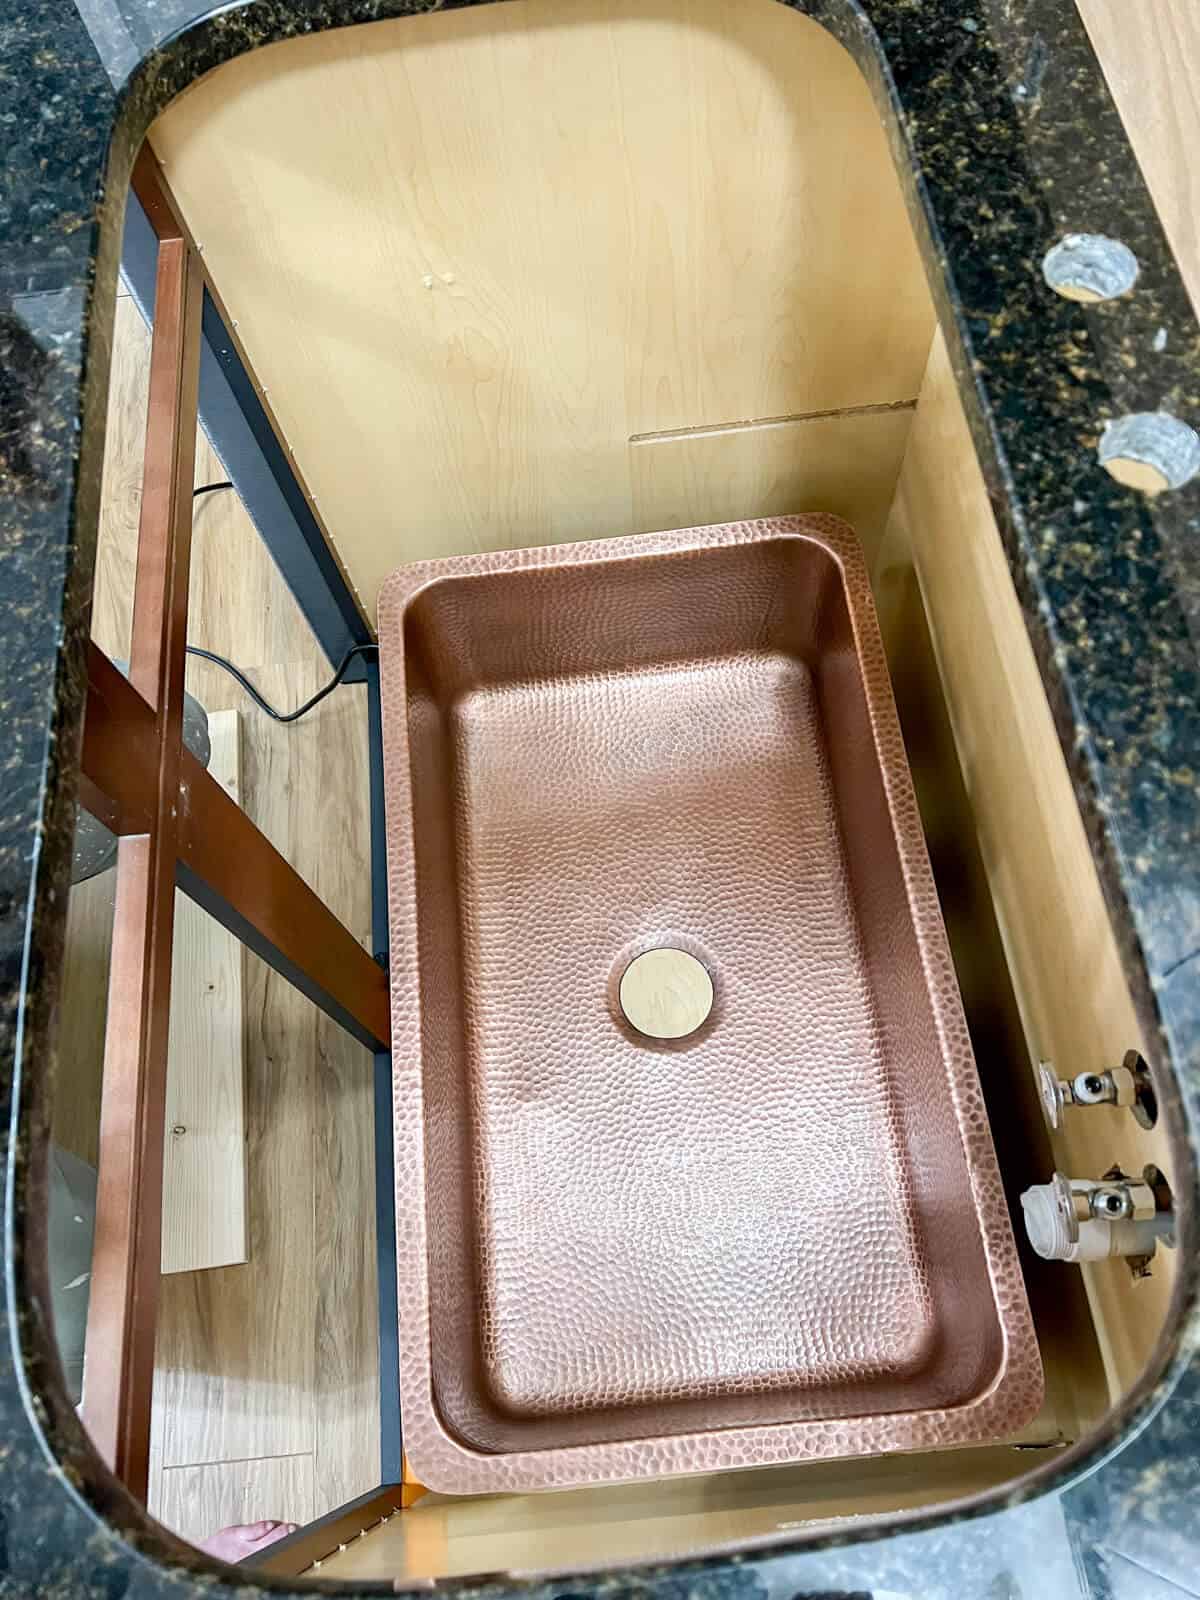
Since we have a granite countertop, we did not have mounting clips, but support mounting brackets made from wood.
Removing the wood brackets won’t be much trouble, but getting all that silicone off was going to take some time.
STEP TWO: Disconnect the Plumbing
Before your remove your existing sink, it is best to address all the plumbing.
So you’ll want to remove the drain pipe, garbage disposal if you have one, and your old faucet if you are replacing that as well.
Hint: Even if you aren’t replacing your faucet, it’s a good idea to turn off the water supply lines.
Since we selected an all in one kit, we were replacing our faucet as well as the old stainless steel sink.
Trent removed all the plumbing and set it aside. If you aren’t sure what to do, it’s best to consult with a plumber if you aren’t comfortable with this step.
We are comfortable with plumbing as we’ve done many of these types of projects in the past. Never underestimate the power of a YouTube videos for great tips from expert plumbers so you could give this DIY a try.
Once you have everything disconnected from the existing undermount sink, we were ready to start the removal process.
STEP THREE: Removing the old sink
Begin by unscrewing the mounting clips or brackets.
Make sure you have someone there to help hold the sink in case the old silicone has already given way.
For our sink, it was stuck on there gooooood!
That required a bit of work to remove it from the underside of the stone.
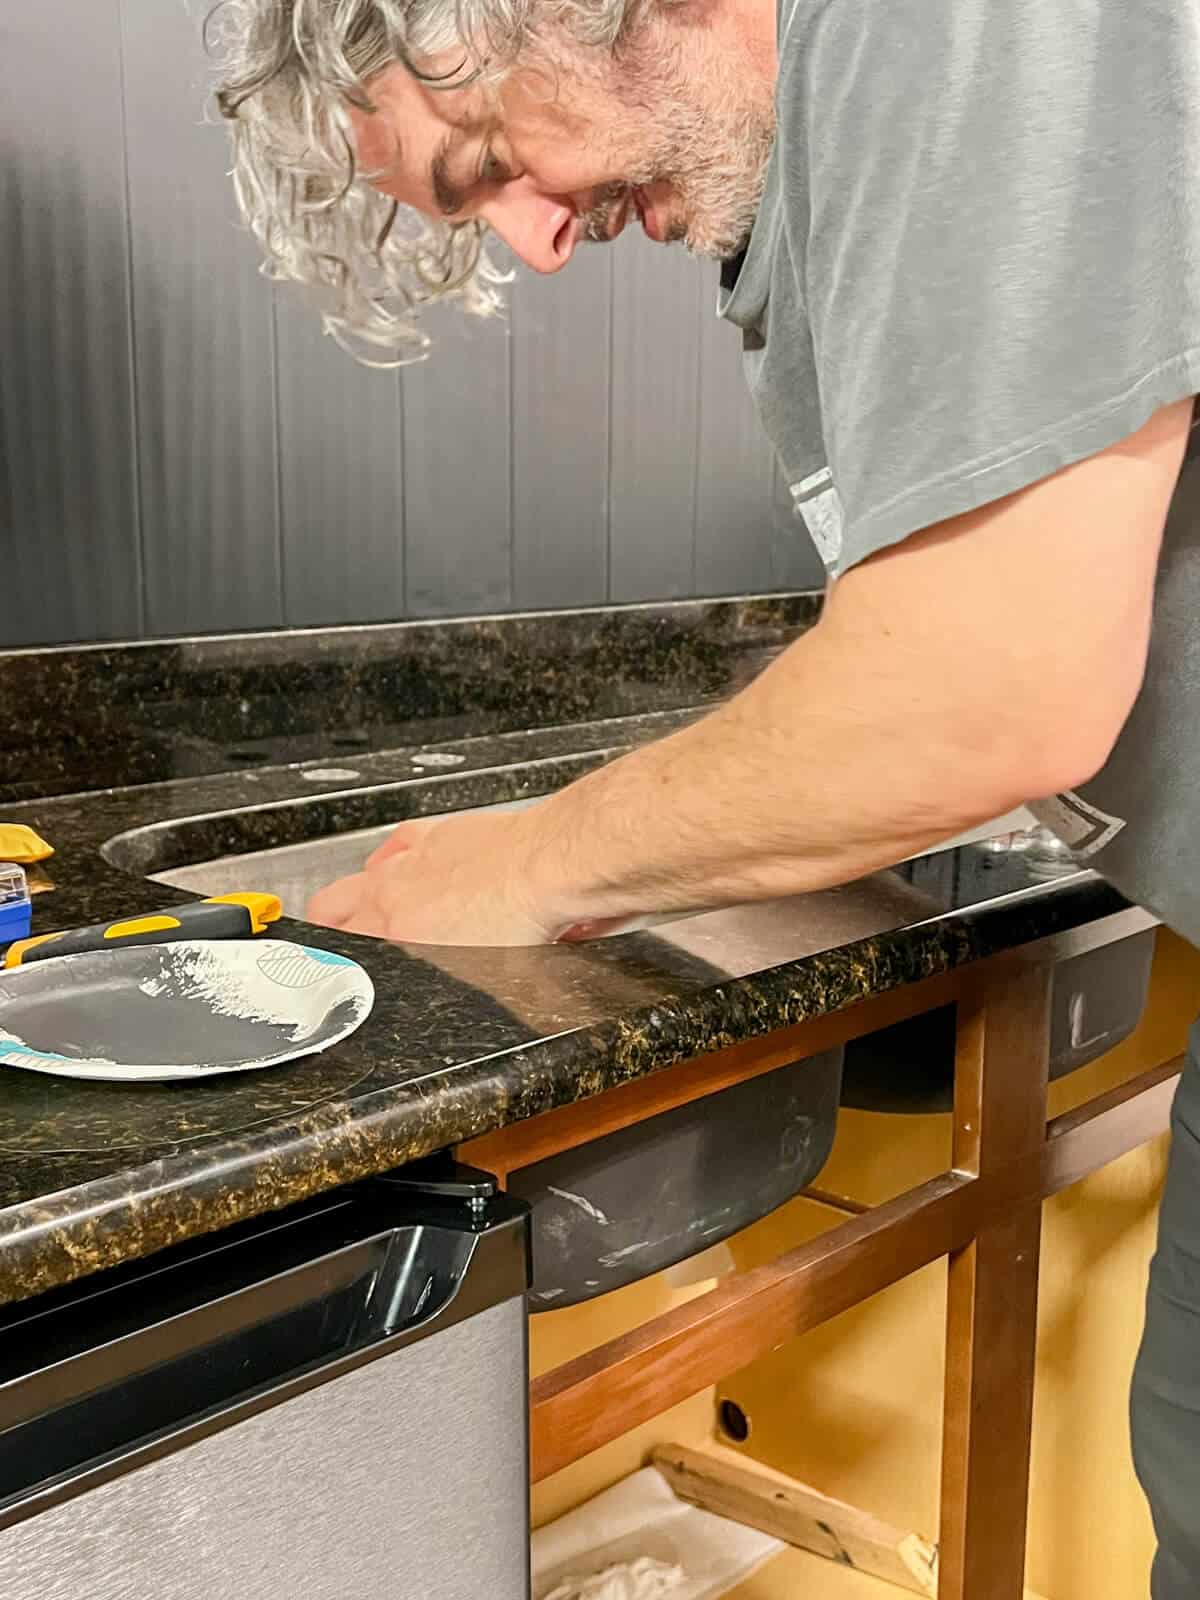
I started with a utility knife and carefully started cutting away at the silicone.
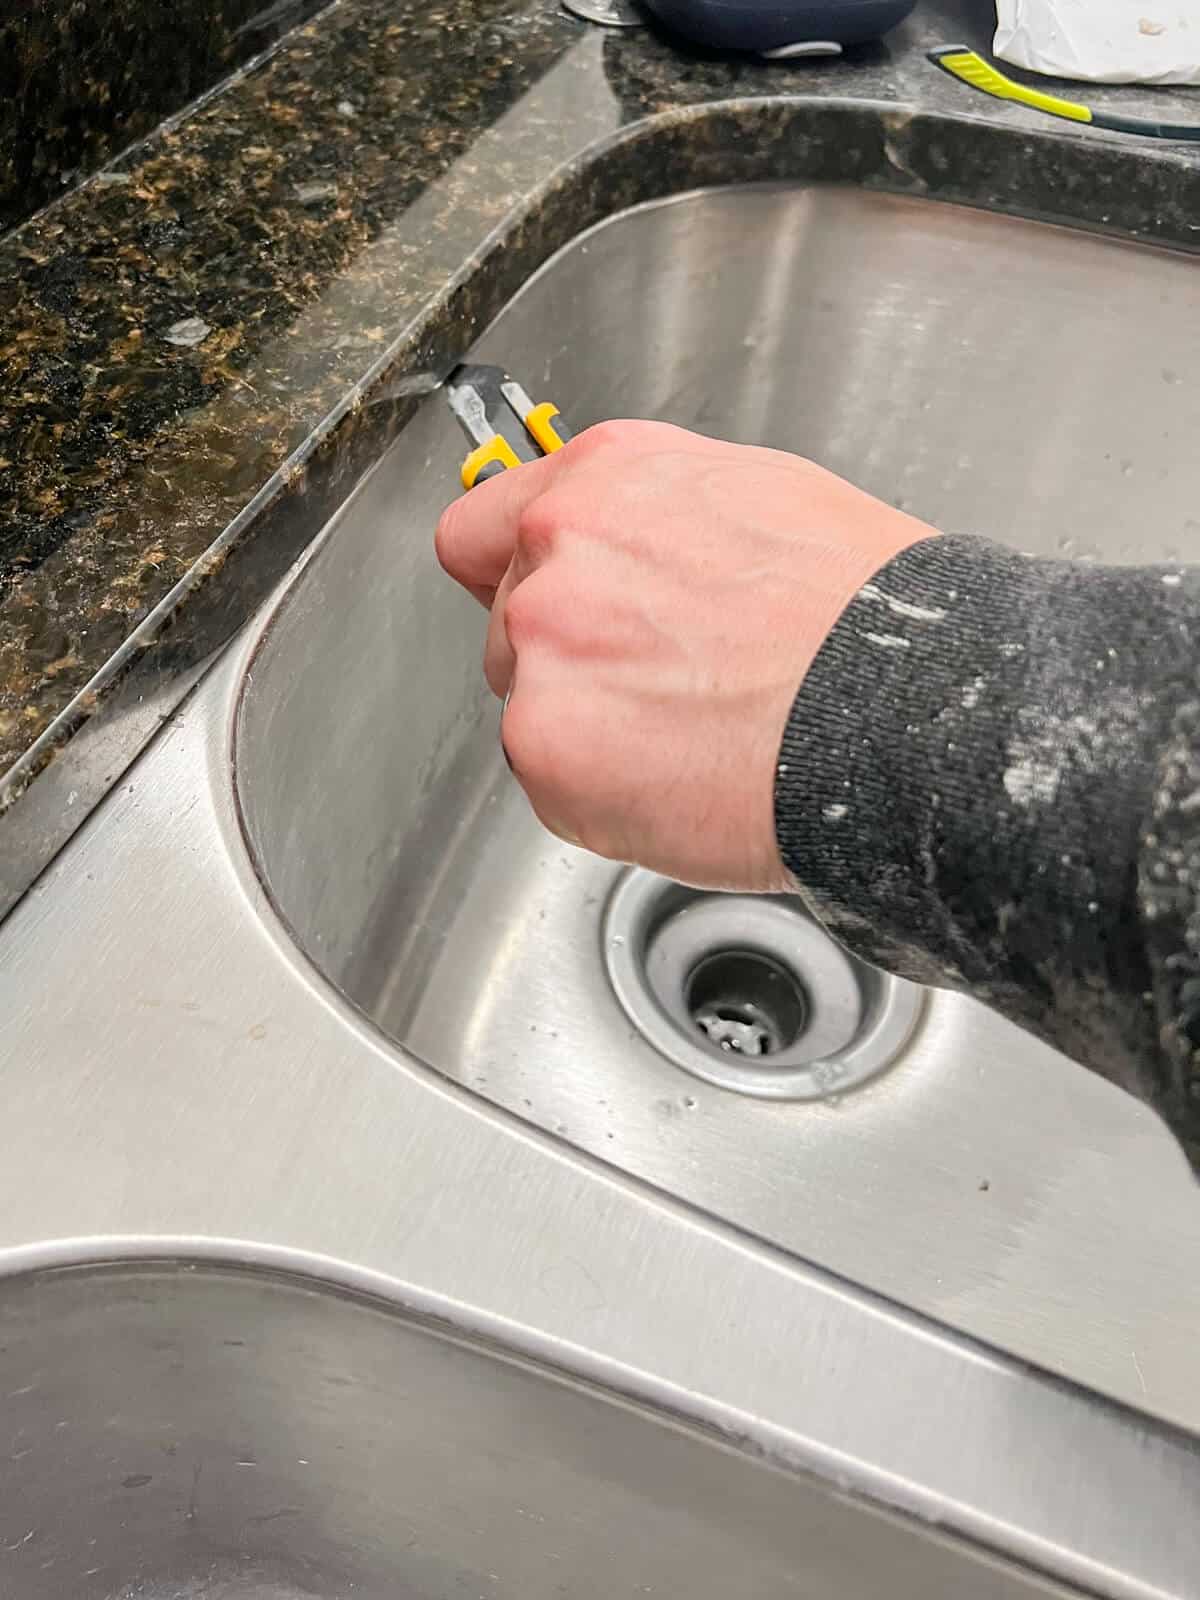
Now lemme tell ya, this took a lot of time – about 45 minutes.
Mainly because we are hoping to repurpose the existing undermount sink as a utility sink one day so we were doing our best to not damage the old sink.
Just take your time and carefully run the blade between the sink’s rim and the sink cutout in your counter.
Hint: Take note of the types of counters you have when cutting. Wood counters can easily be damaged by the blade unlike a quartz countertop or granite counters.
Trent’s face says it all!
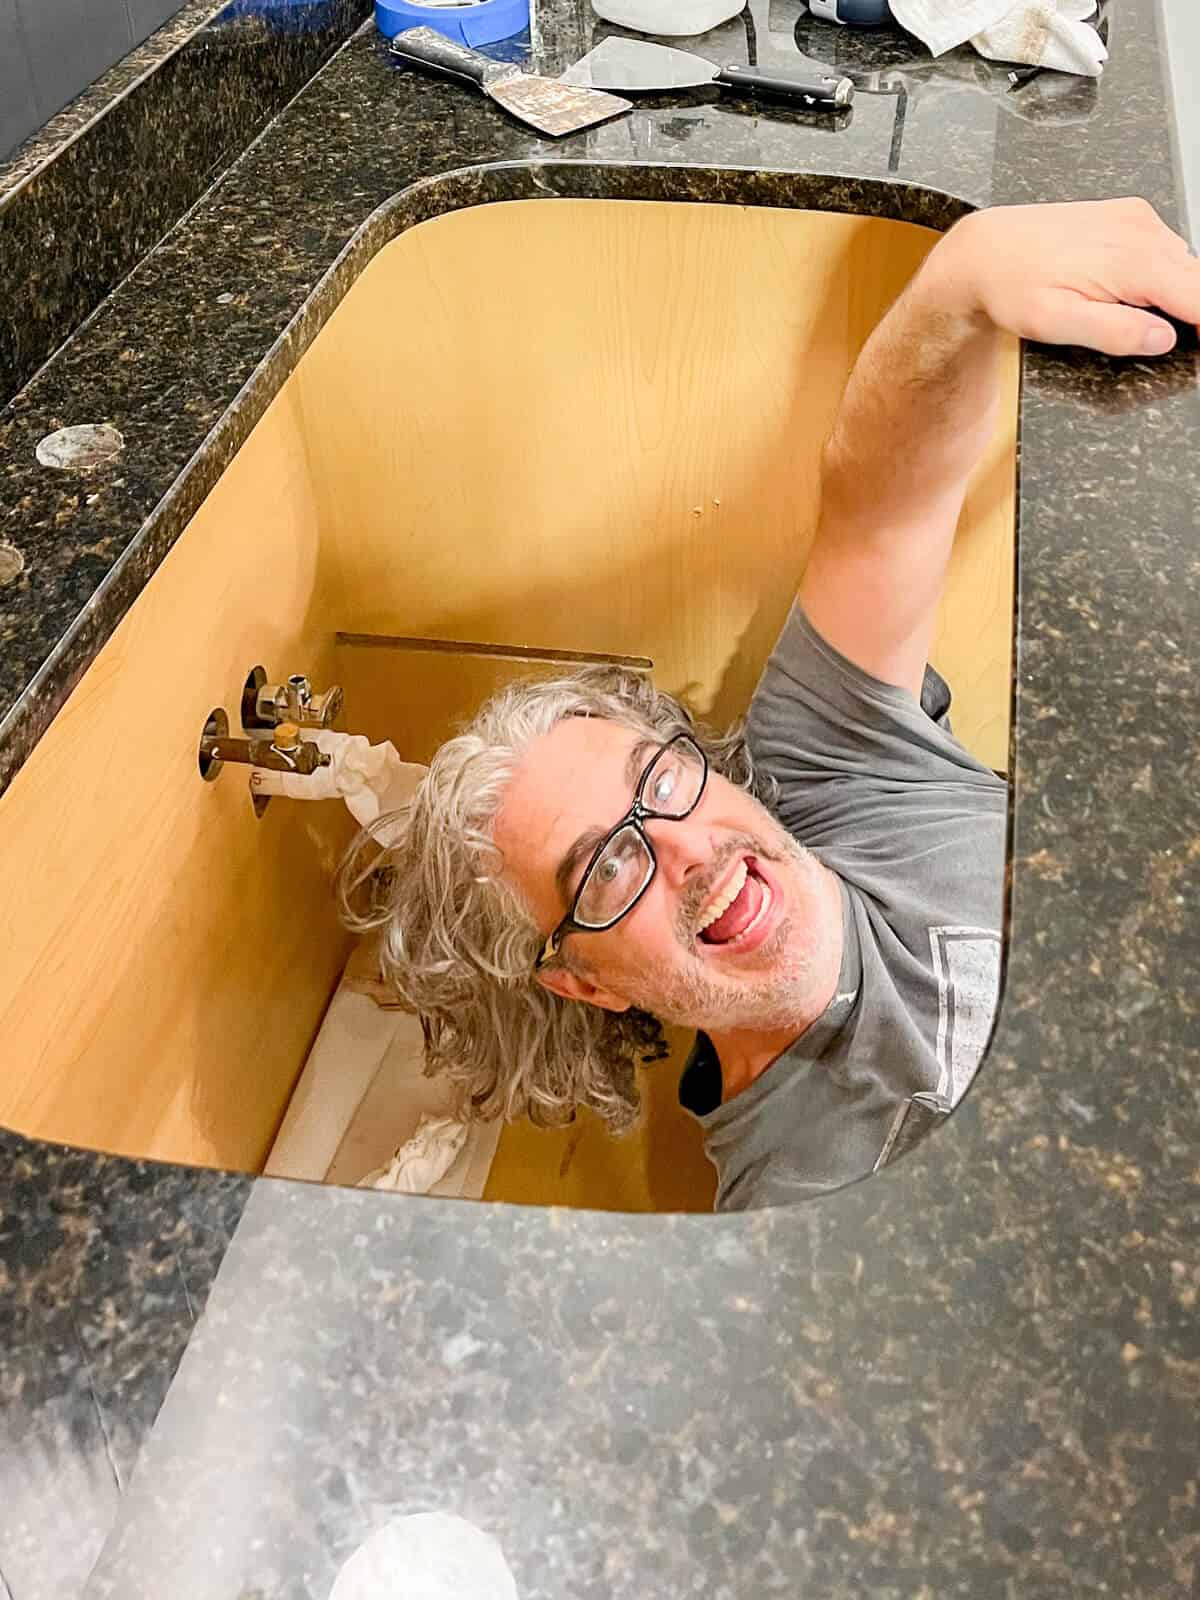
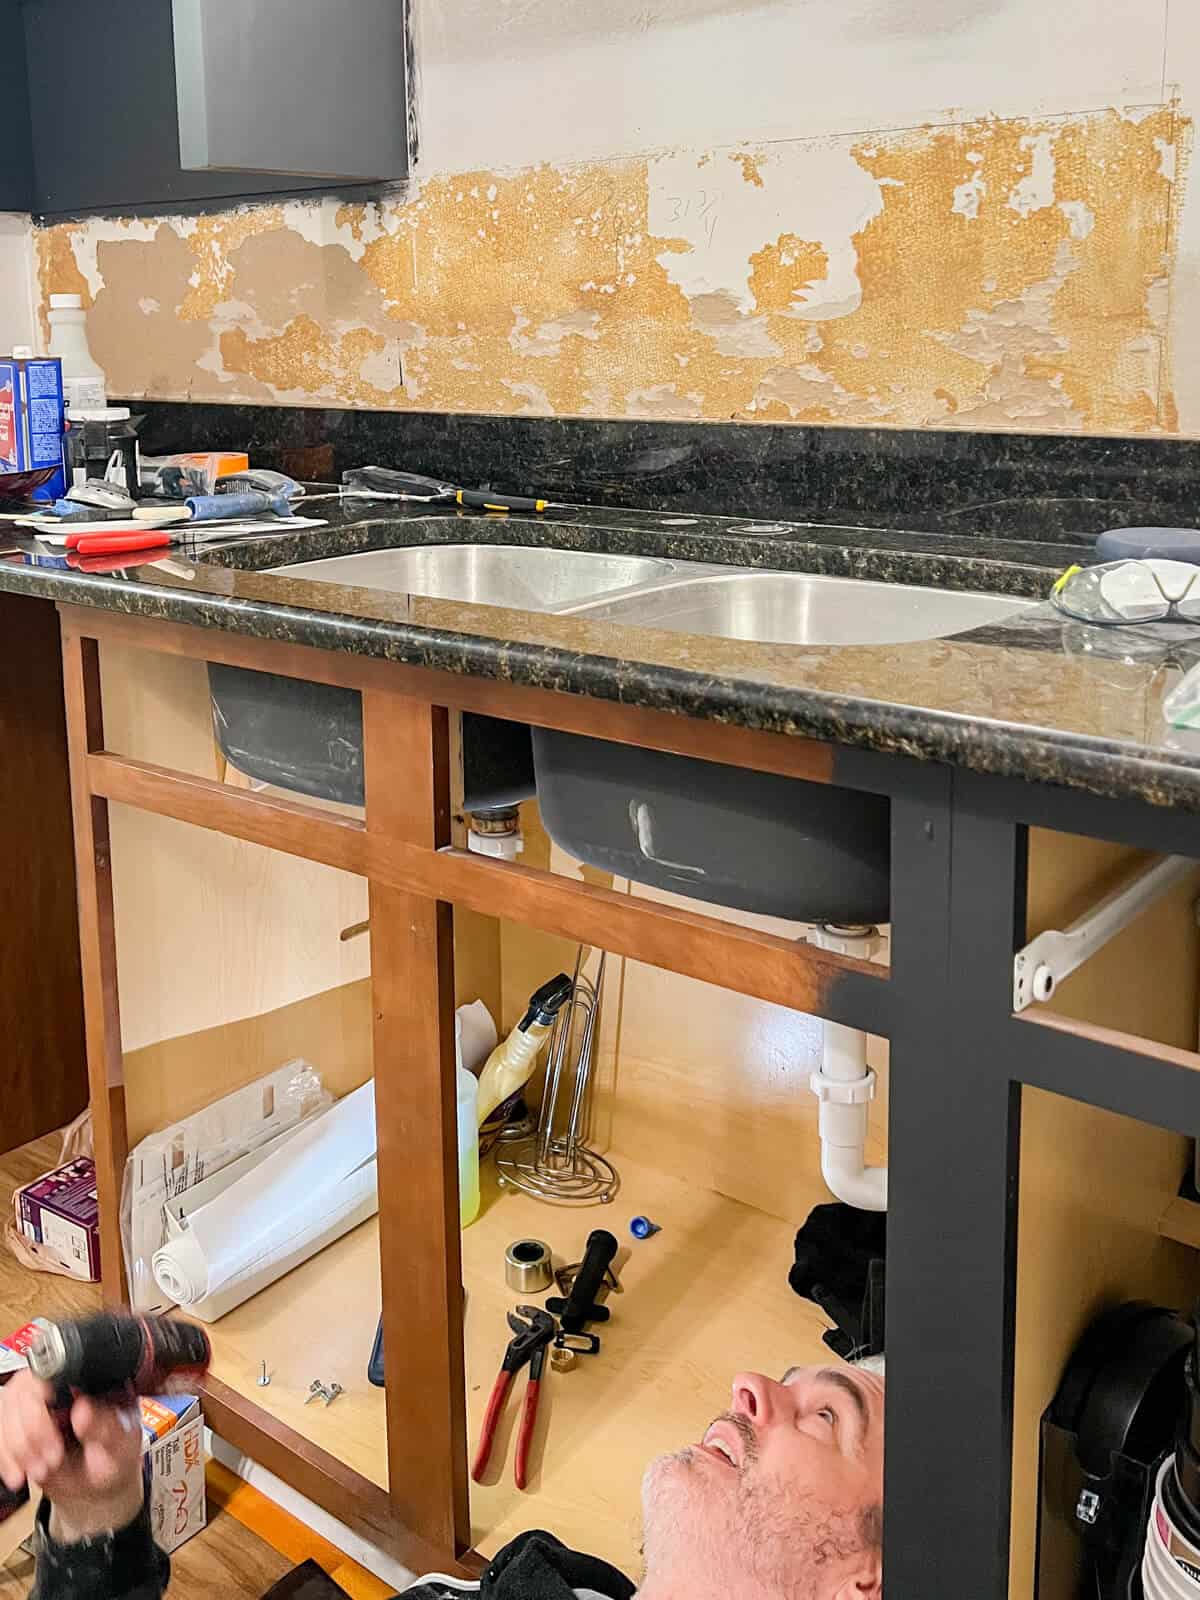
We were so happy to finally see the old sink gone!
But we still had to deal with the leftover silicone residue from the underside of the countertop.
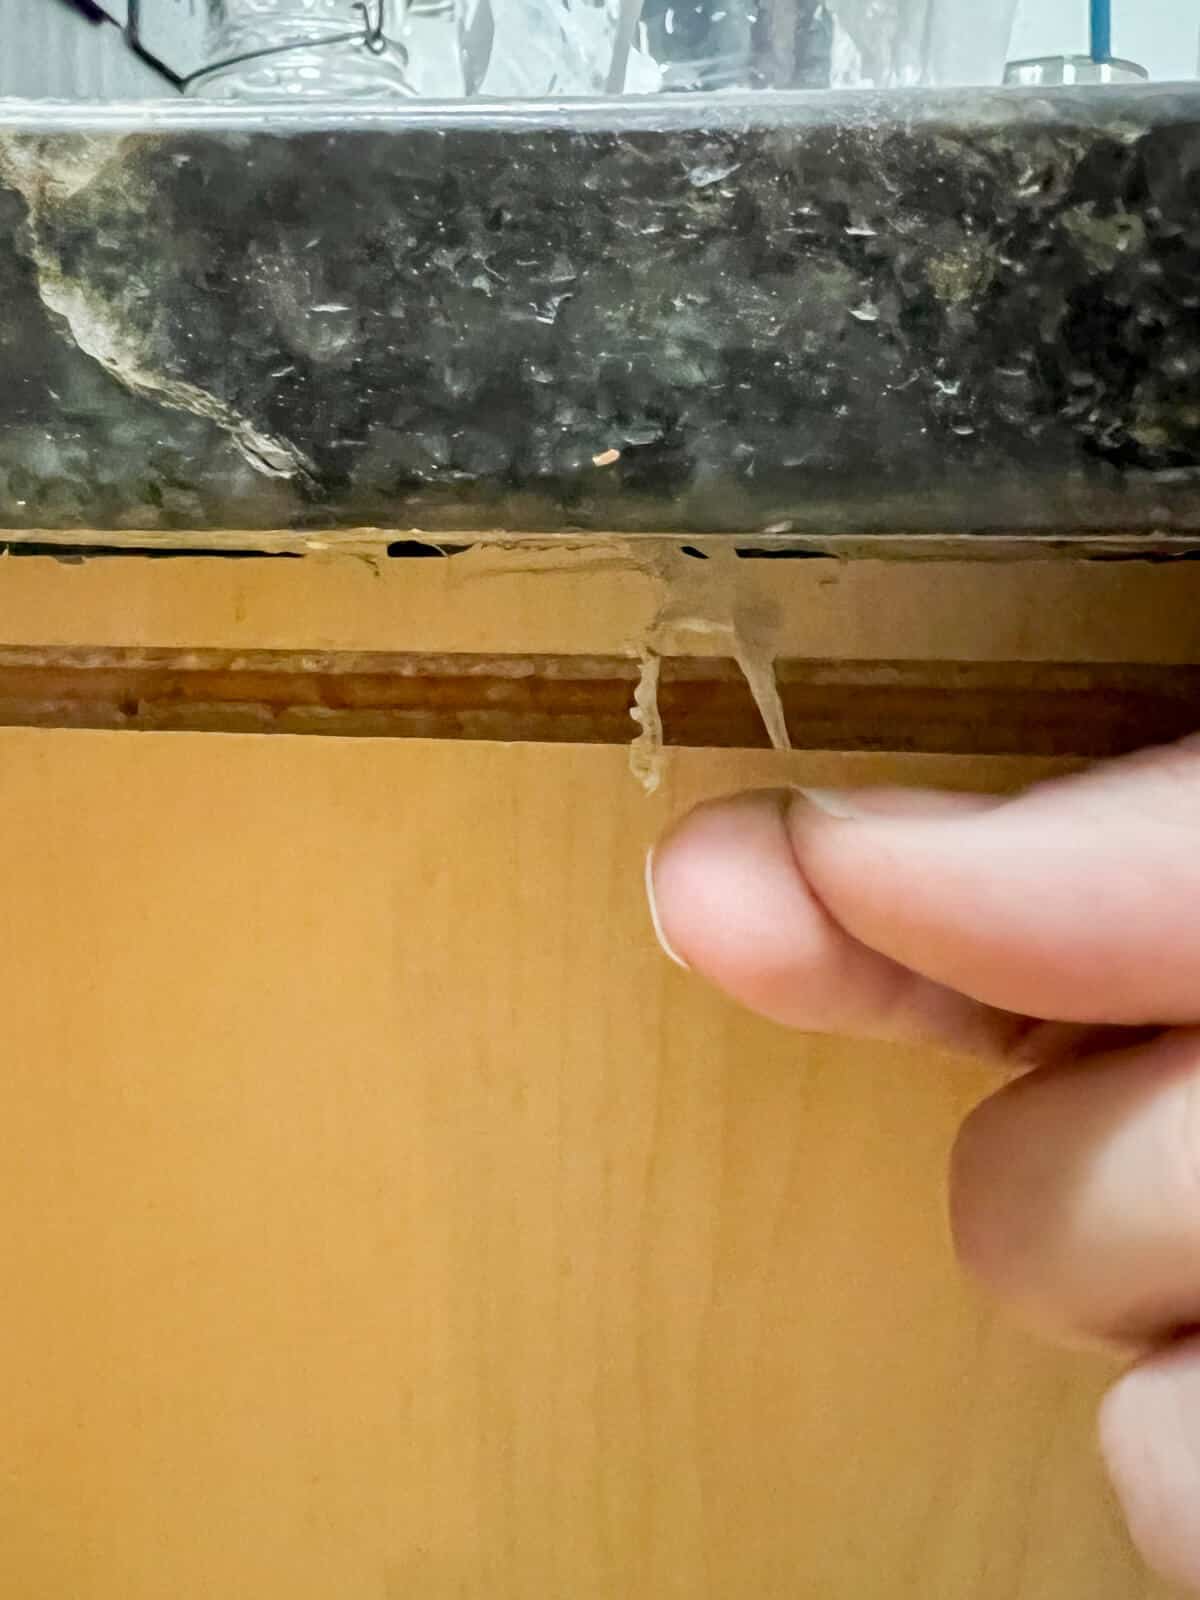
You want to have a clean surface before the replacement undermount sink installation begins.
We used a putty knife to scrape as well as some acetone to remove the old adhesive.
Now you are ready for the new kitchen sink installation!
STEP FOUR: Undermount Sink Installation
Plumbing is disconnected, the water lines are turned off, the removal of the current sink is finished and now you are ready for the new sink installation!
One thing we found super helpful was using a tutorial. Sinkology has partnered with the Bilt App that provides step-by-step support and installation instructions for a new sink installation.
The best thing we found with this app were the supplies needed. We realized we forgot one part (plumber’s putty) and made sure to run to the store to make sure we had everything on hand.
Now our counters were already cut and polished from the granite contractor, but the Bilt app gives instructions on how to cut the sink hole if you are working new counters as well as any tools needed!
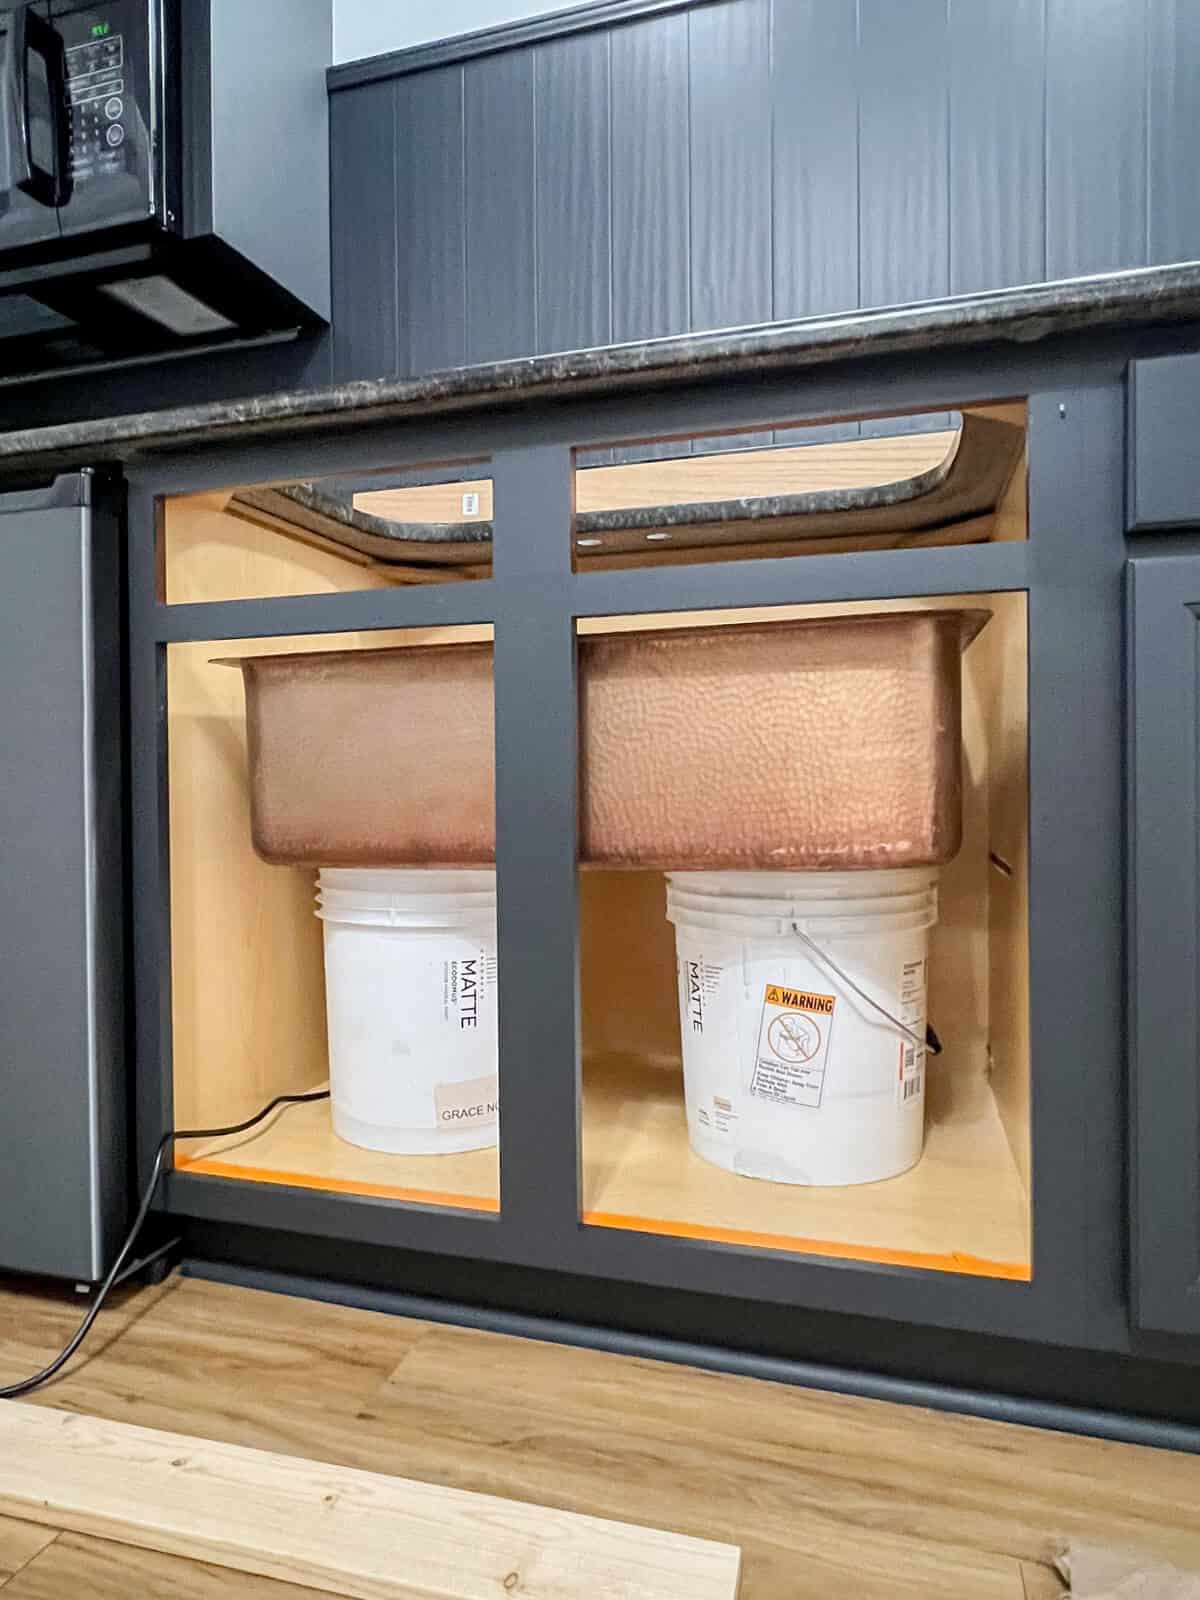
We started by placing the sink in the cabinet resting on top of some buckets to make it easier to grab when it came time to lift into place.
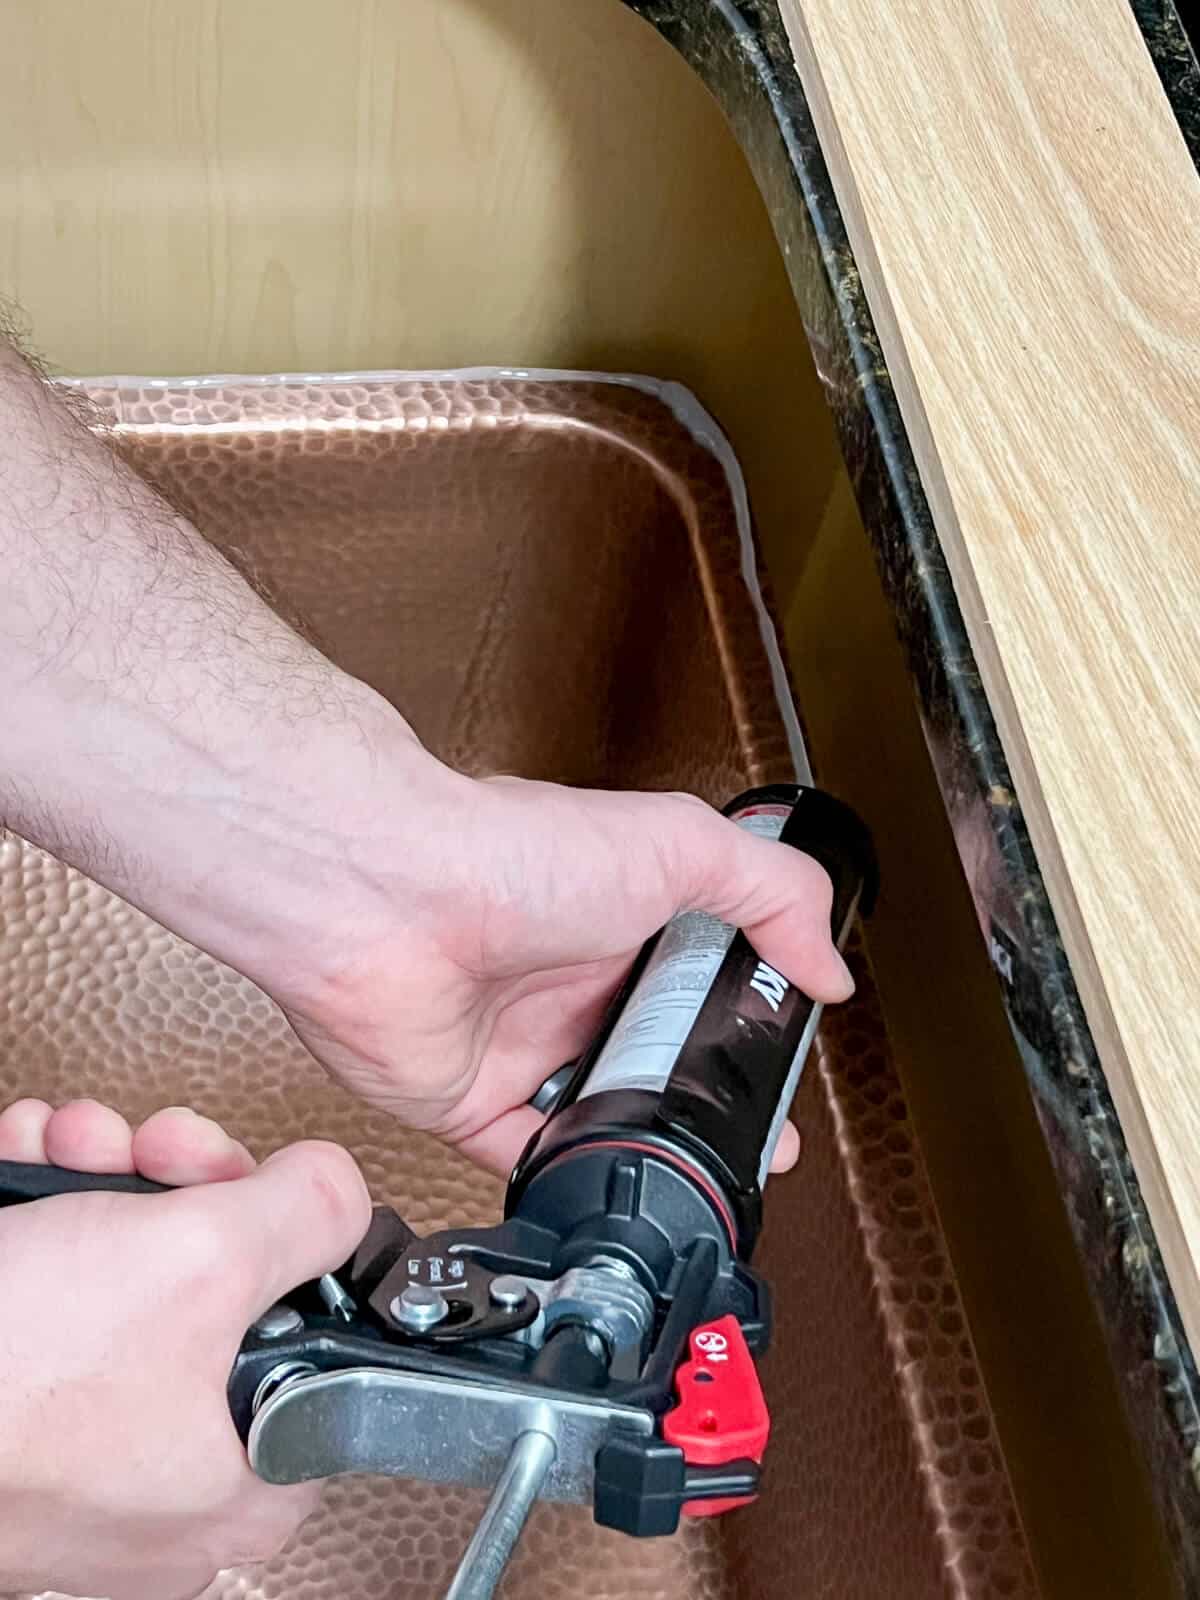
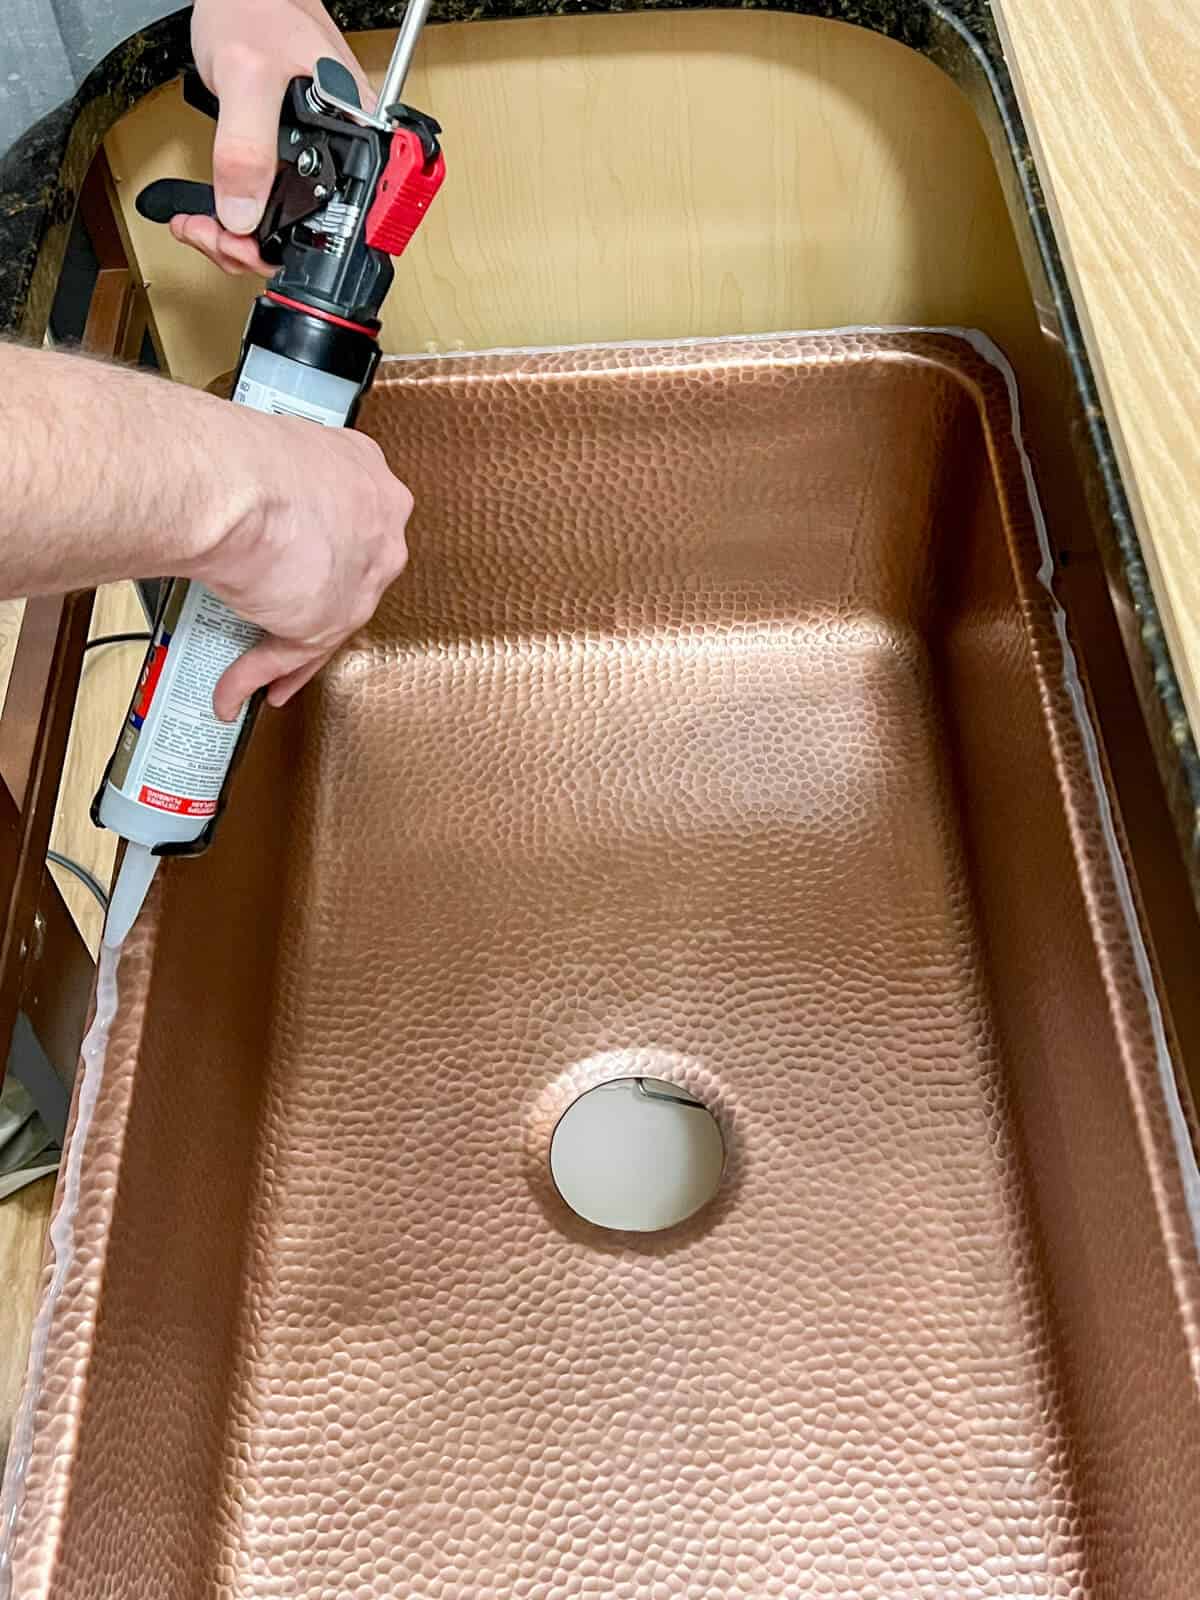
Next, you want to take caulk gun and carefully apply a bead of silicone caulk around the rim of the sink.
Make sure to not apply too much so it doesn’t ooze back out into the sink area. Trent focused on applying it to the back edge of the sink lip.
For this next step, it’s good to have a helper. It’s the best way to ensure that you are even on all sides.
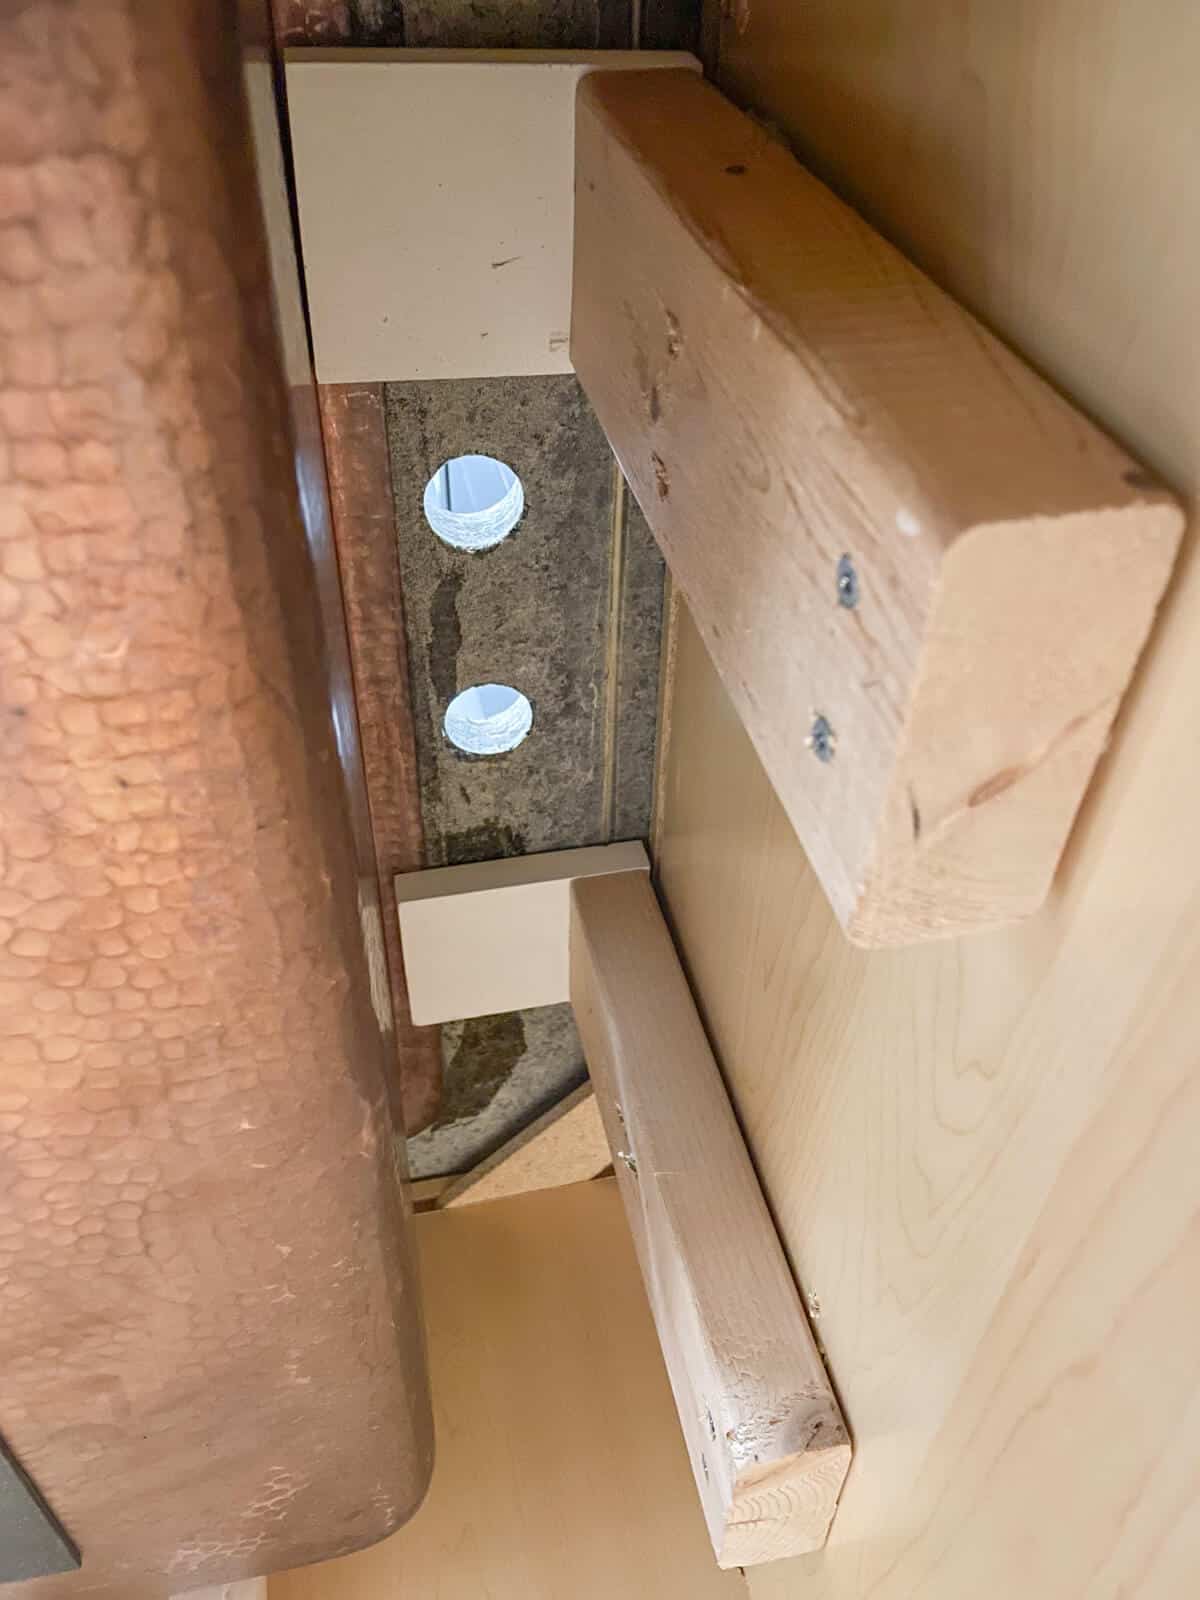
Since we couldn’t use those mount sink clips, we came up with a way to allow the silicone to set overnight.
Trent lifted the bowl in place while I fished a bar clamp into the drain hole.
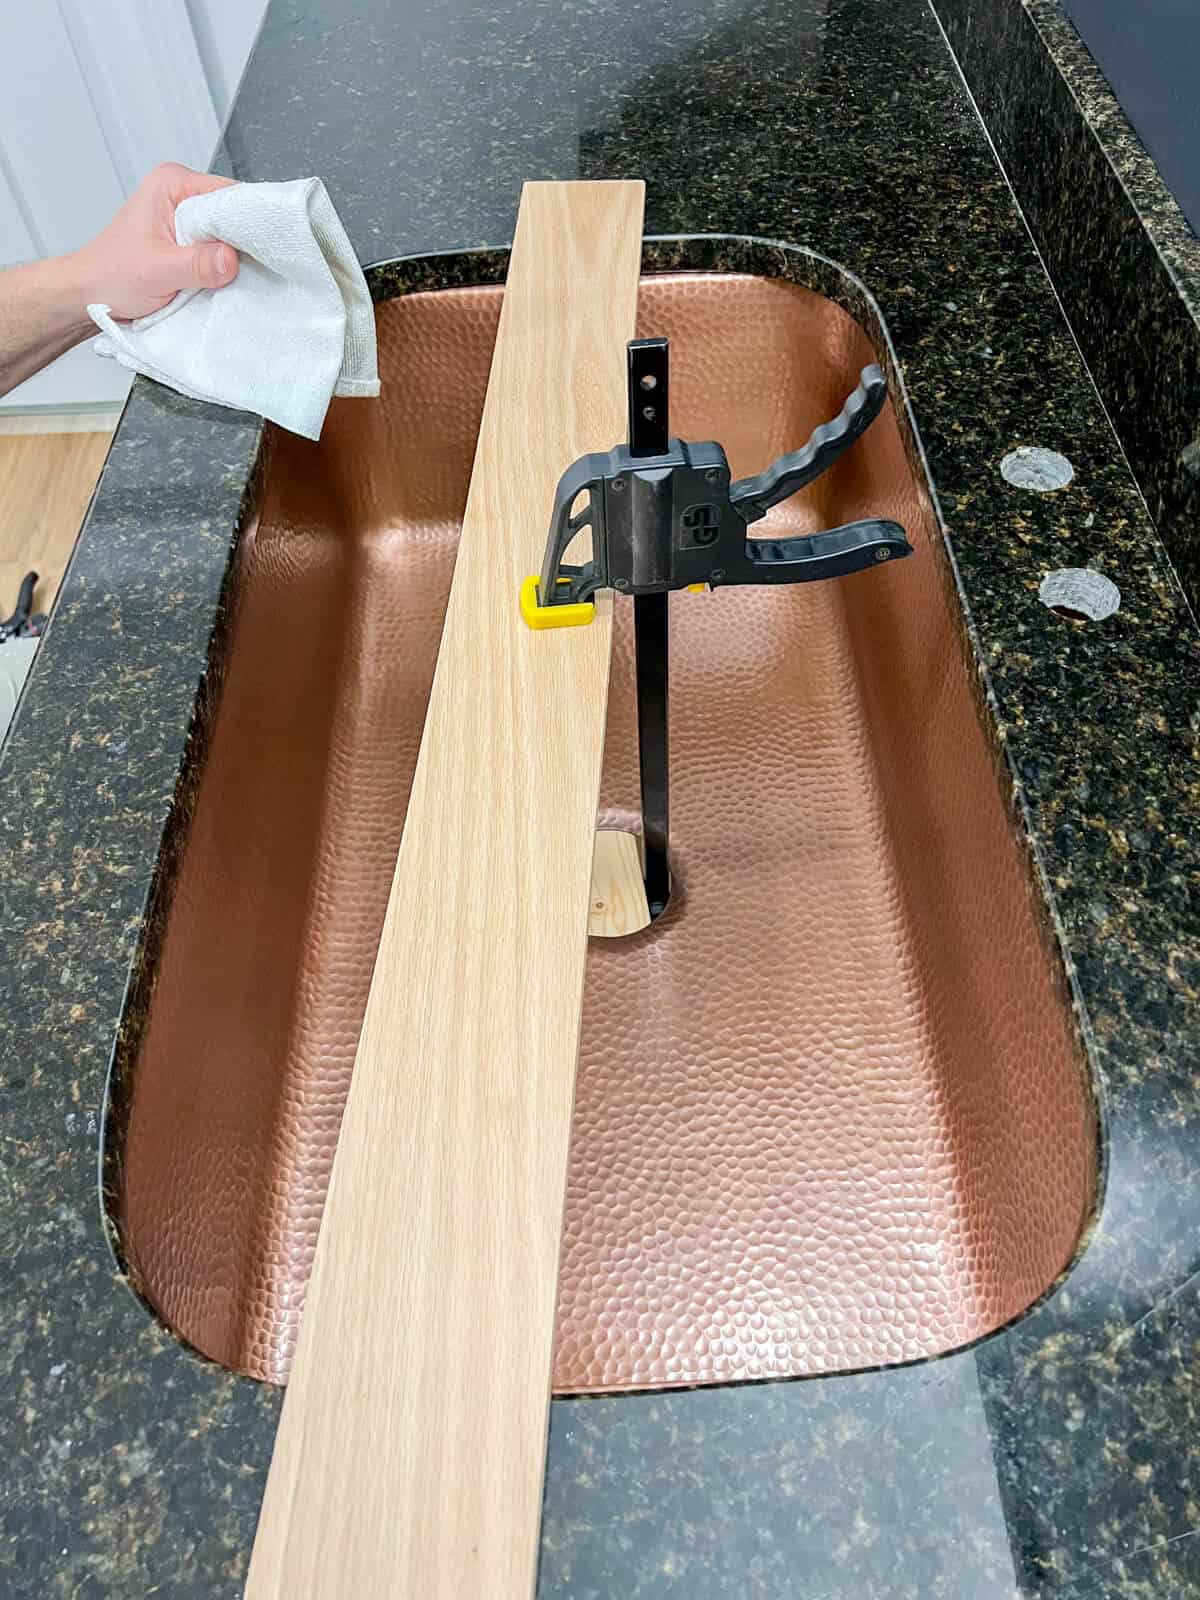
We used a long board running across the top of the counter for one side of the clamp.
On the underside, we didn’t want to clamp directly to the sink bowl so we used another, smaller piece of wood for a solid surface.

Don’t fully tighten the clamp until you have it set it in place.
You don’t have a long time before the silicone adhesive sets up, so make sure it’s in place and level and even on all sides.
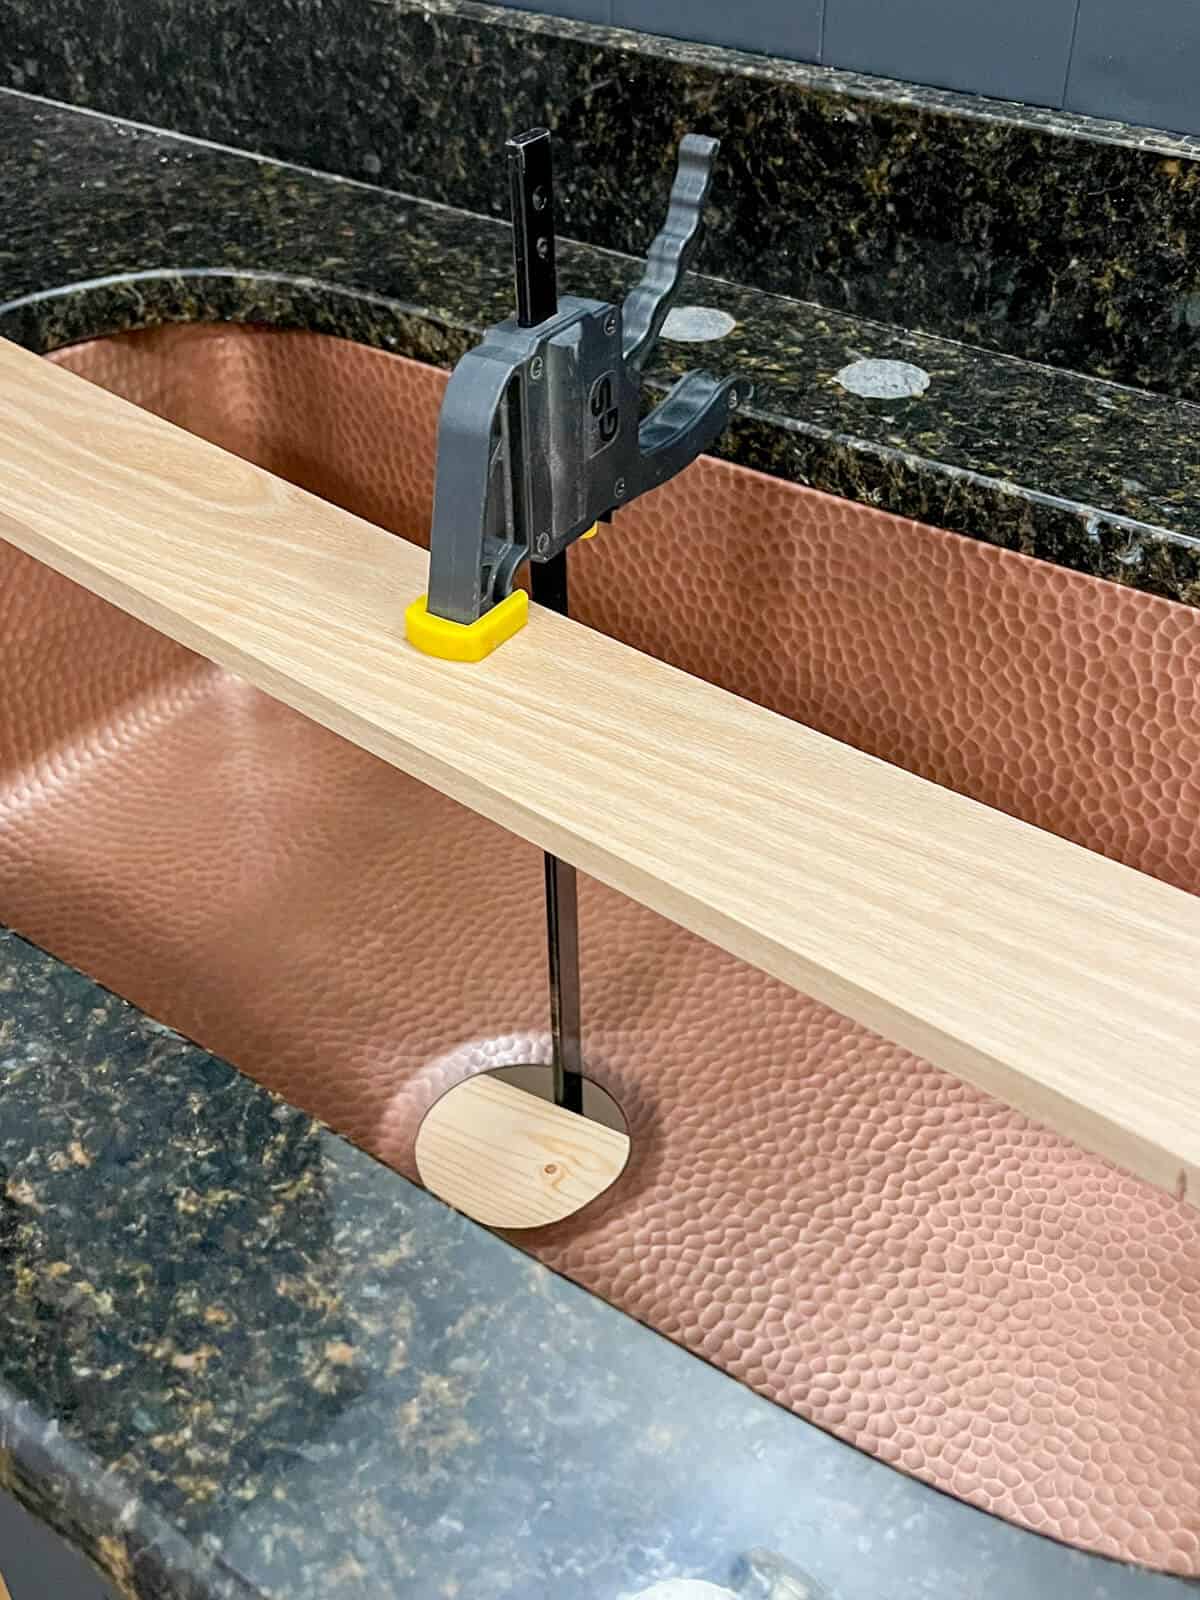
Once you have it set, tighten the clamps and let it dry overnight. Make sure to wipe away any excess caulk that may have oozed out.
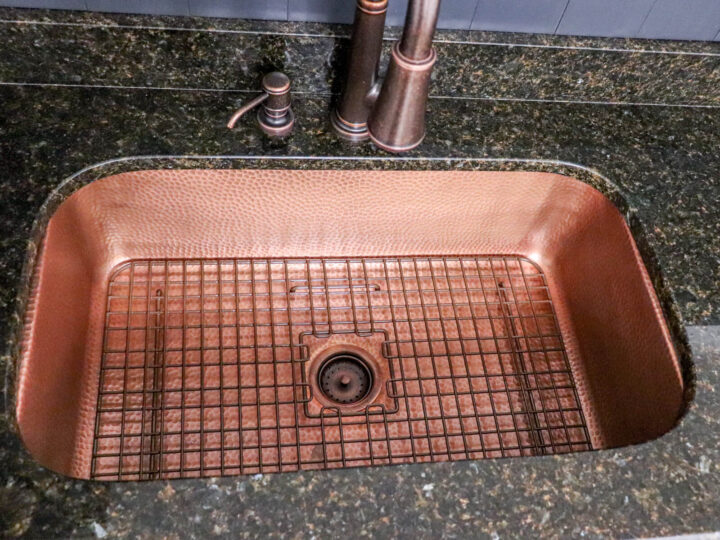
Since we have a single basin sink, we just used one clamp. But if you are installing a 2 basin sink, I suggest running clamps through both drain holes.
STEP FIVE: Mounting the Sink
Once your silicone has fully cured, you can install mounting clips or blocks that support the sink’s rim.
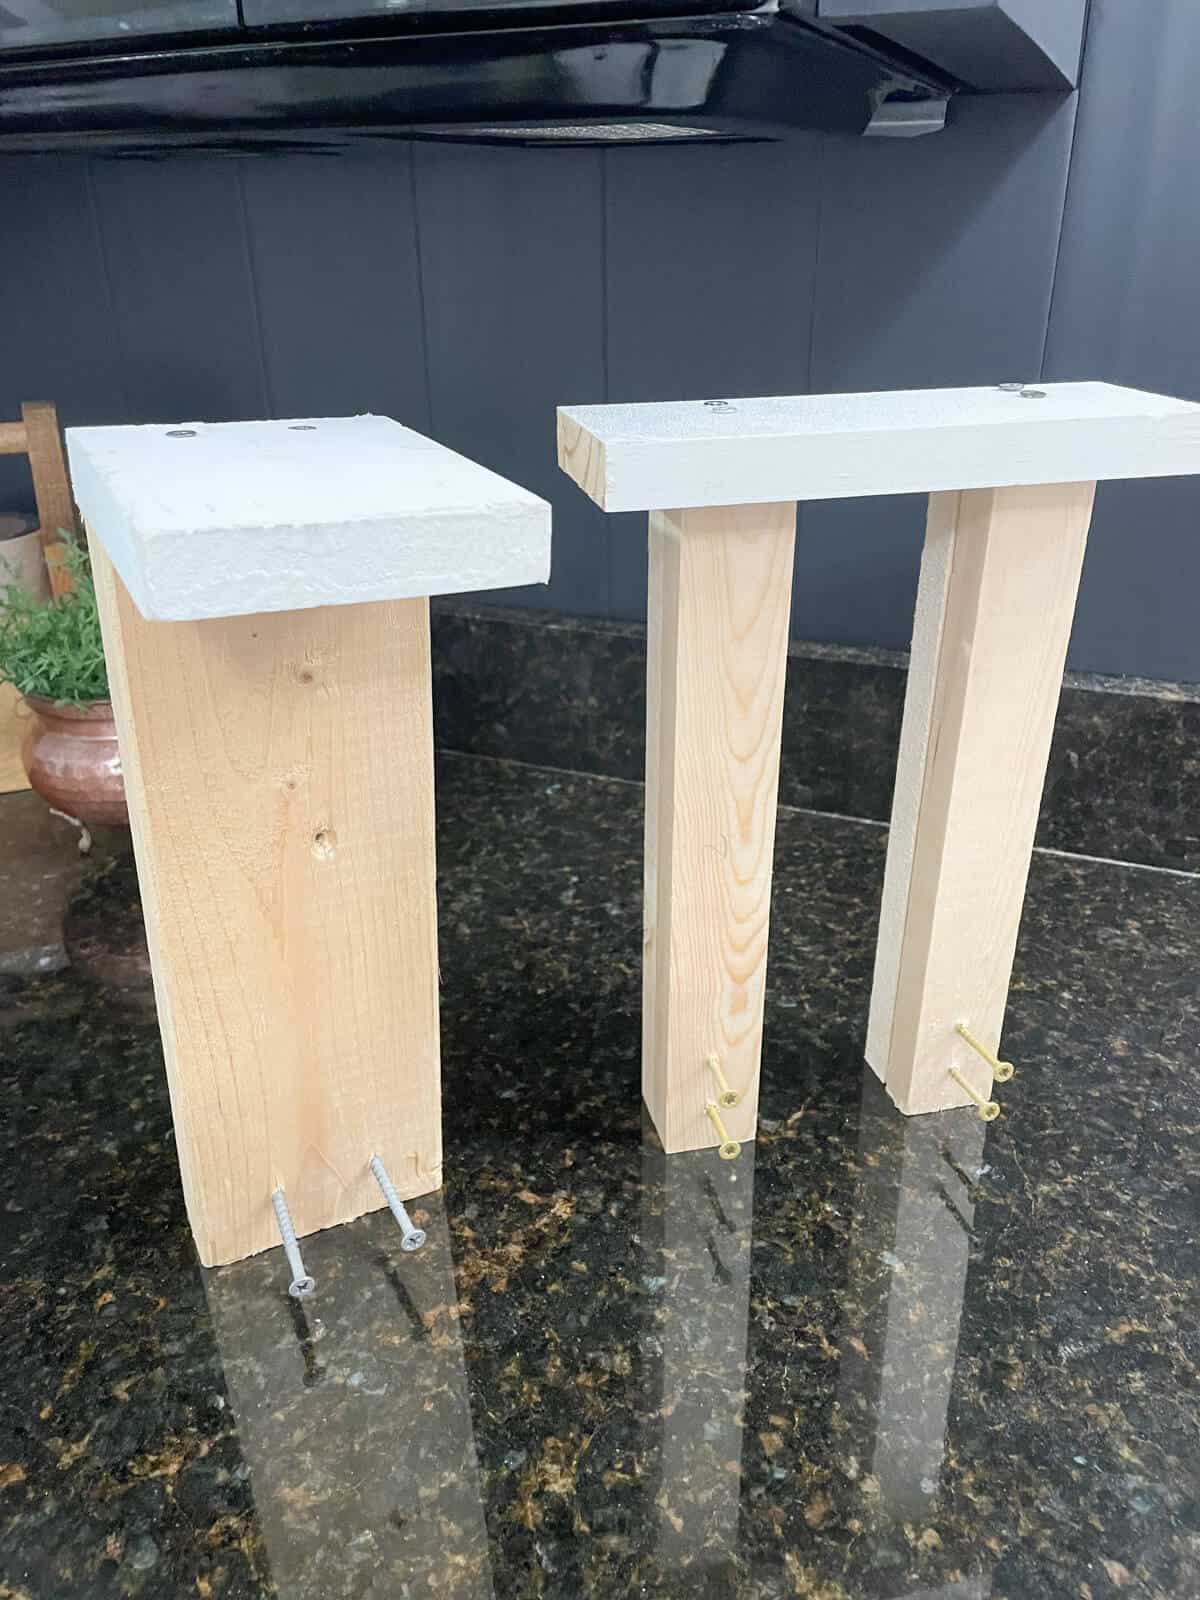
One thing we noticed with the removal of the old sink was that it was held in place by wood supports.
So Trent built these supports out of wood blocks to run along the side of the sink as well as the back.
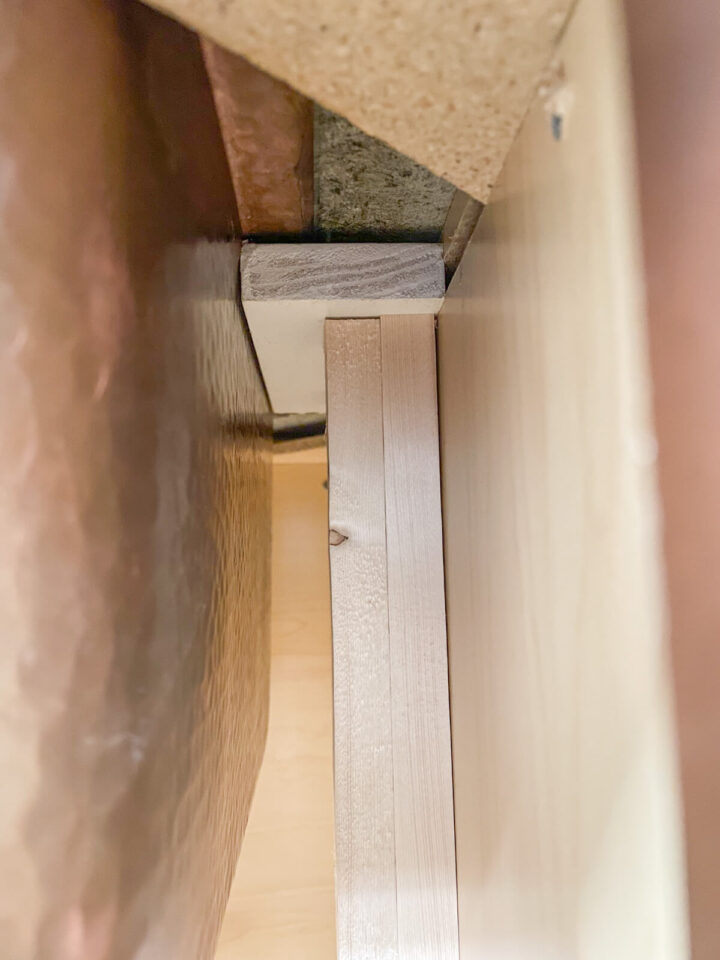
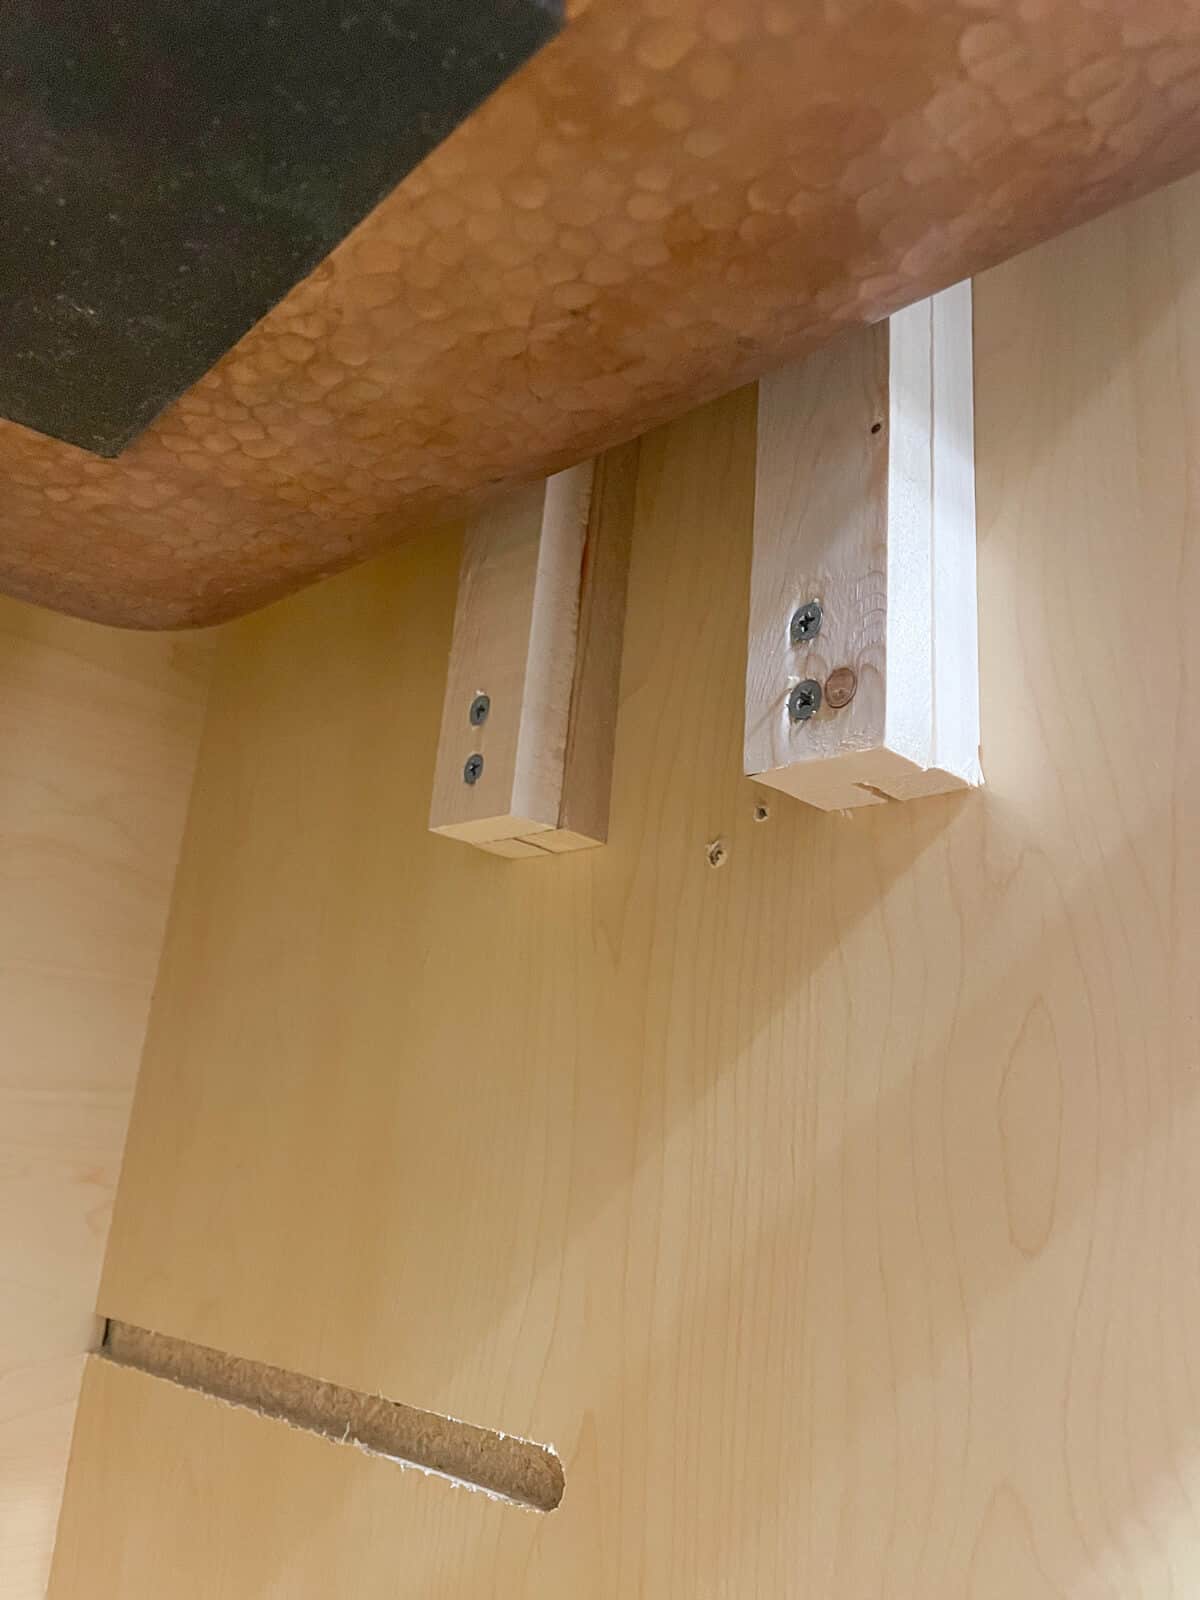
You want to make sure it’s wide enough to support the sink rim as well as long enough to be able to attach them using a power drill.
One thing to note when installing support blocks across the back, leave enough room for the faucet to easily be reinstalled.
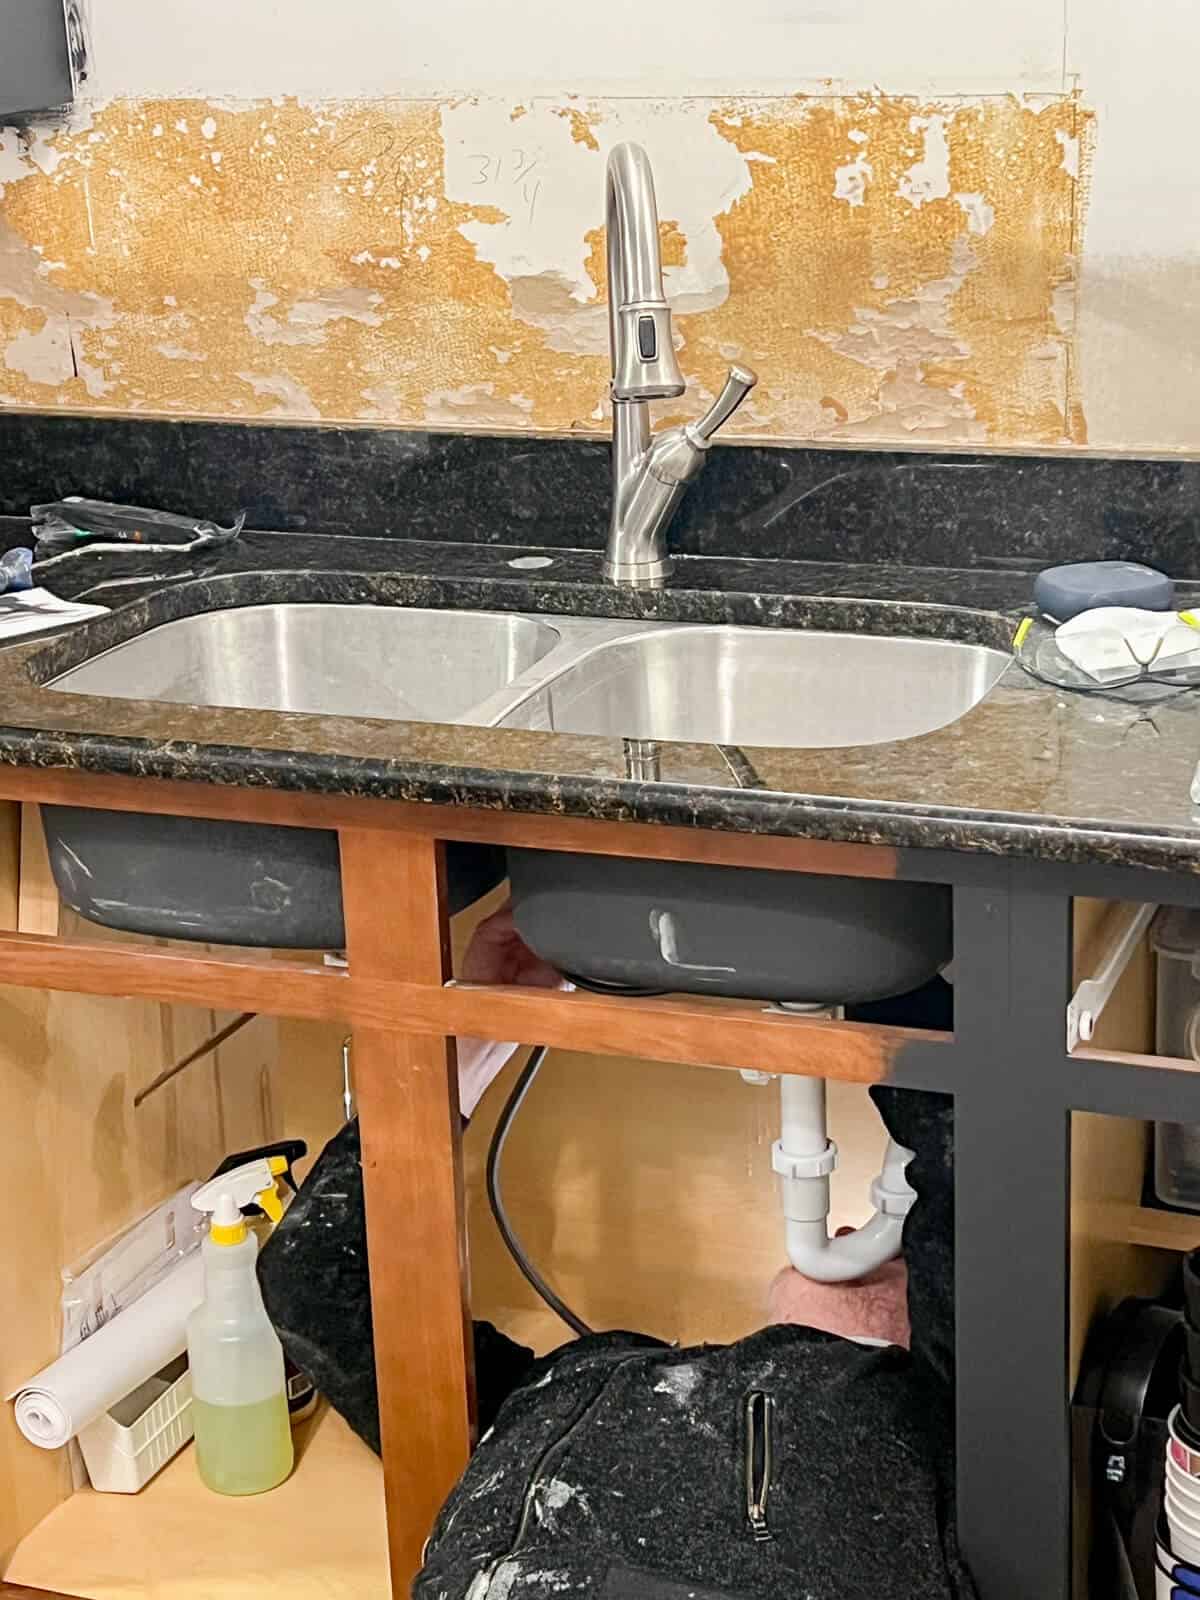
STEP SIX: Reconnect the Plumbing
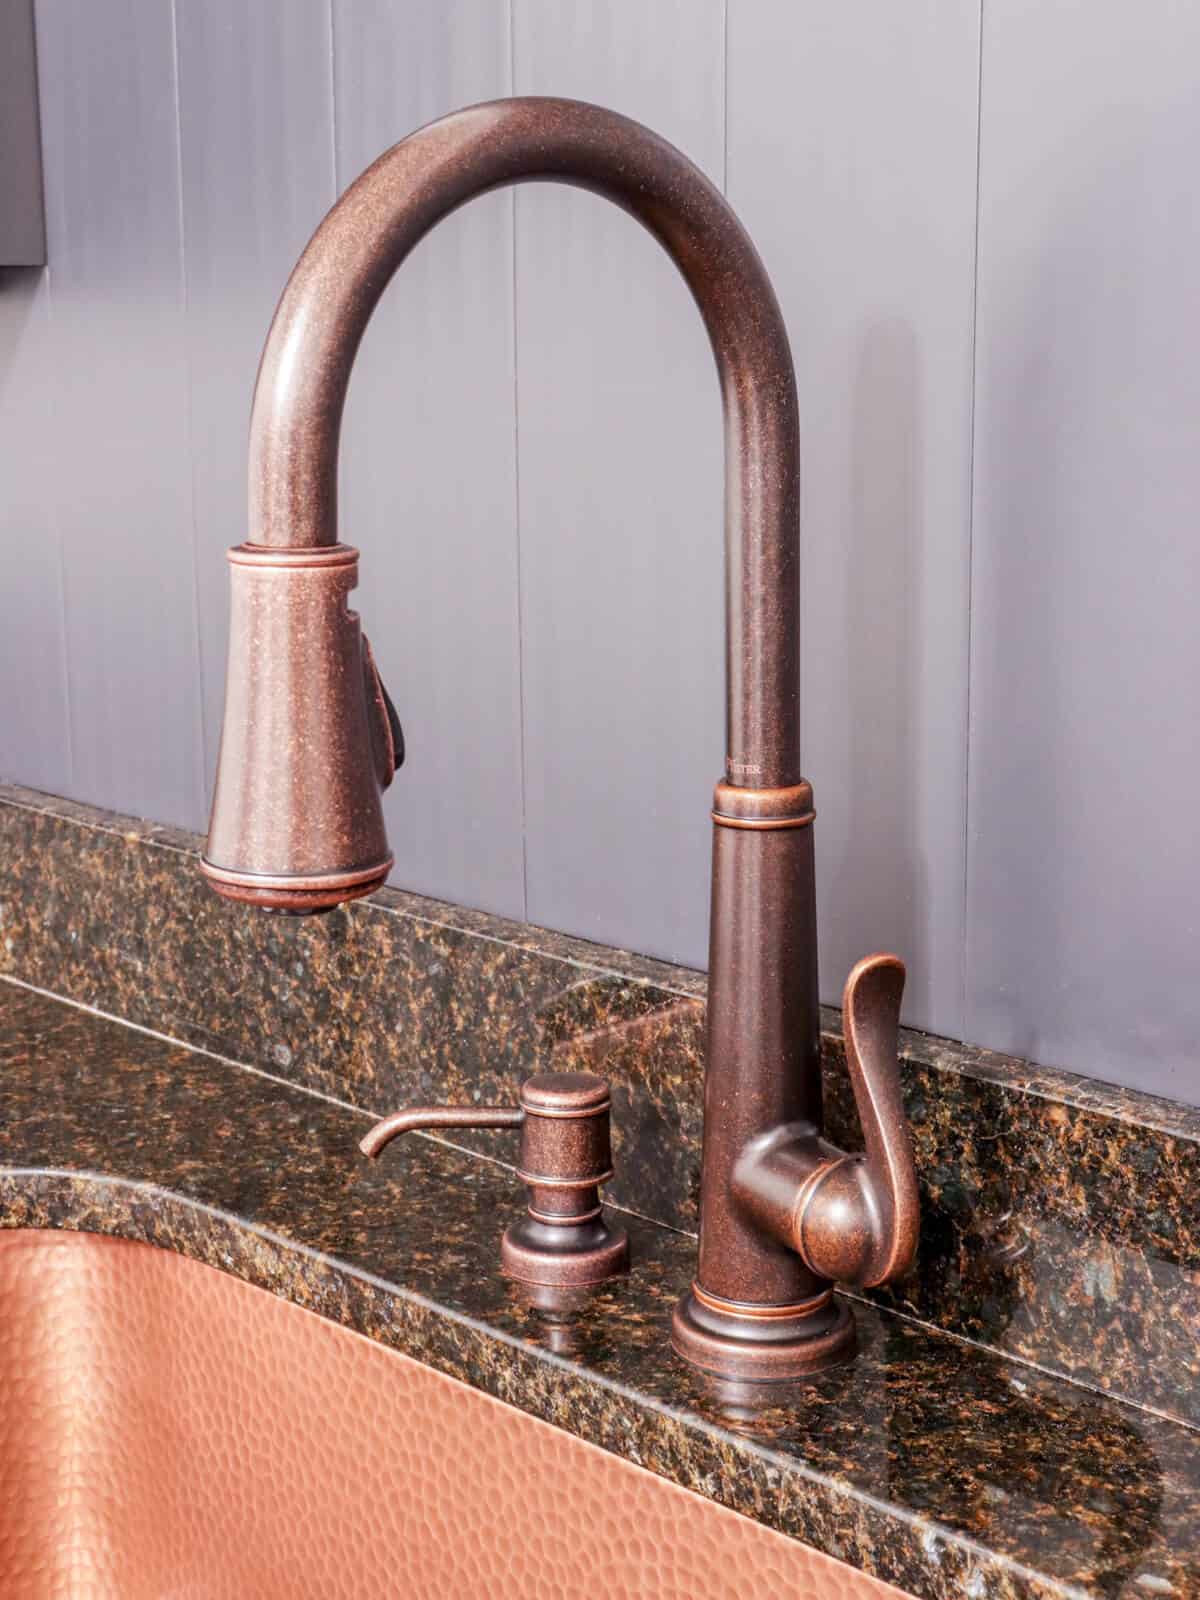
Once you fully installed your sink, reconnect the plumbing.
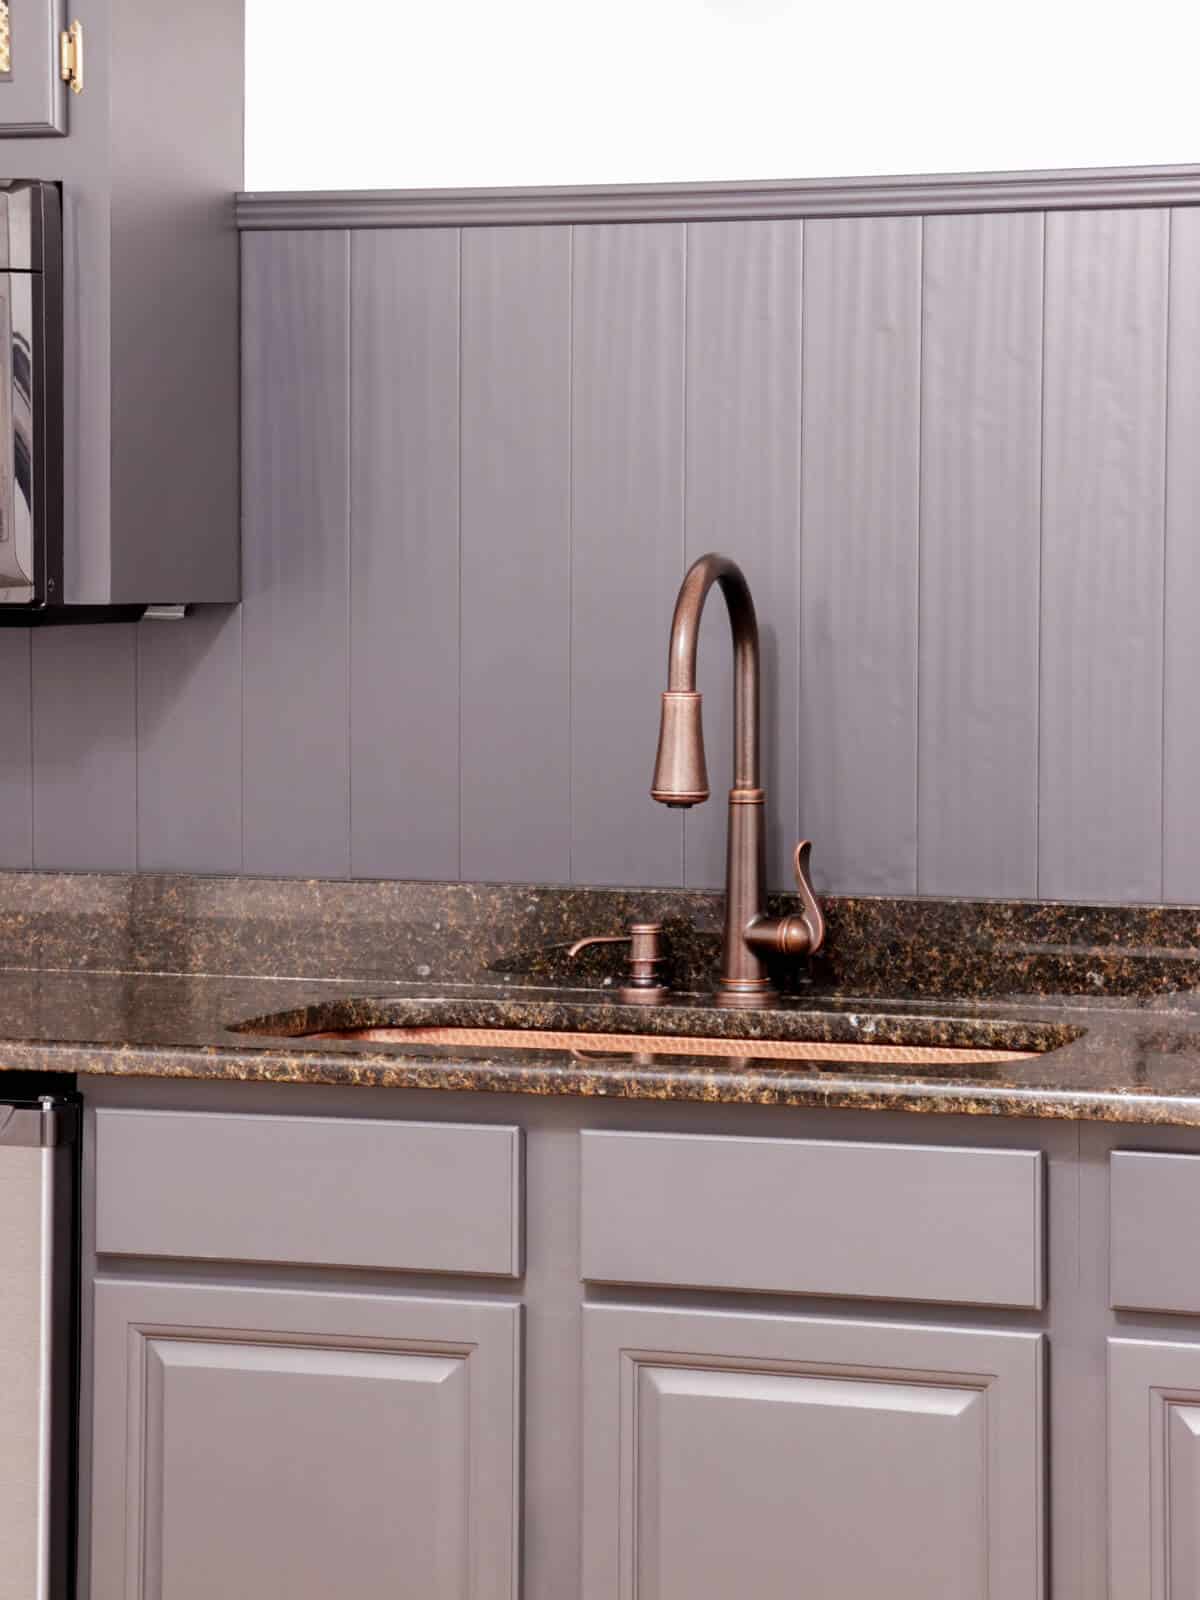
For us, that included this gorgeous new faucet by Pfister!
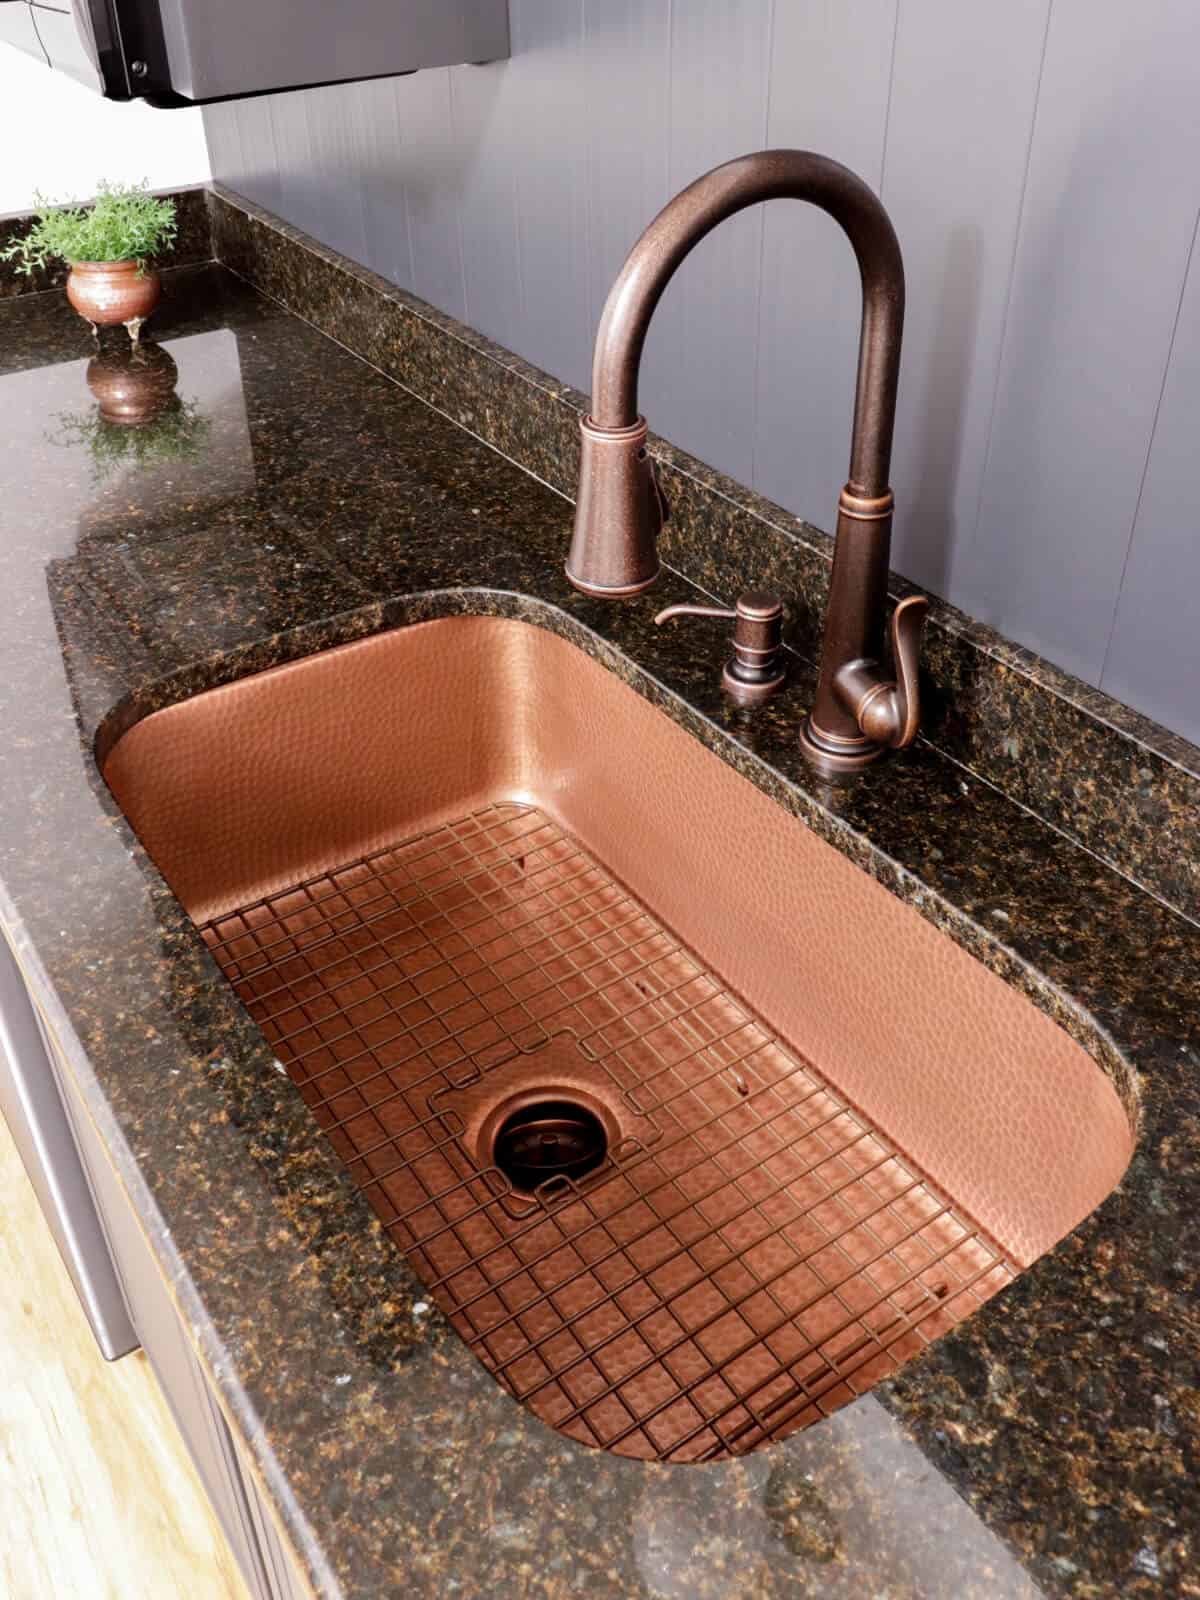
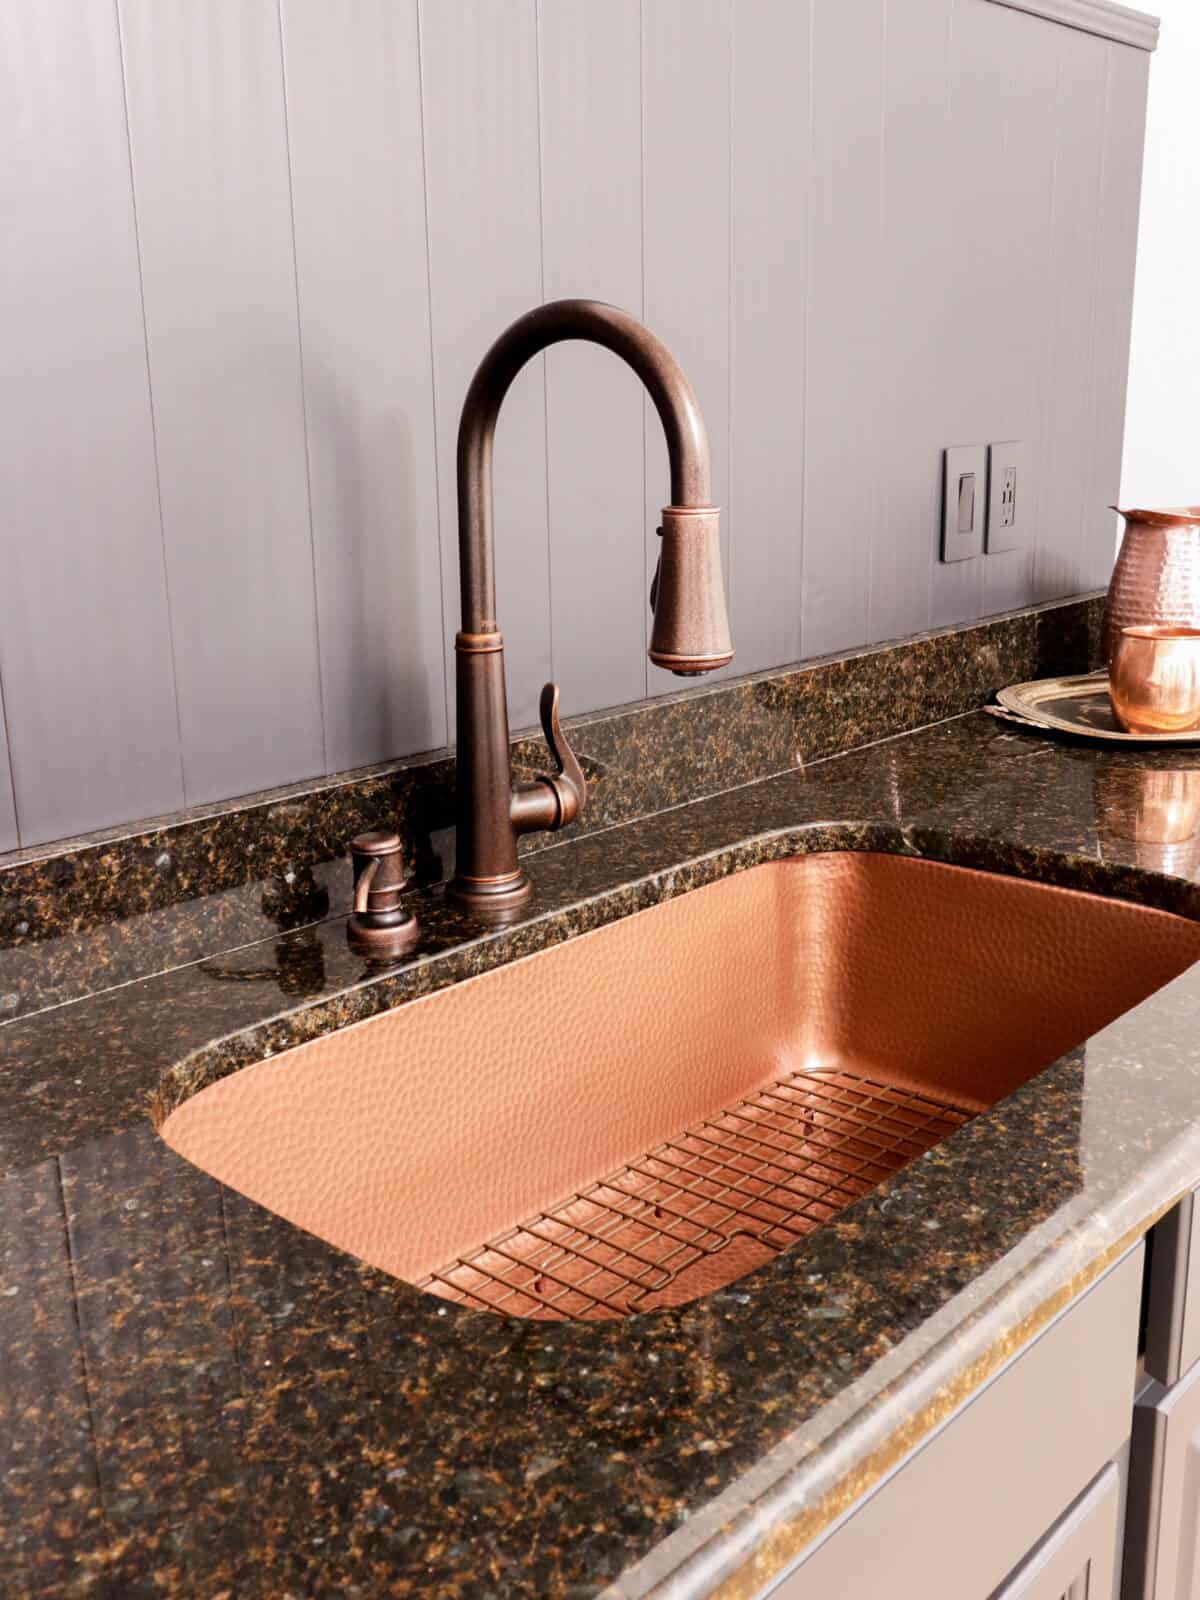
I am so over-the-moon with how this turned out!
The hammered copper finish is so stunning and our countertops look completely different too!
Those copper hues draw out different elements of the stone.
With this job completed, next we move on to finishing the rest of this room which I’ll share later this week.
Top tip
Measure and then measure again because not all sinks are standard size. We made the mistake of incorrectly measuring our opening and needed to replace the sink with a wider one that fit our pre-cut hole in our counter top.
So do you think you could do this sink replacement yourself?
Sinkology offers many kinds of sinks to fit any style, whether you are wanting a farmhouse feel or a modern look.
If you have any questions, feel free to ask us below – we’re always happy to help out!


Hey Morgan!
That is an excellent question and yes, we tried to remove as much as we could. I would say we did about 95%, because some of the silicone just wouldn’t budge, but as long as the majority of the surface was free and clear, the new silicone would attach. We also made sure to use denatured alcohol to wipe where the old silicone was just to make sure it was extra clean!
Hope that helps and thanks for reaching out. Good luck with your project!
Jen and Trent
did you remove every last bit of silicone caulk from the underside of the granite or just the big clumps? running into this issue and having a hard time removing ALL the silicone caulk.
Thanks!
did you remove every last bit of silicone caulk from the underside of the granite or just the big clumps? running into this issue and having a hard time removing ALL the silicone caulk.
Thanks!
Wow, the sink shape doesn’t match the hole cut in the granite! That would make me crazy, but I’m glad it works for you. This one works because the sink is larger in the corners than the granite. If it was the opposite way, it would not have worked. There was nothing in the article about checking this before removing the existing sink!!
This tutorial is very helpful! I do have a question though- How did you remove the wood supports that were holding the original sink up? My current sink is being held up the same way & I’ve hit a wall because I’m struggling with how to remove them. Thanks!
That is an excellent question, Katy! Unfortunately, this sink didn’t have a disposal, but the plumbing did take a bit of research for us. The big plus for us was that the plumbing for both drains ran into one, so it wasn’t that difficult.
I think if we had a disposal to move, we probably would have at least asked a plumber to check the pricing to rework the plumbing, but would still install the sink ourselves.
Hope that helps!
We are about to embark on this task. We have a granite countertop with an undermount double bowl stainless sink. We will be replacing it with an Undermount single bowl sink. Wondering how you addressed the plumbing for the two sink holes in your original sink? We have the garbage disposal on the right and the drain on the left. I’m assuming our new sink will have the one hole in the center. Did you have to eliminate some of the plumbing as in the left side drainage Pipe? How hard was it to move the garbage disposal to the center?
So glad you found this helpful! Thanks for taking the time to comment!
This is such a helpful tutorial thank you!!