Small Basement Kitchenette Makeover on a Budget
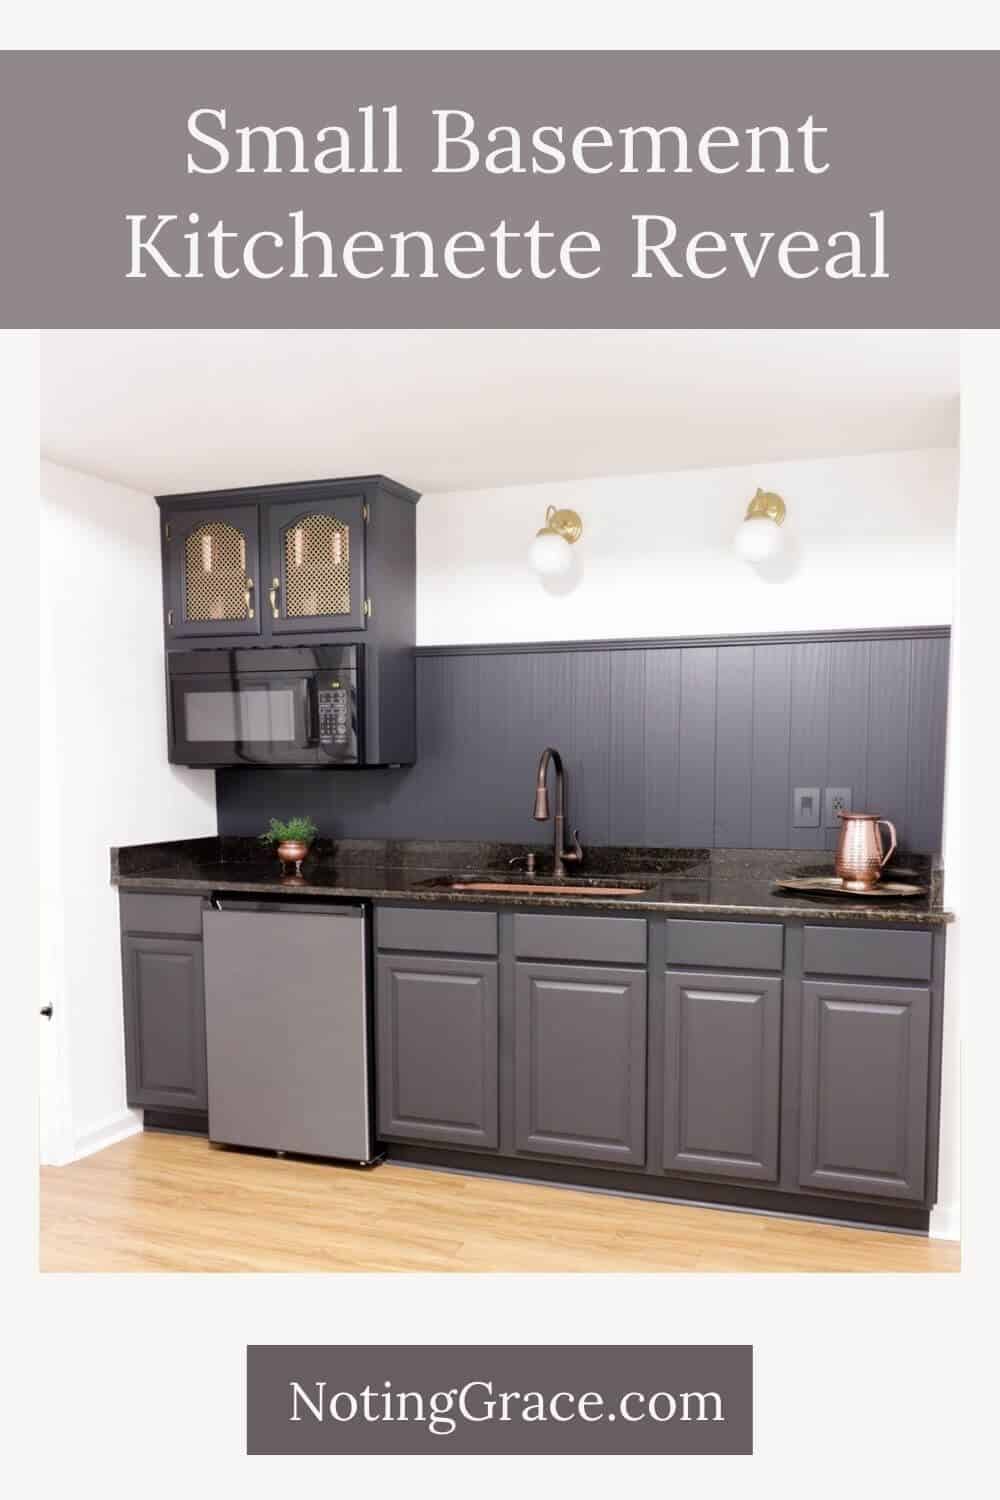
Welcome to our Small Basement Kitchenette Reveal — a transformation packed with budget-friendly DIYs, cozy vibes, and a little surprise that turned this forgotten nook into the life of the party!
Feeling overwhelmed by an outdated basement space you just don’t know what to do with?
Yeah… us too. For us, it was the sad little kitchenette in our basement.
This post contains some affiliate links for your convenience.
Click here to read my full disclosure policy.
In this post, we’re sharing the full reveal of this space, packed with budget-friendly DIY ideas, design tips for small spaces, and clever ways to stretch your dollars.
You’ll see before and after photos, get practical renovation advice, and maybe even a few ideas you can steal for your own basement makeover.
Here are some simple steps to create a space you love – you CAN do this, friend!

Hey there! If you’re new here…
We’re Jen and Trent – your budget-loving, real life DIY BFFs! With years of experience transforming multiple fixer uppers (while raising 2 kids, owning 3 businesses, surviving open heart surgery, and hustling through major financial curveballs), we believe creating a home you love shouldn’t feel overwhelming – or expensive!
From small basement kitchenettes to full-home makeovers, we share approachable, step-by-step projects, honest lessons learned, and all the affordable DIY tricks we’ve picked up along the way. Because you deserve a home that makes you smile — without breaking the bank. And yes, friend — you CAN do this!
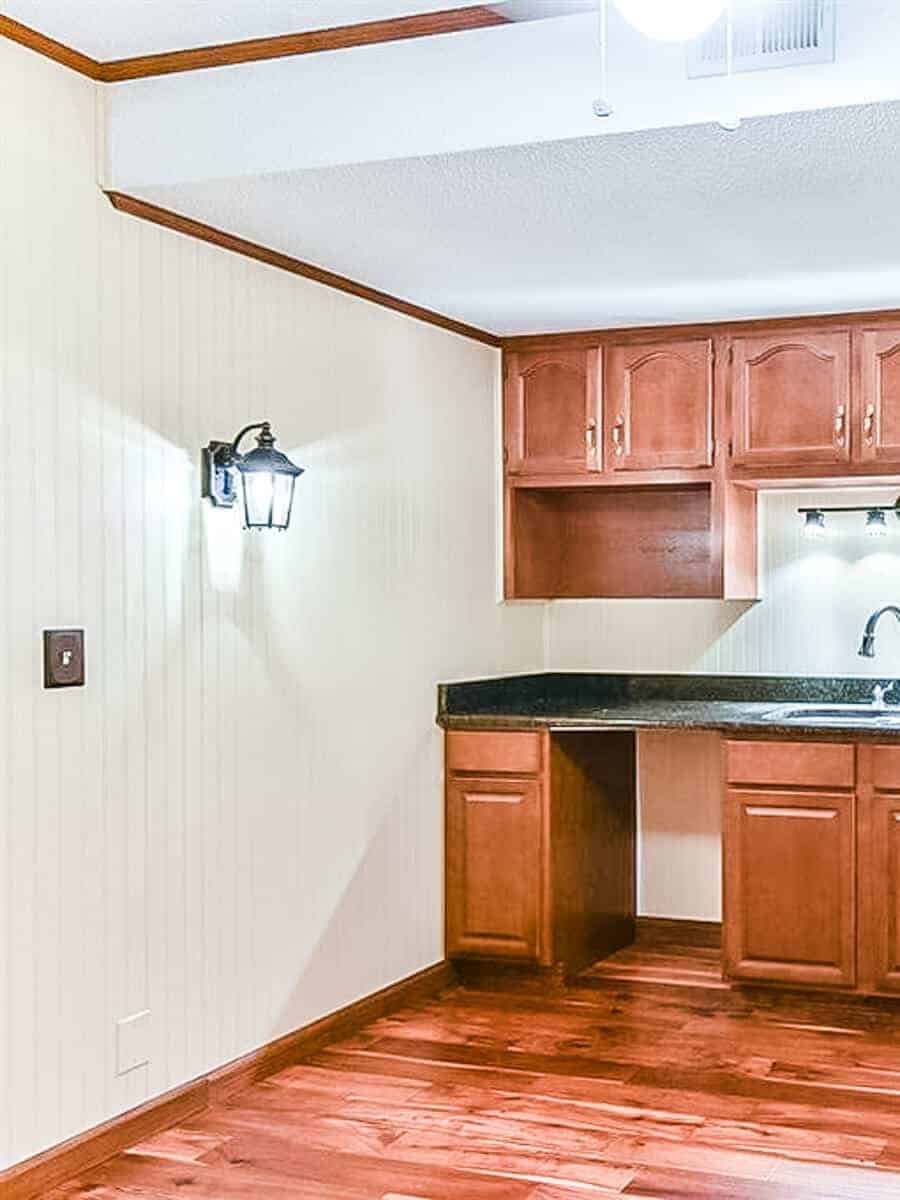
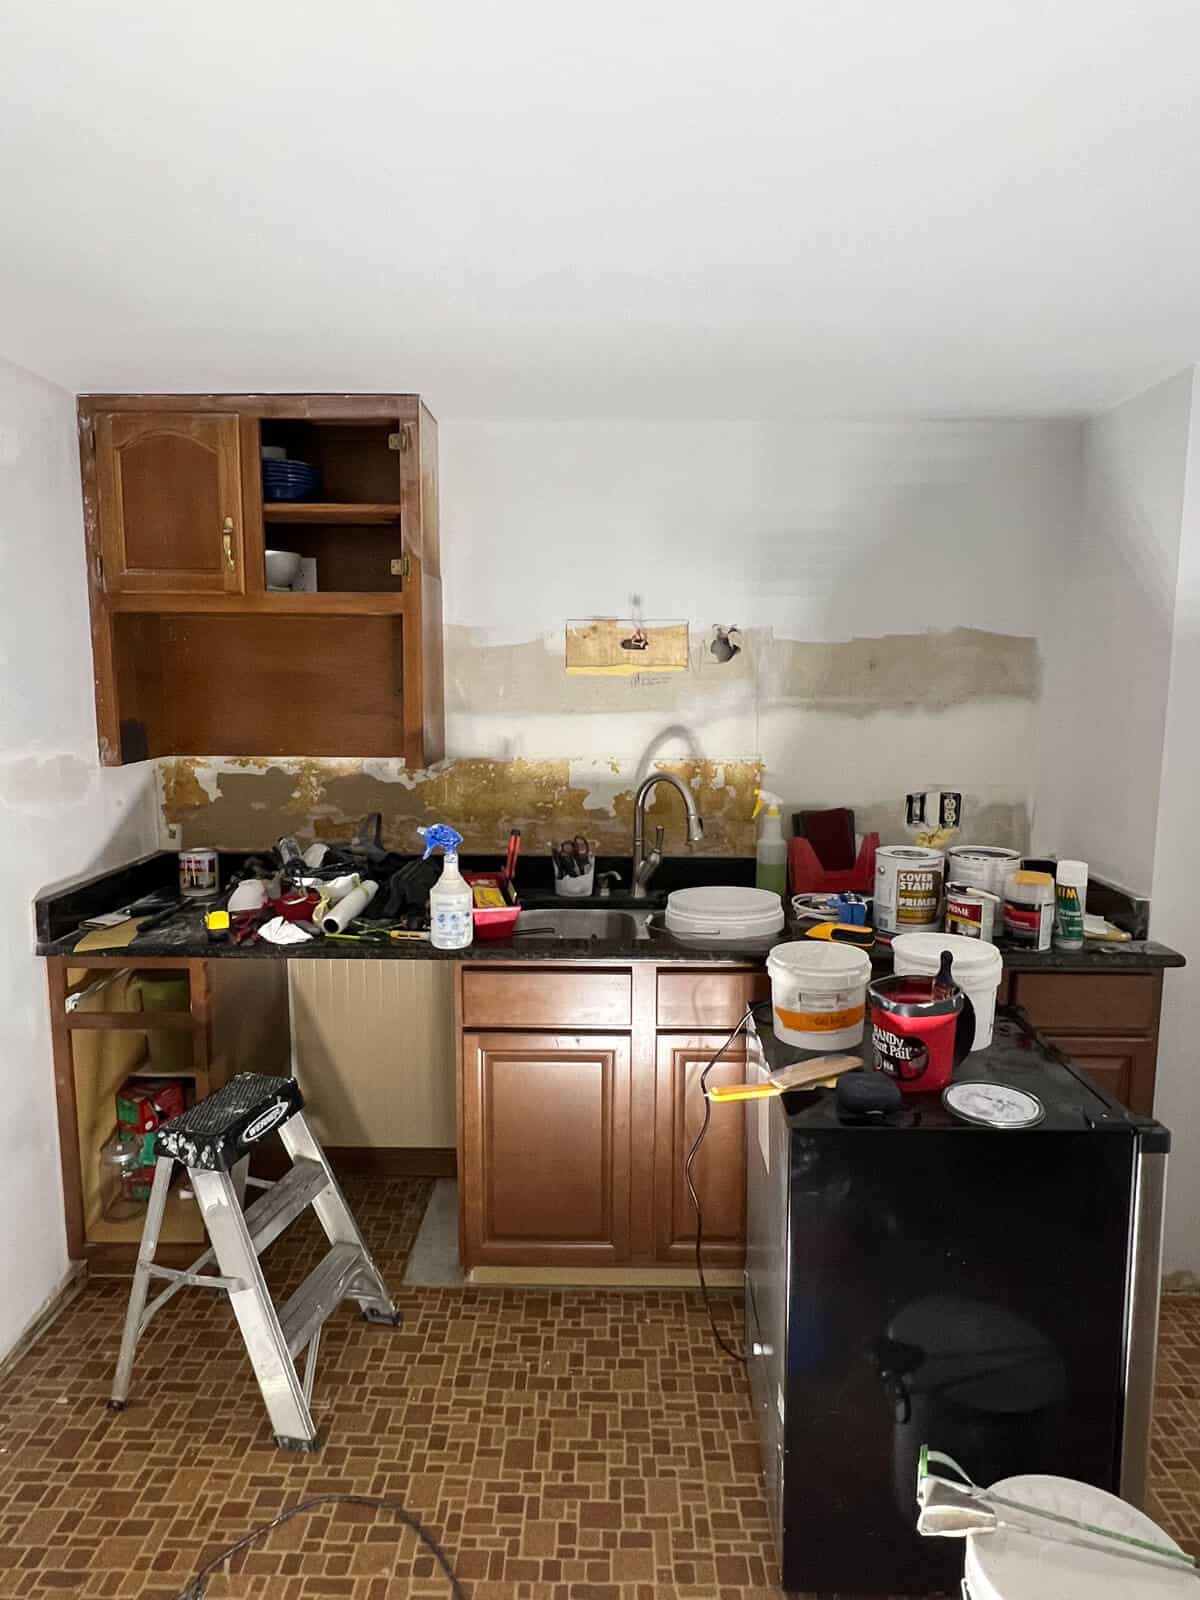
Small Basement Kitchenette : The “Before”
When we first moved in, our basement kitchenette looked like a forgotten 80s time capsule:
Let’s get all Marty McFly and go back in time to see what this space looked like at the beginning of this makeover.
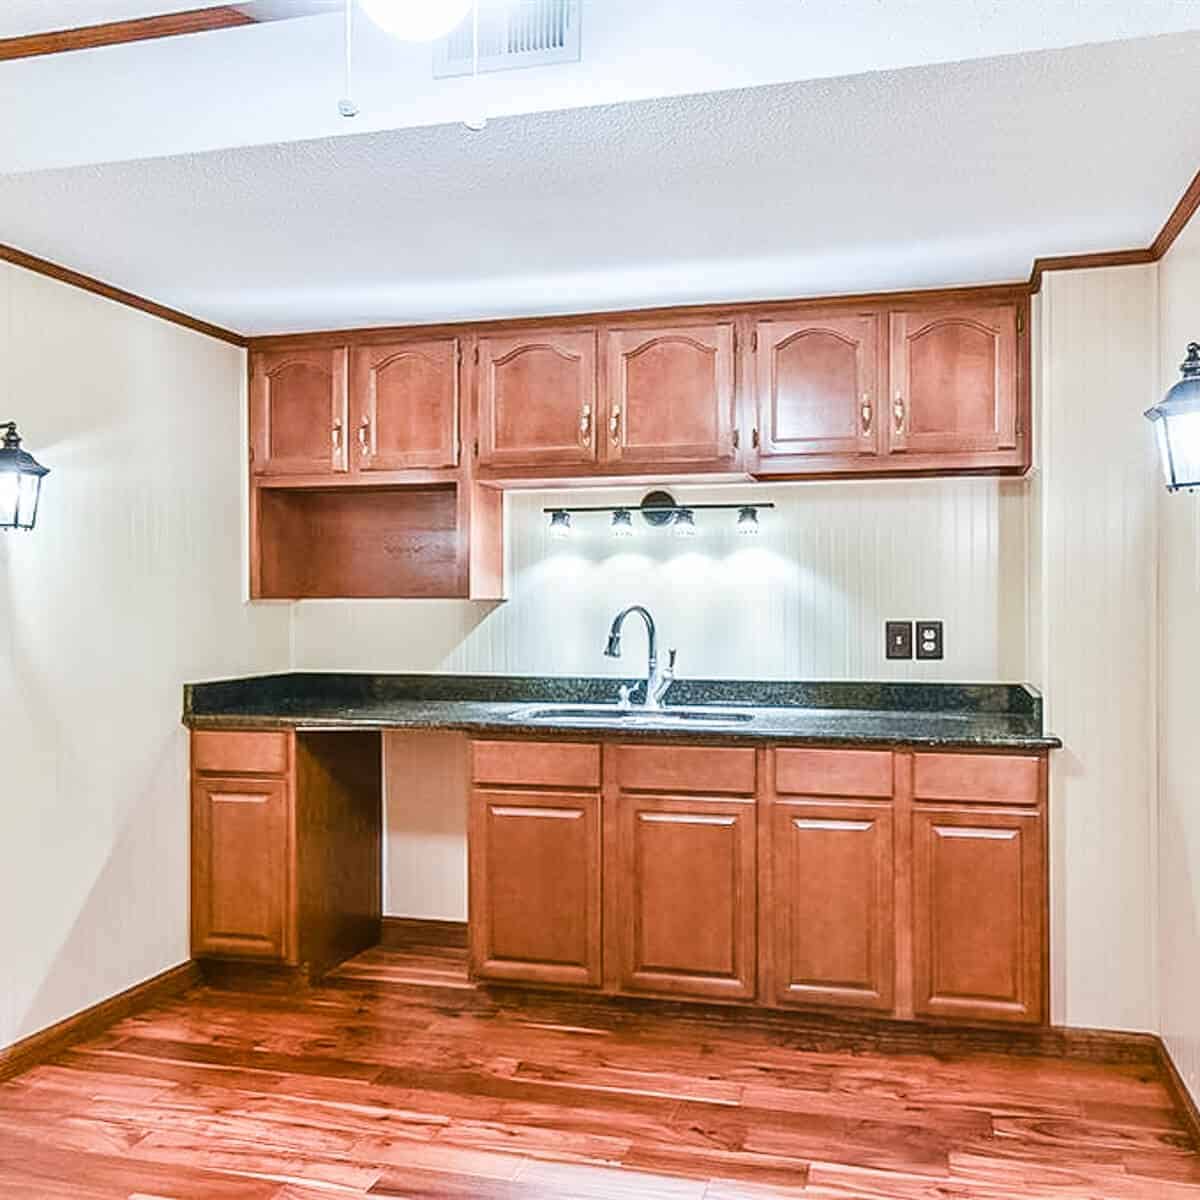
- Mismatched cabinets
- Plastic-y beadboard walls
- A very loud laminate floor
- Missing appliances
- Zero joy, inspiration or purpose
We lived here 3 years and never went into this room. It quickly became a junk room hiding all the things that didn’t have a home.
Our Vision: Flow with the Rest of Our Home
We dreamed of a space that felt like a natural extension of our newly updated family room.
Slowly we’ve been chipping away at our basement little by little to make it more of our own. It’s taken us a little over a year to complete our lower level.
We started with our Music Studio and then moved on to my son’s bedroom and our small workout room. And recently, we just completed our Family Room Makeover.
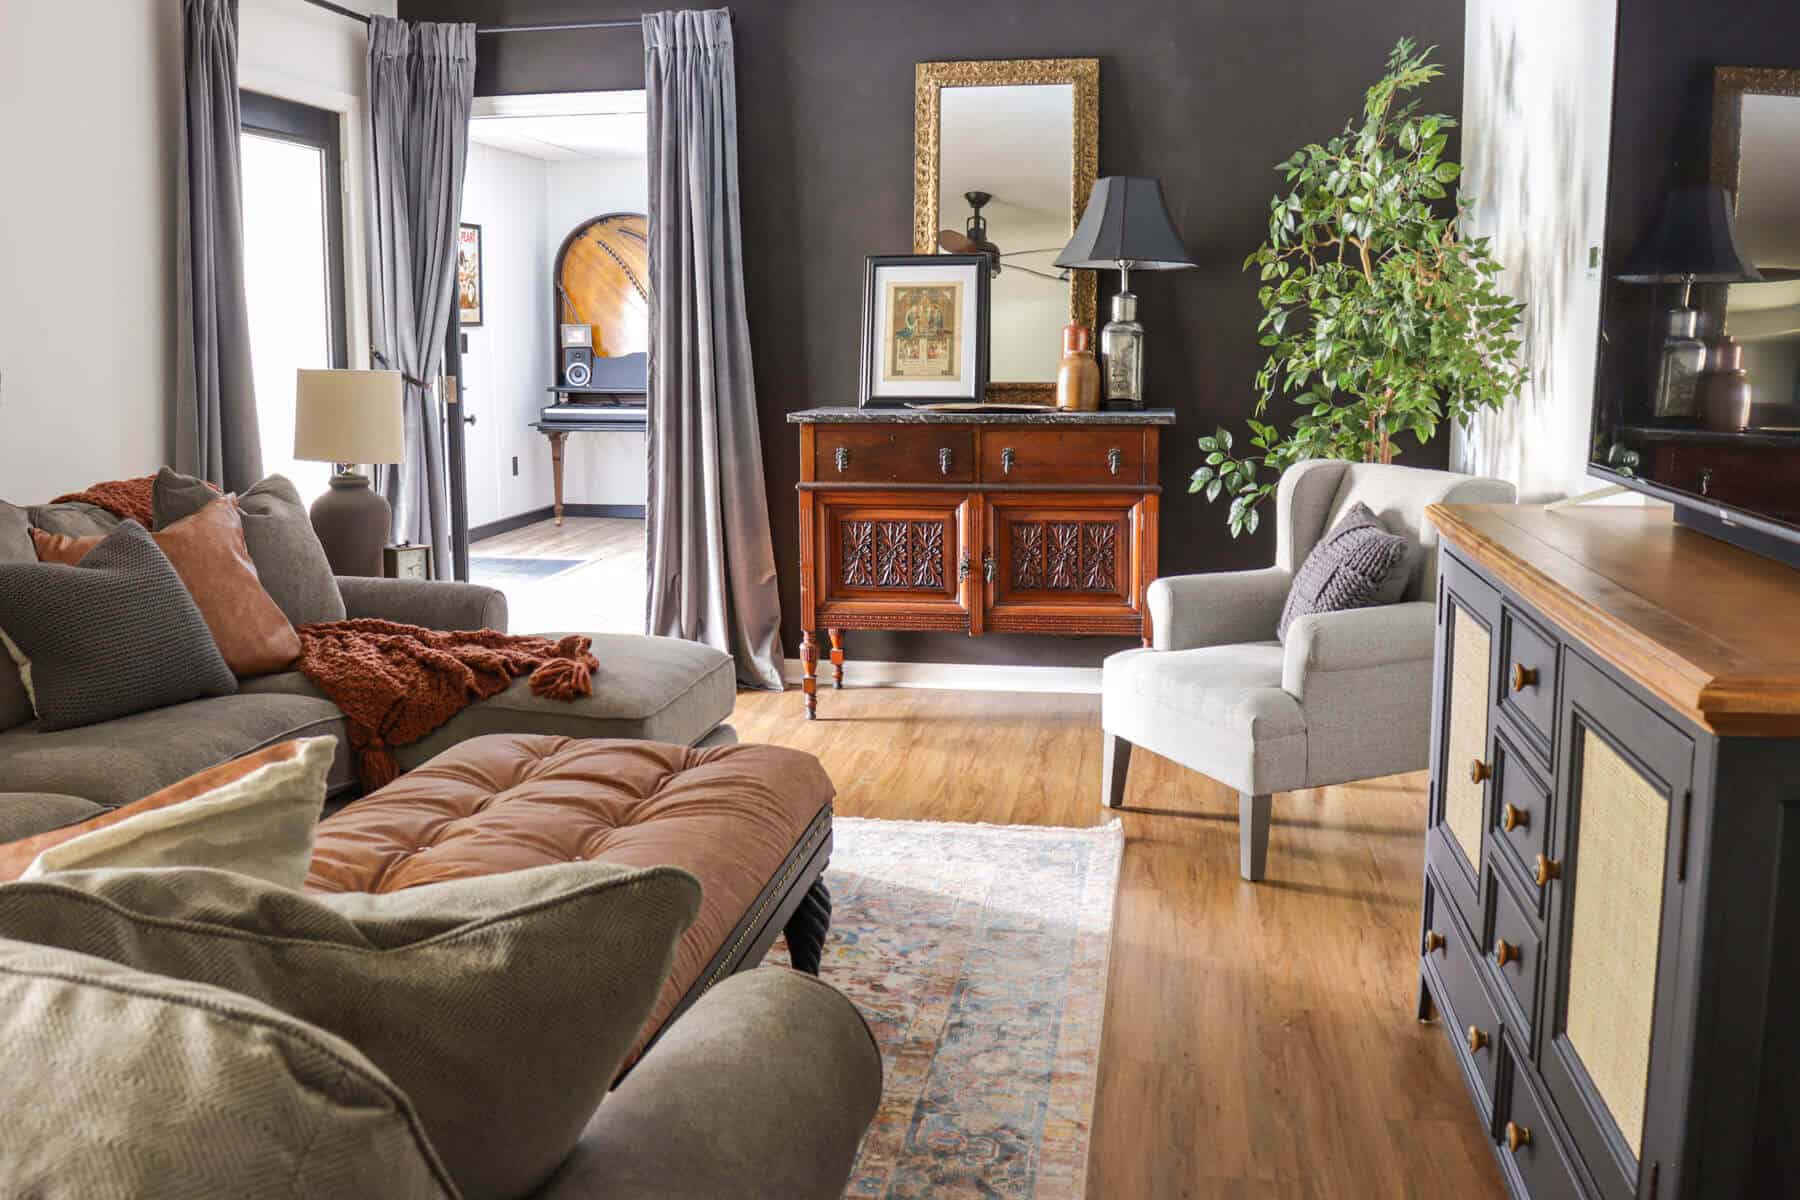
We wanted this kitchenette space to feel light and bright with cozy masculinity to feel like an intentional part of our design.
How to Make Over a Small Basement Kitchenette (Step by Step)
Would you rather opt for video tutorials instead of step-by-step instructions? We’ve got you covered with a comprehensive video tutorial that guides you
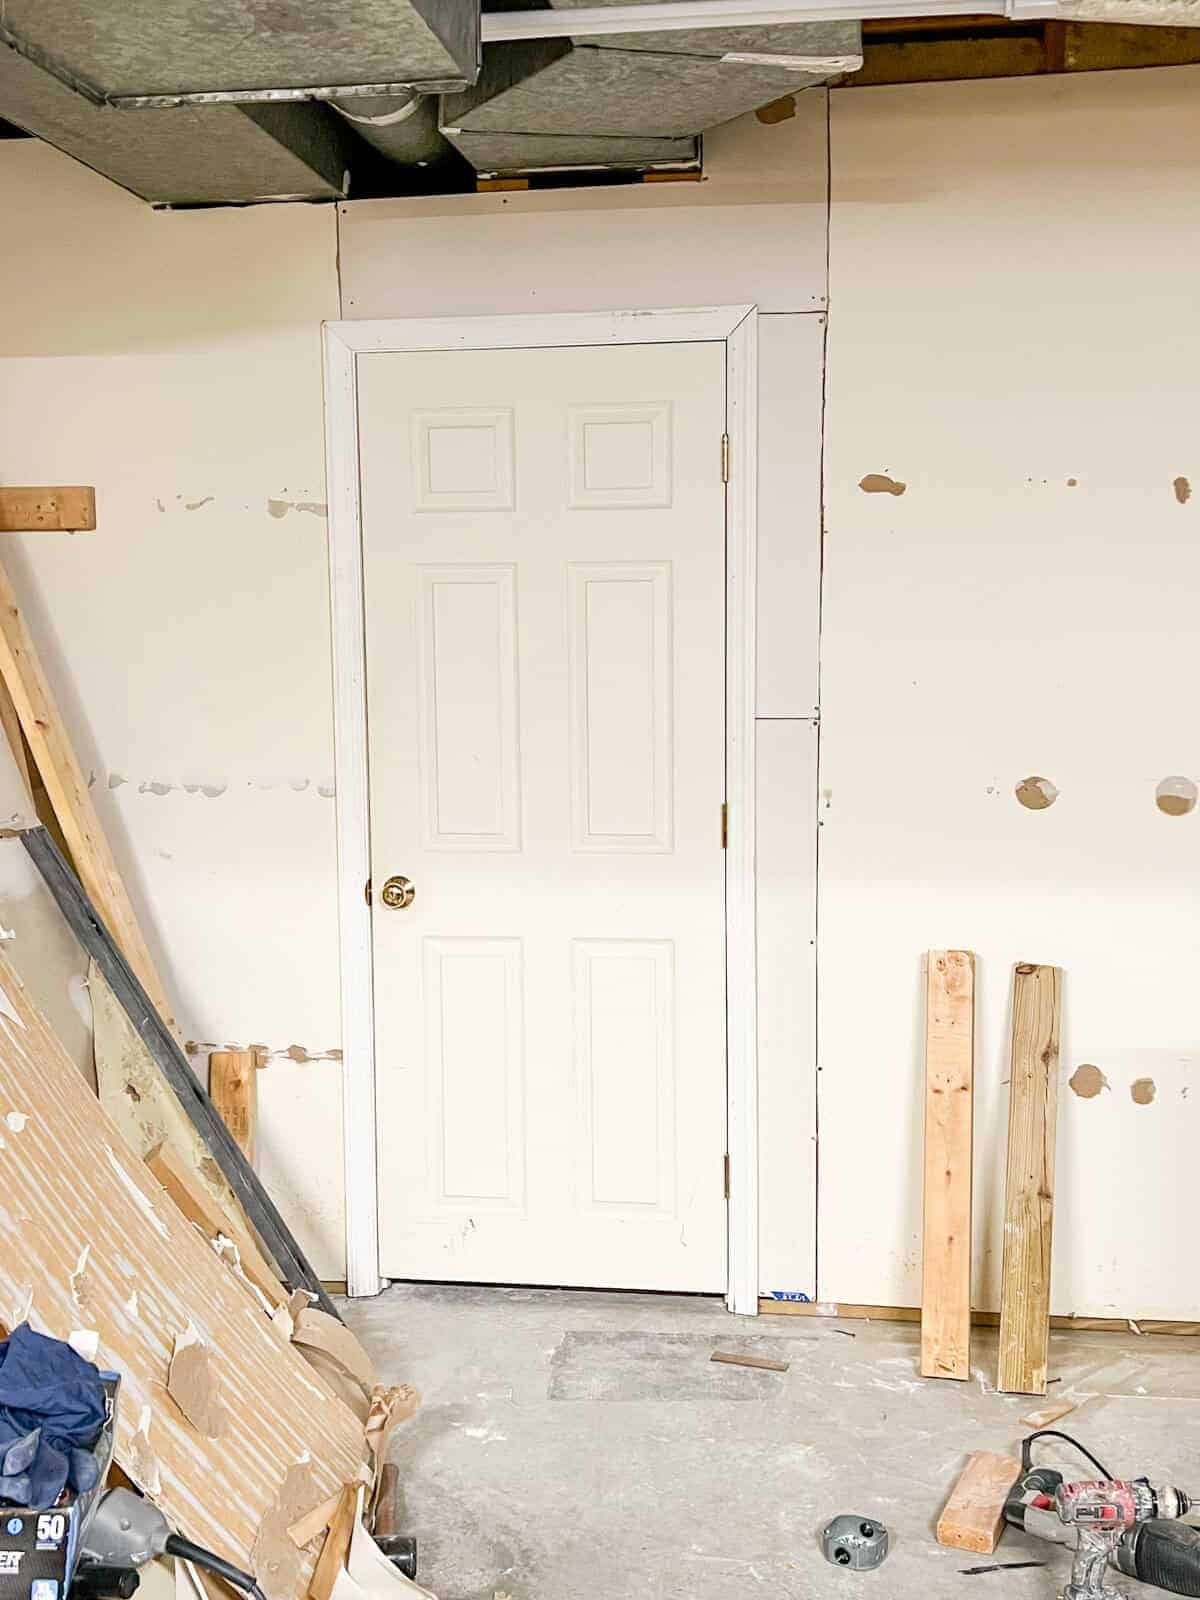
Step 1: Adding a Door to Our Storage Room
This was the DIY that started this entire room makeover! A perfect little bunny trail!
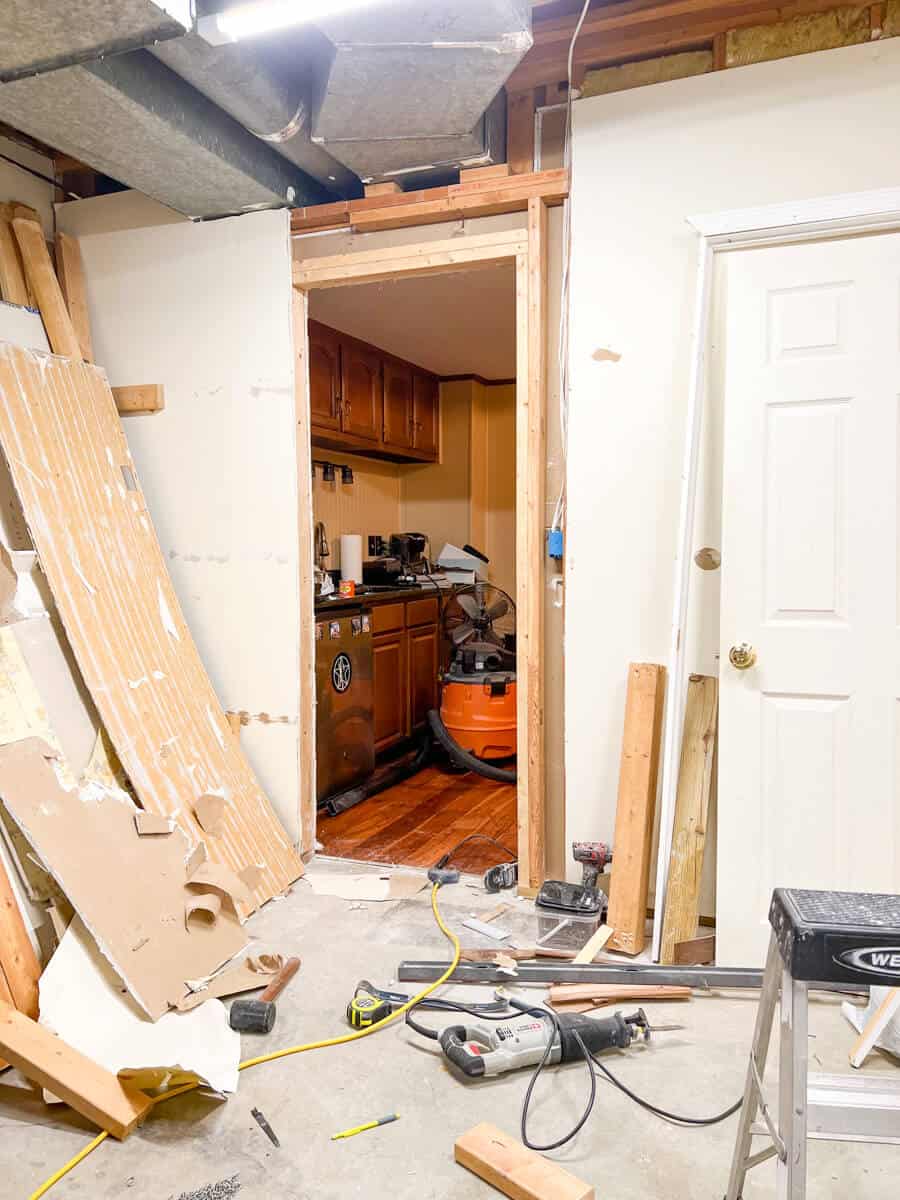
When we updated our storage room, we knew we needed to add an easy access point from this kitchenette.
And lemme tell ya, adding this door was one of the smartest DIYs we’ve done to this house!
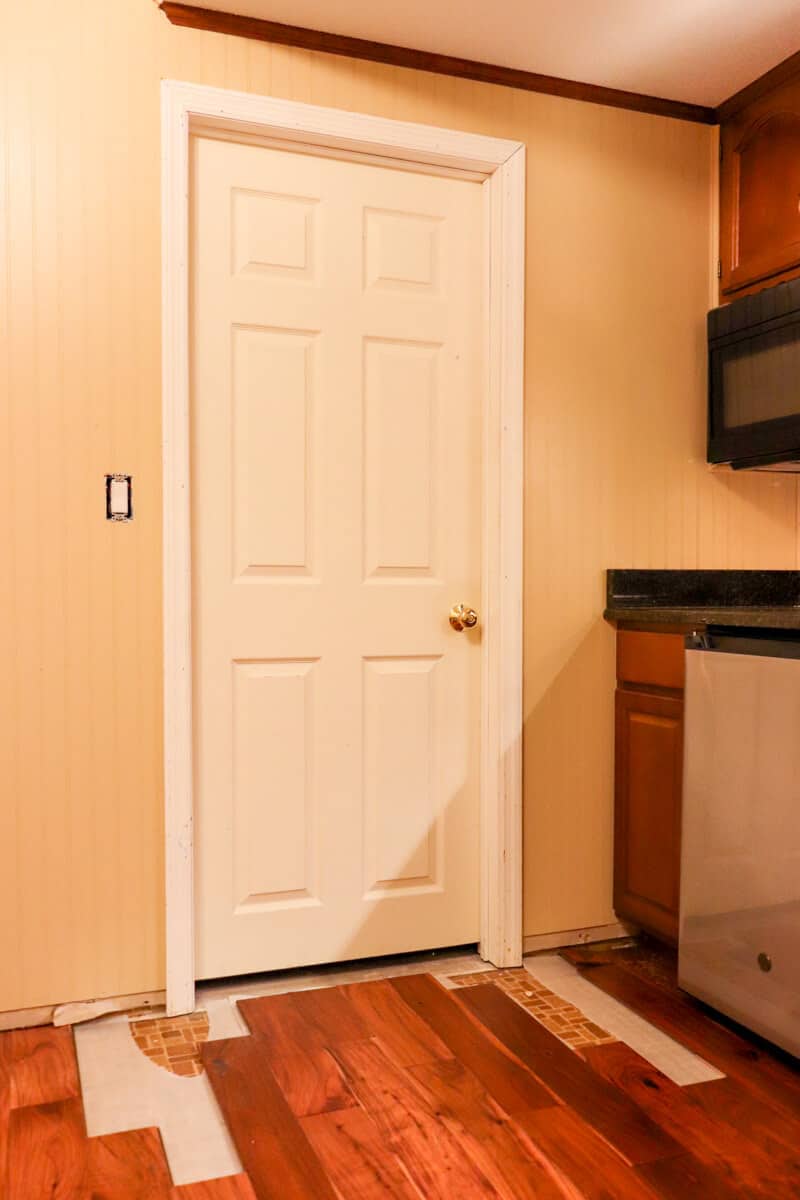
We have a step-by-step tutorial on how to cut into an existing wall and add an interior door if you want to learn more.
As you can see from this addition, once we removed those pieces of flooring – we knew we needed to address this makeover.
There was no turning back!
After we added a door to create easy access to our storage area, we cleared all the junk out of this room and started the makeover.
So the fun deconstruction began!
Step 2: Removing the Popcorn Ceilings, Upper Cabinets and Beadboard Panels

The first thing we did was to remove the popcorn ceilings and beadboard and give our walls a fresh coat of paint.
We are no strangers to scraping ceilings – we’ve removed the popcorn from almost every room in this 80s fixer and have found a few tricks to keep the process nearly mess free!
Next it was time to take down that cheap beadboard that was poorly installed.

Using our favorite wrecker bar tool, we removed each panel one by one with multiple surprises.
The first being the HUGE amounts of glue used in addition to WAAAY too many nails. And then there were lots of holes where they did some rewiring and didn’t patch the holes.

We had a lot of wall repairs ahead of us!
But then….

Straight outta 1986, we found this wallpaper!
It was quite the treat!

But luckily, removal was super simple with minimal damage to the walls.
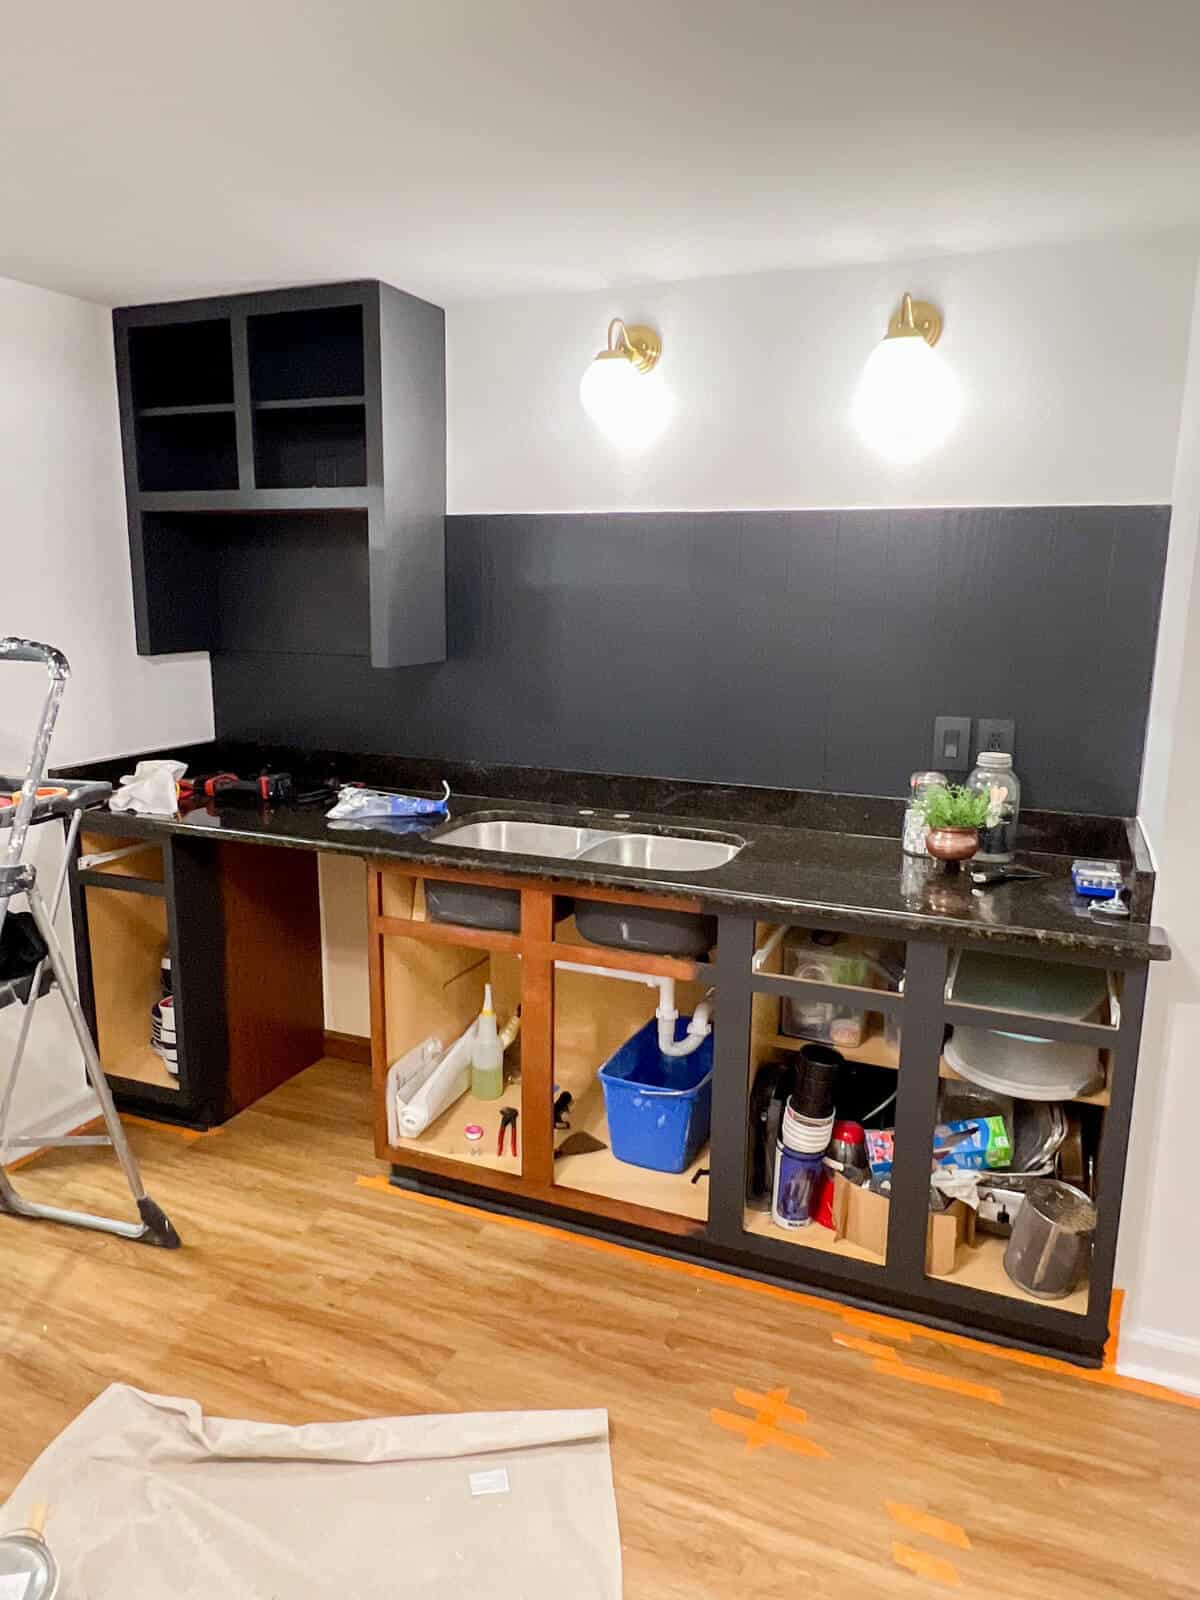
Continuing with the demolition, we started to tackle the mismatched upper cabinets.

We definitely wanted to keep the microwave in place to make popcorn for movie nights, but decided to take those other two upper cabinets down.


We immediately could see the difference with those uppers gone.
Later, you’ll see how we made the cabinet holding the microwave to look more like a hutch than a mismatched cabinet.
Step 3: Fixing the Walls and Painting
Now this was where it got tricky for us.

Repairing drywall is a skill – and we’d put it in the intermediate category.
It’s a game of patience, with lots of layers and drying time, but eventually you end up with a smooth finish.
Until we ran into those pesky spots where the old glue ripped the drywall paper layer.

The paper kept bubbling up if we tried to repair it. So we had to search out ways to fix this easily.
After a few tries, what finally worked was applying a layer of shellac primer and letting that fully dry and recoating if needed.


Once the bubbling finally stopped, we felt confident to repair the wall with drywall compound and then prime and paint.
It took a few days and slowed down our process, but was well worth it in the end.
We have a full tutorial post if you are looking for tips on how to repair damaged drywall after removing wallpaper.
We opted to paint both the walls and ceilings the same color. And the white walls were the perfect choice.

Since we have a lack of natural light in the room, the white color instantly brightened up this room.
PRO TIP!
Painting the walls and ceilings the same light color makes small, low-lit spaces feel bigger and brighter. Trust us – total game changer!
I opted for Grace Note White, which is the same color I used in our family room. Adding that white theme to this room helped the two rooms naturally flow together.
Once the walls were finished, we moved on to those loud laminate floors.
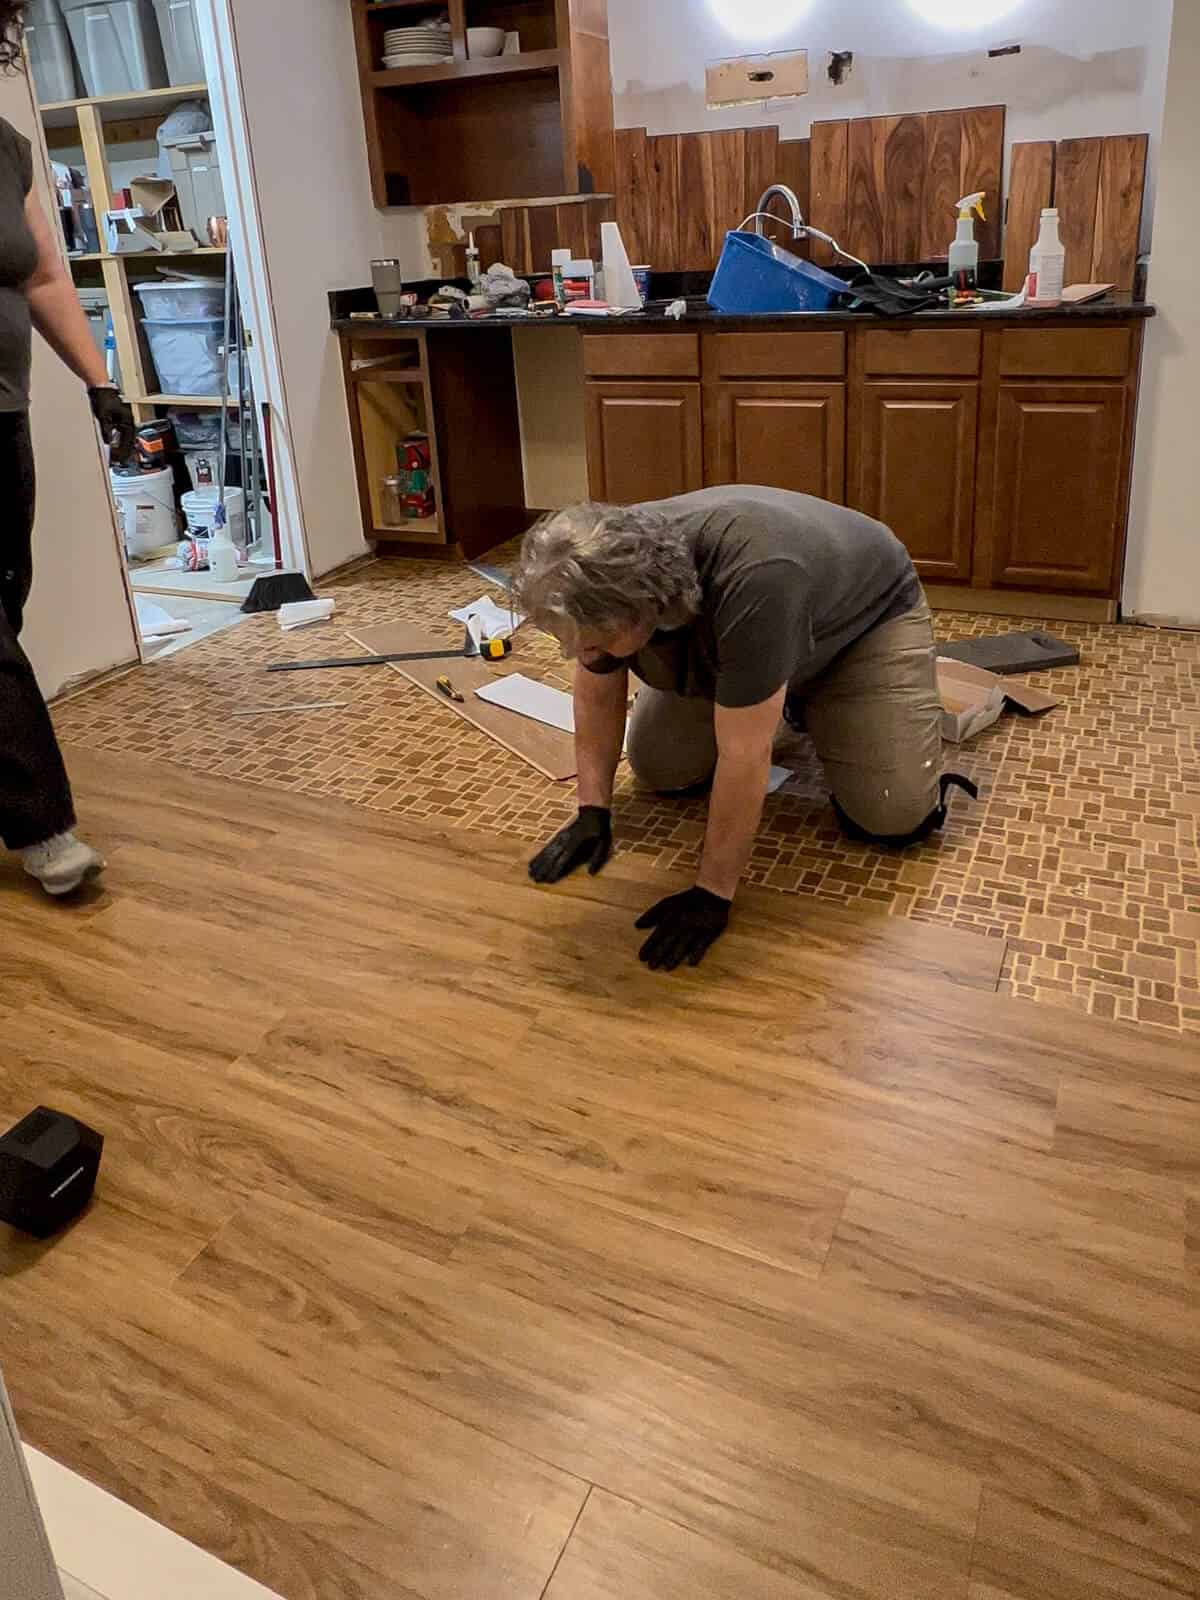
Step 4: Installing Luxury Vinyl Floors Over Linoleum
Next came the flooring adventure.
We pulled up the noisy laminate and discovered this…
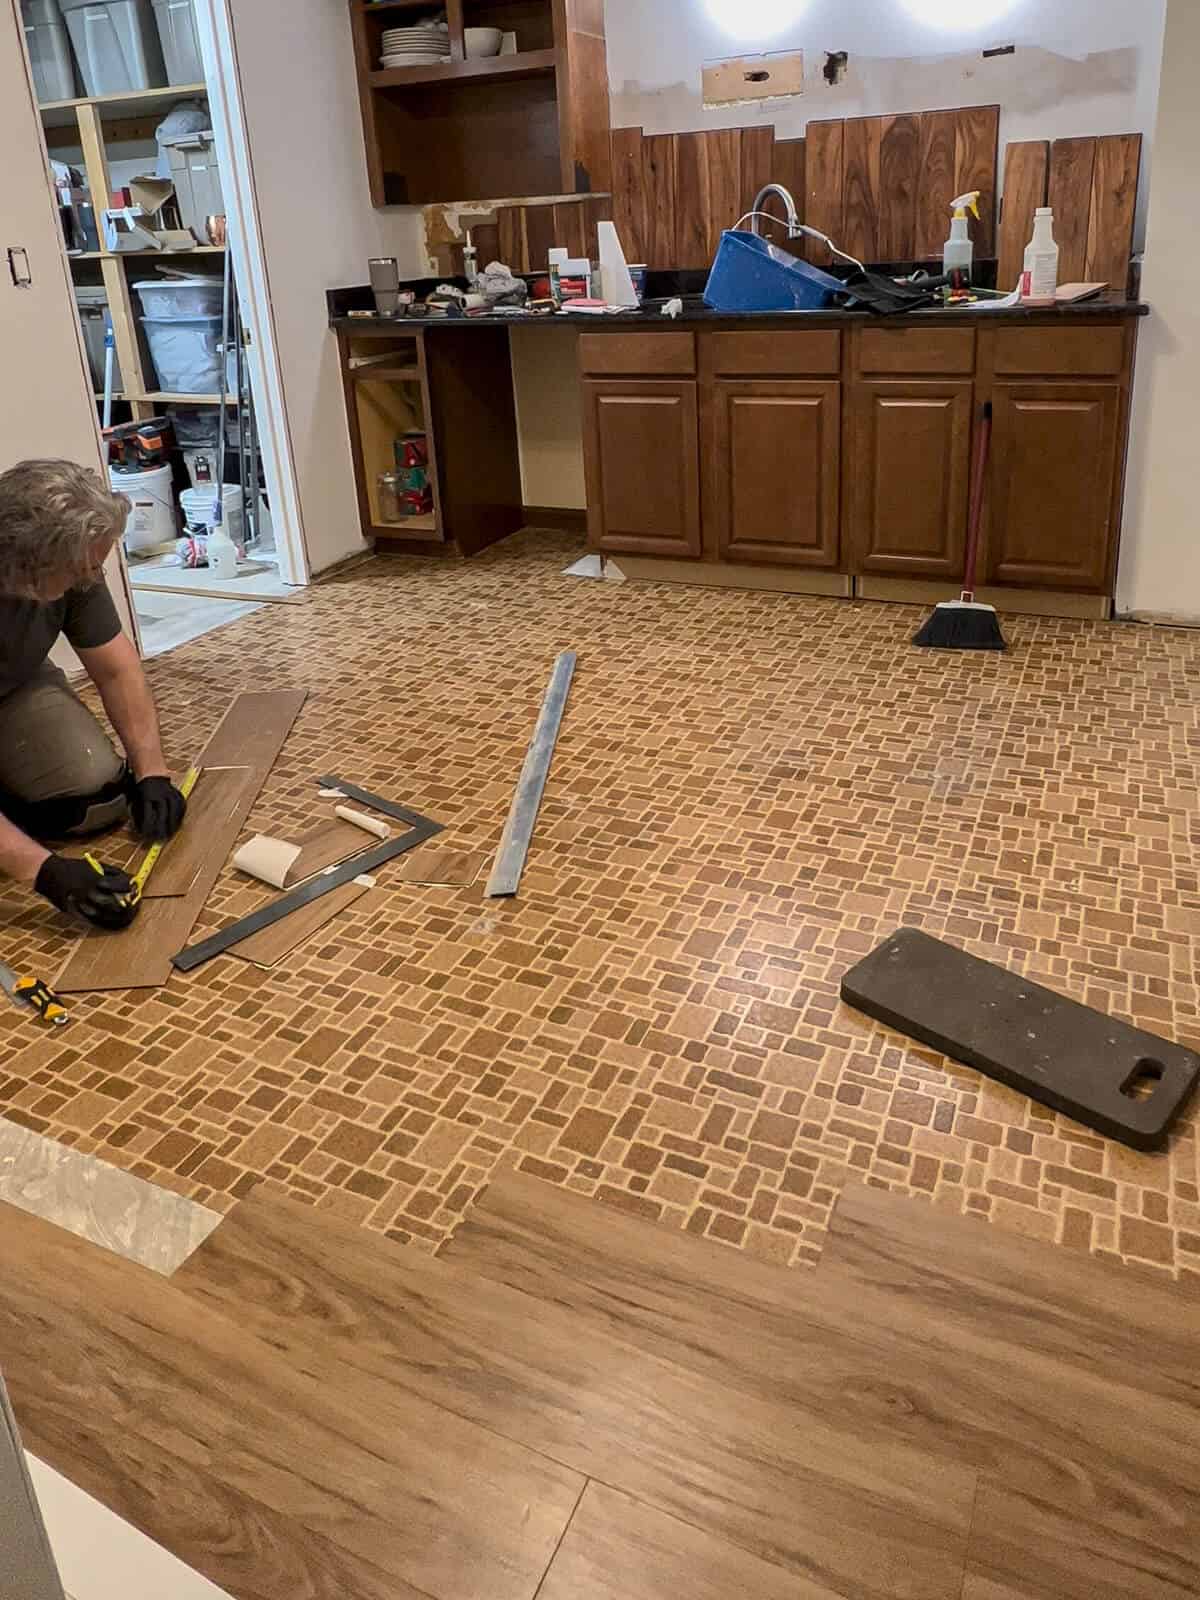
Nasty, old linoleum straight out of a vintage Pizza Hut!
That was a slight curveball thrown our way, but we did some research and were able to continue our flooring into this room.
You can read all about how we installed luxury vinyl tiles over these linoleum floors in our full tutorial post.
And – we reused those old floors to save money! Here’s what we did:
Step 5: Cabinet and Backsplash Makeover on a Budget
Next we wanted to address the mismatched cabinets.

We considered open shelving, but opted for another variation to help them look more like bespoke custom cabinets.
I used Fusion Mineral Paint in Ash to give the cabinets a seamless look.
Keeping with the rest of the house, I chose neutral colors that would also give a masculine feel to this room.
Plus, I gave the entertainment center in the adjoining family an update using this same color paint.
We also installed these two brass sconce lights.
I had purchased these light fixtures years ago from Ikea and found them when we were making over our storage space.
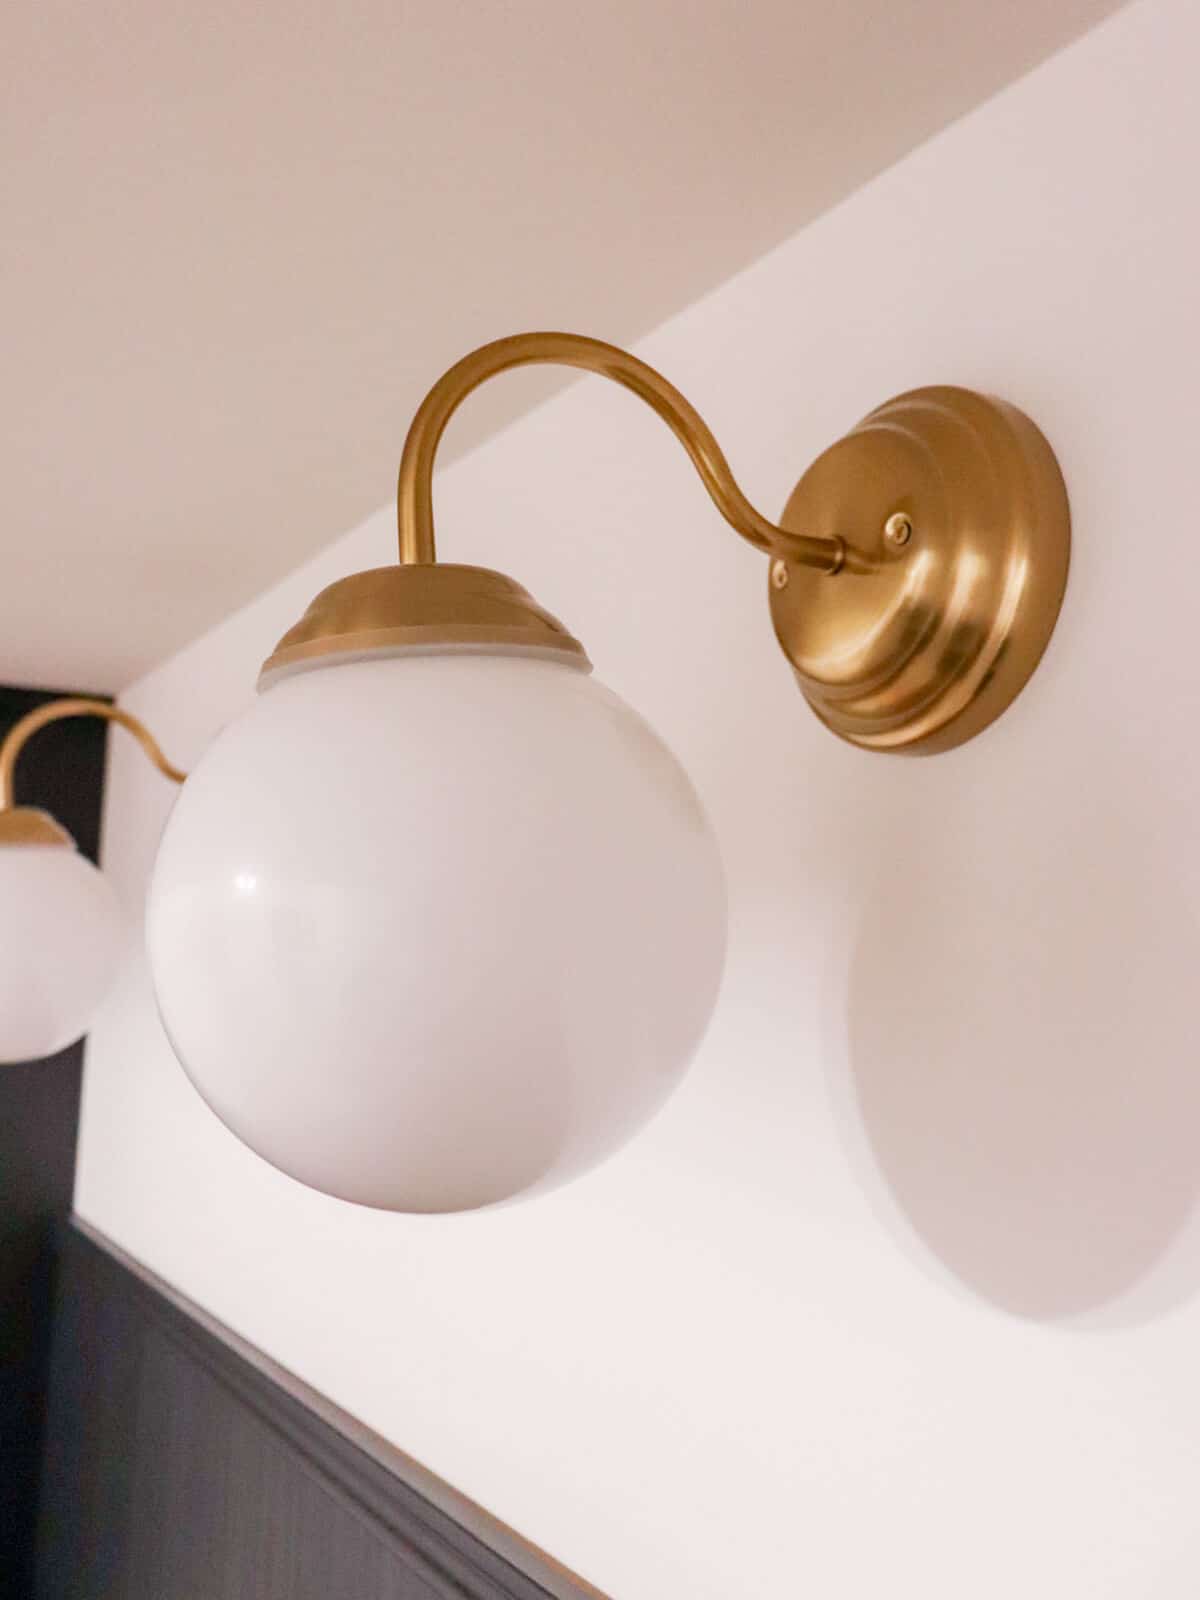
I knew they would be perfect for this space.
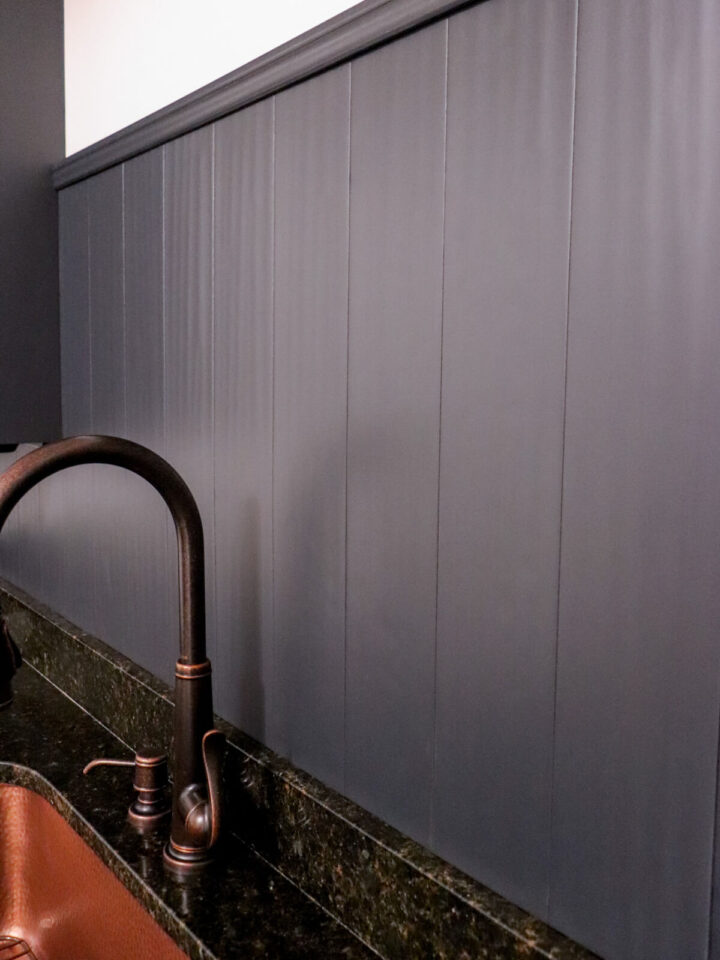
But we needed to address that nasty back wall where the beadboard used to be.
The budget was tight, so traditional tile was out.
Then I remembered the laminate flooring we just removed.

We had used leftovers of this flooring and installed it as a ceiling in our boys’ bathroom.
So why not try it as a backsplash?
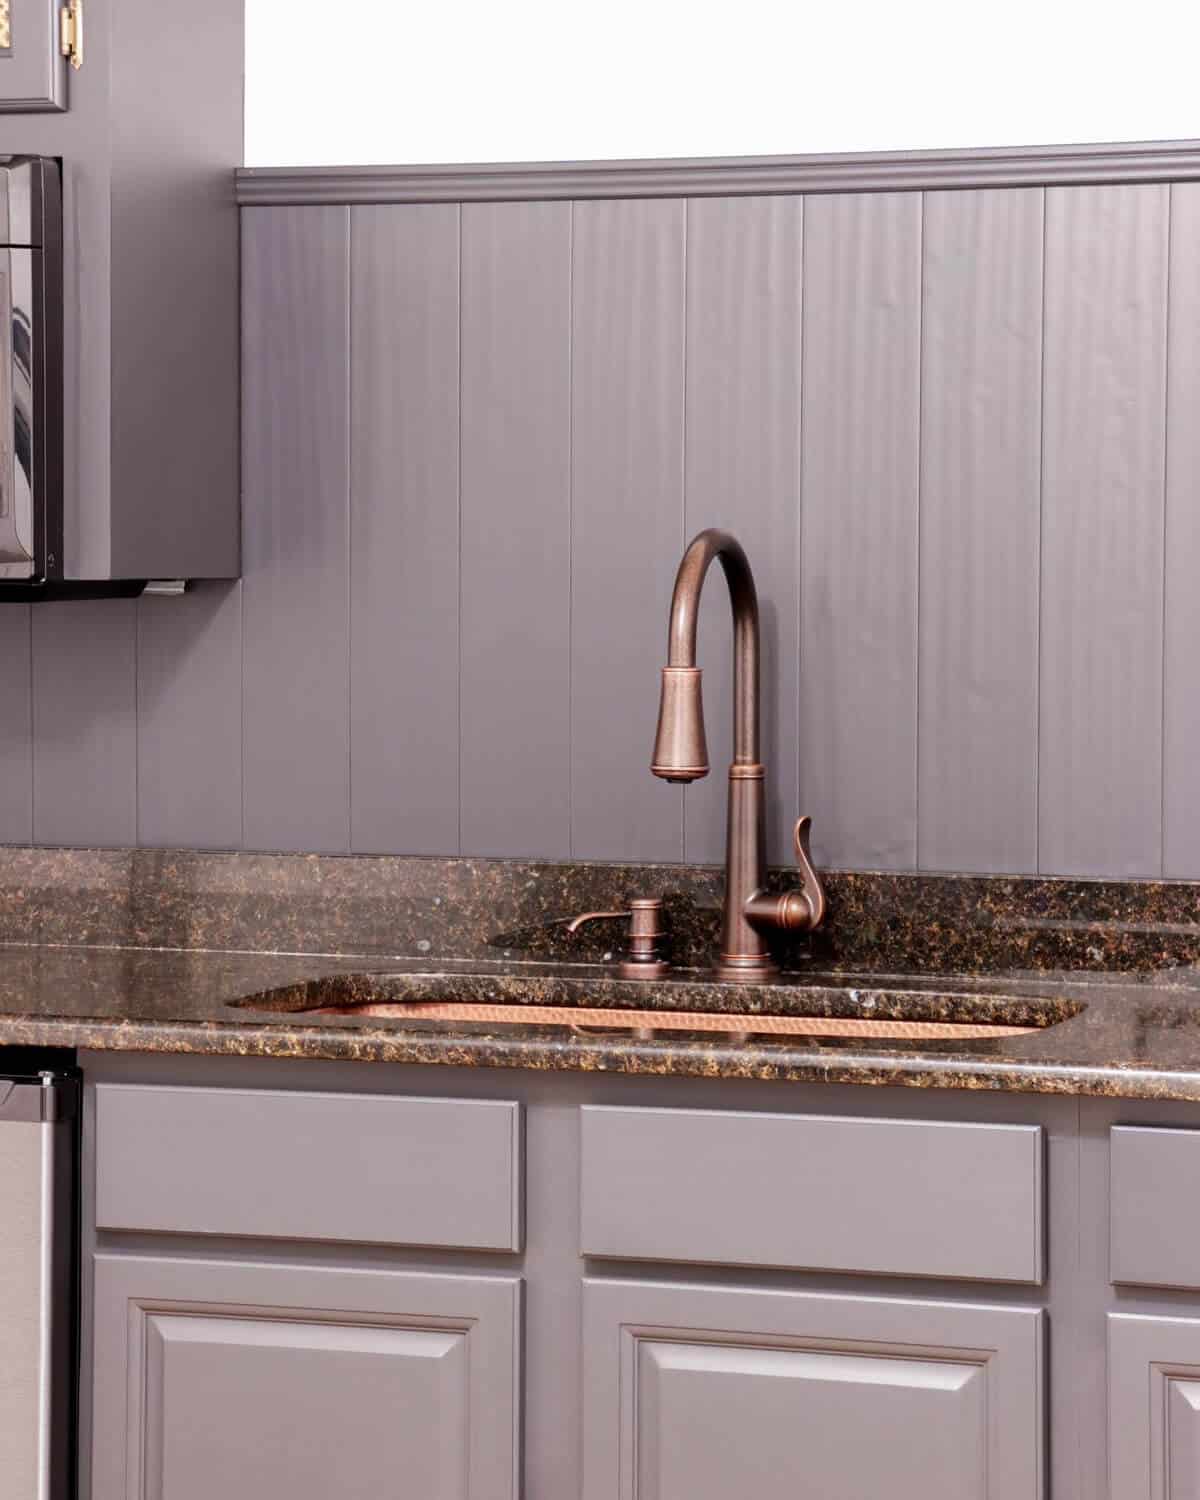
We repurposed the leftover laminate flooring to create a unique, affordable backsplash.
We cut the pieces to fit, scuffed and painted them, and finally sealed them before installing them. Then we used construction adhesive to attach them to the wall.
Total cost? Basically free!
The final thing to do was to install a new sink.
Step 6: Replacing the Old Sink
Our old kitchen sink was in horrible shape. Dented, and dingy no matter how I tried to clean it up.
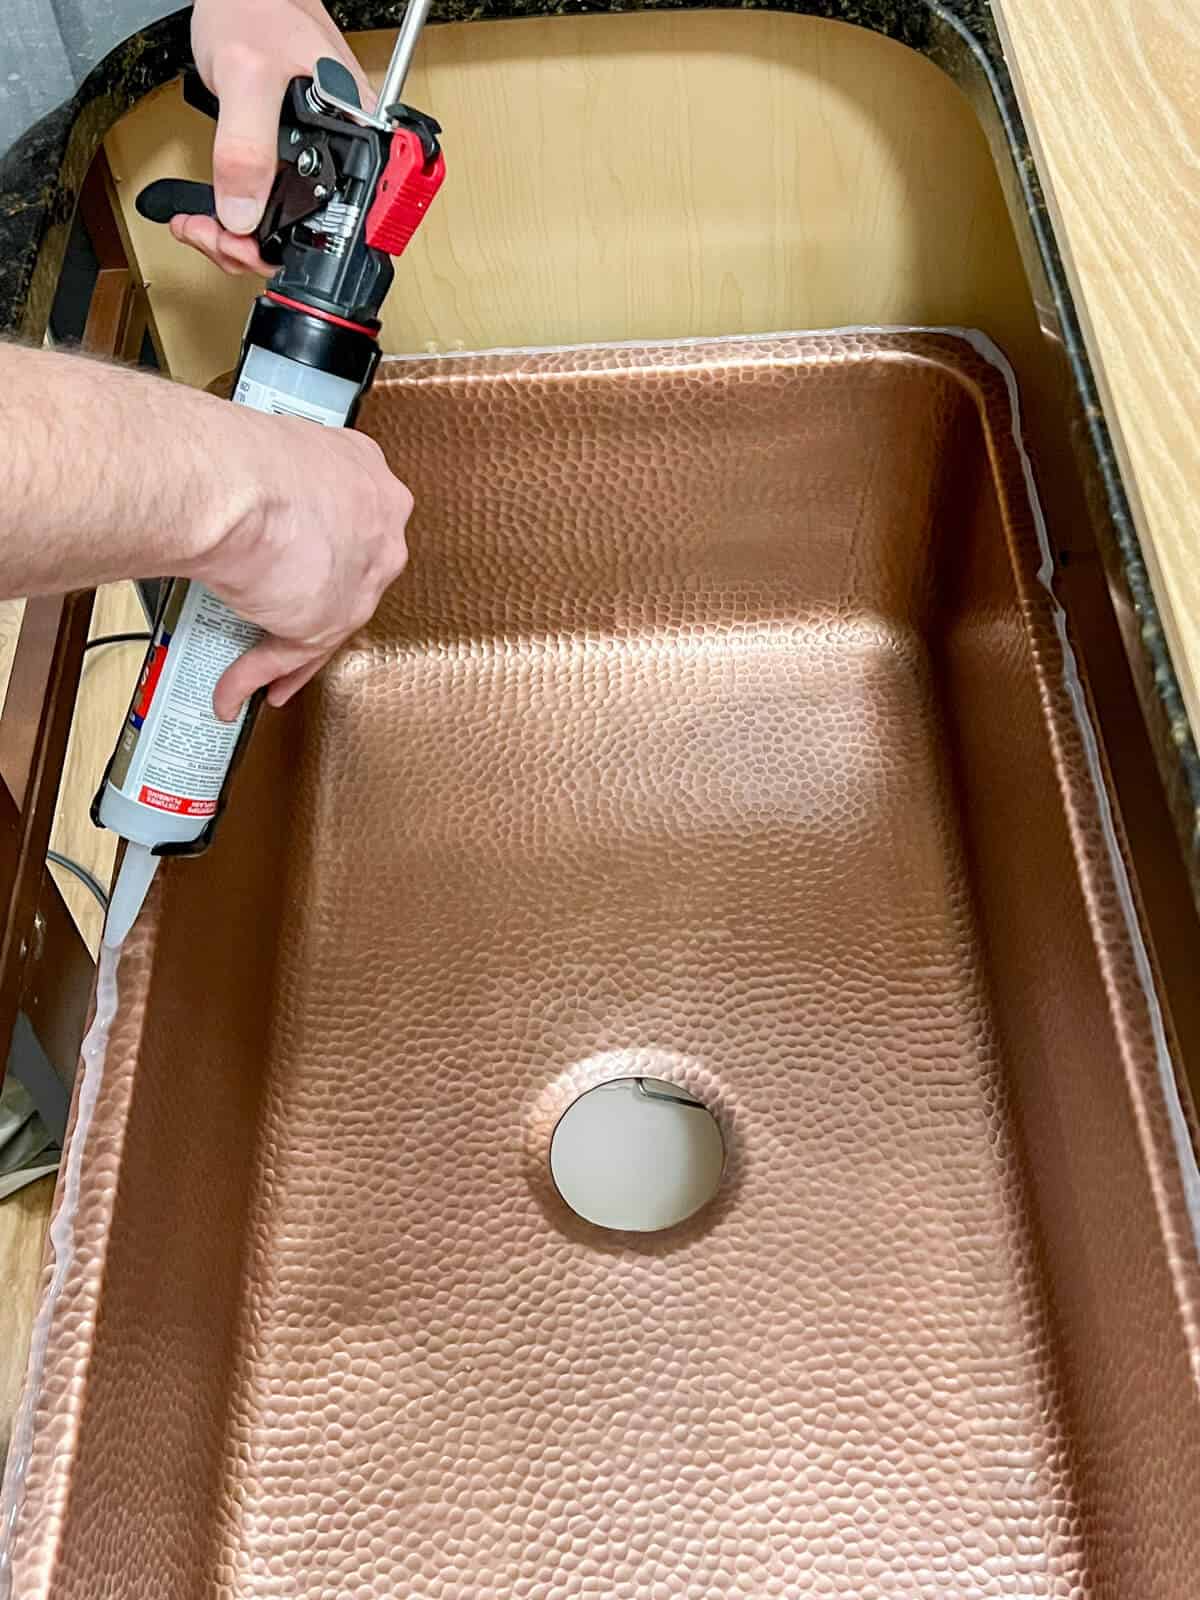
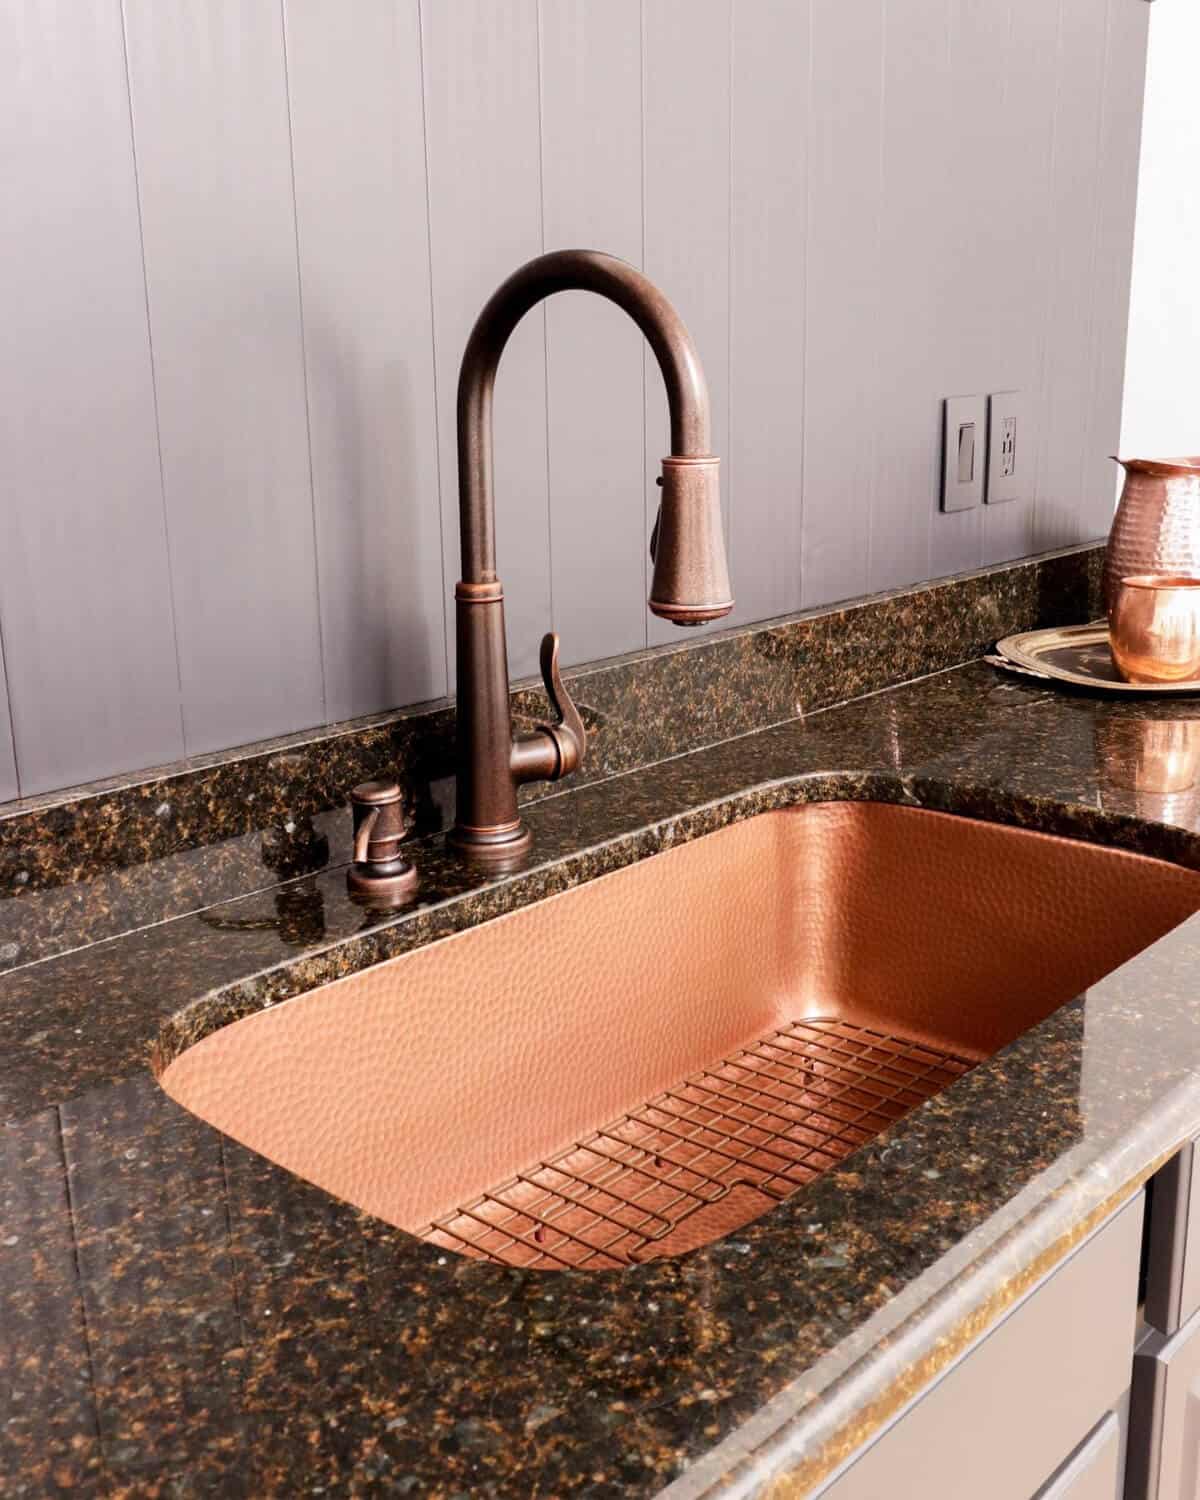
I love this hammered copper sink from Sinkology and think it adds some pizazz to this space.
When Sinkology offered to sponsor a post, we jumped at the chance to get our dream sink!
For a step-by-step full tutorial on how to replace an undermount sink, we share all the details in this post. You can also see how we installed it (along with a video tour of our kitchenette) in this video!
Step 7: All The Details That Make It Shine and the BIG Surprise!
We found a scratch and dent mini fridge a few years back but it had some hefty dents in the front. But it was a steal!

So we filled the dent with bondo, primed the spots and then covered it with some gunmetal gray appliance film.
We were excited to see how well it matched our kitchen cabinet color!
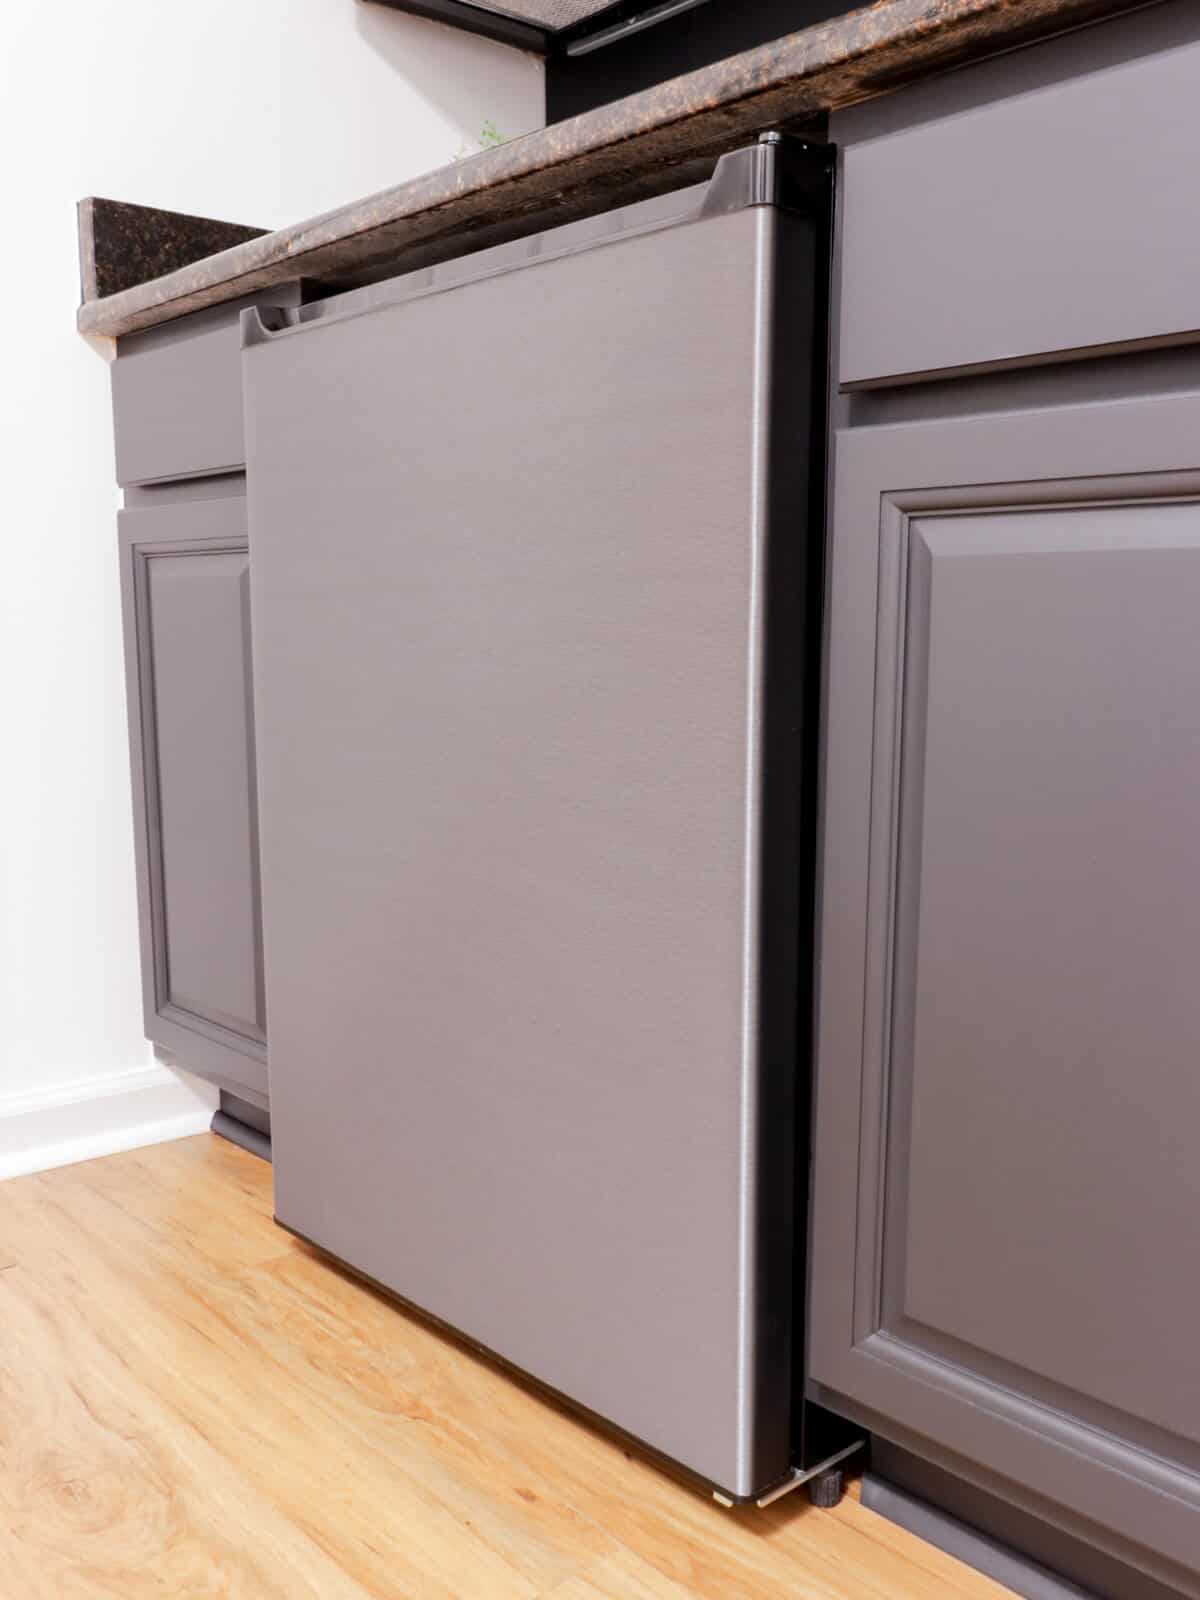
It looks like a seamless design!
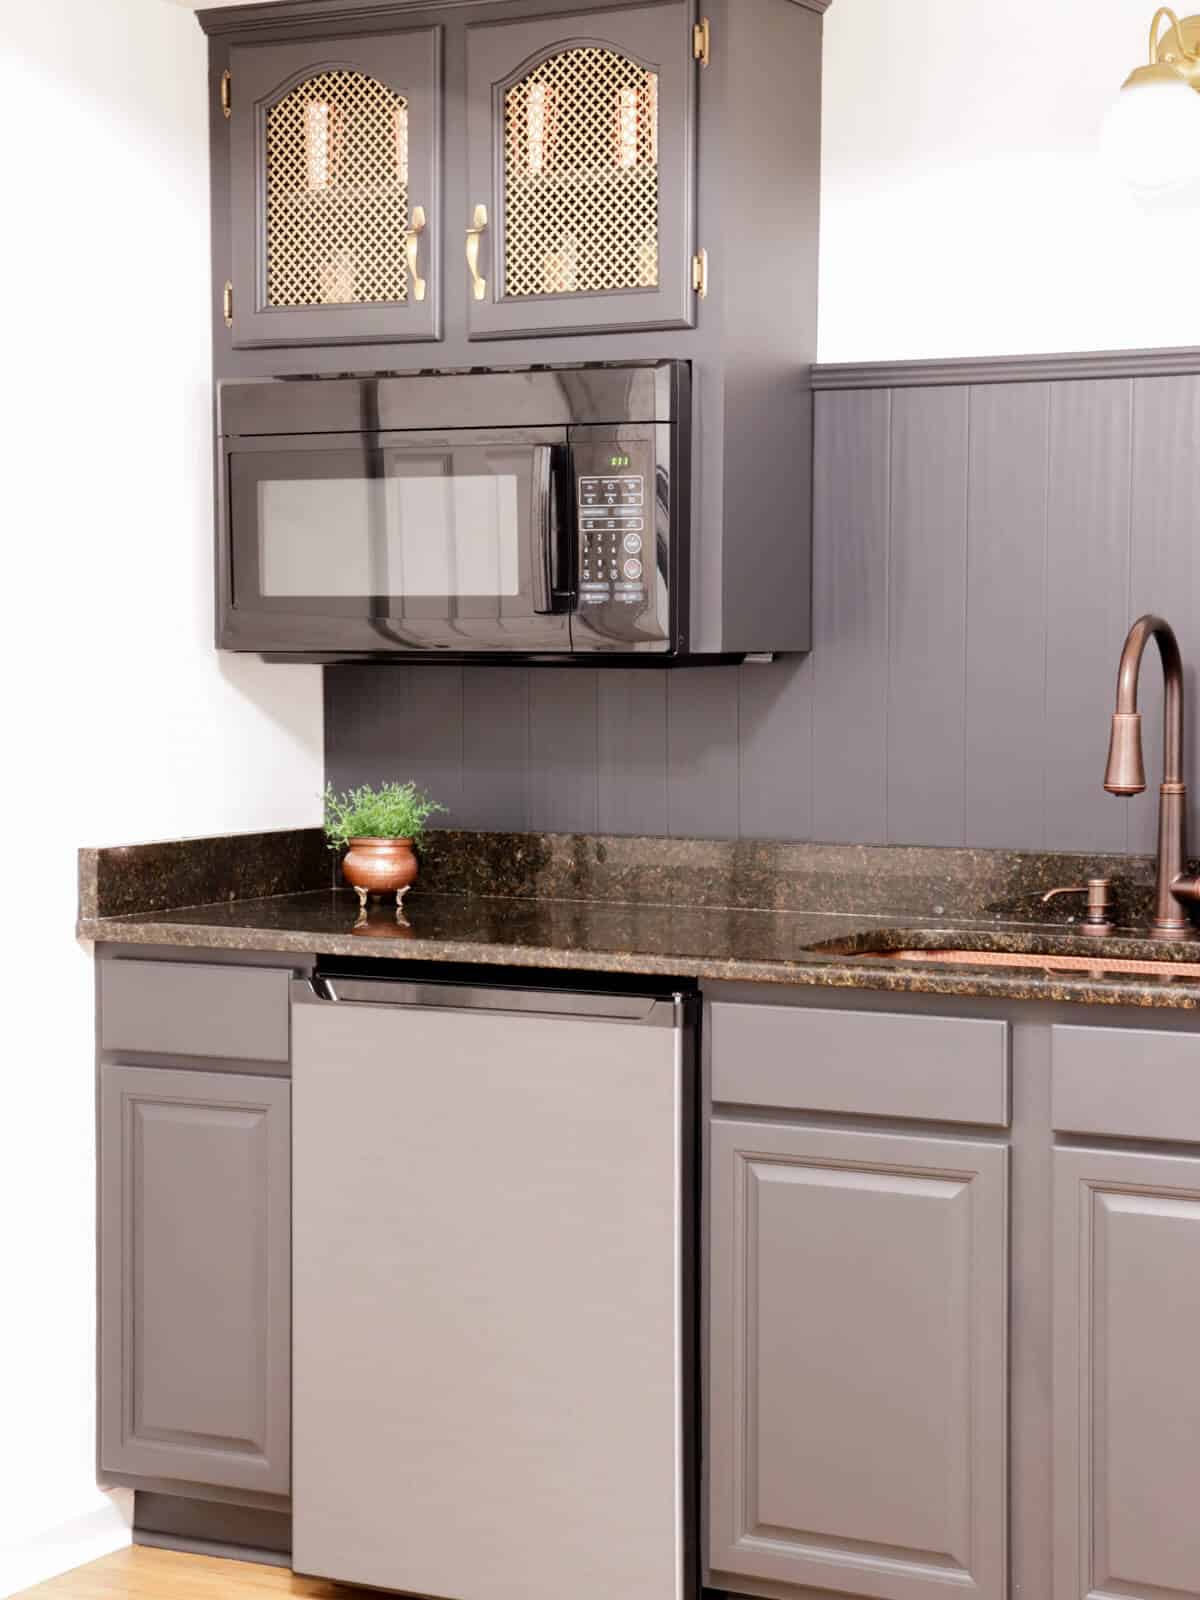
A few years ago we replaced our range hood from our kitchen area on our main floor, we moved the old microwave that was above the stove down to this room.
I would eventually like to replace this with an updated microwave, but since this one works and it’s free – it’s staying for now!
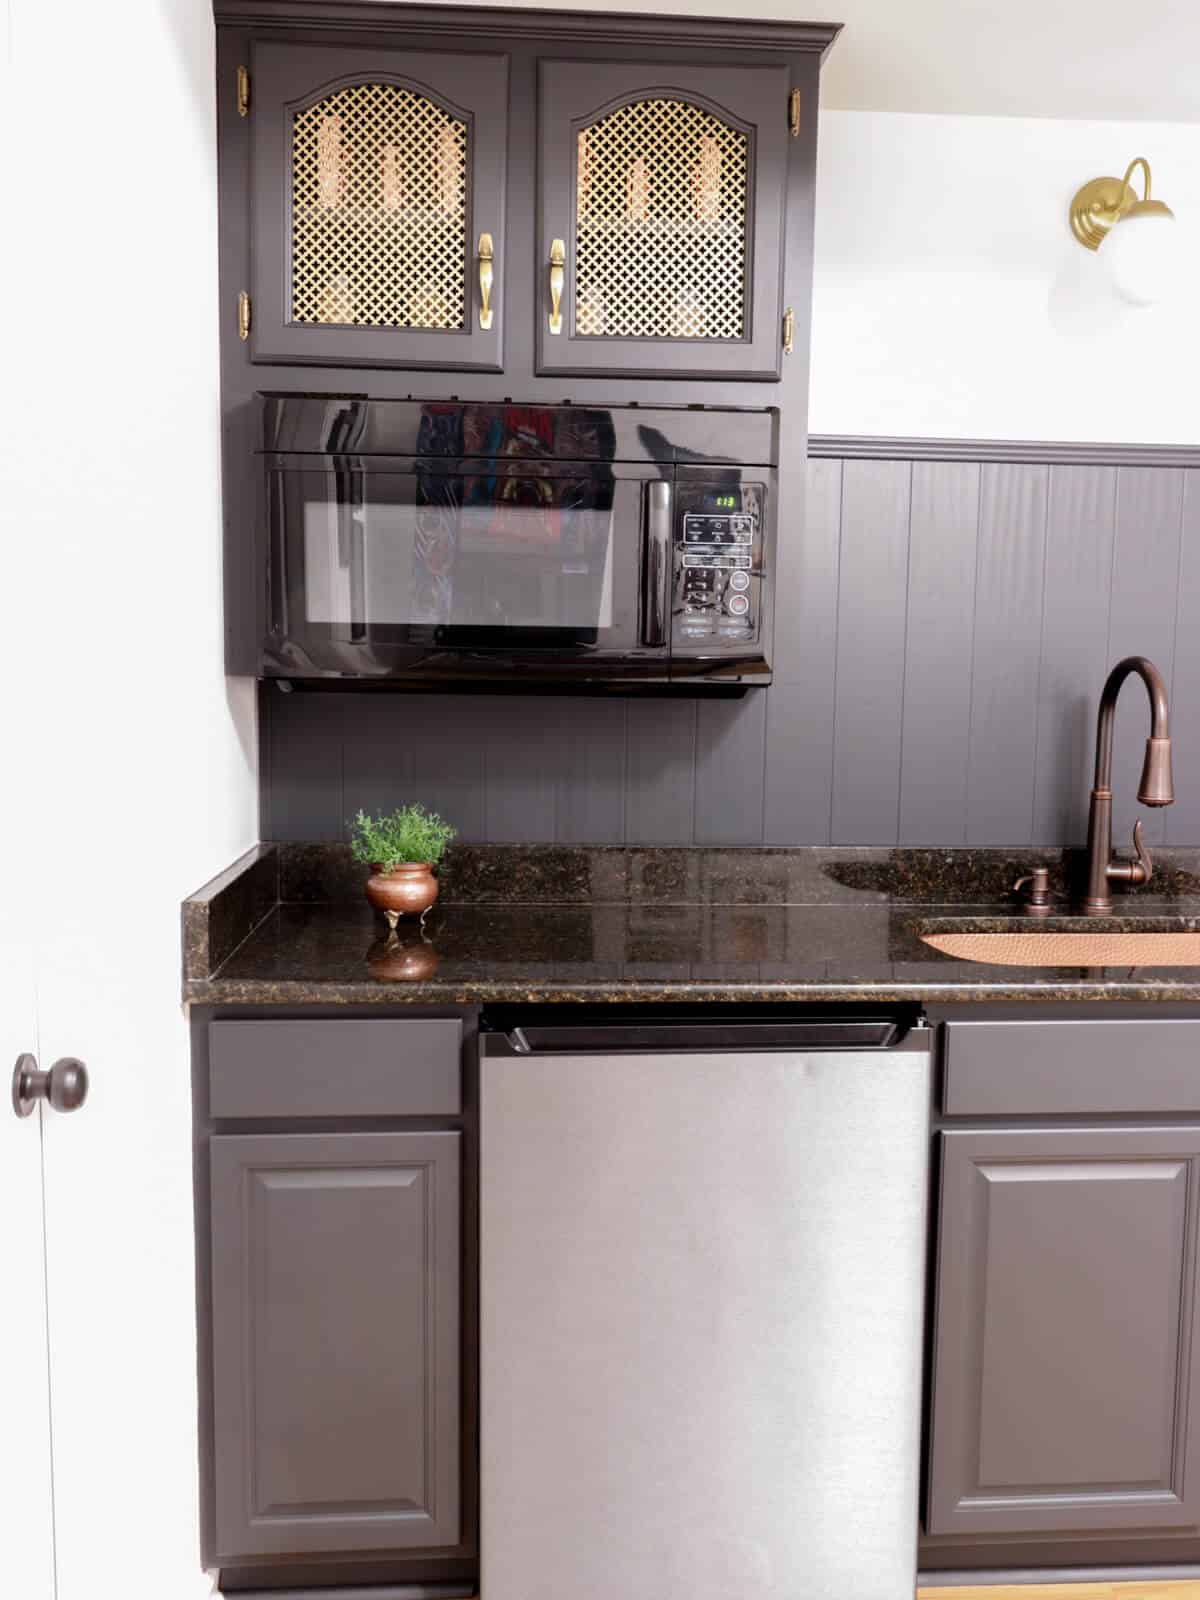
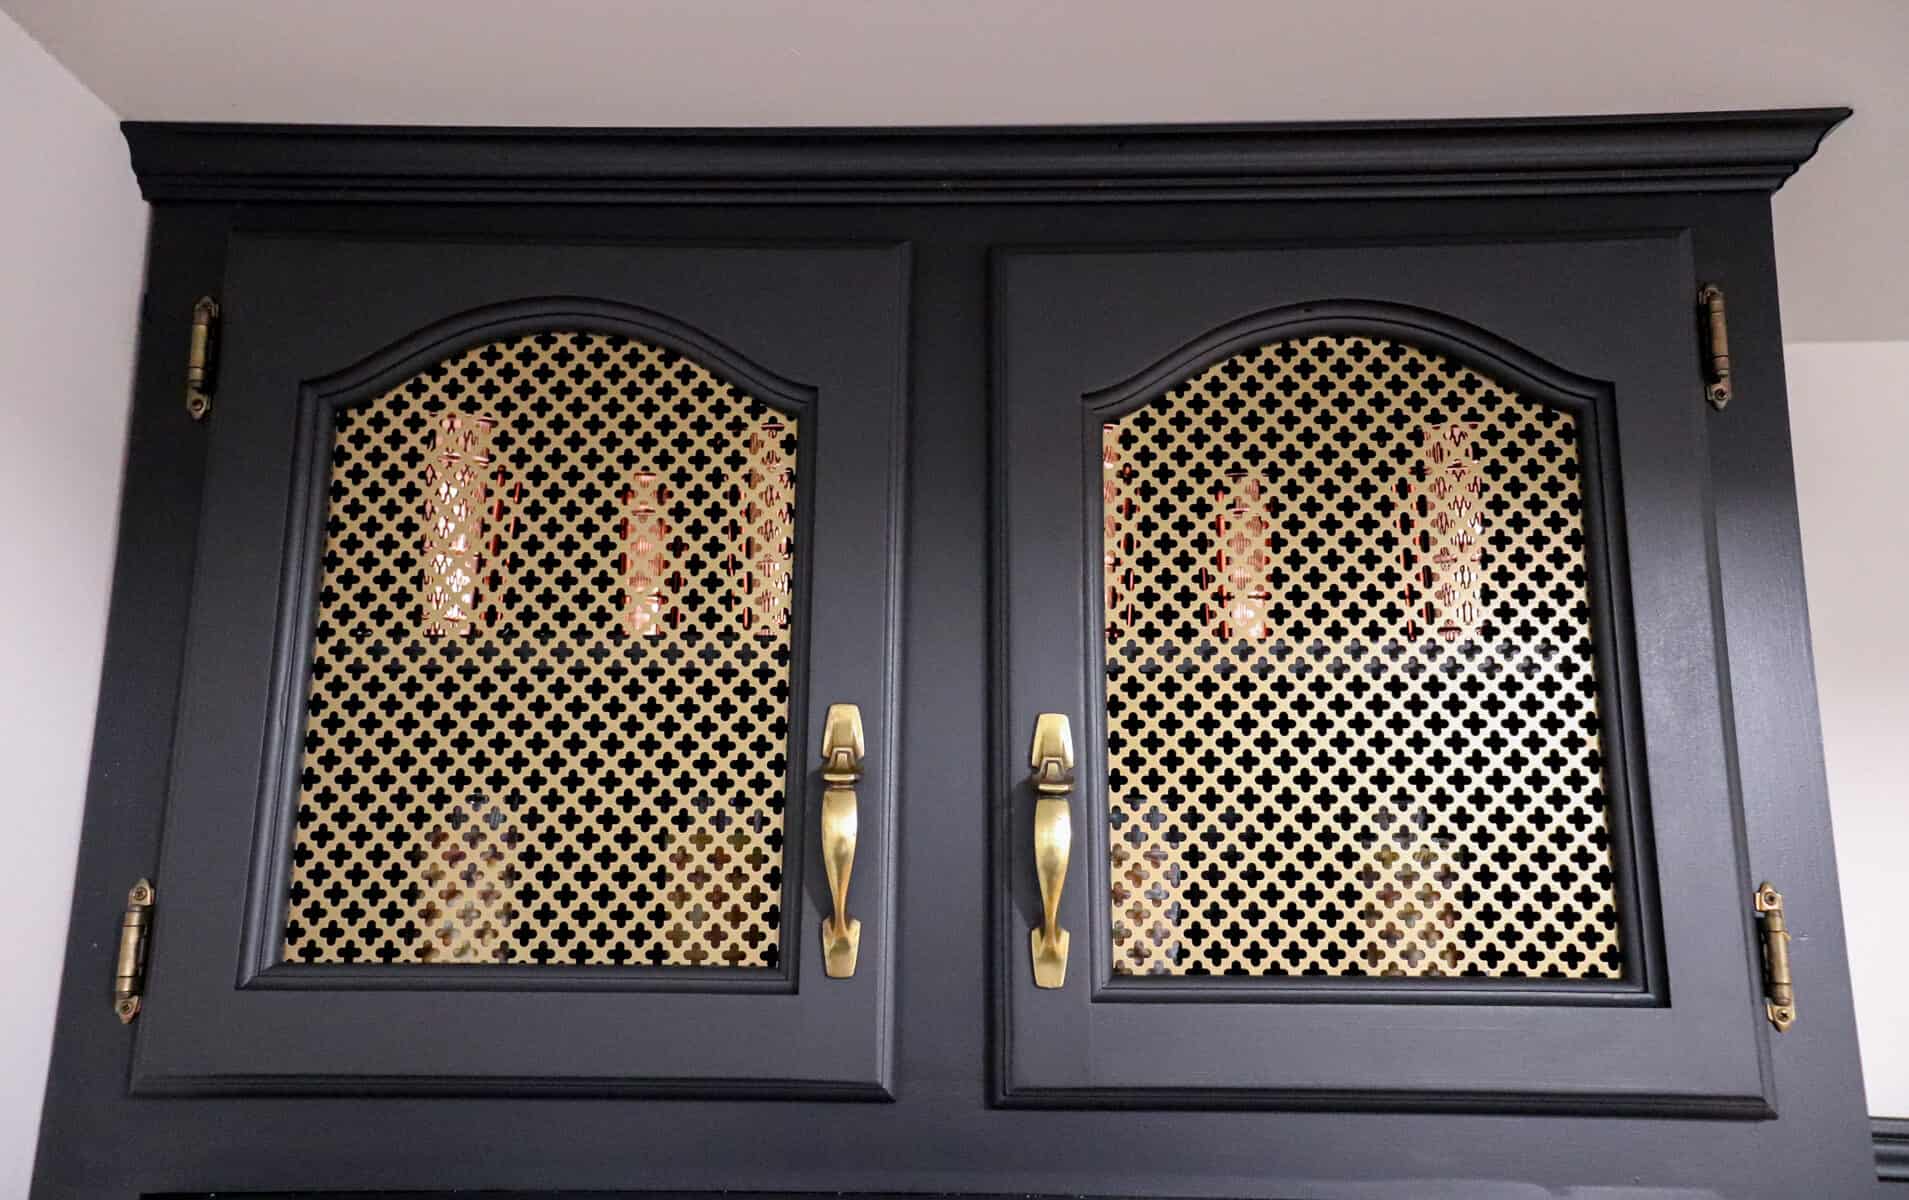
To make the upper cabinet not look mismatched, I removed the center wood panels from each door and replaced it with brass metal sheeting I had on hand.
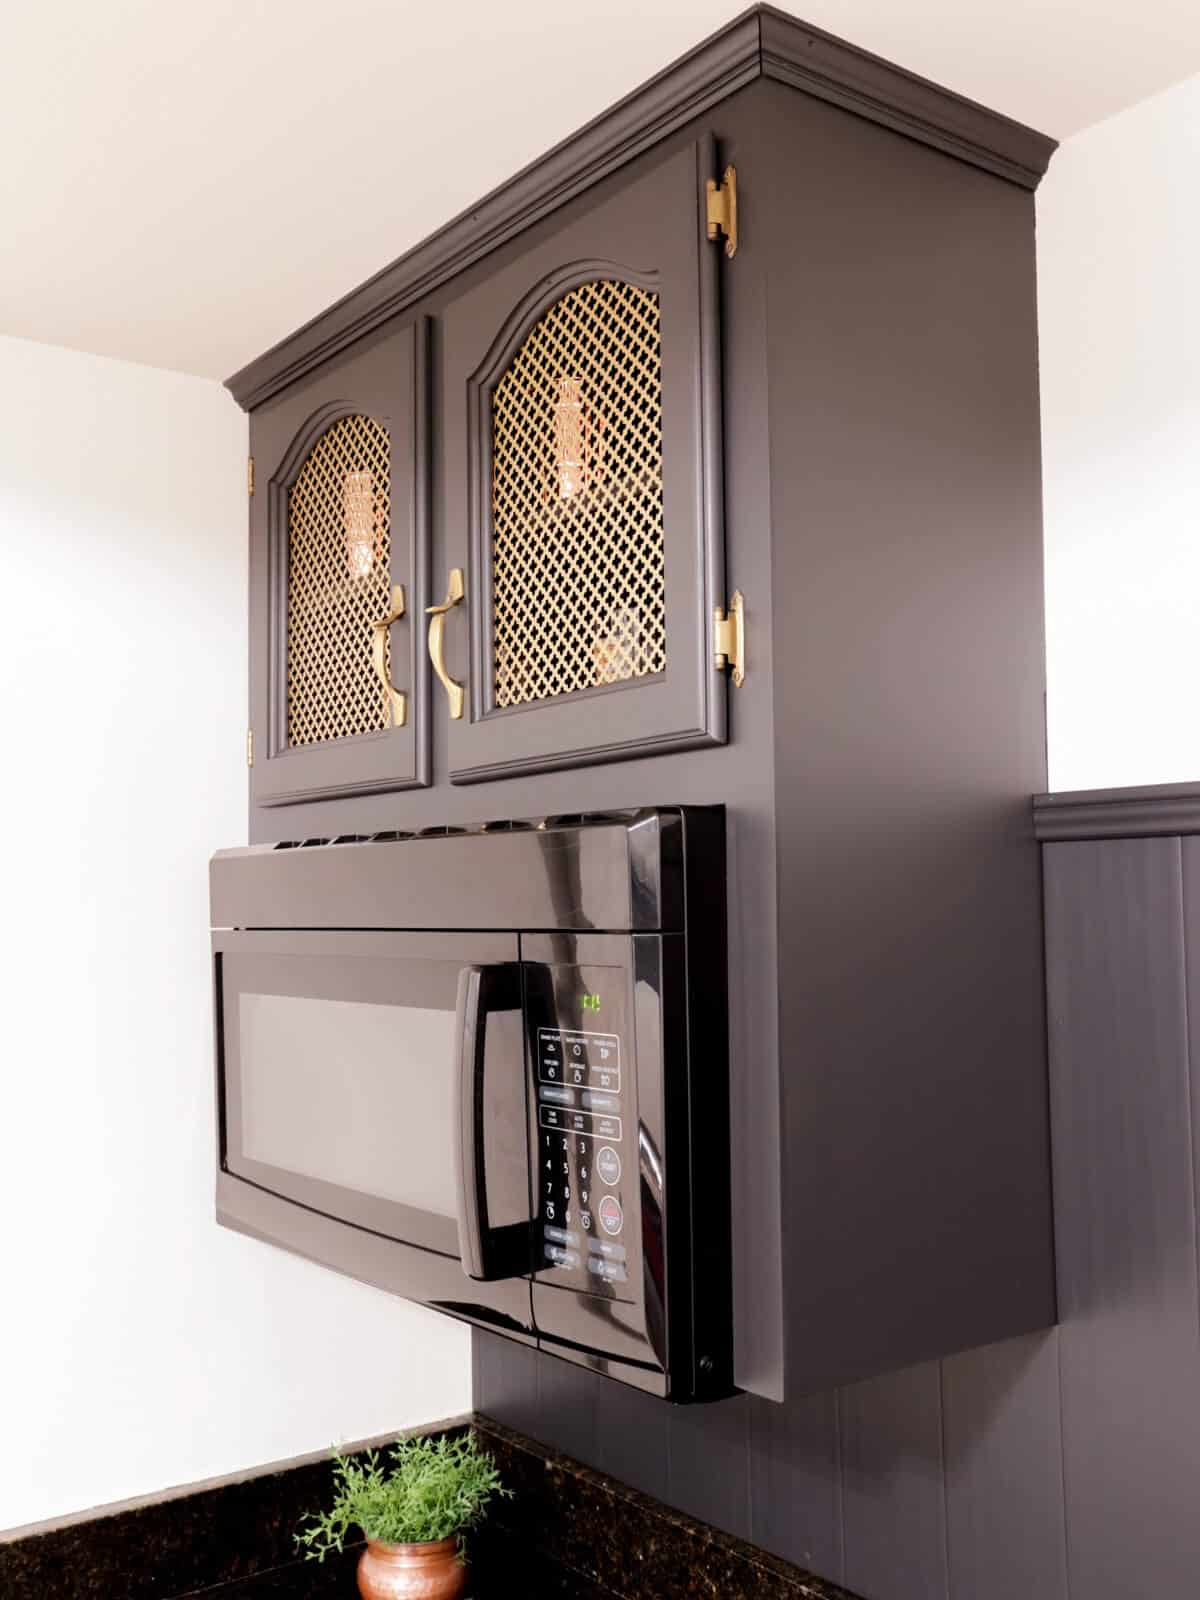
This is the same metal sheet grid that I used on a cabinet in our entryway to disguise an ugly air vent.
And the original hardware is the same that was here before. I just gave it a polish using Bar Keepers Friend and it looks like new!
It’s all about the small details and being able to repurpose and save money makes us super happy!
Here’s another thing that couldn’t have fit any better.
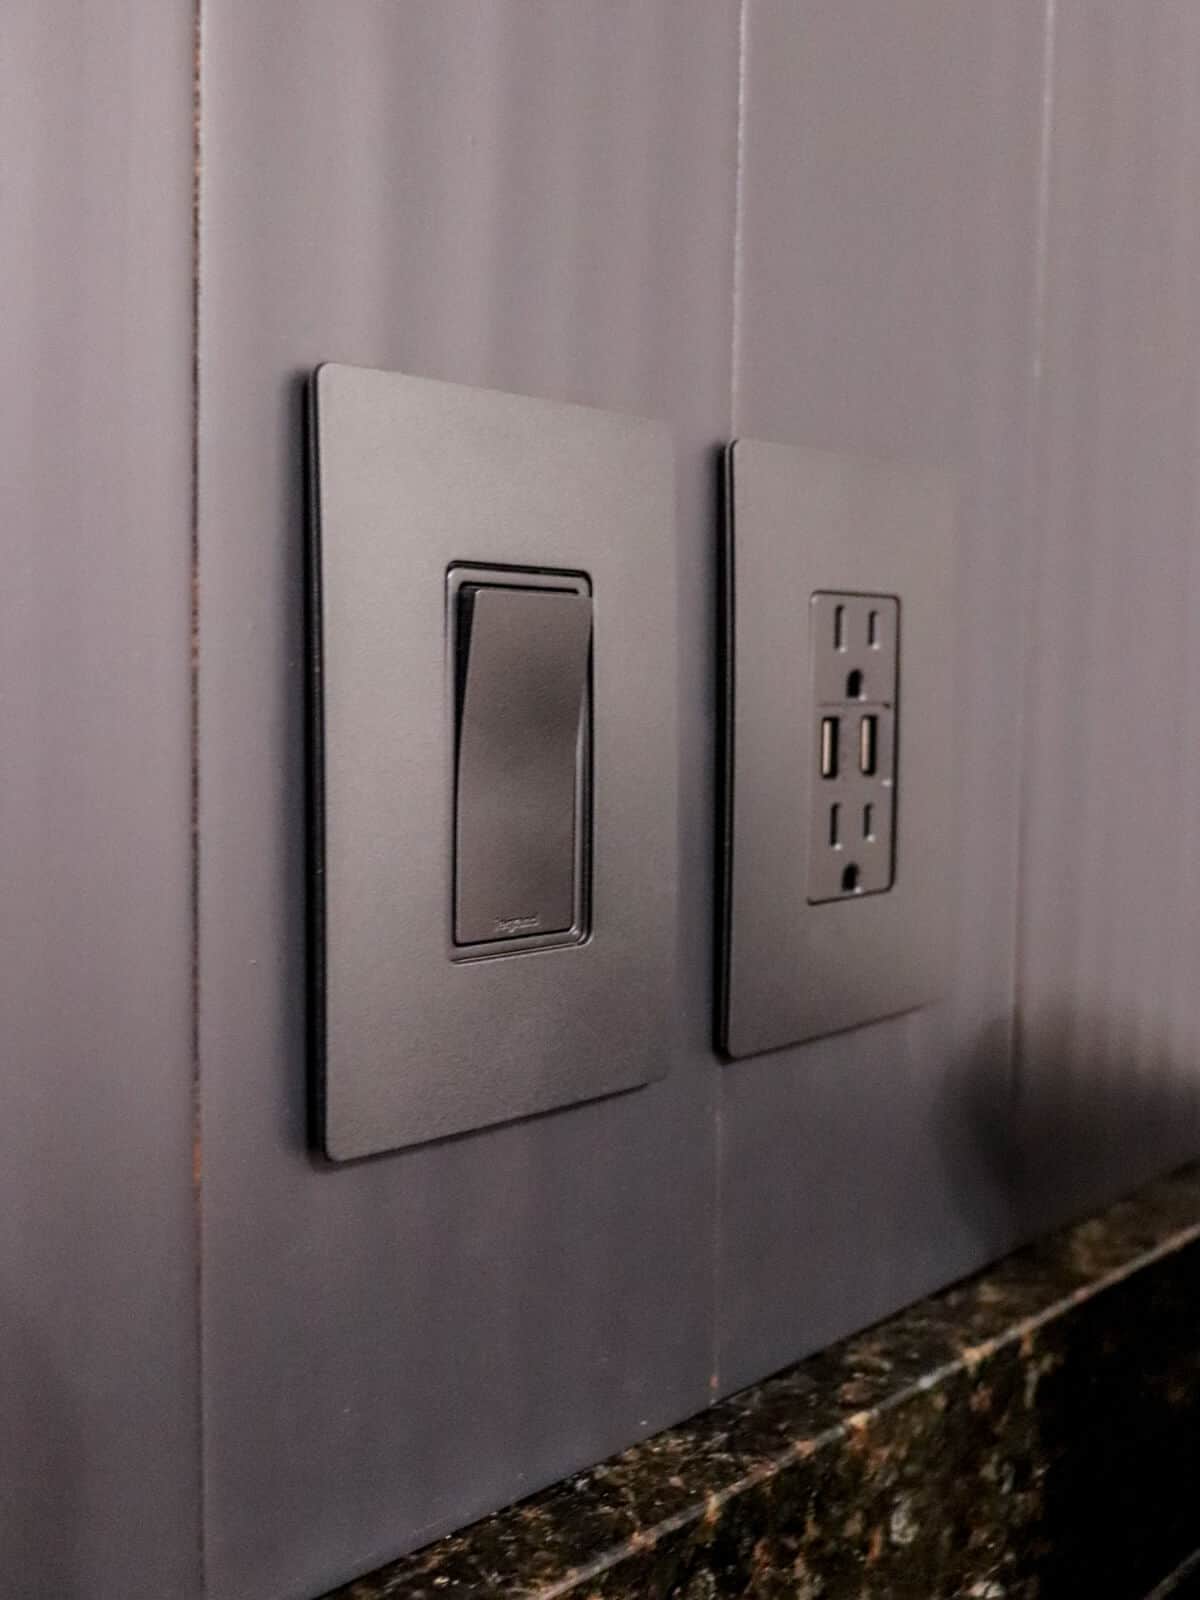
When we replaced our outlets on the backsplash wall, we were able to find these dark gray matte fixtures.
They blend into the wall perfectly!
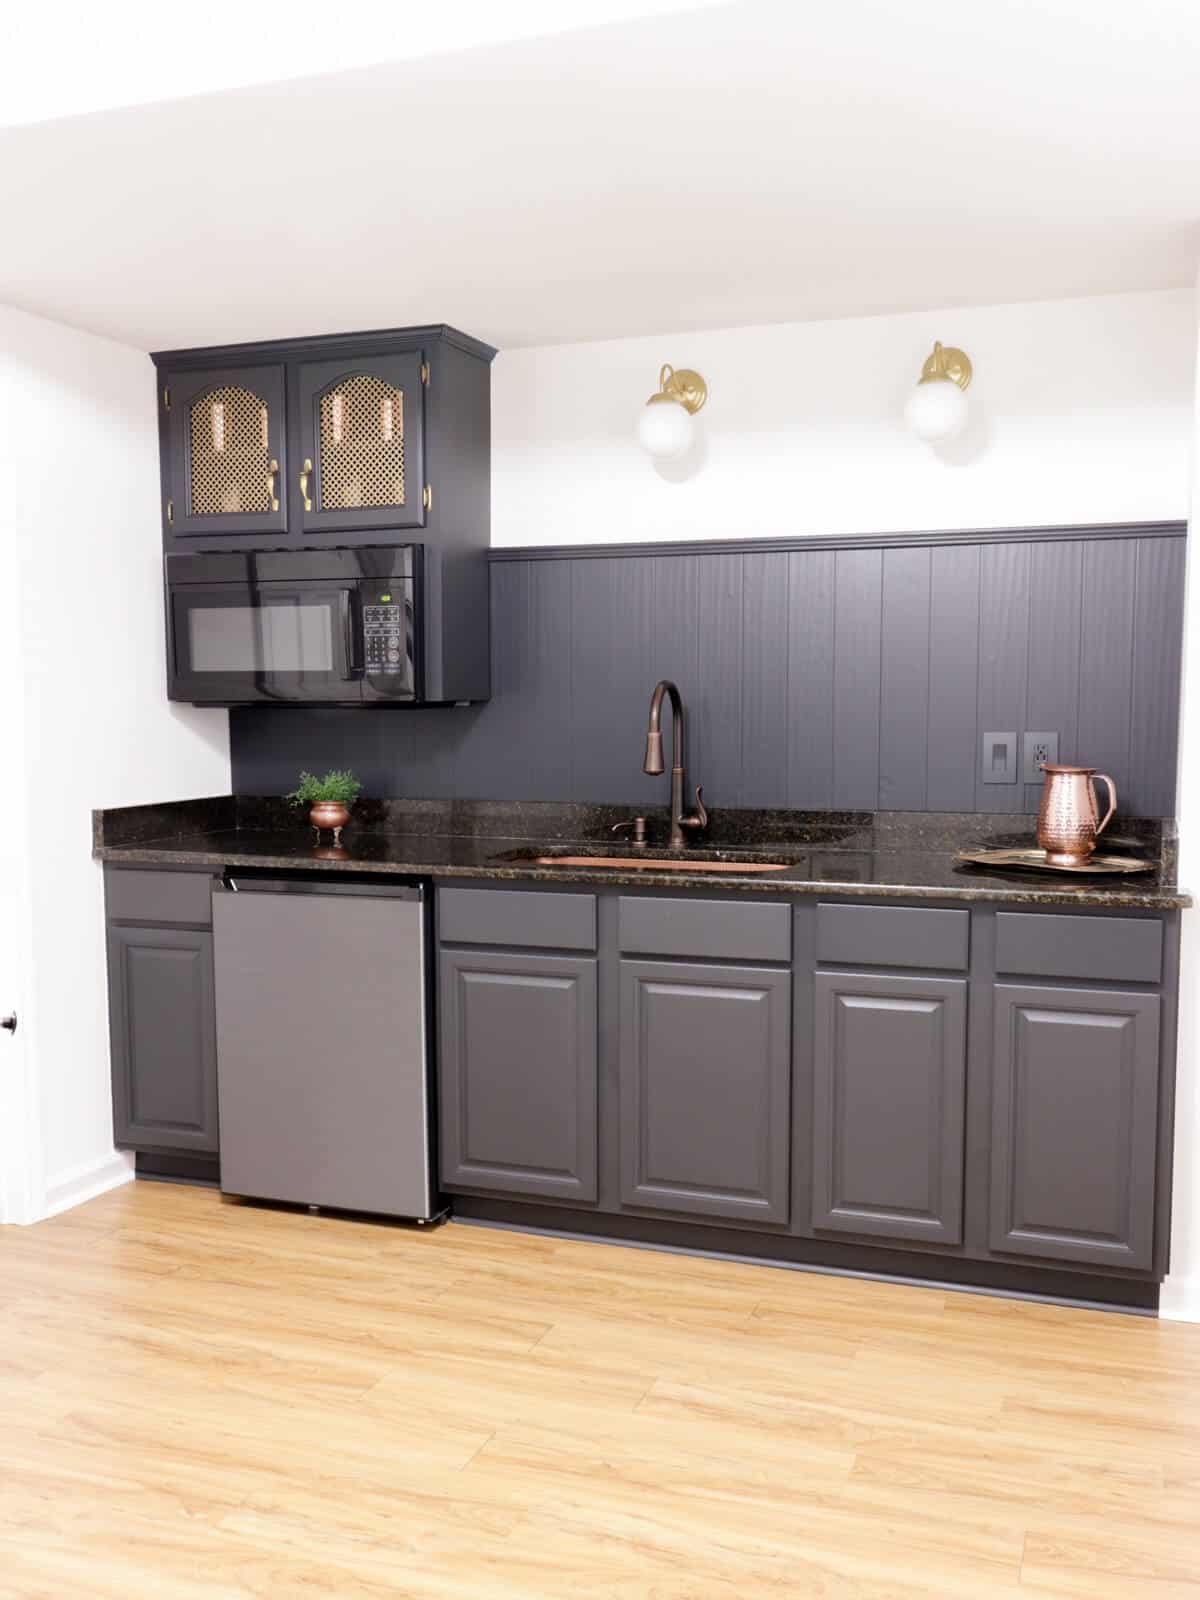
Final Reveal
Now that you’ve seen all the details of the project, are you ready to see the full small kitchenette basement reveal?
Check out this before and after!
Good-bye to those old trouble spots that annoyed us so much!
We are so pleased with the end result!
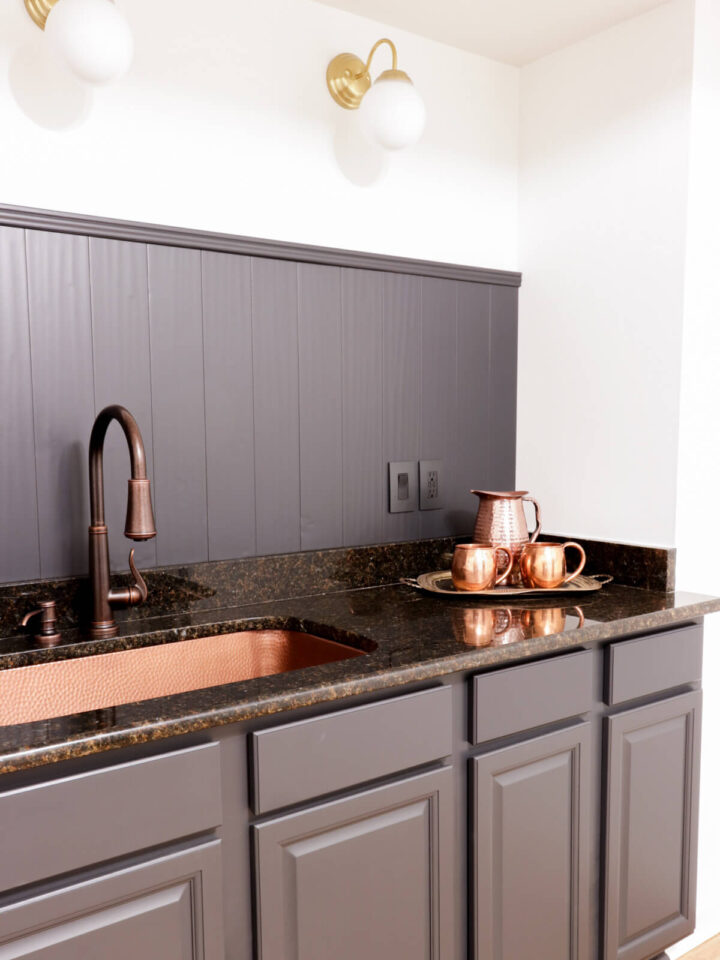
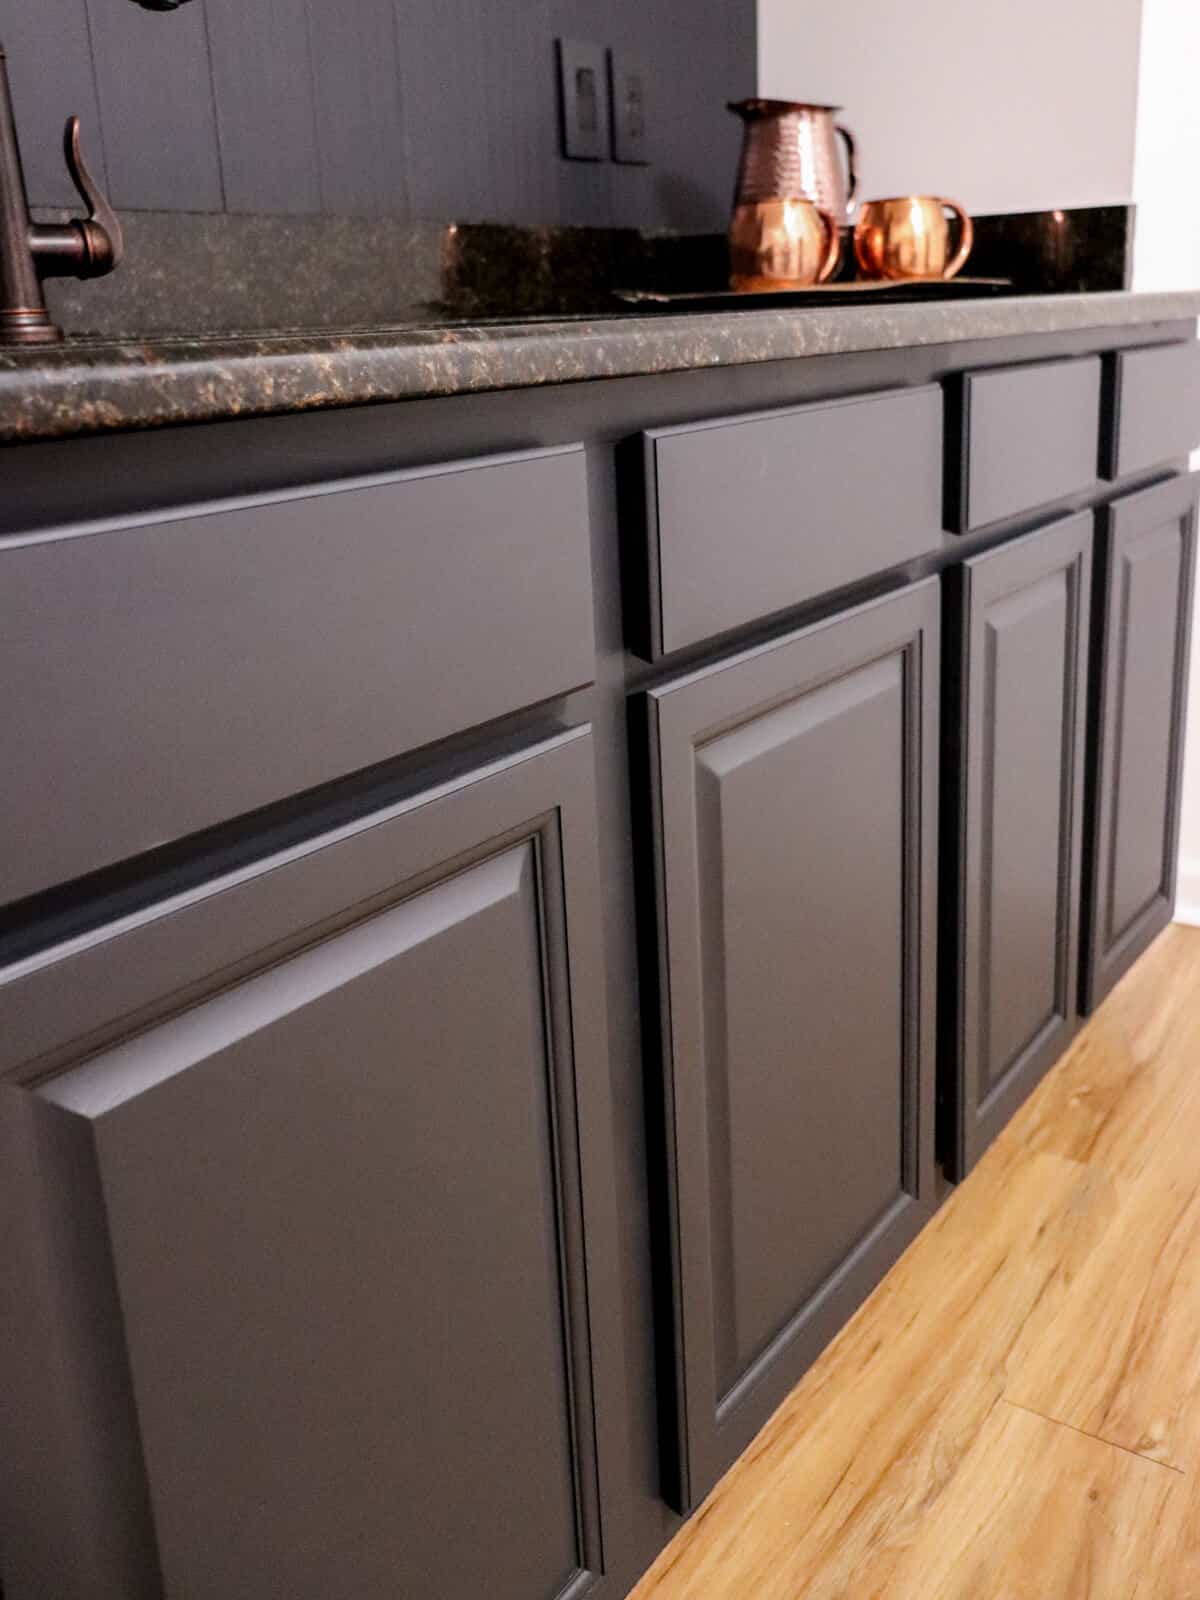
The choice of gray for the cabinets worked well.
It adds a touch of masculinity without darkening the space too much.
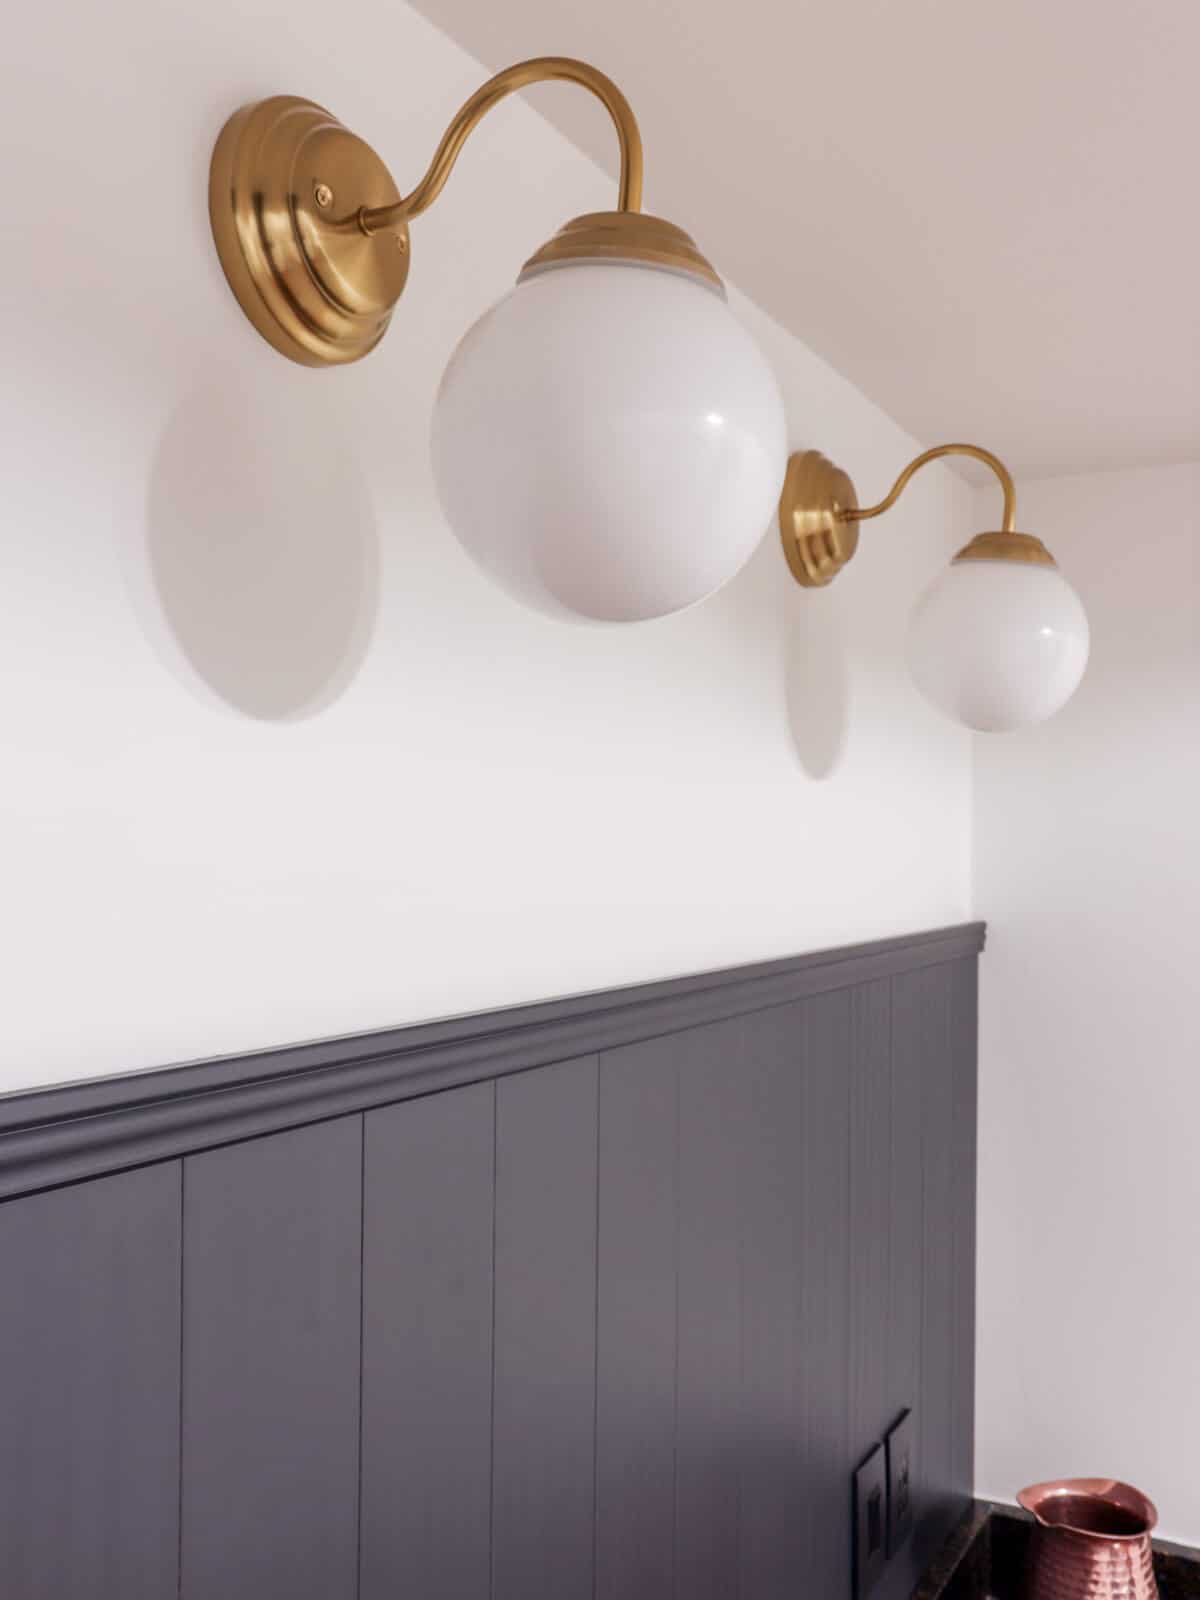
These curved brass lights take up the rest of the space where the old kitchen cabinets were.
And since they were so shallow, installing open shelves would have broken up the light, so we just capped off the wood backsplash with a piece of trim.
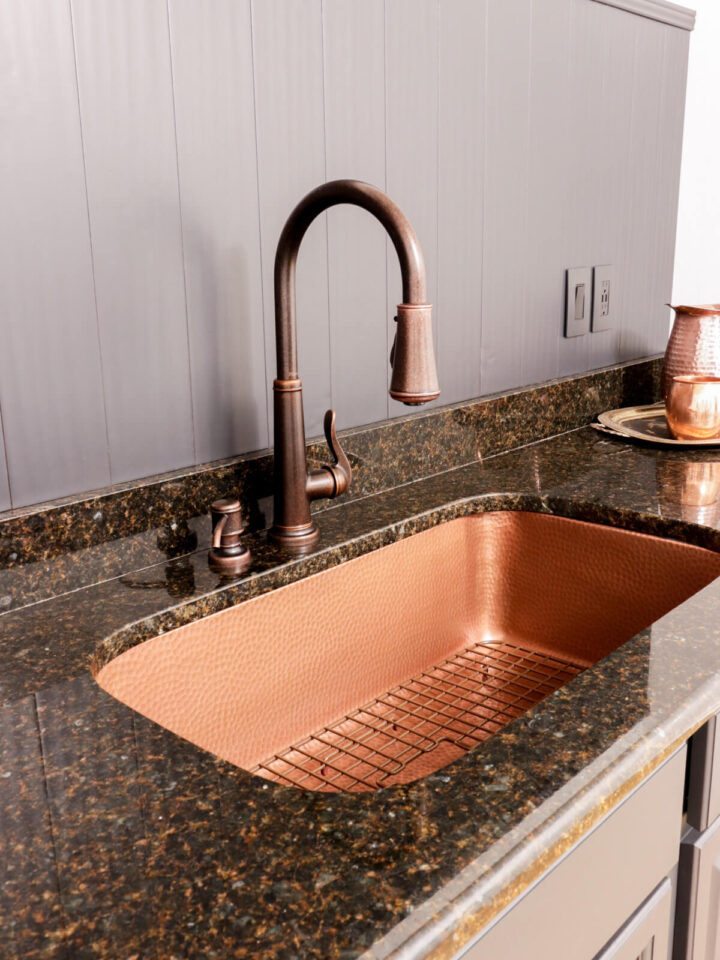
And I am IN LOVE with this large basin sink.
This was one of the things I wanted for this basement kitchen design.
If we have a large gathering, I can fill it with ice and have cold drinks on hand for anyone to grab.
The Big Surprise!
You didn’t think I forgot to share the big secret I’ve been keeping for so long, did you?
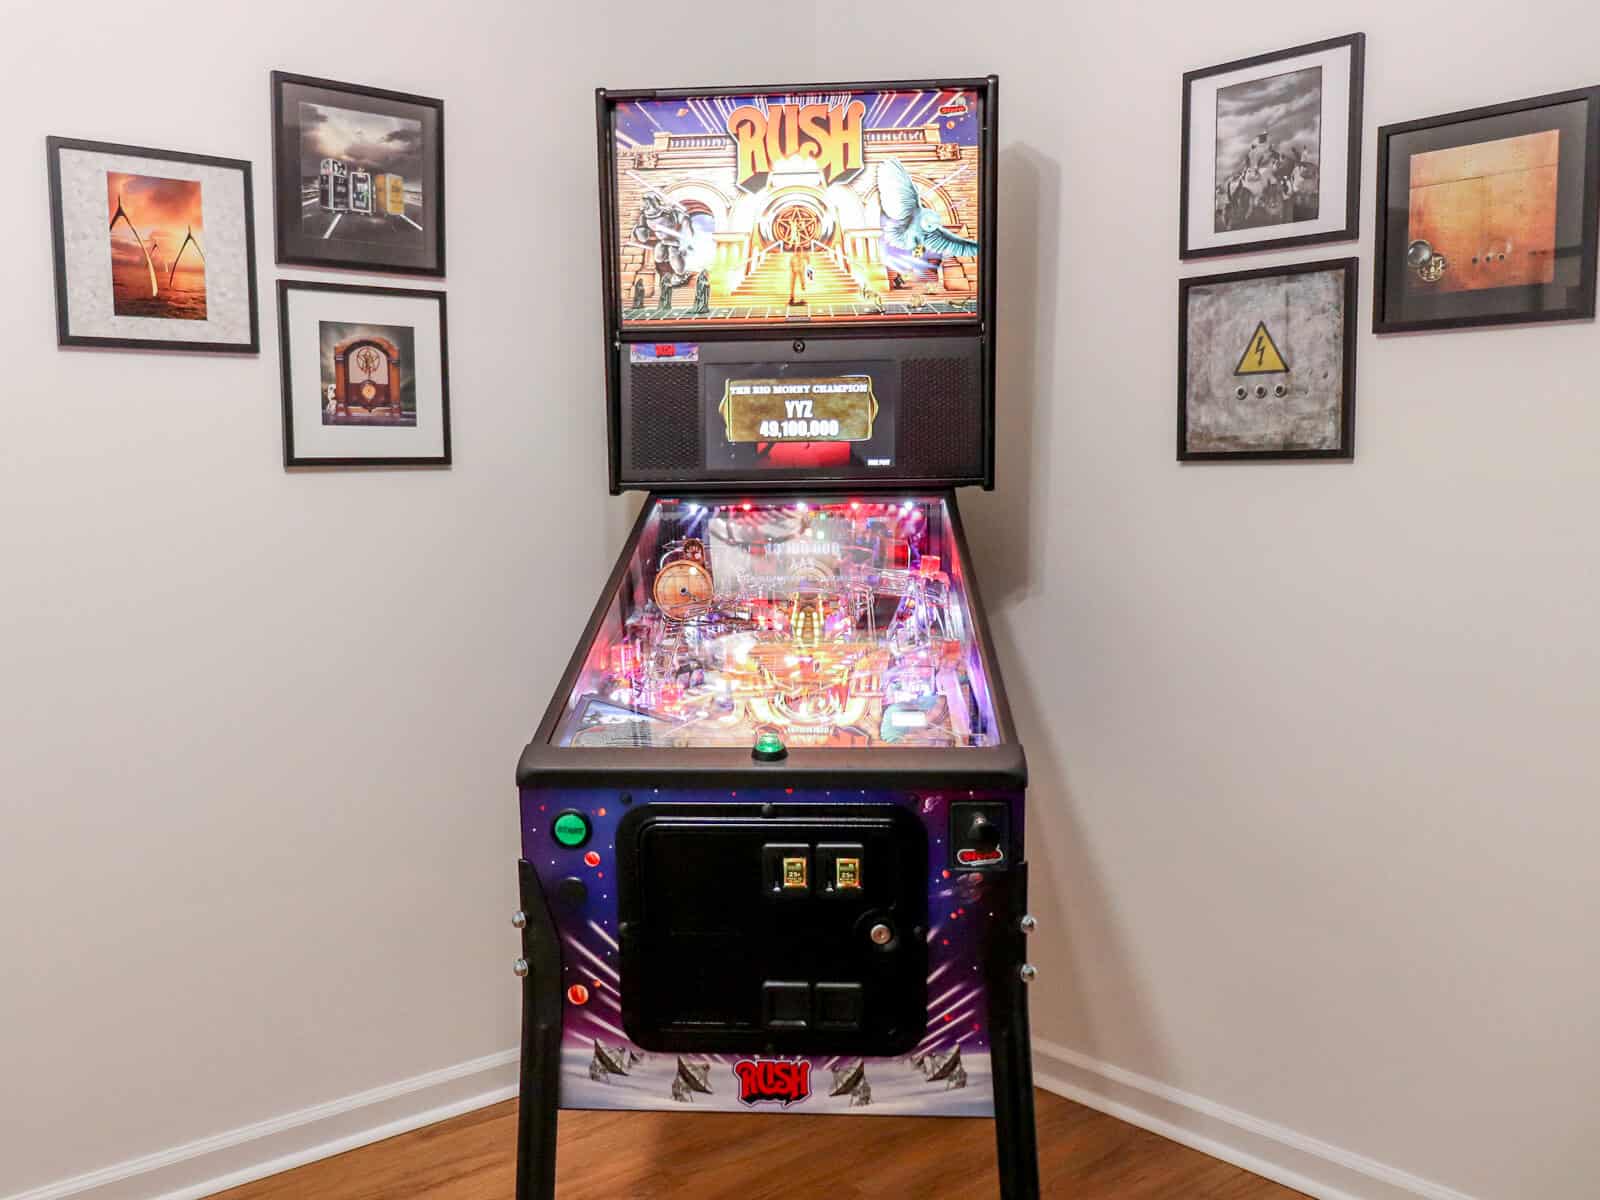
This isn’t just a kitchenette anymore – it’s a legit basement tavern.
Right smack in the middle of the space?
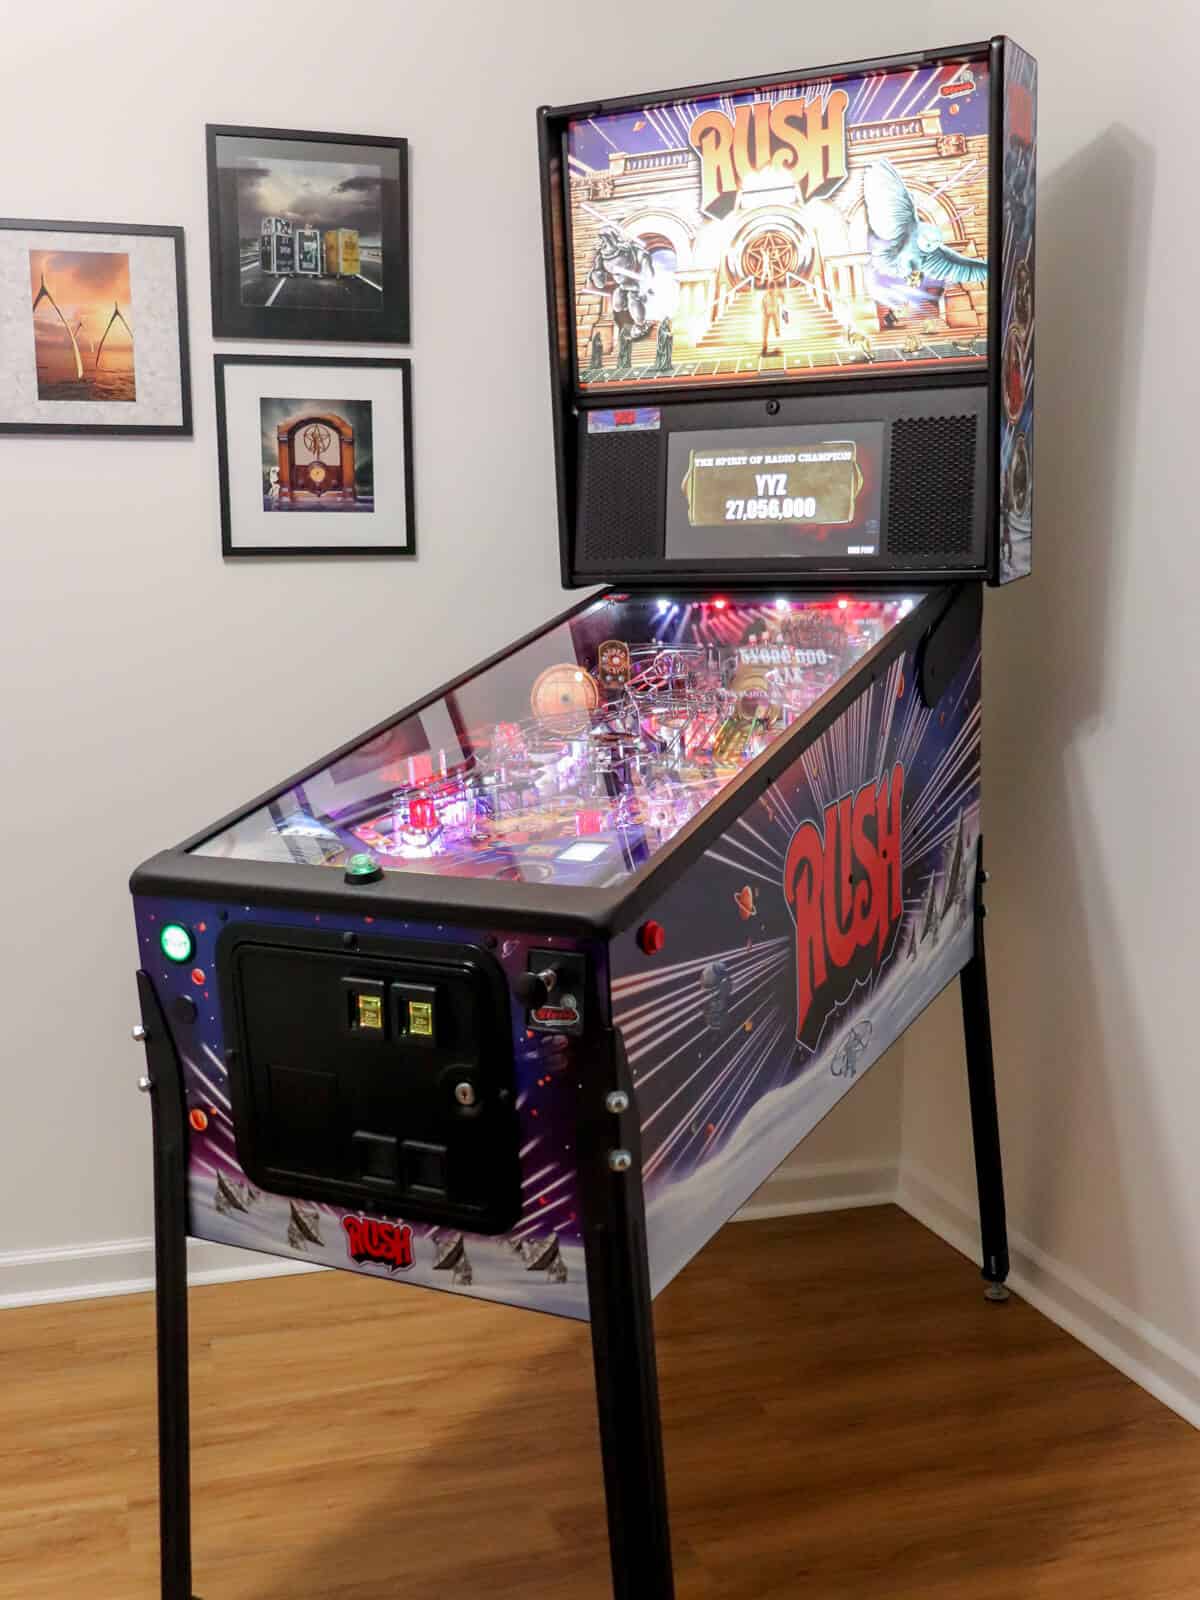
A custom Rush Band Pinball Machine in our basement kitchenette makeover!
Trent has wanted a pinball machine ever since we were dating (like… decades ago).
So when Rush announced their limited edition model, we KNEW it was meant to be.
And now the tavern vibe is complete – with framed Rush album art and color-changing party lights for serious hangout goals!
So now this is an entertainment space where one can play pinball, grab a drink and hang out.
So we were able to take this once forgotten, cluttered space and create and turn it into a functional, personality packed kitchenette – all on a tight budget!
If you’re staring at a sad little corner of your home thinking this will never be cute – don’t buy into that lie!
You CAN create a beautiful space with a little creativity AND on a tight budget.
If you have any questions, reach out below. We would love to hear from you and help out in any way we can!
Video Link
You can find more video tutorials on our Youtube Channel
Our favorite supplies used for this project
Here are some of the supplies that we used to makeover this room that are our go to helpers!

Estwing Wrecker Bar
We love this handy tool and use it all the time. It’s perfect to remove trim, wall paneling, or nails with minimal damage.
BIN Zinsser Shellac Primer
We have this on hand for those tough spots that keep peeking through. Be warned! It has strong VOCs so wear a mask.
FAQs About Designing a Small Basement Kitchenette
What defines a kitchenette versus a kitchen?
Kitchenettes are compact spaces that offer some items a kitchen has but not the full appliances in a typical kitchen.
If you are starting from scratch and in the planning phase, consider what you hope to achieve with adding a kitchenette to your home.
There is a lot to learn about kitchenettes. Check out this Redfin article we were featured in for all you need to know about why kitchenettes have big potential!
How much space do you need for a small kitchenette?
Around 80-100 square foot is perfect. Ours is just over 100 and works beautifully for our needs.
Does a basement kitchenette add home value?
Absolutely! Finished basements with special amenities like a kitchenette, rec room, or work out space massively boost resale value.
What should be in a basement kitchenette?
Honestly, whatever you want! I mean, we’ve got a pinball machine in ours!
But truly, think about your home and what you need. Is another oven important? Would you like an extra dining area for game day?
My mother-in-law loves to cook and has enjoyed having a second kitchen in her basement to prepare for large family gatherings.
Make it work for you.
Decor Sources
We sometimes take for a granted that we have years (or decades) of cooking experience, that the average visitor may not. Add to, or remove from, the list below with health and safety tips.
- Wall Paint: Grace Note White in Matte
- Cabinet Paint: Fusion Mineral Paint in Ash
- Flooring: Tarkett Luxury Vinyl Tile in Pecan Swirl (no longer available)
- Sink: Hammered Copper Sink (All in One Kit available)
- Faucet: Ashfield Bronze Faucet with Pull Down
- Ceiling Light: Barrington Drum Light
- Wall Sconces: From Ikea – discontinued. Similar one here
- Mini Fridge Wrap: Vinyl Appliance wrap in Gunmetal Gray
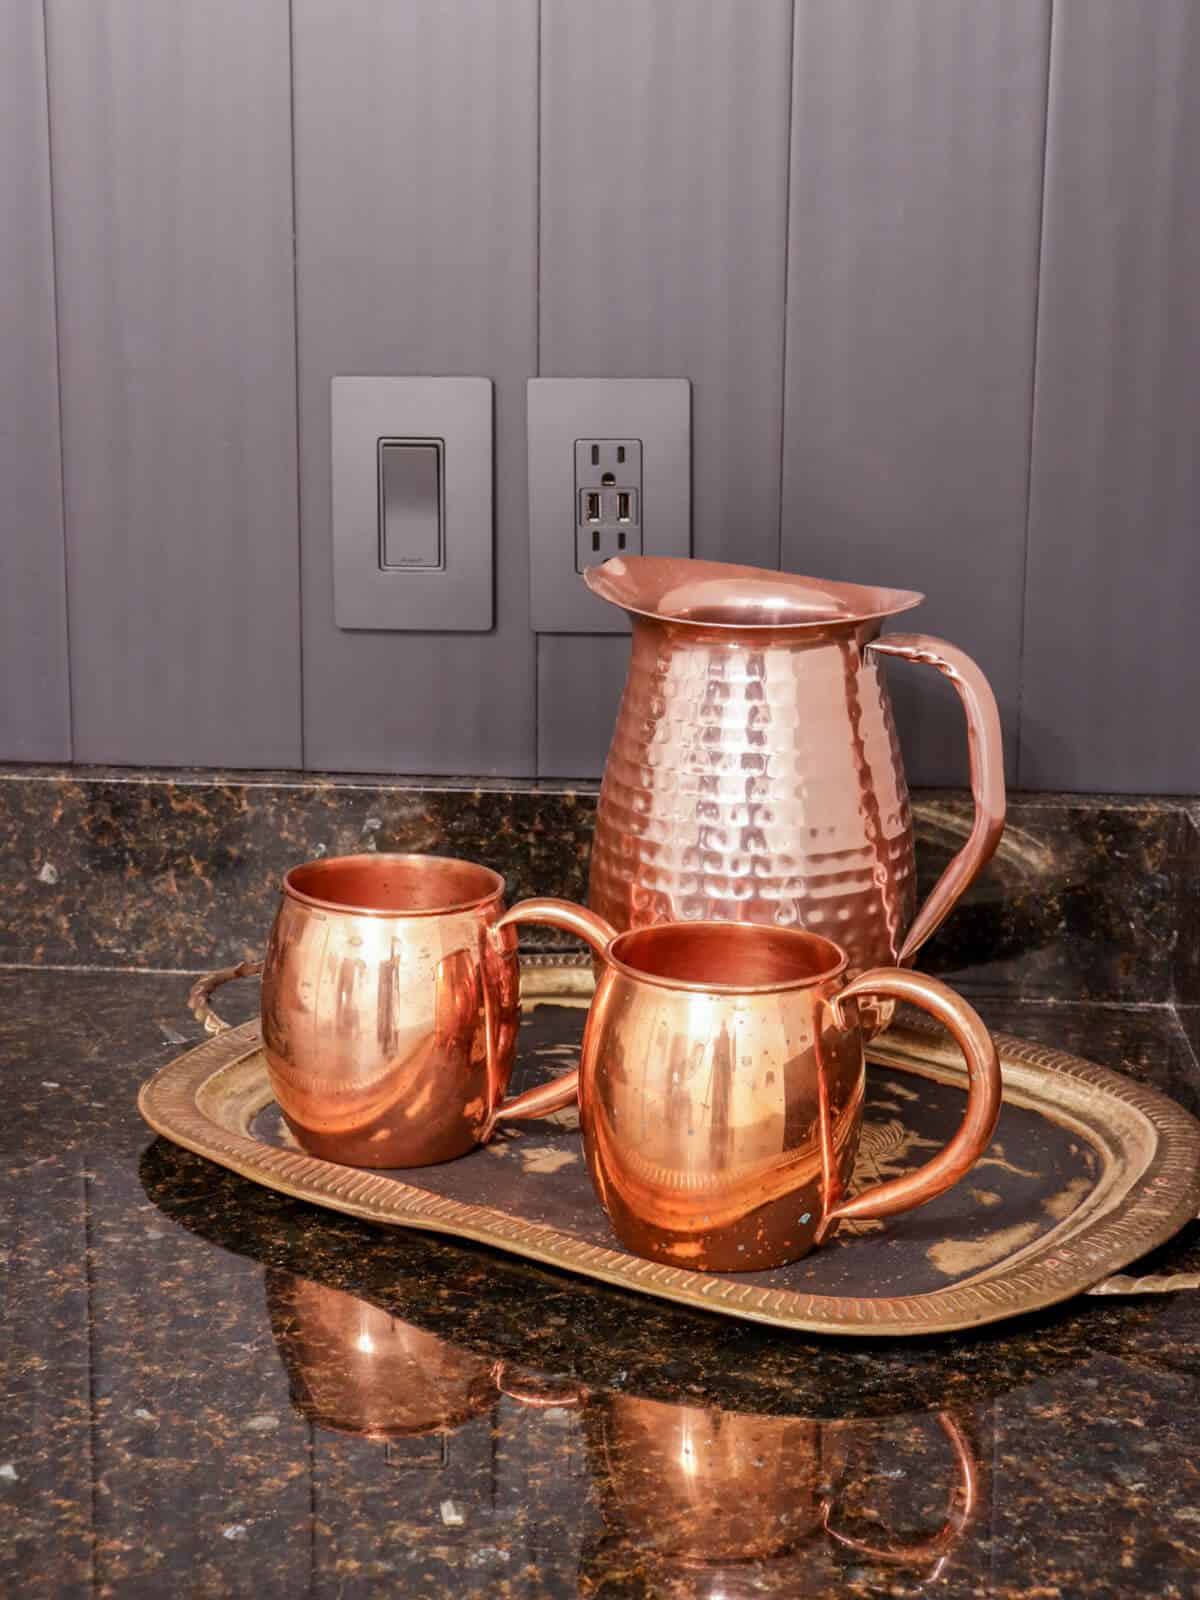
- Hammered Copper Pitcher
- Moscow Mule Mugs
- Brass Decorative Sheet Metal for Microwave Cabinet
Tutorials in this post
Check out the other tutorials I shared in making over this small basement kitchenette reveal:
Feeling Inspired?
We hope this small kitchenette makeover shows you that even forgotten corners can become stunning spaces – and yes, you CAN do it on a budget!
Pin this project for later or subscribe for more DIY tutorials, behind the scenes peeks, and simple renovation tips!

Thank you, Stacy!
Thanks Mary! We are loving how it all turned out!
Wow! What a transformation. I love the copper accents as they go so well with all your color selections! Great job!
Jen this turned out amazing!!!! wow!
That is quite the transformation! I know y’all enjoy spending time in there. Everything is so well thought out and perfect. I never even realized they made dark gray switches. Those are fantastic! Great job. pinned
Thank you Janice! I found that on Amazon. If you scroll to the bottom of the post, I have the exact one linked for you!
Turned out beautiful! Love the gray cabinets and copper sink and touches. Where did you purchase the gray film for the mini fridge?