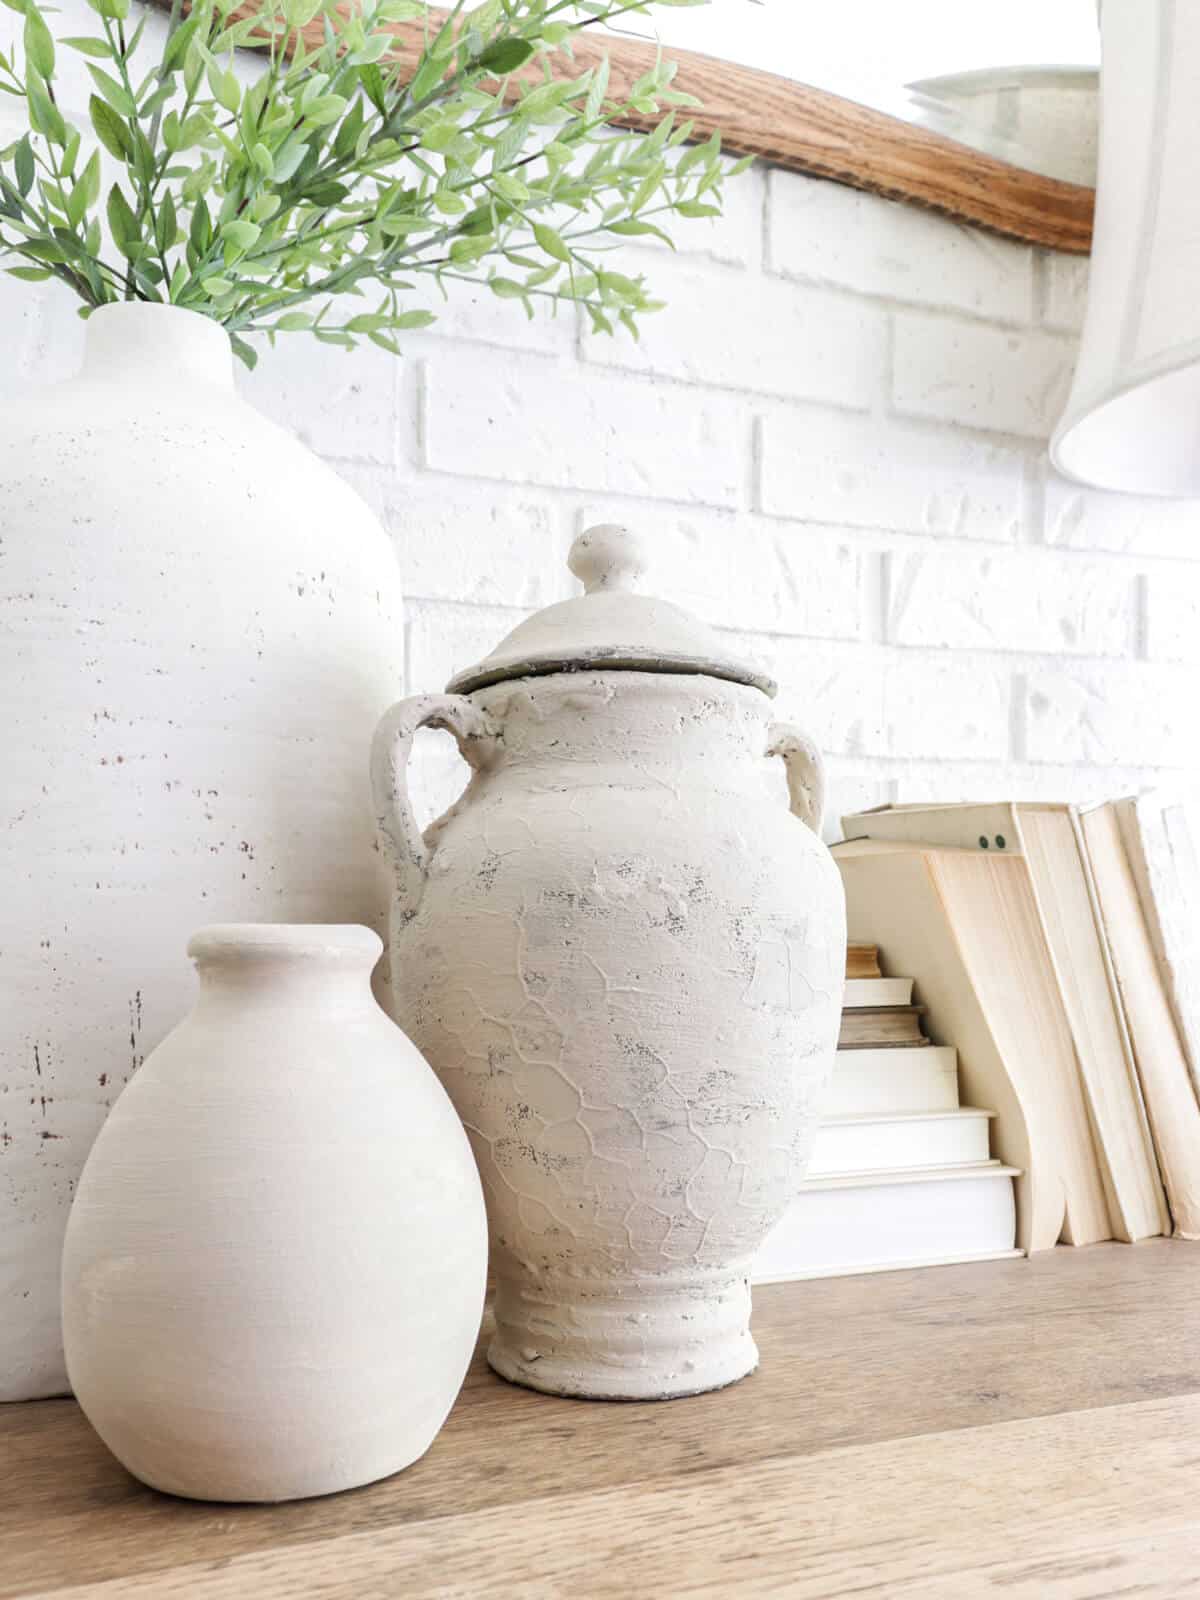
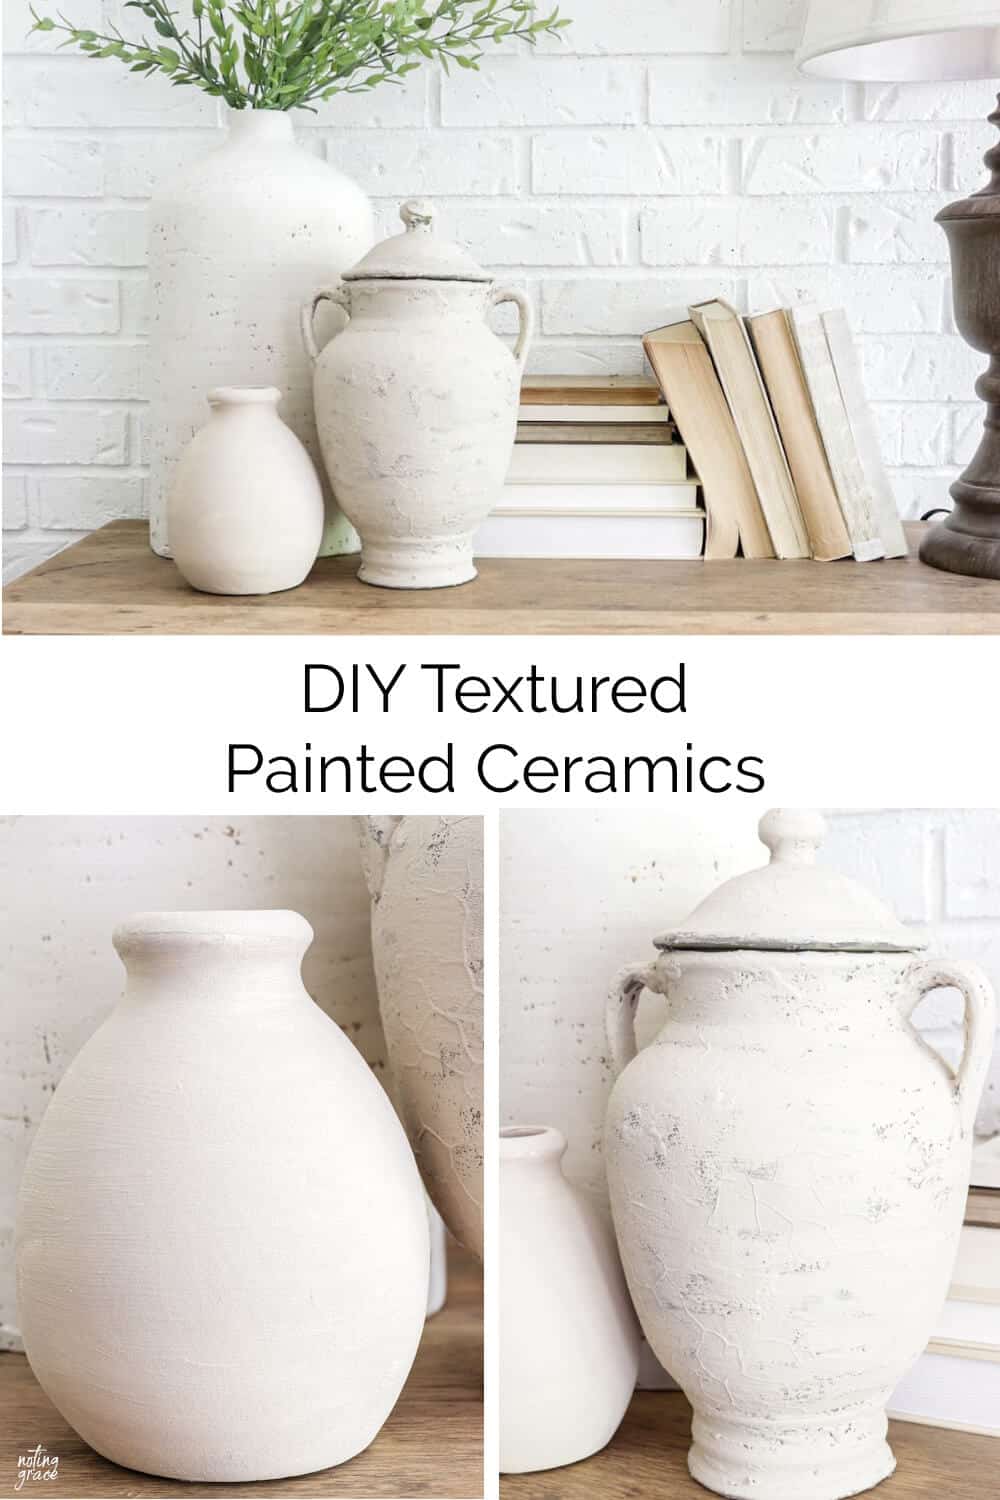
DIY Textured Painted Ceramics
Do you have old ceramic vases around that no longer fit your style? These DIY textured painted ceramics are a great idea to consider.
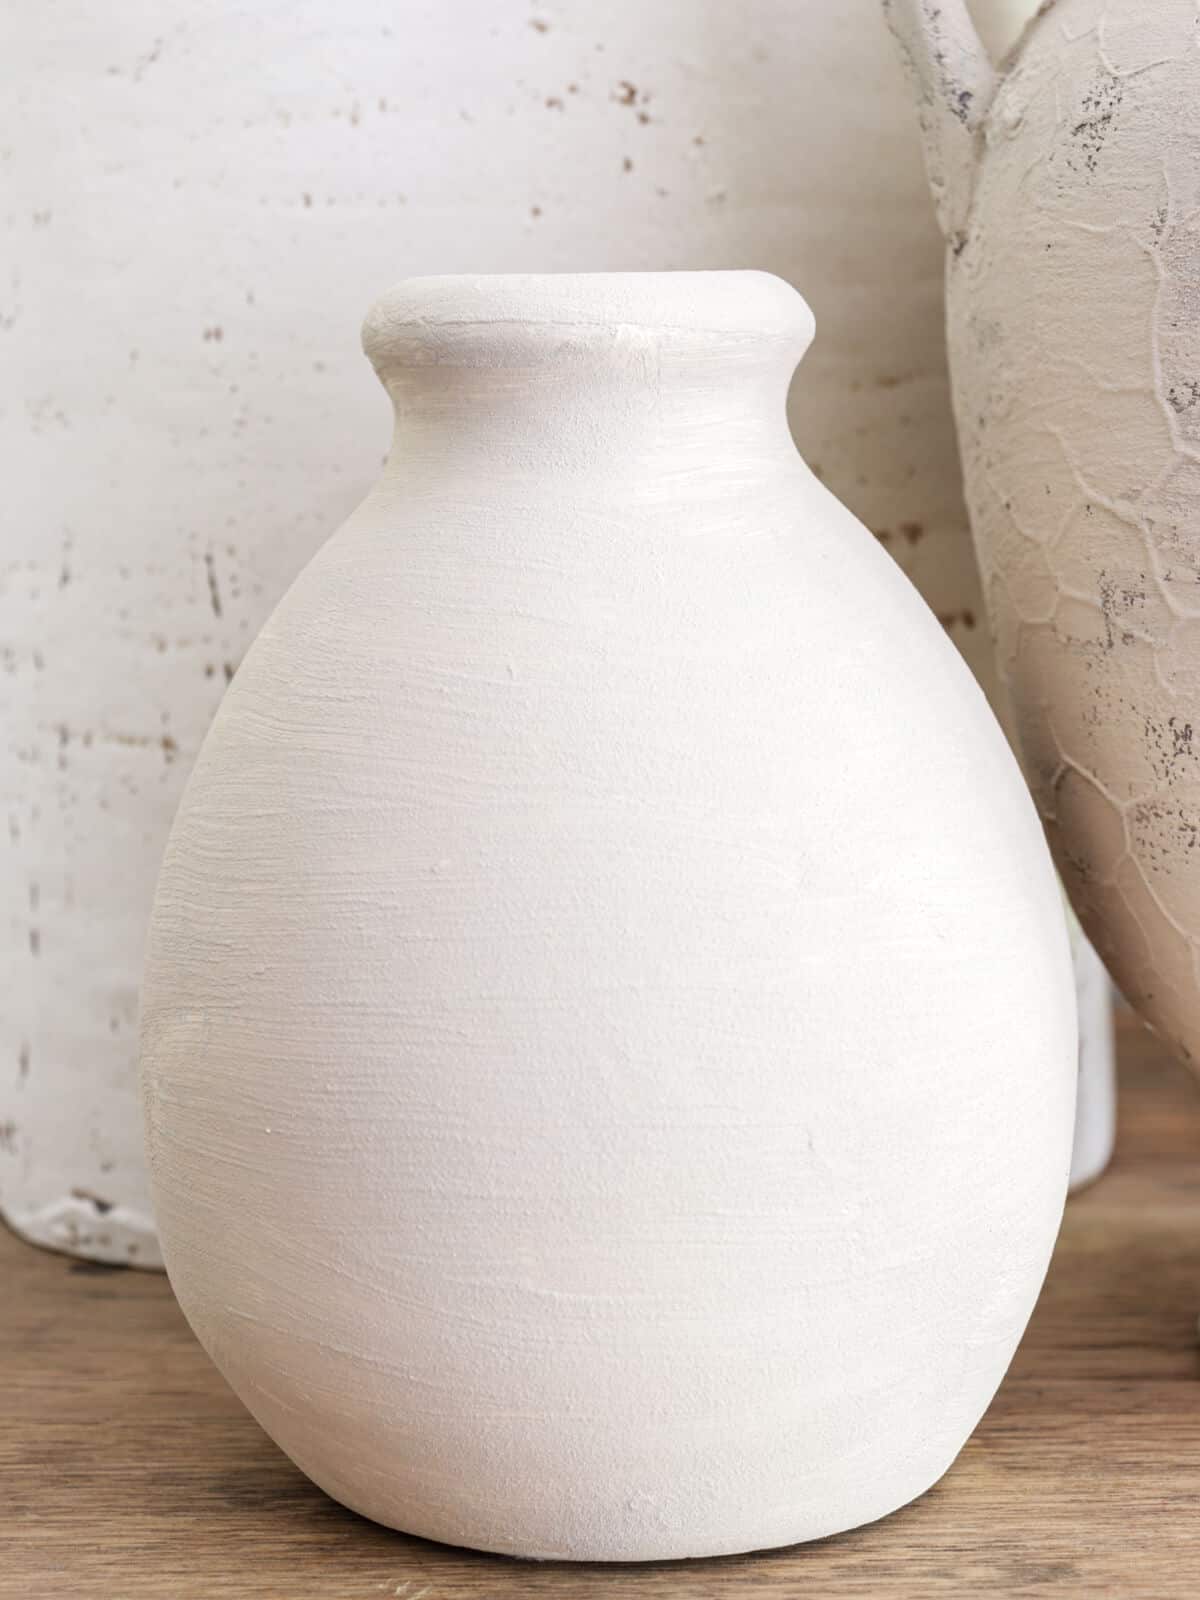
I stumbled upon a deal in the clearance section at Hobby Lobby.
A cute little bud vase for less than a buck!
I have done a lot of DIYs to update items.
Using spray paint to update old brass fixtures, or an old vase.
And I have seen a lot of projects on creating decorative items for your home by mixing together a little bit of baking soda with paint.
So I thought this would be a great way to get expensive looking decor in an inexpensive way.
Here’s how to make your own baking soda paint to create a statement piece for your home.
And you’re in for a treat! Scroll down to the end of this post to find more DIYs
DIY Textured Painted Ceramics
(Some affiliate links are provided below. Full disclosure here.)
Use a clear shot of the ingredients for this recipe, prepped, and labeled if necessary. Insert the ingredients into the list below, omitting quantities.
These are the supplies you’ll need for this project.
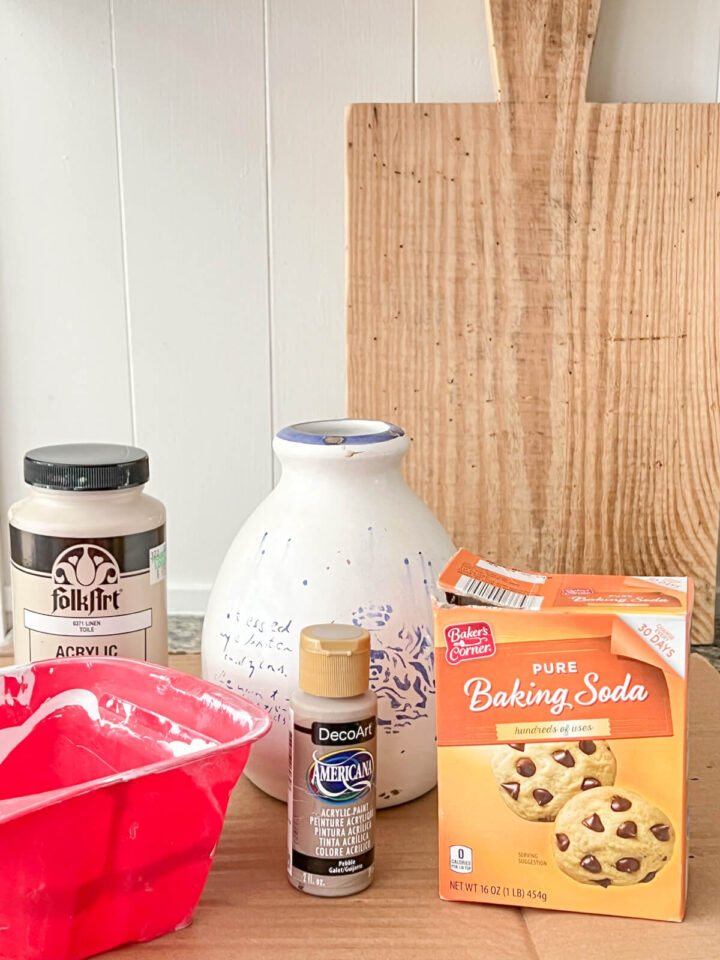
- Old Vase for Updating
- Acrylic Paint – I used Folk Art Matte Acrylic in Linen and Medium Gray
- Baking Soda
- Paint Pail
- Chip Brush or a foam brush
Instructions
You want to start by mixing together your acrylic paint and baking soda. This is the combination that creates the textured paint.
The first thing you do is to pour your acrylic paint into a container. Slowly add the baking soda until you get a nice texture.
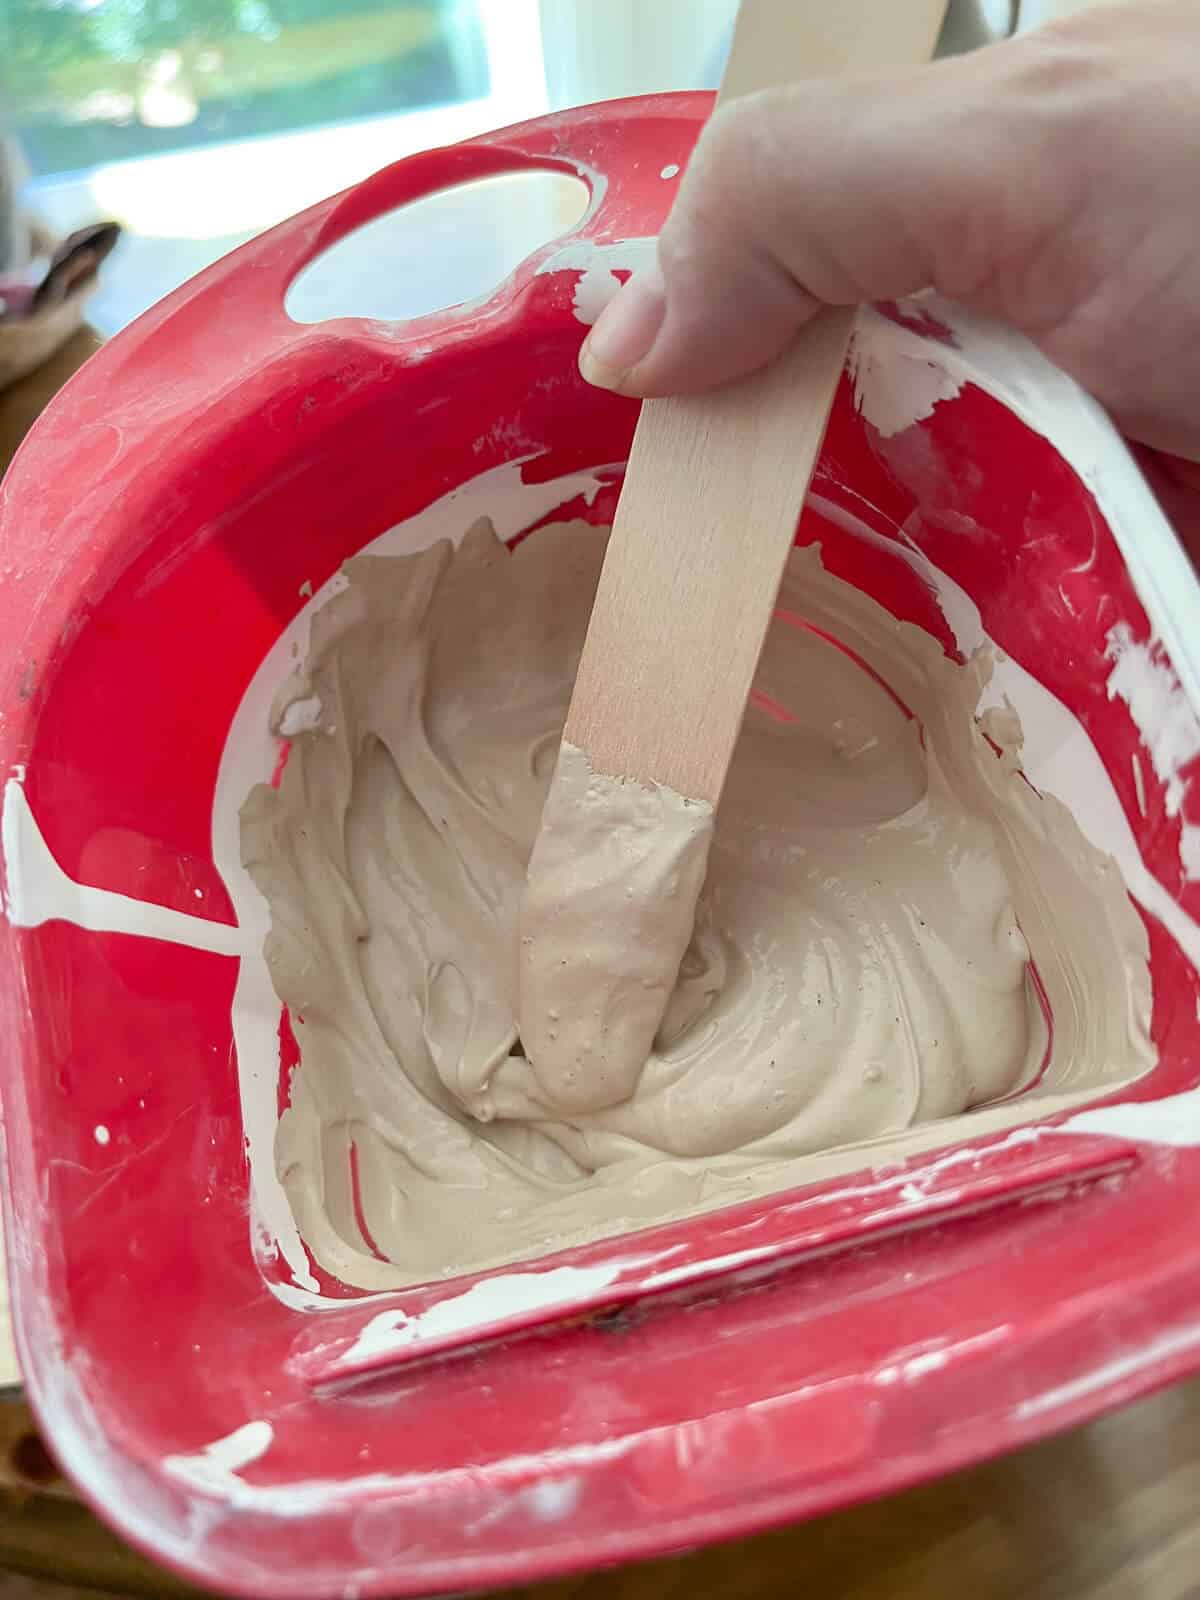
There really isn’t a set ratio to use. I’ve read before that some people use 1/4 cup of baking soda to a cup of paint.
But that’s a lot of paint to mix for small projects.
You can use any craft paint or leftover paint to create a paint mixture. I start small and add a little baking soda at a time to your mixing container until I get the texture paint you want.
So if you want a lighter texture, don’t add as much baking soda.
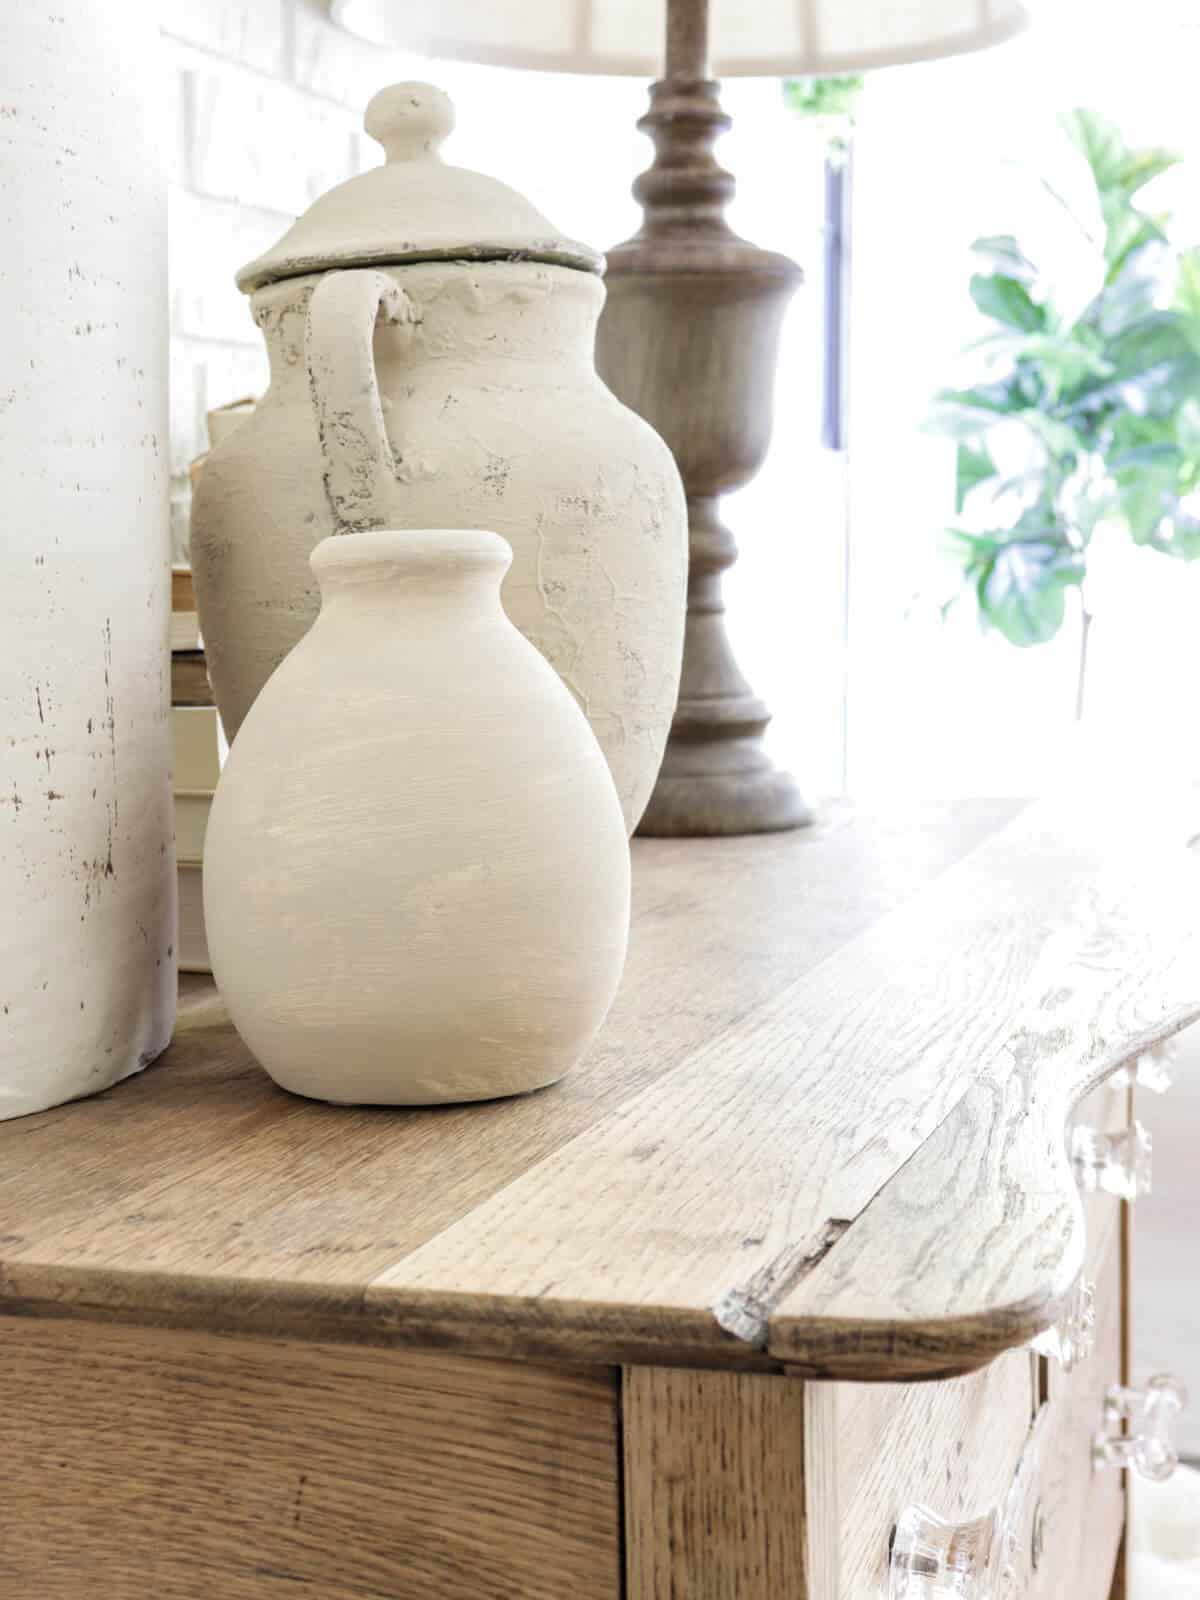
Before you begin, check the ceramic items you plan to paint.
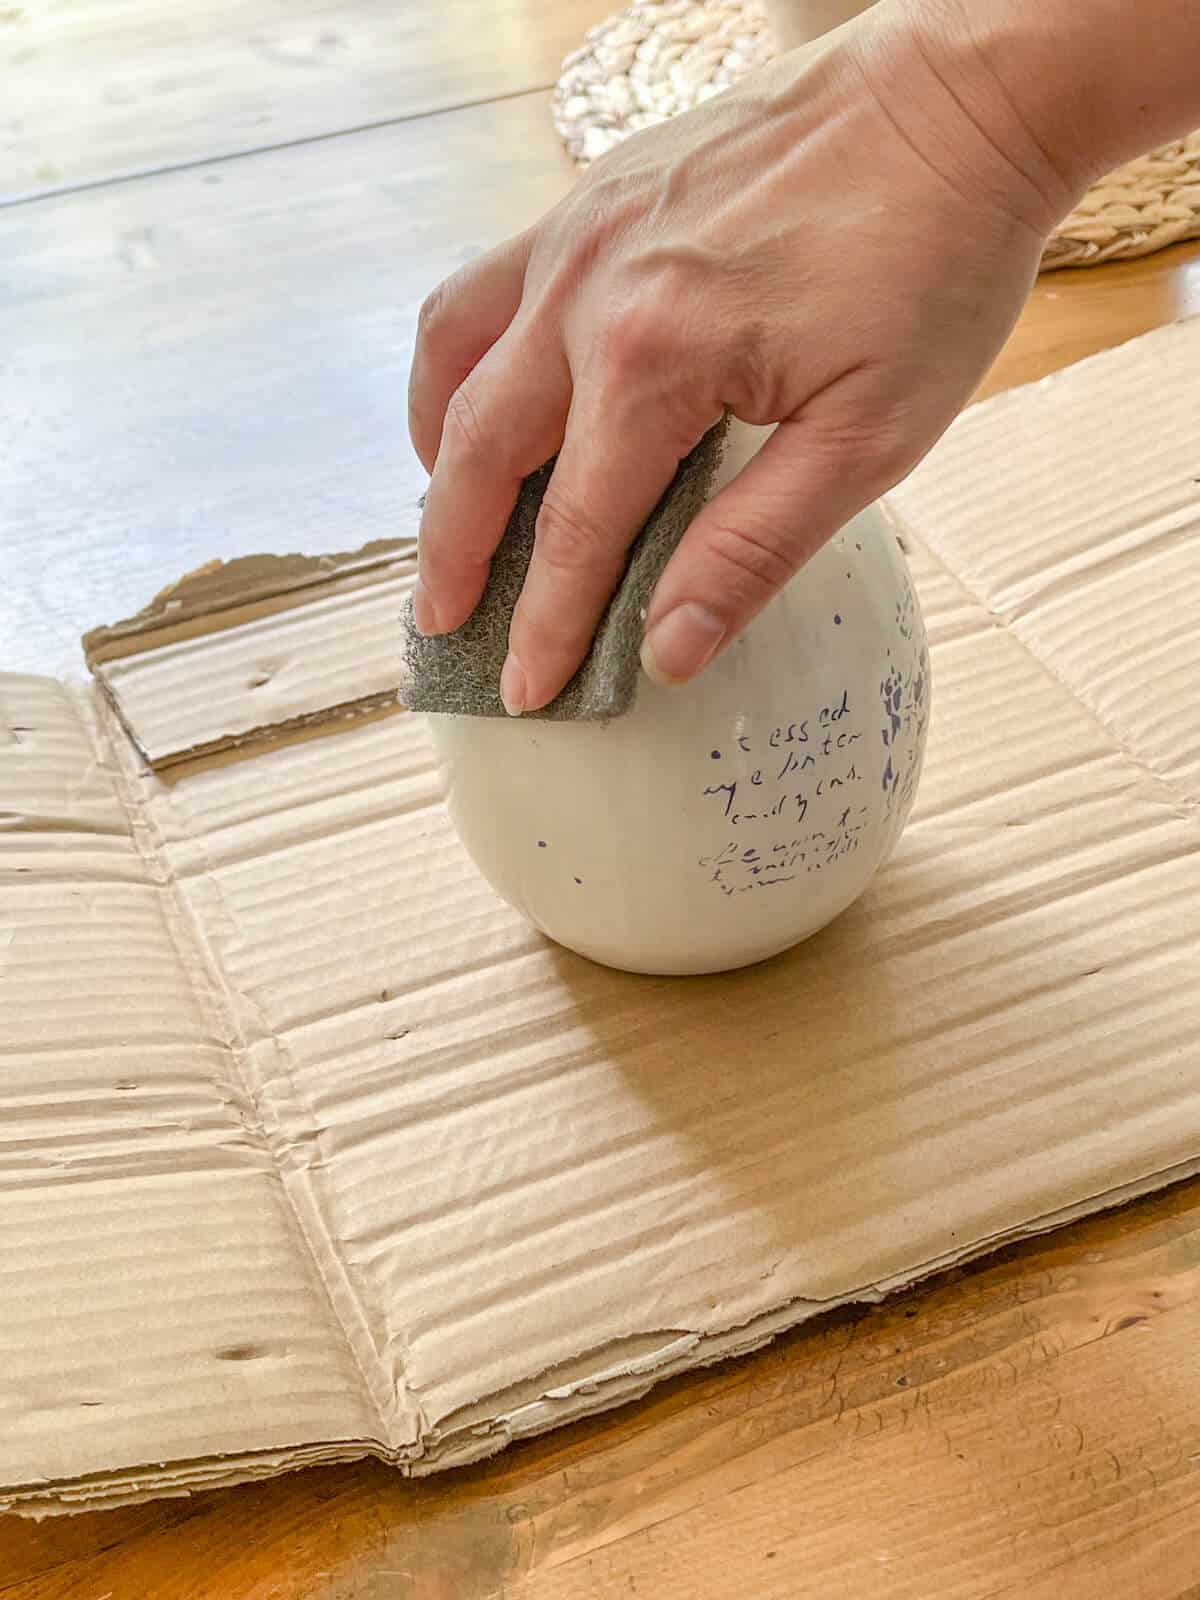
Since my piece was shiny, I knew I needed to scuff the surface to make sure the paint with adhere.
Hint: Don’t skip the scuffing before you paint. I didn’t scuff the ginger jar as well and the paint had trouble adhering in a few spots!
For this vase, I didn’t want too much texture, so I left my paint mixture on the runny side. More like the texture of hummus.
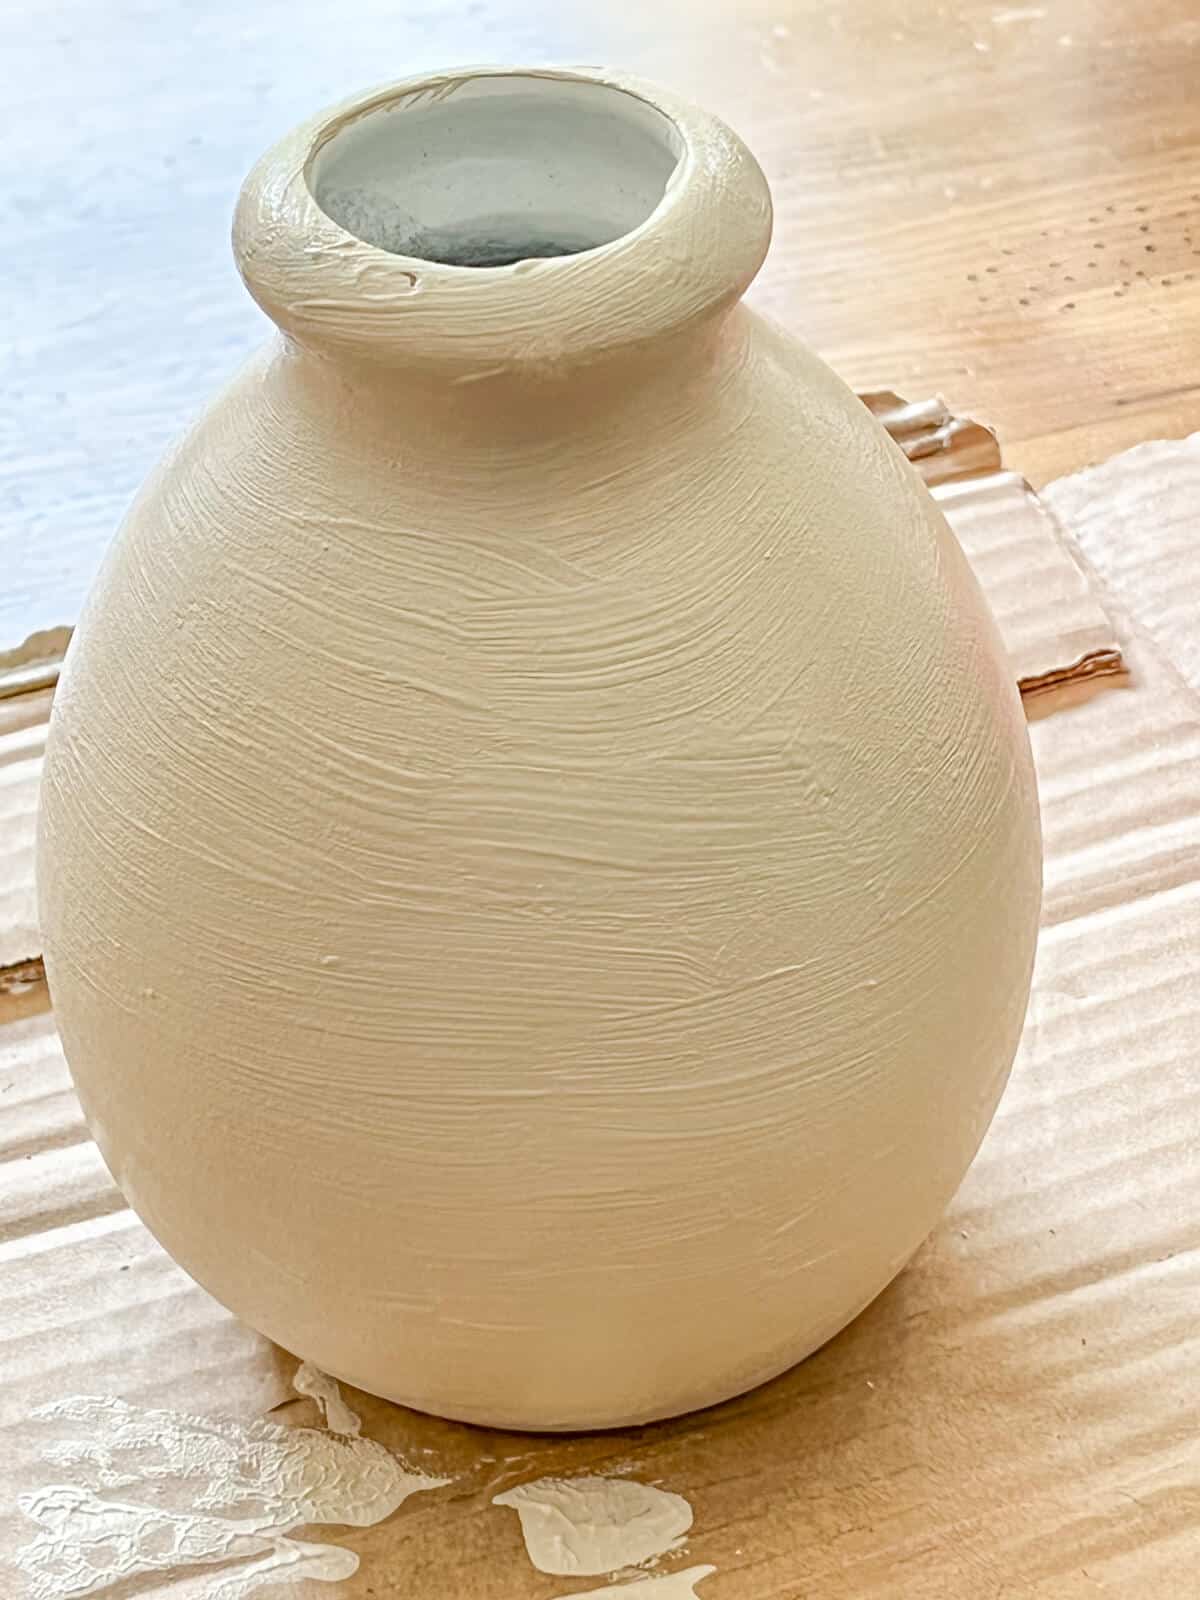
I used paint brush to apply a light coat to create a soft, even look.
Once it was dry, the finish look was perfect!
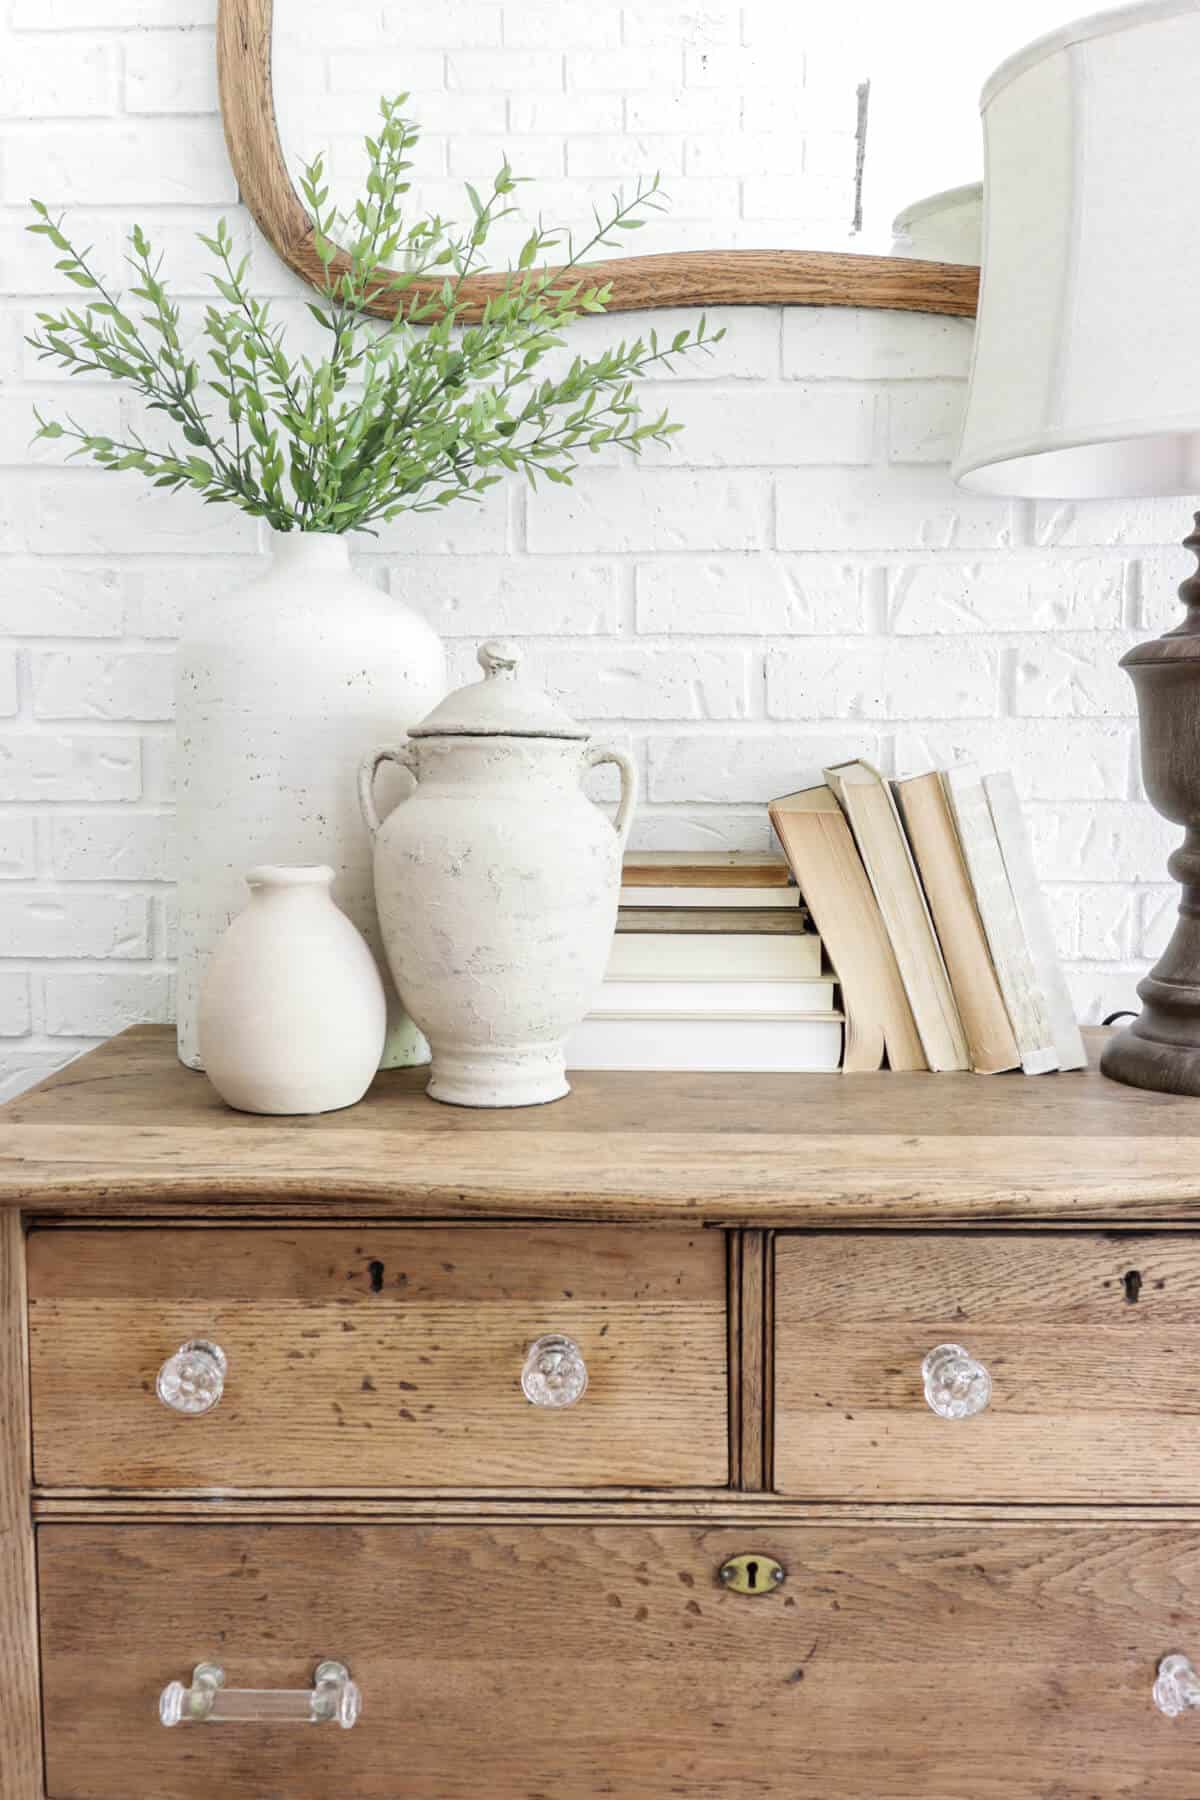
So I had a second thrift store vase that I found for a steal.
But for this, I wanted to try a different look for this ginger jar.
I started with a heavy mixture of baking soda paint.

The first coat I applied on thick using a similar technique but with a foam brush. I chose to leave it chunky in a few places.
Once it was dried, I added a coat of paint using the same mixture I used for the Hobby Lobby vase.
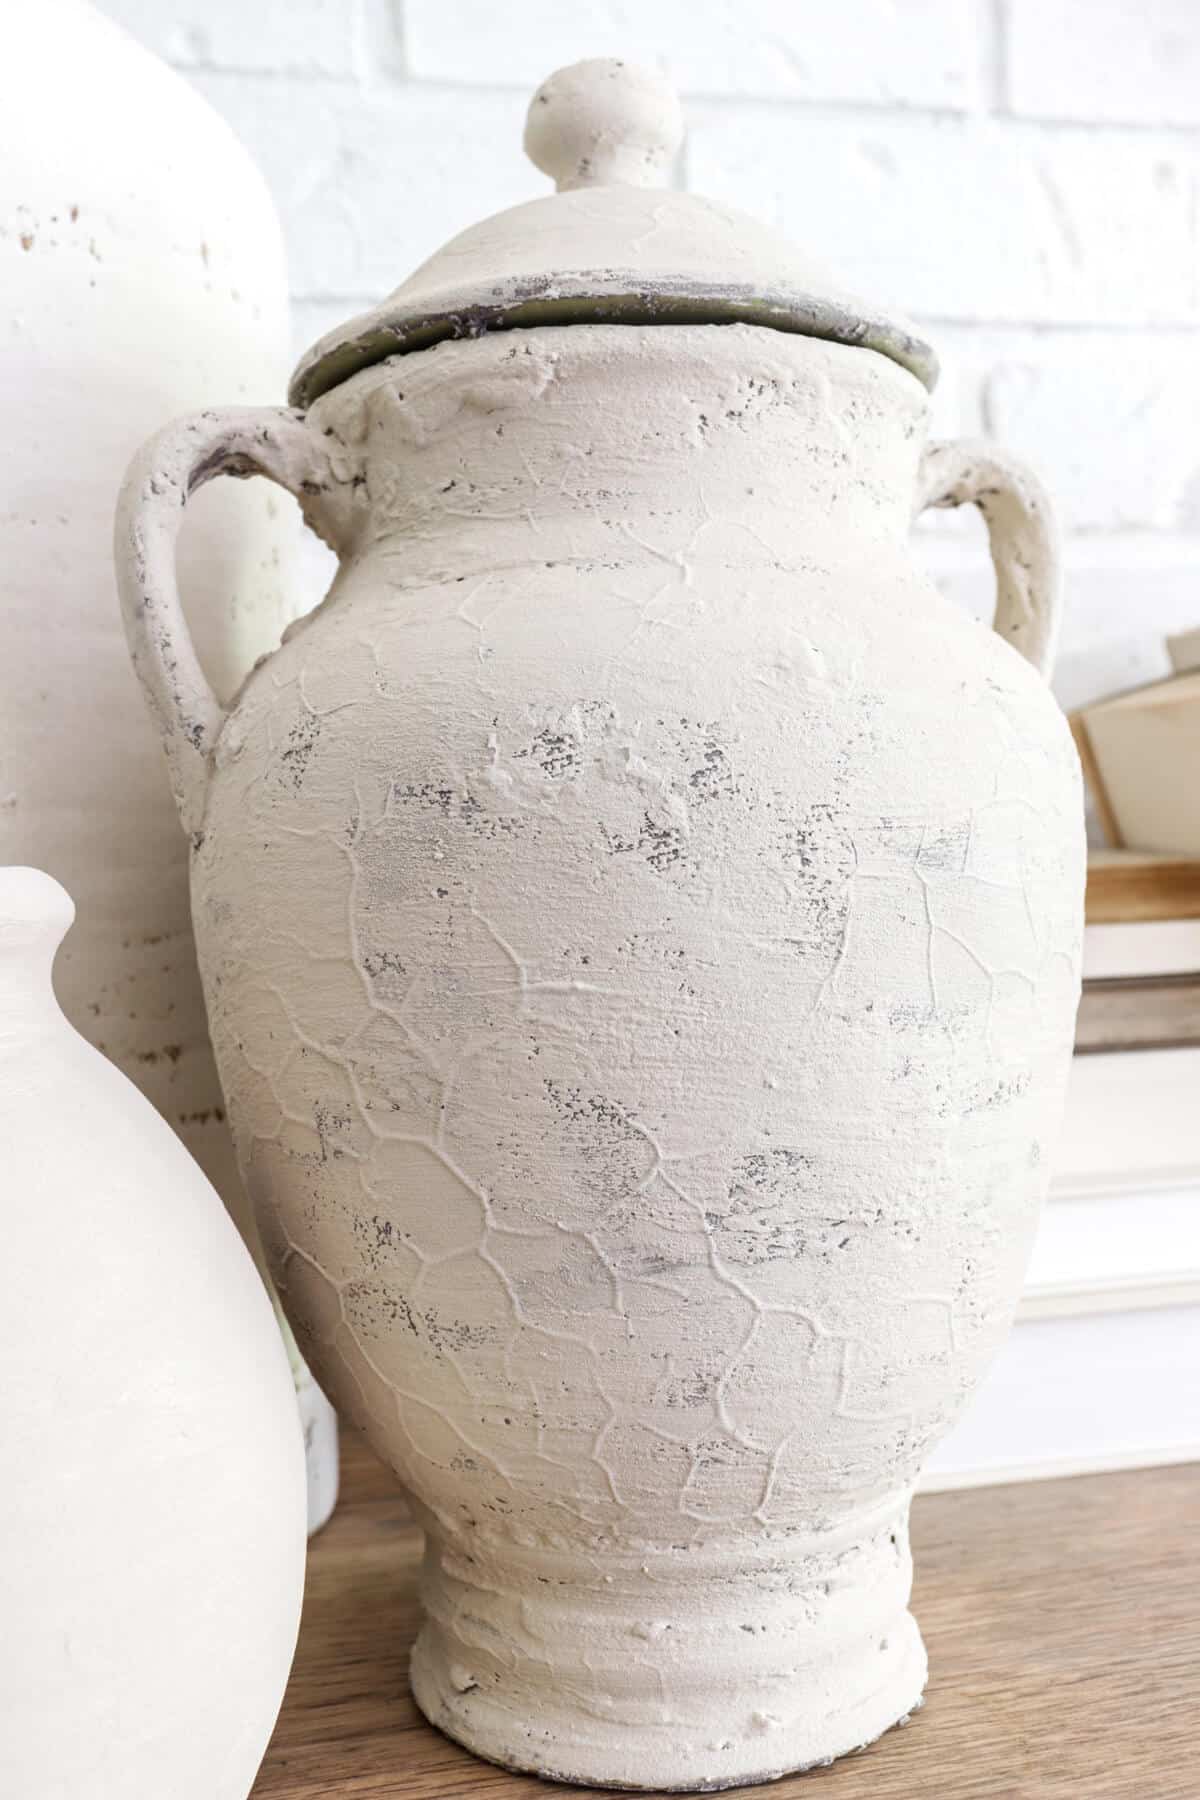
The final result was a super textured vase with this neat veiny look.
I LOVE the rustic pottery texture.
Variations
There are different methods to create this textured or aged pottery finish.
- Different Paint Colors – The fun part about this easy diy tutorial is that you can try different shades of colors to create a look that matches your home.
- Chalk Paint – This would also work with chalk paint if you don’t have acrylic paint on hand. Just play around with the ratios to get the look you want.
- Dry Dirt or Coffee Grounds – For a rustic finish, lightly rub a little dirt or coffee grounds over your pottery to give an aged look and organic feel to your finish.
- Terra Cotta or Glass Vase– It doesn’t have to be a ceramic vase. Try creating this look with with a different type of project with the same end result.
- Joint Compound Mixture – there are similar tutorial using joint compound instead of baking soda. It creates a heavily textured look.
So, what do you think? Would you give this easy diy project a try? The next time you stumble upon ceramic or clay vases, give it a brand-new look with a lot of texture by trying this technique.
I’m off to hit more garage sales to find more projects to try!
I am joining a few of my friends as we are each sharing something that we are updating, making over, or refreshing in our homes. We’re calling it New Again, where we are giving new life to something. Enjoy the posts below!
New Again

A Life Unfolding
$17 Dollar DIY Desk
Cribbs Style
From TV Stand to Bedside Table
Refinishing a Long Lost Furniture Piece
Noting Grace
DIY Textured Painted Ceramics
shop our favorite home items
shop now
Join Our Community
Don’t miss the next DIY! Receive exclusive content, including behind the scenes photos, our favorite home decor DIYs and more!
More Home Decor Projects and DIYs to Check Out
- Making a Ceramic Lamp New Again
- $15 Dresser Makeover With DIY Chalk Paint
- How to Make Unique Faux Concrete Planters With Paint
- How To Easily Paint a Fabric Chair With Mineral Paint
That sounds like an awesome find! Hope your project turns out the way you want! We still love our lamp!
Cannot wait to try this technique on a small ceramic lamp that I scored in an auction haul (got 2 large end table lamps and the little ceramic lamp all for $4.00!) Intend the little lamp to be made into a cordless one with a rechargeable light bulb so it can be used anywhere!
I love that ginger jar!! I’ve done the joint compound technique a few times but I haven’t tried the baking soda one…the results look so cool! They look so expensive
These turned out so beautiful! What a great idea! Thanks for the tutorial!
Thanks Brendt! Hope you enjoy your weekend!
These are stunning! I will have to try, thank you for sharing Jen.
xoxo,
Brendt