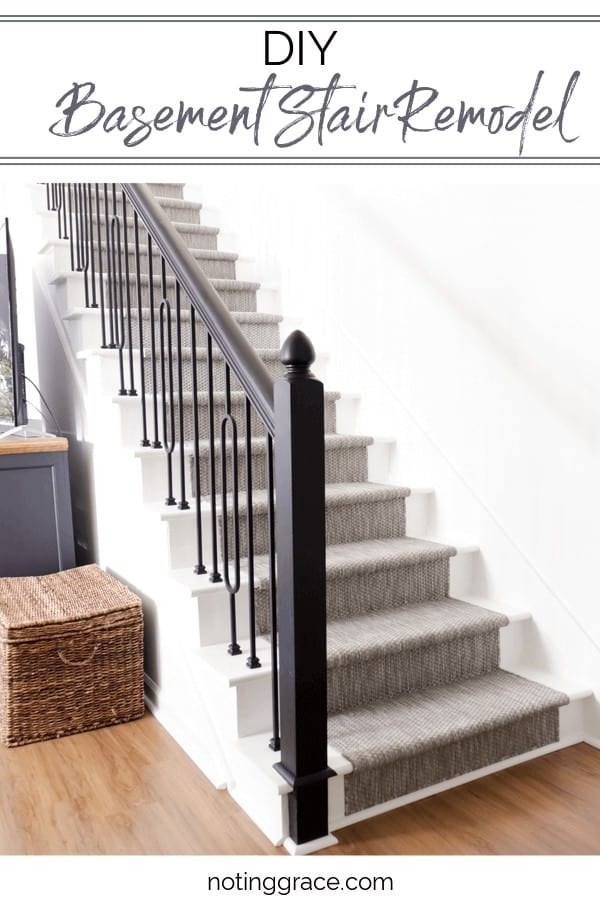
DIY Basement Stair Remodel and How to Install an Indoor Outdoor Carpet Runner
There’s been one project I couldn’t wait to tackle this past year – my ugly staircase. Here’s how we completed our DIY basement stair remodel that’s easy to accomplish and how to install an indoor outdoor carpet runner
Almost 2 years ago, this stairway makeover was on my wish list, but it was trumped with other projects.
So when we had the opportunity to make over our basement, I was most excited about finally getting rid of this dated, ugly banisters and filthy carpet!
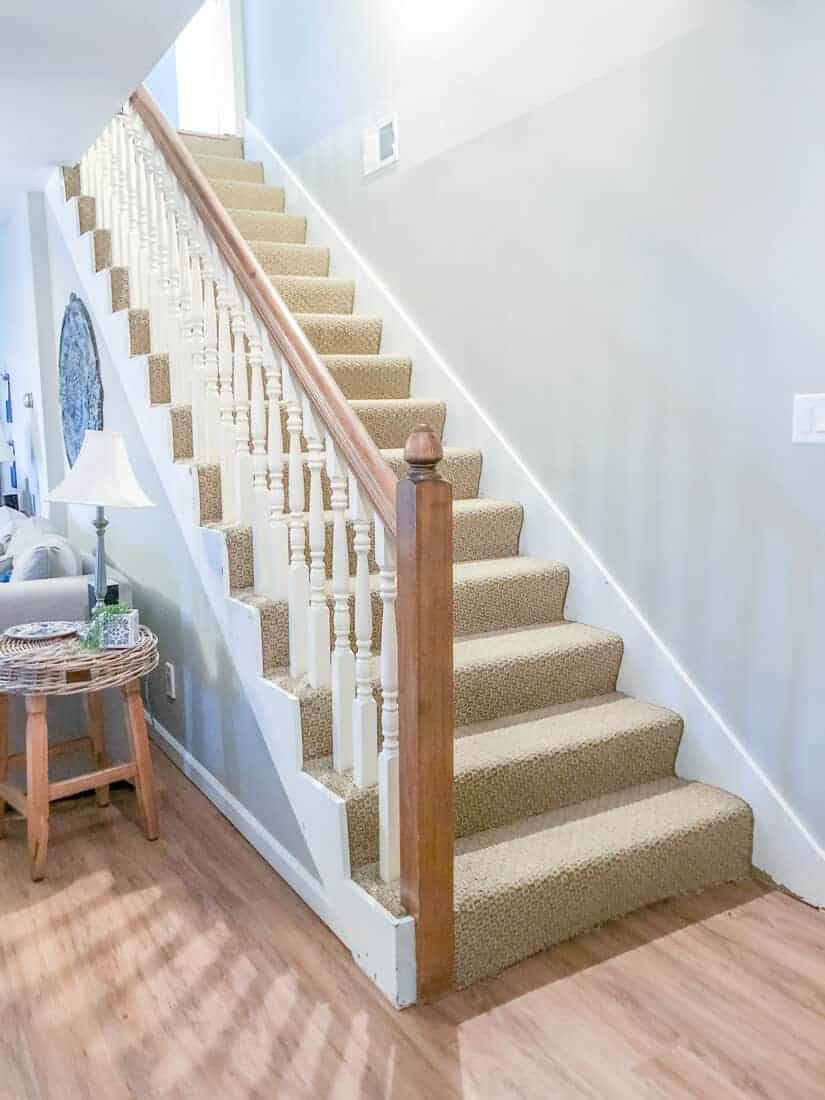
This is how it looked before:
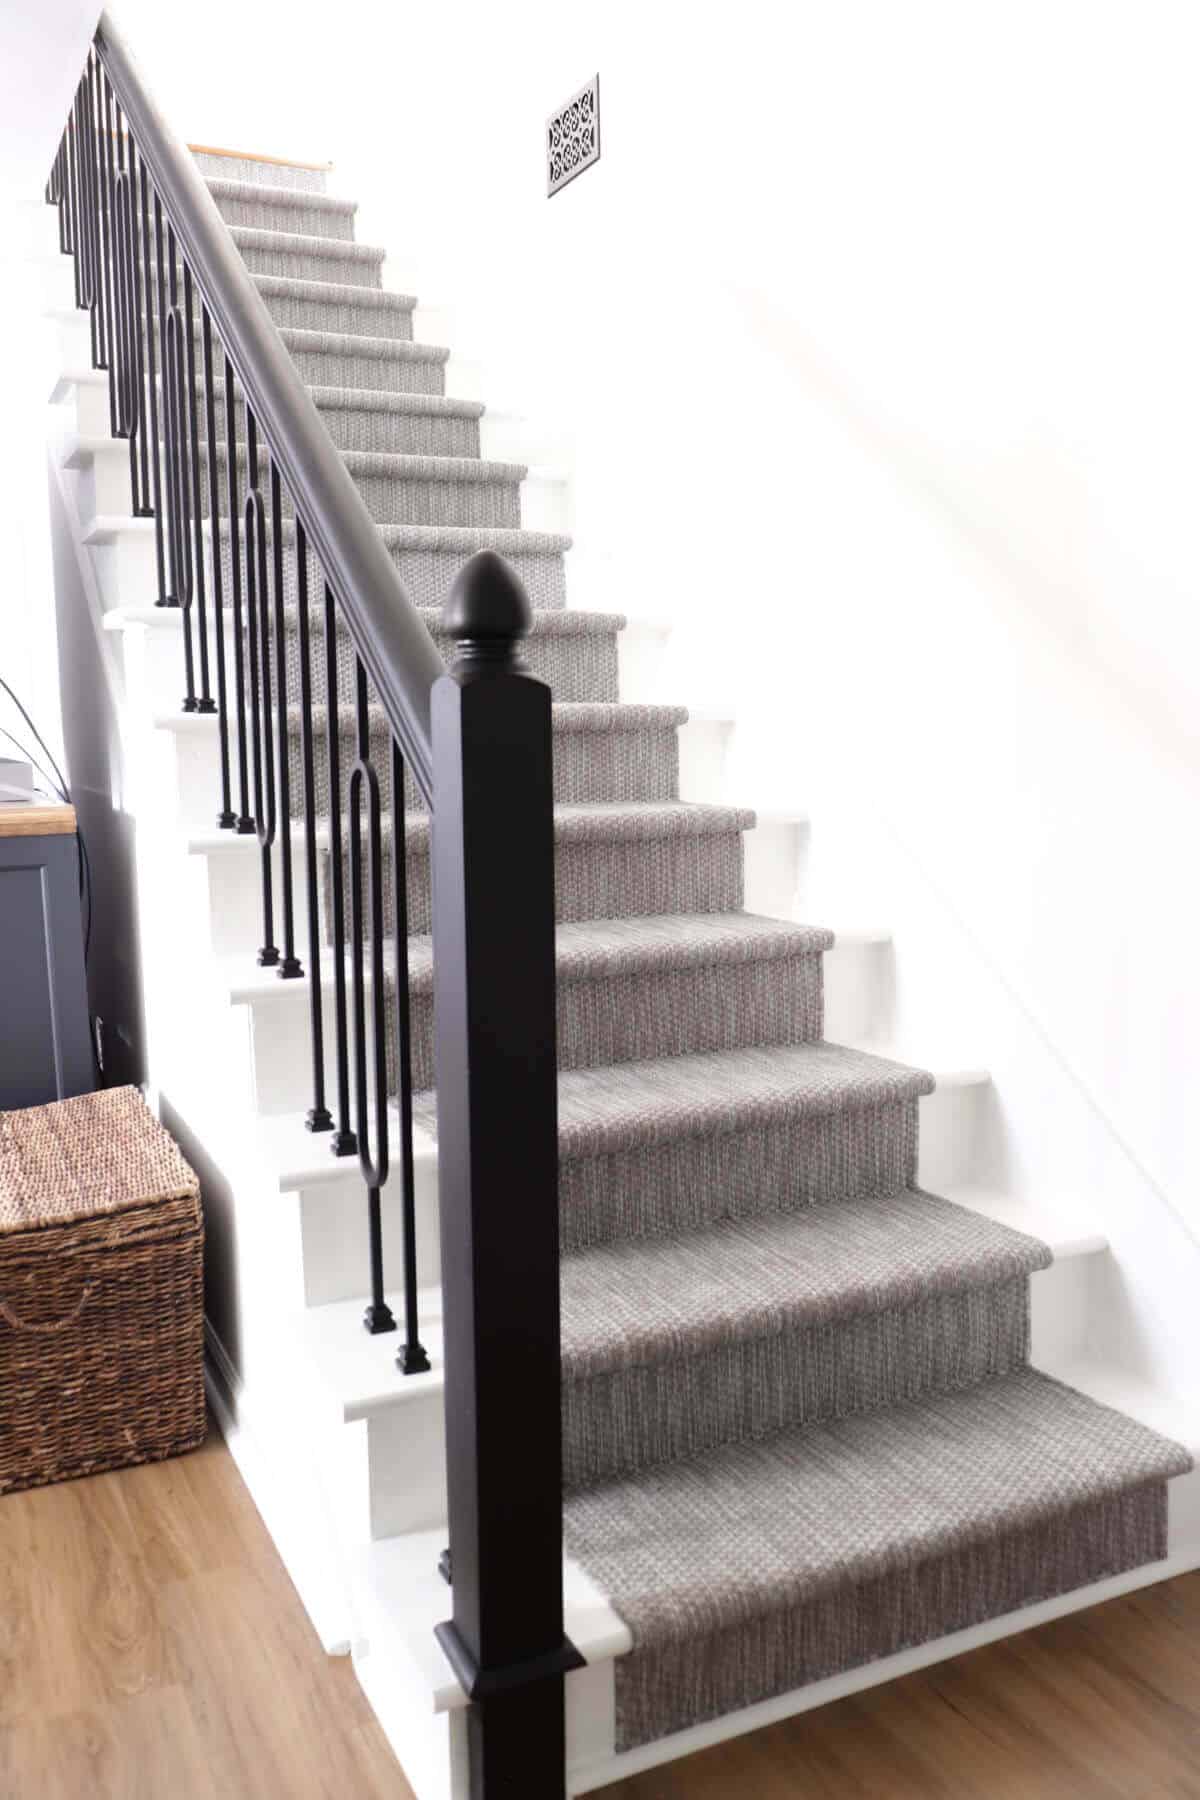
And this is how it looks today.
It’s quite the change!
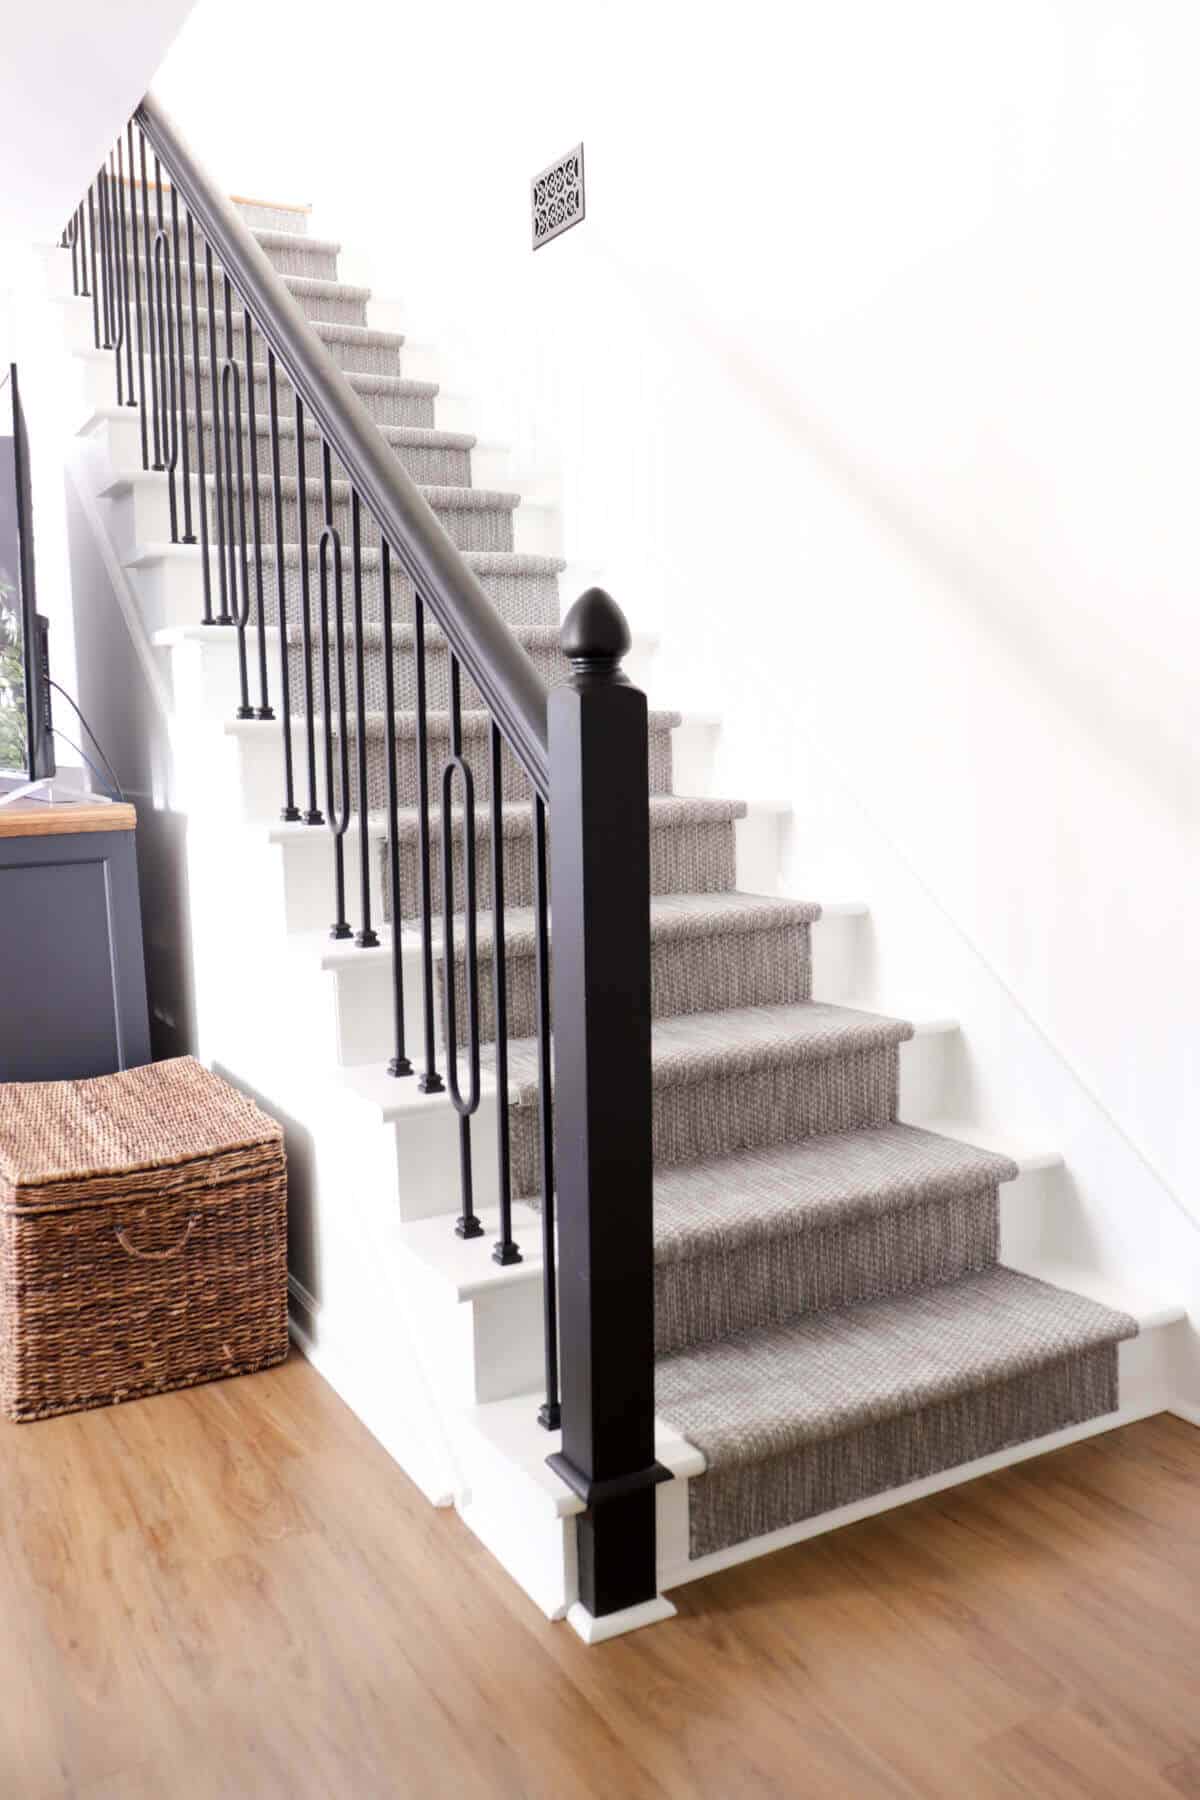
It feels like a new set of stairs and it finally matches the rest of the house.
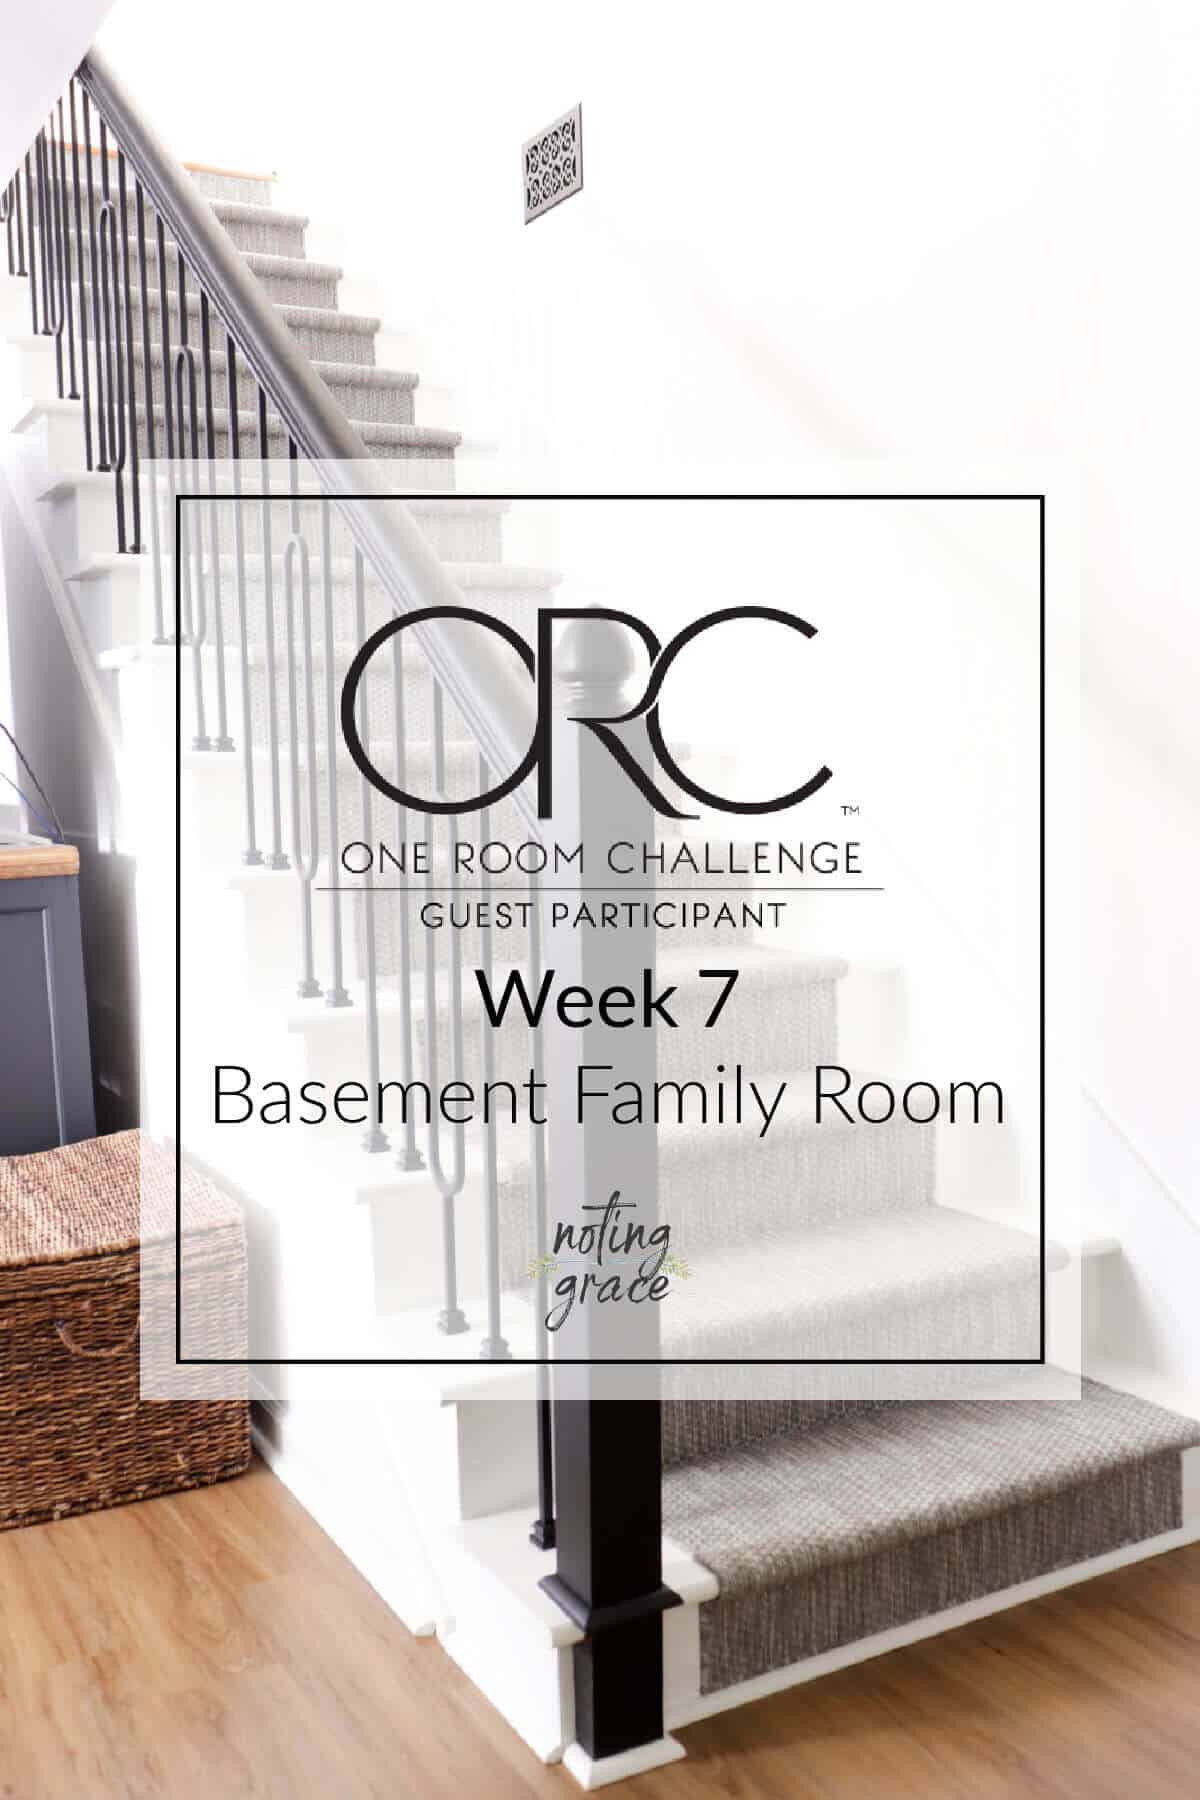
This entire process has been part of the One Room Challenge and we are at week 7, but this project was one of the main things to tackle for this basement renovation.
Here’s how we did this DIY basement stair remodel and lemme tell ya, it wasn’t a difficult task. Just a lot of little steps.
DIY Basement Stair Remodel
(Some affiliate links are provided below. Full disclosure here.)
The original plan was to use as much as the old stairs as possible to help save on cost.
But that quickly changed and we had to go back to the drawing board and rework our original plan.
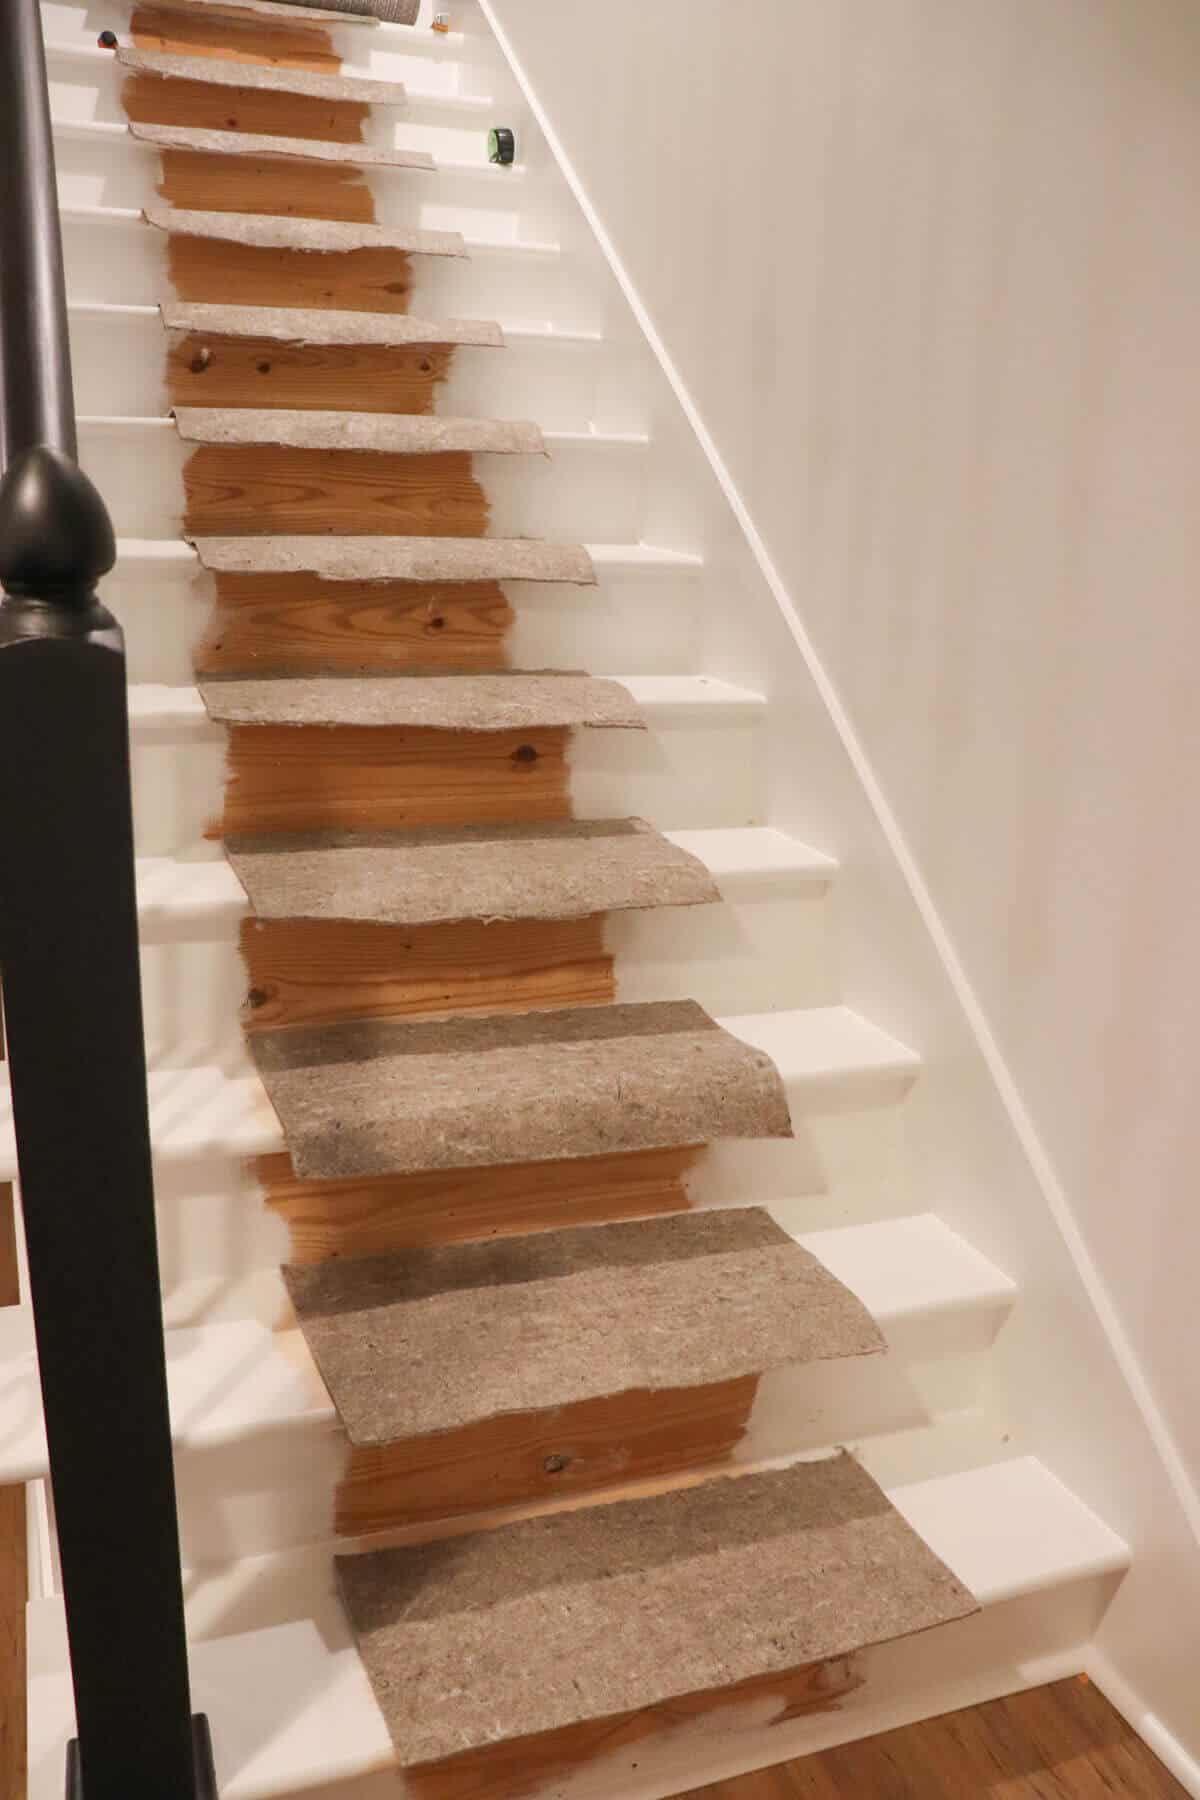
The first step was to remove all the old carpet.
A wrecker bar and some tack pullers made this process quick and easy.
And that’s when we noticed the issue with our basement stairs.
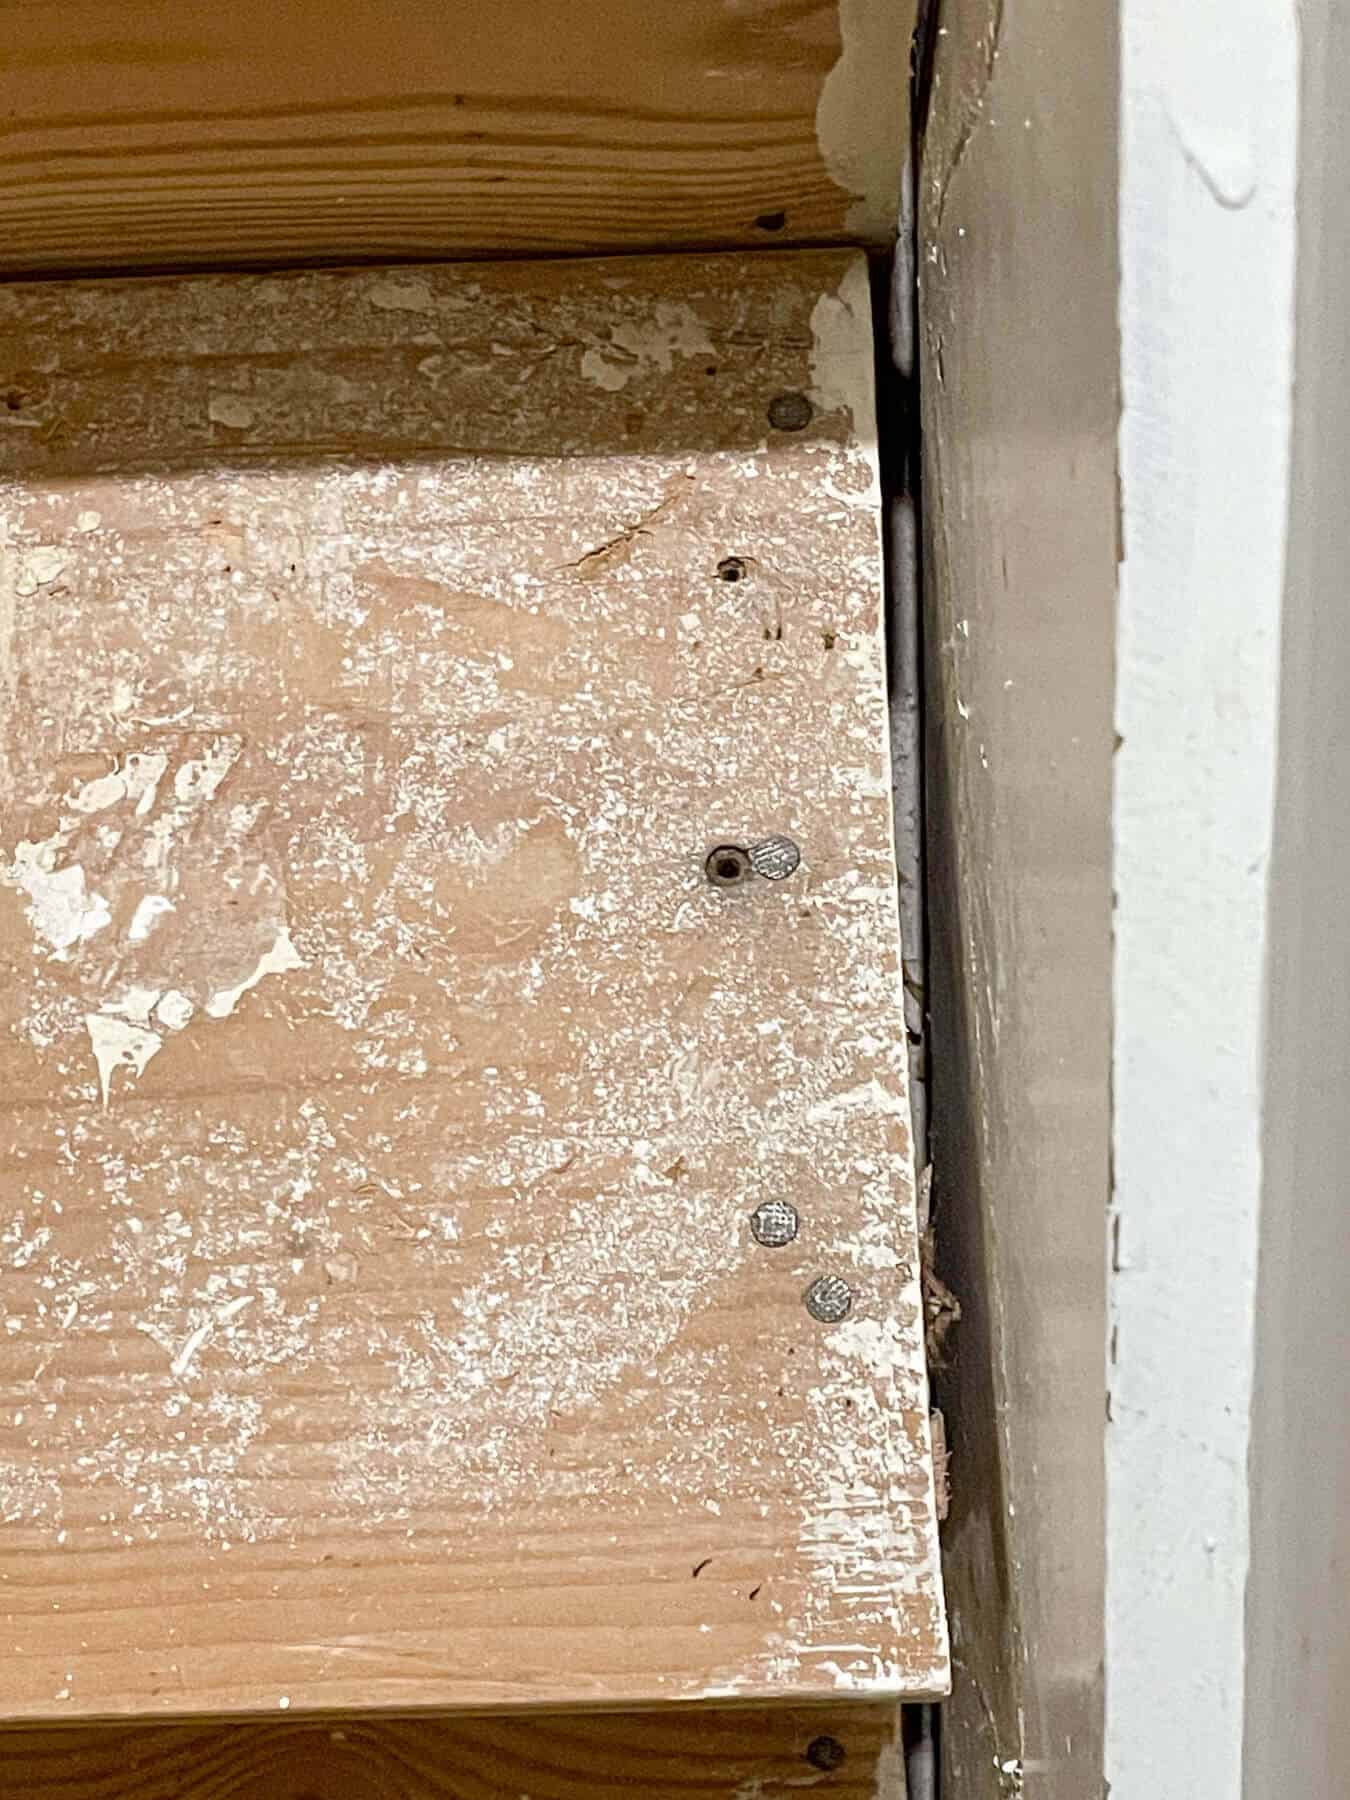
We don’t know if the builder installed these stairs or if the original owner that finished the basement has this shoddy work done, but look at those gaps.
At least a half inch space between the stair sides and treads that especially got worse at the bottom of the stairs.
So our options were to either replace the stair treads or work with the existing stairs. That could cause multiple problems.
We found the cheapest options for stair treads and decided it was worth the cost to replace them than worry with the headache of trying to fix all the issues.
And that meant removing the banister and balusters to make enough room to install new stairs.
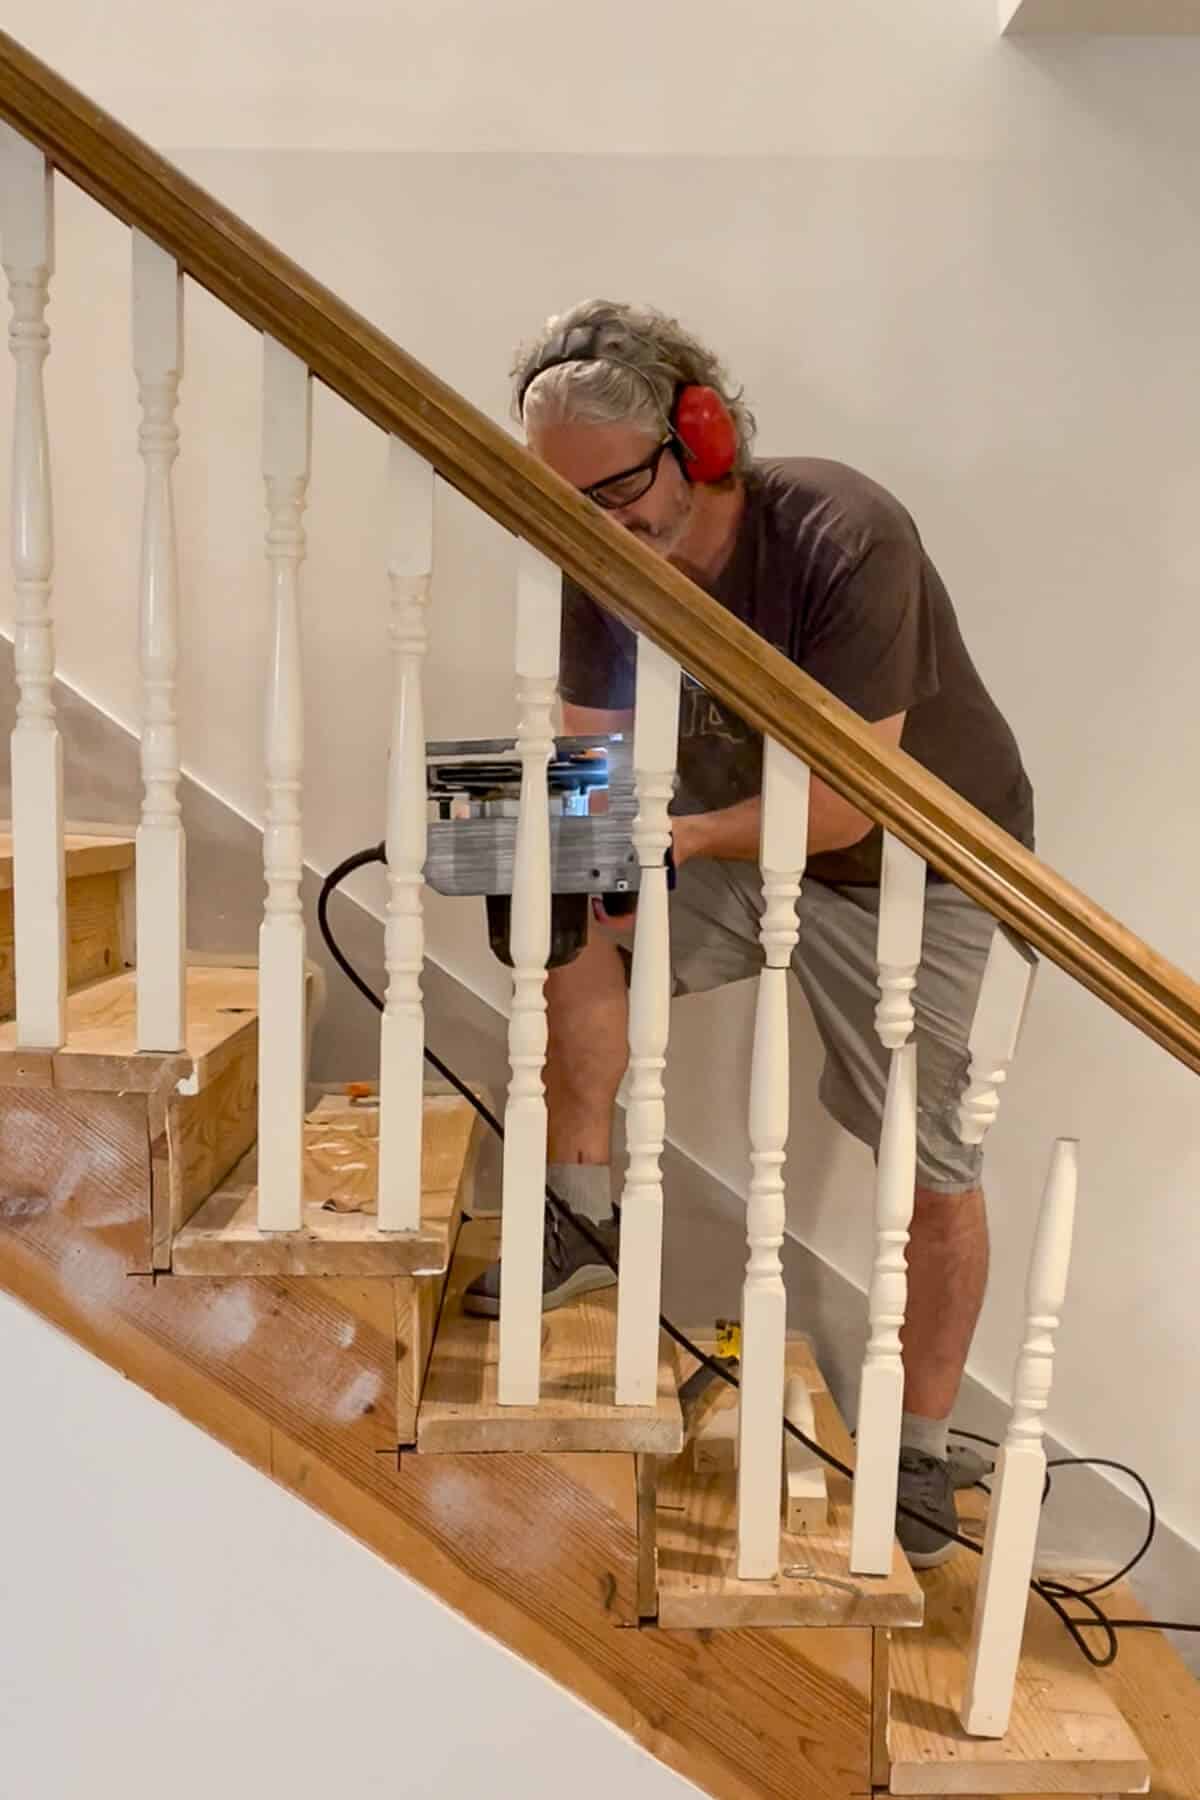
With a quick zip of a circular saw, Trent had these cut through in less than a minute.
There may have been a few Tim the tool man Taylor sound effects happening afterward.
We also had to remove the stair skirting on the outside of the stairway since the new treads wouldn’t fit the old one.
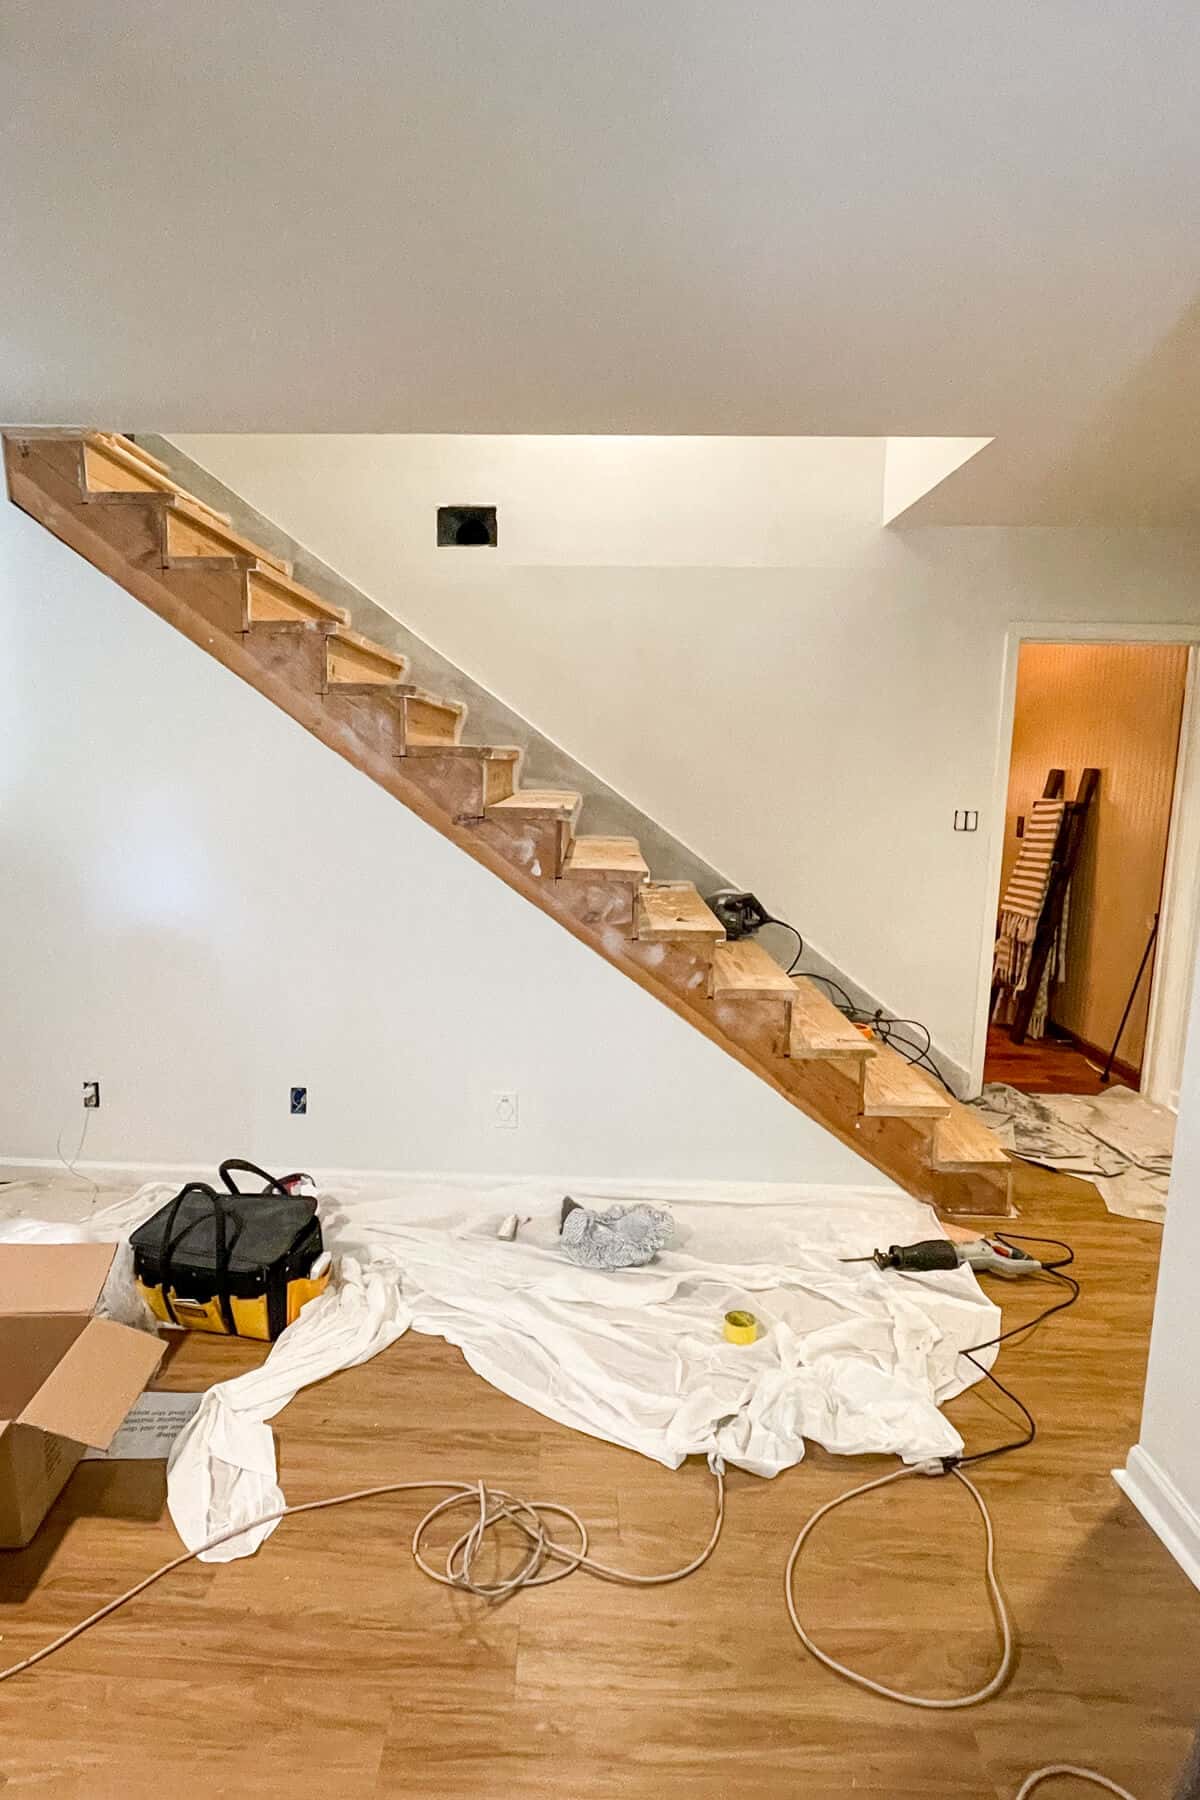
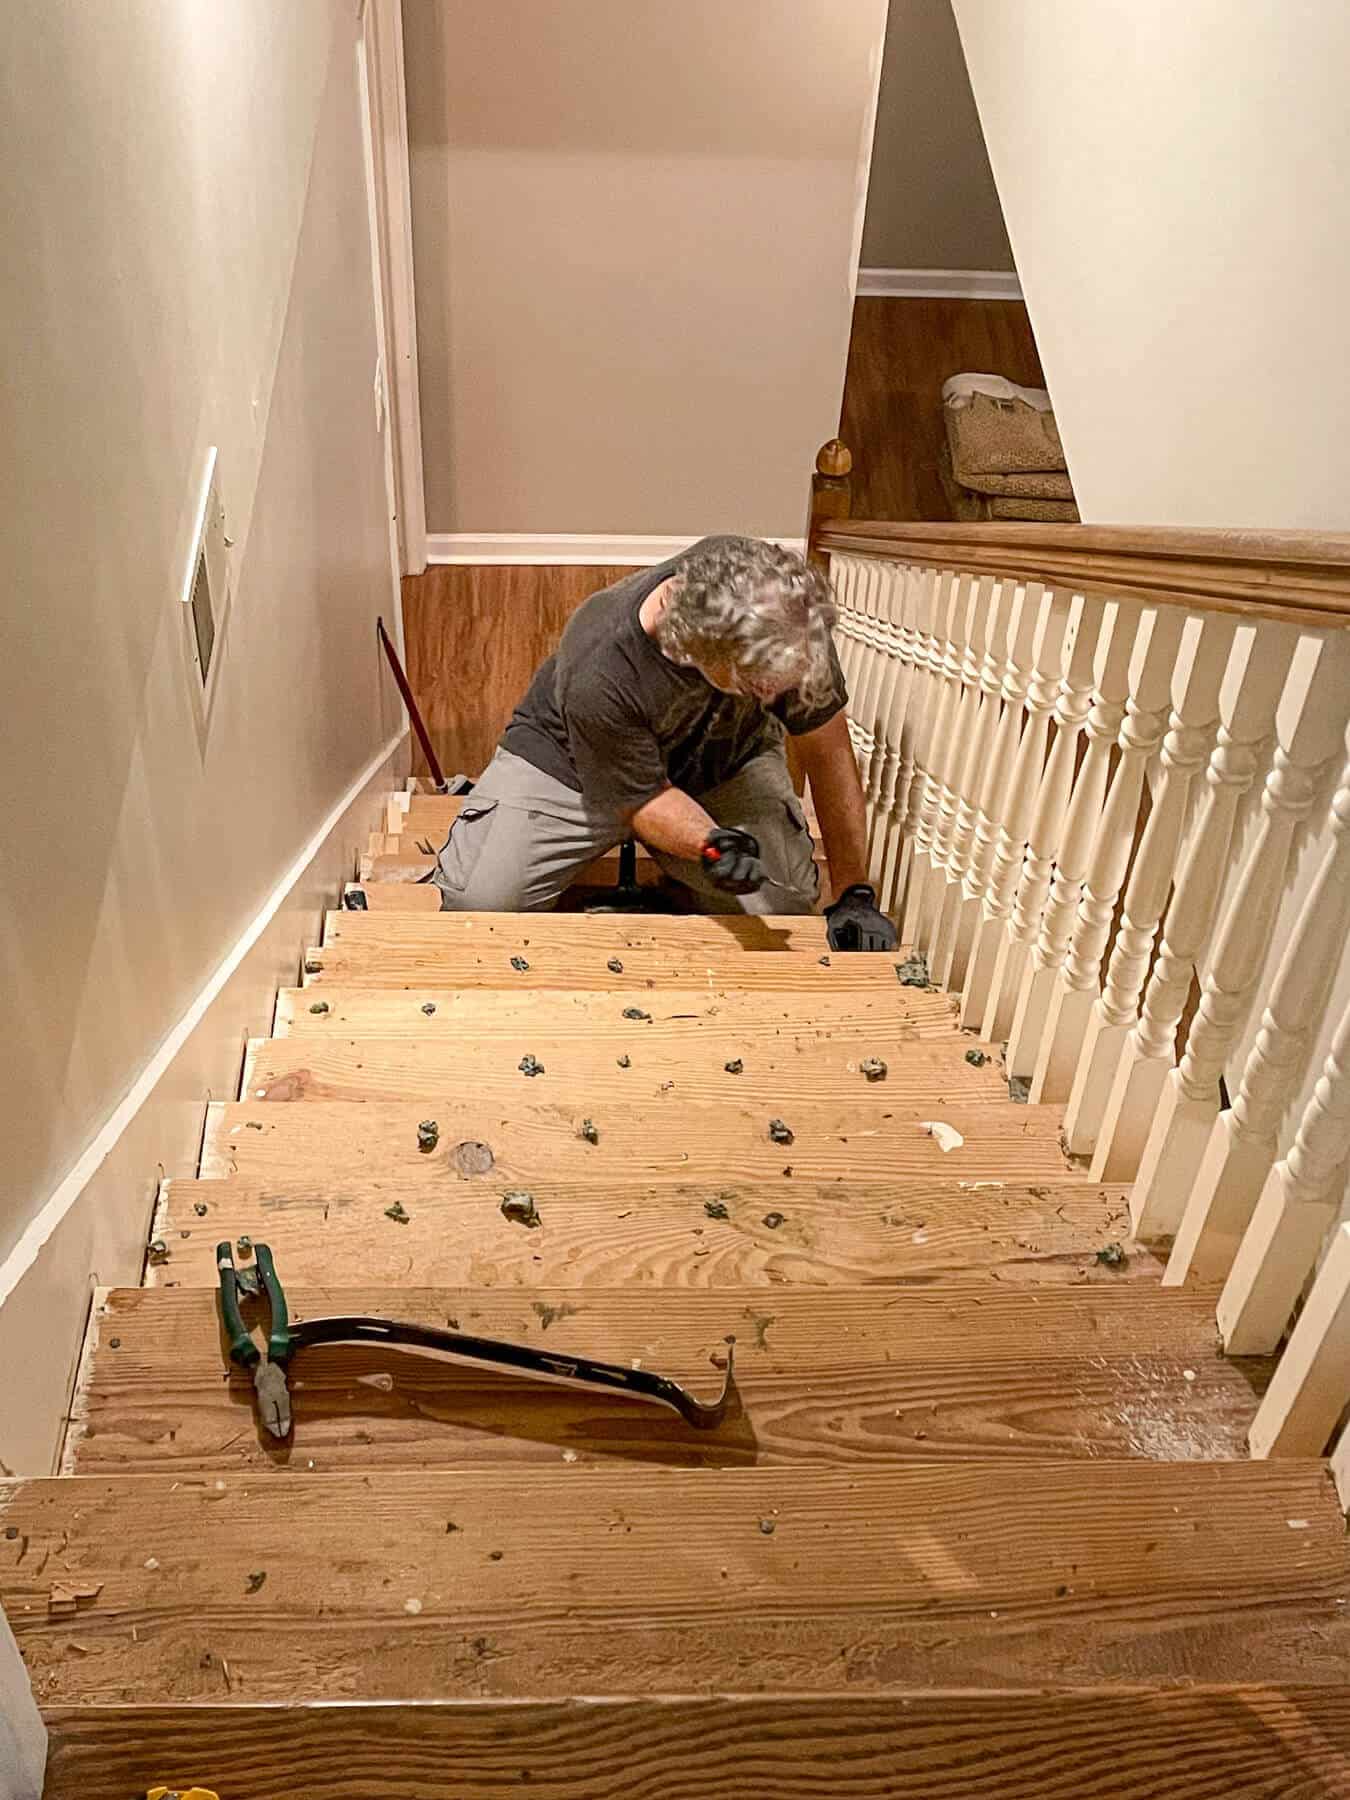
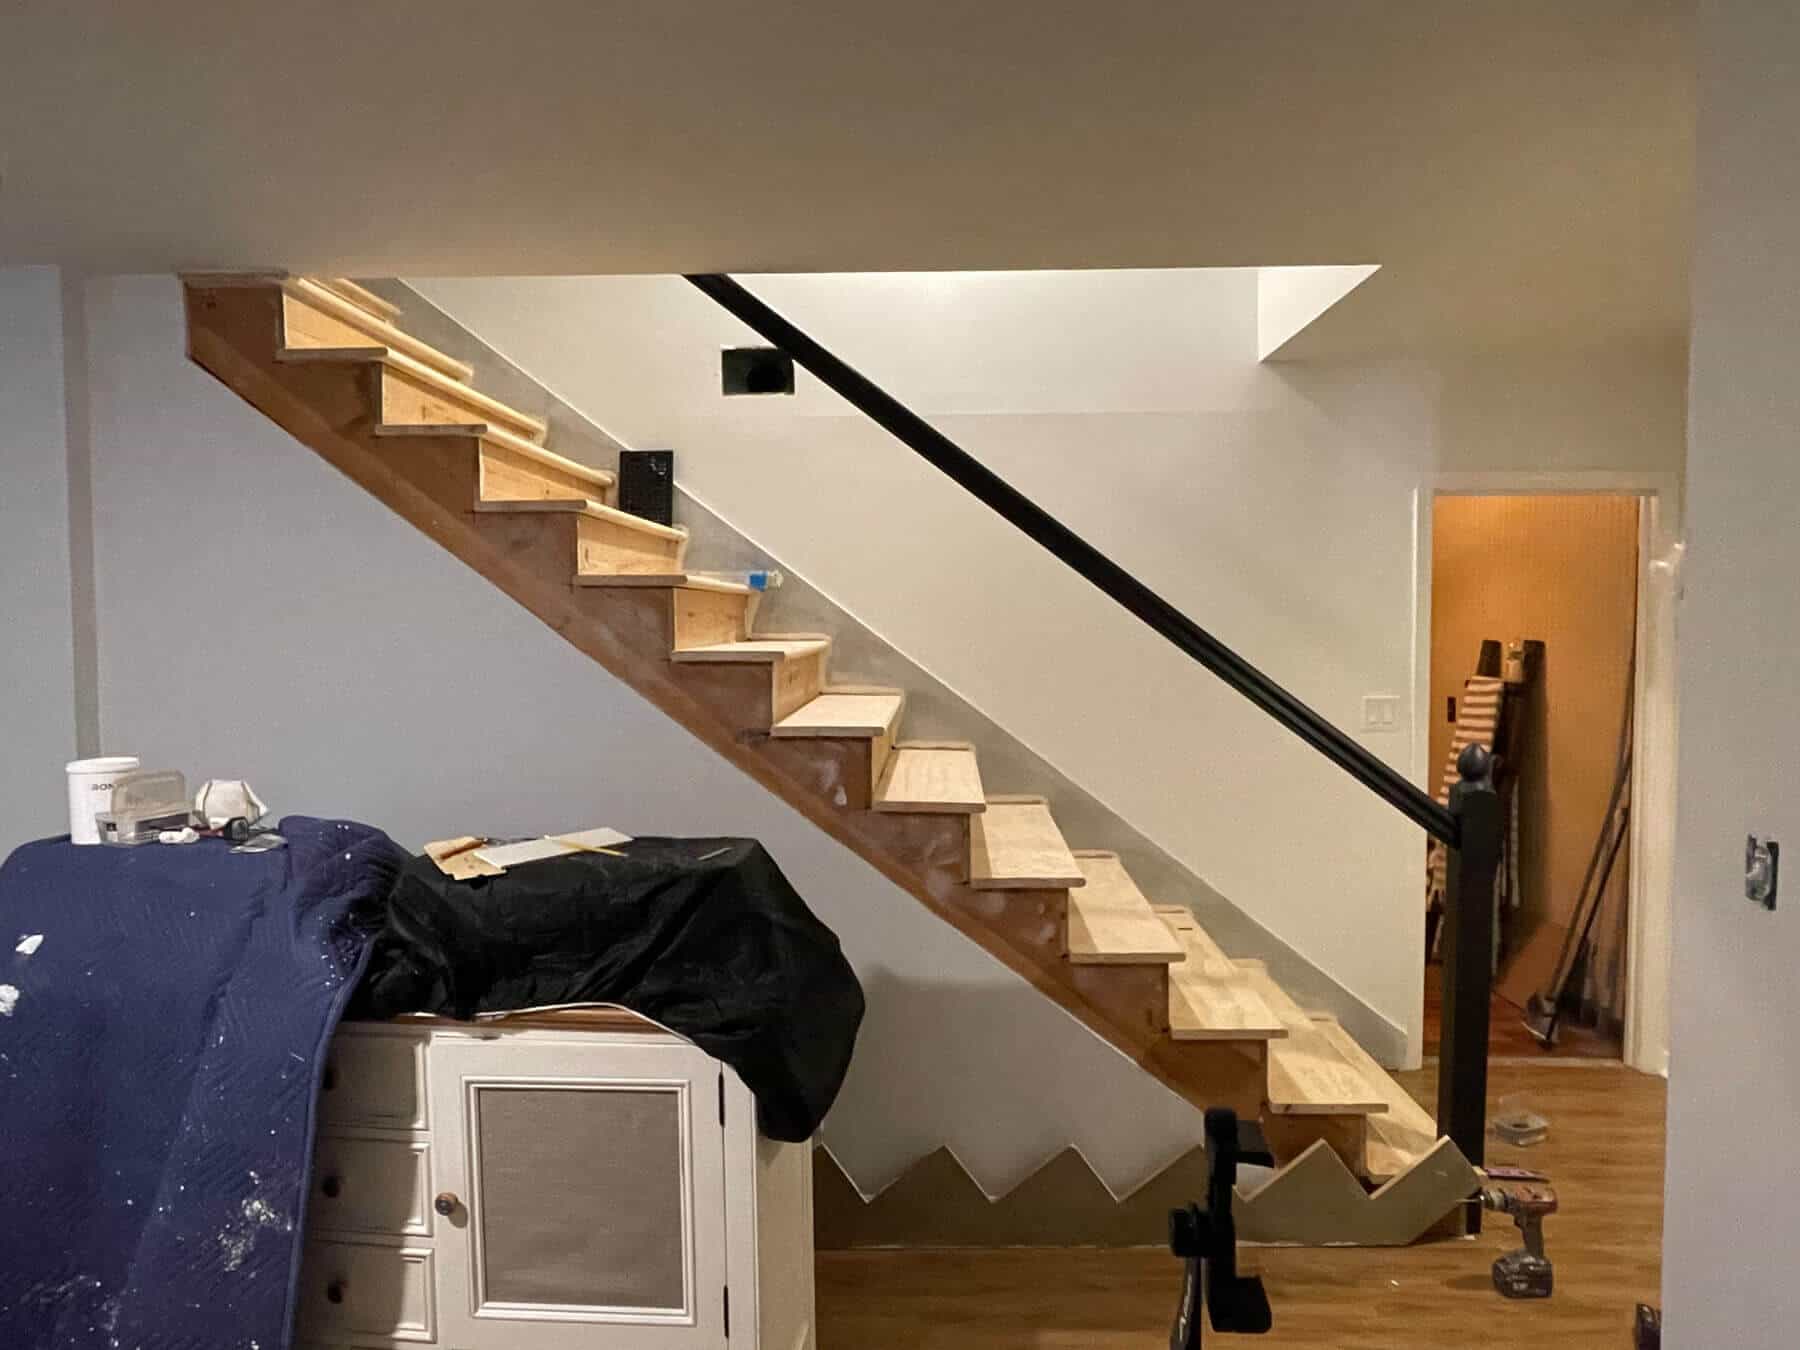
Once the banister was removed, we started the process of taking out the old staircase treads.
This was the most difficult task as it does require a bit of muscle. In older homes, they used nails for everything and the nails were very long.
Since Trent had a hard time with those long nails, he would work in sets of two steps. And no, I don’t mean the dance.
He would remove 2 treads and then install the new treads in place.
It was an easy way to inspect each stair riser and measure the riser height to ensure everything was even.
He started at the top landing and worked his way down.
It already looks like a new flight of stairs.
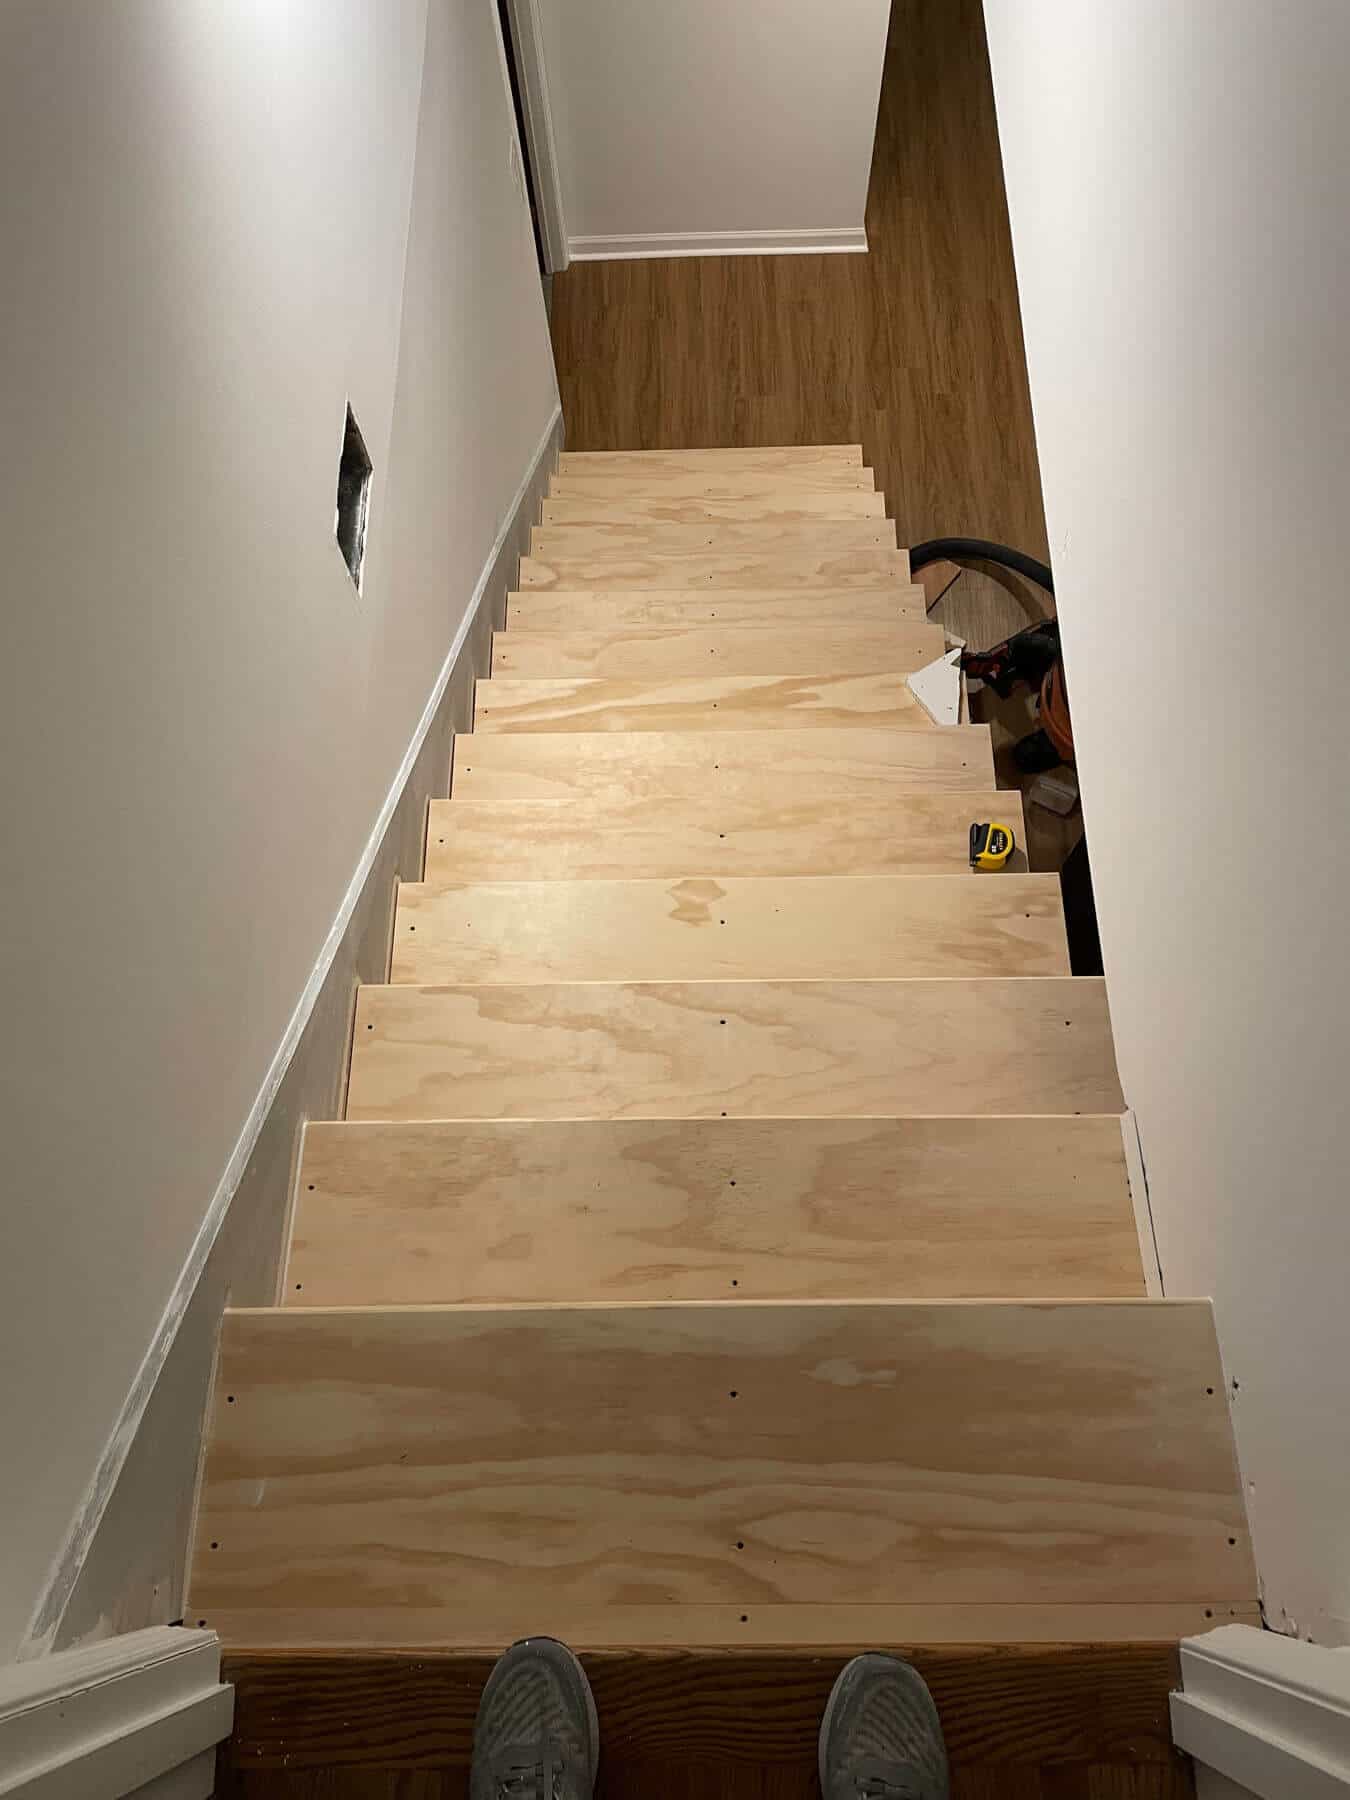
After I did some research on some basement stair ideas, we learned that the best way to install the treads was to use deck screws.
It’s a good idea to pre-drill the holes using a counter sink. That makes screw holes easy to fill in.
Trent also took an extra measure and used some construction adhesive on the stair risers to keep the treads in place.
Plus, that may help with any future creaks and squeaks on the stairs!
We decided to make these wider stairs that hung over the wall since they were cut short from the previous owner to have them covered with carpeting.
Replacing these stair treads took a couple of days time.
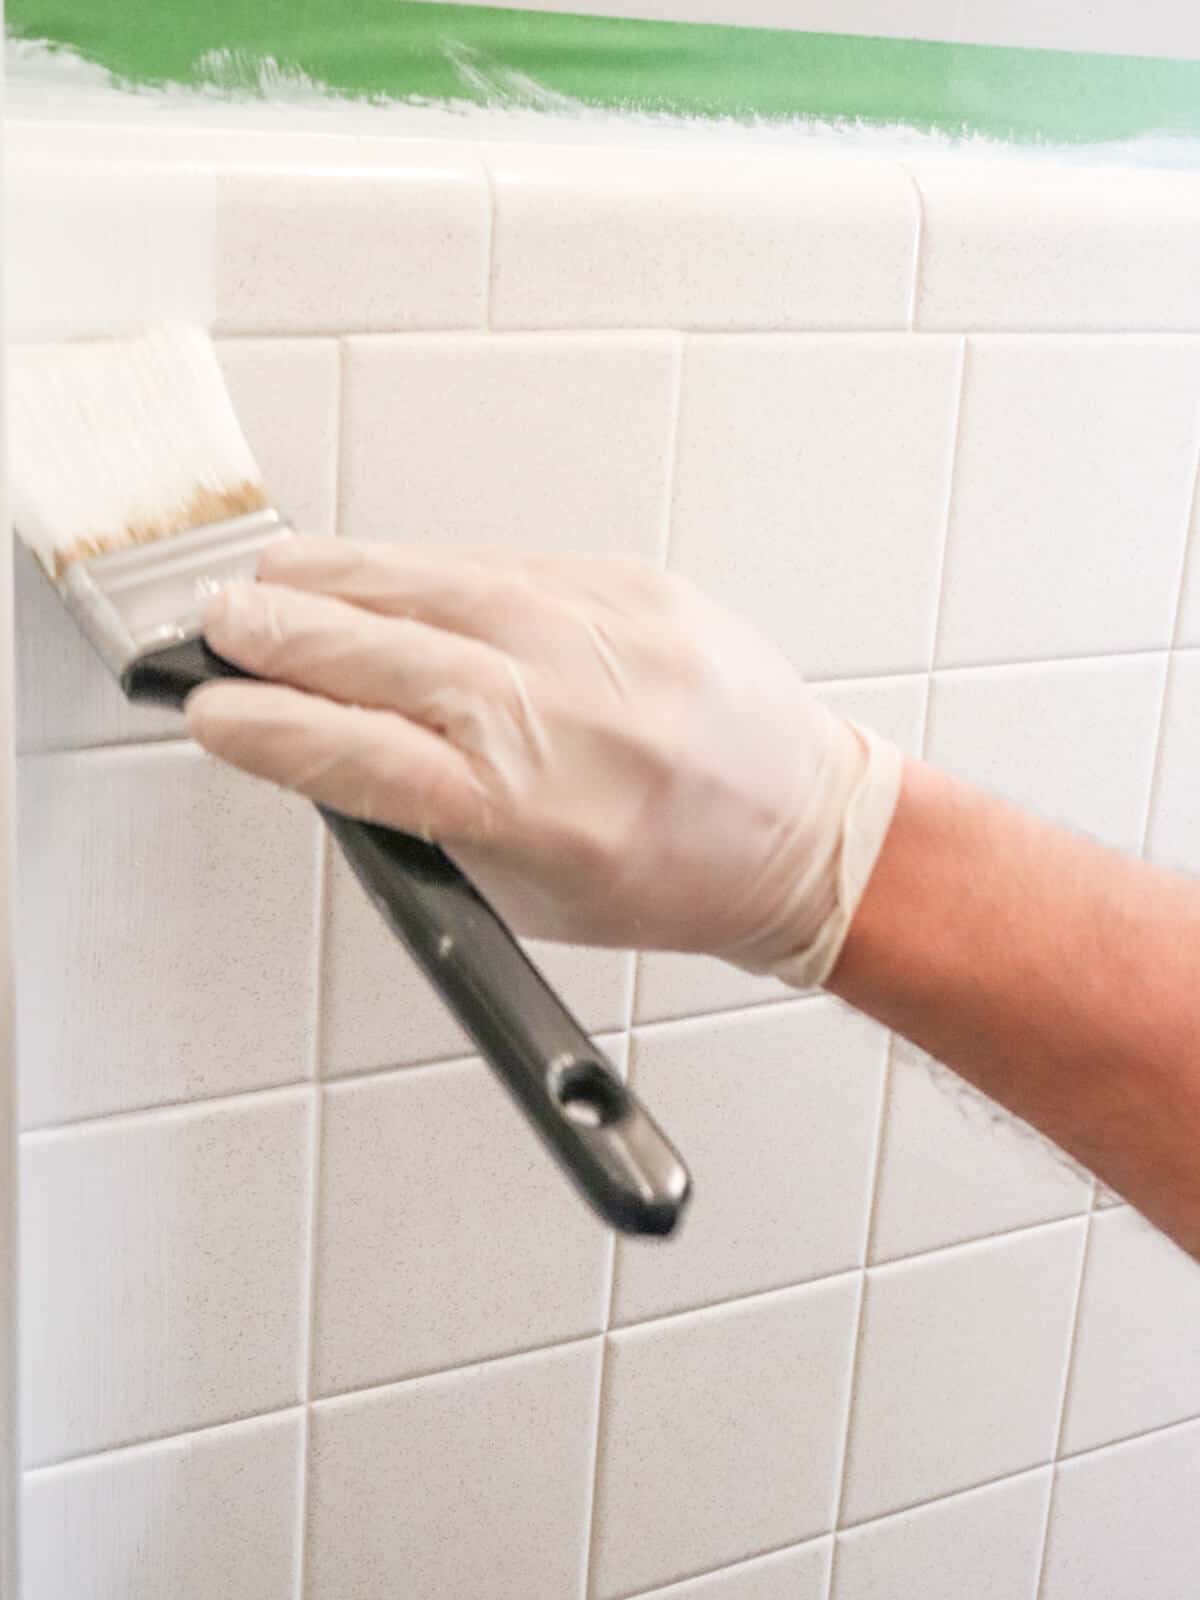
While Trent was installing these stair treads, I started painting the banister with a first coat of black paint.
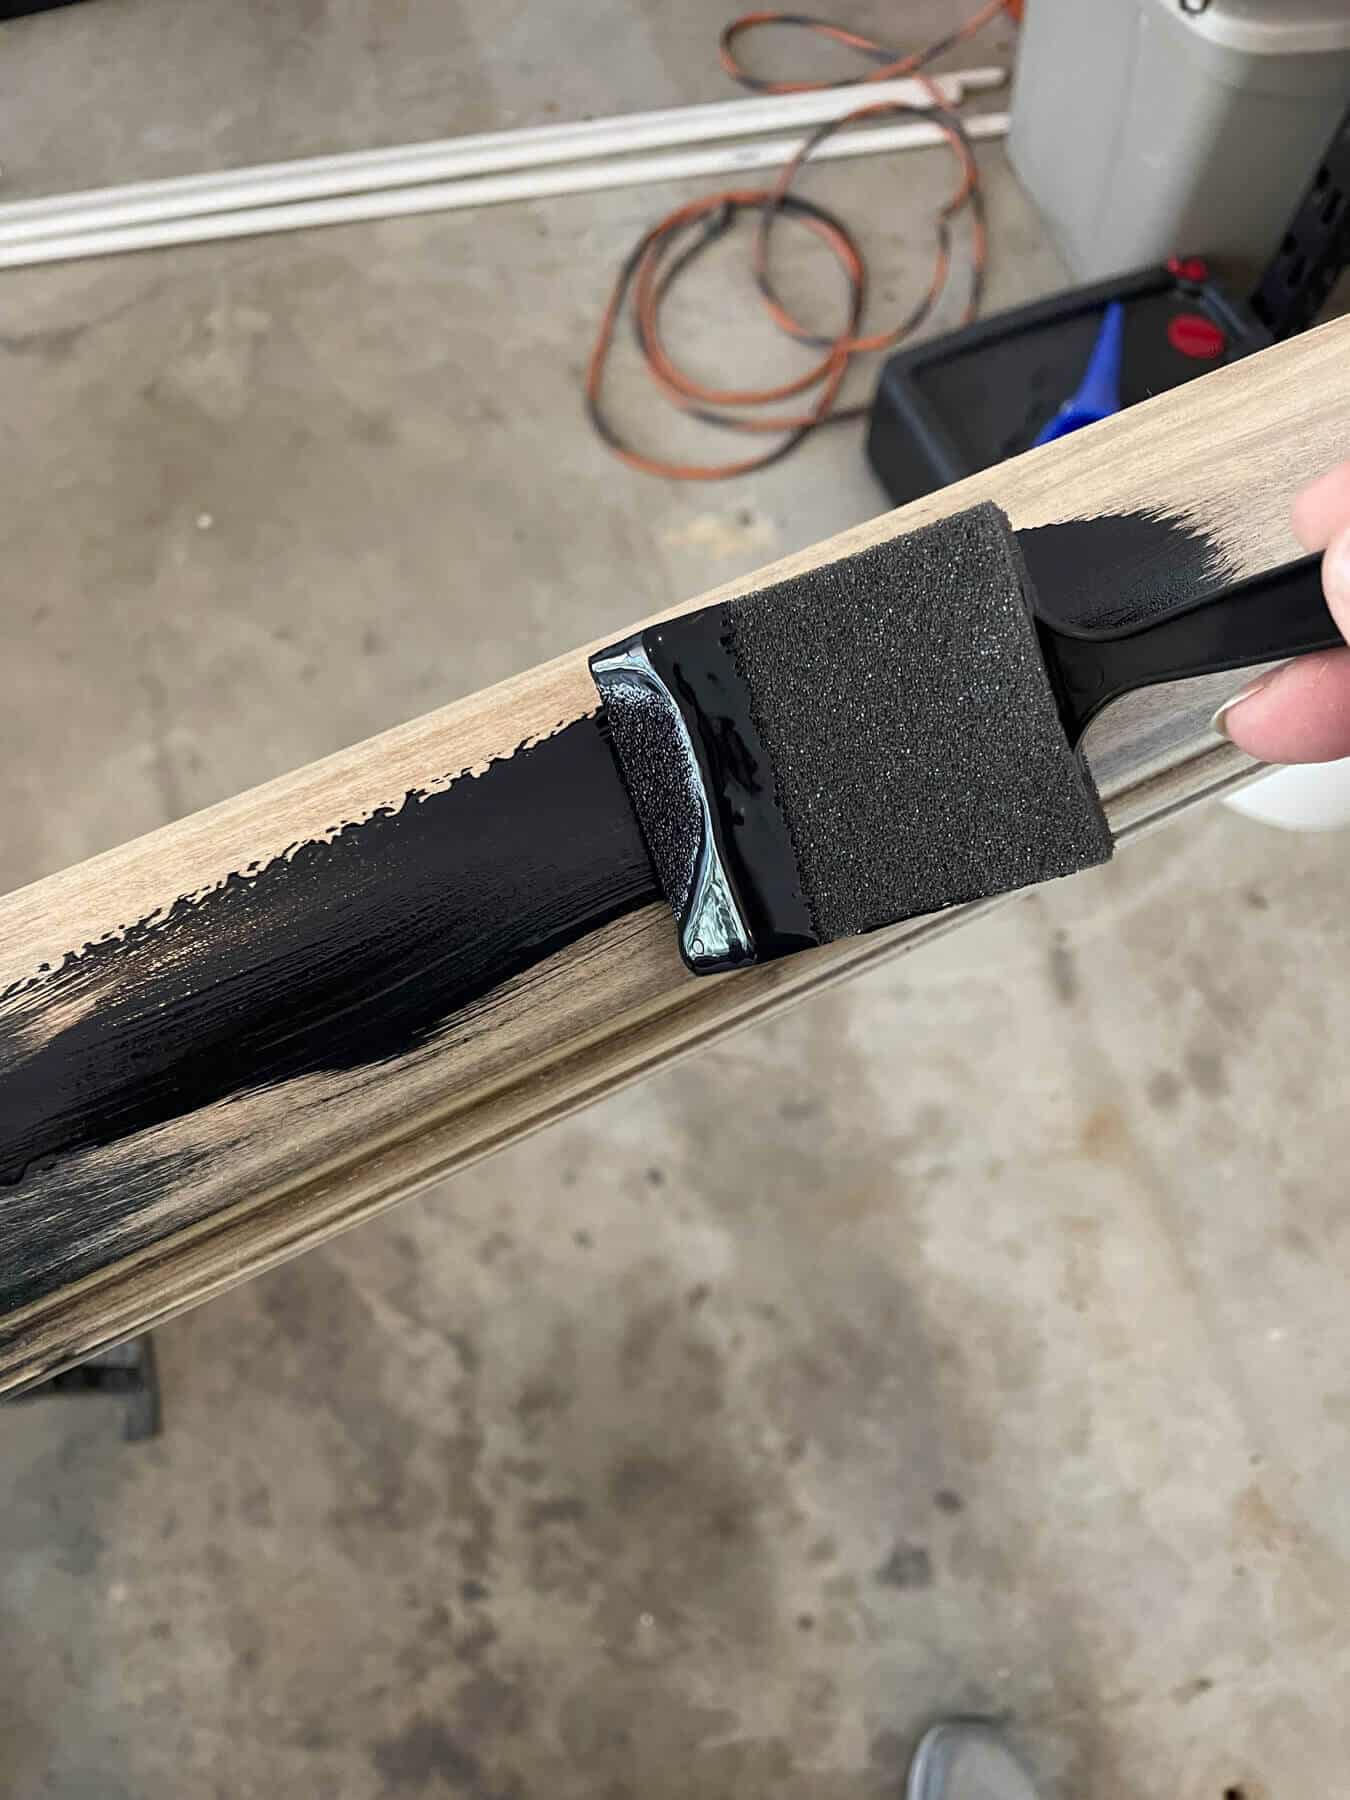
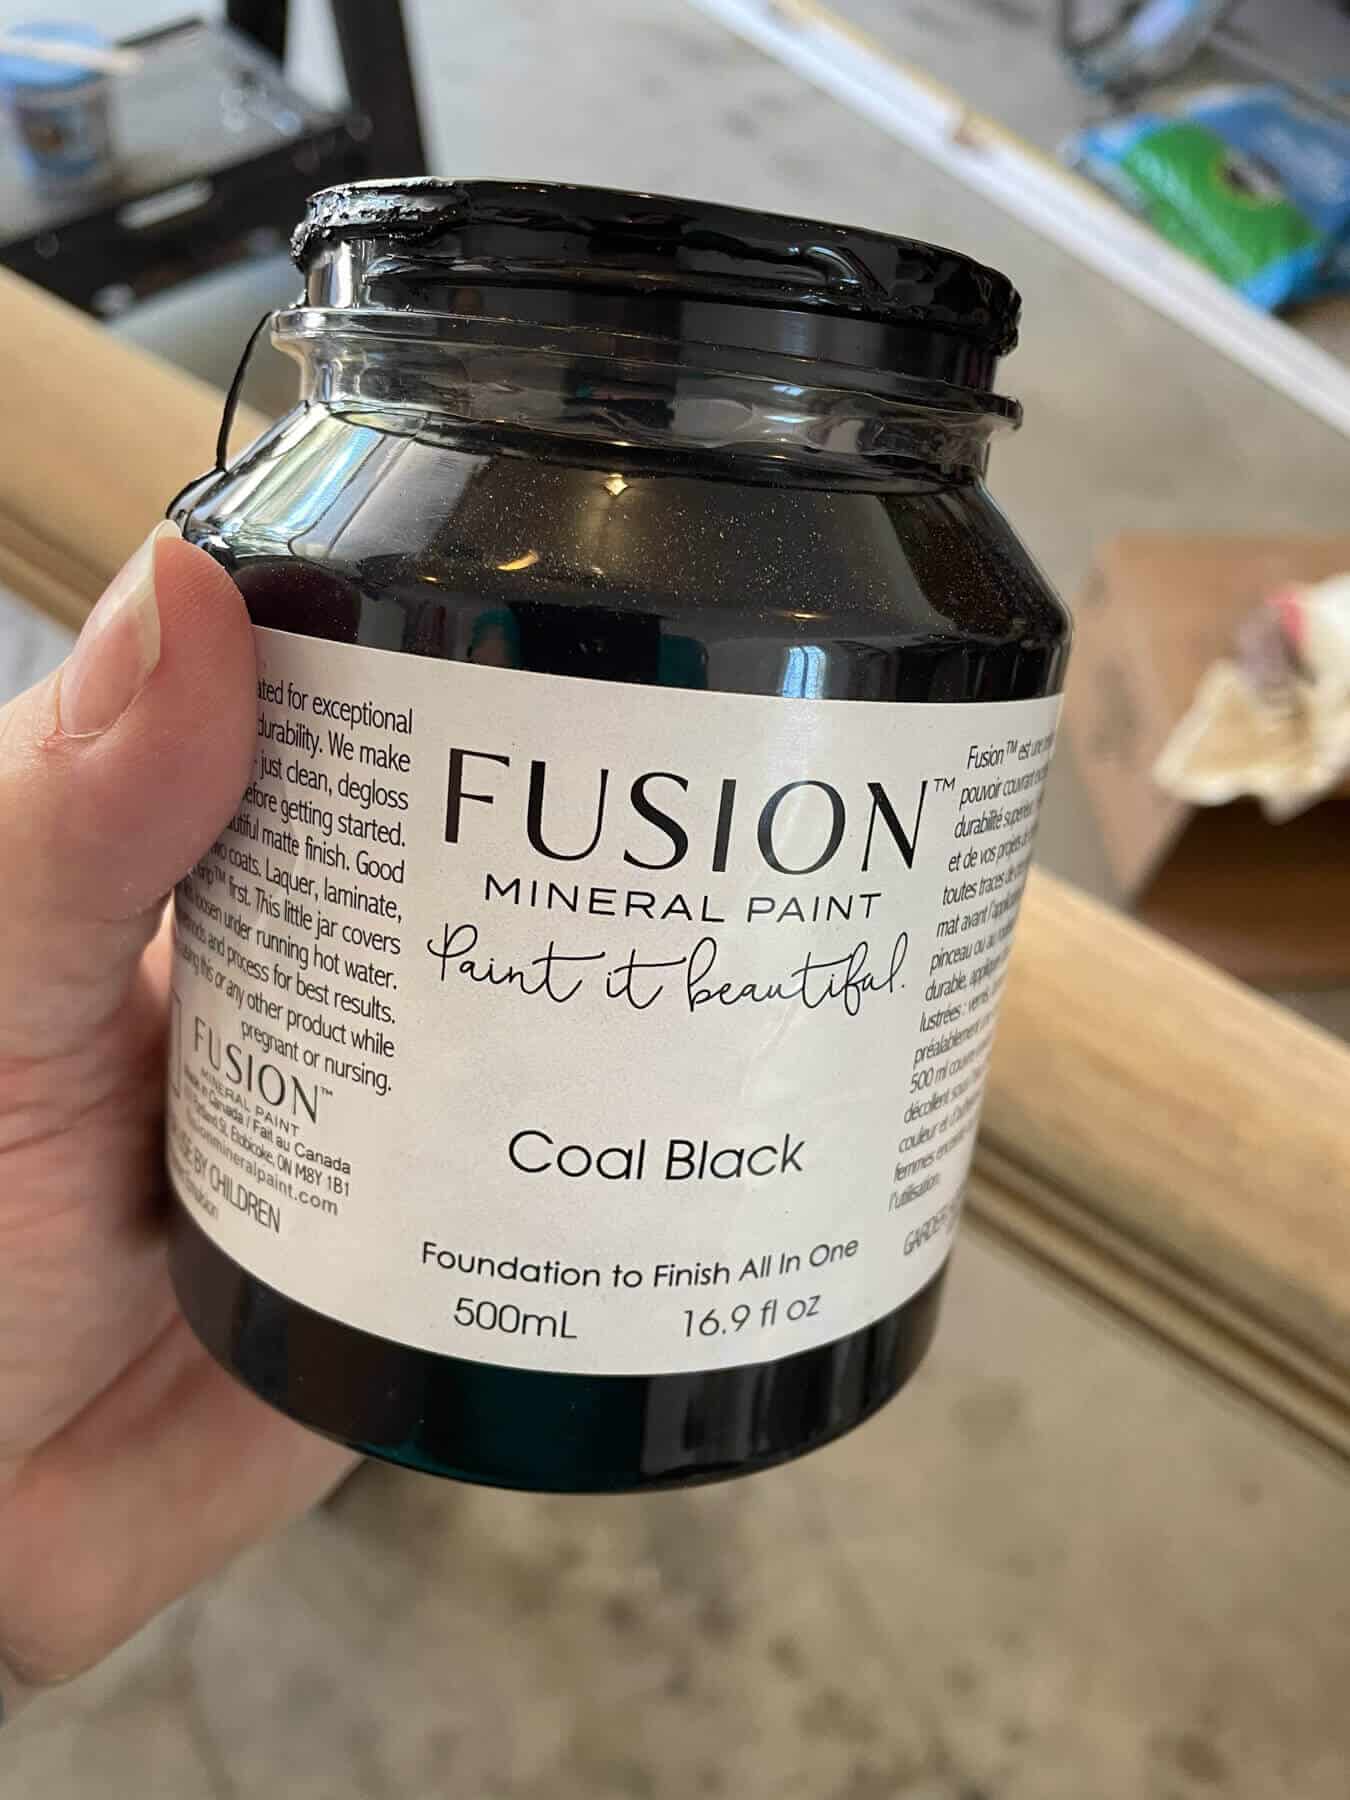
I am using Coal Black from Fusion Mineral Paints for the handrail.
I purchased it locally at a booth a the Brass Bear, an antique shop in Birmingham. But you can also find this online at Amazon.
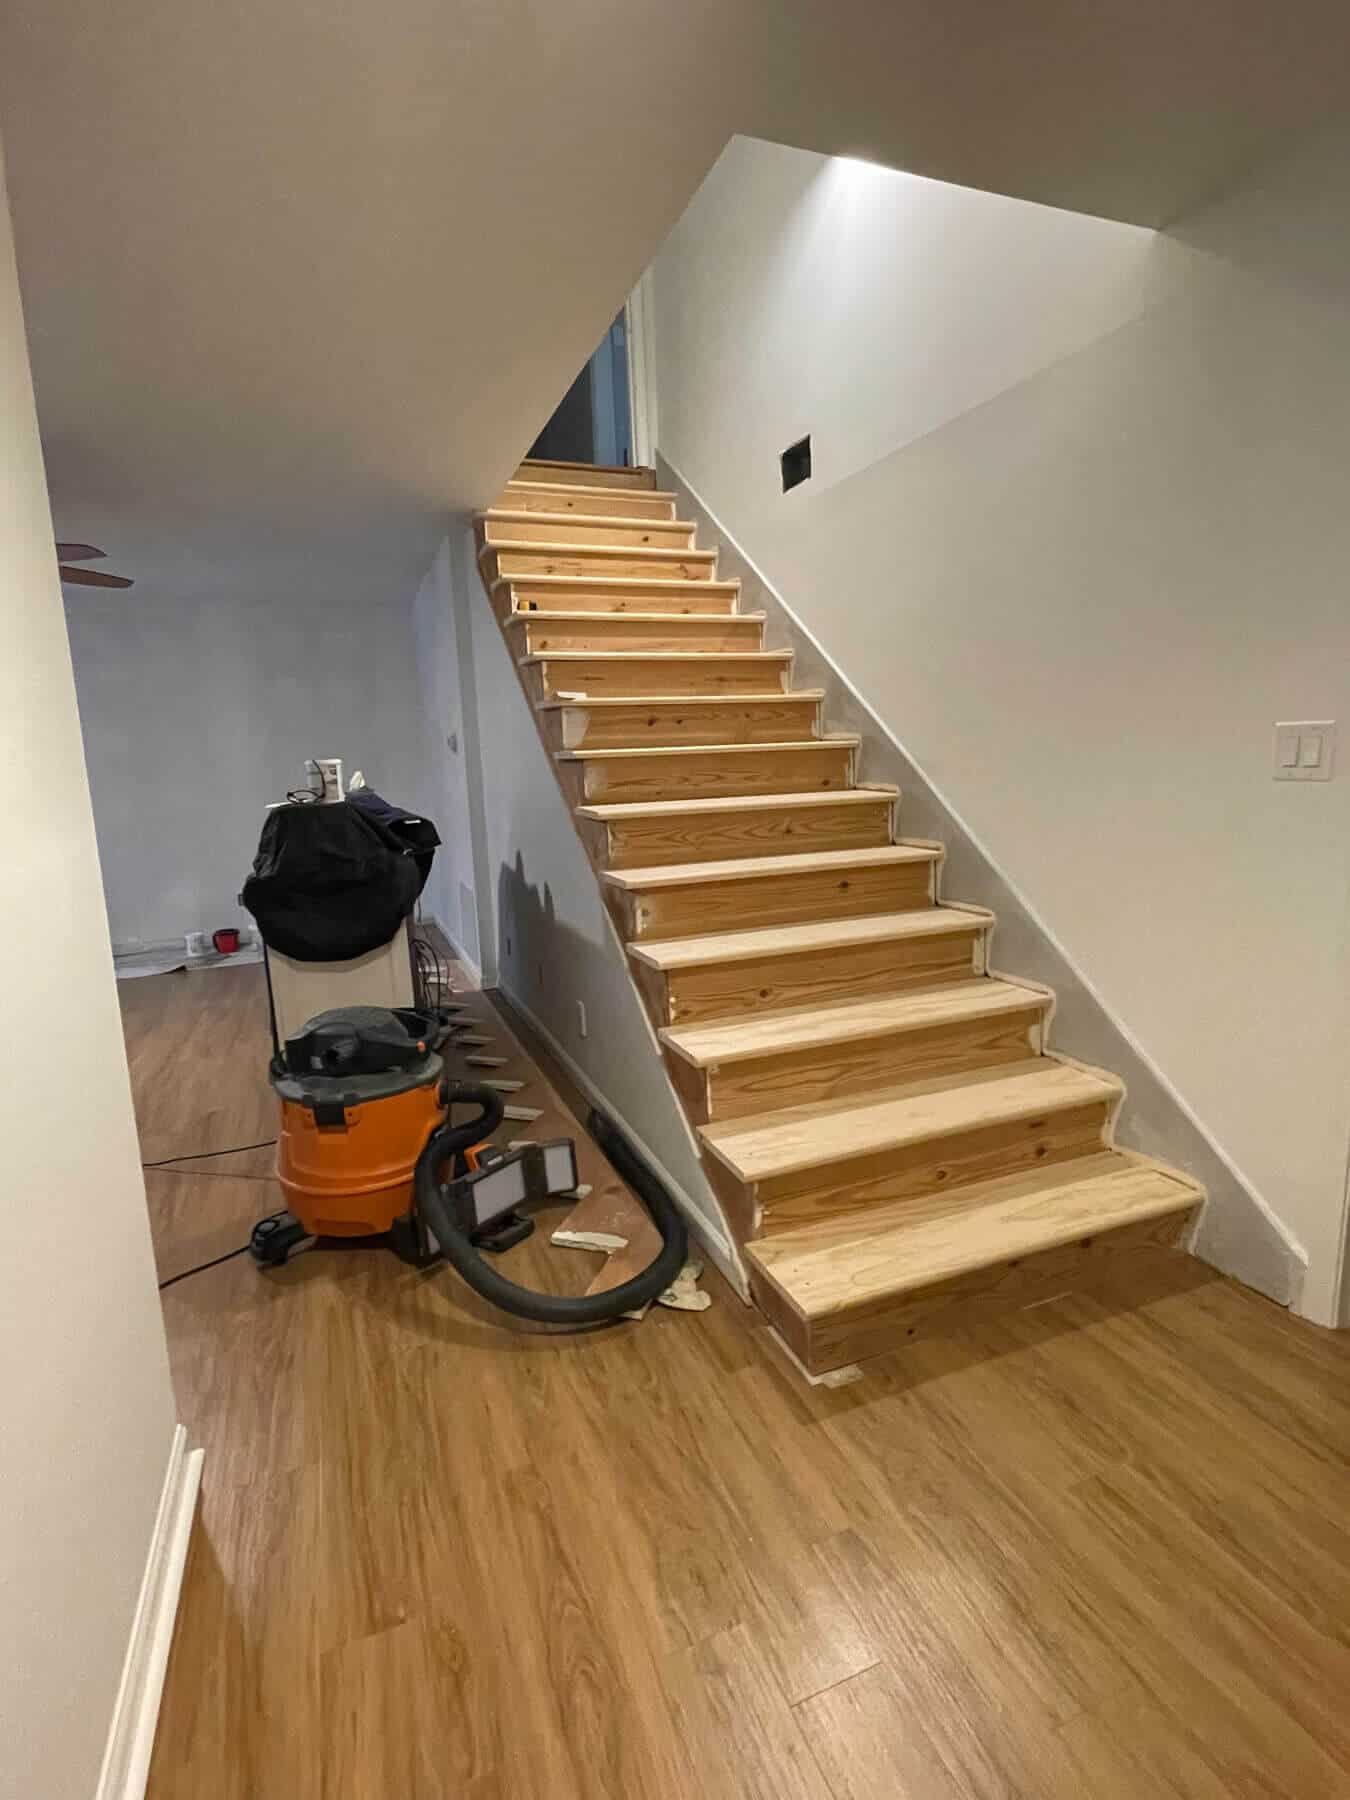
Once all the treads were installed, we put the original but newly painted handrail back in place.
Since we opted for an affordable stair tread from our local Home Depot, our plan was to use white paint and a gray carpet runner down the center.
I started with priming each tread. I left the middle section unpainted since it was going to be covered with the carpet runner.
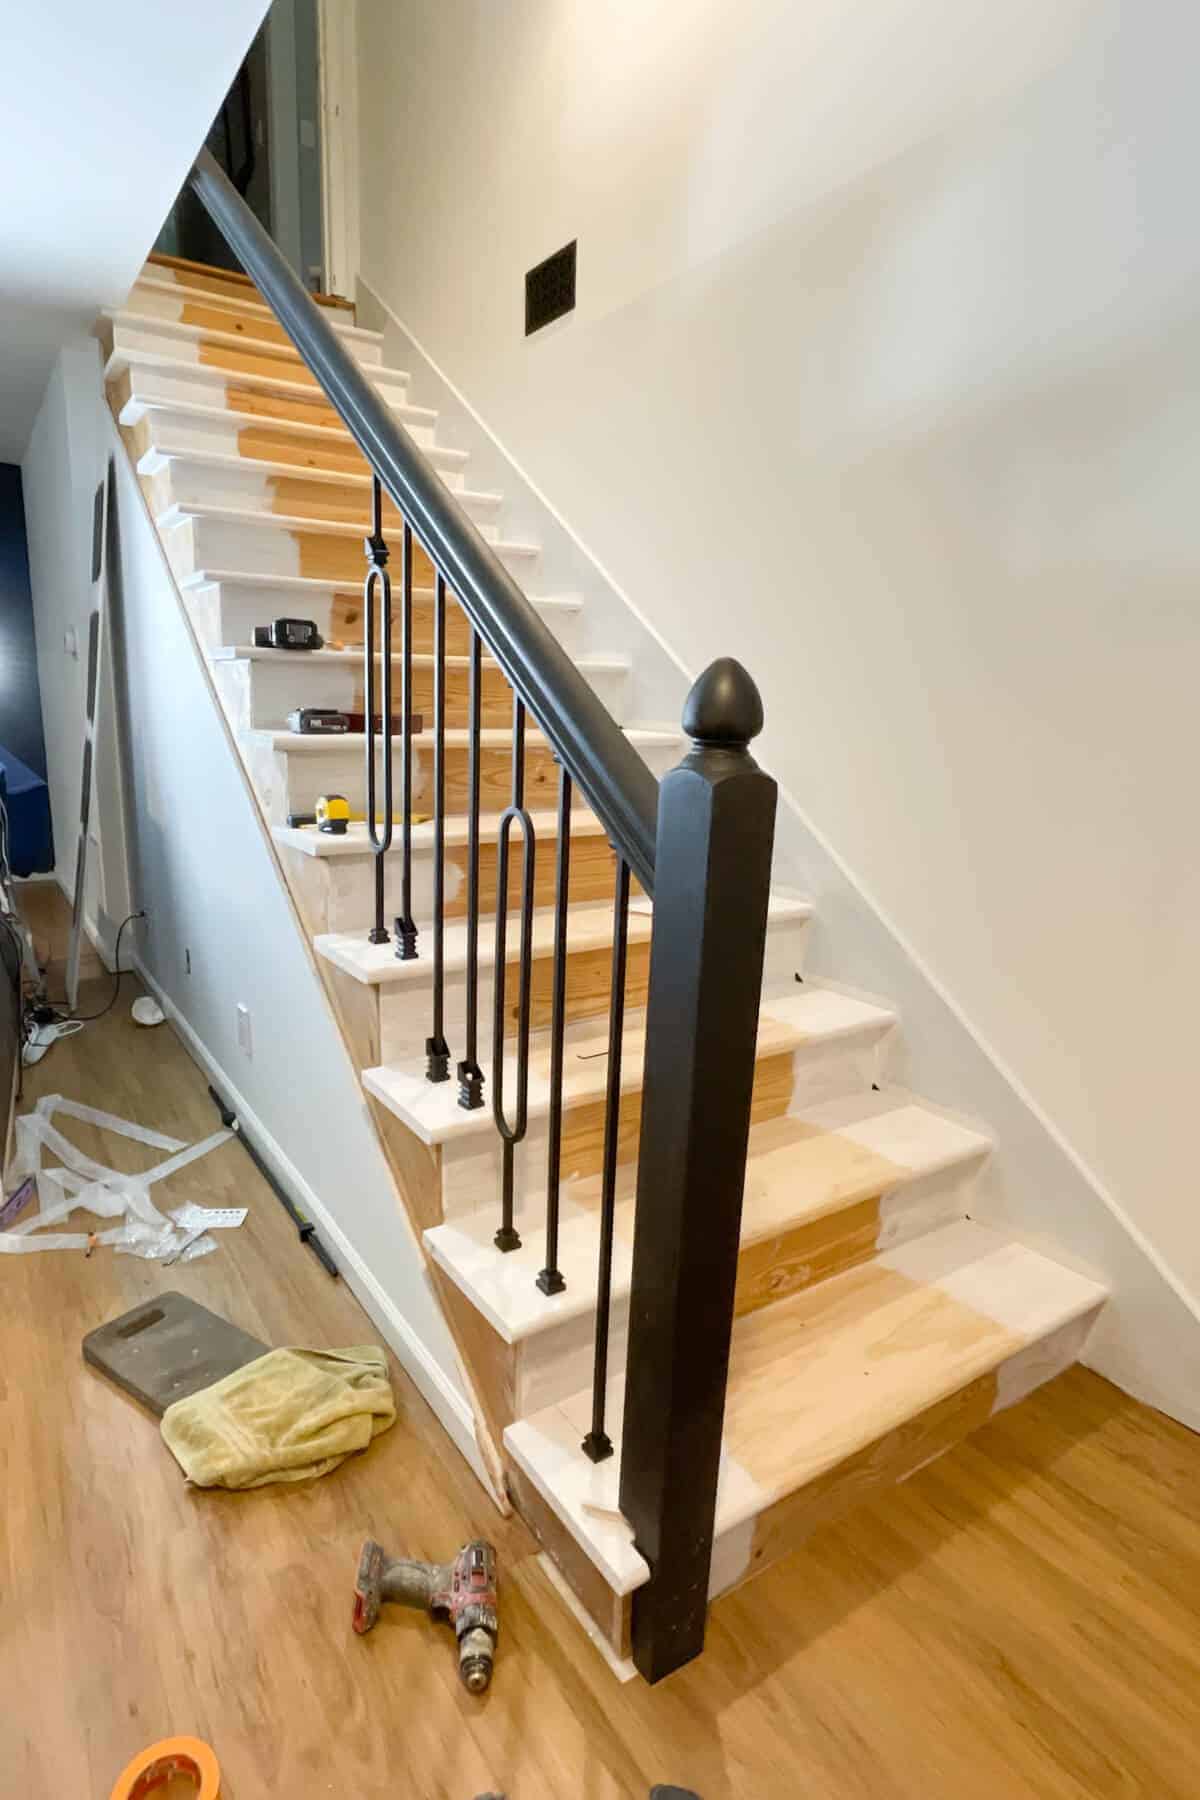
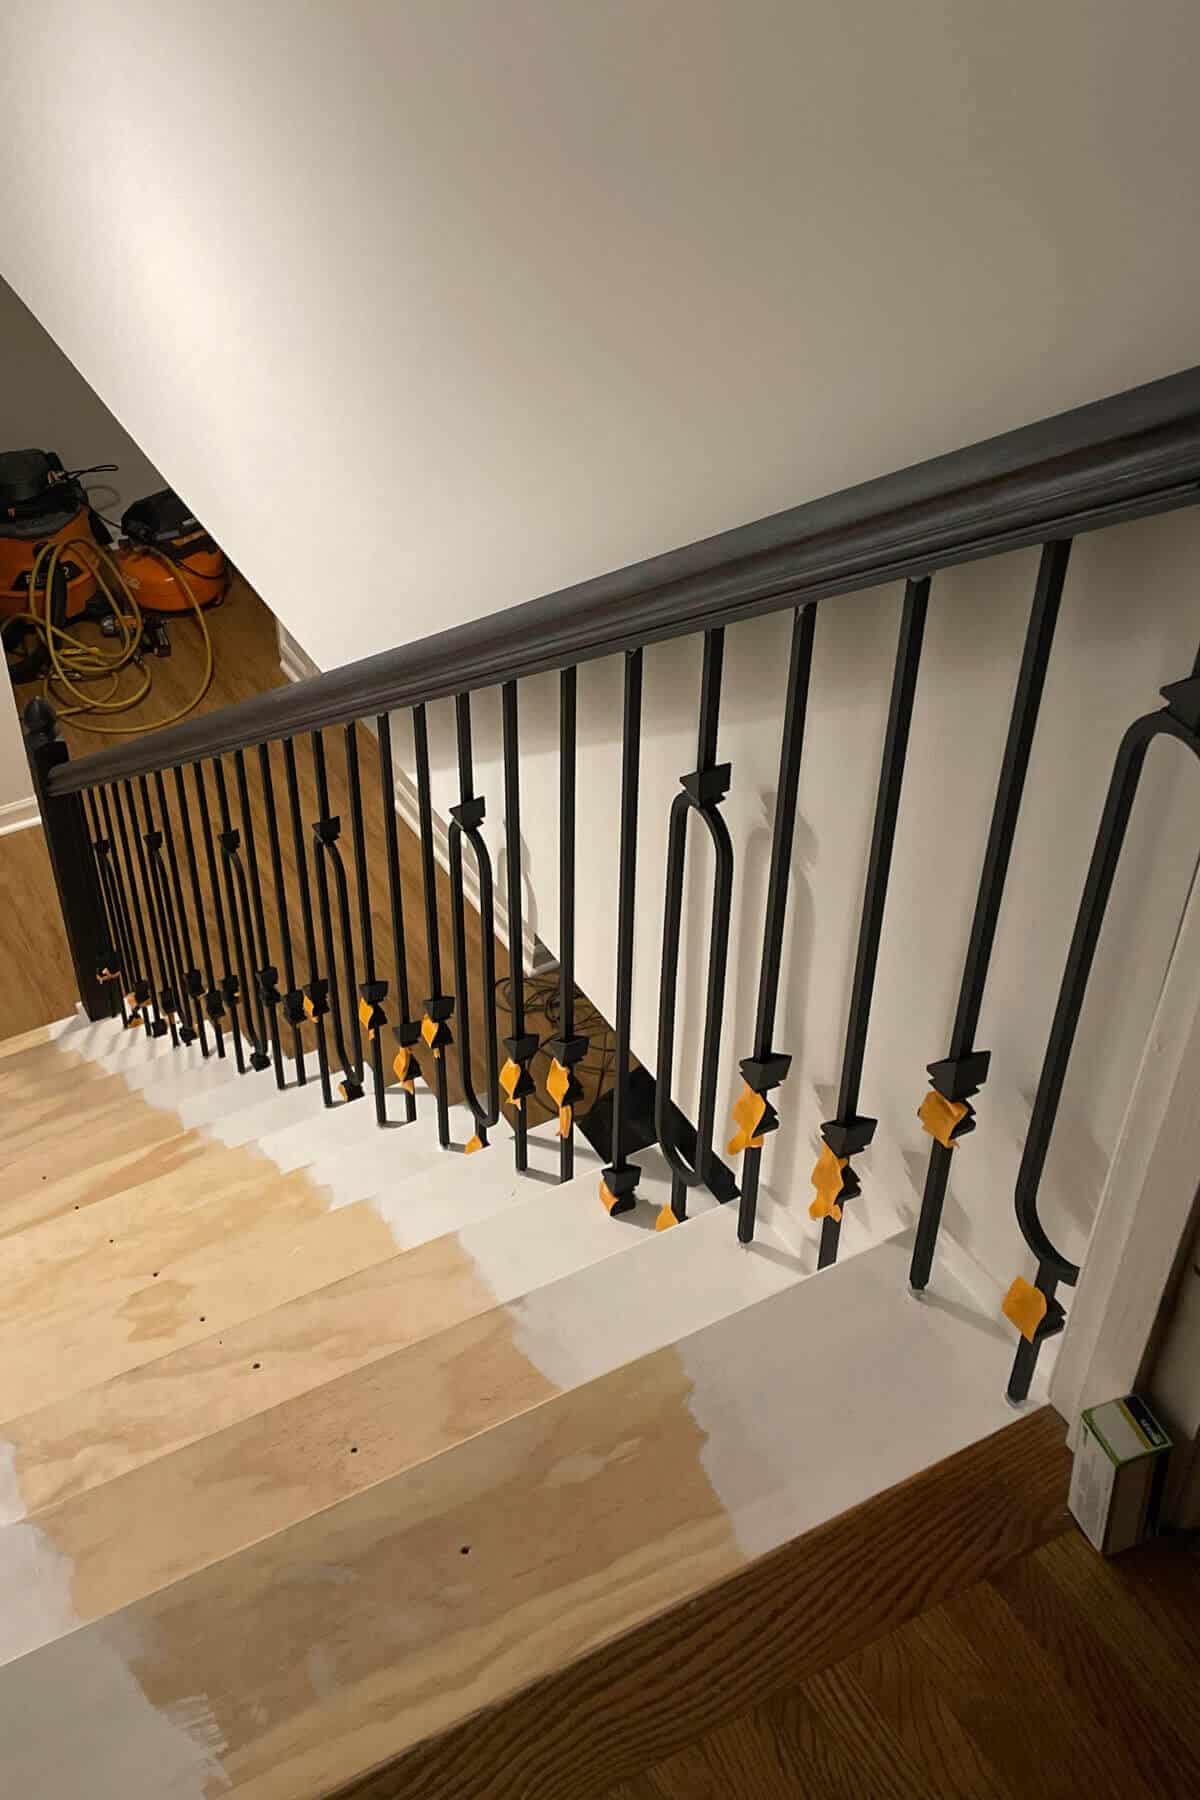
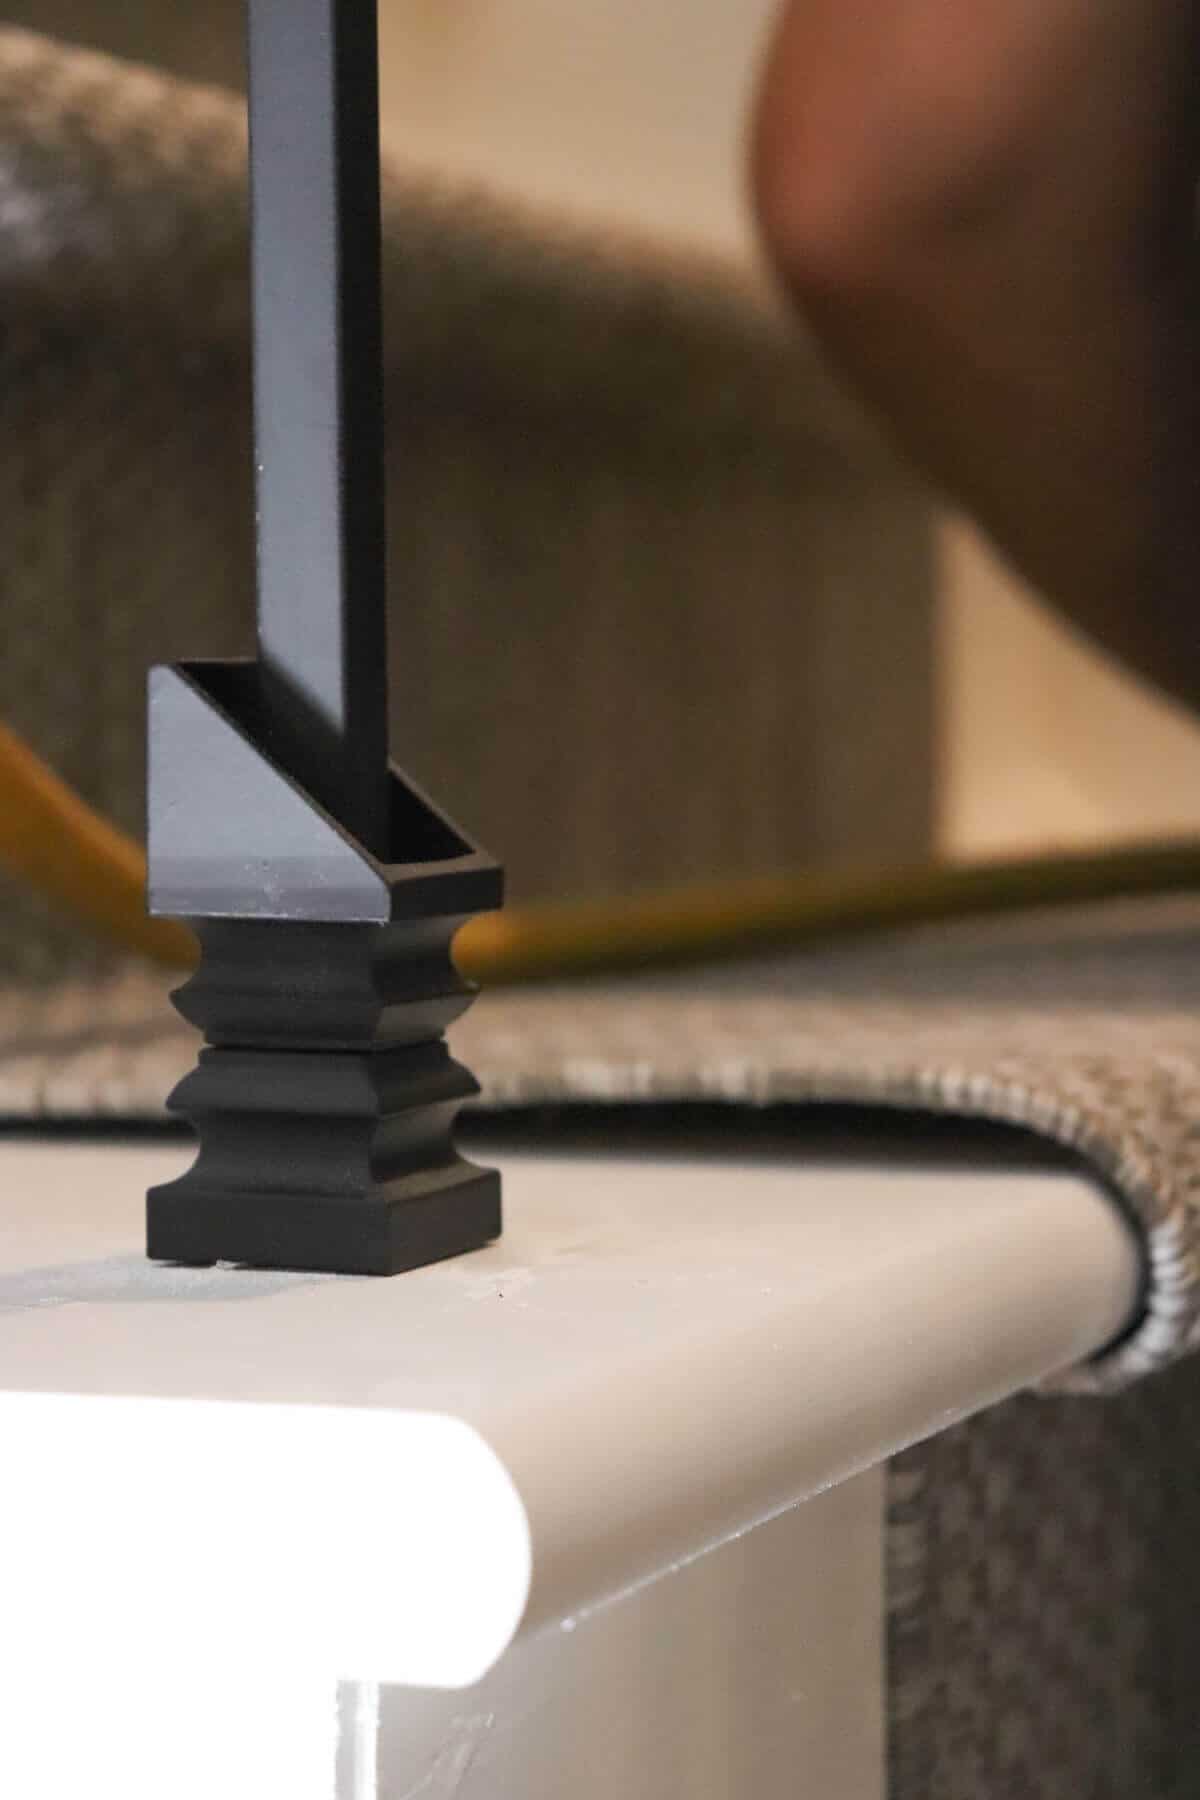
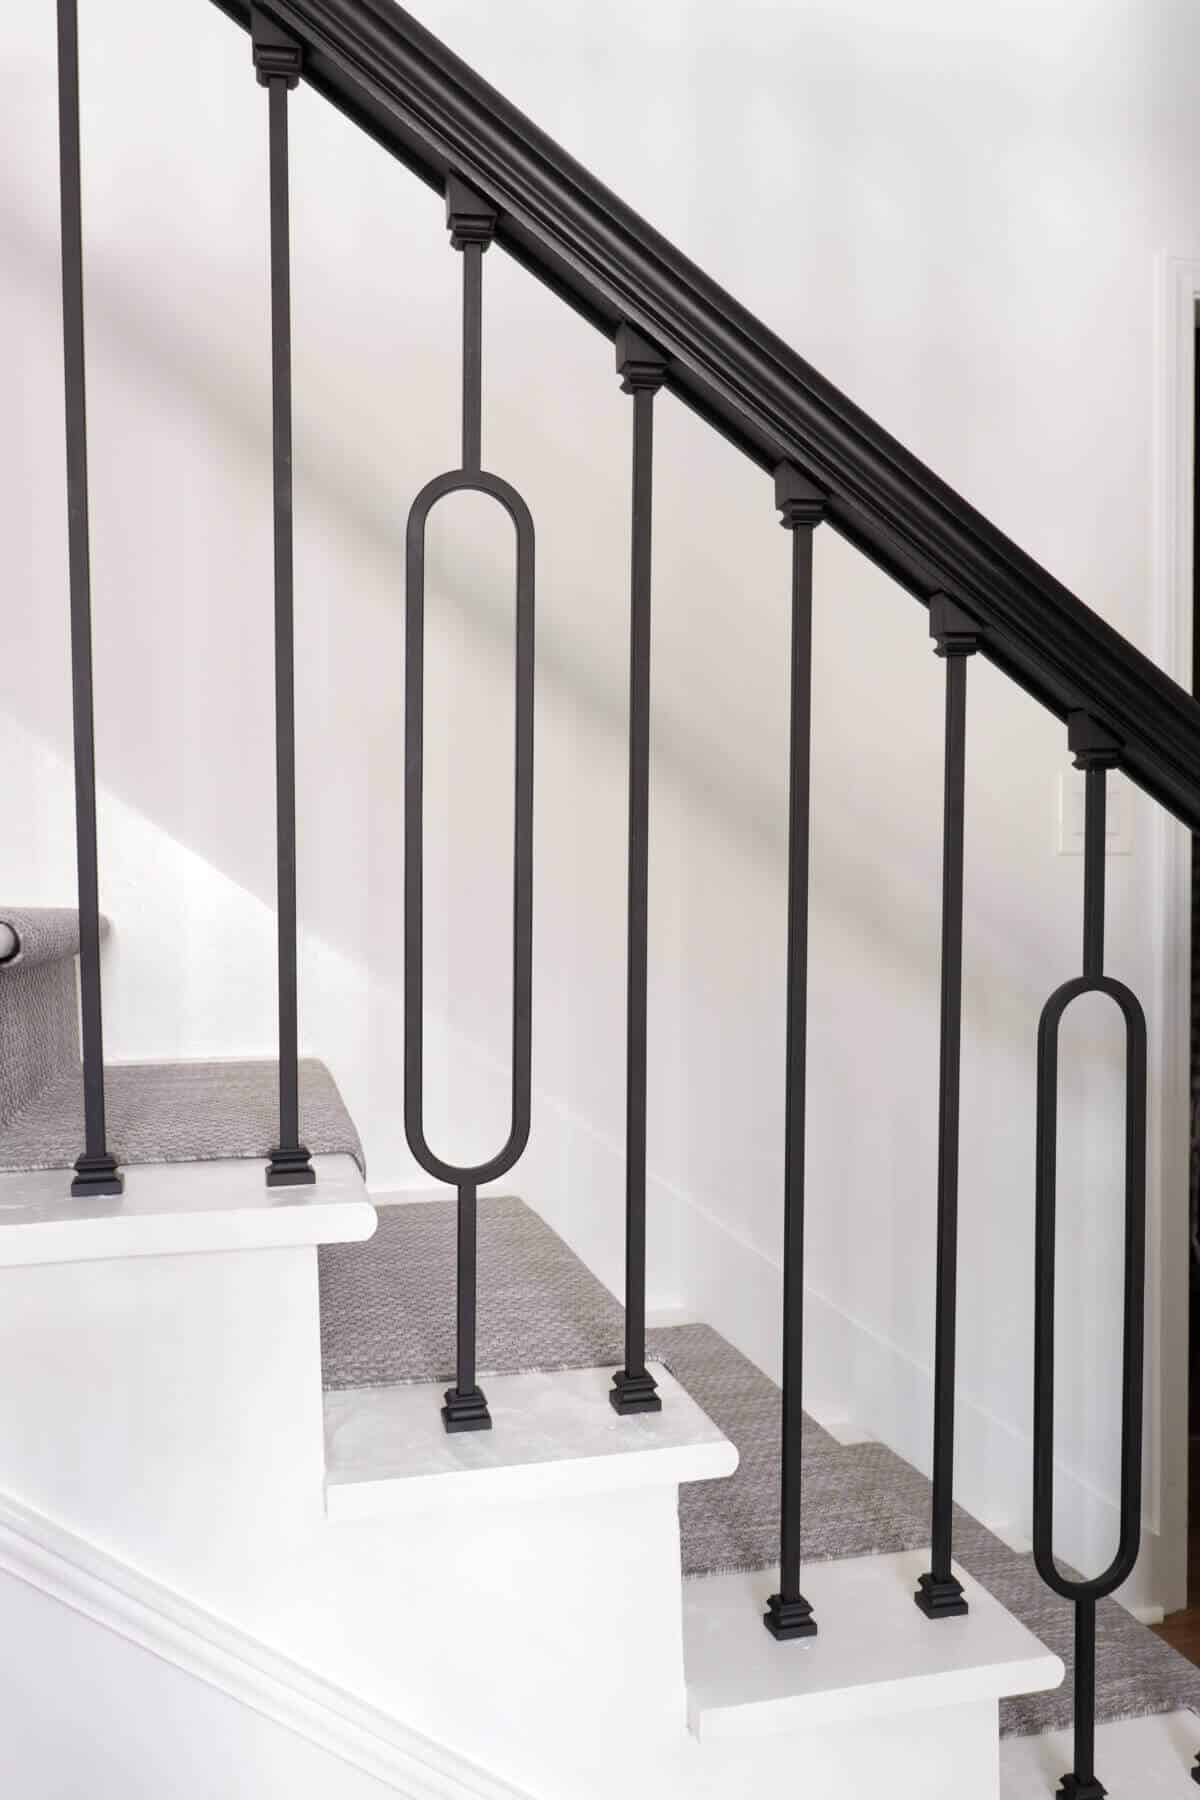
As soon as we installed the banister, I primed the stairs and Trent began installing the iron balusters.
I have an entire blog post dedicated to the iron baluster install if you want to learn more about how we finished that.
After Trent finished installing the balusters, I took a couple of days to paint the stair treads white. I allowed each coat of paint to dry overnight to make sure
I wanted a lighter color to help brighten our dark family room.
Plus, a white paint color is a great option for basement steps if you are using a carpet runner down the center.
But I wouldn’t recommend it for direct foot traffic. Or you will be fighting dirty treads constantly.
So the next step was to install the carpet runner.
I thought the best option for a carpet runner was an indoor outdoor carpet that I found, but I was concerned about how it would feel underfoot.
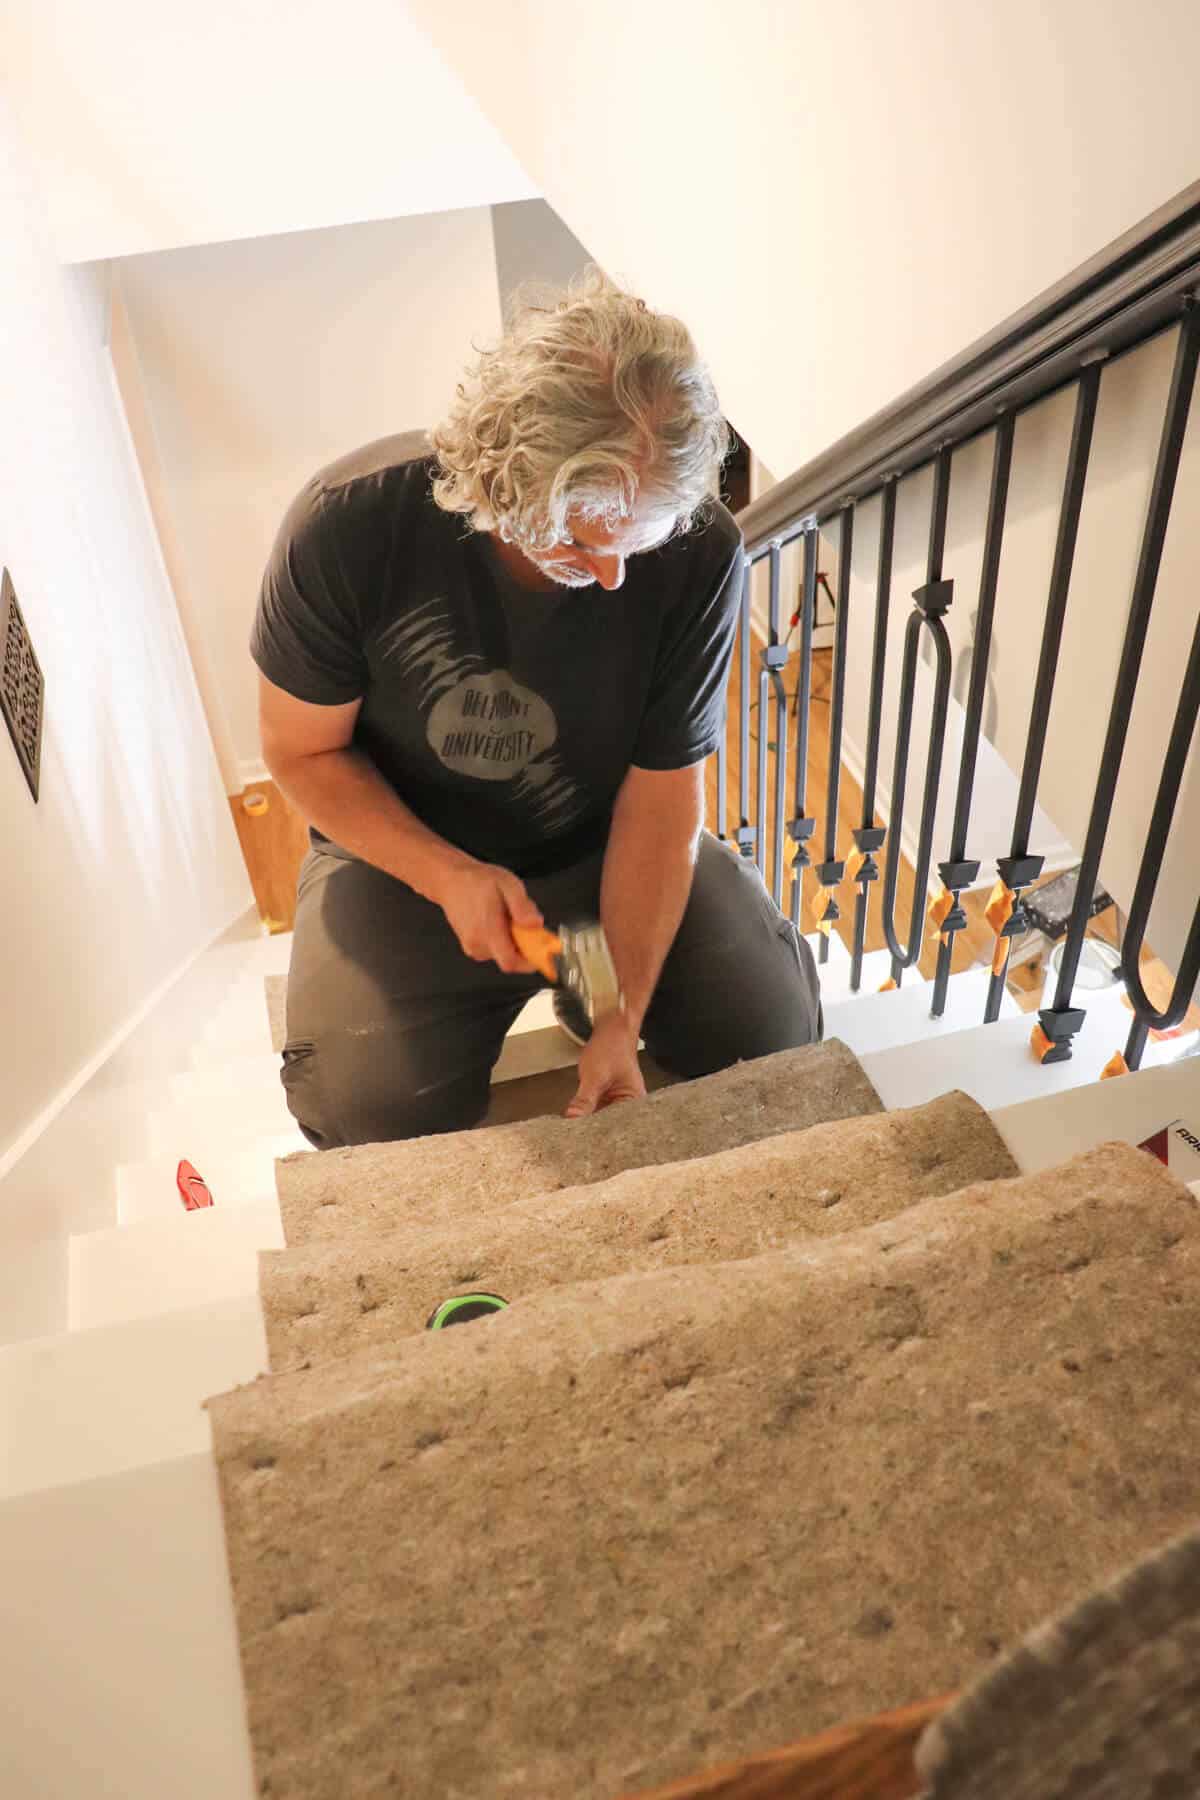
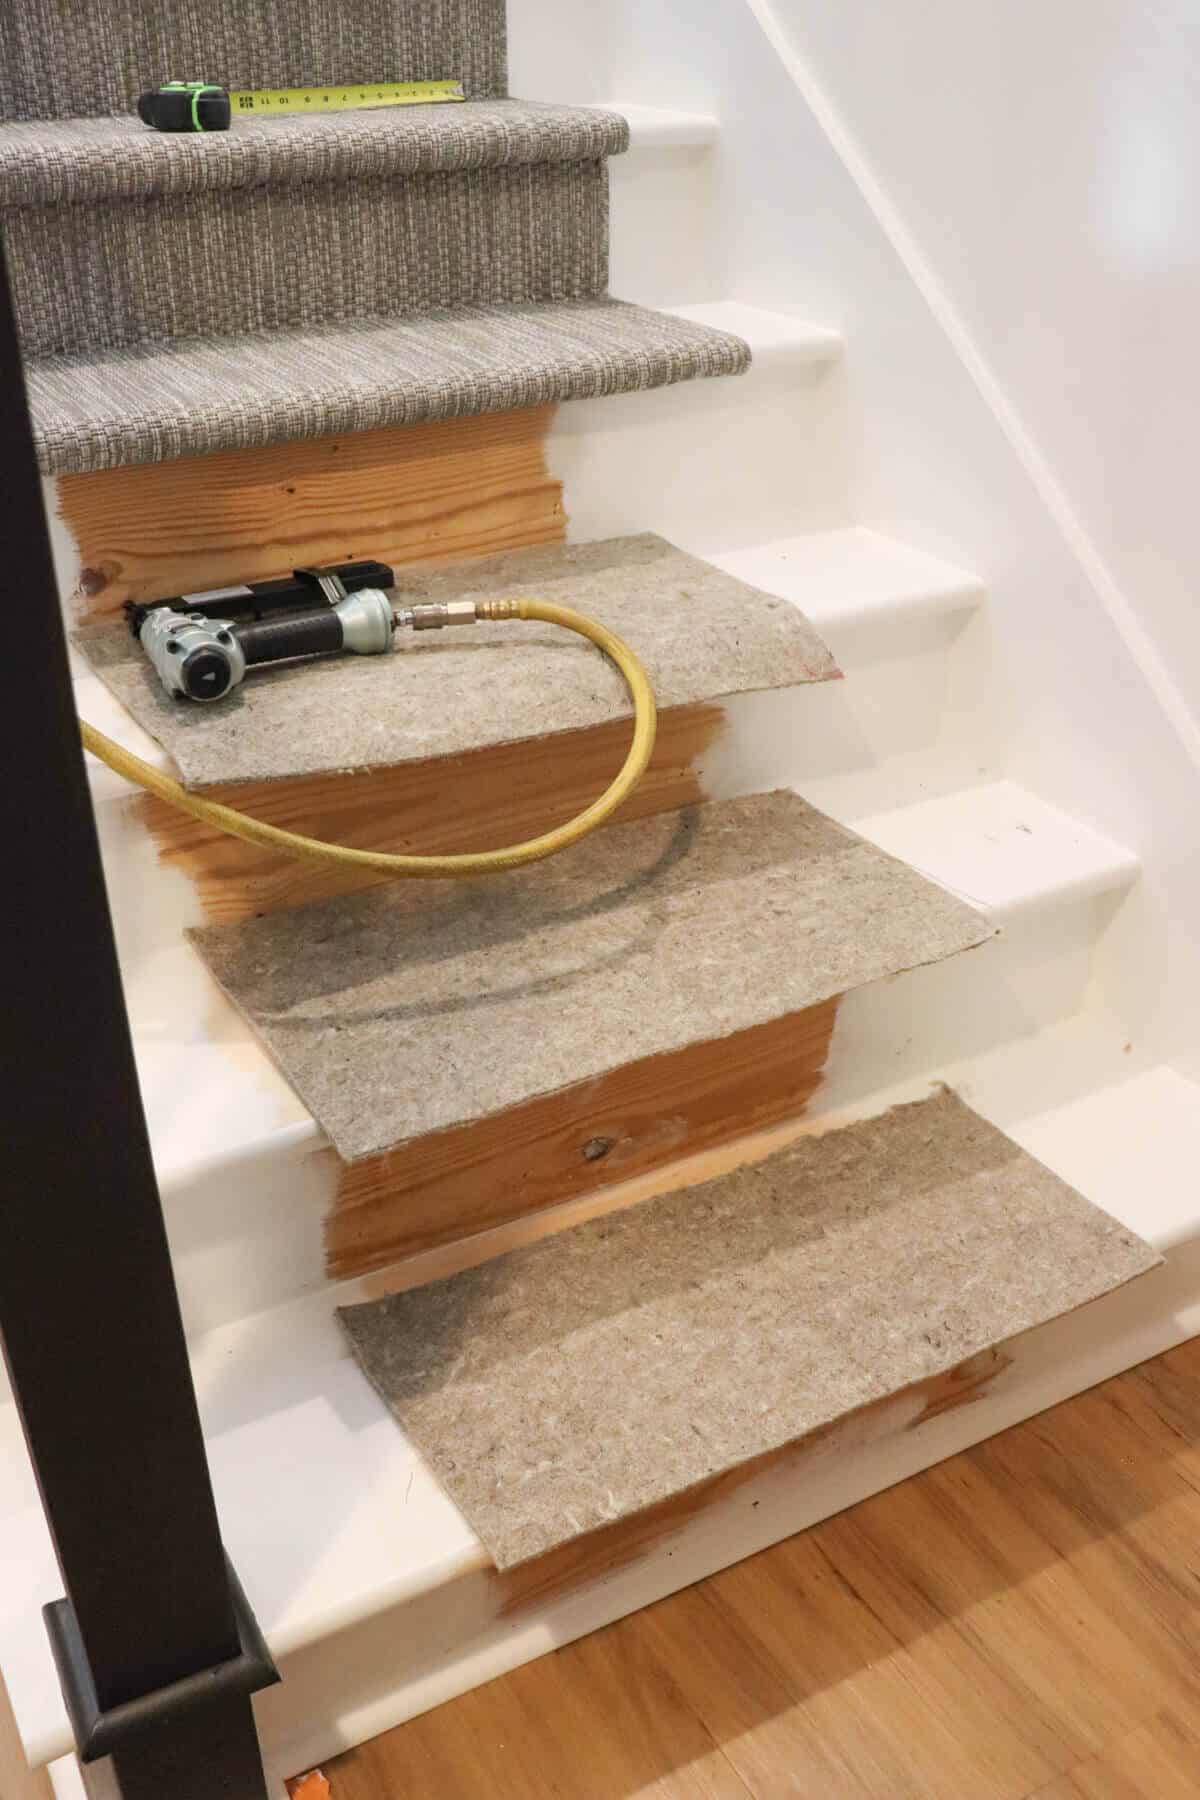
So to add a bit of cushion to each tread, we installed an affordable carpet pad on each step.
First, we cut the pad to fit each step.
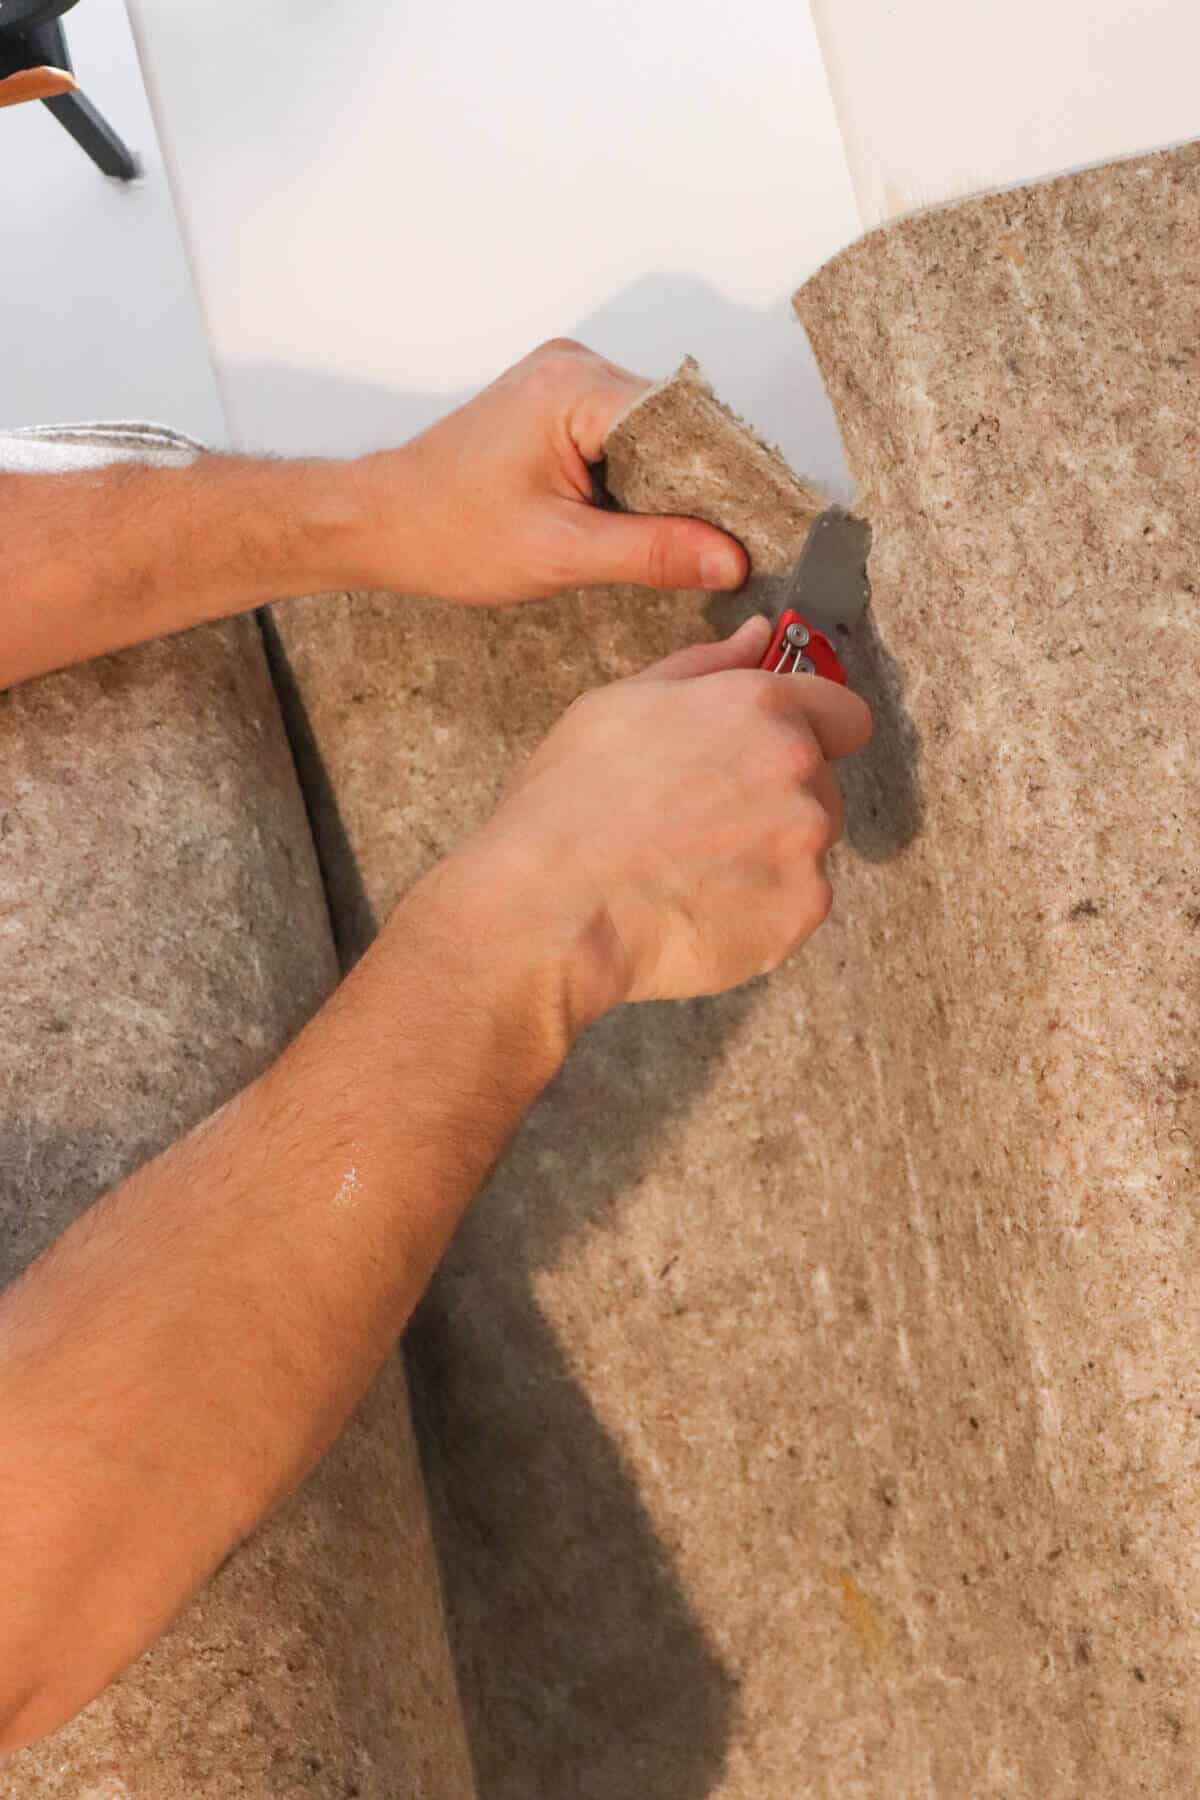
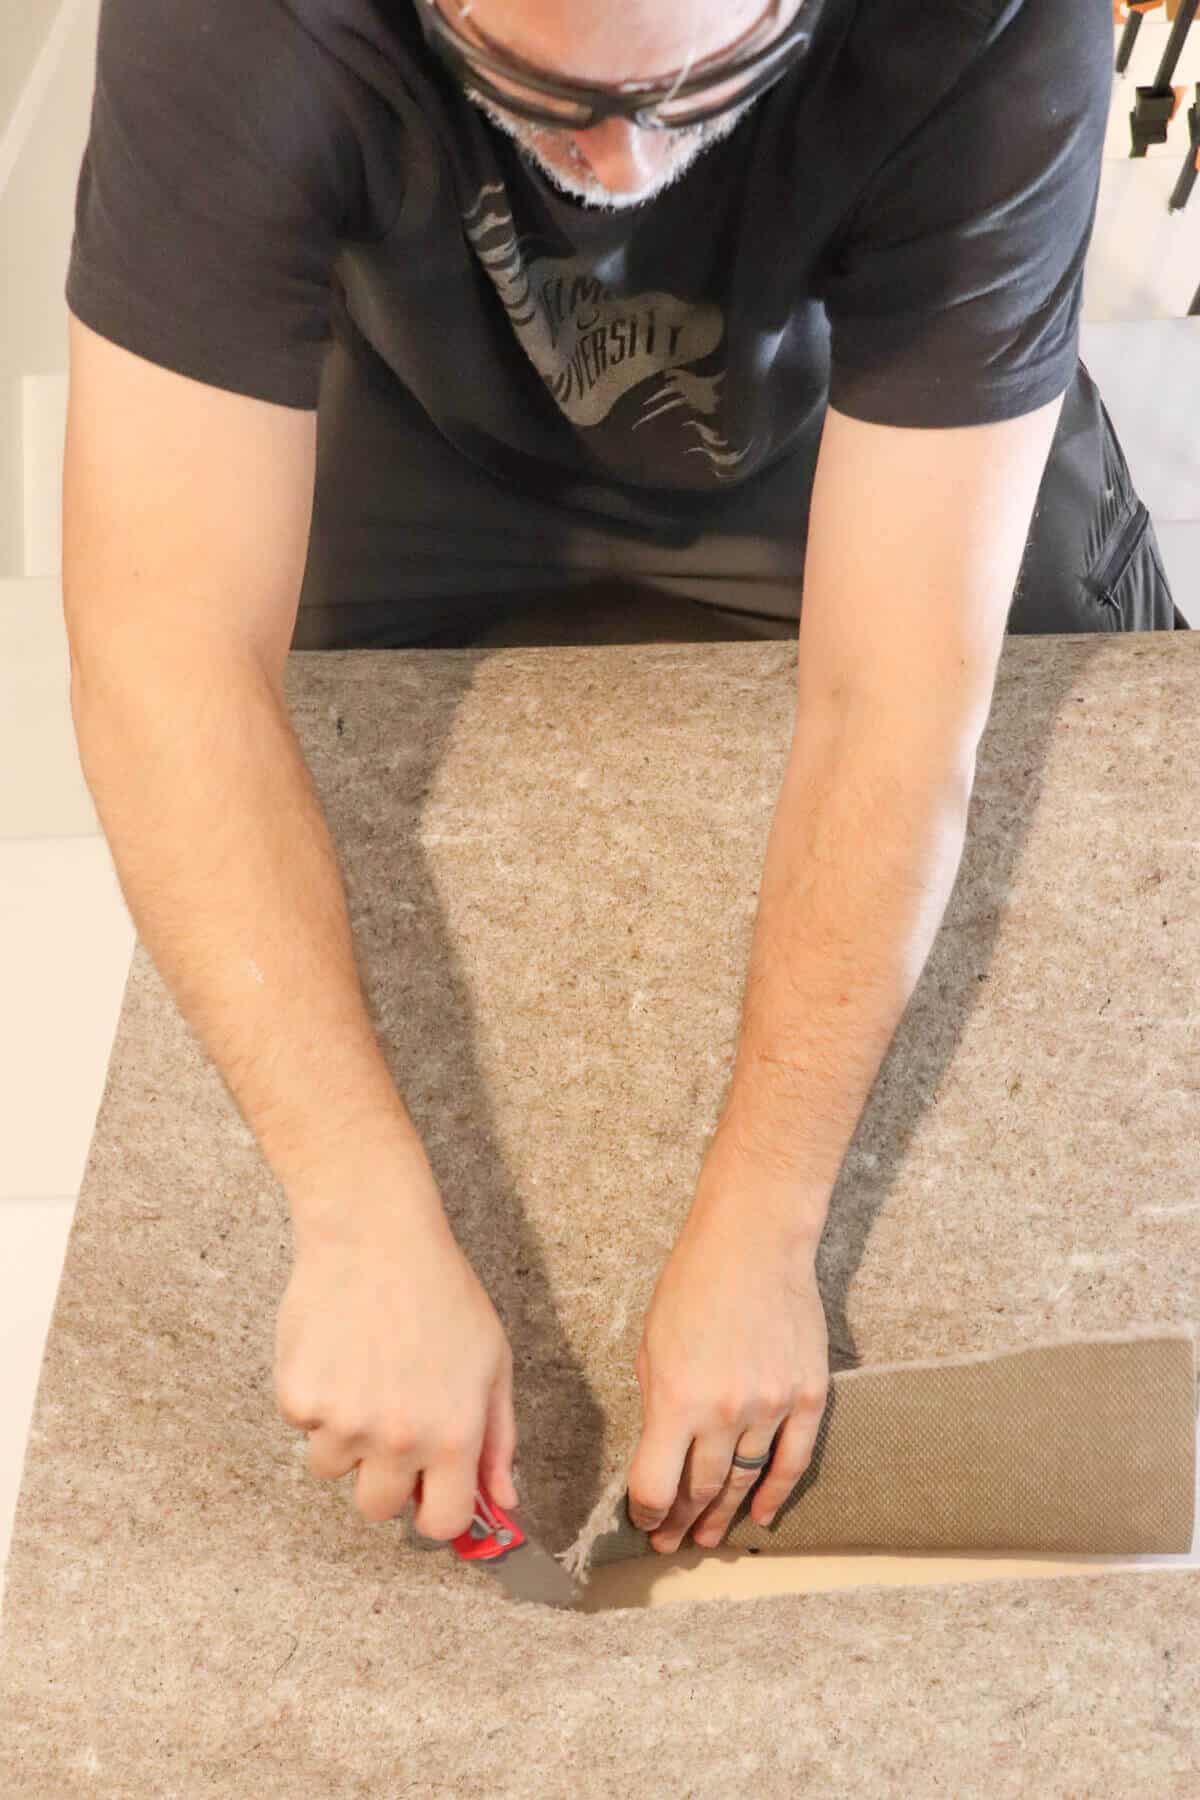
Trent loves this utility knife for projects like this.
Once we cut the pad, we attached the pad to the stair tread using a hammer stapler.
Now it was time to finally place the carpet runner!
How to Install an Indoor/Outdoor Carpet Runner on Stairs
I found an indoor outdoor runner rug from Well Woven that was a perfect neutral gray.
It didn’t come in the right length for our staircase, so I ordered three to cover the entire staircase.
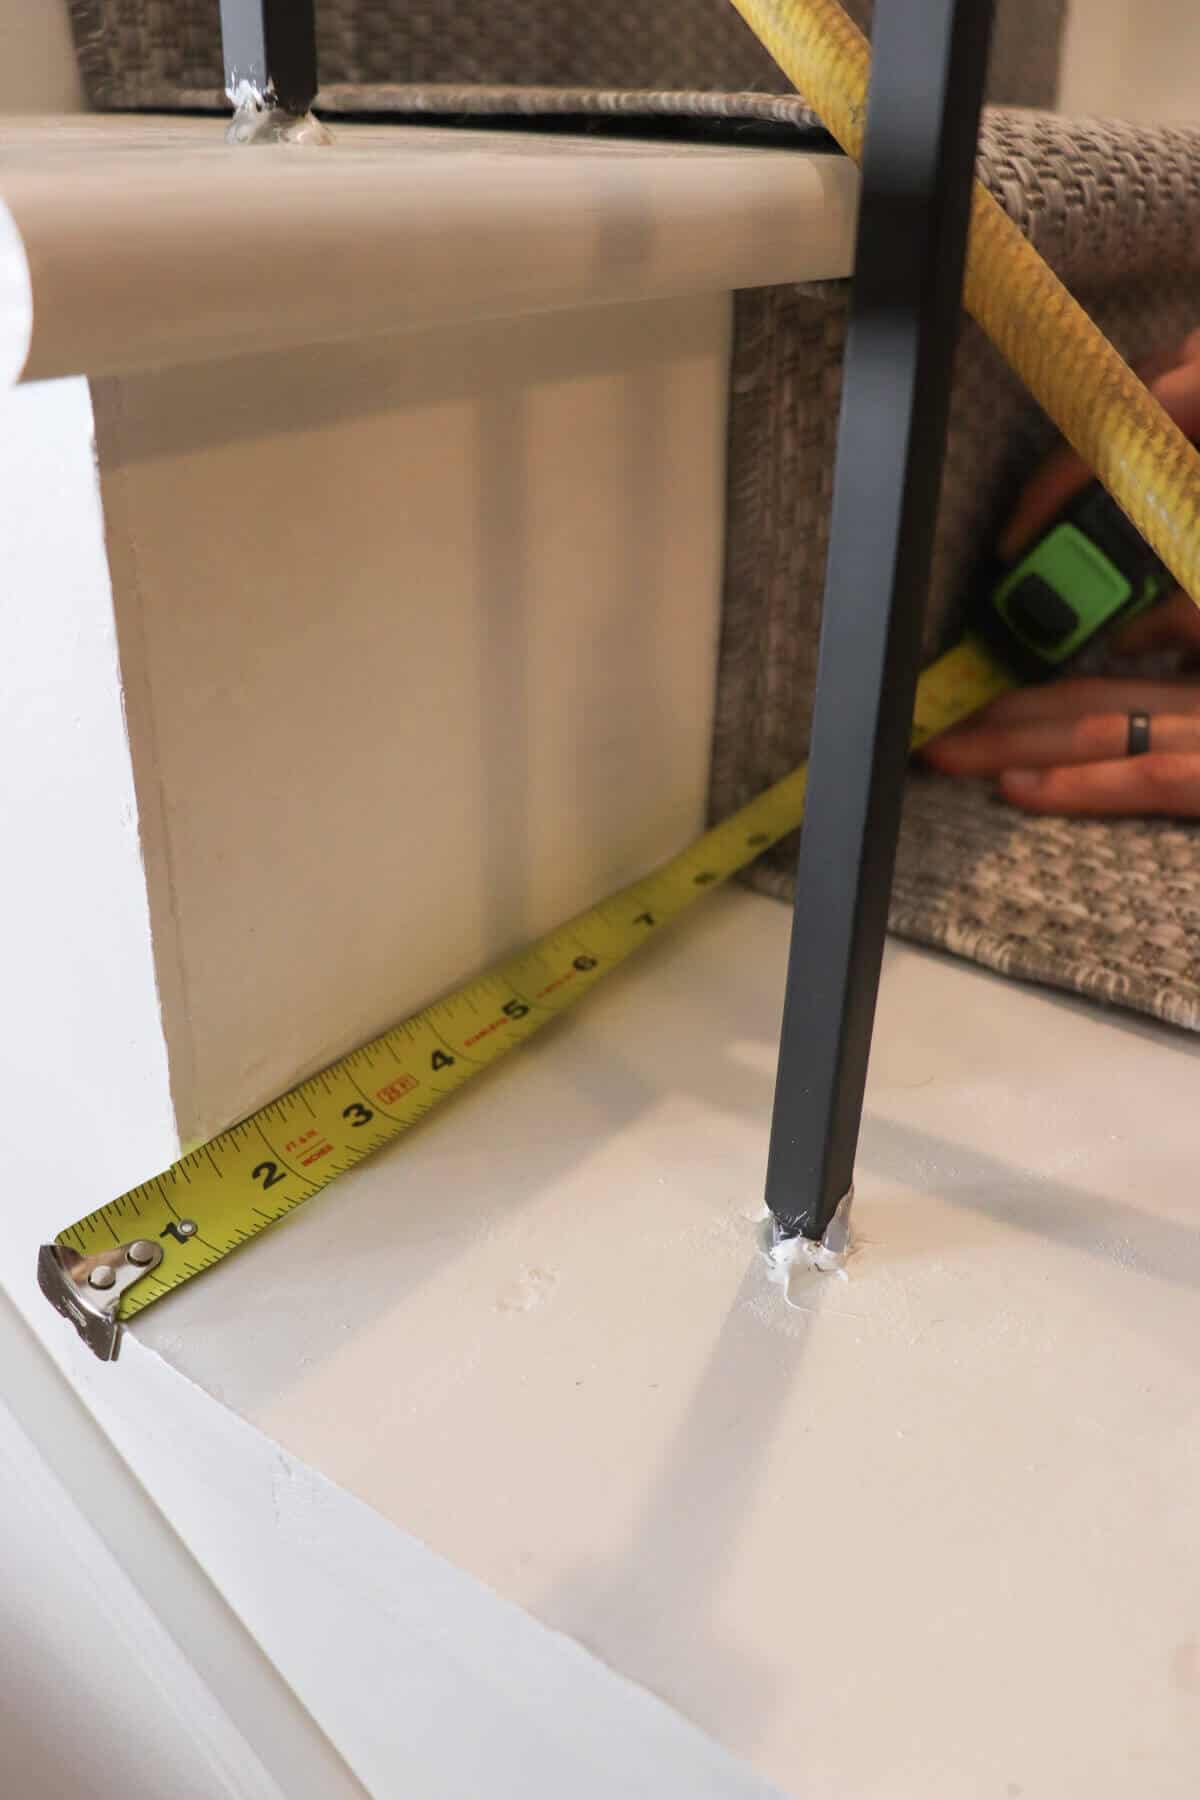
To find out how much you need, take a sewing tape measure and measure each step and riser making sure not to forget the bullnose!
So if you ever wondered how to install an indoor outdoor carpet runner for your staircase, here’s how you do it.
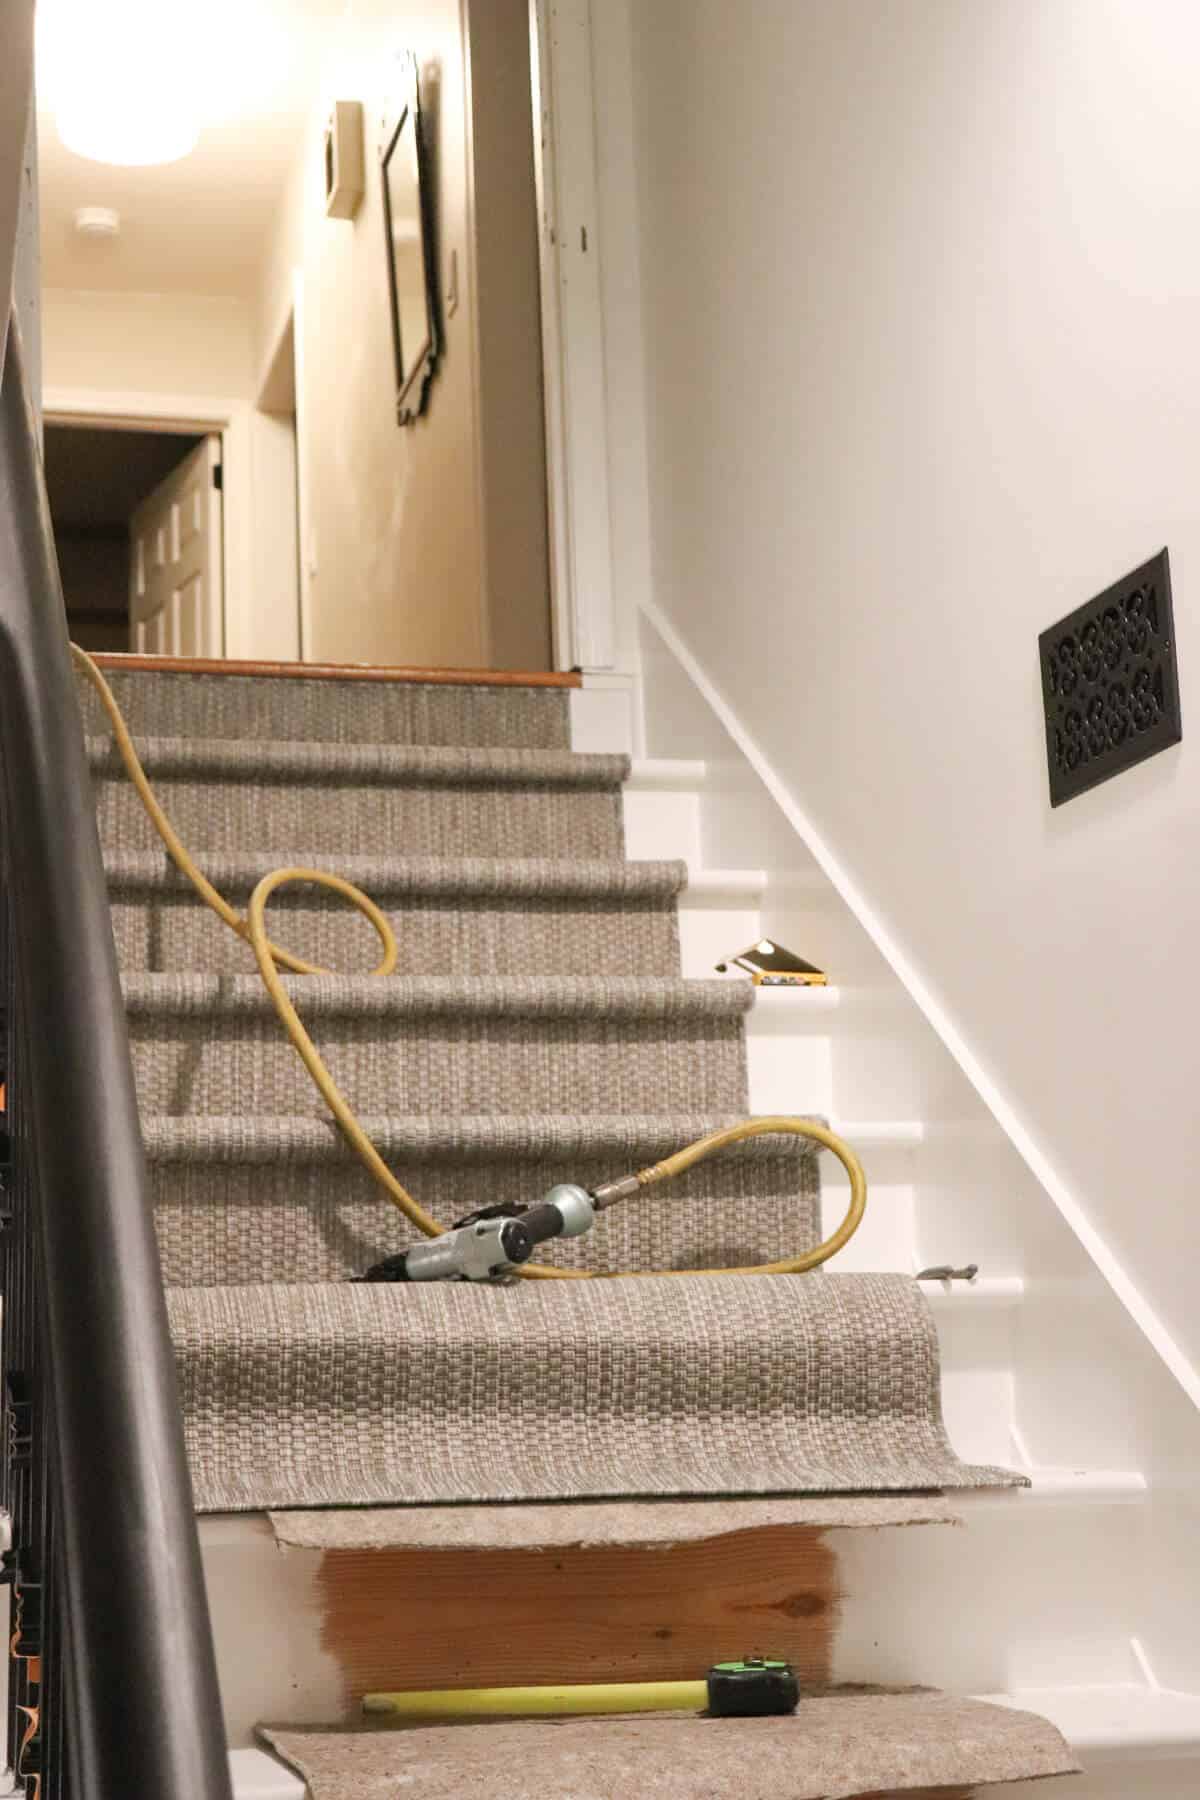
We found the best starting point to install the carper runners was at the top of the stairs.
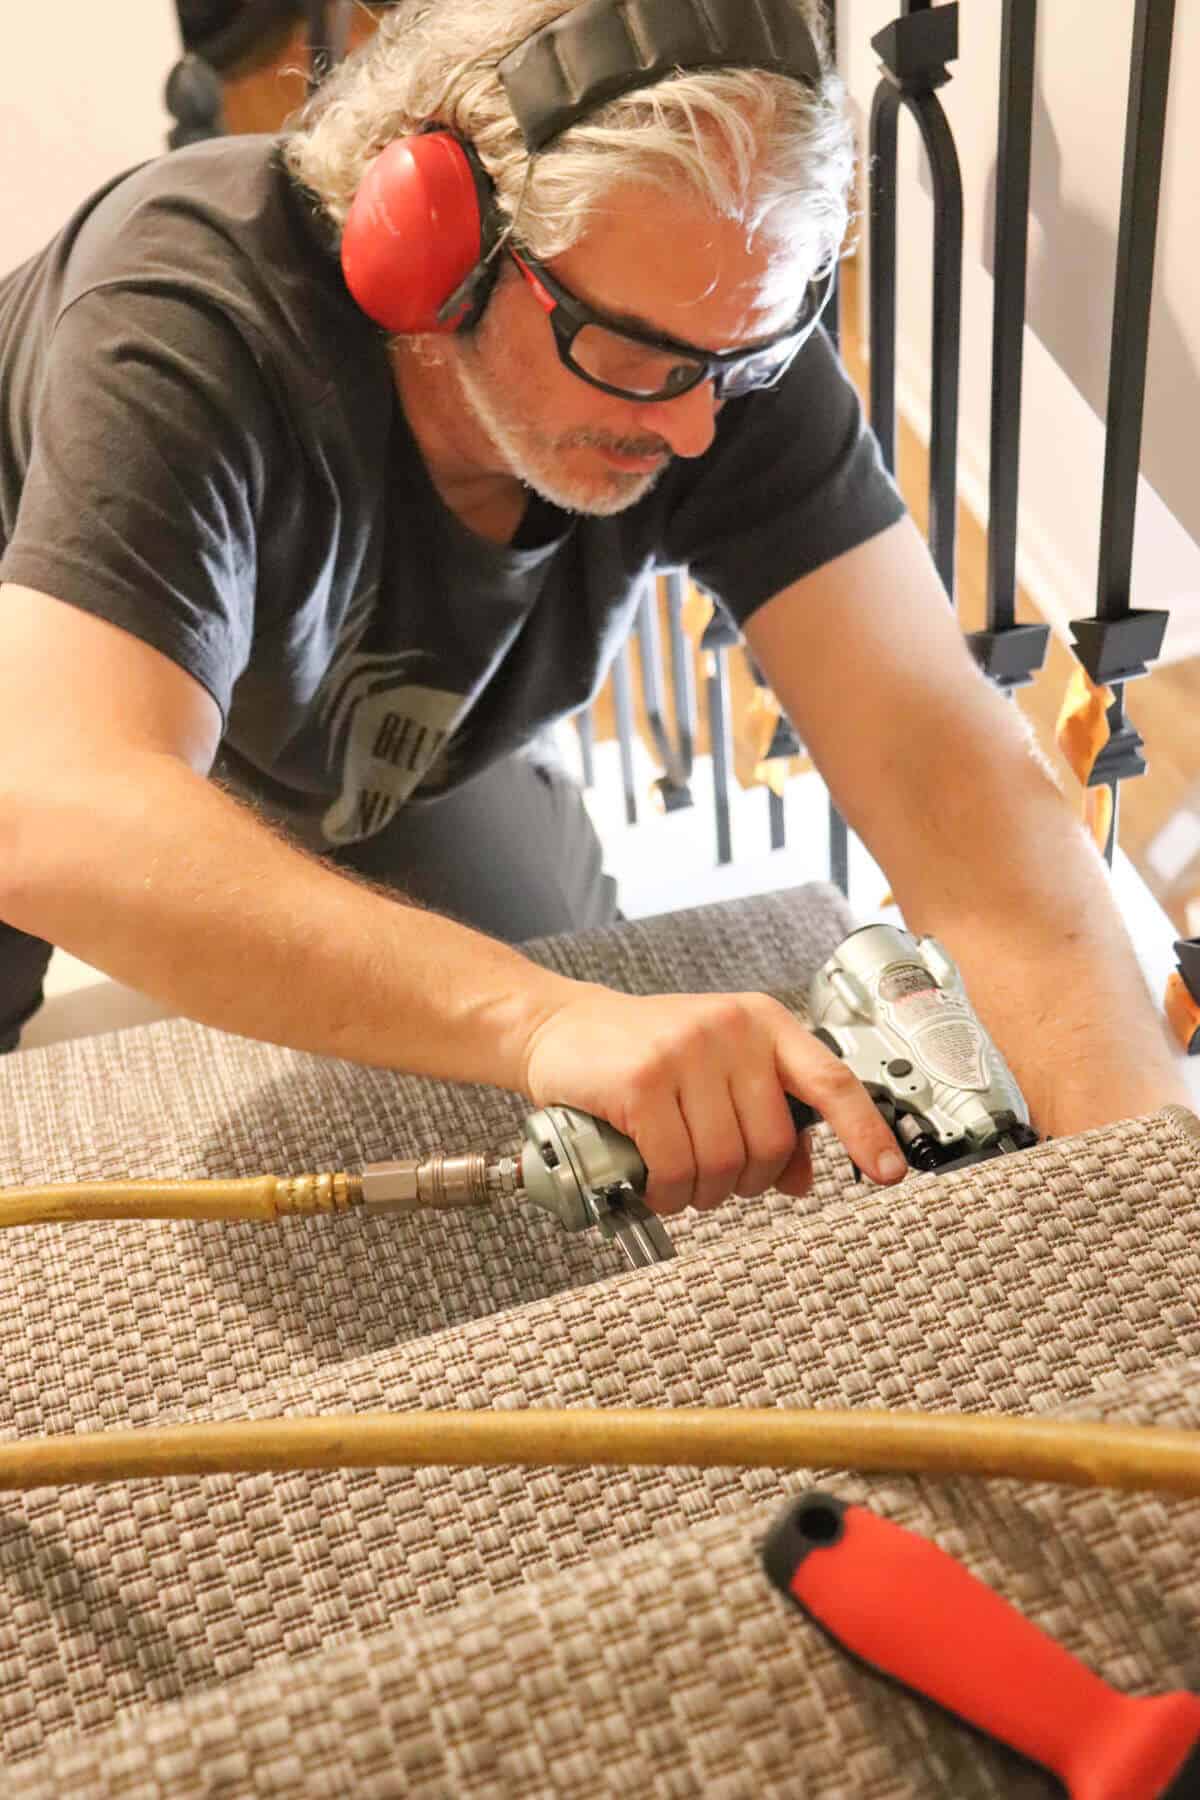
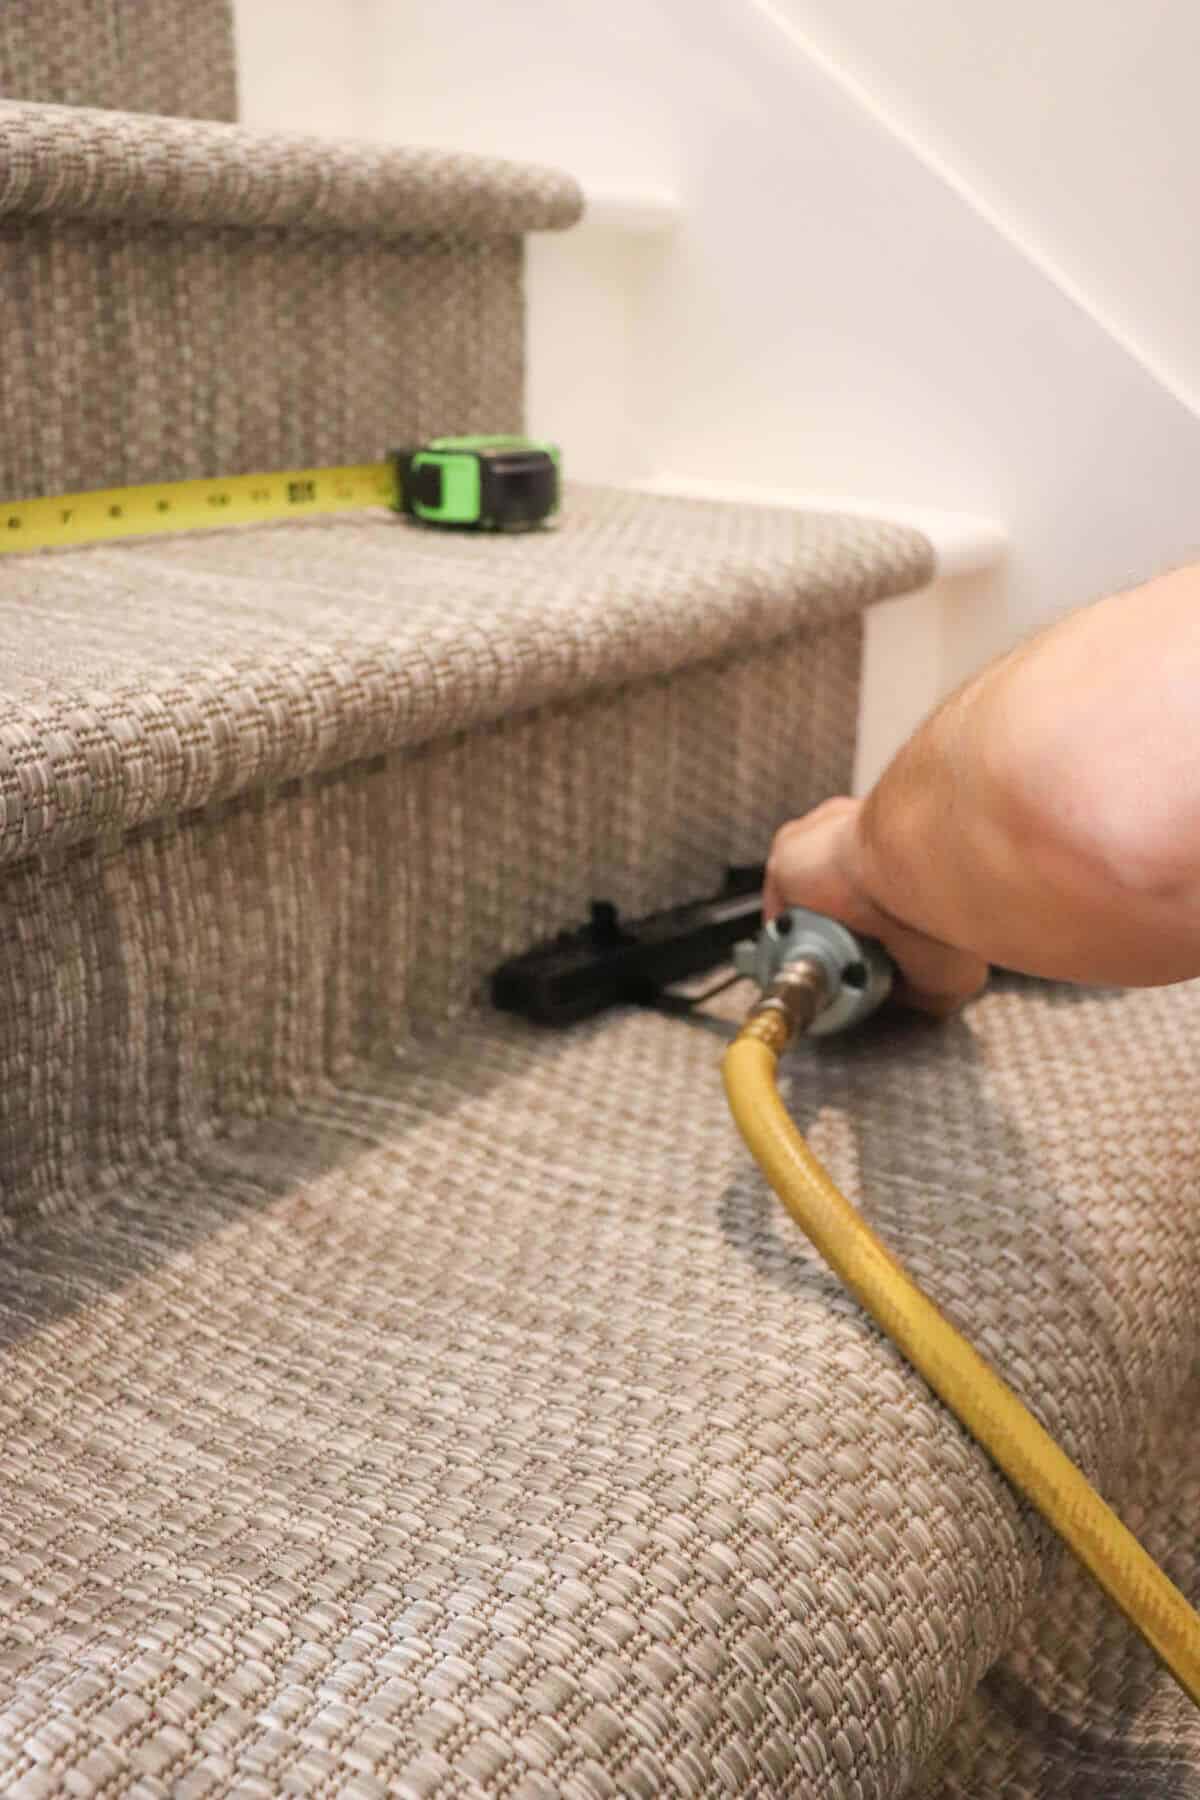
It’s always important to have the right tools for the job and this crown stapler was perfect!
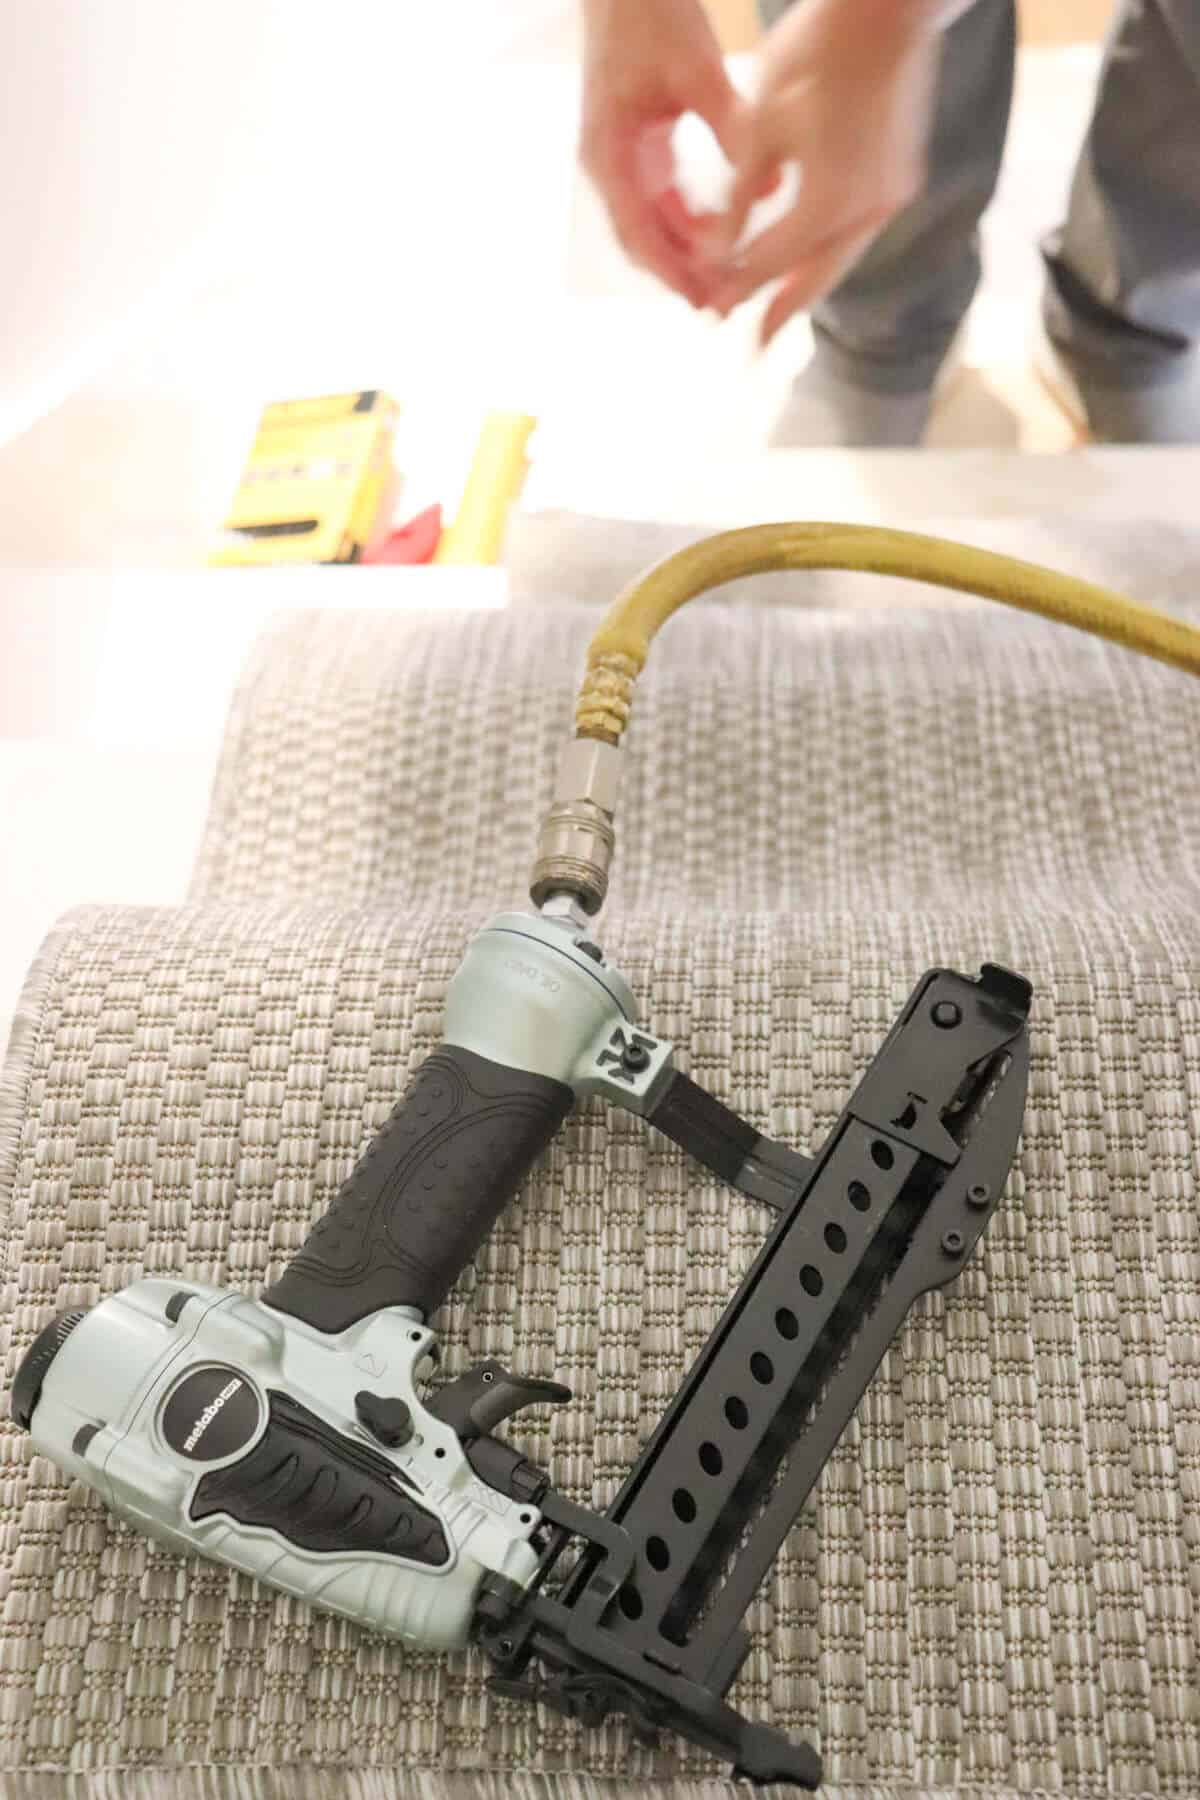
I’ve mentioned many times how much I love having pneumatic tools for our work area and it really is worth the investment if you do many home improvements.
You can find combo pancake air compressors and tool kits for great deals!
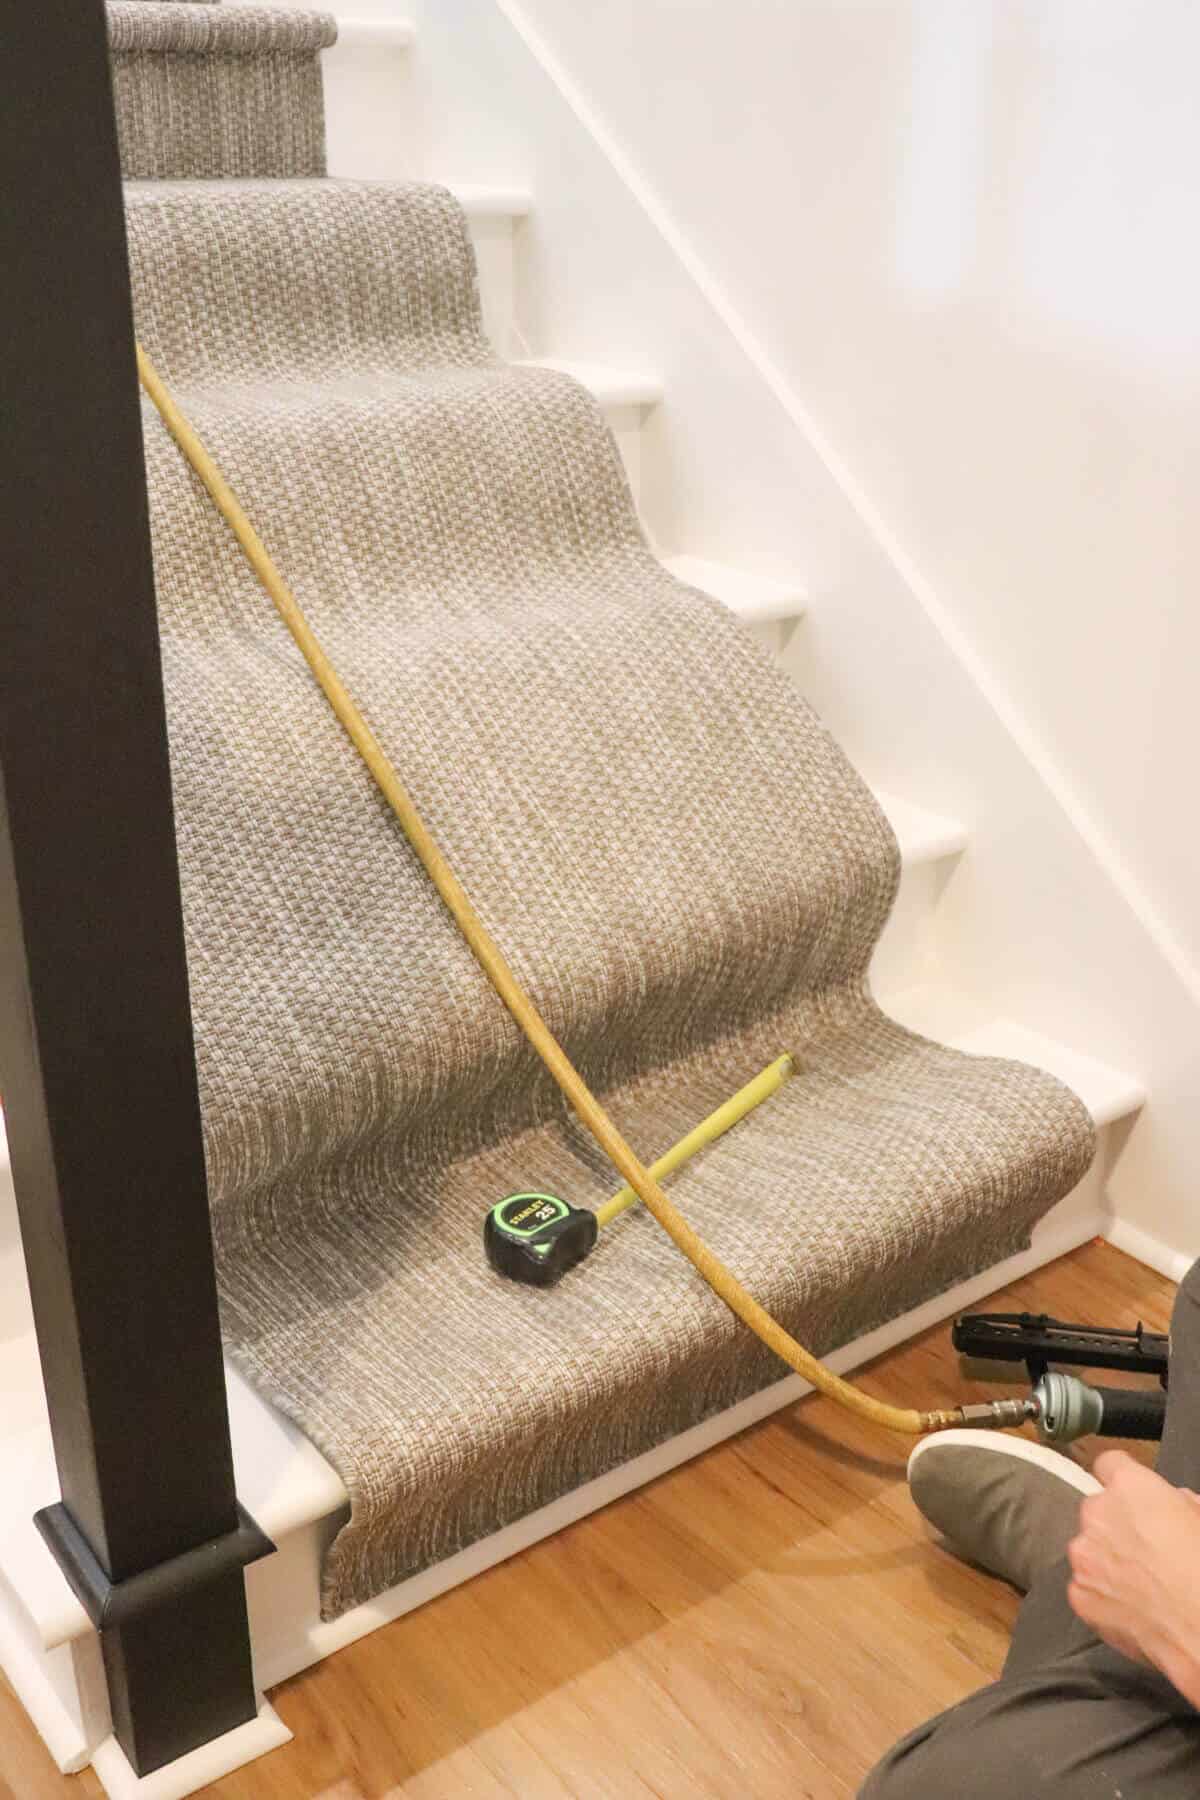
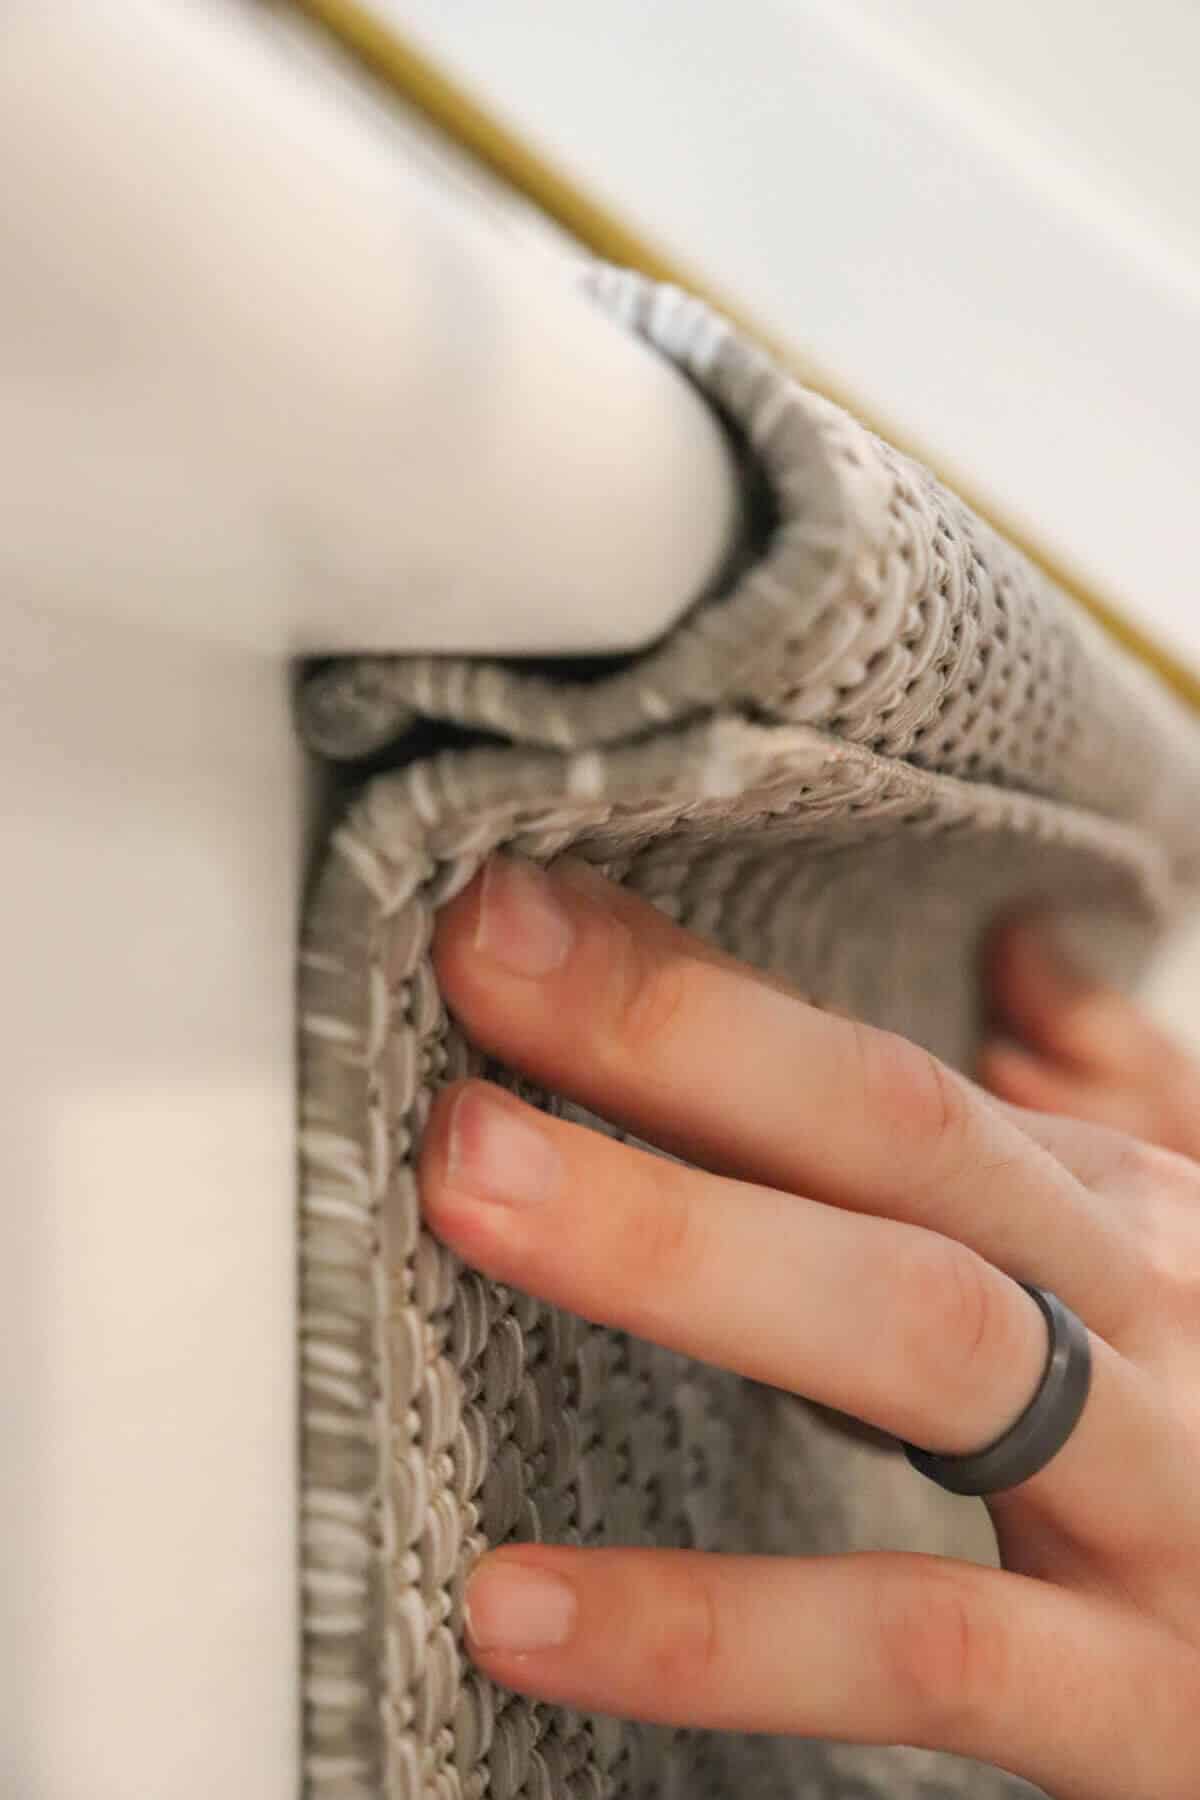
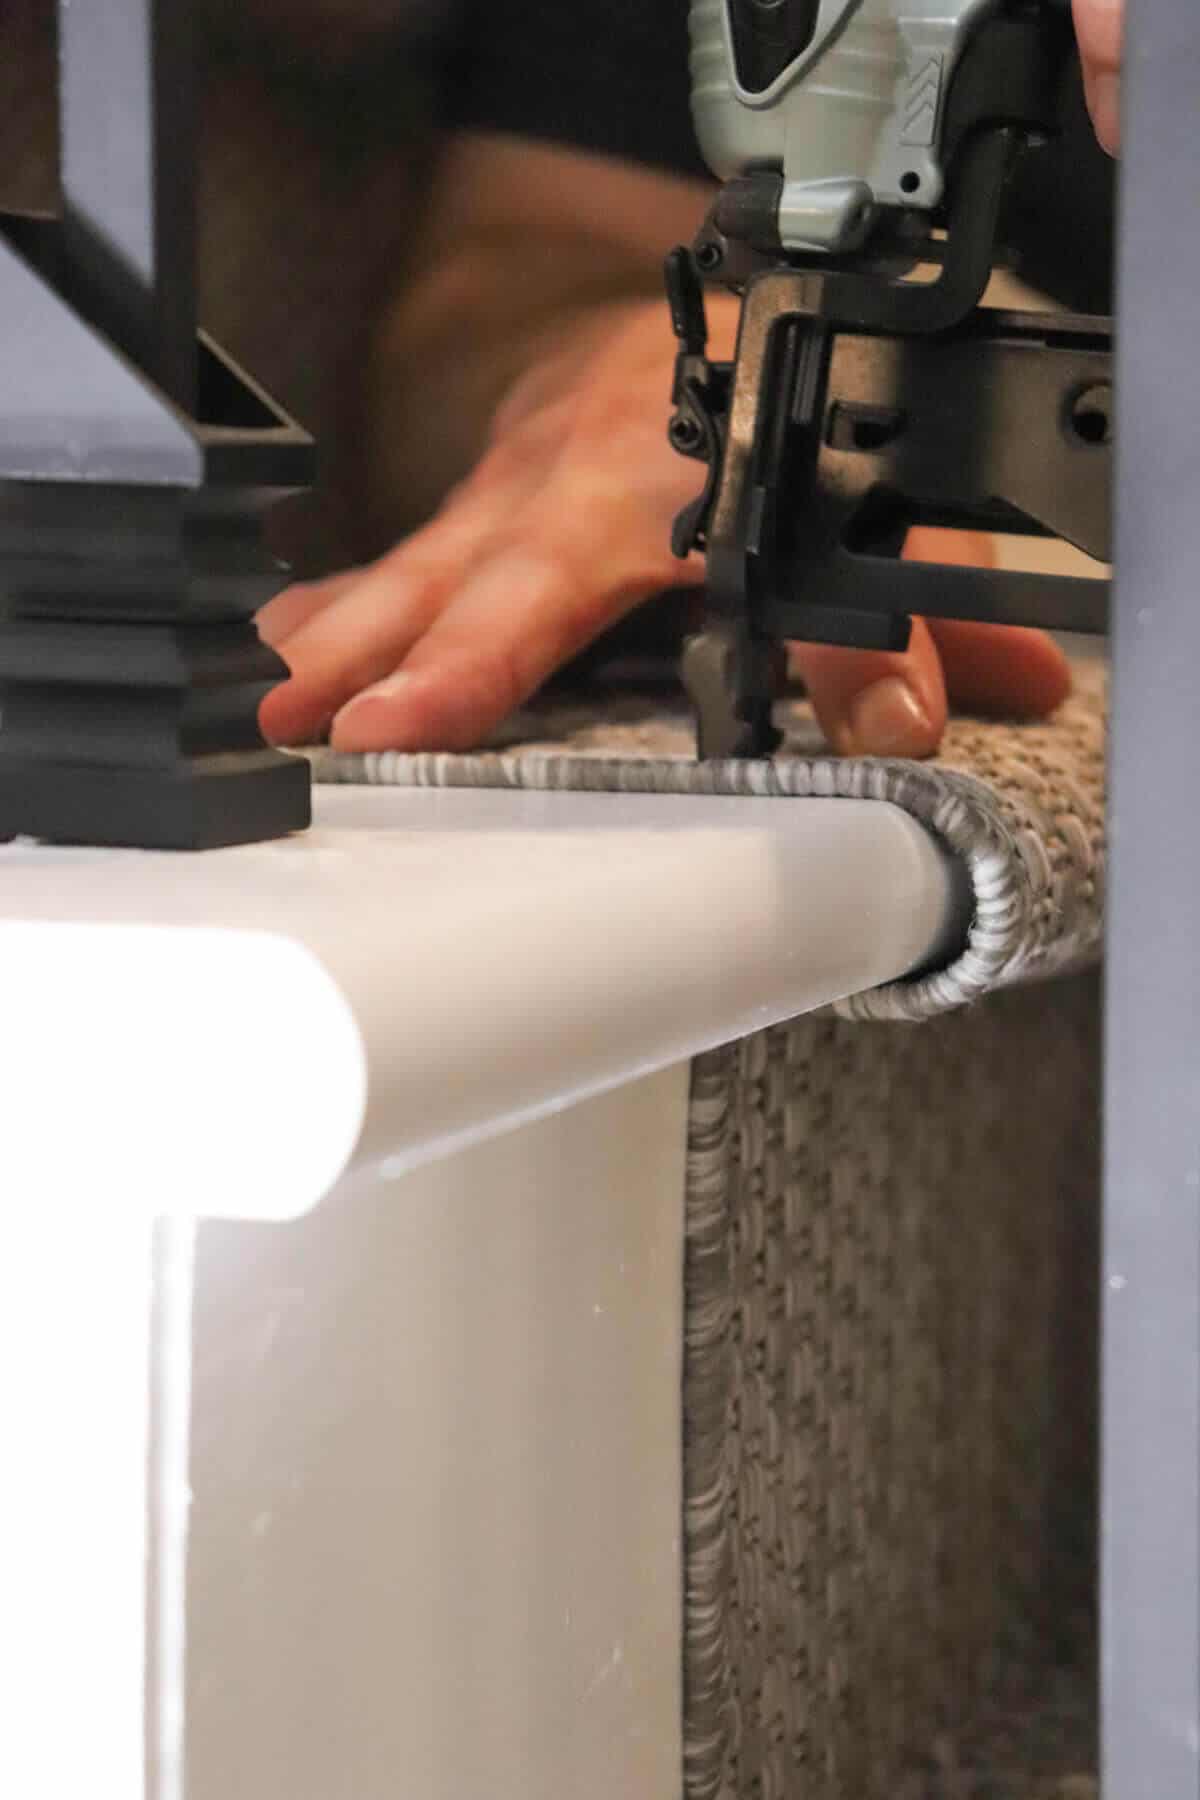
When you meet up the two rugs, it’s best to trim the woven edge from the carpet to create a seamless look.
It was really easy to do with scissors and you can hardly find where the two carpets meet up.
It looks like the real thing – one complete runner.
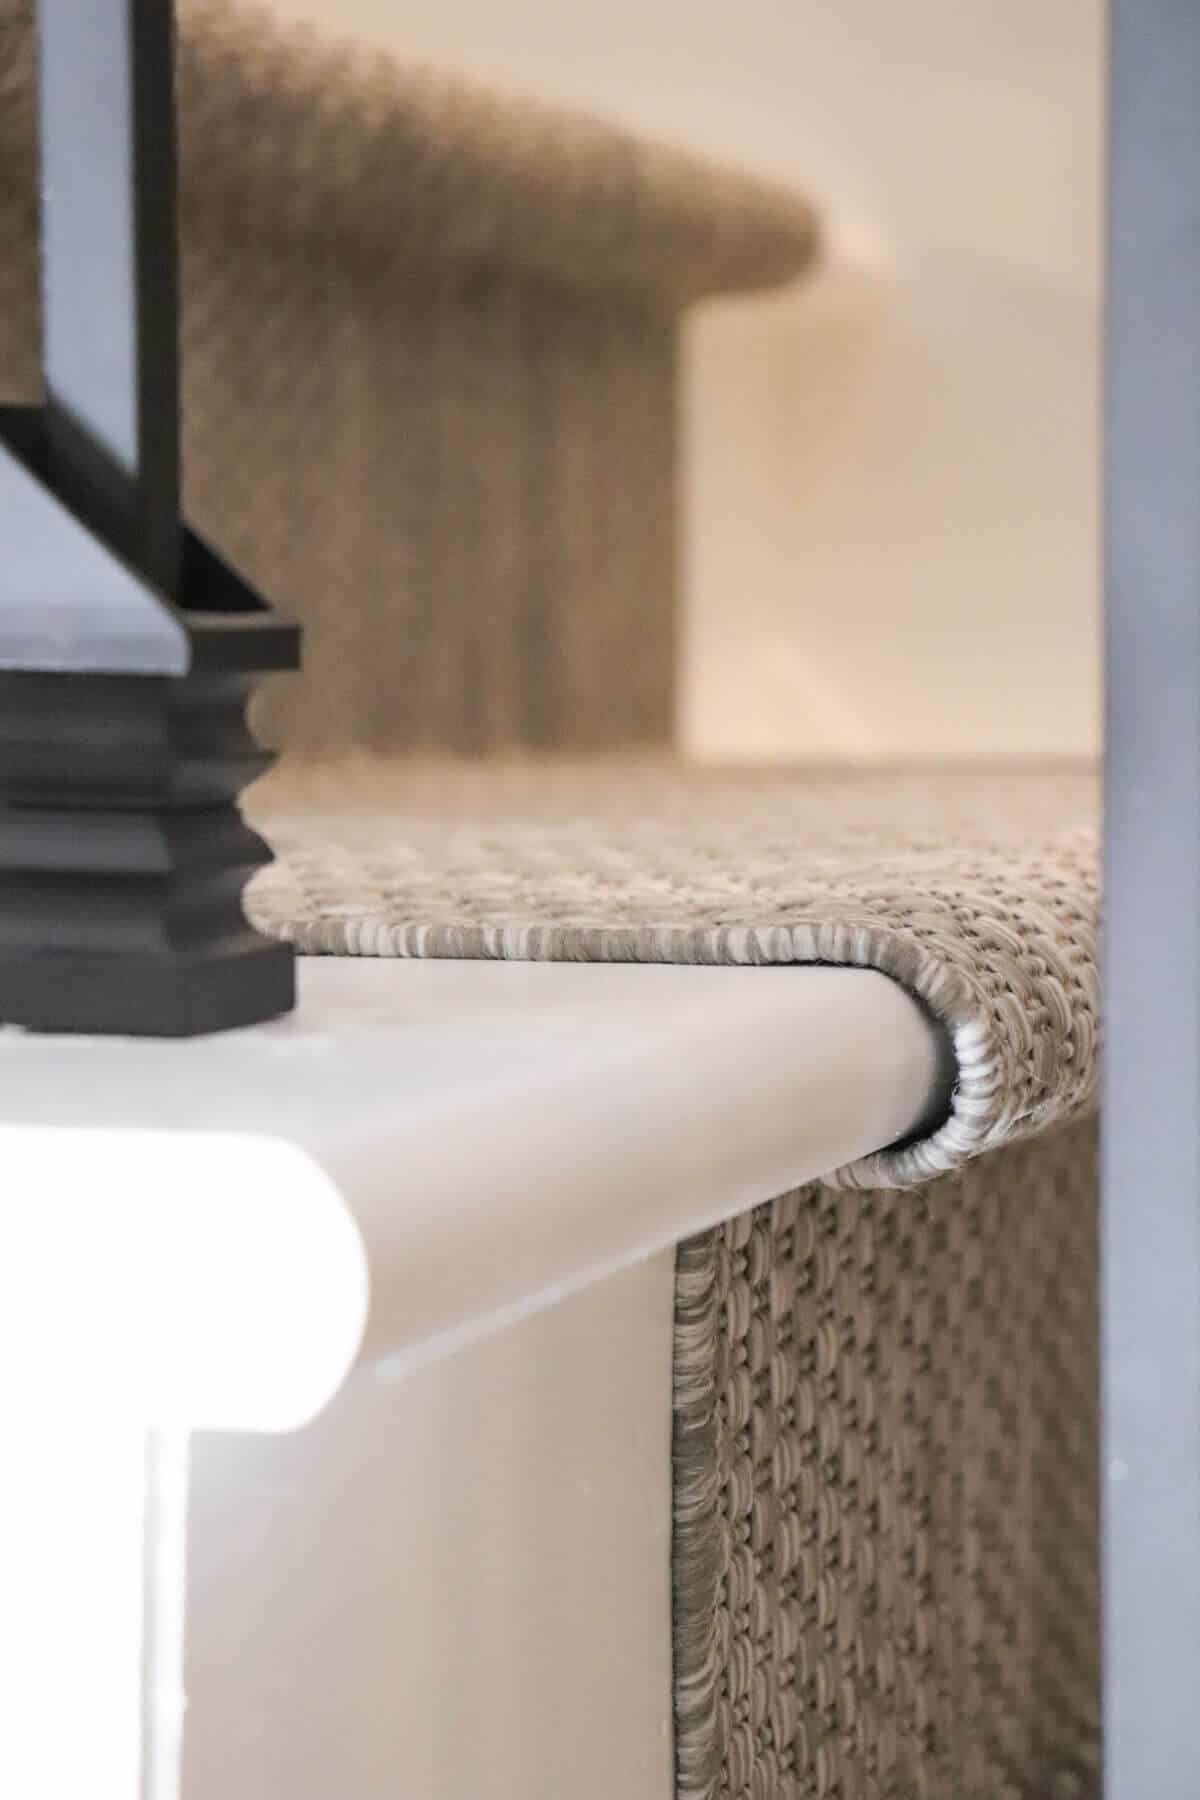
What’s the difference between waterfall and bullnose stair runners?
Waterfall is the easiest installation for your stairs. You attach the carpet to the stair riser and then allow it to fall over the lip of the stair without any detail.
However, I love the defined look of the bullnose, so we would attach to the stair riser, then wrap it over the stair tread and put multiple staples under the stair lip to create the bullnose.
The only thing you want to make sure of is your spacing while moving down the stairs.
Keep a tape measure handy and check often that you are lining up with your wall.
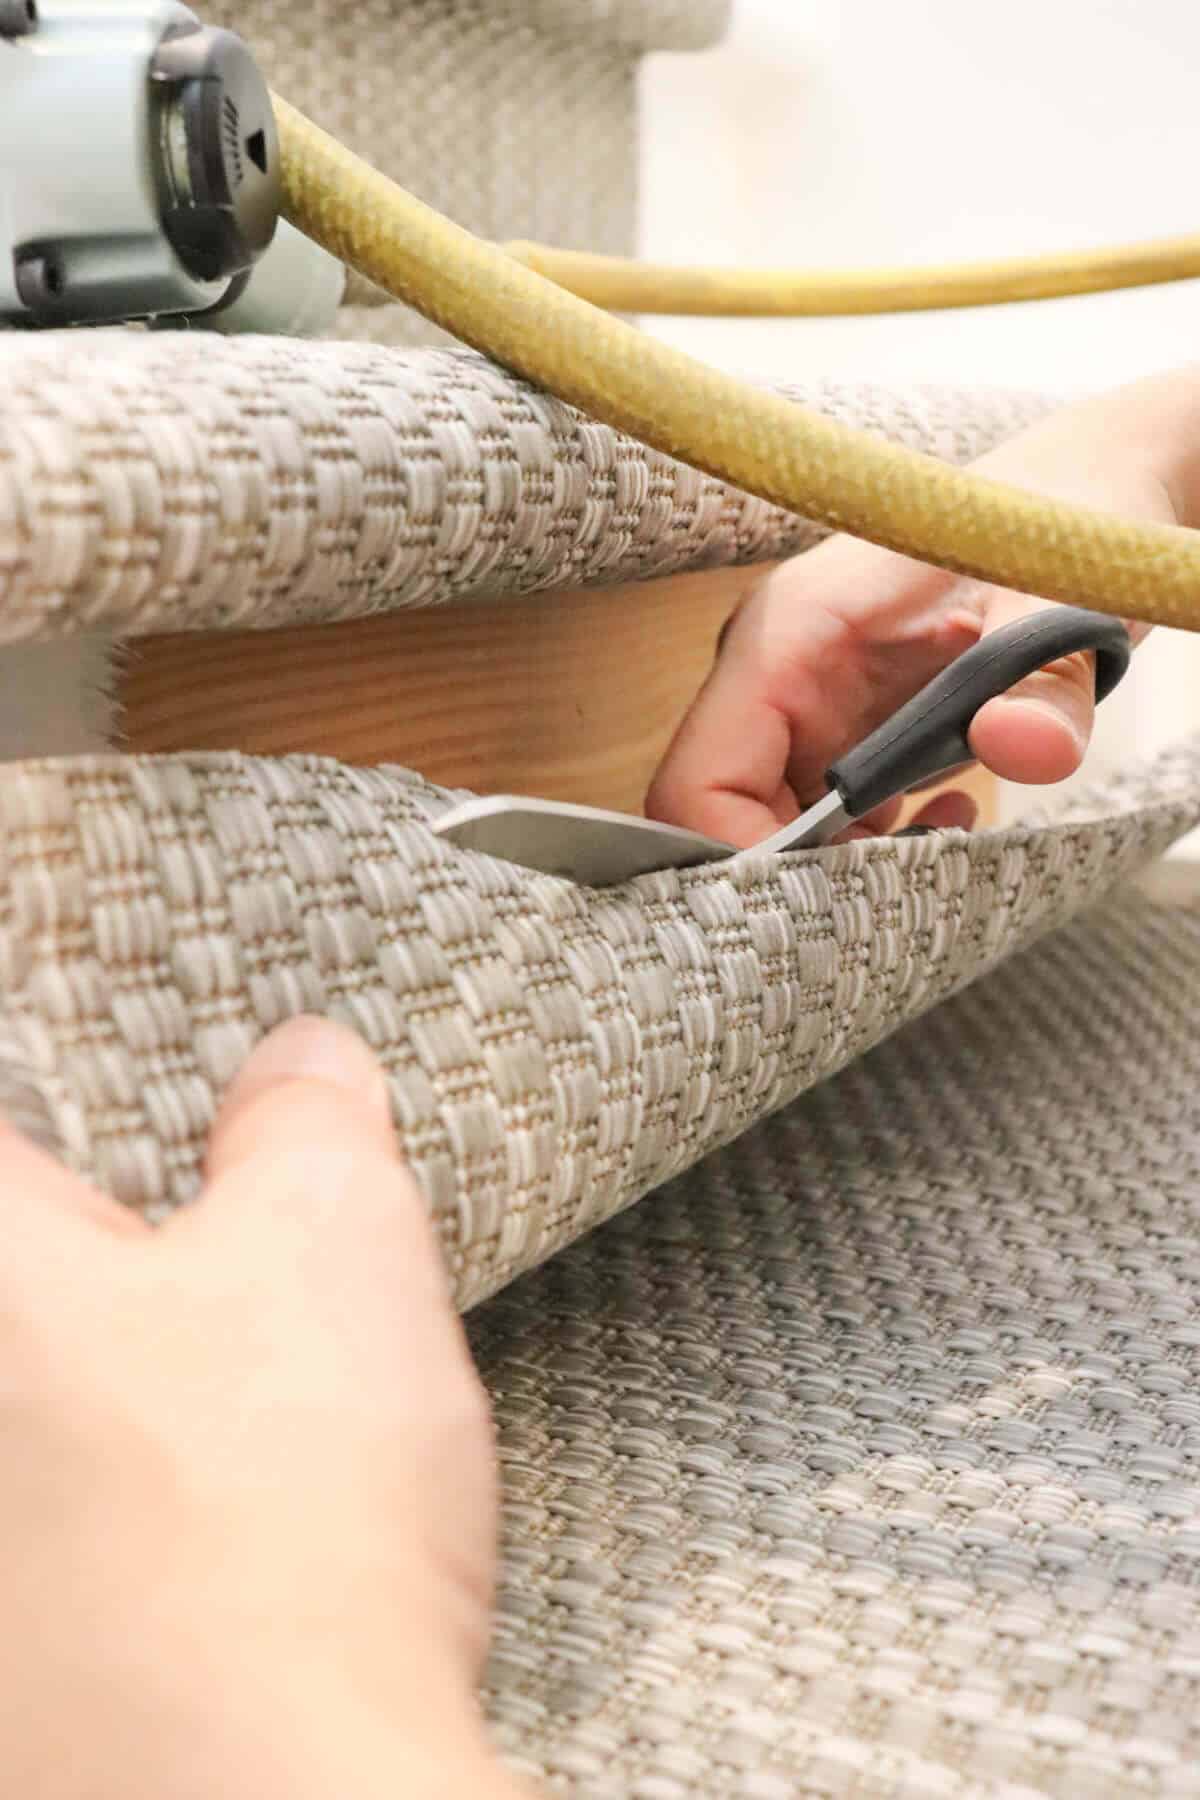
We worked out way down the staircase, but realized that in order to have a clean edge at the basement floor, we needed to start working up from the bottom.
So we found a clean stopping point under a bullnose and trimmed the excess carpet.
Next we started from the base of the stairs with the woven edge of the carpet and worked backwards until we met up with the stopping point.
The only issue is that you you have to watch that the carpet pad doesn’t bunch up underneath.
Once we met up with the stopping point, we took found where we could trim the edge.
Use a pair of sharp scissors and it’s really easy to cut. Just make sure you follow a clean line.
How about that?
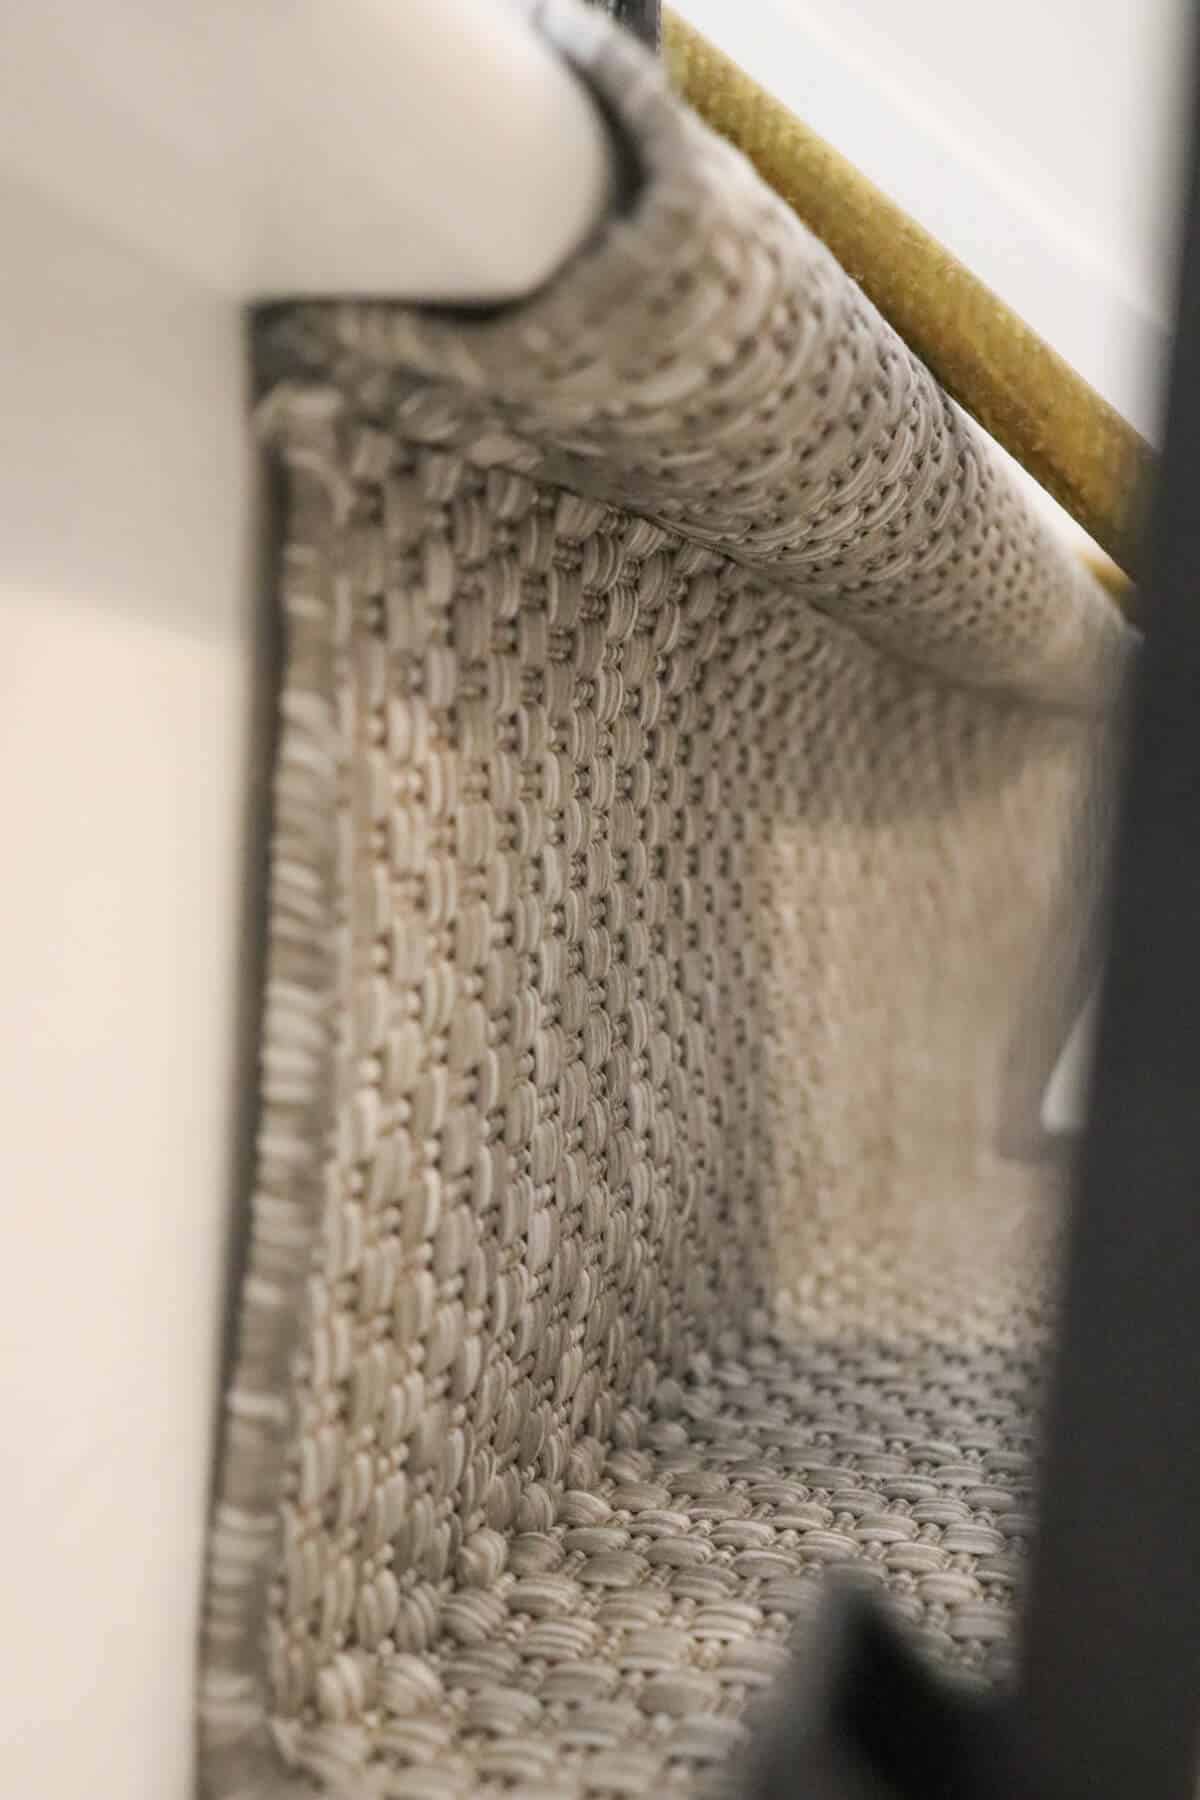
What I love about the crown staples is that they disappear under the carpet threads becoming almost invisible.
We only had one last thing to address once all the carpet was installed.
The carpet bowed slightly on the edges of the stair tread where we had not nailed.
So Trent took the crown stapler and tacked it down on each step to create a flat, clean look.
I am in love with this new staircase.
It makes my living room feel like an open floor plan with these new balusters, too.
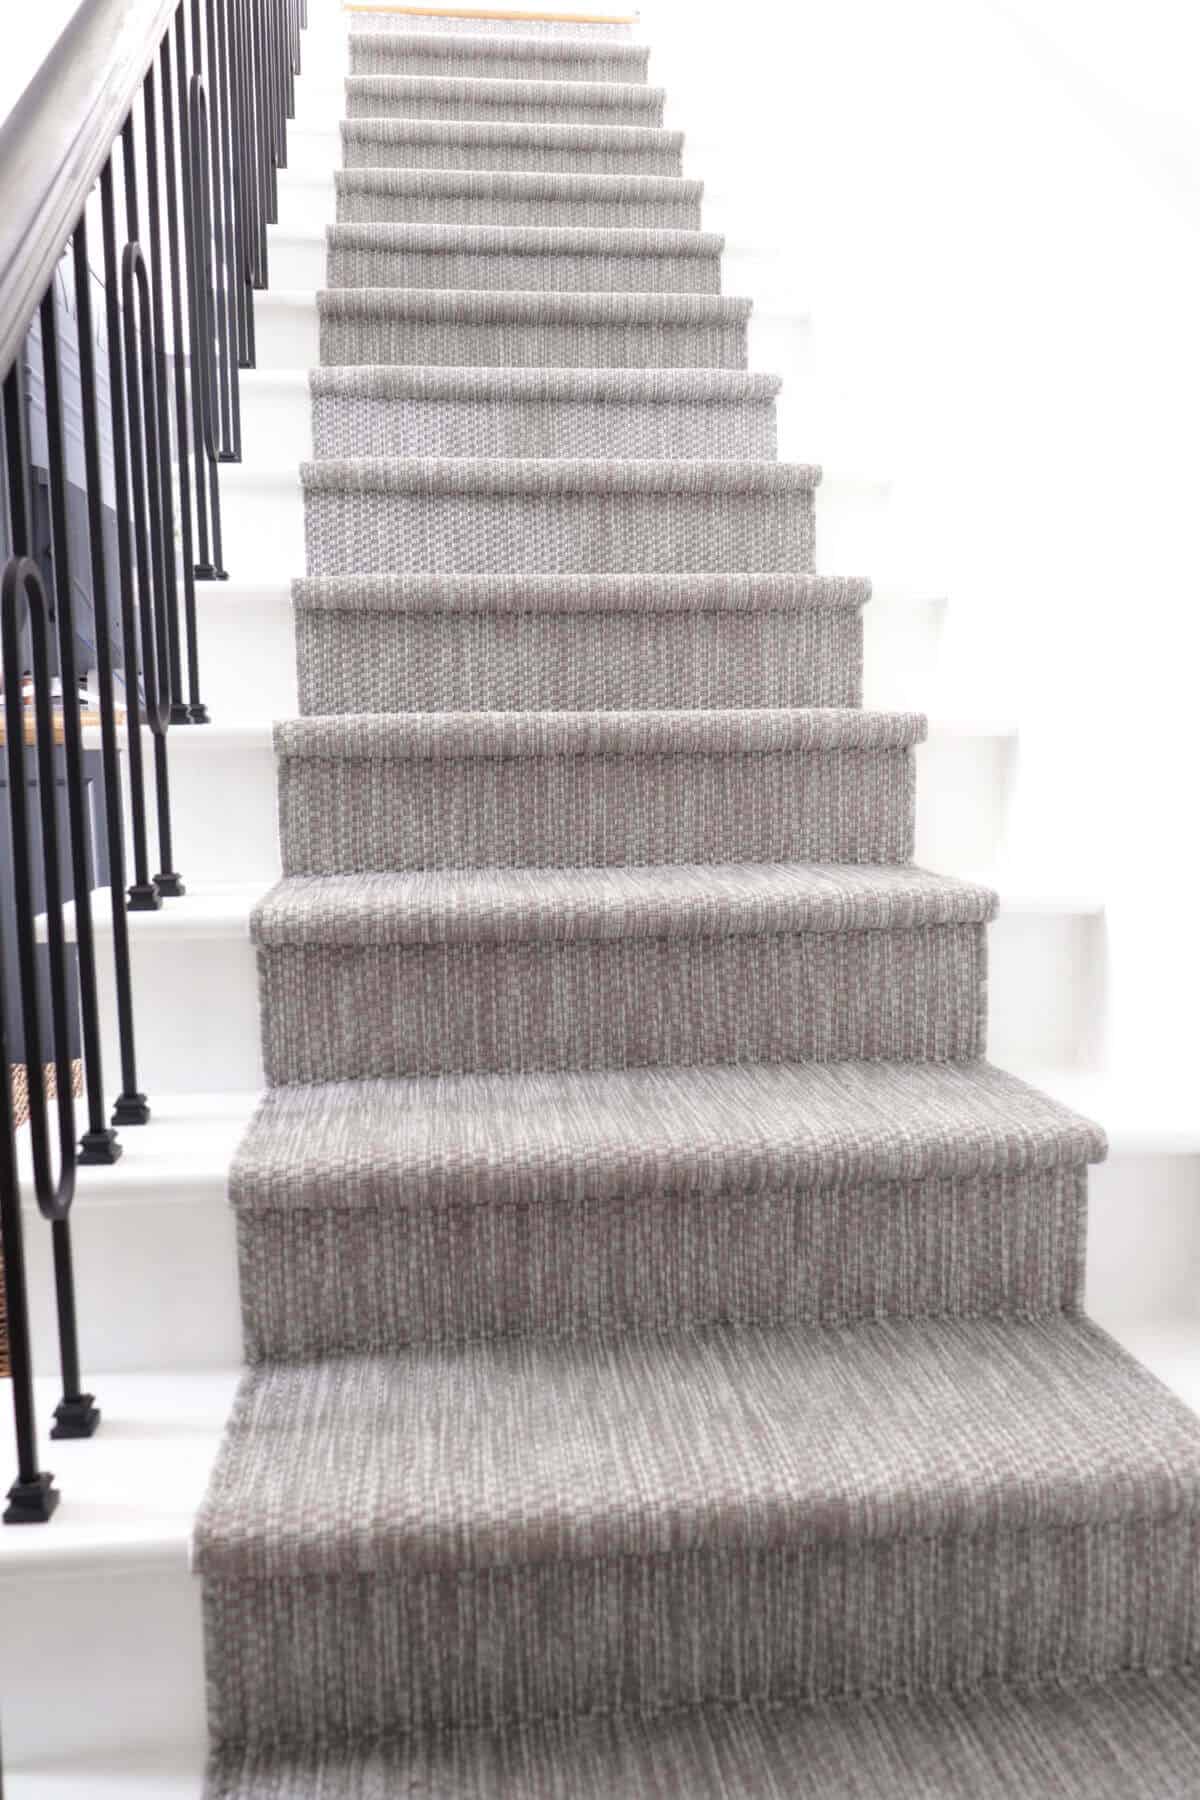
The indoor outdoor rug has enough traction underfoot where you don’t feel like you could slip.
Plus, it should be easy to clean if there are ever any spills.
And there’s one sneaky thing that I bet you didn’t notice until now.
We had very small gaps where the new stairs and old side skirting met up.
So we installed these tiny triangles to help hide the gap.

I am loving this new look and can’t wait to show you how it flows with the rest of the room.
This DIY Basement Stair Remodel is officially complete and I’m more than pleased with the results!
It was the easiest way to fix this problem without having to completely remove long board running along the wall.
And it blends perfectly with the white stairs.
I hope this helped you if you wondered how to install an indoor outdoor carpet runner for your stairway.
Plans for Next Week
So now we are down to the last week for this One Room Challenge and it’s my favorite part. And I’m so glad this DIY basement stair remodel is finally checked off the to do list!
Pulling the room together and placing the decor.
Here are my goals for this last week:
- Paint the entertainment center
- Start putting the room together
- Hang curtains and pictures
And hopefully our last piece of the sectional from La-Z-boy will arrive! It’ll be super close!
Be sure not to miss this season’s Featured Designers and the Guest Participants links at the One Room Challenge weblink up! As always, special thanks to the One Room Challenge media Sponsor, Better Homes and Garden and to Linda – owner and creator of the One Room Challenge.

Home Pop || HANDy Products || Urban Ambiance || Affordable Blinds || Romabio Paints
Pin this post for a later date!

Wow, Len! Thanks for your kind words! And I’m so glad this post inspired you!
Our balusters were attached with nails into the stair tread as well as to the handrail. Some balusters are inserted into holes drilled into both places – it truly depends on the type of balusters you have. I say cut around one of the balusters to see what you find. Worst case scenario, you may need to add some trim if there seems to be a gap where the carpet was. But most balusters are installed first and the carpeting second. You’ll know more once you start ripping out the carpet.
On this side of things – it was well worth it!
Thanks again for reaching out!
Jen
My wife has been bugging me to replace the extremely worn carpet on our stairs (rest of house as well 🙁 ) so finding this article was a god send. Extremely well detailed so I thank you.
If you can answer a question though: I know you cut through the existing balusters BUT I need to retain mine. How are they normally fastened to the tread and bannister? I haven’t had a chance to research that yet so if you know…..?
Thanks !
Jen,
This looks AMAZING! You all did such a great job.
Thank you for sharing how to DIY a stair remodel.
Wishing you a beautiful rest of the weekend.
xoxo,
Brendt