How to Remove an Interior Wall
We needed to let more light shine in to our living room and there was just one obstacle keeping that from happening. Here’s how to remove an interior wall.
Do you have a dark room that you can’t brighten no matter what you’ve tried?
I do – it’s my Jen Den.
And no matter what tricks and properly placed mirrors there were, the room was still super dark.
So, one day an idea struck.
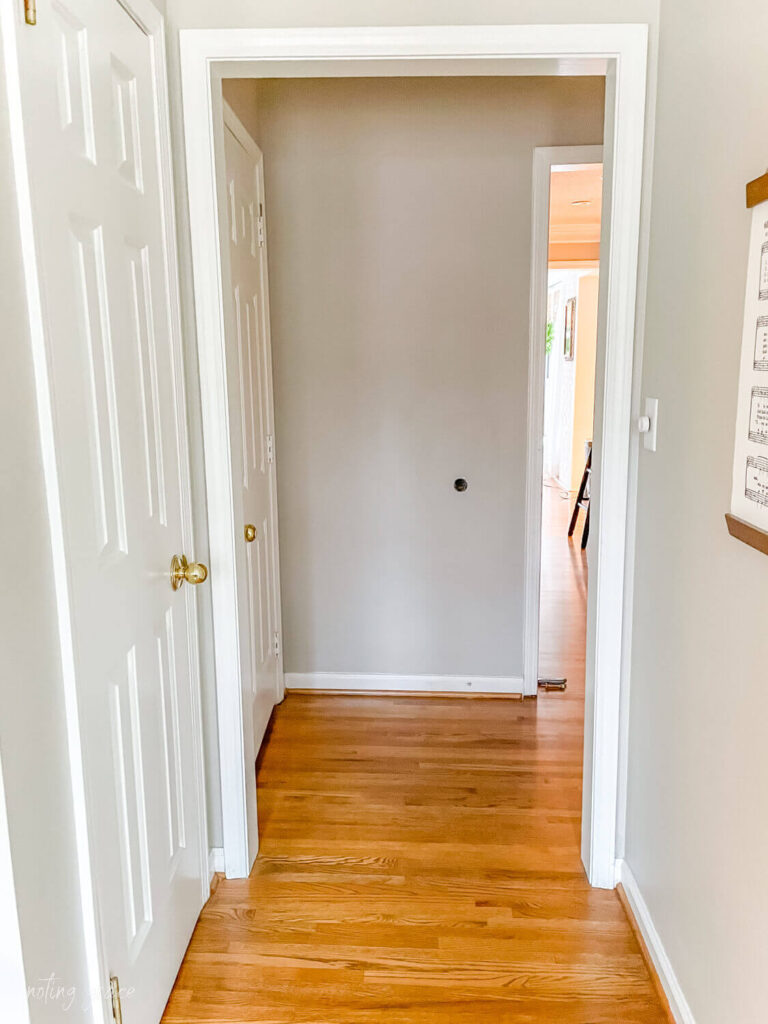
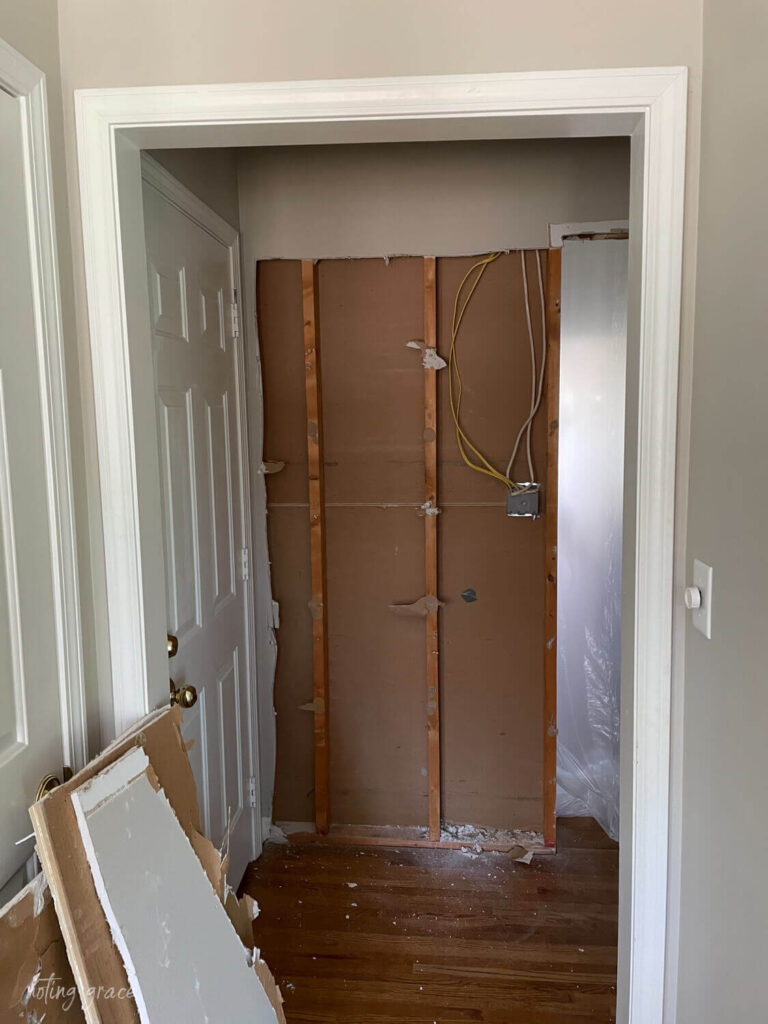
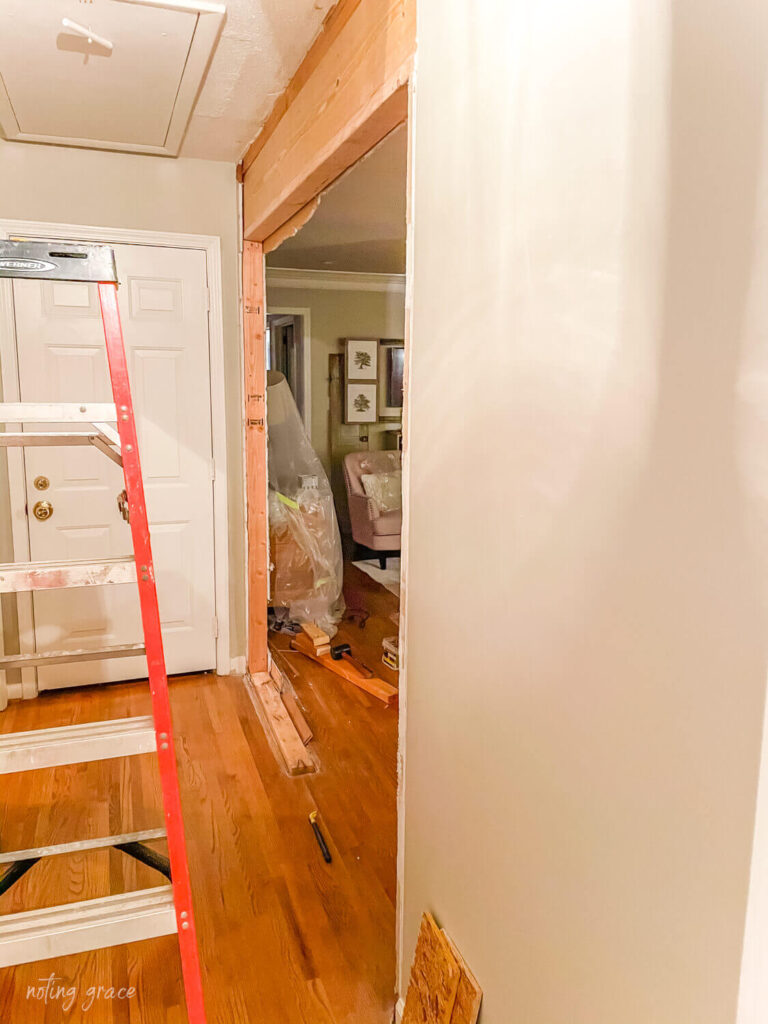
When you opened our front door – this is what you see.
A blank wall.
With a doorknob hole in it.
Definitely not a welcoming site for any guest coming into our home.
I thought – what if that wall were gone?
I was sitting on my sofa one afternoon when this idea hit.
On the other side of this wall is our front door.
See all that light?
And look at the floor – notice how that wall just blocks that light from coming into the room?
At our old house, we added a pass through to an existing wall and that was super easy to do!
So that’s what made us start figuring out how to remove an interior wall.
How to Remove an Interior Wall
(Some affiliate links are provided below. Full disclosure here.)
Here’s what you’ll need:
Shop Vac – we just upgraded to this one with wheels and we love it!
Pry Bar
Razor Blade
Reciprocating Saw
2 x 4s
2 x 8s if needed
Dremel Multi-max Tool
Plastic Drop Cloths and Tape
Mask and Goggles
Before You Begin
There is something to mention about load bearing walls.
A load bearing wall means that it carries the load of the ceiling above. So, if you aren’t sure if you’re is a load bearing wall, then you need to consult with a contractor that could help you.
Luckily, Trent’s cousin is a licensed contractor and he walked us through the process.
It turns out that it was difficult for us to tell since it was a hallway. One or both walls could be carrying the load, so we erred on the side of caution and prepped the wall just in case it was.
Getting Started
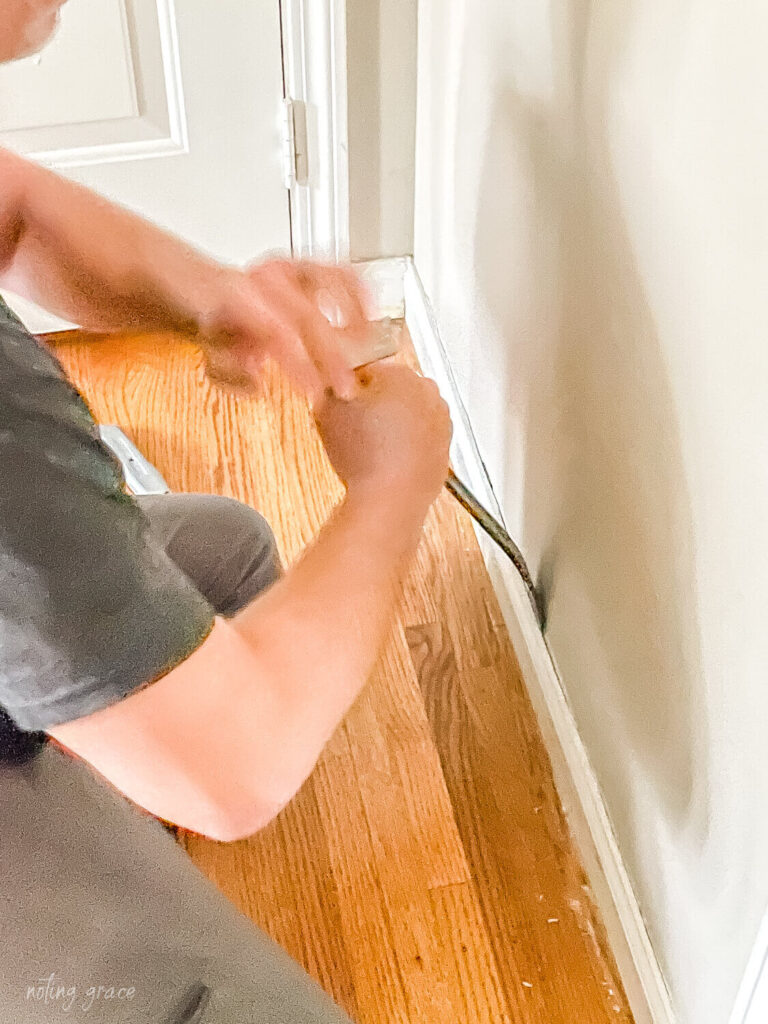
We started by removing the trim.
Take a razor blade and score along the caulk line to help make the trim easier to remove.
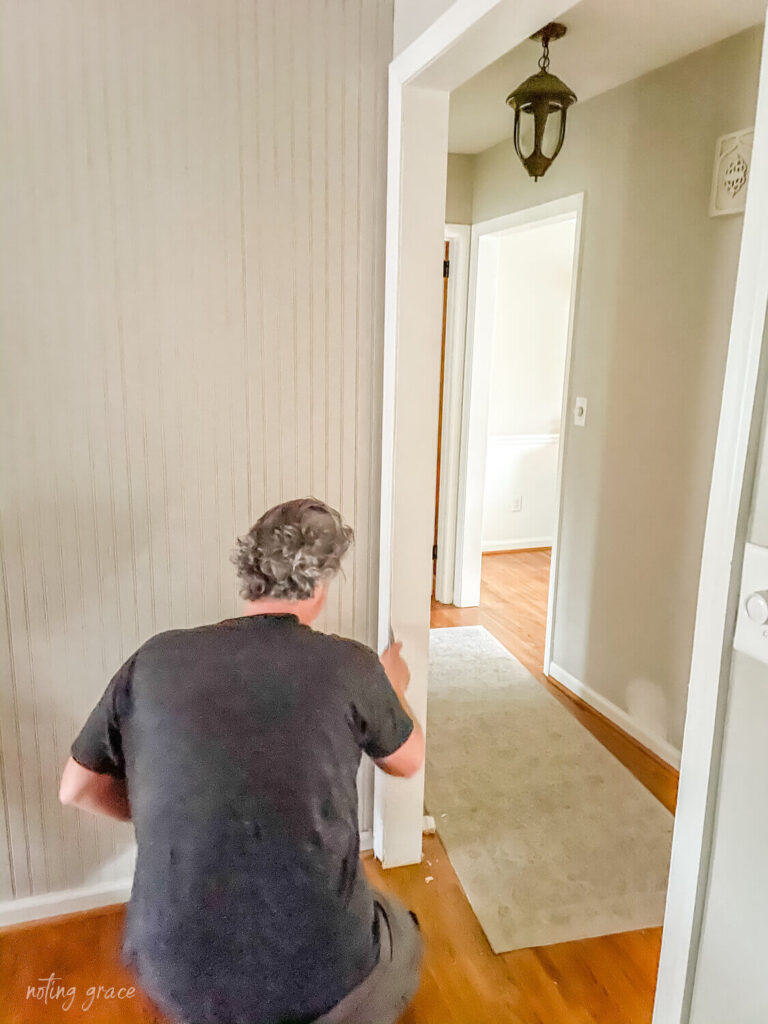
Simply follow along the seam.
Then you use a pry bar to remove the door casing or floor boards.
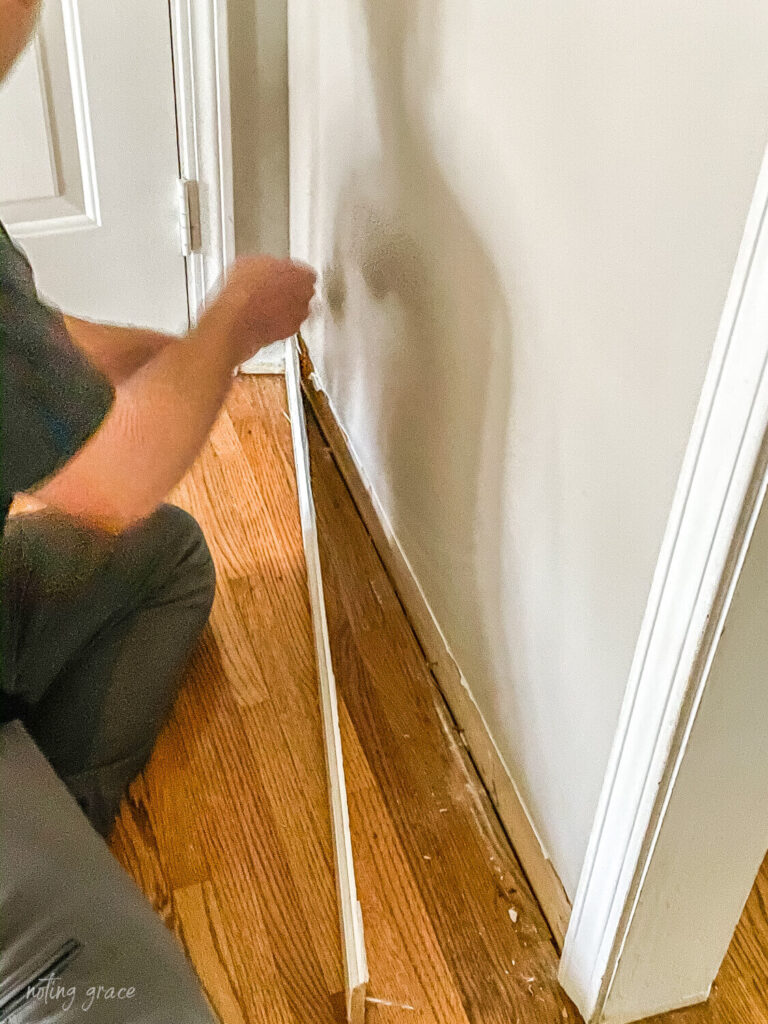
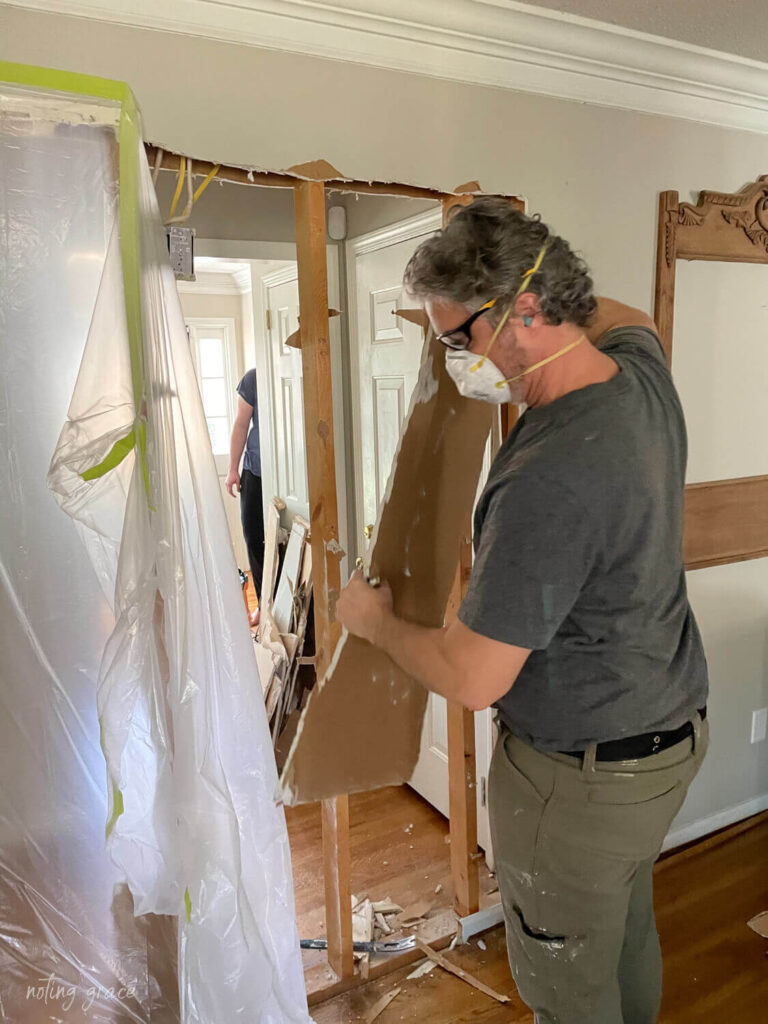
Once all the trim is removed, now you can start taking out the drywall.
Now, I know that Chip Gaines will take a running start and plow right through a wall.
But, I am one who prefers a more controlled environment.
Lemme tell ya – demo is DIRTY!
All that being said, we still let each boy take a whack at the wall with a hammer.

Well, as you can see, more than one whack was taken!
So if you’re like me – here is the trick that I have found to keep mess to a minimum.
Tape off any area that you don’t want the dust to go.
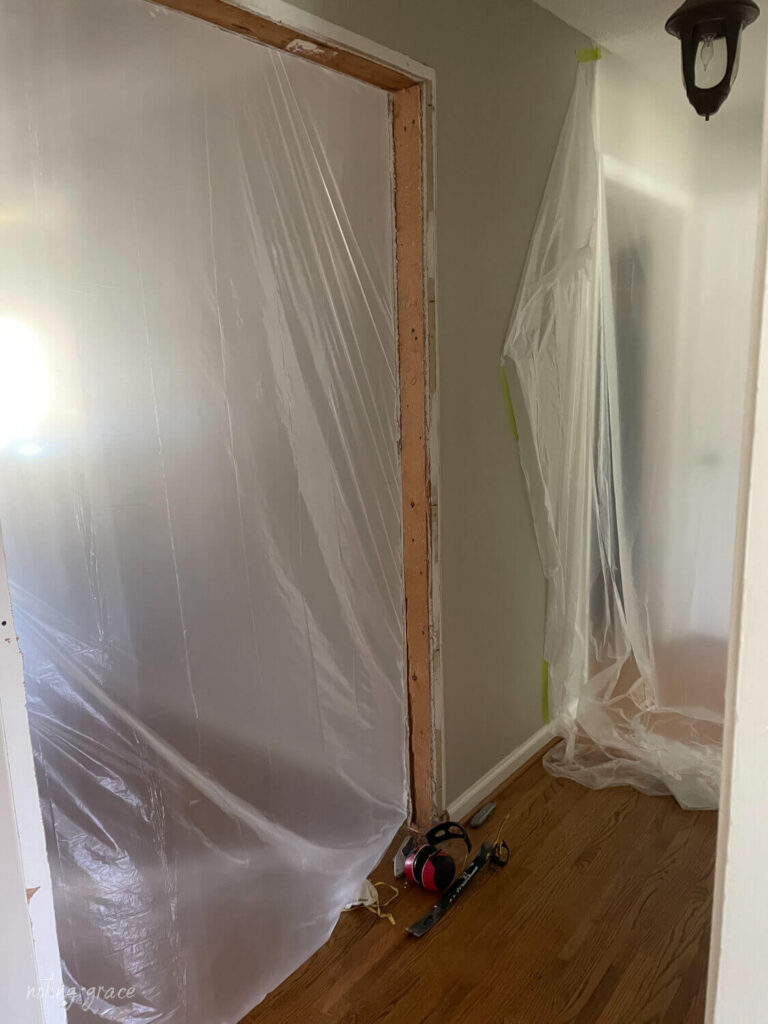
We used plastic drop cloth and masking tape and it really helped contained the construction dust.
Be sure to suit up with eye protection and a breathing mask.
Next, we used our favorite tool – our Dremel Multi-max tool – to remove the drywall.
But here’s the secret!
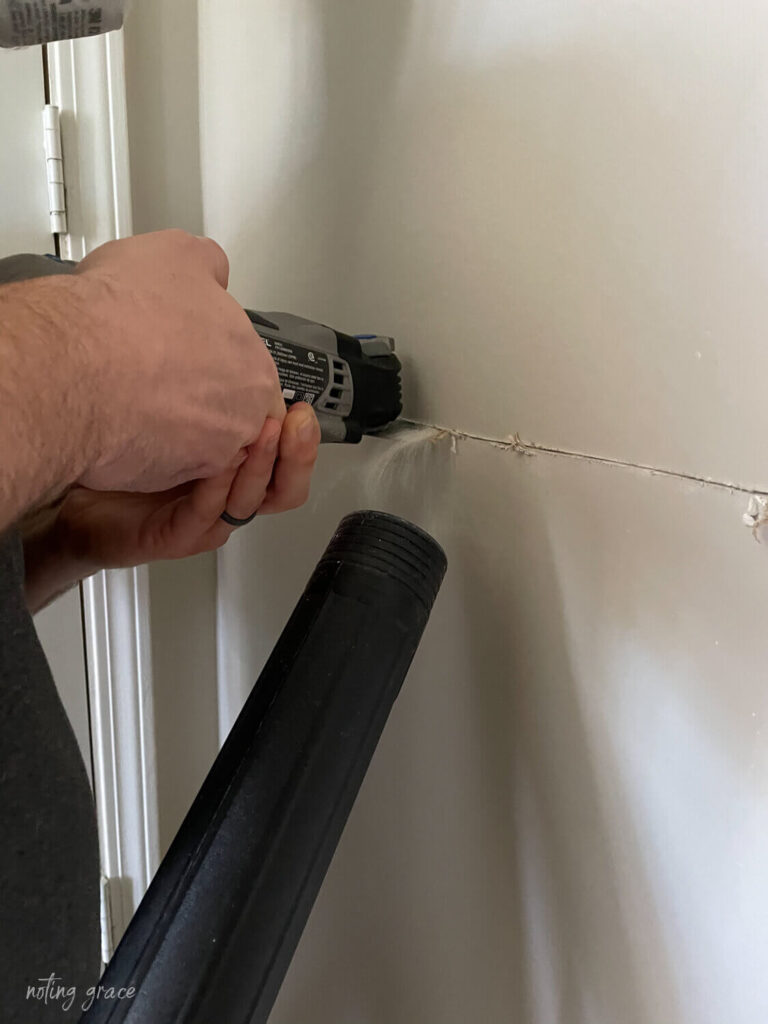
Get your shop vac ready and allow it suck up as much dust as possible.
It doesn’t catch 100% of the mess, but I’d say it cut down on at least 95%!
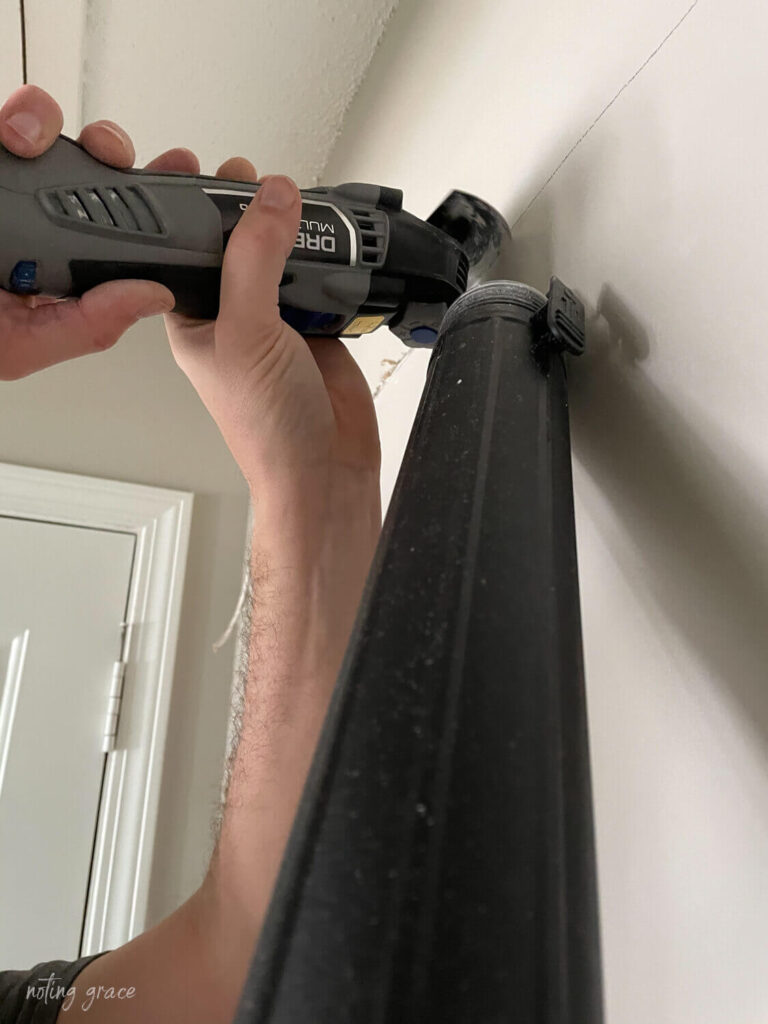
By scoring the wall this makes the removal not so messy!
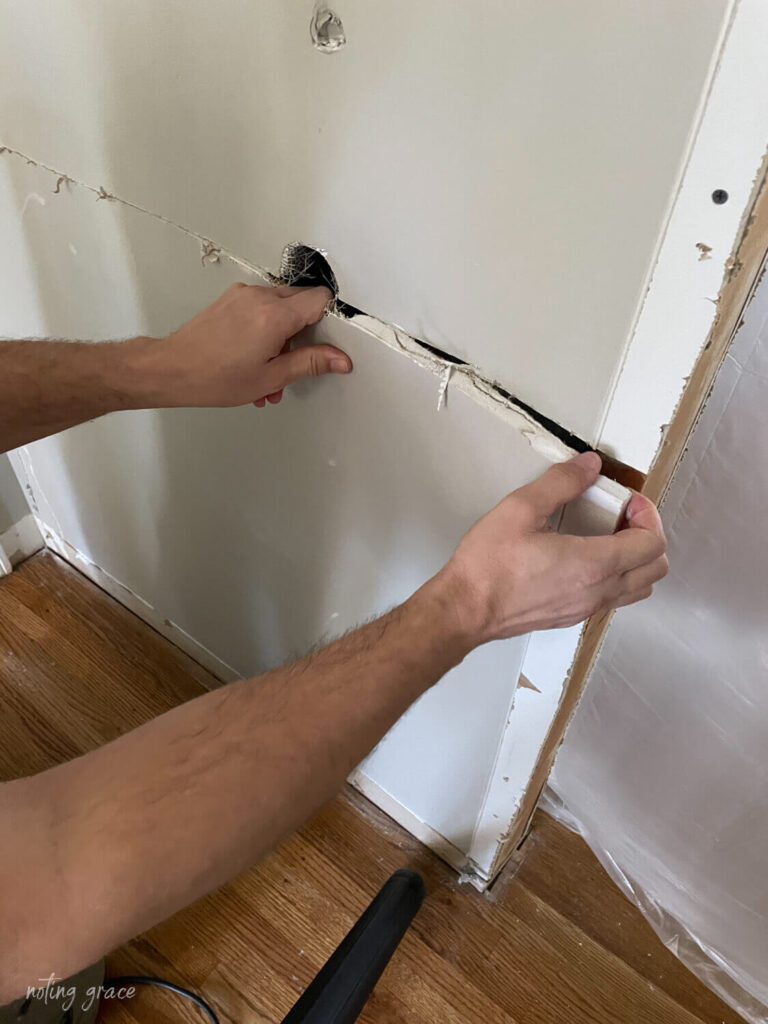
Once you have scored the drywall, gently pull it away.
Notice the floor – see how it’s not so messy?
That shop vac is a life saver!
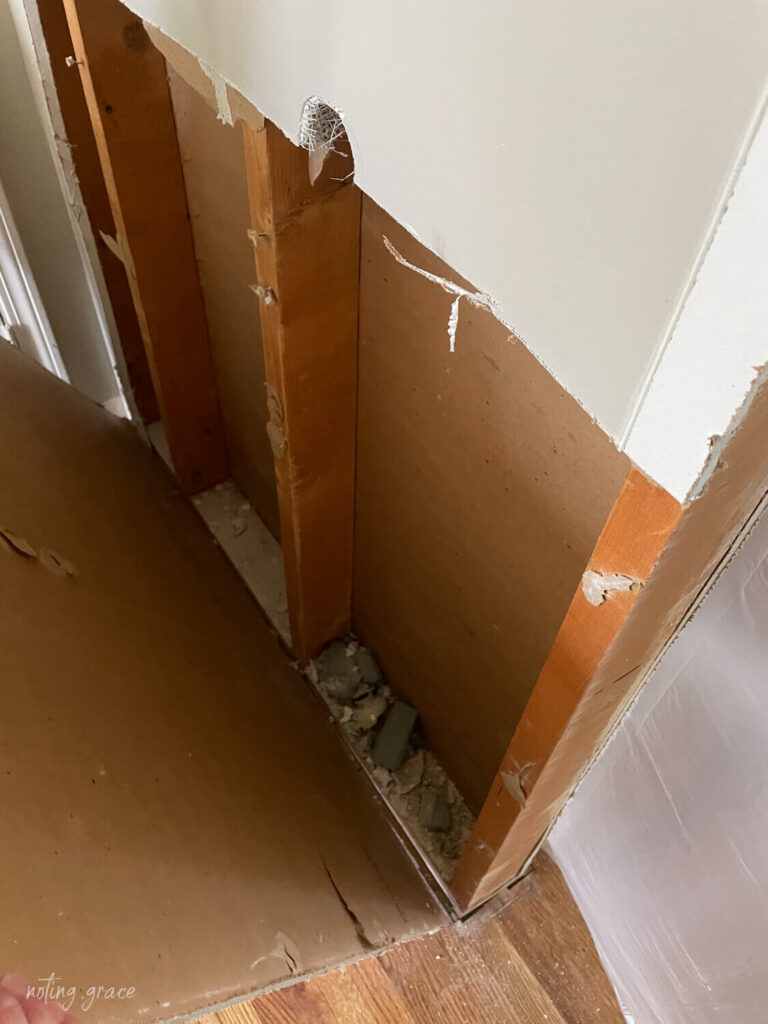
Here’s view of the most mess that was created in the process.
Pretty minimal – and very manageable.
One thing we needed to tackle was moving the electricity.
Before we made the first cut – we made sure to turn off the power to that outlet.
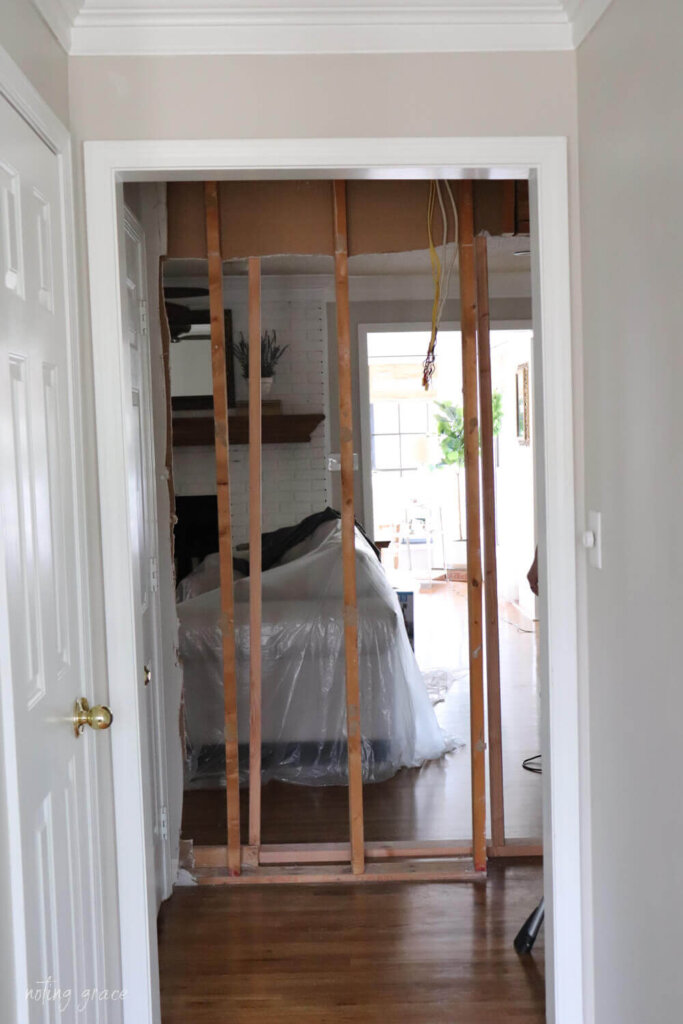
I couldn’t wait until all the drywall was removed to see all the light coming in!
I mean – excited dance kind of anticipation!

WOW!! That light just comes in!
Here’s how it looks after we removed the drop cloths.
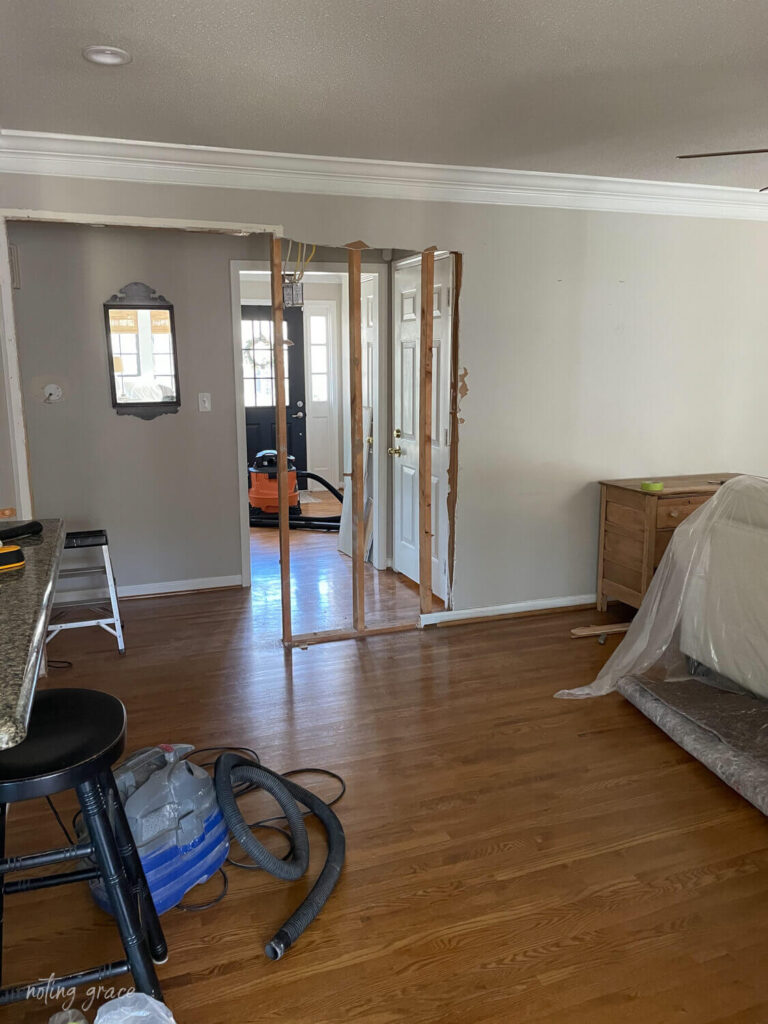
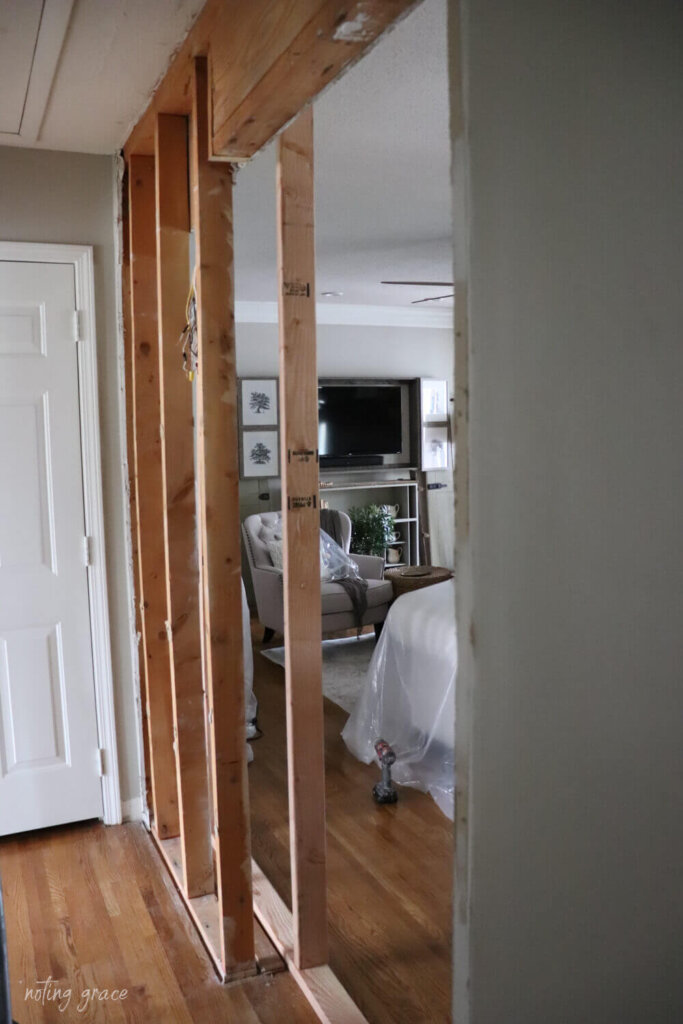
The next day, it was time to tackle removing the studs.
Removing the Studs
Since we weren’t sure if this was load bearing, we took the safety measures necessary.
We looked back on when we built the pass through in our Tennessee Home.
We worked in tandem with a contractor and before he removed any stud supports, he built a false wall.
The way you build a false wall is to position a 2 x 4 on the floor and the ceiling. Remember this is just a temporary step, so you won’t be screwing it in permanently.
But you will need extra hands to help.
We started by placing the 2 x 4 on the floor.
Then someone holds another 2 x 4 against the ceiling while the other person hammers the fake studs into place. This was a time we were very thankful to have a 6’7″ son!
Once 2 or 3 boards are in place, the ceiling stud holder can let go, since tension is holding it all together.
We chose to toenail in the temporary stud boards – which means screwing in at an angle. But be careful not to screw so deep to mar your floor or your ceiling.
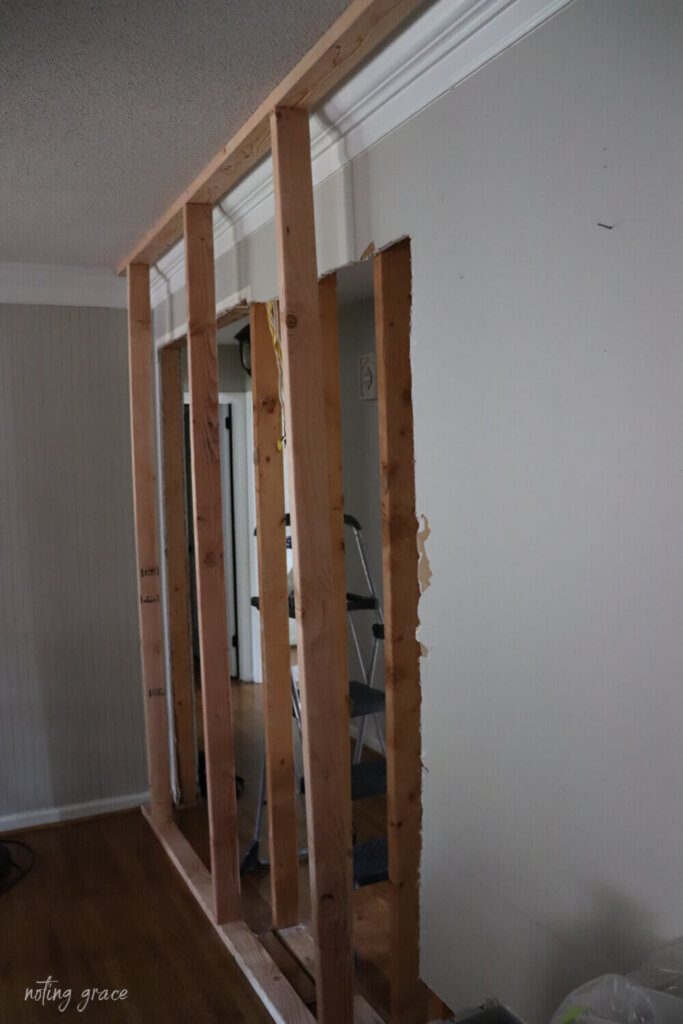
Now that your temporary wall is in place, you can away the old studs.
But first, do you notice how the original studs go all the way to the ceiling?
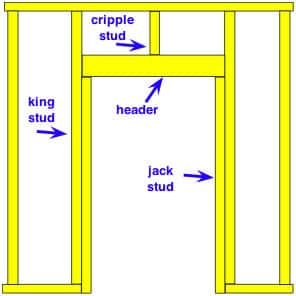
In order to support the ceiling above, you need to install a header, which is basically two 2 x 8 boards sandwiched together, resting on studs on either side. Those are called jack studs, which are screwed into the king stud boards. Here’s a diagram I found to show you what I mean.
We cut away enough drywall to see what was underneath where the king studs should be. Sometimes you need 2 king studs to bear the weight of the header.
Luckily, we already had king studs in place, so it was just a matter of fitting that huge, heavy header in place on the jack studs.
Once we made sure this would work, we started to cut away the original studs.

Phew – lemme tell ya – those first few cuts are always scary!
One thing we needed to address was moving the electrical that was in place.
Since that requires a good bit of professional knowledge – I am choosing to not include this step.
But I’ll tell you that Trent went up into the attic and fed the electrical down to the new spot we chose in the wall.
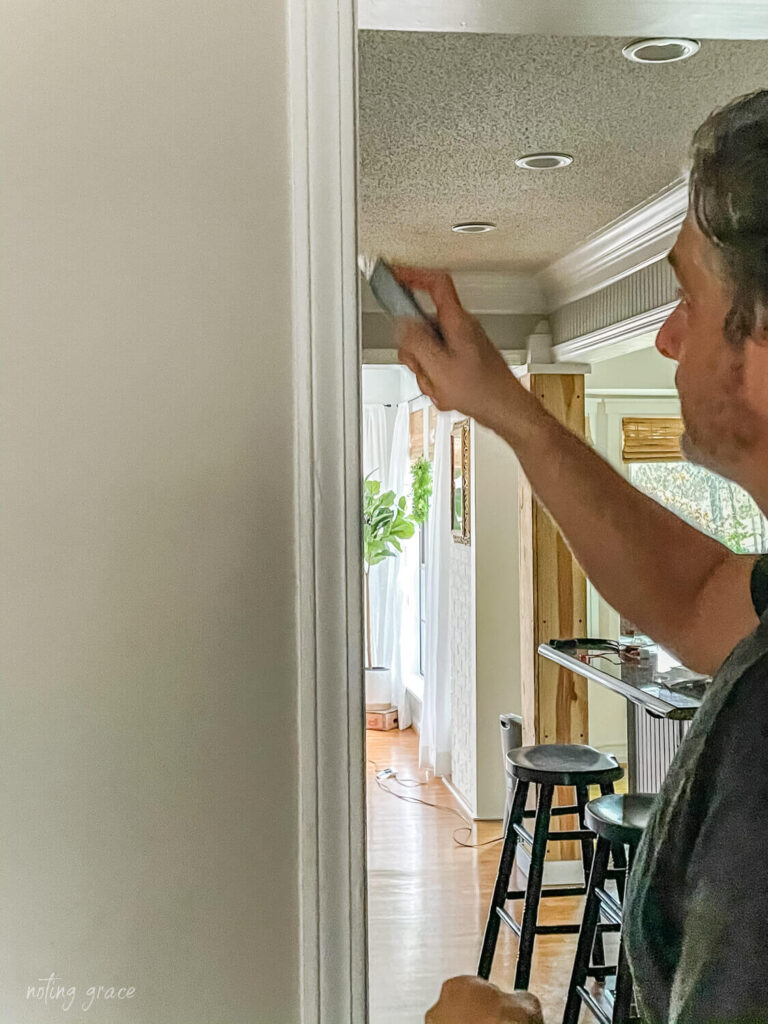
Installing the Header
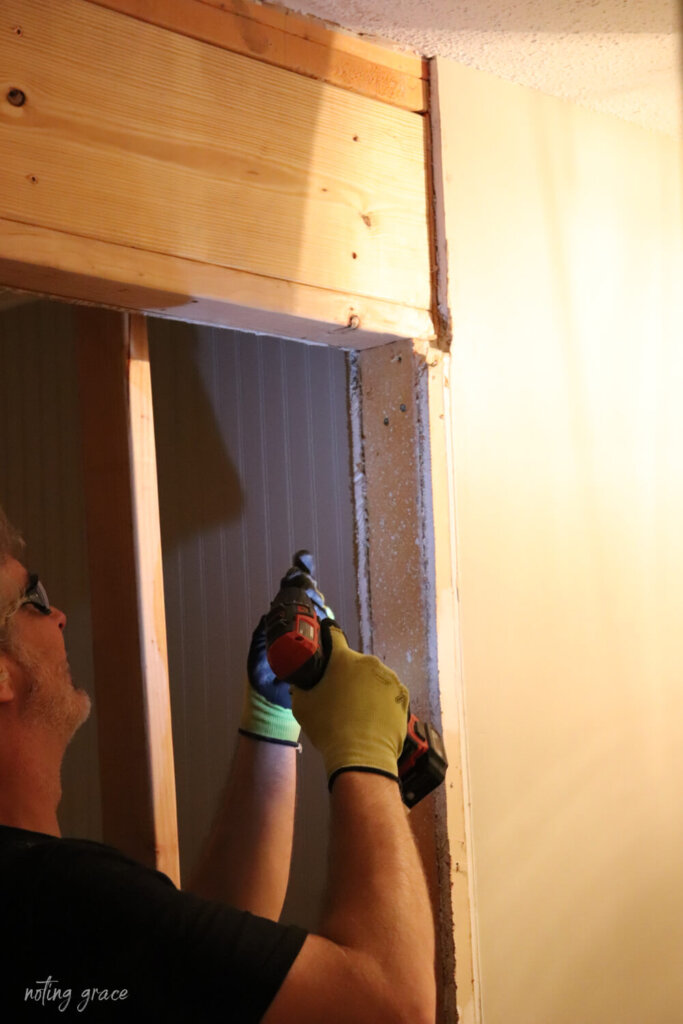
Here’s picture of Trent screwing the header into place.
I wasn’t able to take pics of the header being installed because it was all hands on deck to fit it into place.
Our home is about 30 years old and has settled quite a bit, which means nothing is square.
So Trent had to make lots of cuts and adjustments while we helped lift this heavy piece in place.
Just so you know, our boys learned a few new colorful words during this process.
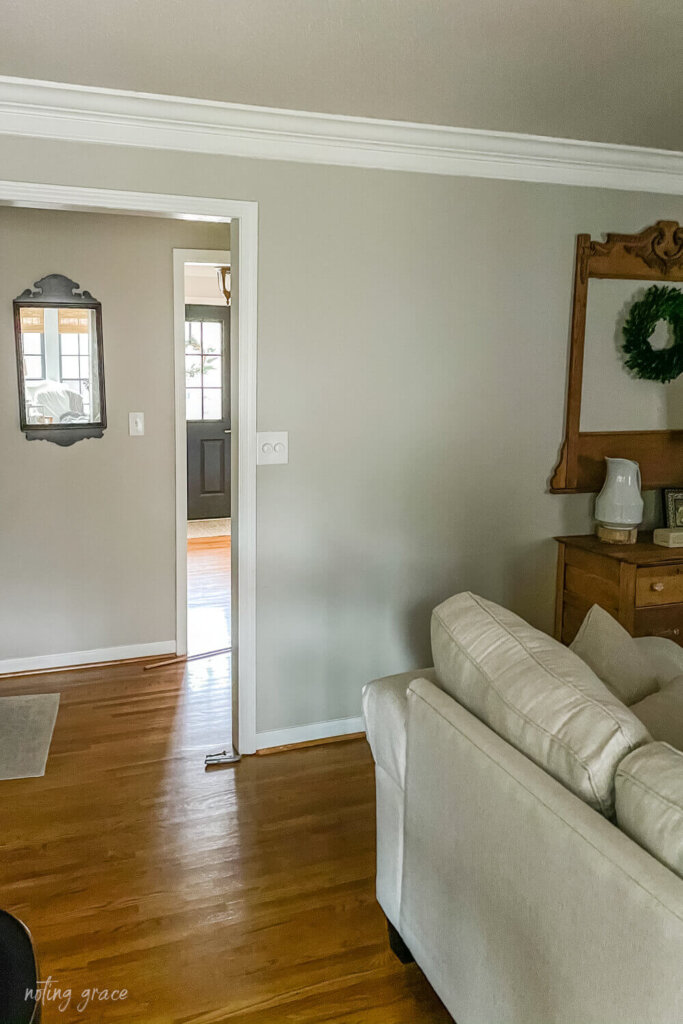
Here is it after the installation of the header.
It was so amazing seeing that opening without any studs.
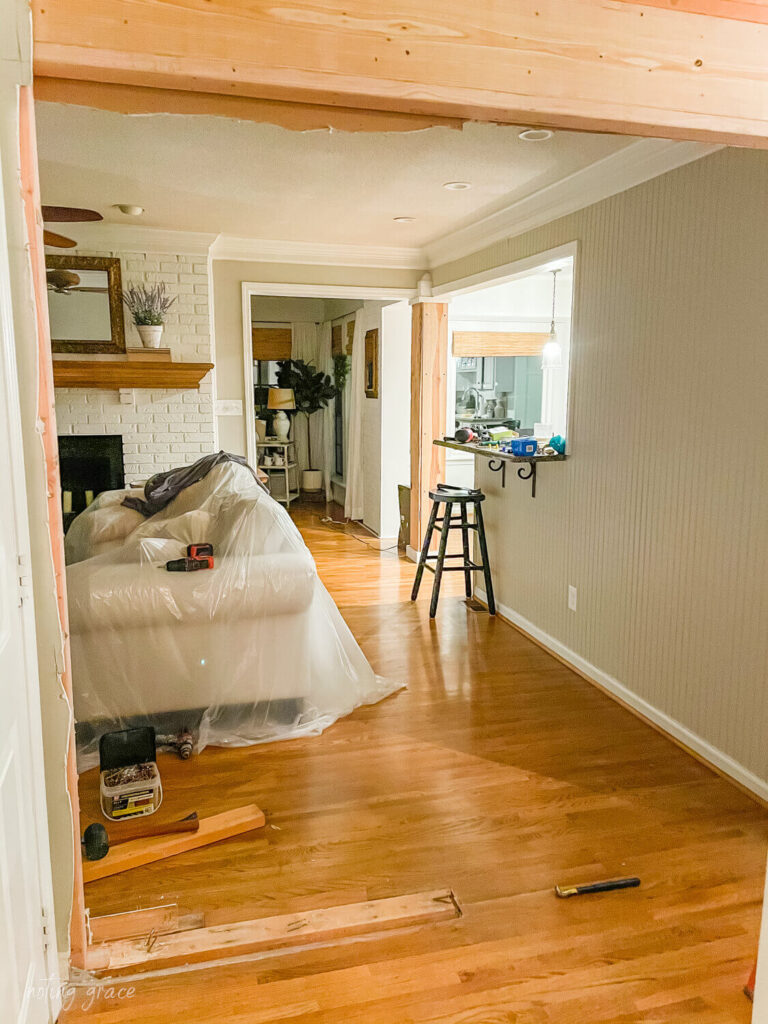
We added the drywall to the header and then framed out the opening with the same style trim we used in our kitchen.
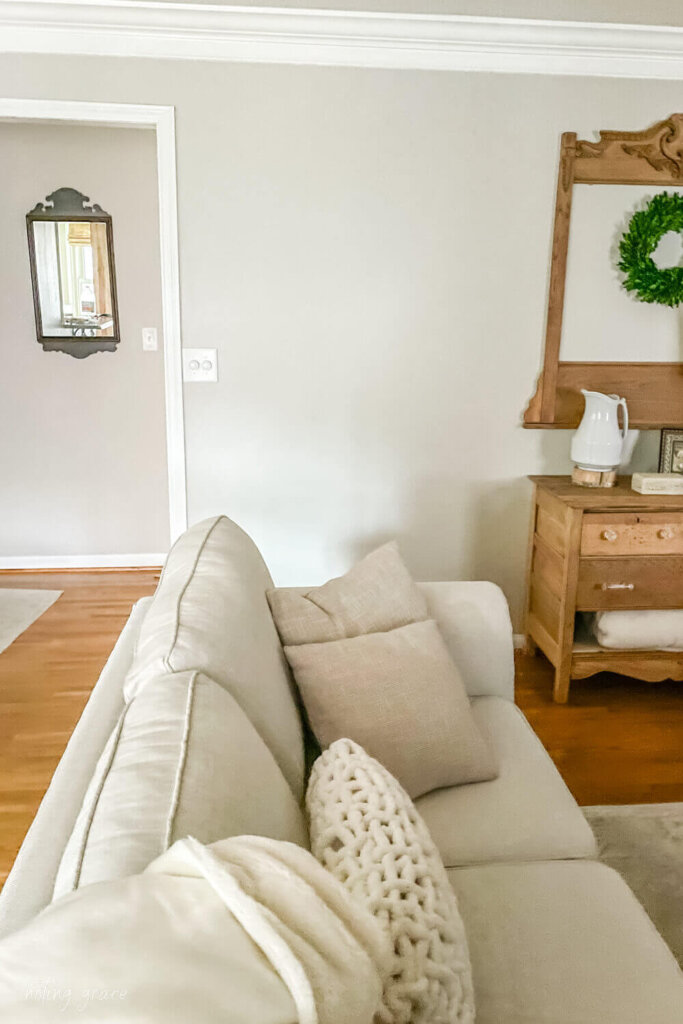
Here’s a look of at the before and after!
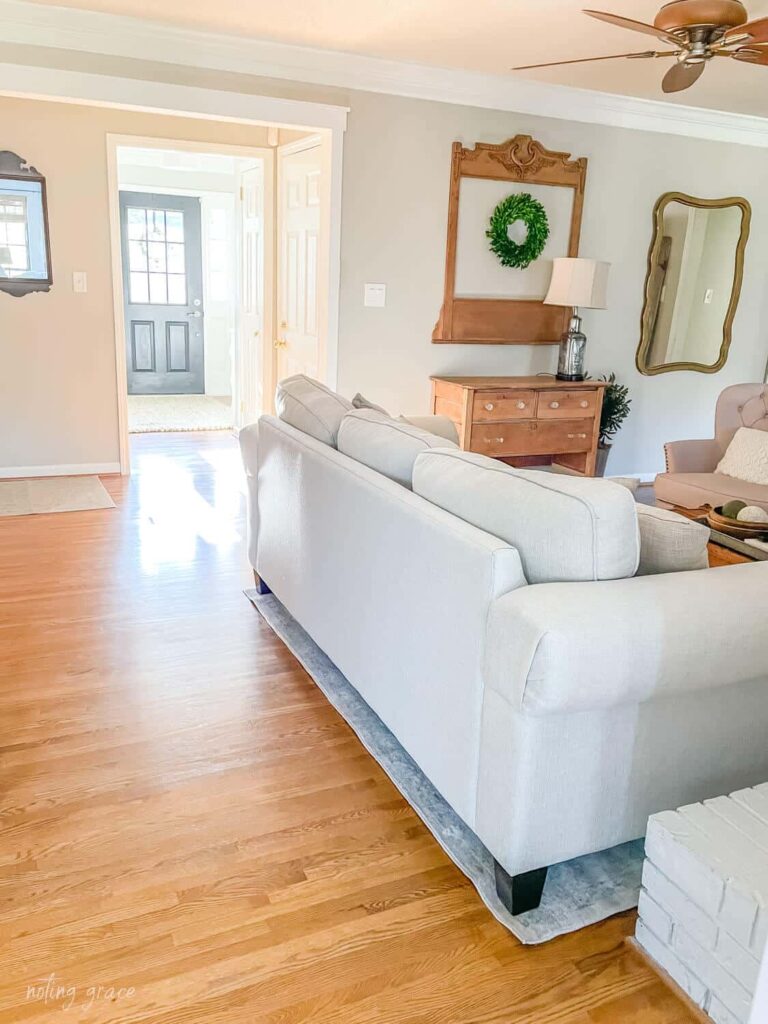
All that light coming in makes me so happy!
I wish we would have done this sooner.
There are still a few things to address, like the floor – which I will be sharing in another post soon.
But for now – my smile muscles are hurting because I can’t stop grinning at this makeover.
I hope this encourages you to think about opening a wall to let that light shine in!


Thank you so much Jill and we are on the same wave length removing that bar – it juts out too far. But we can’t do all the projects at one time, unfortunately. So stay tuned and we hope to get to that soon!
Glad you enjoyed this!
This was a brilliant project, it looks like it should always have been there and the view from the entry must look so much nicer. Now it would be nice to see that little bar thing removed and a behind the sofa table instead. Sorry, designer brain at work.
Thank you so much for sharing such a detailed explanation! I’ve never actually known how this process worked. Now I know!