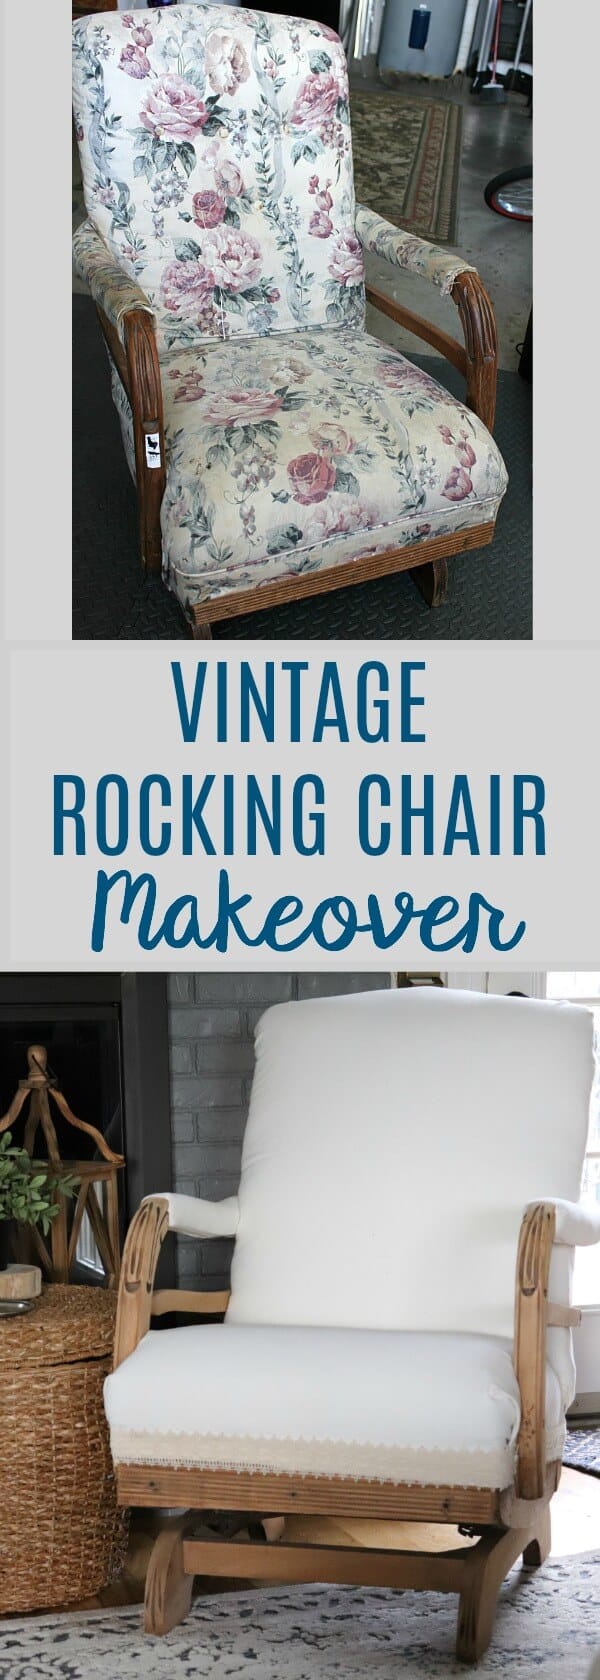
Vintage Rocking Chair Makeover
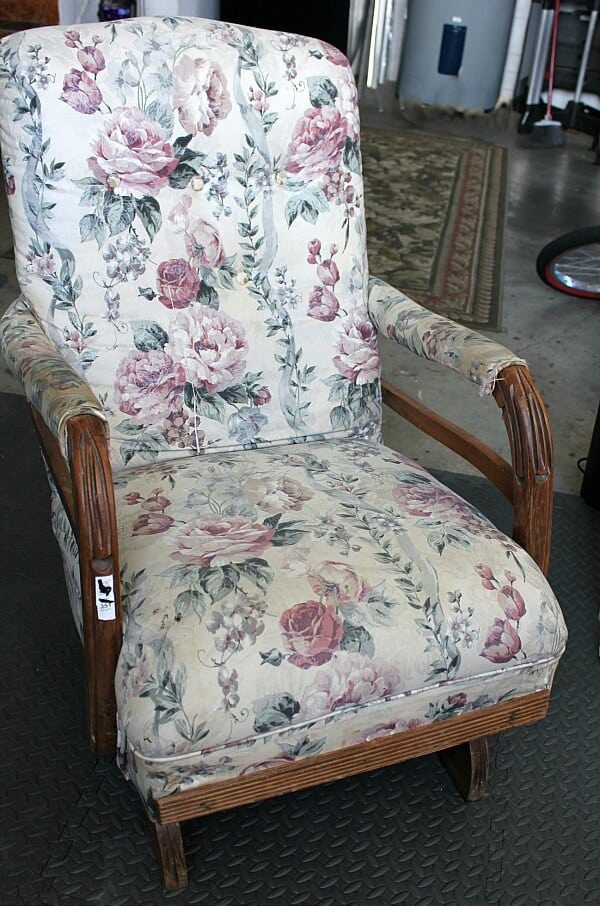
Have you ever been to a garage sale and had a piece follow you home? It was back in October, on a rather warm day for the season when I stumbled upon a sale. Loads of vintage goodies were sitting in the yard beckoning me to come and visit. Grab a cup and I’ll share the story of this Vintage Rocking Chair Makeover and how I flipped it into the beauty it is today!
To be completely honest, when I first saw this chair, I quickly passed it by.
I had just completed my DIY Dropcloth Recovered Deconstructed Chair and Ottoman and wasn’t feeling another upholstery project.
So I ooh’ed and aah’ed over all the other goodies and started my pile for check out, ready to barter a bargain… until I met my match.
There sat this beautiful lady with a twinkle in her eye – you know, the kind of lady you just wanna hug! In closing our deal, she said she’d reduce my price if I took that chair.
What? I’d get a better deal on everything if that came home with me?
I kindly said no thank you, but soon learned it was a deal that I couldn’t pass up.
She would only give me the price I wanted if I took that chair as part of the bargain. Before I knew it, they loaded it into the back of my van along with my other treasures.
I don’t know who was smiling more – me or her!
The chair was in excellent shape for it’s age. I started to see the beauty in all the blemishes and gave this Vintage Rocking Chair makeover a try!
Vintage Rocking Chair Makeover
(Some affiliate links are provided below. Full disclosure here.)
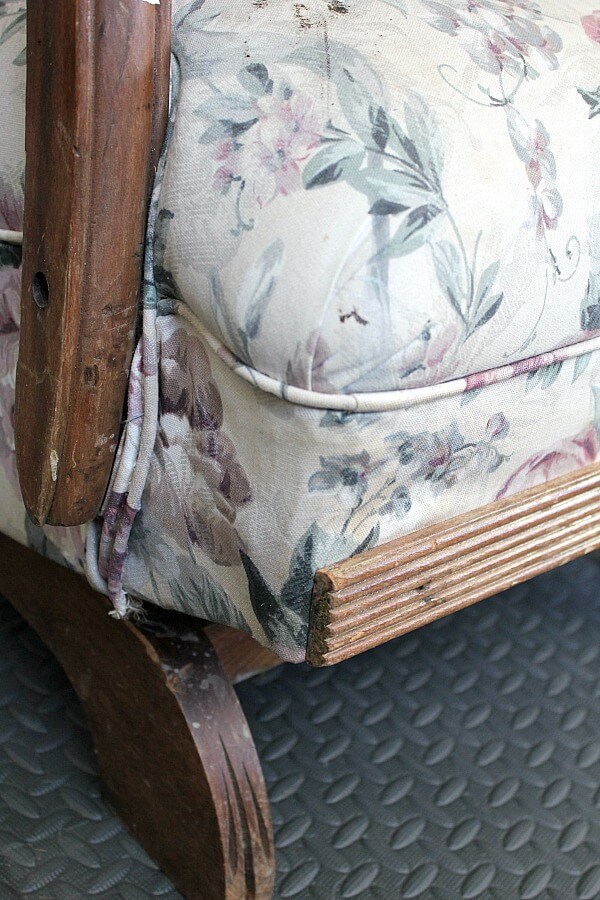
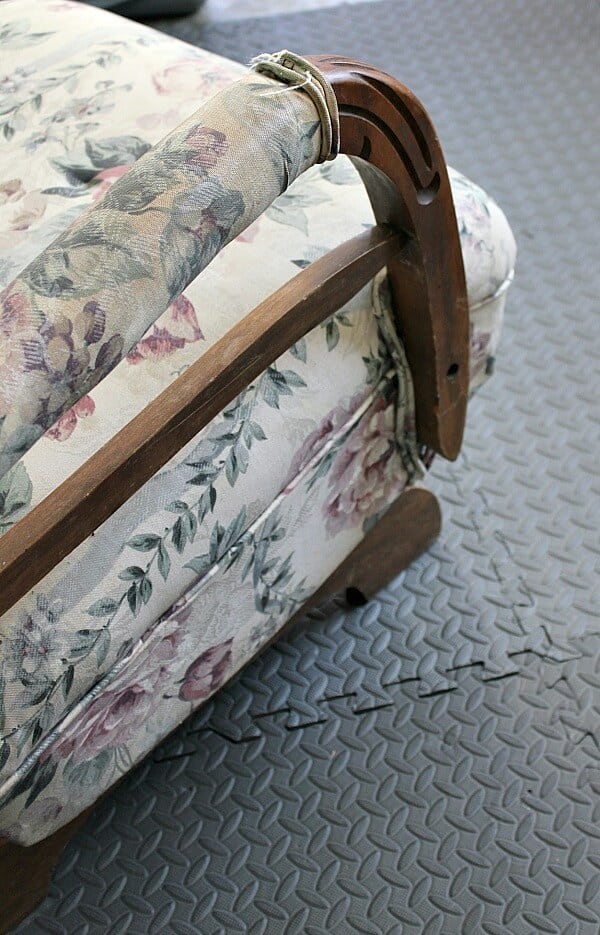
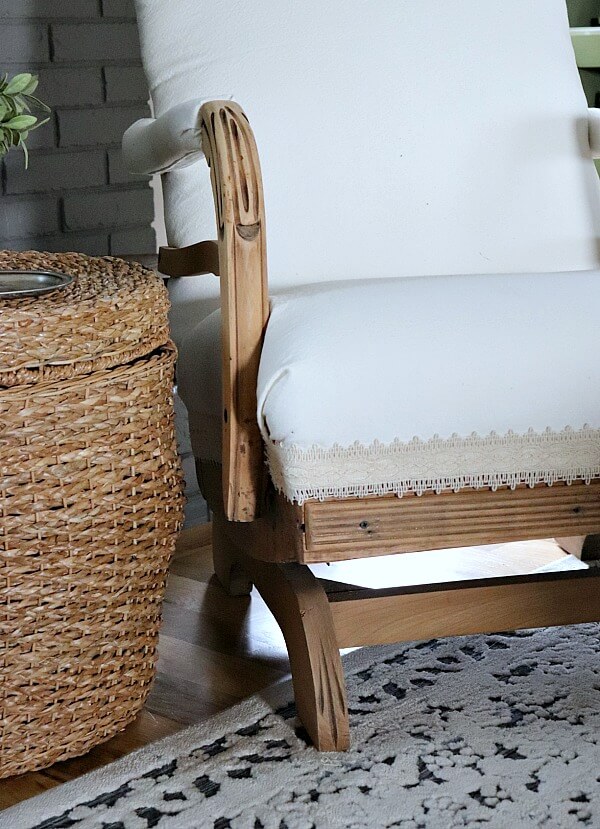
The only part that needed repairing were the arms. The wooden dowels that held many elements of the arms broke in various places from years of use.
So that was an interesting repair which involved drilling out the broken dowels and replacing them with new ones using wood glue.
First, after stripping the old fabric away, I was amazed to find the old coconut fiber used for stuffing.
It was quite a mess and had to be disposed of immediately, so capturing a picture was difficult.
I bet there’s coconut fiber still in the seat. Since the springs were intact and there wasn’t any sagging to the seat, I decided to leave it as is.
I sanded the exposed wood to achieve a unfinished look.
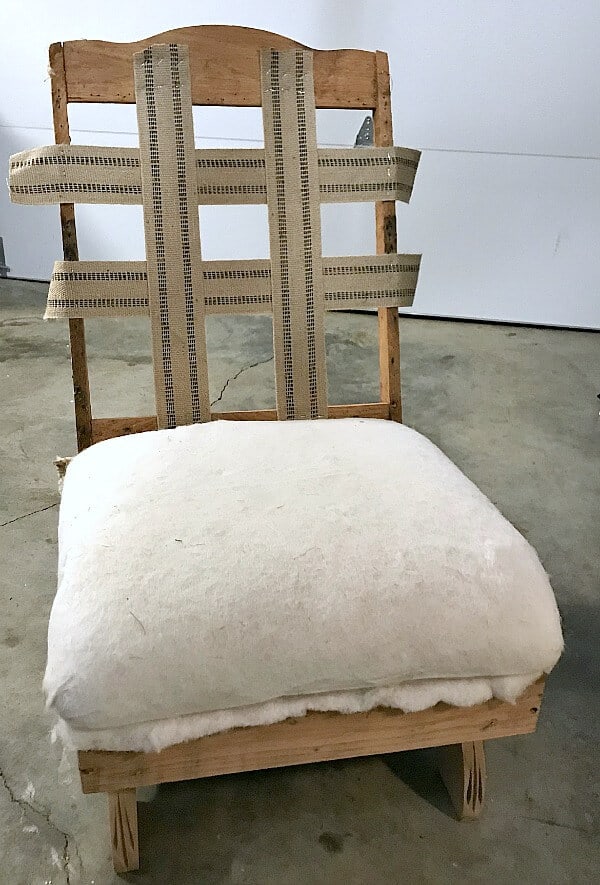
Wanting to mimic my Deconstructed Chair and Ottoman, I stapled upholstery ribbon to the back for support.
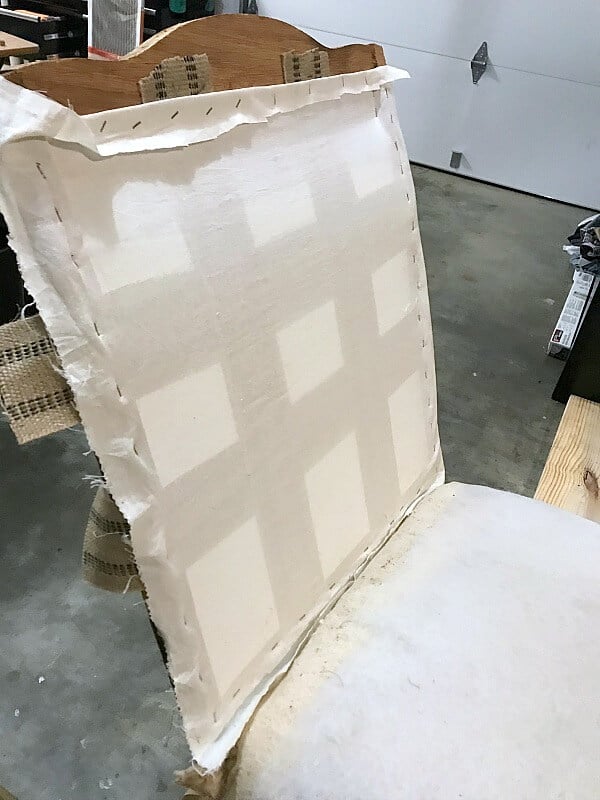
Next I stapled muslin fabric and I love how they look together. After that, it was a flurry of stuffing and batting and wrestling the fabric to maintain shape. Alas, in that process, my pictures were blurry.
I used the original batting from the back (minus the coconut fiber!) along with filler from a few old pillows I had. I covered that with a second layer of batting before I added the drop cloth fabric.
It was the same as my other chair tutorials, like my Wingback Chair or my Deconstructed Chair. Pulling the dropcloth fabric taut, I stapled each piece in place.
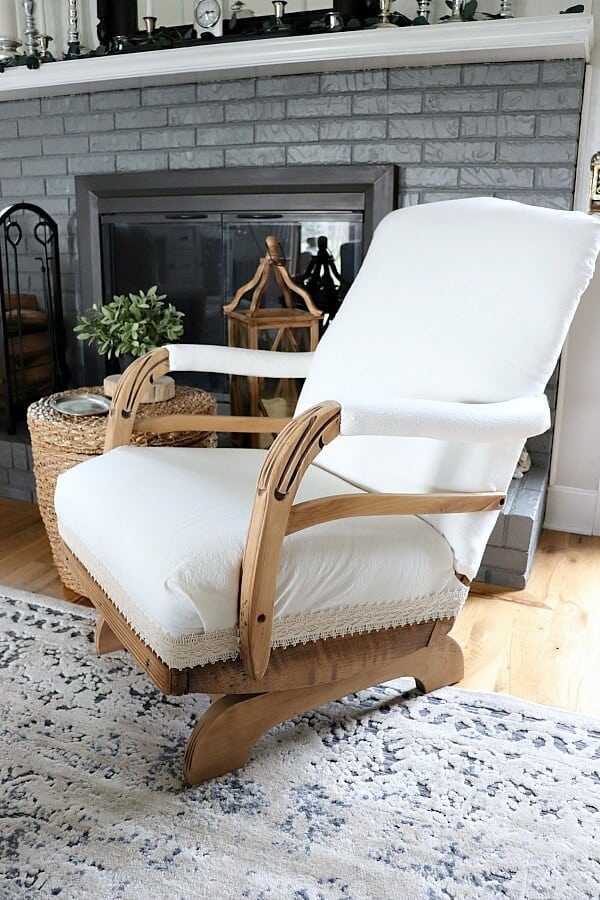
I covered the exposed staples with upholstery trim. I chose a lacy type of trim along the bottom in off white.
For the back I used a smaller ribbon in burlap, which matched nicely with the upholstery straps.
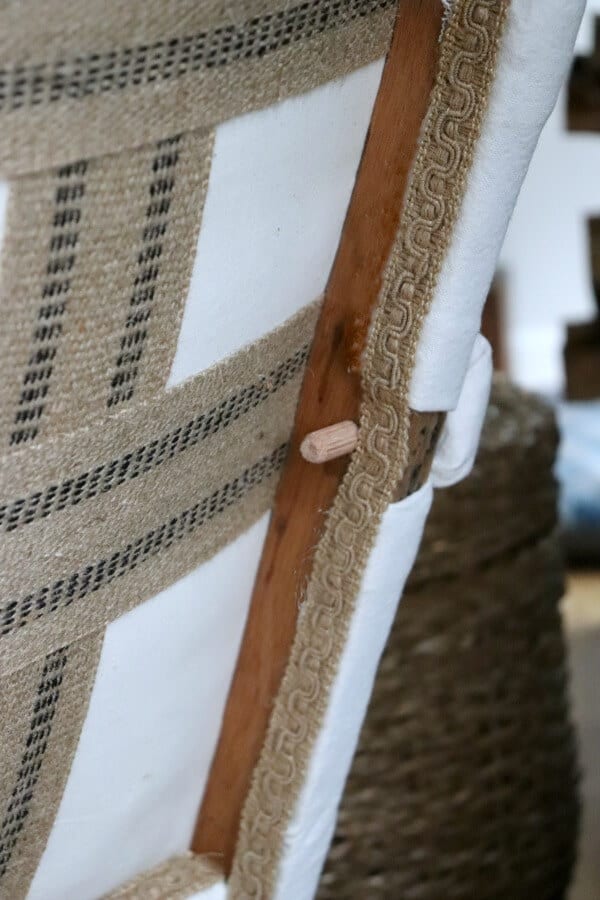
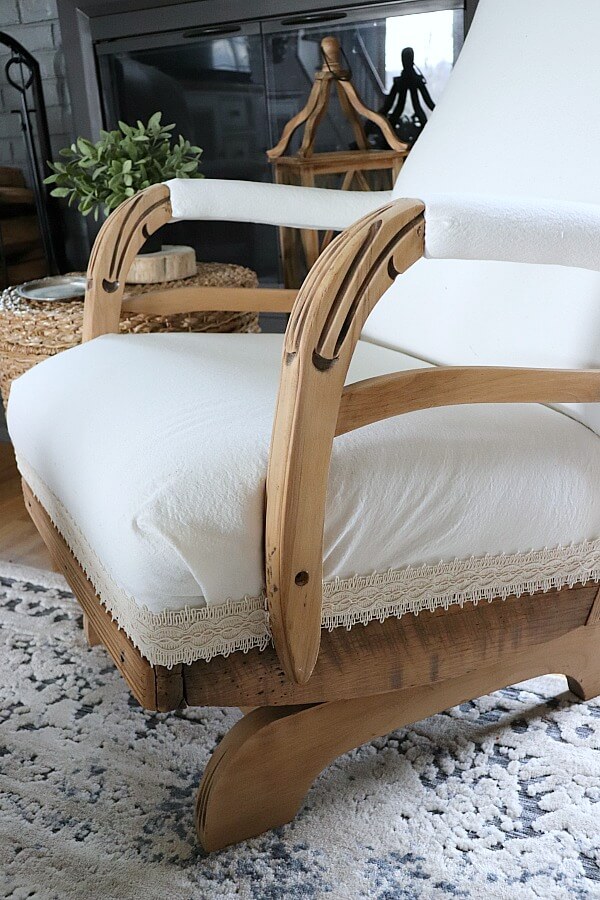
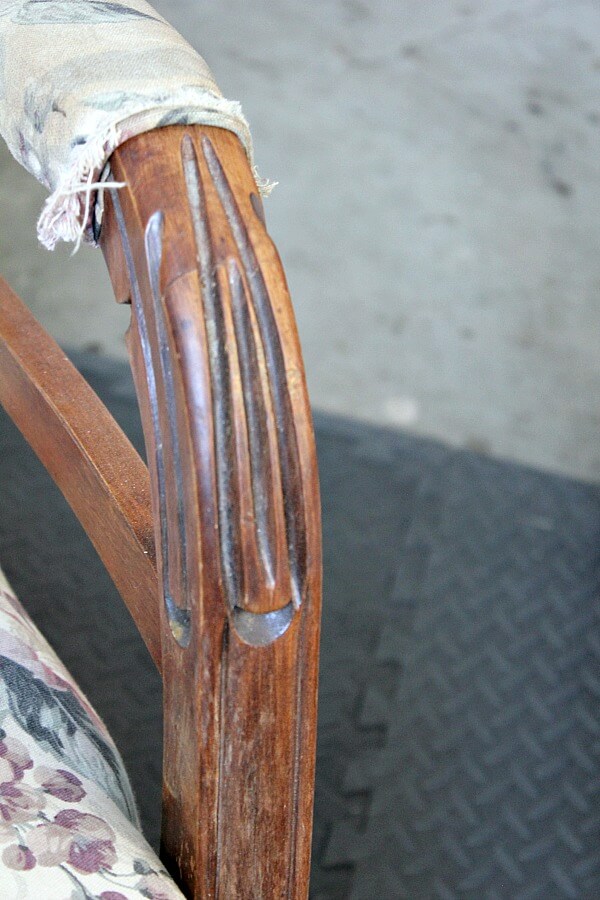
The arms reassembled beautifully with the new dowel rods.
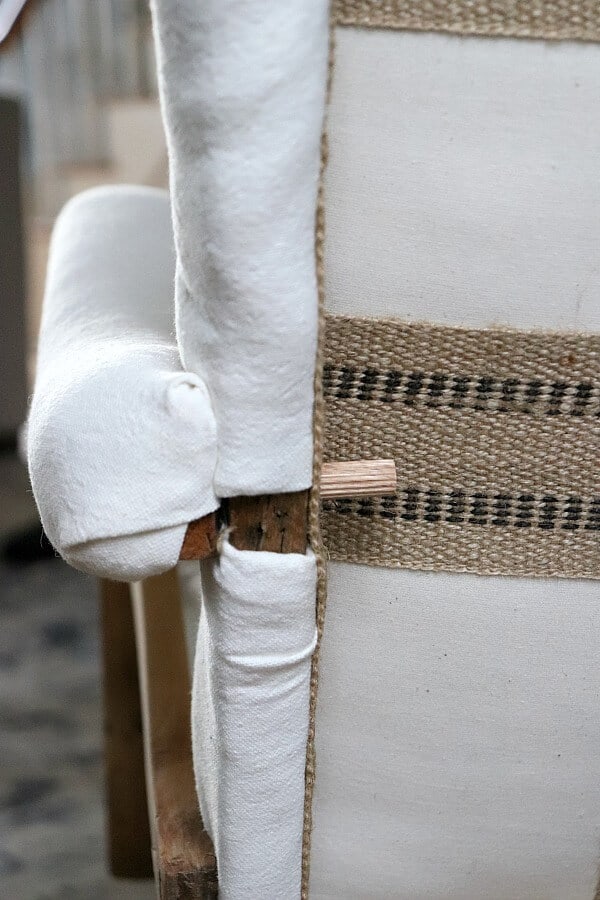
In keeping with the original build, I chose to keep the dowels exposed instead of trimming them off.
I think it adds to the rustic element of the chair.

And most of all, I love how the two chairs play nicely together – as if it’s meant to be!
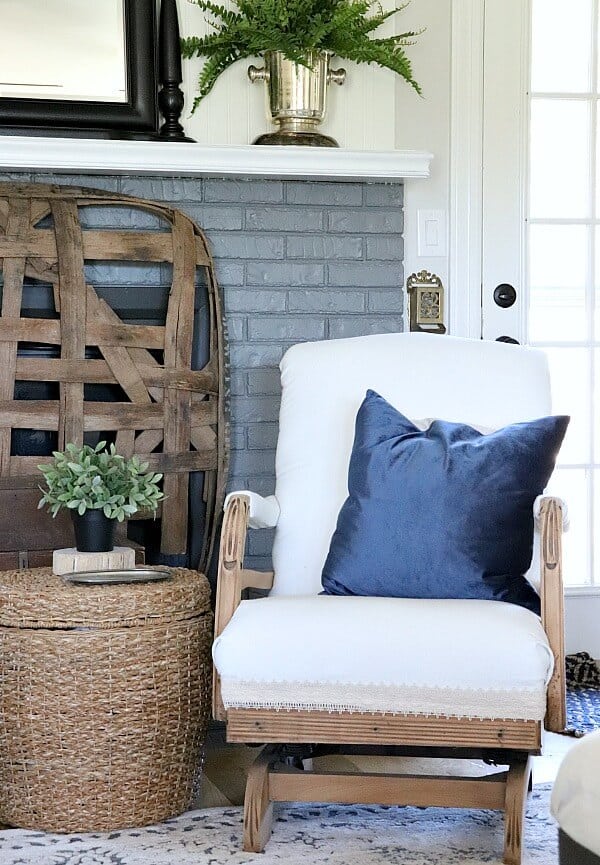
So this little chair that followed me home now has a soft spot to sit and a soft spot in my heart!

Pin this project for later!


Hey Tammy!
Thanks for reaching out and that’s a great question. I had a huge bolt of bleached drop cloth that I used for this chair, so I didn’t take an exact measurement.
I would say 3 – 4 yards of upholstery fabric would be more than enough.
Hope that helps!
So glad this inspired you, Cathy!
And I get the same way every time I try a new DIY. But as you can see, I eventually overcome those nerves and get into beast mode! LOL
Good luck with your project – you can do it!
I have my grandmothers rocking chair just like this one. I am so excited to redo the chair. I am not crafy at all, so I am nervous to start