**Timeless Farmhouse Kitchen Renovation – Demolition Week!
When you are making over a room on a teeny budget, sometimes the tough stuff is left for you to do. On this Timeless Farmhouse Kitchen Renovation – Demolition Week, we have had to stretch our DIY skills!

Before we get into the demolition mess – let’s take a moment to admire this HUGE open space!
The beast of a kitchen island is gone!
Hurrah!
Here’s a quick reminder of what it looked like.
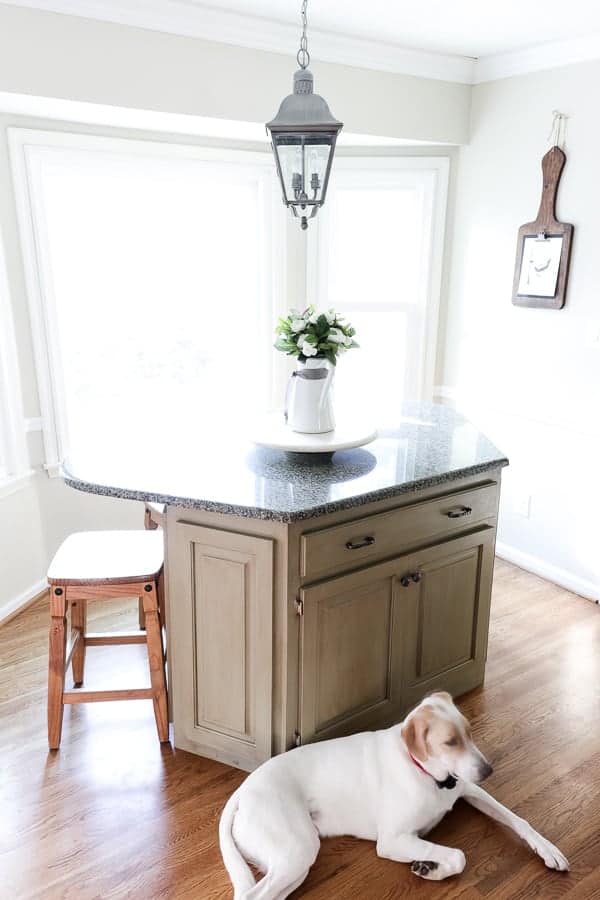
Big, bulky and blah.
Not only is the huge island gone, but we were also able to sell it on the Facebook marketplace that same day!
So with that money we were able to put it back into this room reno for our range hood.

Our biggest concern was if the hardwoods ran underneath and hallelujah – they did!
So after that was gone, we started removing all the trim in the kitchen.

We were able to remove the wood from the support pole and we plan to cover it with cedar boards.
We also took down the chair rail and crown moulding that was original to the house. That chair rail was in bad shape.
We aren’t sure if we’re going to put the crown moulding back up. We are loving how open the room feels!
This house only has 8 foot ceilings, and sometimes the moulding around the top makes the walls appear smaller.

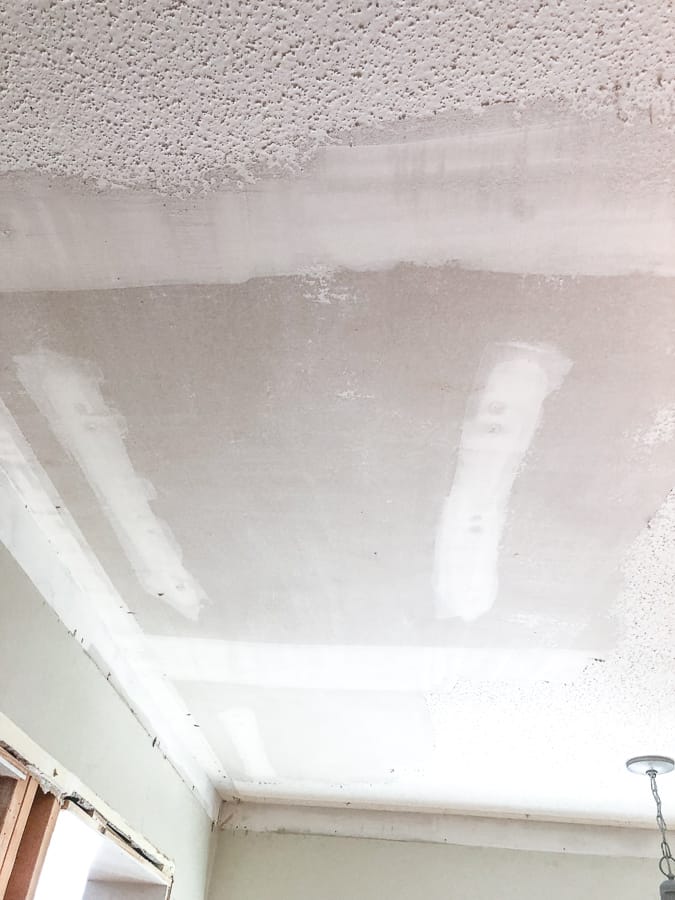
After all the trim was gone, we started the messy task of scraping the ceiling.
This was my first attempt at doing this, and with trial and error, I found a trick that worked.
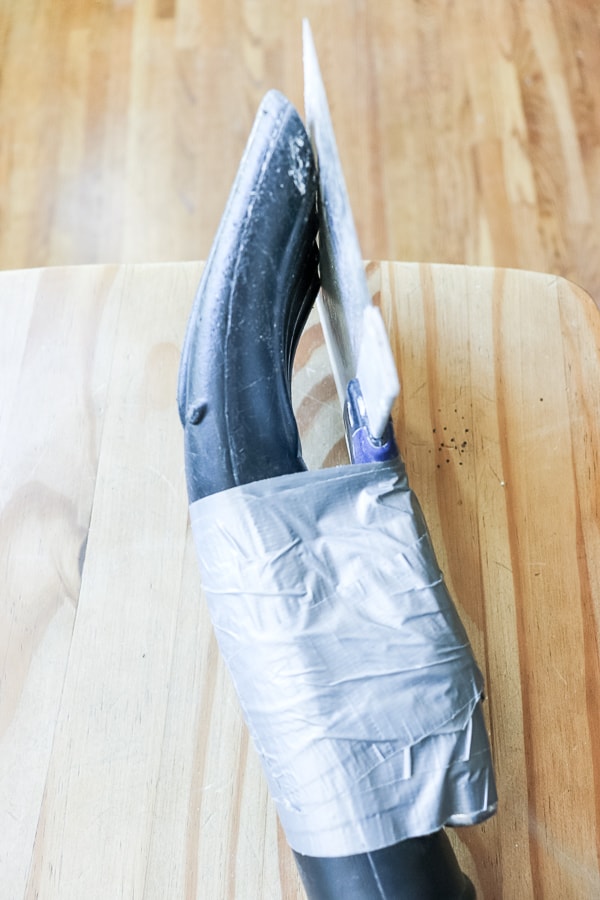
A piece of duct tape, my scraper and the end of my shop vac hose.
First, I wet the ceiling popcorn with warm water and then started scraping. This DIY hack trick was the best!
The vacuum was able to catch most of the mess!
I’m still learning this process, and luckily – every . single . room . in my house is crowned with a popcorn ceiling, so I’ll fine tune this.
UPDATE: Check out my 3 secrets to Scraping Popcorn Ceilings!

But for now, we have a smooth ceiling. All we need to do is fill in a few spots, sand, prime and paint.
Next up on this Timeless Farmhouse Kitchen Renovation – Demolition Week are the backsplash tiles.
We were also able to get rid of the dated travertine backsplash. I can’t wait to update this with our shiplap idea!
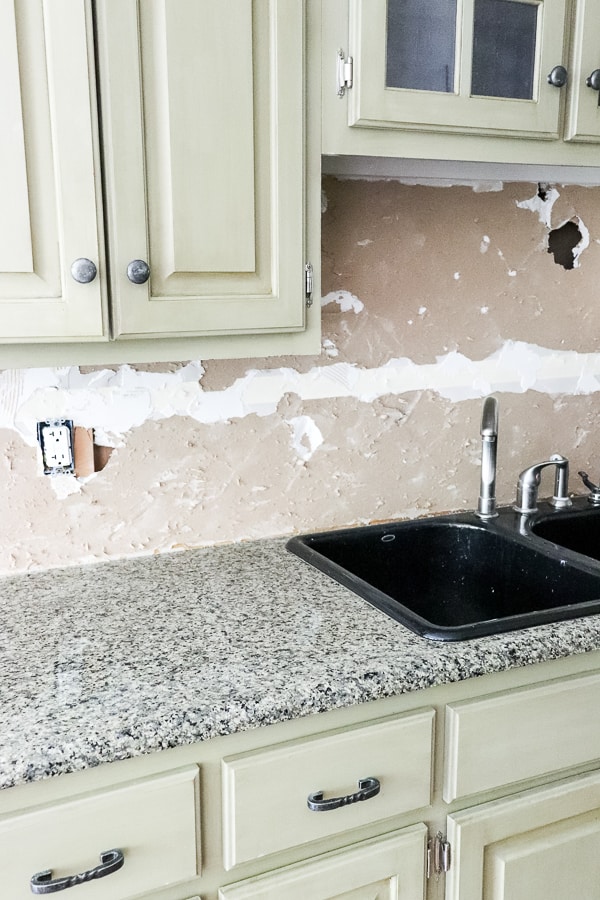
You always run the risk of ruining the drywall when you remove the tile.
Behind the sink went pretty well with minimal damage.
However, the tile behind our stove did not come off so easily.

Once we removed the tile, we learned that this wall was not one solid piece of sheetrock, but 5 – maybe 6 – different smaller pieces put together like a jigsaw puzzle.
It basically crumbled as each tile fell.
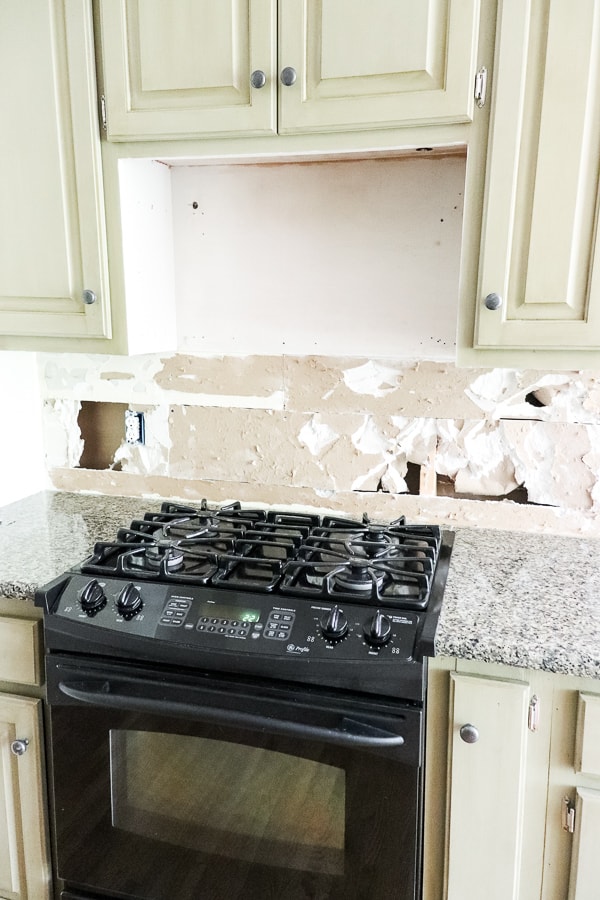
So this will have to be repaired before we install the shiplap backsplash.
But hey! The microwave oven is gone – ready for a new range hood.
I found a deal on Amazon for a returned one in their Amazon Warehouse. It’s a bit dinged up, but we were able to knock 50% off the retail price!
Plus, we’re planning on covering it with a wood frame to disguise it, so the scratch and dent will work perfectly!

And we are barely surviving the mess.
A kitchen reno is no joke. In fact, every room has some item or another from the kitchen.
And next comes the sanding of the ceiling, so the mess is about to get worse.
But not bad for this week – Timeless Farmhouse Kitchen Renovation – Demolition Week.
Once we jump that hurdle, the fun stuff begins! Painting the cabinets!!
Let’s see how I’m doing on my To Do list:
Timeless Farmhouse Kitchen
Renovation on a Budget Plans
Remove Kitchen IslandRemove Dated TrimDemo Travertine Tile BacksplashScrape Popcorn Ceilings- Paint Ceiling
- Replace Microwave with Vent Hood
- Frame Around Vent Hood
- Frame in Refrigerator
- Updated Farmhouse Trim and Support Beam
- Add Faux Stainless Steel to Stove and Dishwasher fronts
- Remove Dated Sink and Replace with Apronfront Sink
- Paint Kitchen Cabinets
- Install Shiplap Backsplash
- Add Woven Blinds
- Replace Light Fixture
- Replace Hardware
- Create an eat-in nook with table, chairs, blinds, curtains.
- Decorate!
Not too bad! And so far, we’ve spent zero dollars!
Since this next week will be all about painting, be sure to follow along so you don’t miss a thing! I’ll be sharing lot’s of behind the scenes progress on my instagram page as well.
Of course, head over to the One Room Challenge to see all the other participants. That’s my favorite part – seeing all the other amazing bloggers and their progress!
Week One | Week Two | Week Three | Week Four | Week Five | REVEAL


11 Comments