Limewashing an Interior Accent Wall
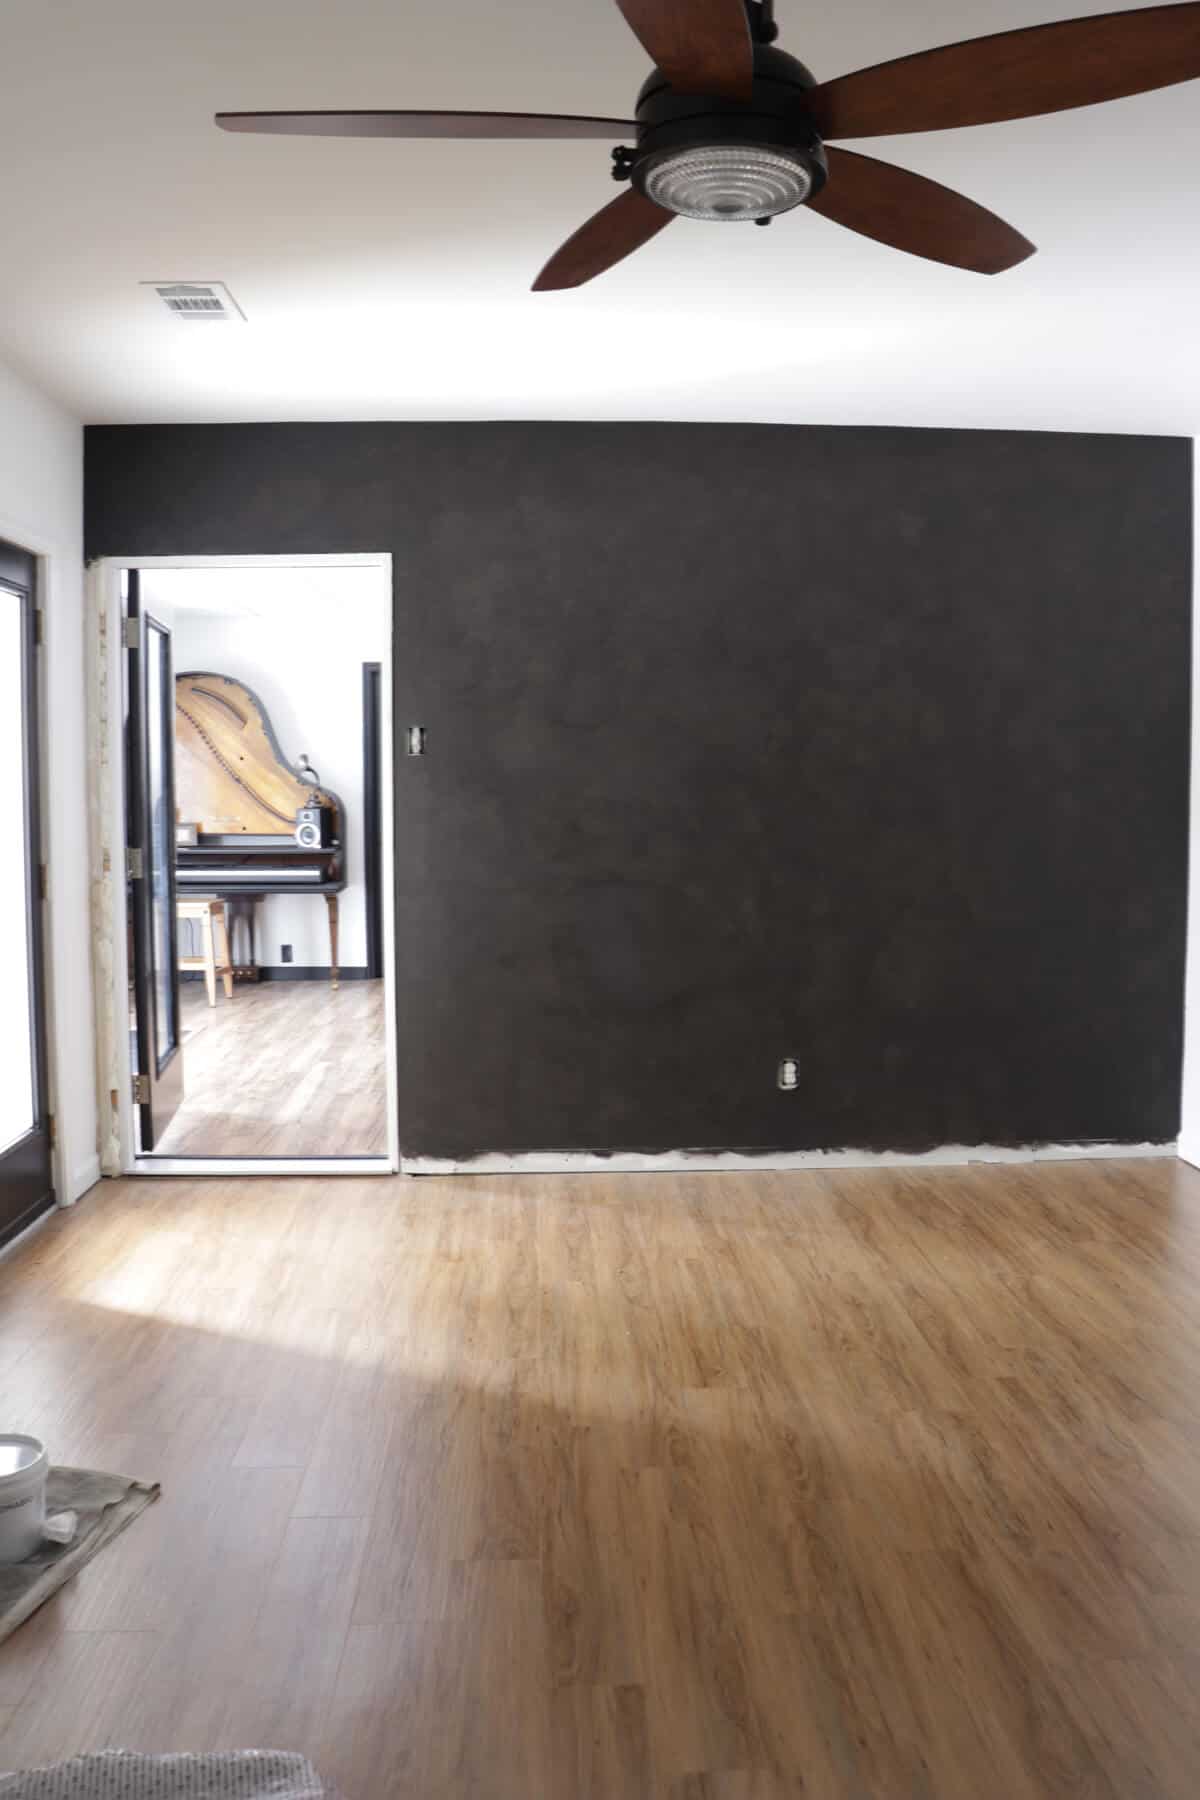
For our basement remodel, I knew I wanted there to be a focal point of the room that wowed us. So we have been limewashing an interior accent wall with Romabio Paints. And it’s stunning!
I love trying new things.
When I was working with Romabio Paints on our Lime Slurried Fireplace, I mentioned the accent wall idea to them and what I was looking for.
I wanted something different than traditional paint. And I thought a Limewash look that has depth and movement to the finish would be beautiful.
But there was one issue.
Romabio Classico Limewash is intended for porous surfaces, like brick exteriors, so I knew it was a long shot when I asked about an interior wall.
Here’s what they said.
Can you Limewash Drywall?
Yes and no.
Romabio’s Classico Limewash isn’t meant for drywall alone. The final finish would result in a chalky finish. Which means when you rub your fingers across the wall, you would have a slight chalk residue on your fingers.
There are products out there that have additives in their limewash mixture that make it possible, but those additives mess up the original elements of limewash. One of my favorite qualities that Romabio has are the zero vocs in their paints which they achieve through natural ingredients.
In order for the limewash to work on interior walls, you would need to apply a top coat over the lime washed finish like their Lime Glaze or their Mineral Shield.
So that meant that the look I was hoping for was possible!
I may have totally busted a move when I heard that news!
Today, I’m going to share what we did in order to achieve this look.
Limewashing an Interior
Accent Wall
(Some affiliate links are provided below. Full disclosure here.)
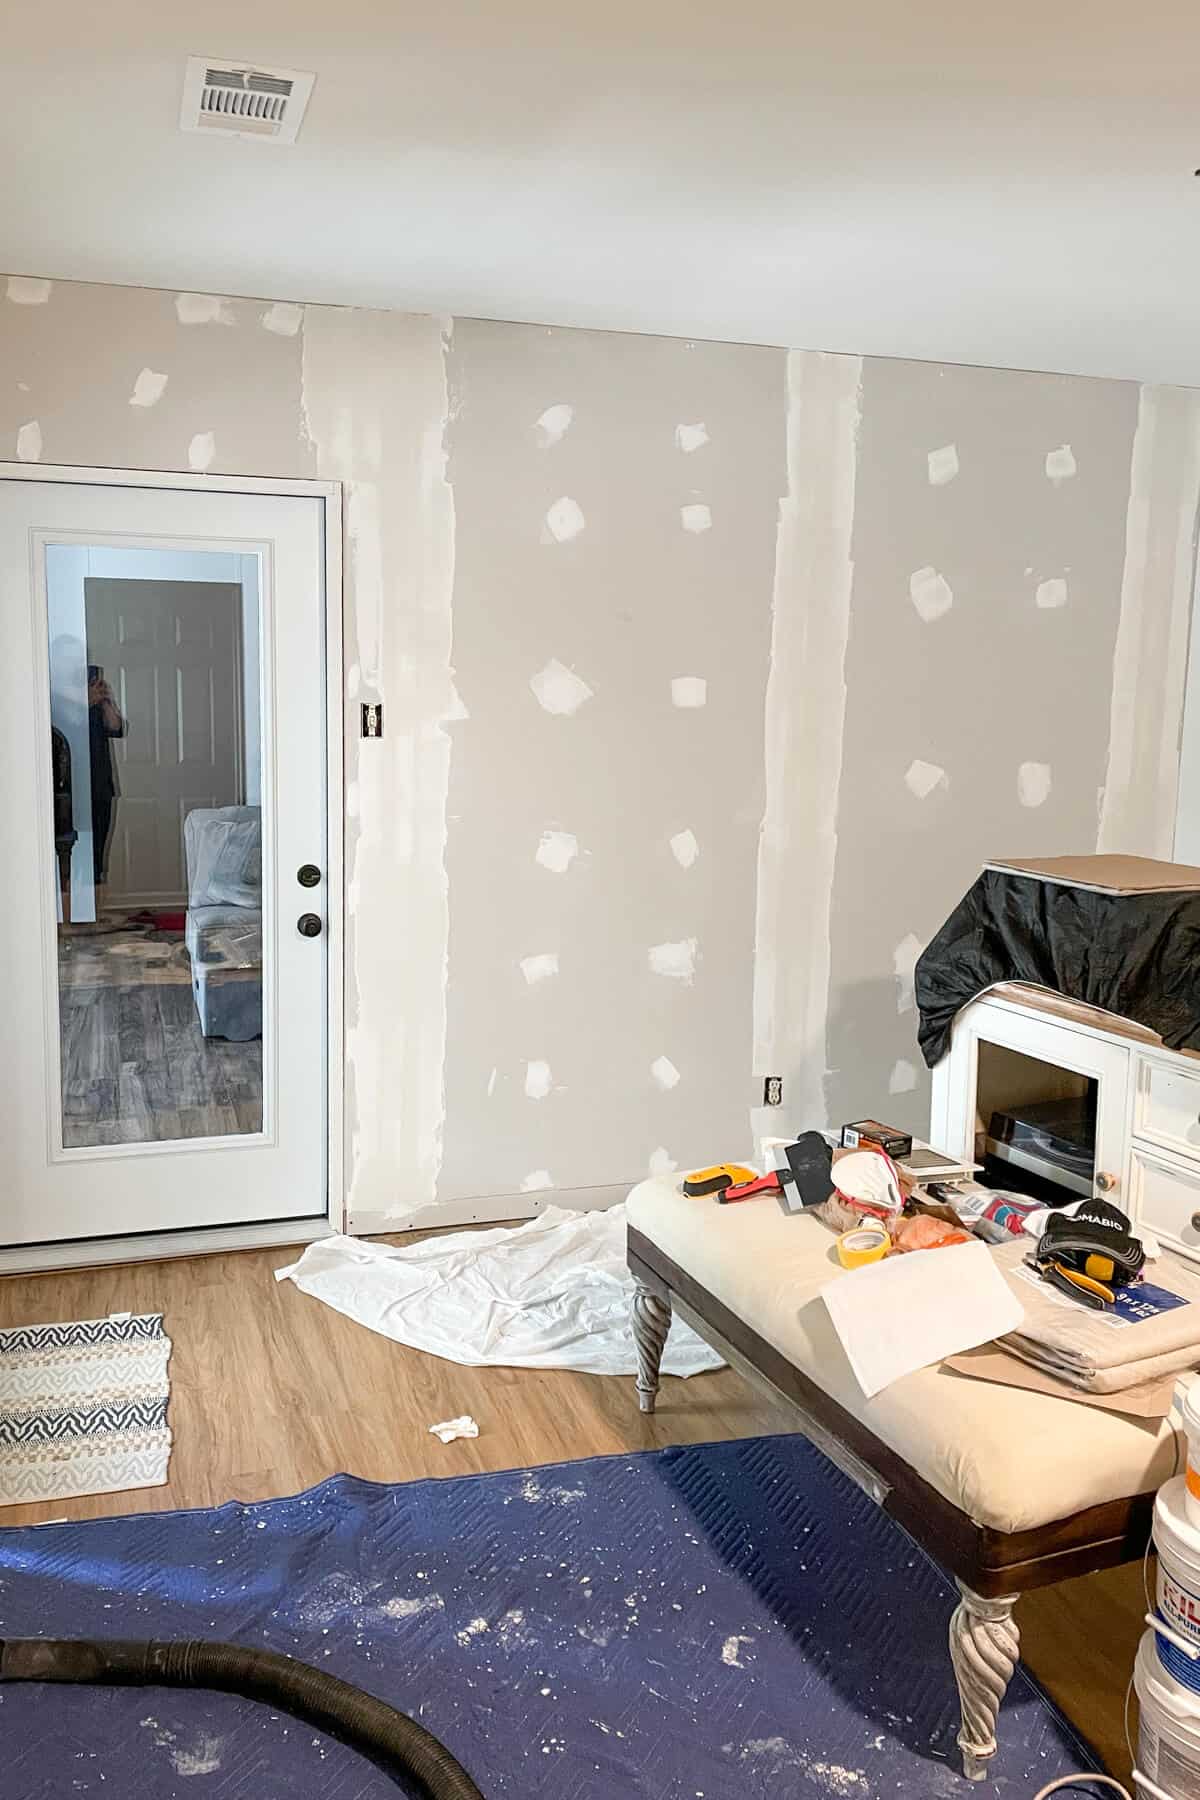
Last week, we left off with installing the new 1/4 inch drywall and mudding the seams and screw holes.
Before you can put on the application of limewash, you need to use a quality primer.
I chose Romabio MicroGrip Primer. It comes concentrate so you have to dilute it with 25% clean water which is a simple process. Just mix thoroughly until all the water is fully incorporated.
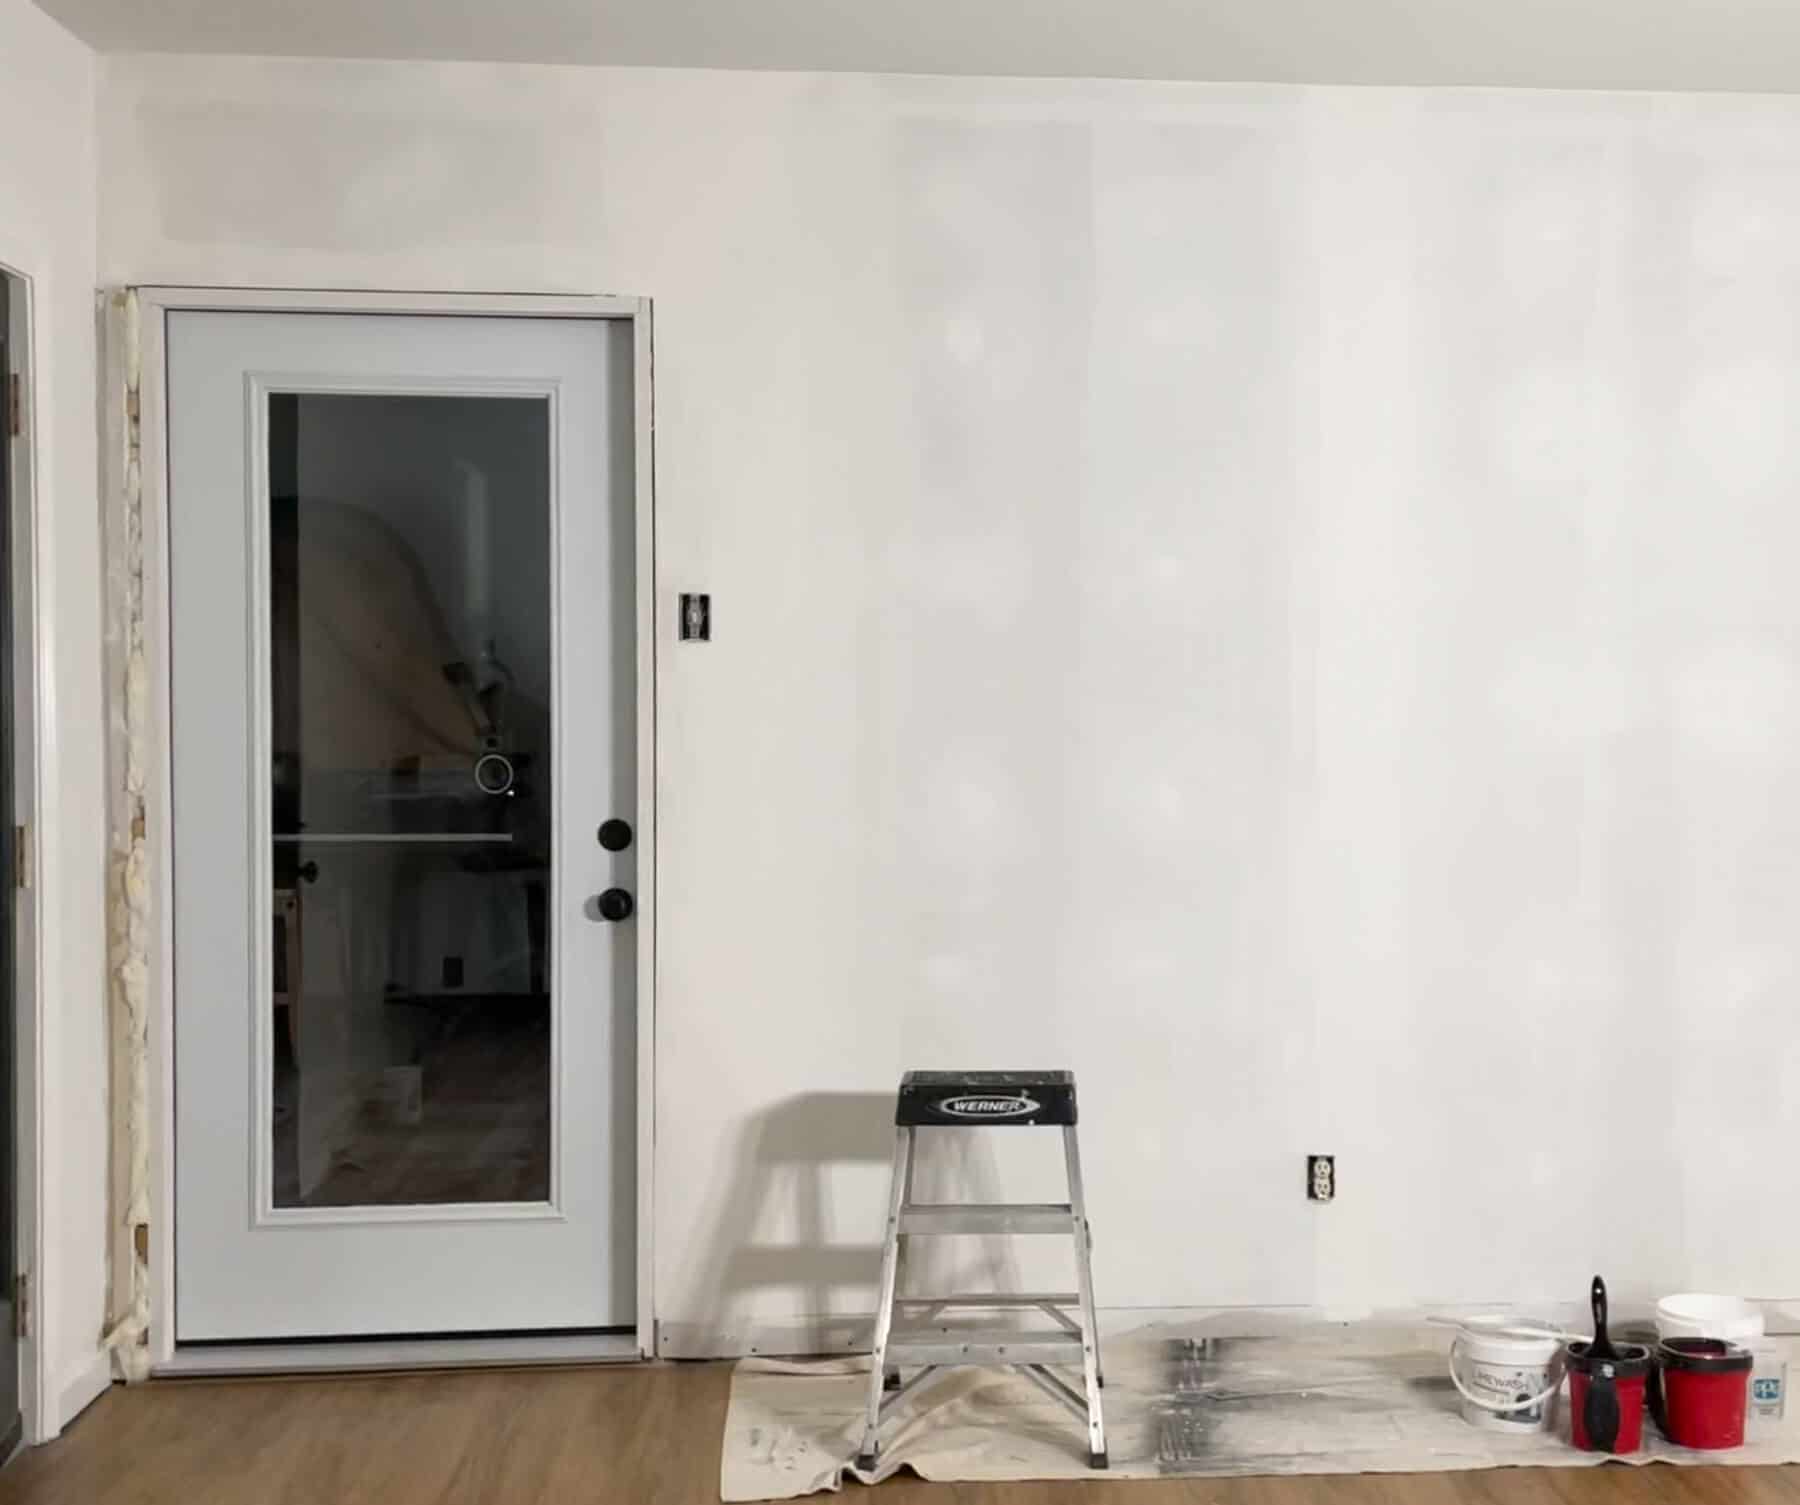
The primer goes on like regular paint, and the best part is that it doesn’t have the smell that typical latex paint has.
Some of those paints have quite the strong odor!
We applied one coat and then allowed it to dry overnight.
The next morning we were ready to start lime washing.
Now here’s a complete blogger fail.
Or rather a phone fail.
I set my phone on the tripod to record the process to show you the lime washing in action, but for some reason, my phone rejected the recording.
Which means I missed the in progress lime washing shots.
So all I have to show is the limewash drying.
But I still have you covered!
How do you apply limewash to a wall?

First you will need to dilute the limewash with 40-50 percent water. Mix thoroughly until all the limewash is completely incorporated.
We started with a little less water to see if that worked for us – which it did. And a little goes a long way, so start with a small batch of limewash to begin.
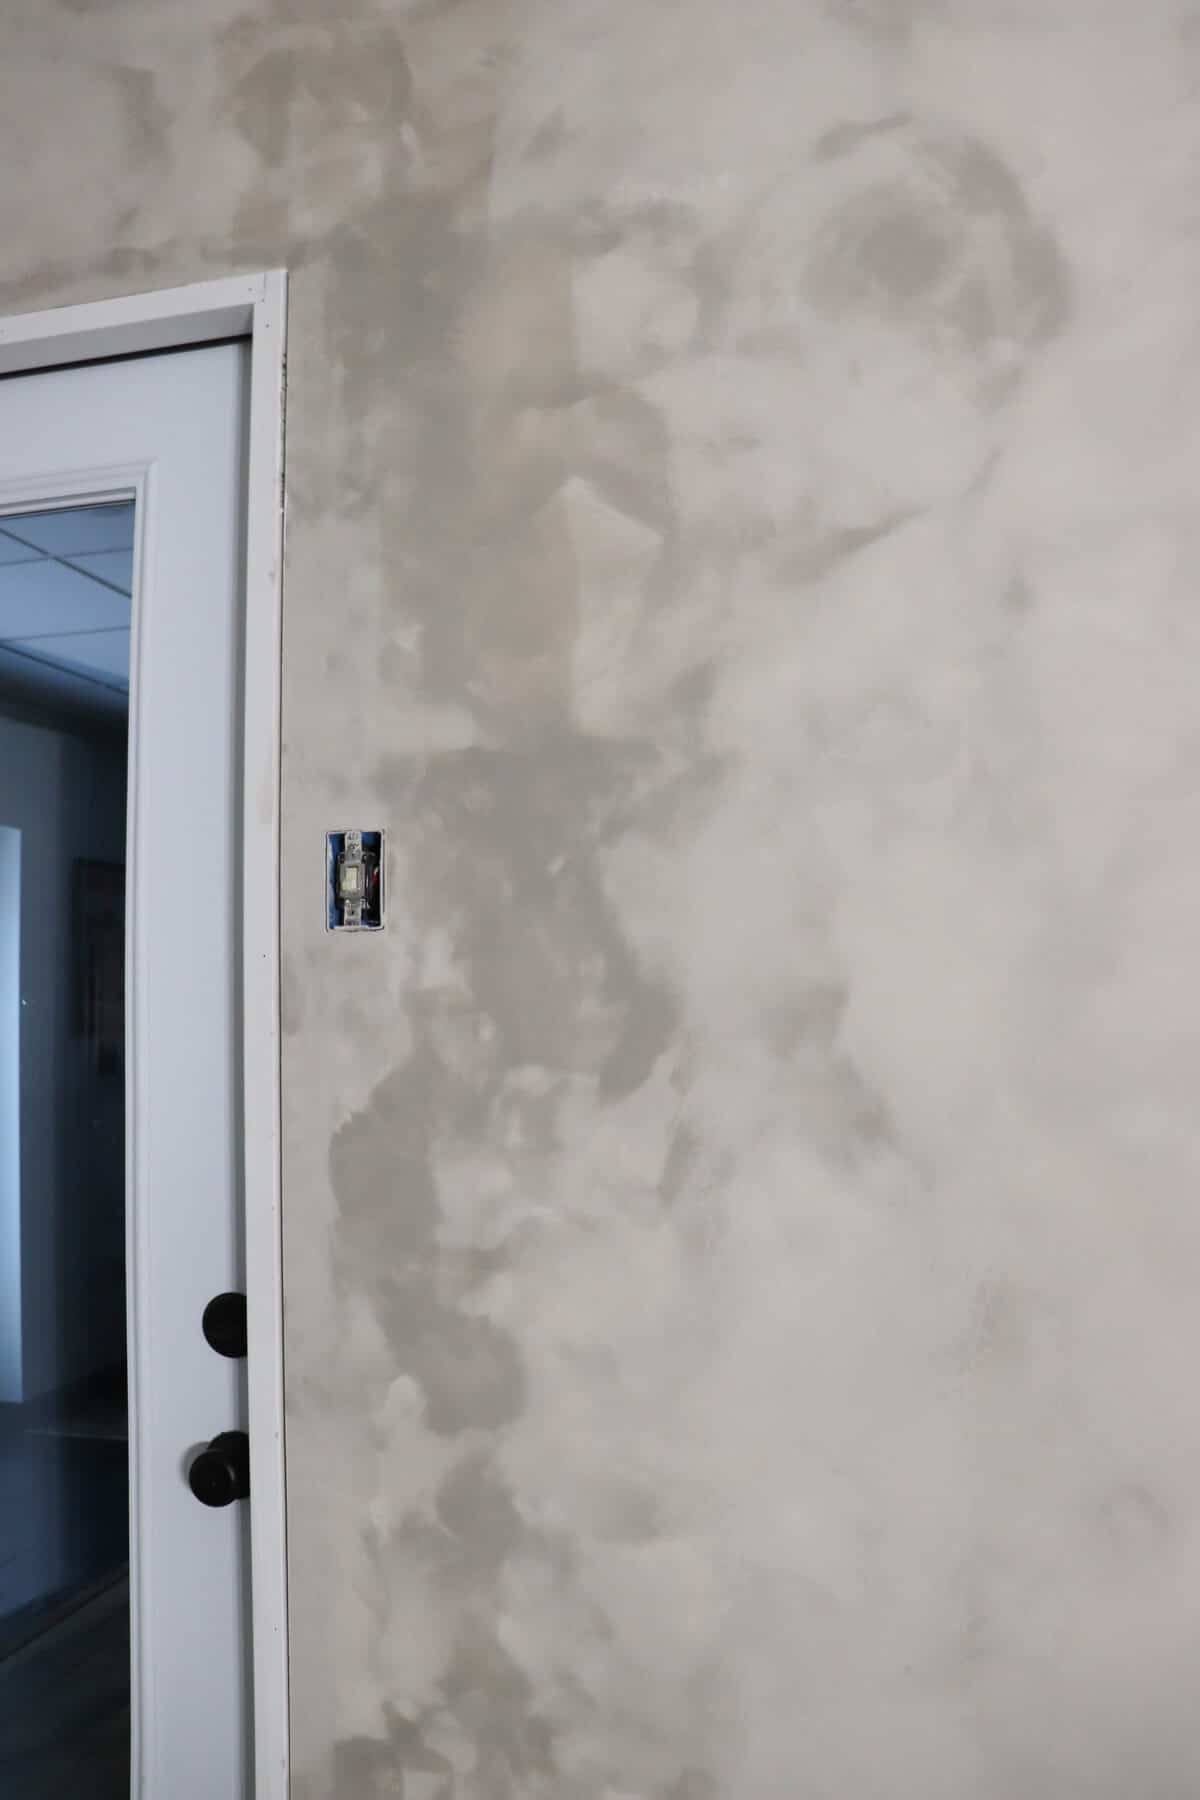
For our base coat, we used Classico Limewash in Nube Gray on our walls. You can see the depth and movement happening, right?
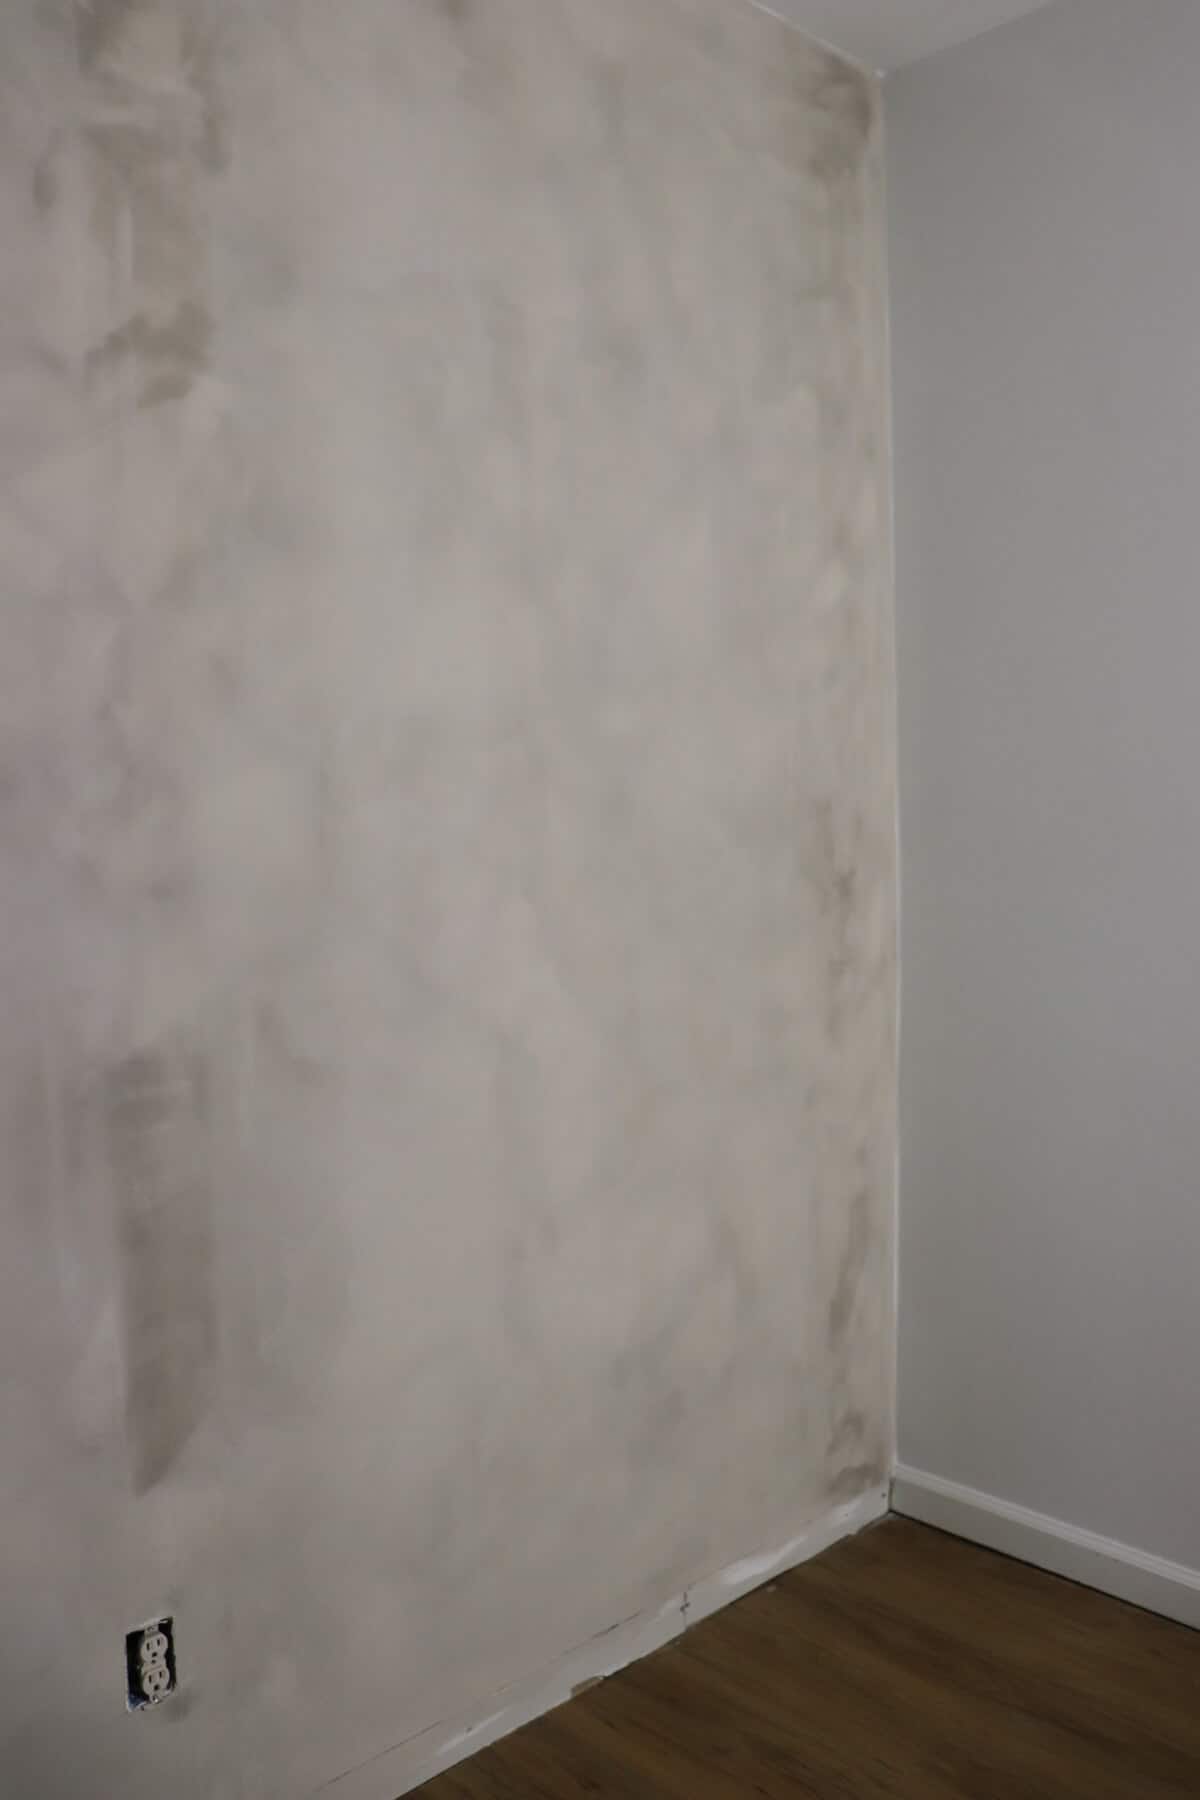
Limewash paint is different than latex paint in many different ways.
It’s workable meaning there is subtle movement to the paint while you apply it.
If you are wanting that to show, then apply using a brush and cross hatching technique, which means making small x’s in your brush strokes on the wall overlapping the painted finish slightly.
Also, it does the opposite of typical paint in that it is darker when wet and dries lighter.
For the initial application, work in thin coats. Remember this is drywall with a paper layer. If you get the wall too wet, you could ruin the integrity of the drywall.
At first we tried a masonry brush, but quickly found that it was too big and too difficult to control with this application. So we switched to smaller, natural bristle brushes and that worked perfectly.
What creates this look is the natural color variation lime wash has. You could create a solid finish using limewash, but I think you would be better off using one of their interior paints for that look.

Once the wall was covered, we allowed the limewash finish to completely dry overnight. At this point, I found limewashing an interior accent wall is super simple! It gives the feel of a subtle texture without there being one.
Now if you like this look, and wouldn’t want it changed or darkened, then you can ‘seal’ this finish by applying Romabio Mineral Shield over top of this. It has a flat finish and will stop the limewash from chalking.
However, I wanted a dramatic accent wall, and since lime paint is naturally a white base, you don’t have many options. So while you can get the limewash in different colors, you are limited to those with a lighter tone.
Which is where the lime glaze comes in.
I wanted to use my custom color, Iron City, for this room, which is a deep charcoal.
The lime glaze isn’t commercially sold, so we are sort of being guinea pigs for Romabio, but you can order this directly from them.
The lime glaze is a 1:1 dilution rate, meaning that you use equal parts of lime glaze and water to get the correct ratio.
One great tip to use is to test your products before applying them.
We created a test panel from the leftover drywall to find which application technique we liked best. It’s a great way to get some practice in before you start on the wall.
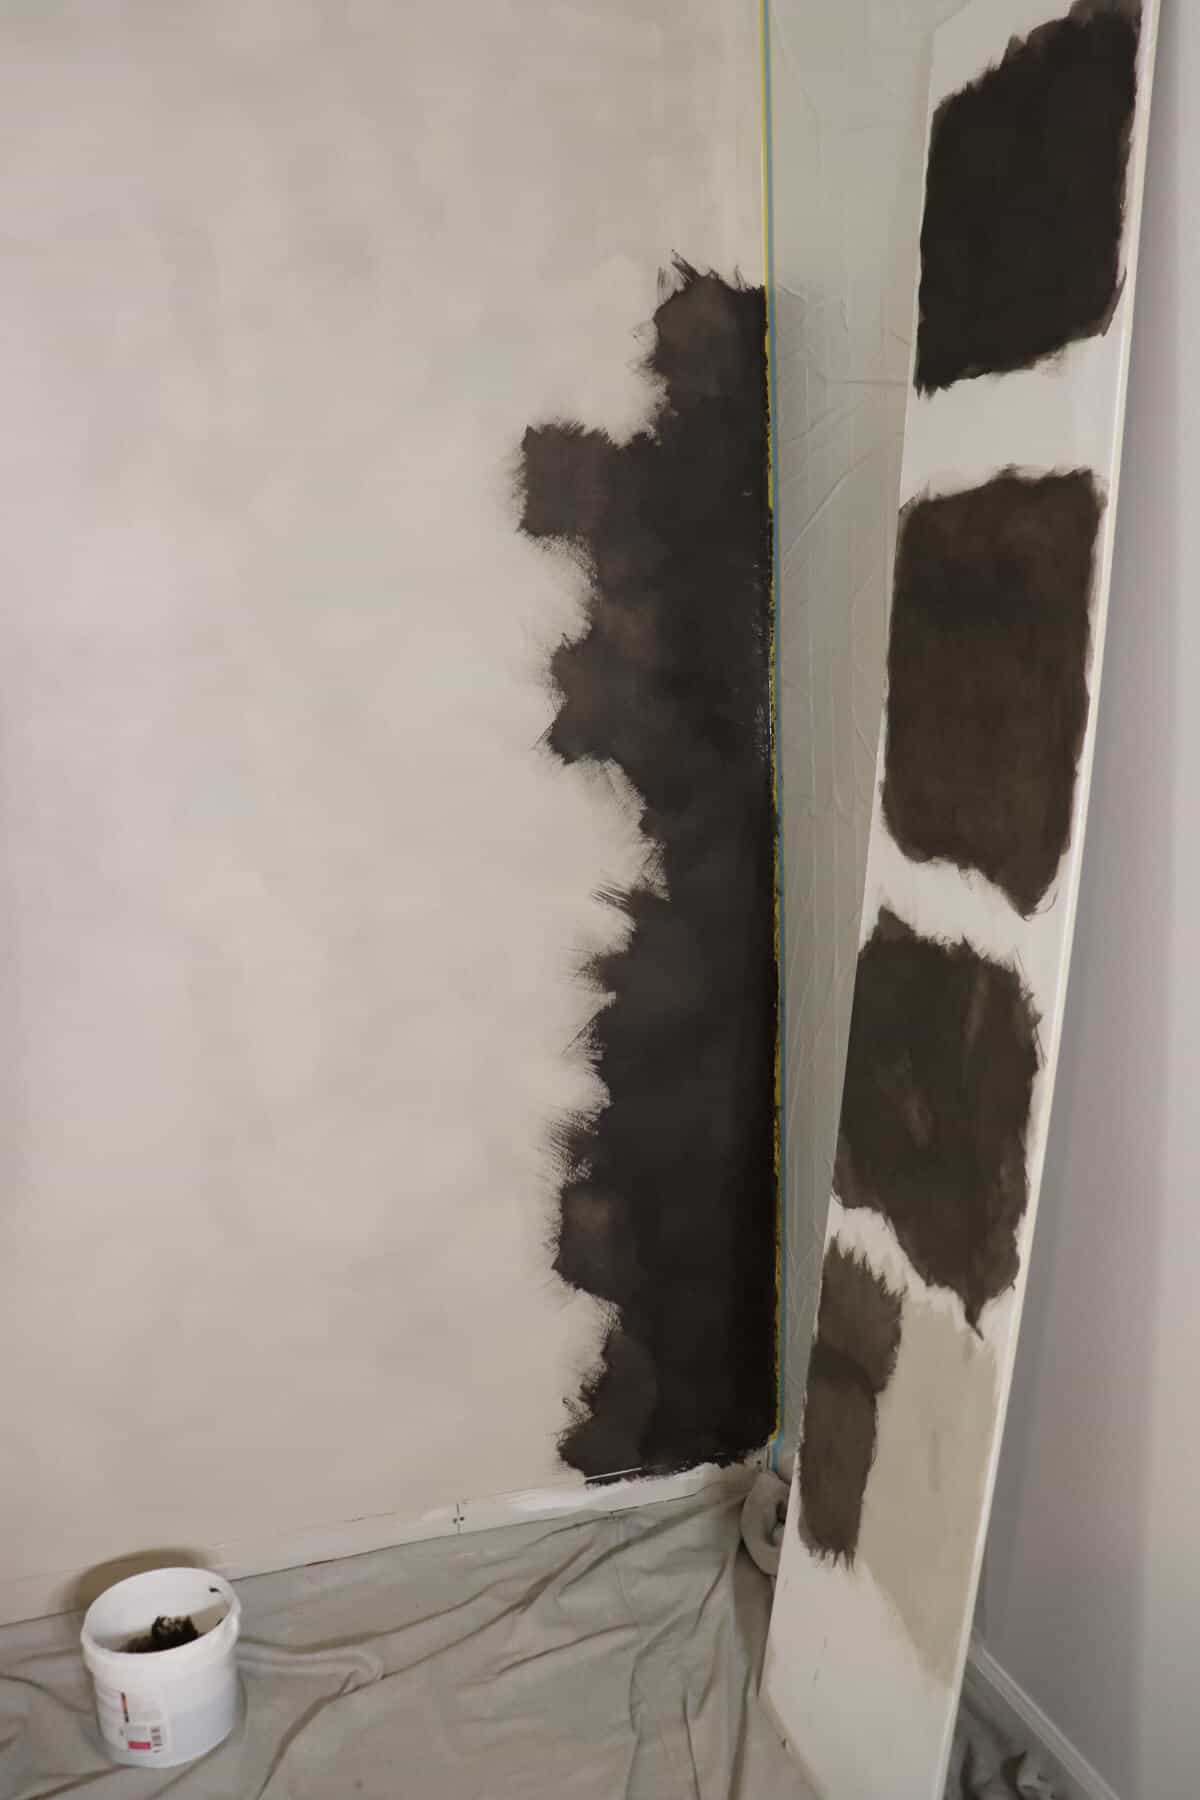
The x’s take the win and we began the application once Trent had masked off the wall and ceiling.
The lime glaze is very runny and we were worried it may fling on the walls.
Or better said – that my clumsy self would fling it where it shouldn’t be.

Again, a little goes a long way!
So start with a small mixture.
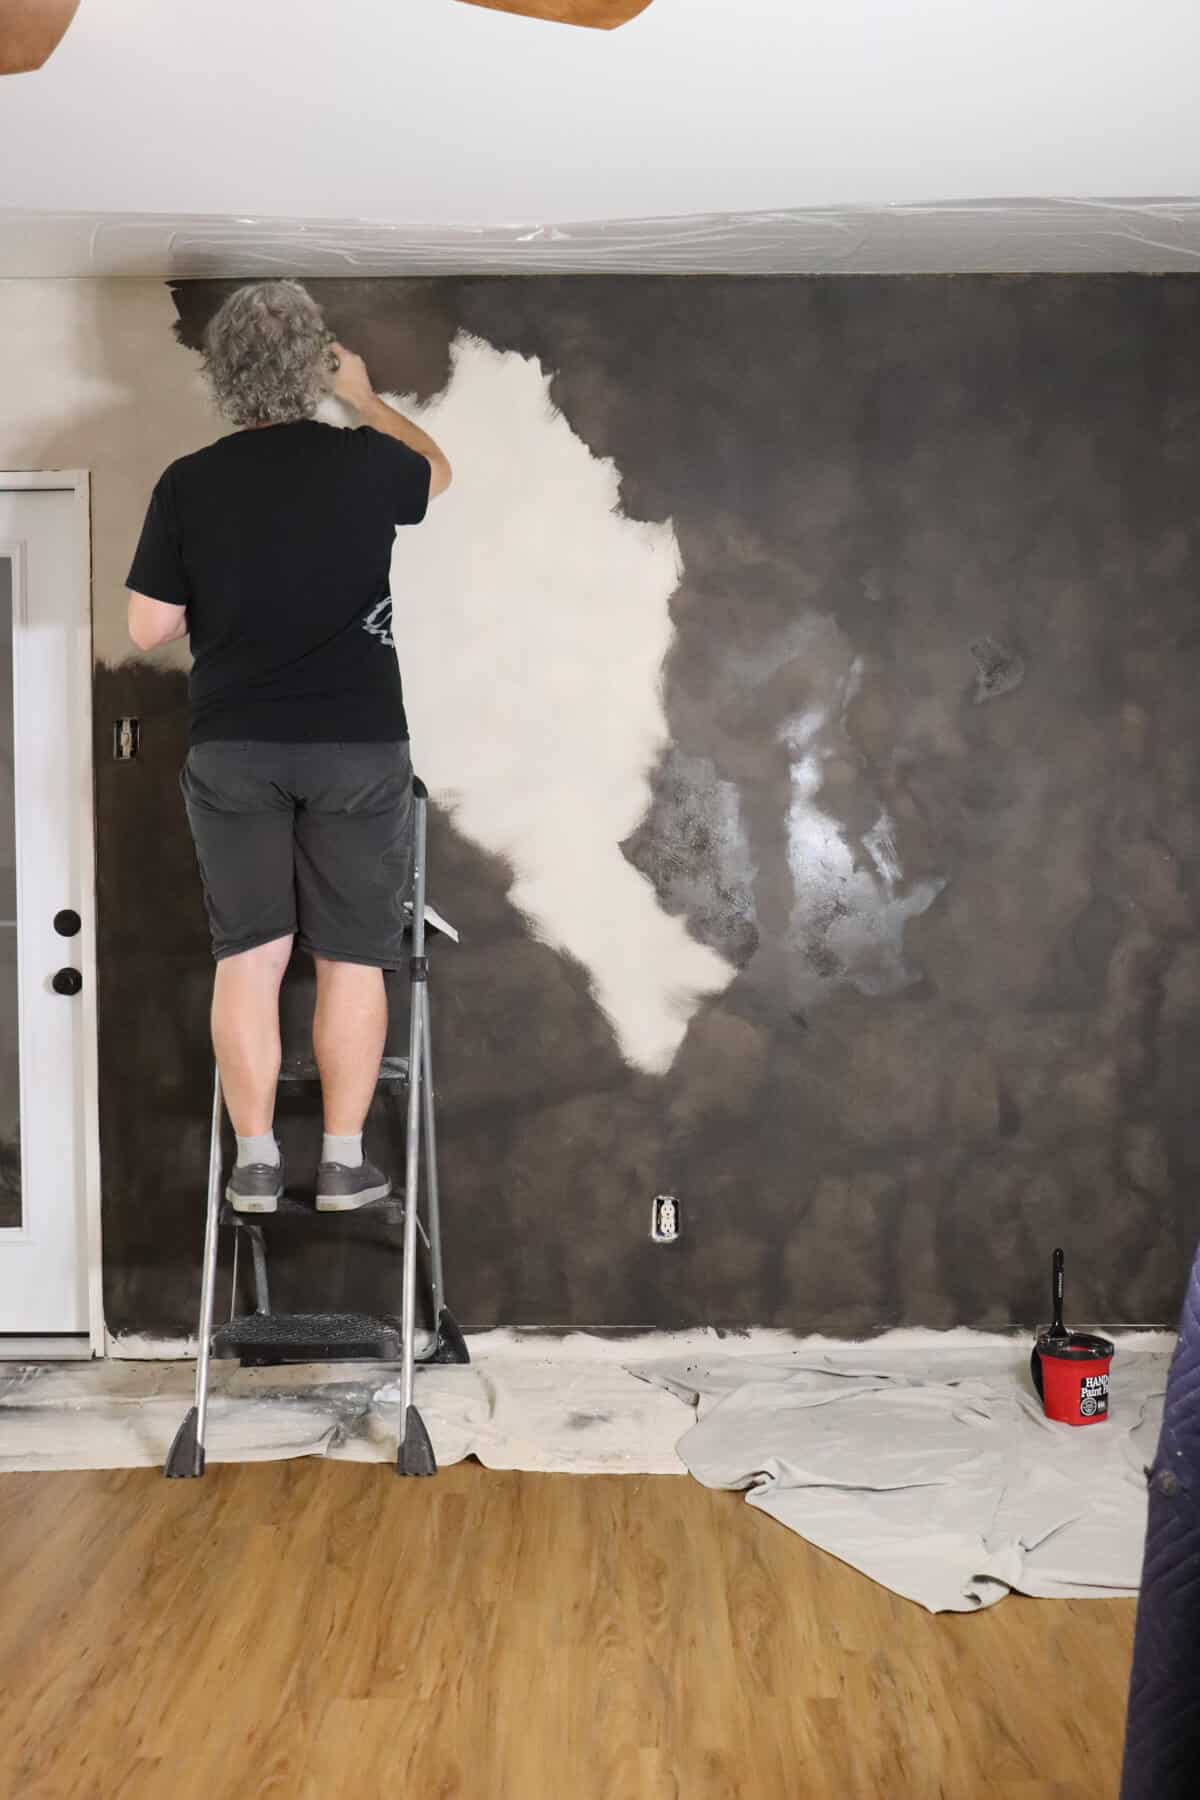
This whole wall took us just about 20-30 minutes to complete.
You allow it to dry overnight to see if you need additional coats.

Which we did.
This sort of looked like a turtle shell to us, so we came back with a second coat and allowed that to dry overnight.
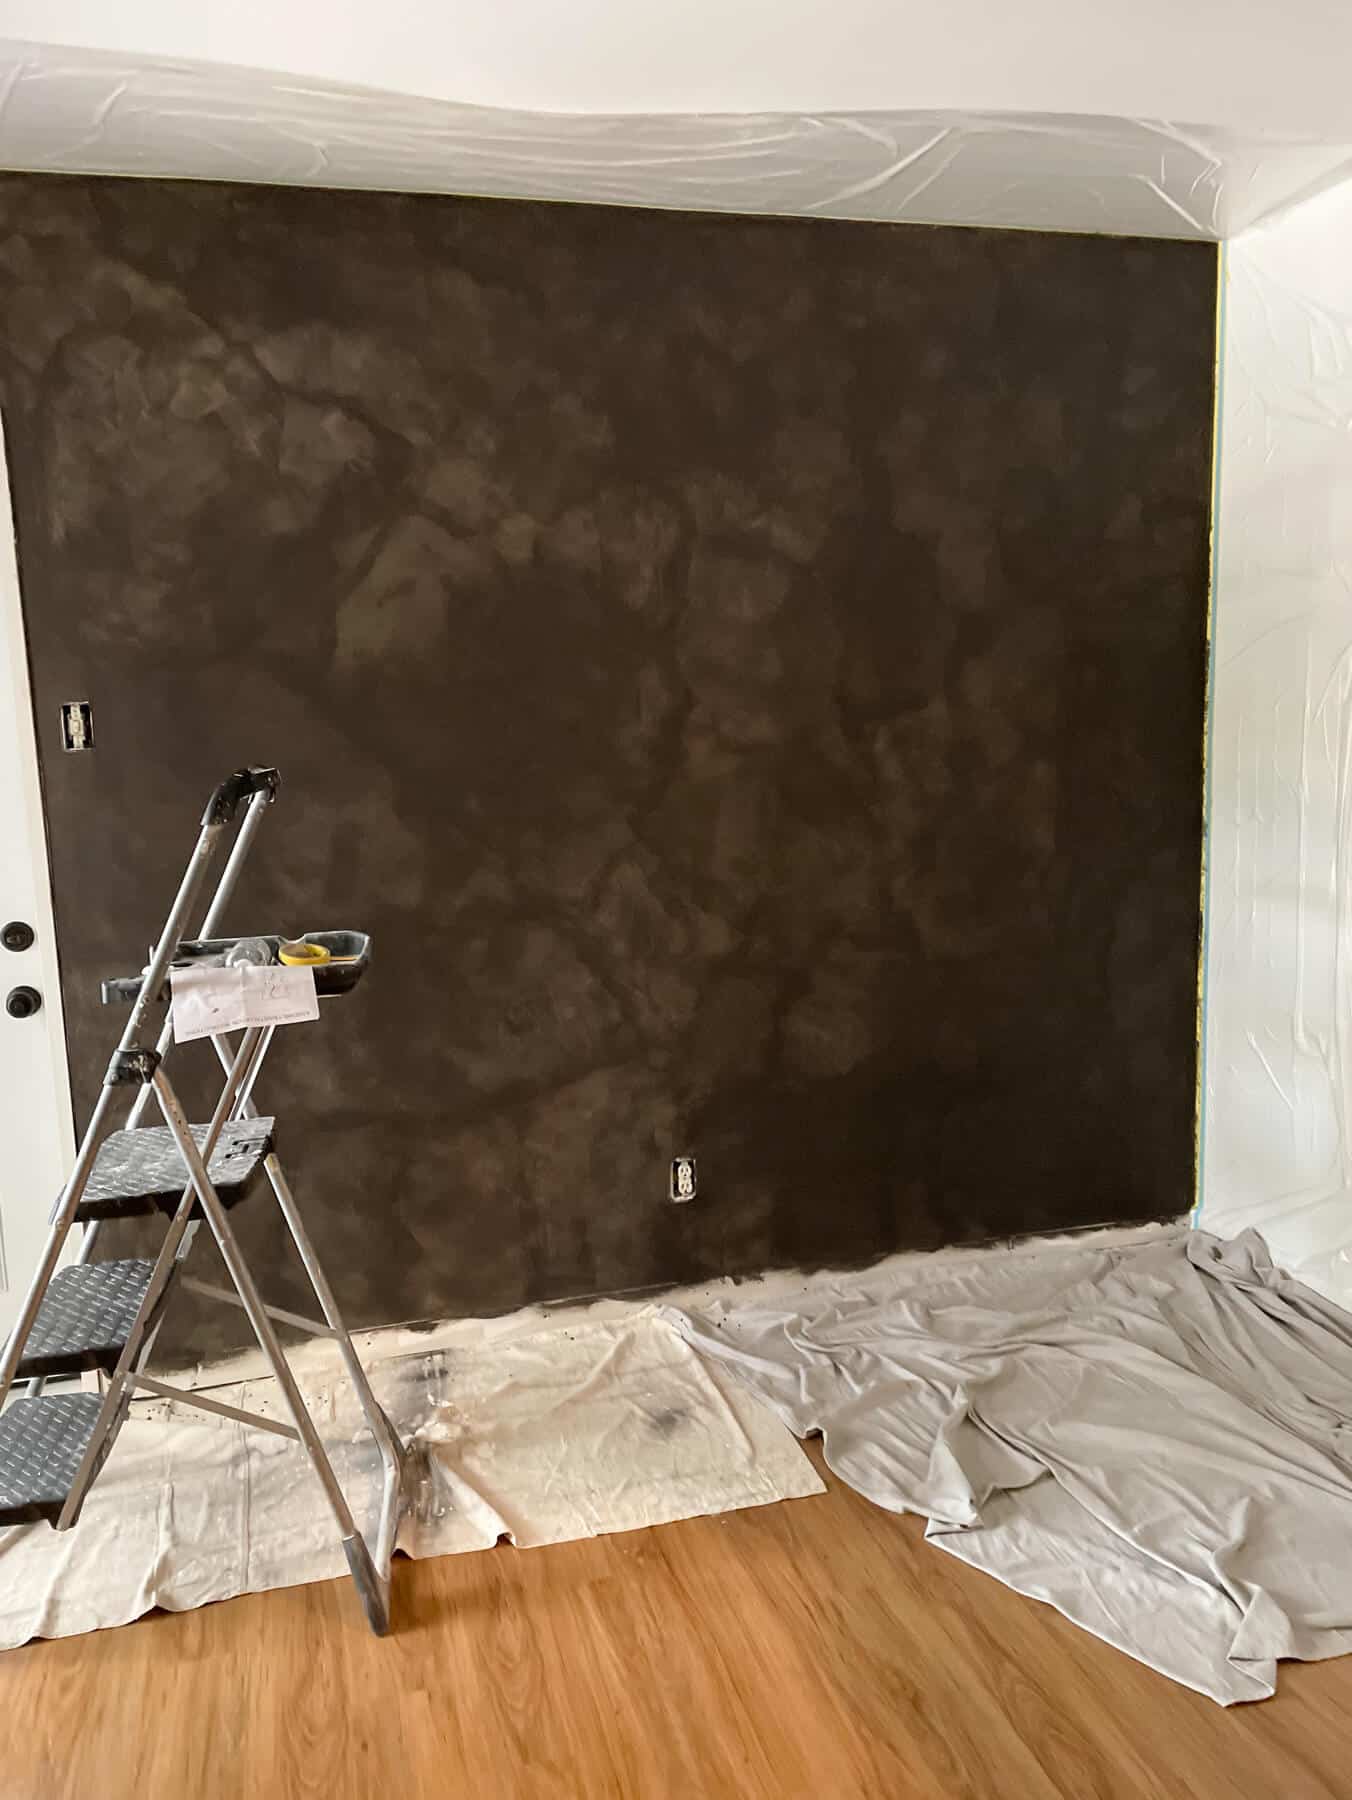
After 24 hours, we checked it out and LOVED how it looked.
Much more of a natural look we were going for.
Until….
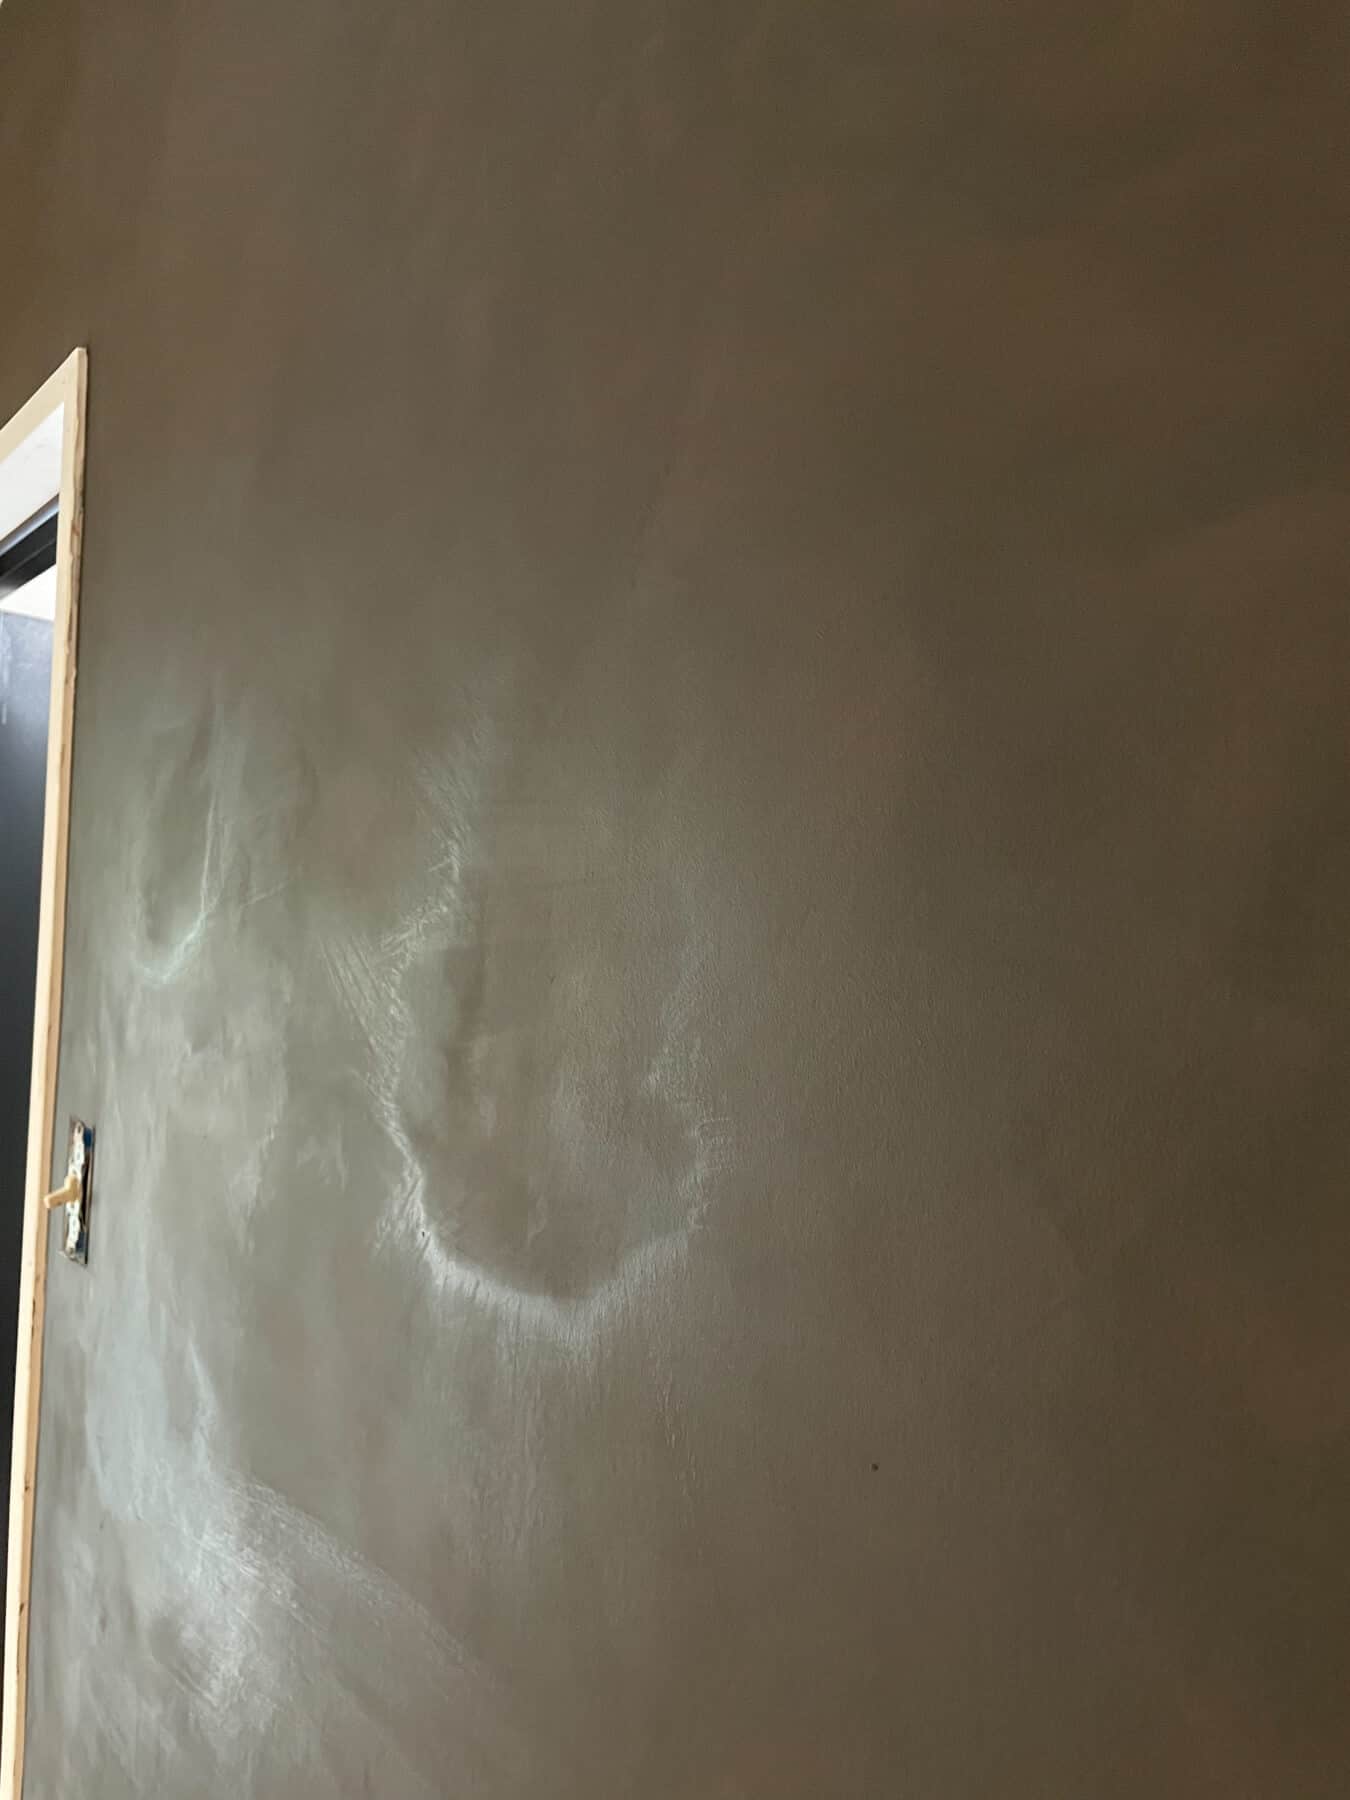
We noticed this weird flashing happening in a few spots.
I reached out to Romabio and I think it came down to user error.
So I opted for one last, even coat.
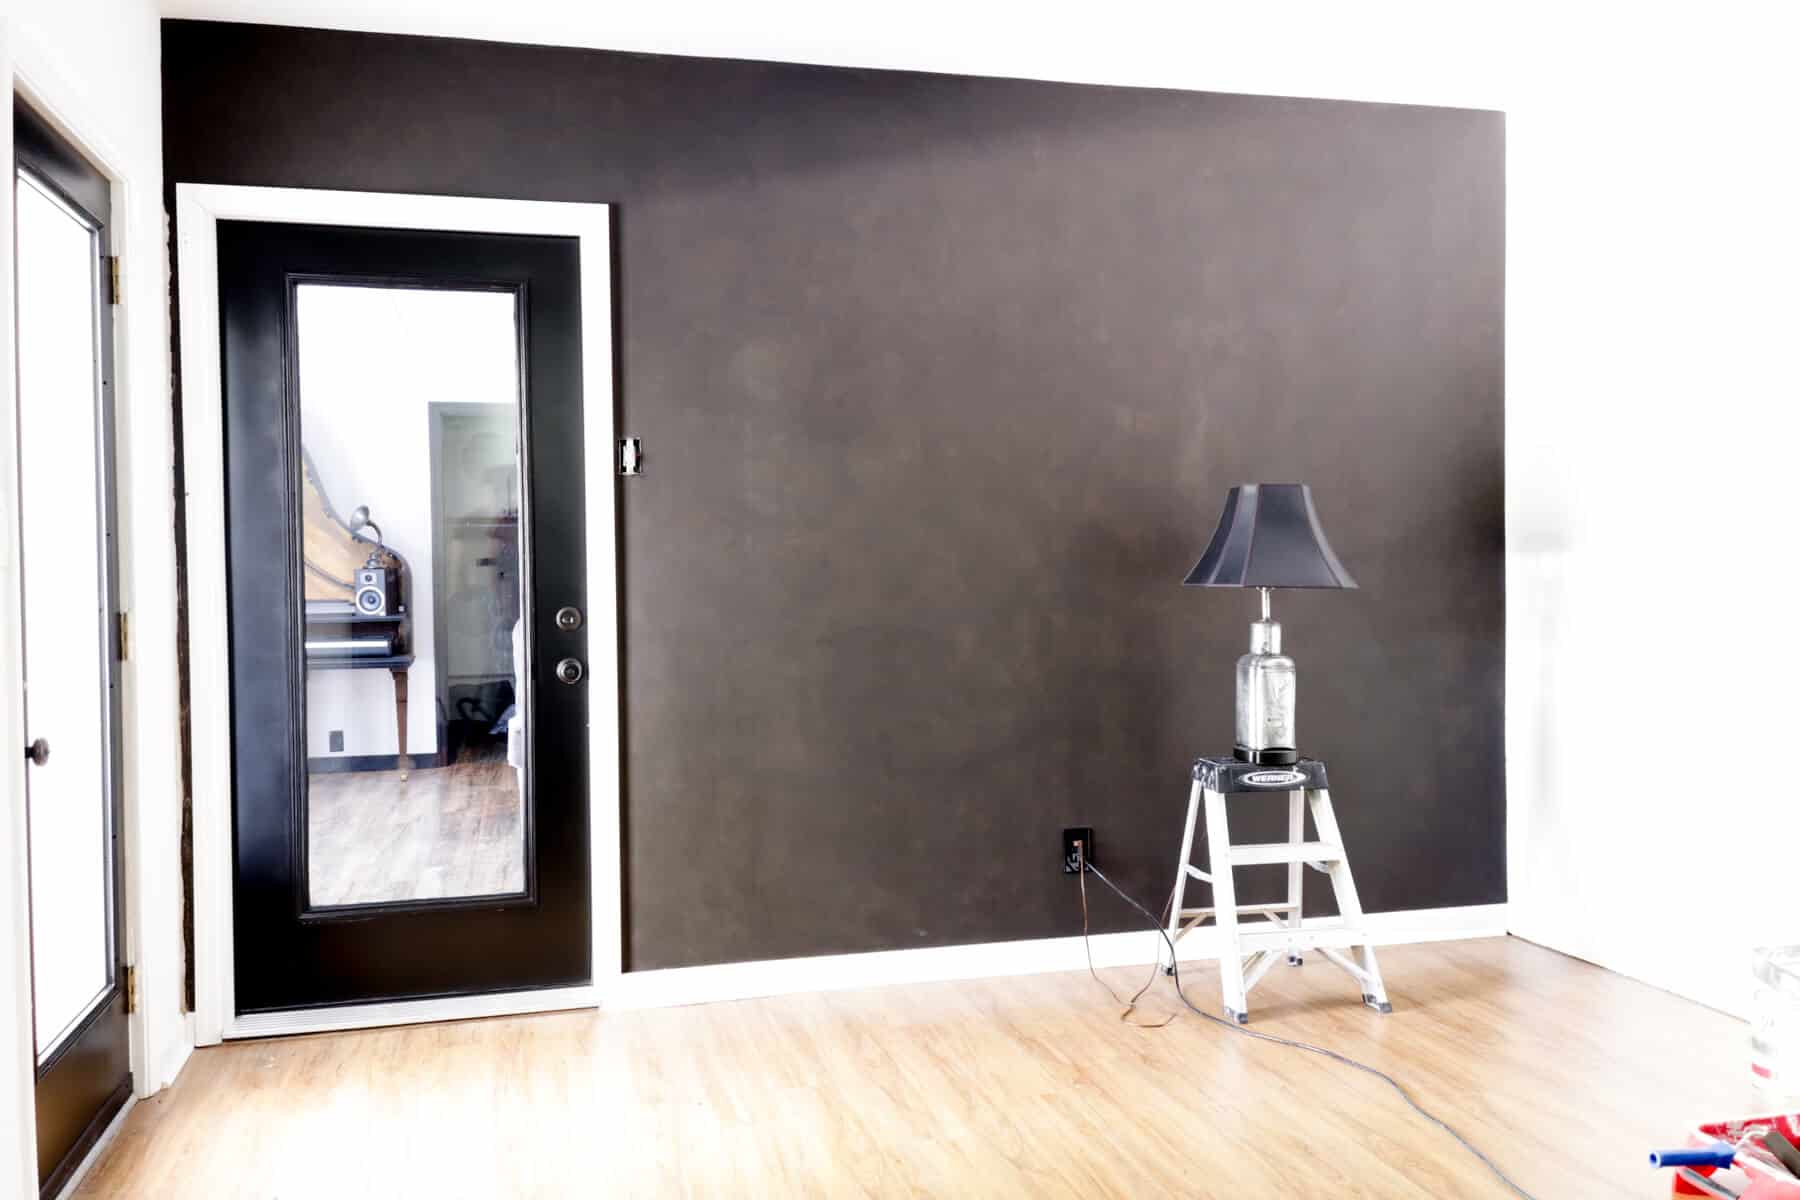
Perfection, right?
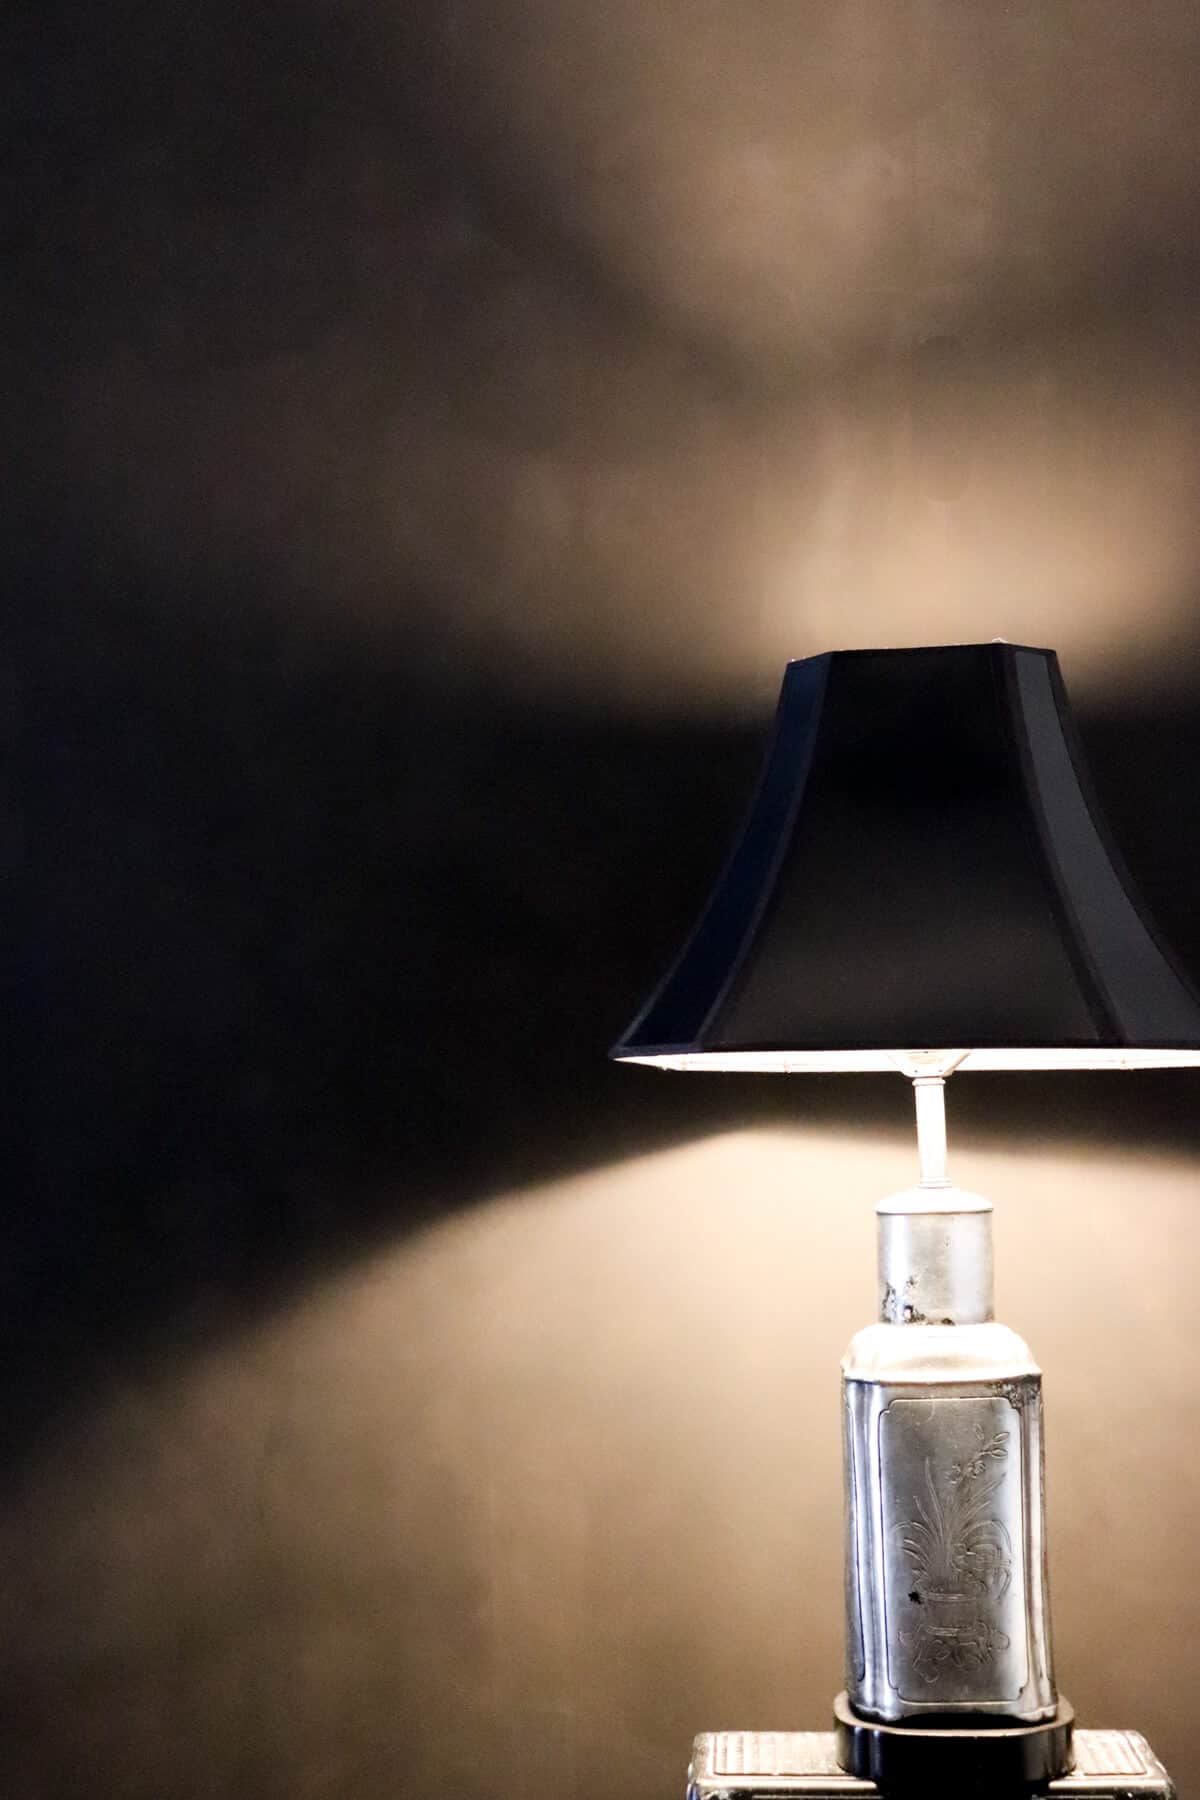
The wall looks like there’s movement to it.
Now for some reason, the coloring in the photos reads with a brownish undertone, but in real life, it definitely has a more charcoal color.

Oh yeah!
I am totally loving it.
And don’t be thrown off by the word glaze. Some may think that means sheen. This is a completely flat finish, but still stunning!
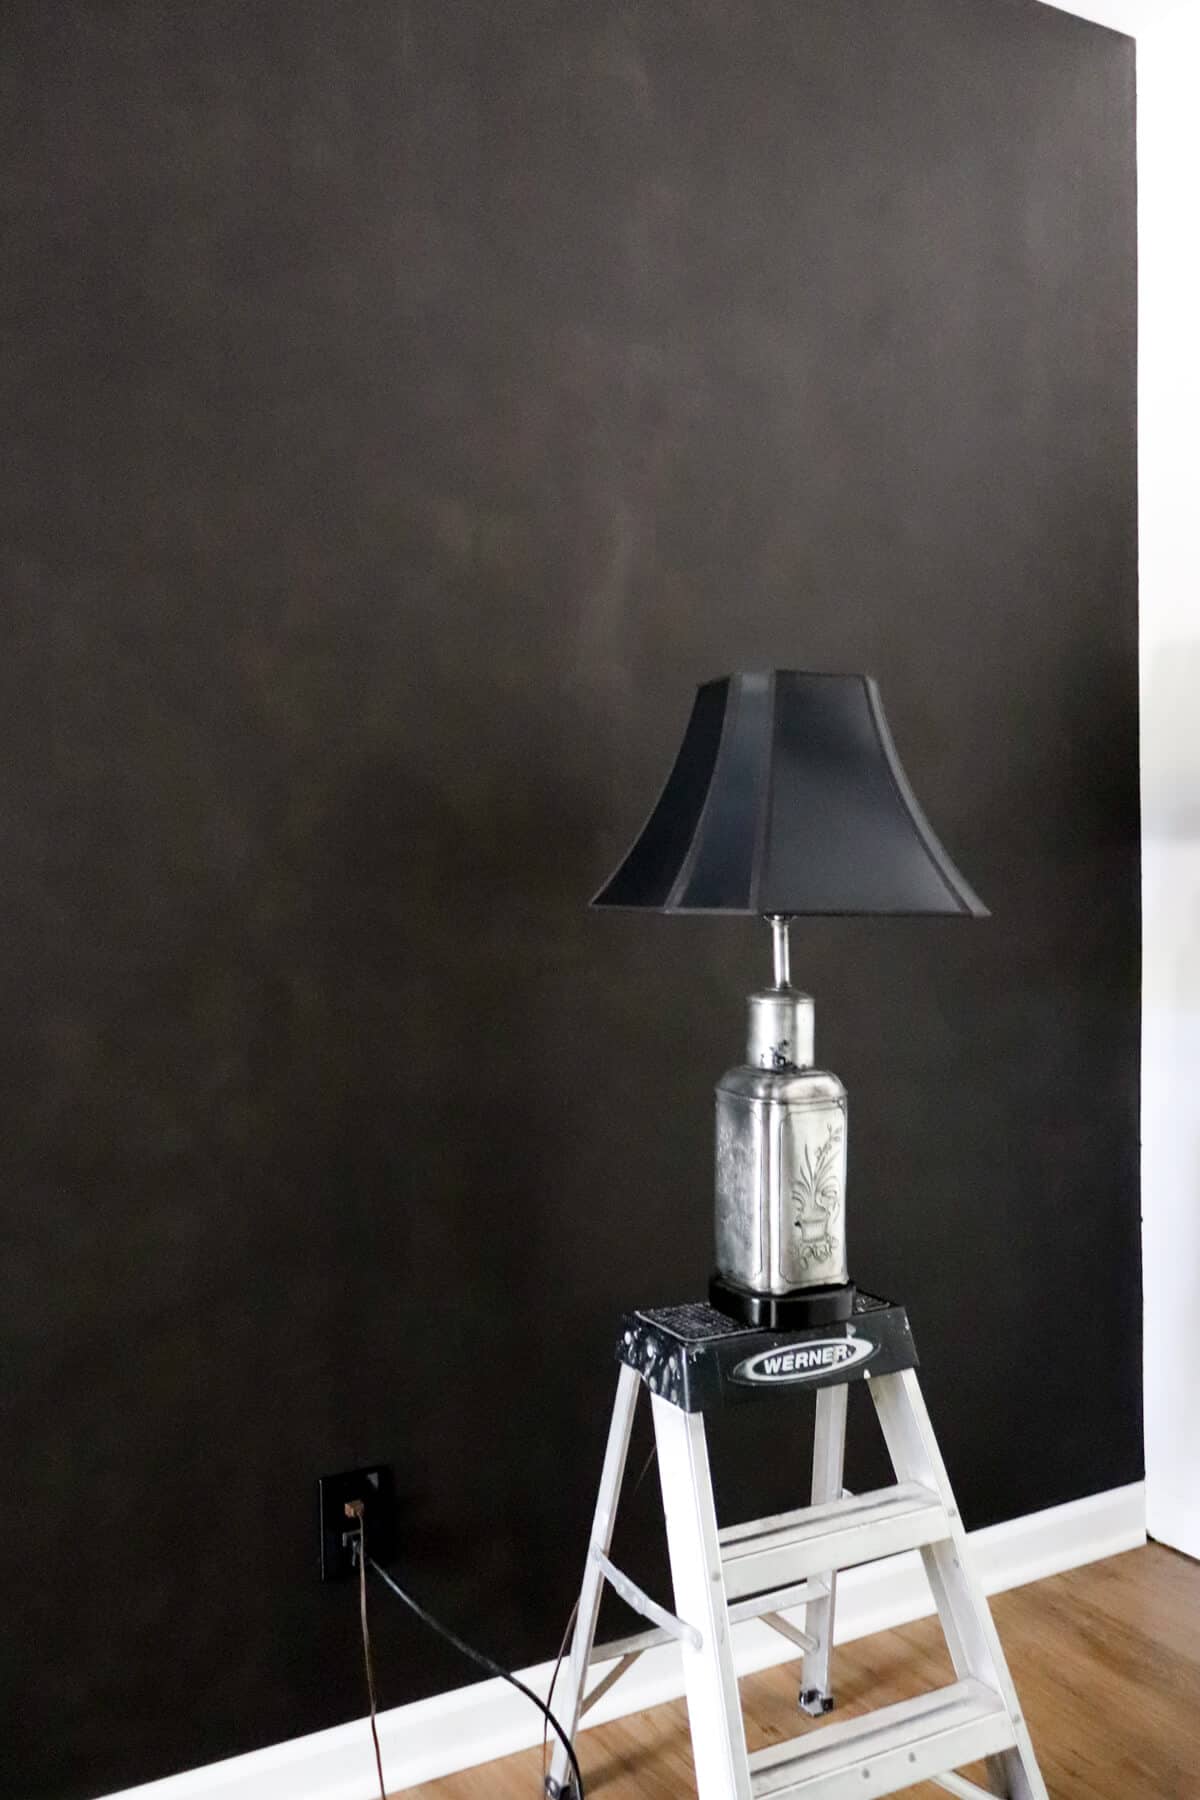
Don’t mind the step stool. It’s just a prop until we pick up the piece of furniture that will be going in it’s place.
So I hope this DIY project inspired you to rethink your accent wall. You may have to play around with the number of coats of limewash you apply.
But these helpful tips should get you started.
Ceiling Fan Install
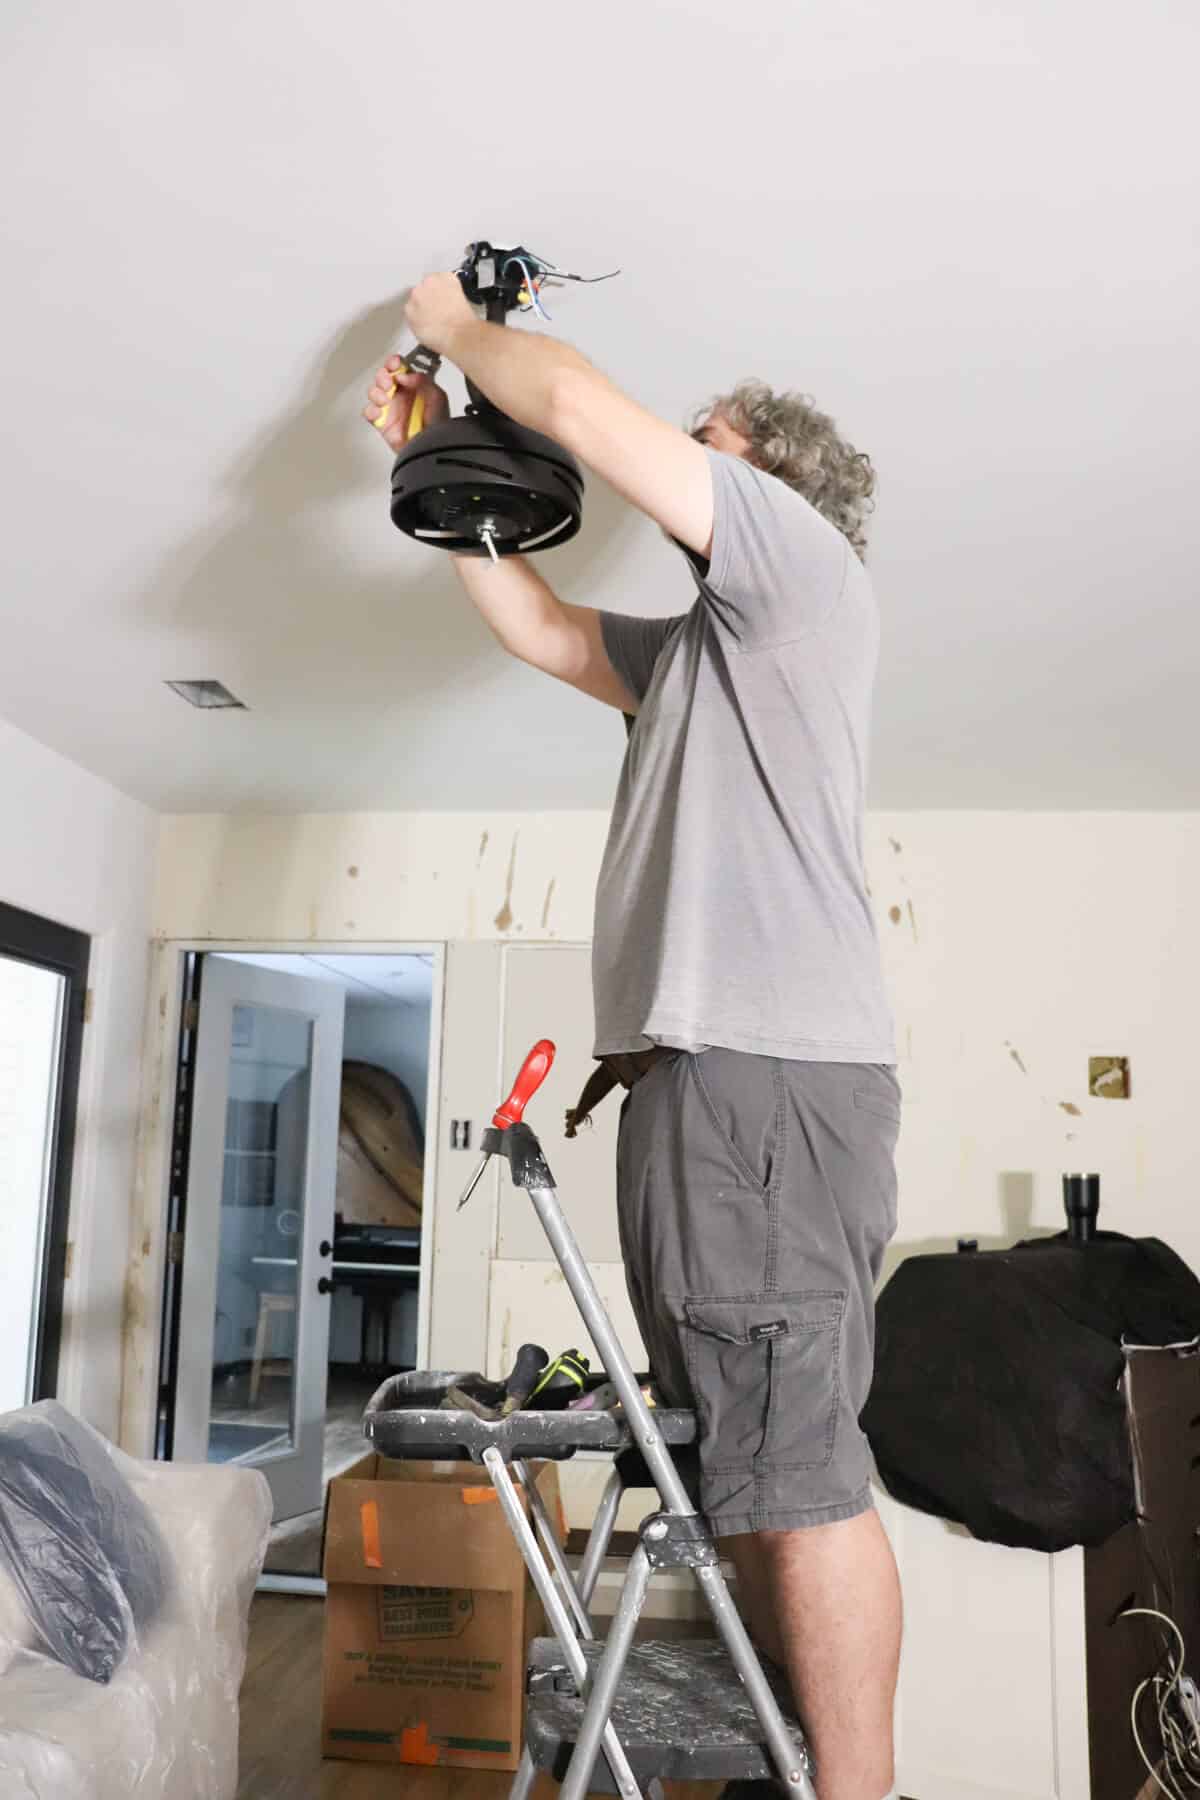
One thing I have forgotten to show you all is our beautiful ceiling fan.
Early on, we knew we needed to install this since the basement is such a dark room.
We were working off one of these lights.
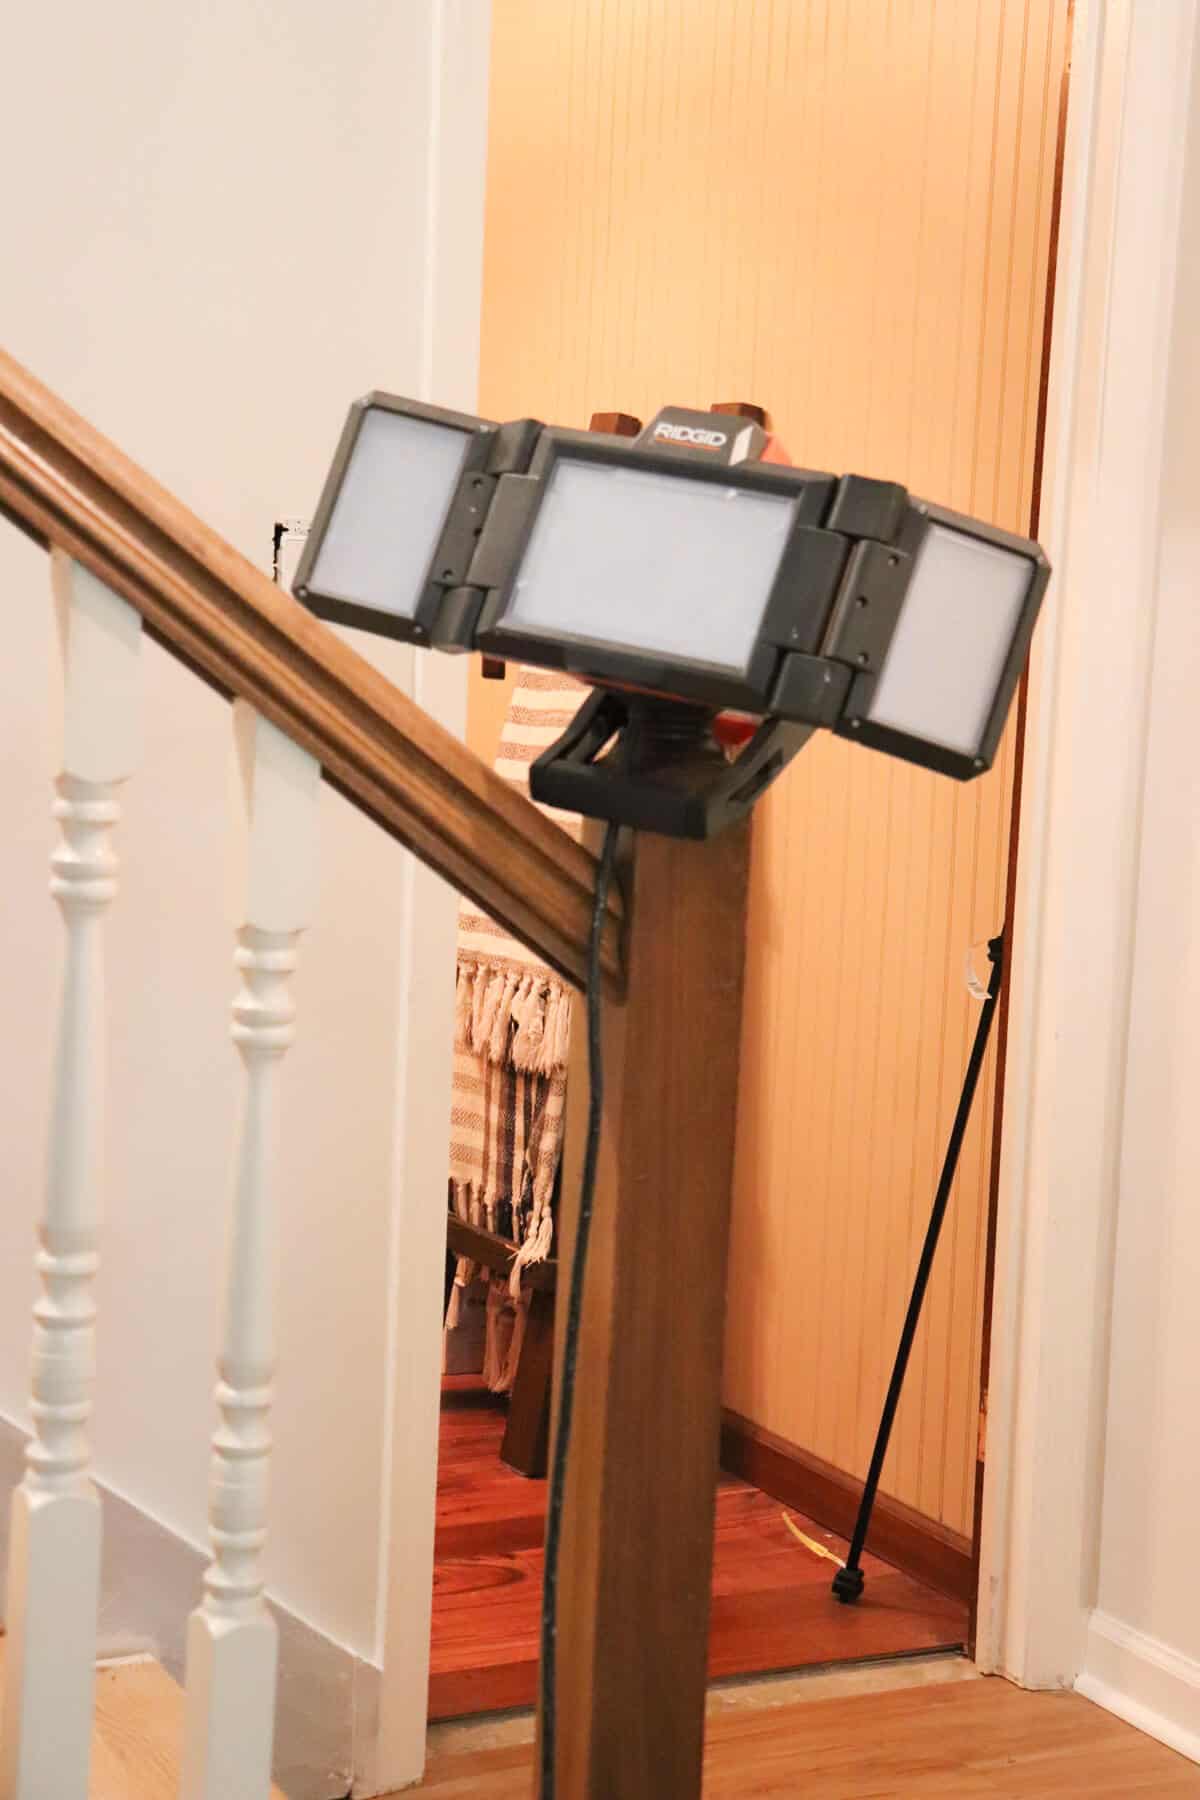
It’s awesome and works, but it does create a lot of shadows and we needed to have additional lighting for all these projects.
So after we painted the ceiling, Trent started the install and I just LOVE how the ceiling fan looks.
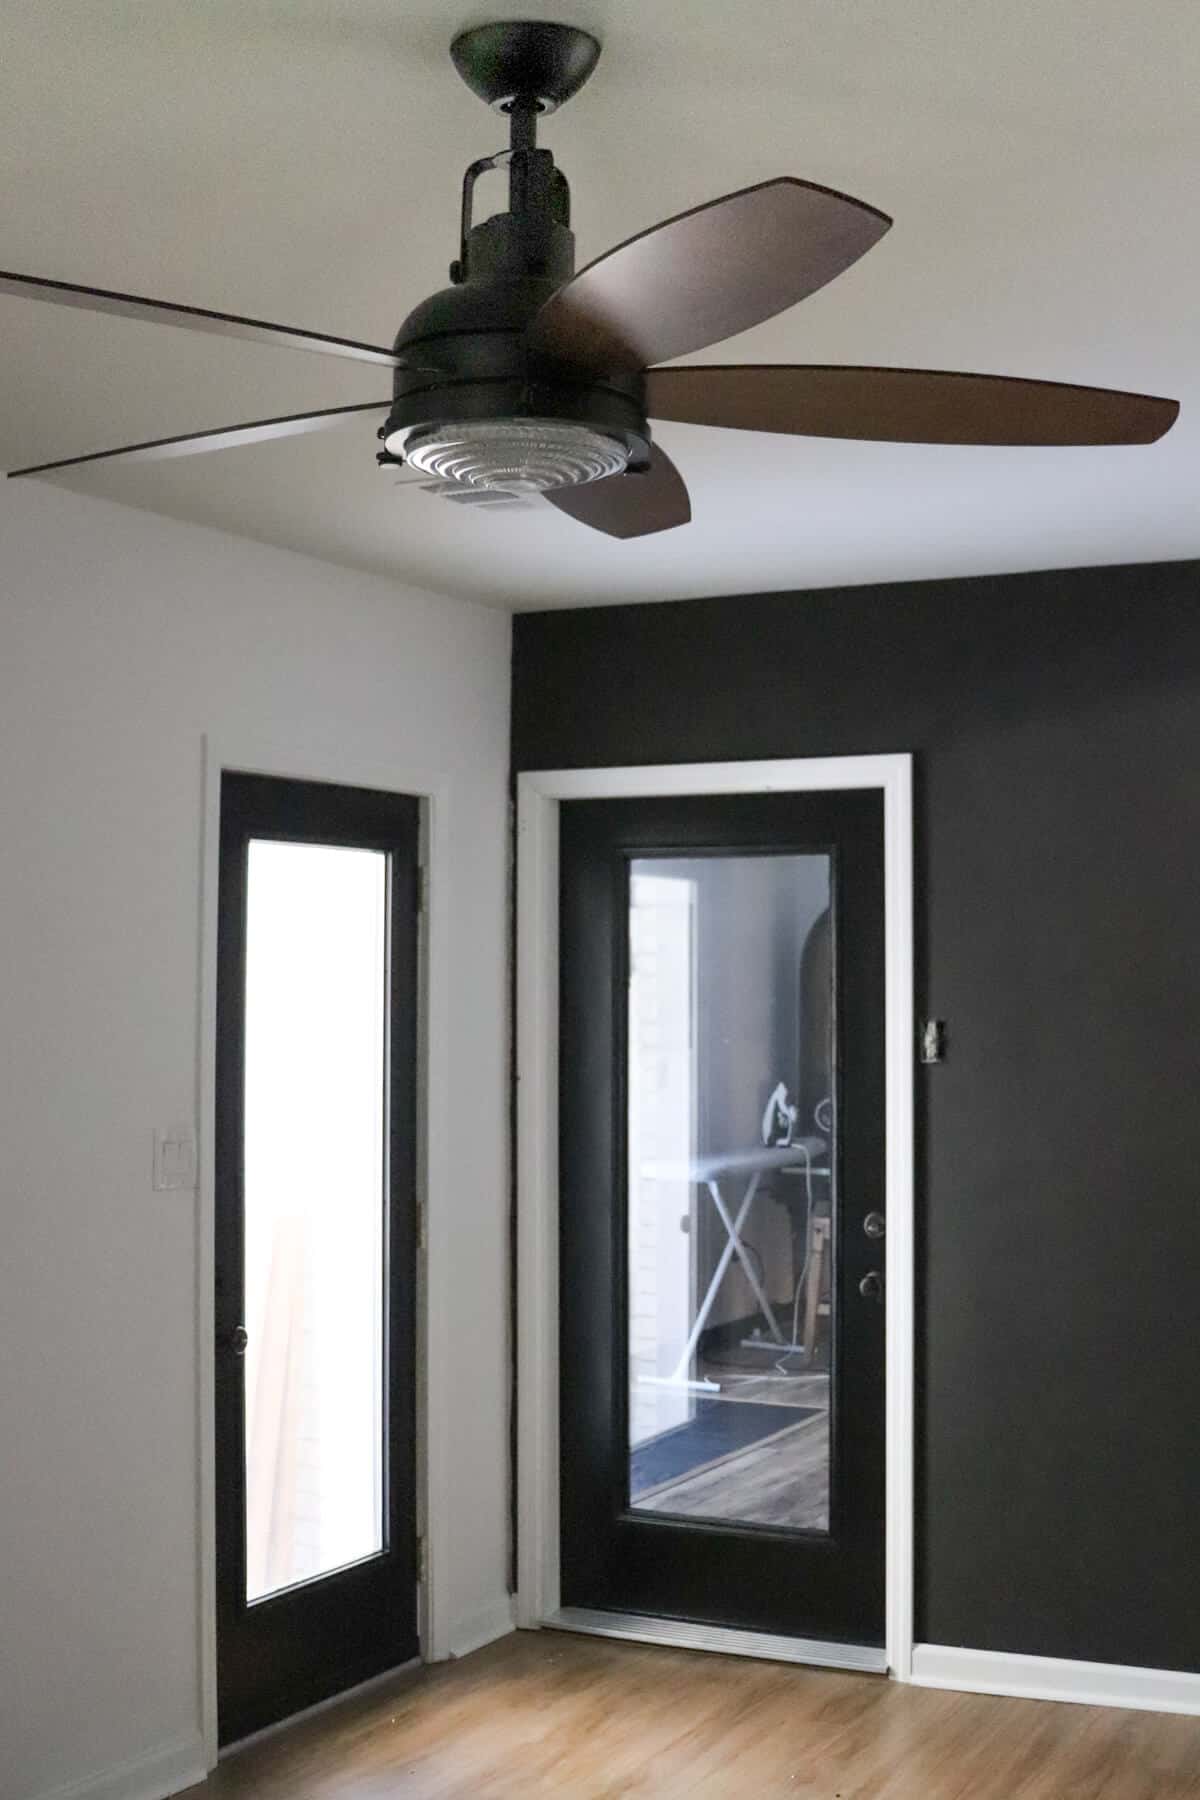
This is the Pismo Fan from Urban Ambiance and the look is industrial chic.
I wanted the lighting to give a slight nod to our music room which is adjacent to this family room.
And when I saw that this looked like a stage light, I was in!
The glass is fresnel (pronounced fruh-nel for all you non-theatre peeps) and makes Trent and I reminisce on our days of performing.

Stair Update
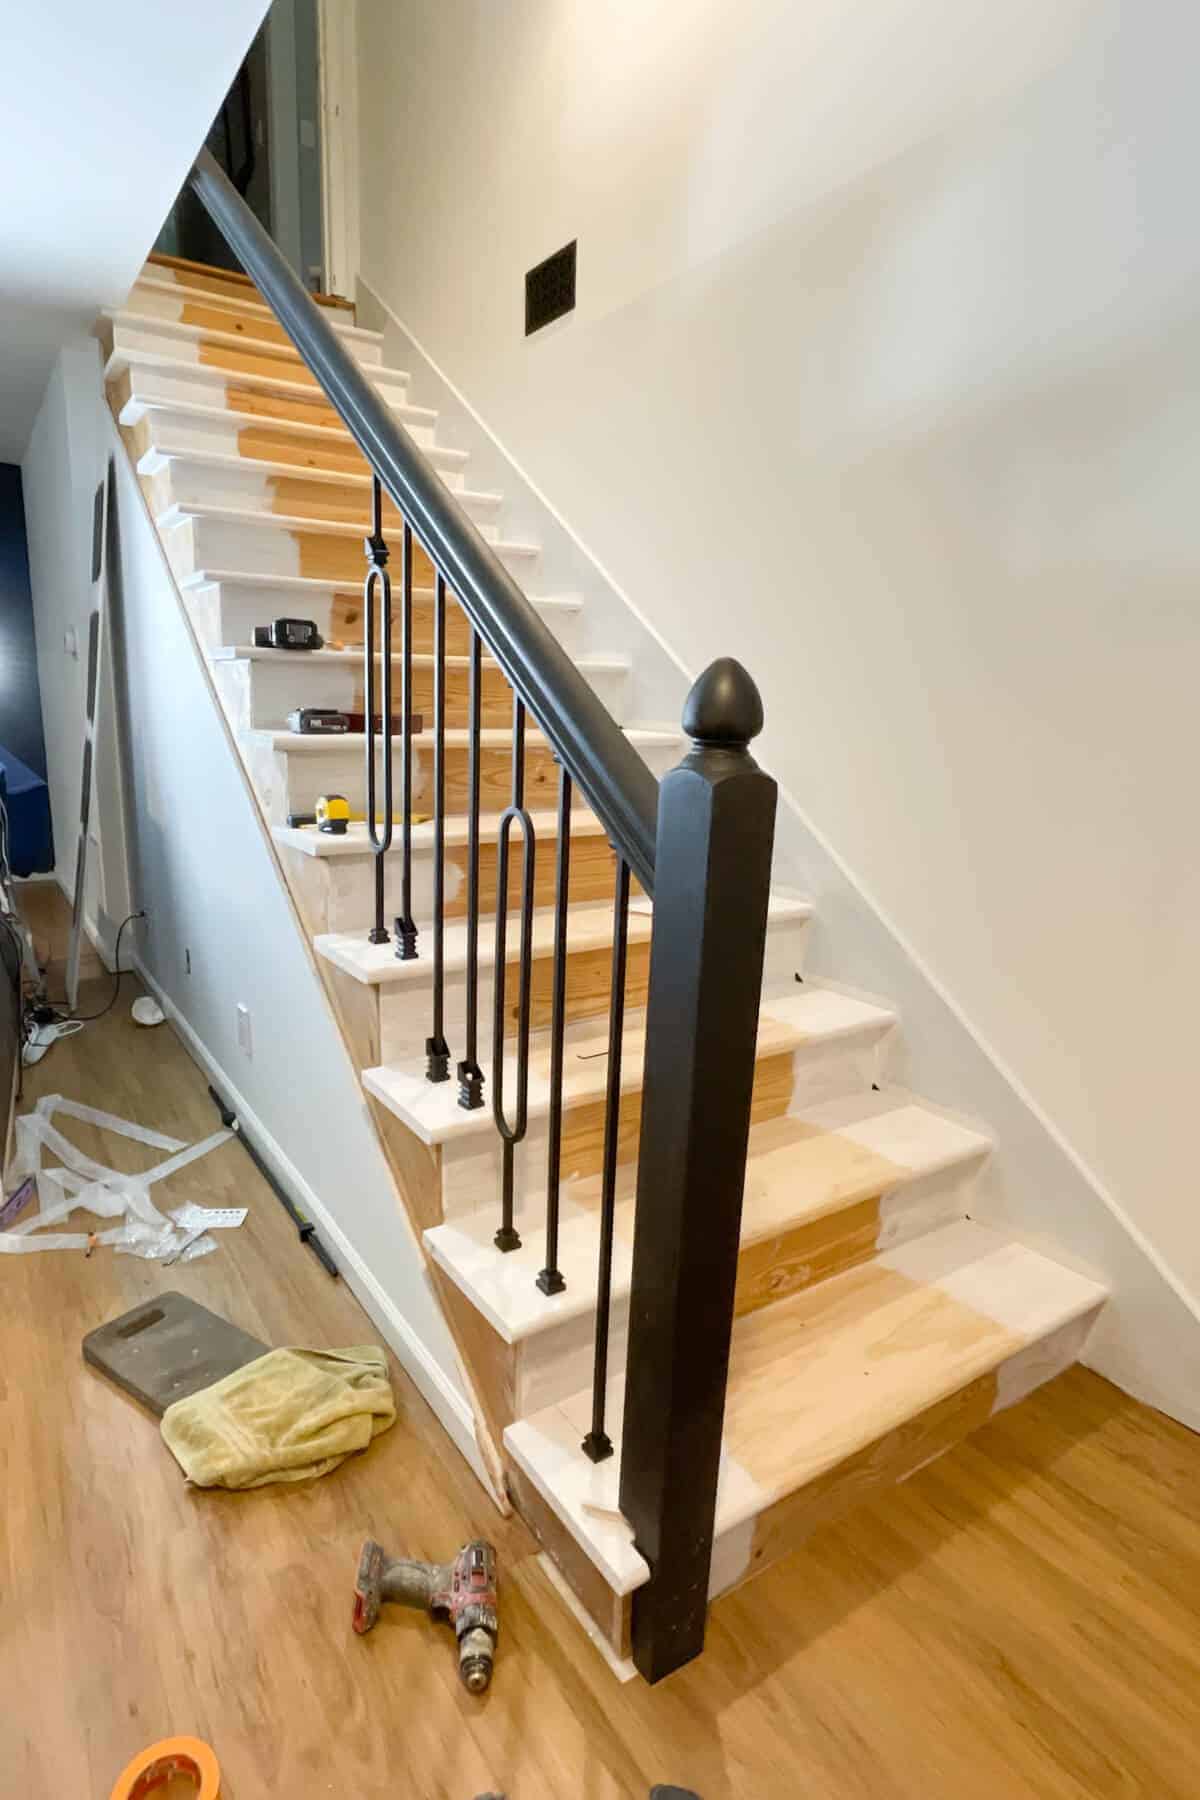
I started priming the treads, but painting we can’t continue until the balusters are fully installed.
But look at that, y’all!
I am loving how it’s beginning to look.
Plans for Next Week
Stairs and Wall will be on our minds for these next few weeks. But I can finally see it coming together for the first time.
Here are my goals for Week 6:
- Work on recovering the ottoman and painting the entertainment center
- Finish installing the balusters
- Paint the treads and hopefully install the carpet runner
Be sure not to miss this season’s Featured Designers and the Guest Participants links at the One Room Challenge weblink up! As always, special thanks to the One Room Challenge media Sponsor, Better Homes and Garden and to Linda – owner and creator of the One Room Challenge.

Home Pop || HANDy Products || Urban Ambiance || Affordable Blinds || Romabio Paints


That’s a great question! We gave it a third cost using the same cross hatch technique, but with a higher dilution rate.
Hope that helps – thanks for taking the time to comment!
Jen and Trent
Hi. I love the outcome. When you noticed the splash marks and said you needed to do an even coat. Did that mean your third coat was with a roller or that’s you just went ahead and gave it a third go with the X technique?
So glad this inspired you! Good luck with your project!
Jen
Jen, I also have Romabio and have been hard-pressed to use. I am now a Renter and that is Challenging for DIY’S. This is perfect. Thanks sharing such a Great tutorial. Let’s hope I can accomplish the same 🤞
Jen,
I LOVE the way technique this looks on an interior wall. It turned out so good!
Thanks for sharing and happy Halloween!
Brendt