How to Install and Mortar Wash a Herringbone Brick Patio
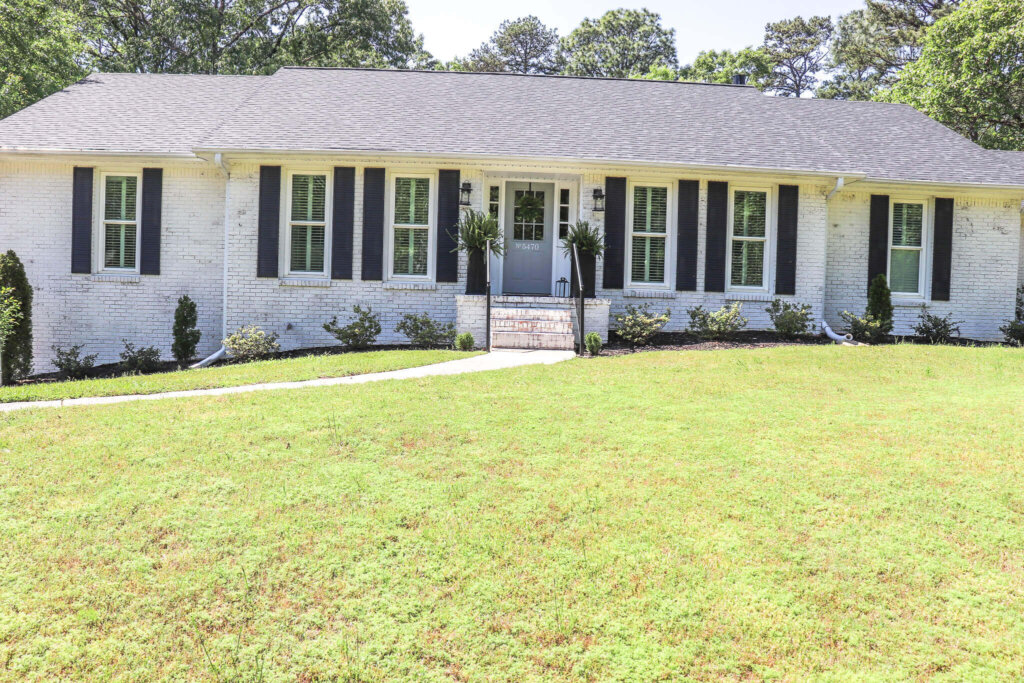
We have LOVED our Limewashed Exterior, but our dated red pavers did not match the look we wanted. Here’s how we fixed that problem and how to install and mortar wash a herringbone brick patio.
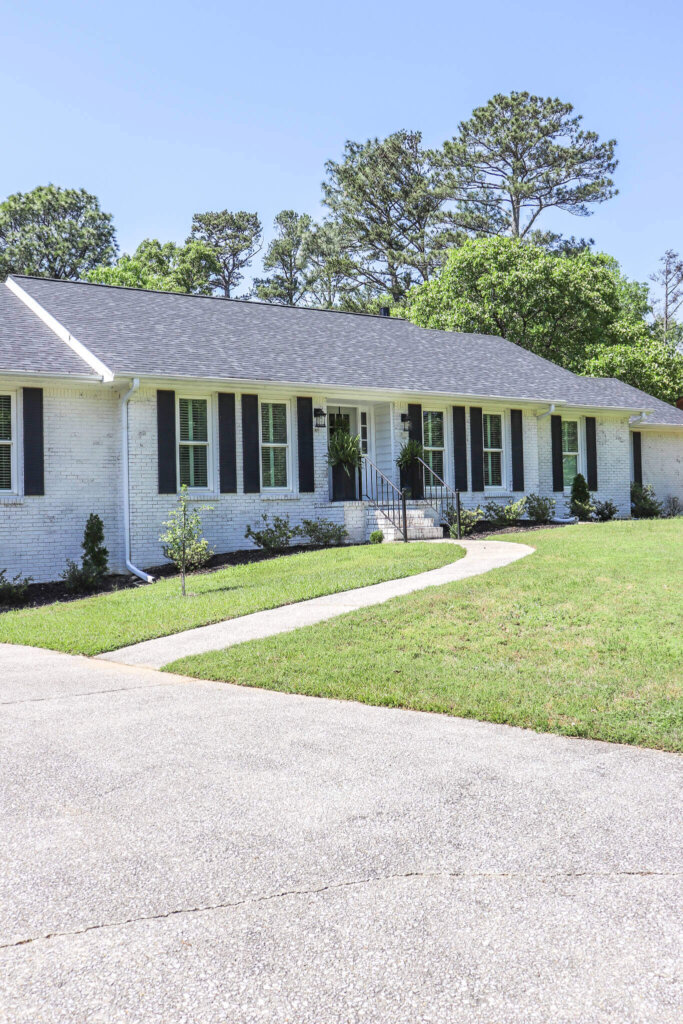
When we limewashed the exterior of our home, we knew we had on big issue to address.
It’s one you can’t really see until you get to my front door.
What a sad little front porch.
These orangey-red pavers have seen better days.
Deteriorating grout, weeds poking thru, subpar repairs – it was time to give this porch an update!
Plus it just didn’t vibe with our newly added porch rails!
So here’s how we made this sad forgotten porch into a gorgeous welcome for all who visit our home!
HOW TO INSTALL AND
MORTAR WASH A
HERRINGBONE BRICK PATIO
(Some affiliate links are provided below. Full disclosure here.)
Materials Needed:
- Chisel, Hammer and Crowbar for demo
- Thin Brick Patio Pavers – we used General Shale’s Smokestack
- Mortar for Patio Pavers
- Tile Cutter
- Tile Spacers – ours were 3/8 inch
- Thinset in White for Mortar Wash
- Mortar Bag
- Notched Tile Trowel
- Rubber Grout Float
- Grout Bag
- Drill
- Paddle Mixer
- Speed Square
- Level
Start with demo
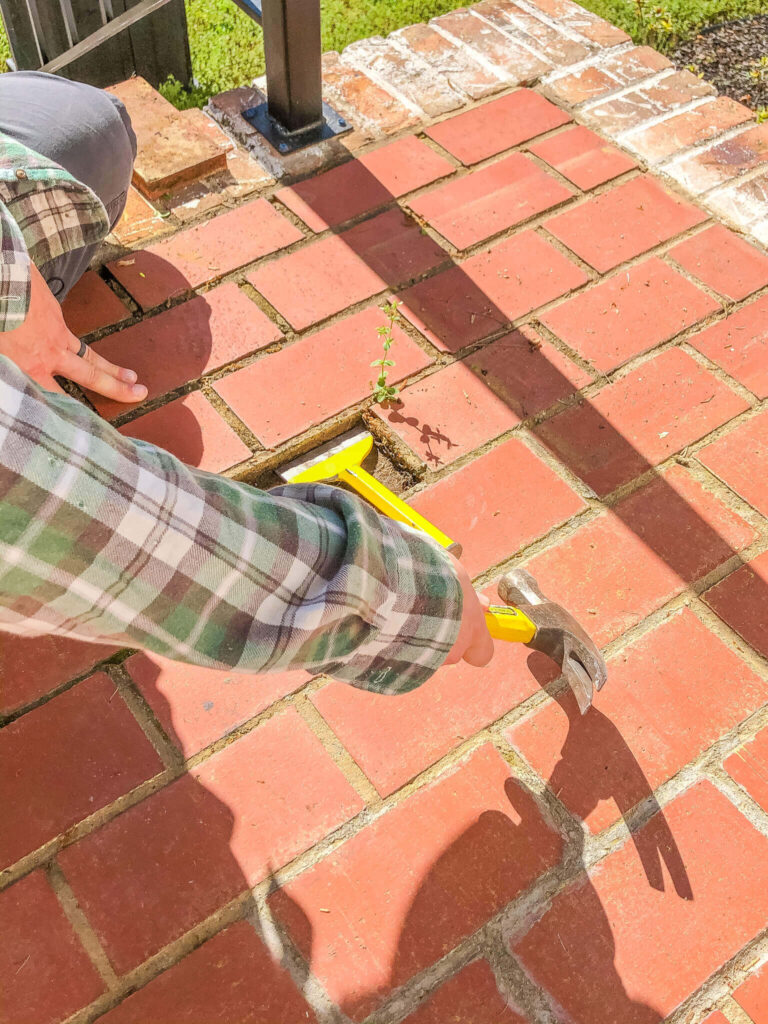
First, we had to remove all these old, dated pavers.
It was a quick task. Trent went to town pulling up the pavers and chiseling away the old grout.
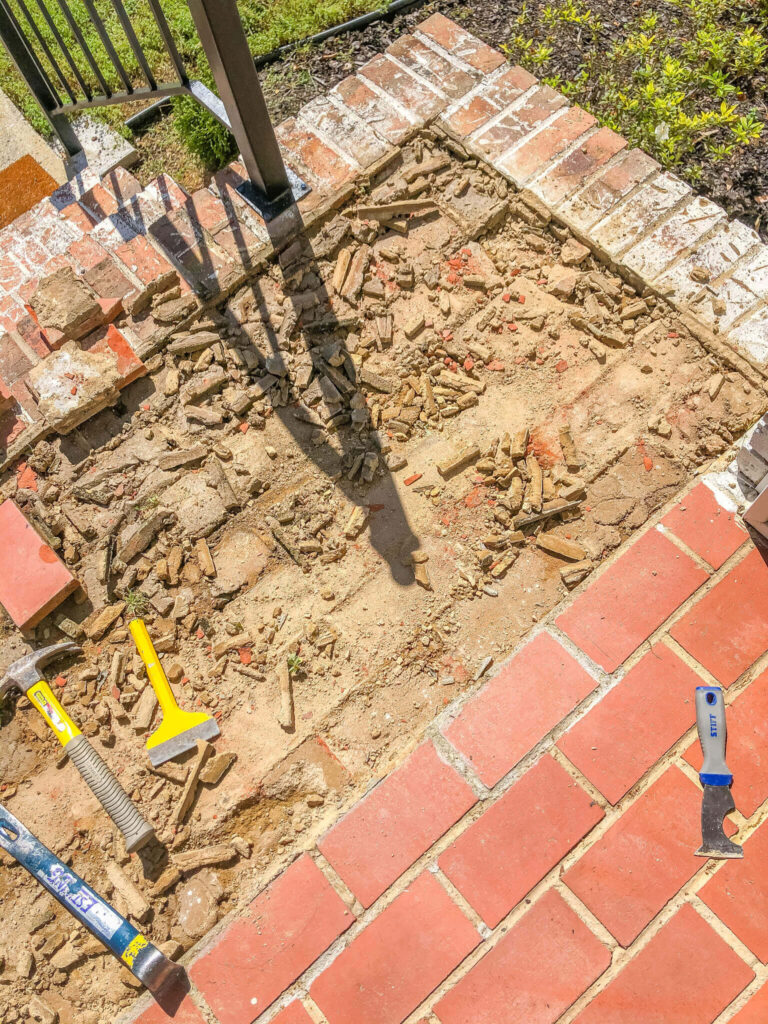
I enlisted the help of some strong teenage muscles and we carried the old pavers to the side of the house.
I’m sure we’ll be repurposing those for a future DIY!
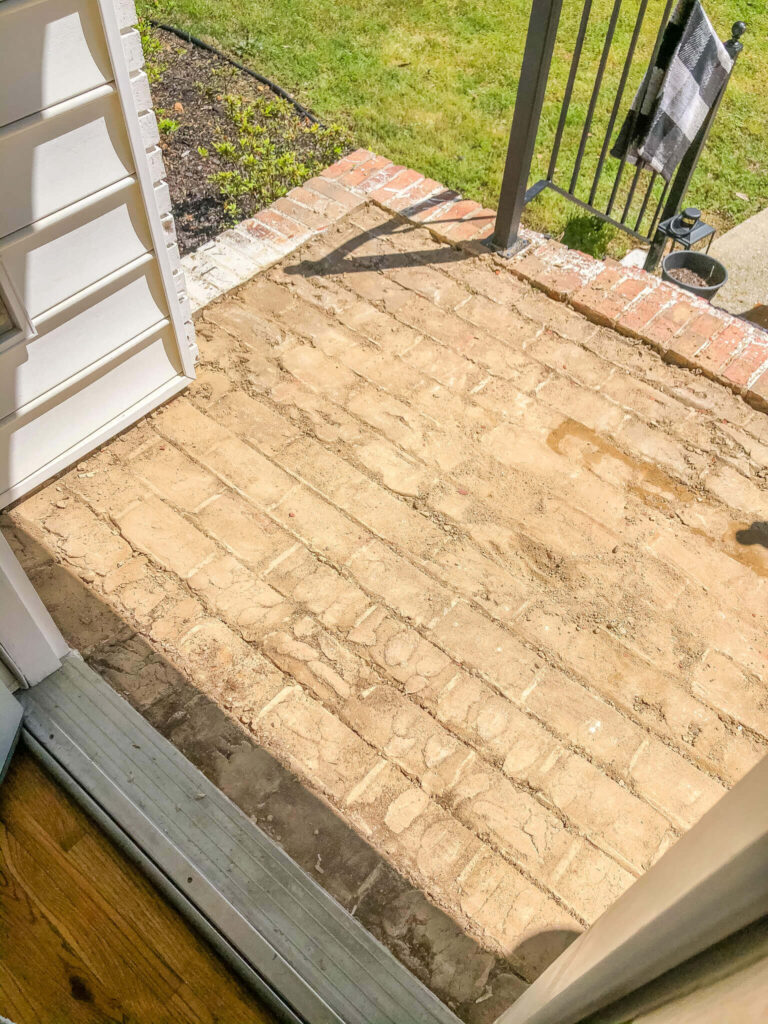
In no time, we had a clean slate!
We swept away any debris and made sure the surface was as level as possible.
Before we used any mortar, we laid out the brick to see how it would look.

We were installing a herringbone pattern with the thin brick, so we used a chalk line to mark where center was.
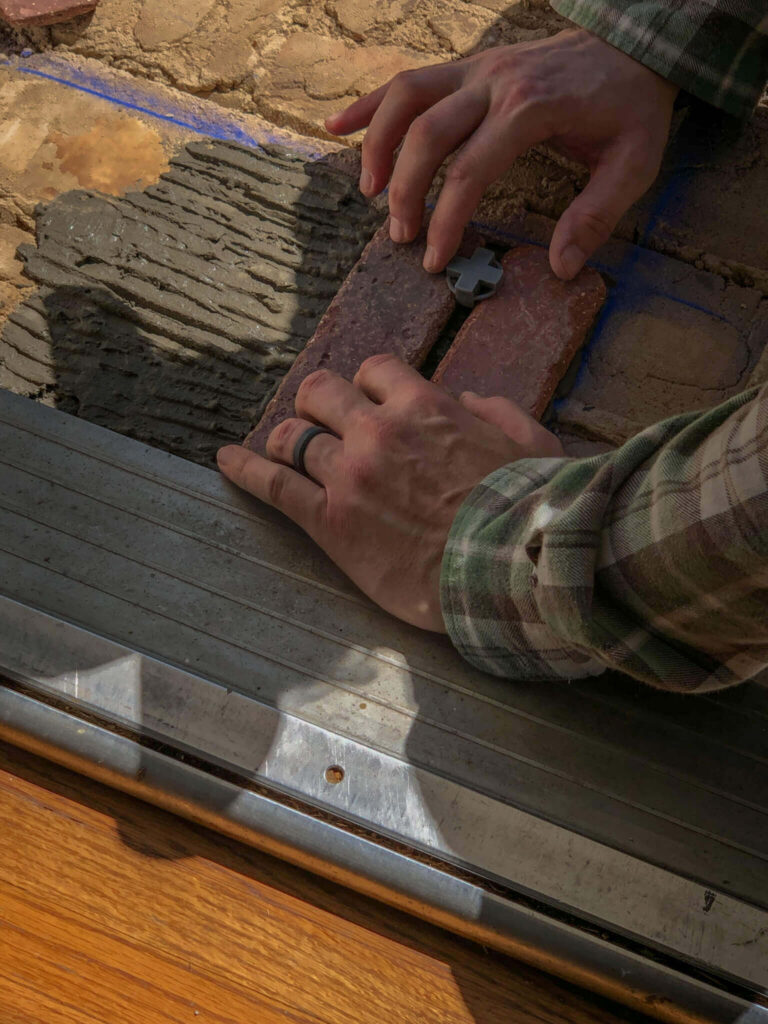
Then we were ready to start laying the thin brick.
Mix the Thinset Mortar
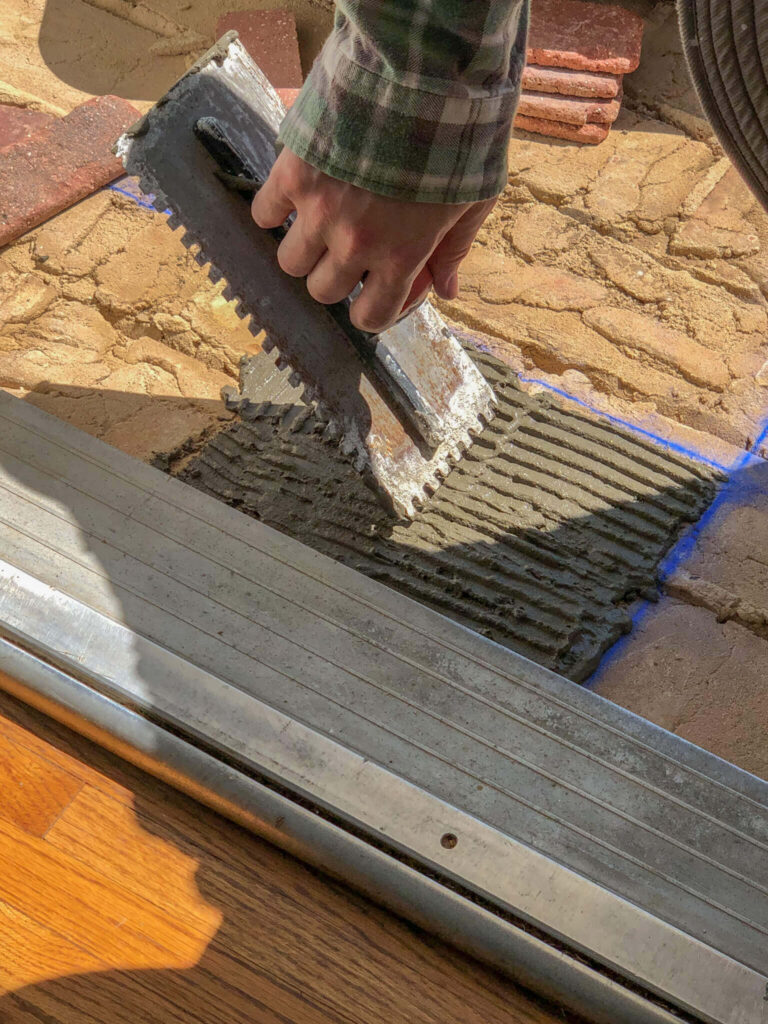
Using a concrete mixing pail and a drill and paddle mixer, mix together the thinset mortar to lay the brick.
You want the consistency to be thin enough to spread easily, but thick enough to allow for grooves to stand when you use the notched trowel.
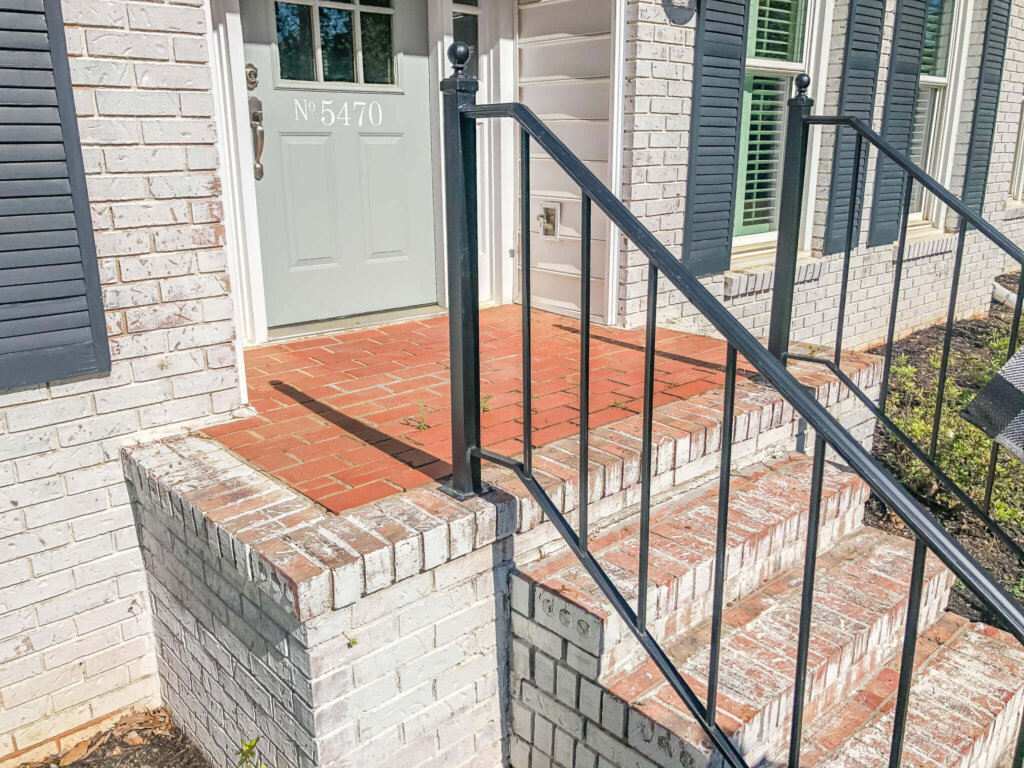
Next, lay the Thin Brick Pavers
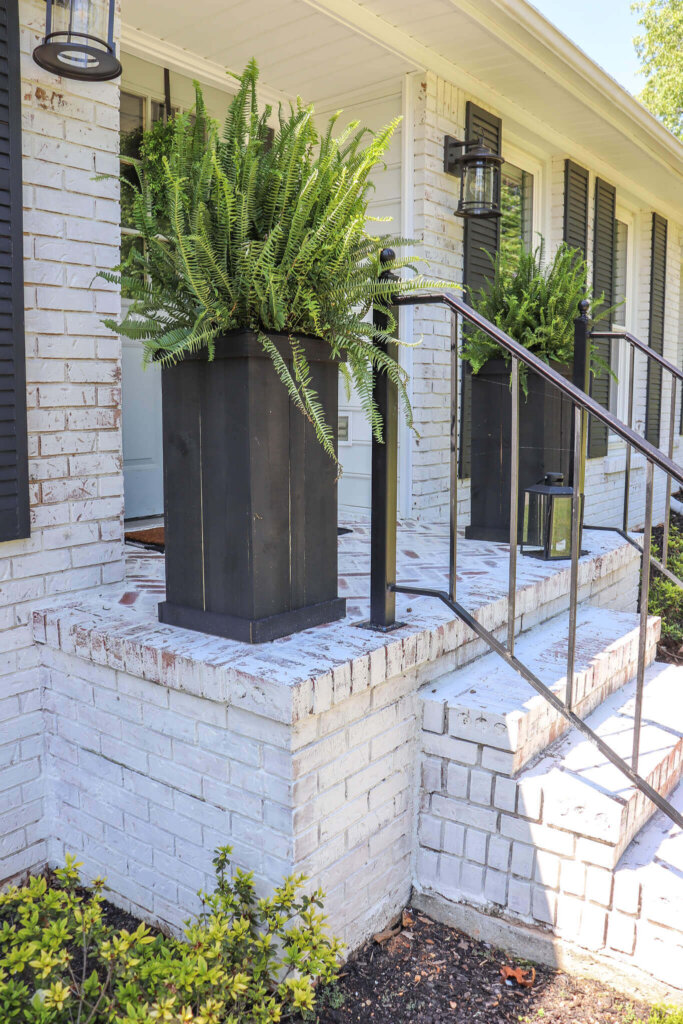
We wanted the top edge to mimic the top step, to give the herringbone pattern a framed in look.
You want to back butter each brick.
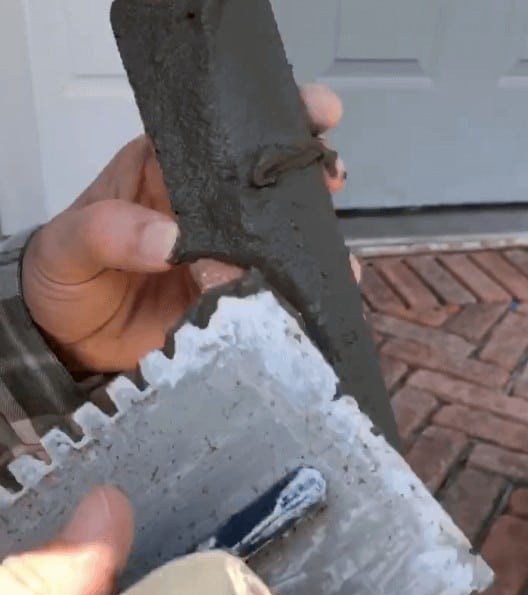
That basically means adding a layer of thinset to the back of each brick before you set it in place.
Make sure to use spacers to ensure everything stays even.
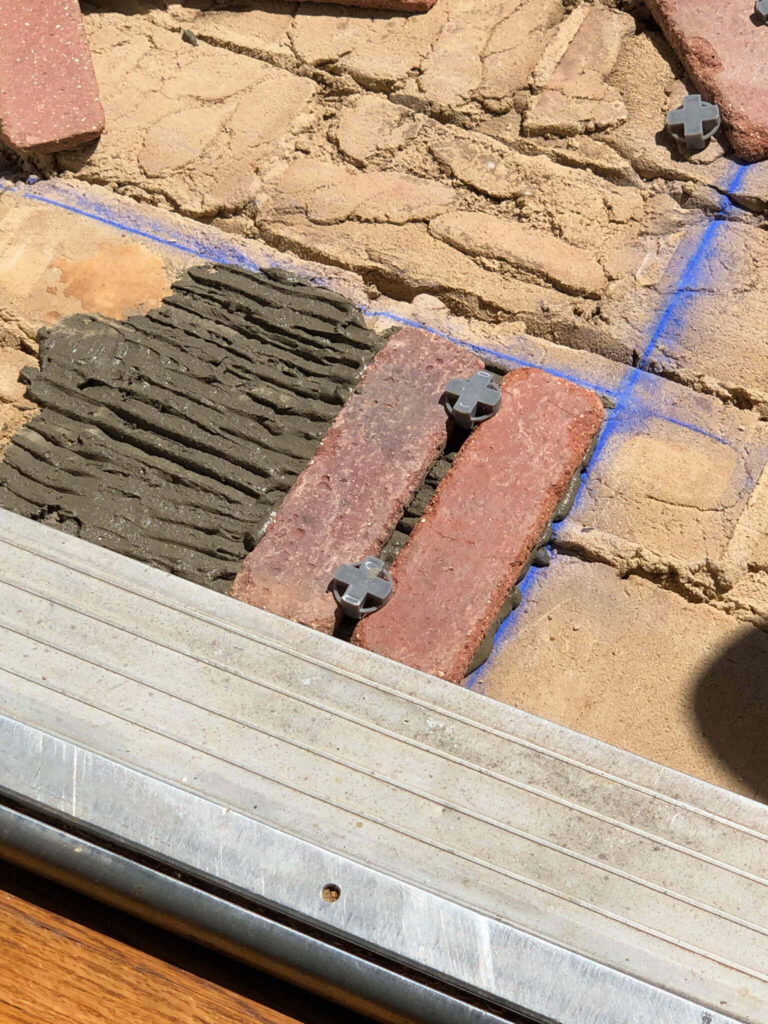
Then you are ready to start the pattern.
You will need to use a tile cutter to make the herringbone pattern.
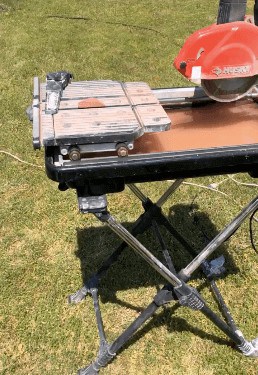
We found a good rhythm. Trent would lay the brick and mark where cuts needed to be.
Then I would head to the tile cutter and trim each thin brick as needed.
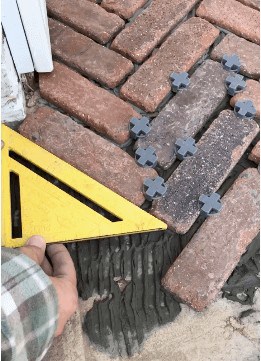
We found a few tools handy to help keep our herringbone pattern straight.
Using a speed square, we would check if our lines were straight. We also had a small level on hand to make sure we were still sloping.
The challenge with any porch is that you want the porch to slightly slope away from the front door.
Luckily, we were working on stop of the existing concrete, so that was a good guide!
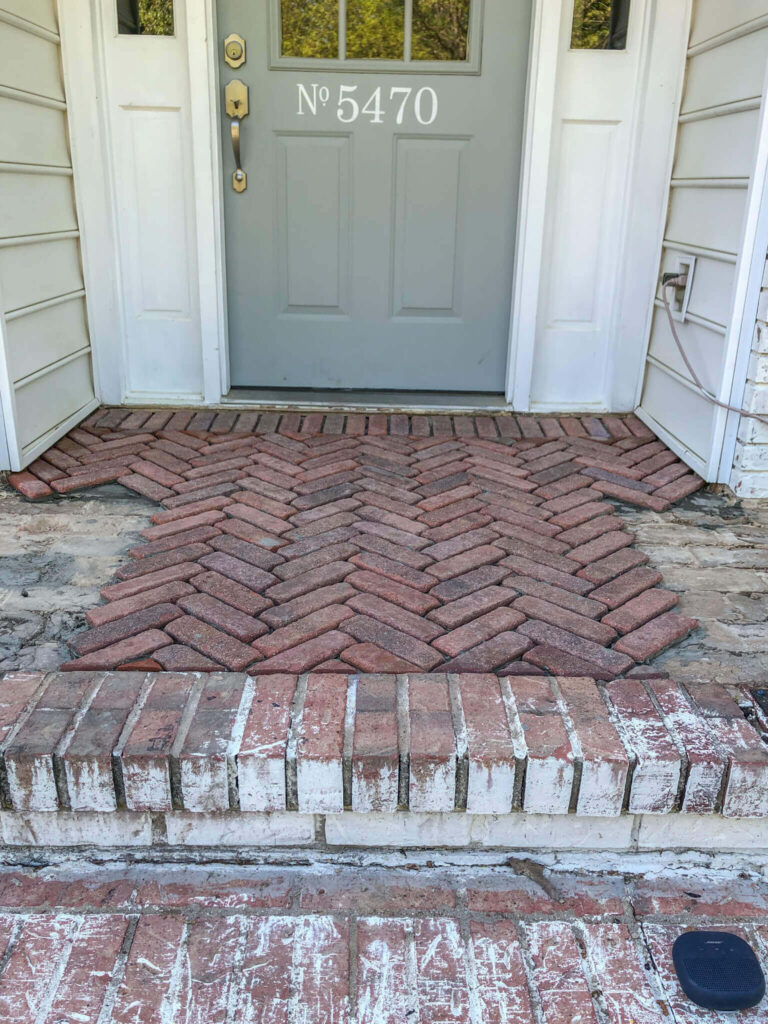
We started to run out of daylight, so we stopped with the majority finished. Not bad for day one!
The next day we finished the rest of the brick and love how it looked!
We were so excited to get to the mortar wash, but the thinset needs 24 hours before you can apply any grout, so day 2 was super quick!
But it was already a HUGE improvement.
How to Apply the Mortar Wash

Using the same technique to mix the mortar for laying the tile, mix together the White Thinset with water.
Trent says the best consistency is a like a thick Frosty from Wendy’s.
So I think that means some research and development need to take place with a trip – for educational purposes only! 😉
Have a bucket of water and a sponge handy before you begin.

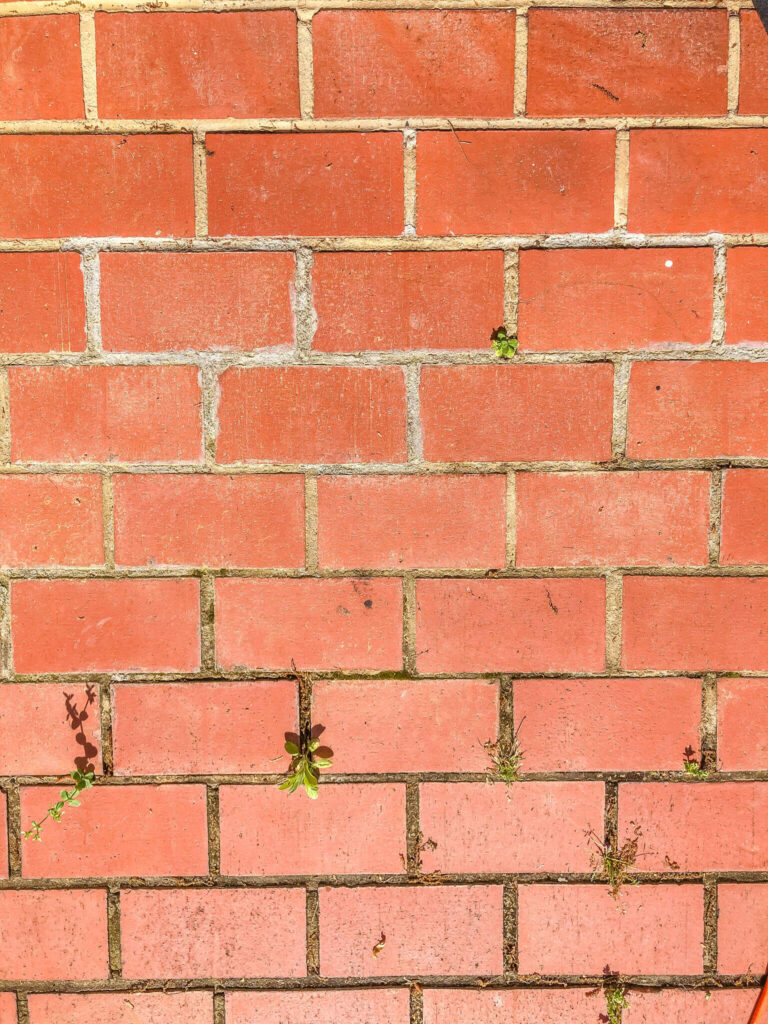
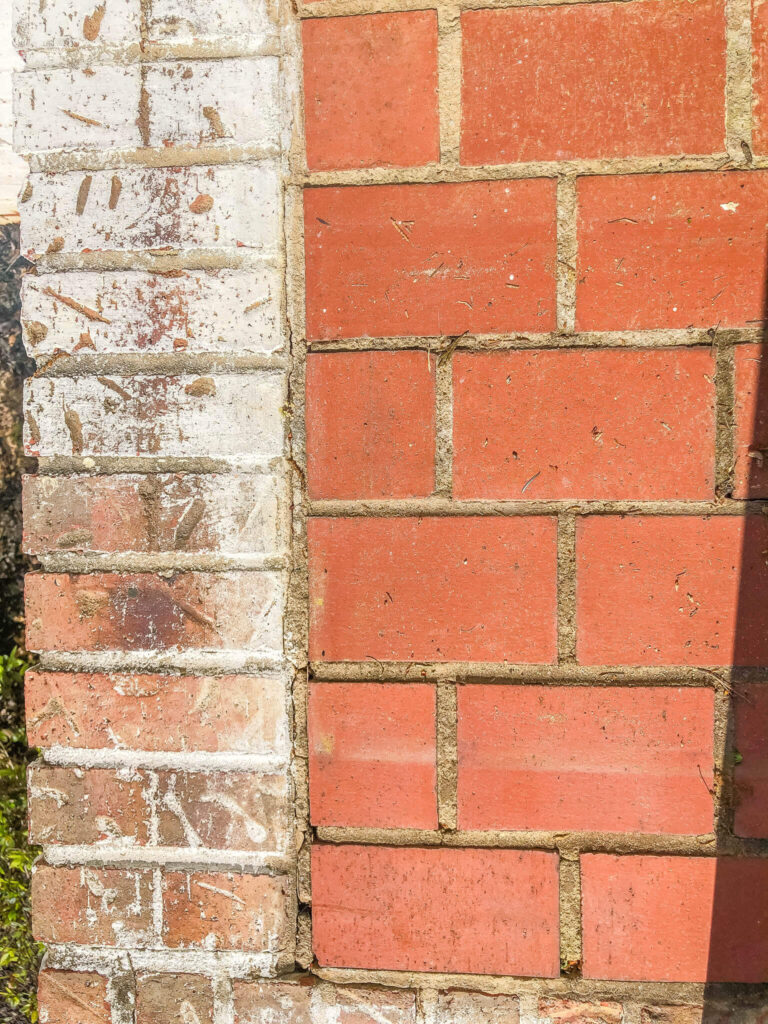
Using the rubber trowel, smear the mortar wash over the brick and into the grout lines.
If you’ve ever tiled, it’s a similar process, but you won’t wipe away all the mortar so you can achieve this look.
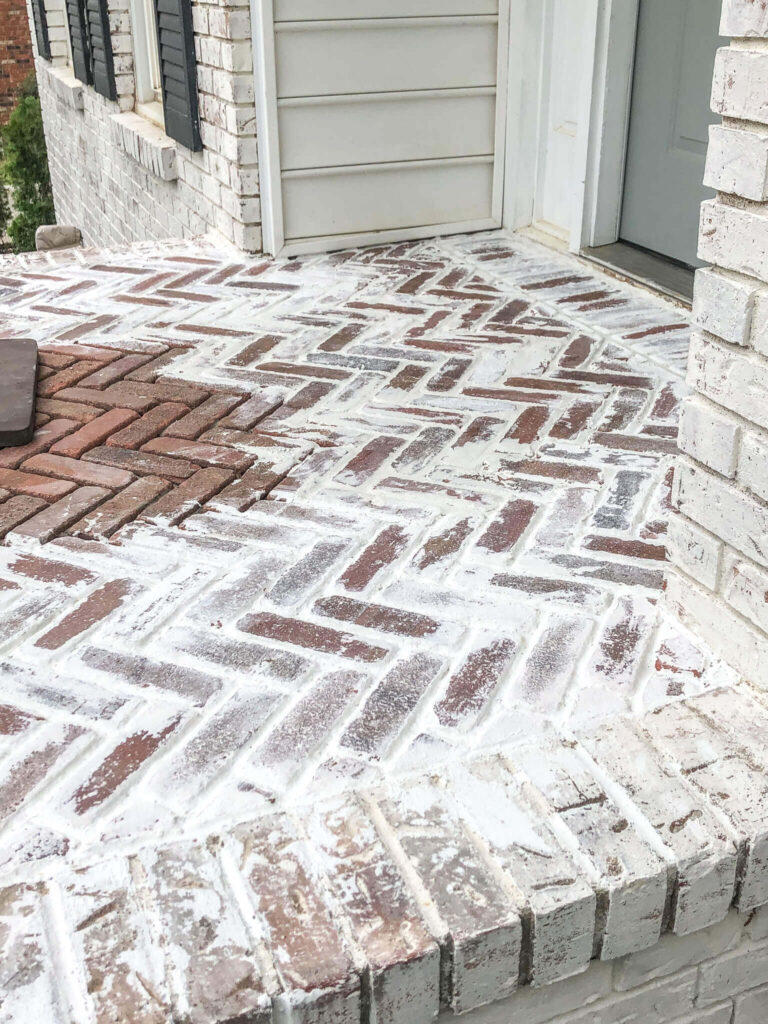
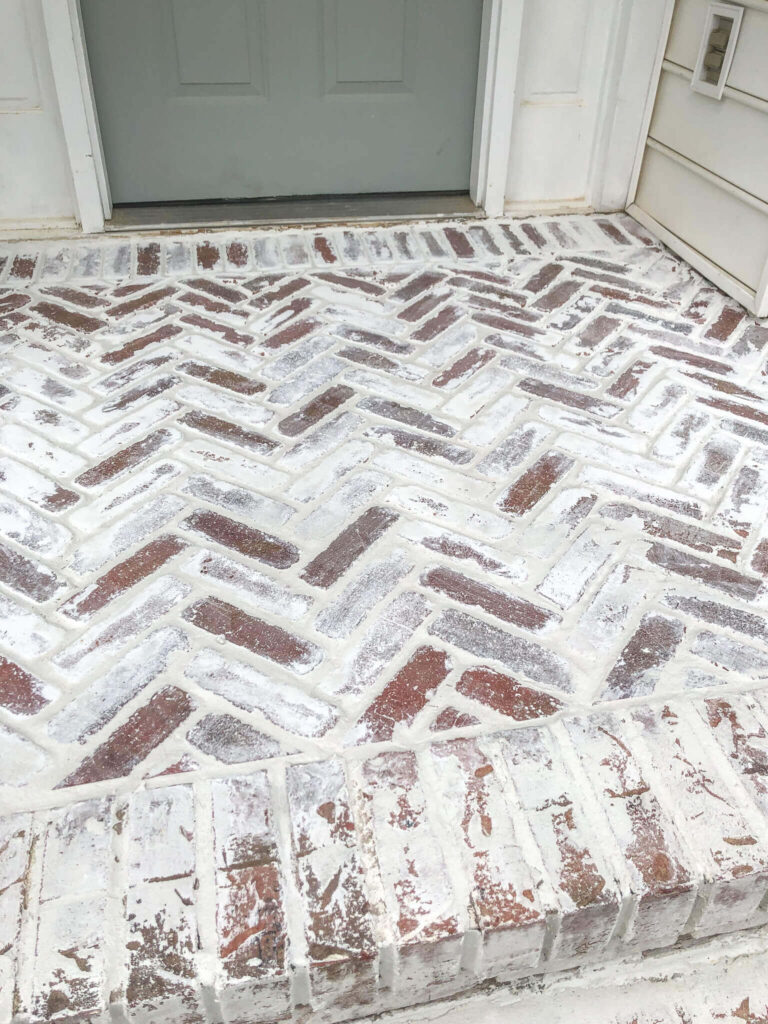
We noticed that some of our brick had a smooth top and others had a rough texture.
So we focused on wiping away the smooth tops and left the rough one mostly covered.
Play around until you get a look you like.
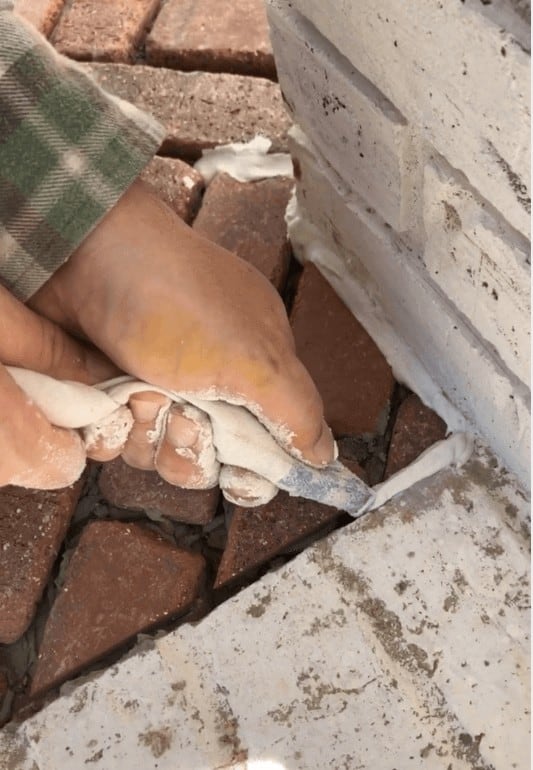
For deep crevices, like under our siding, we used a grout bag to get in those hard to reach places.
It works just like a piping bag does and is super helpful to have on hand.
After you are done, allow the mortar to dry for 24 hours before walking on it.
We finished this project in just 3 days!

But had we not run out of daylight on day one, this entire project would have been finished in 2 days.
Now here are some pics from start to finish.


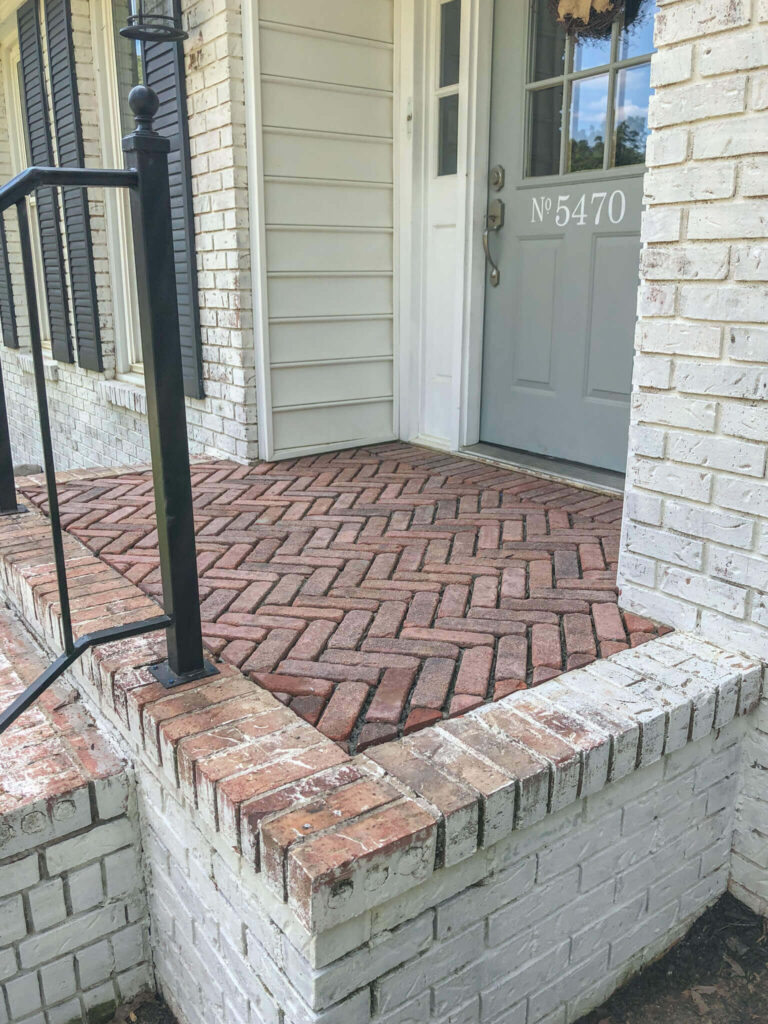
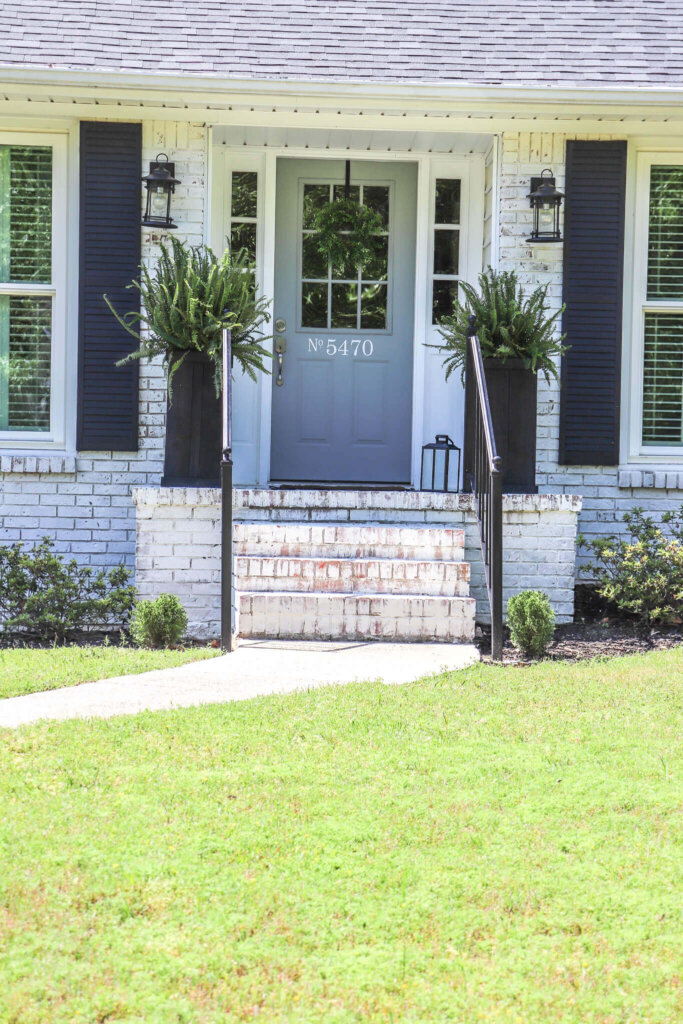
We noticed that the Limewash had worn away on the steps. so we continued the mortar wash on the steps as well.
It’s just so pretty and matches our Limewash beautifully!

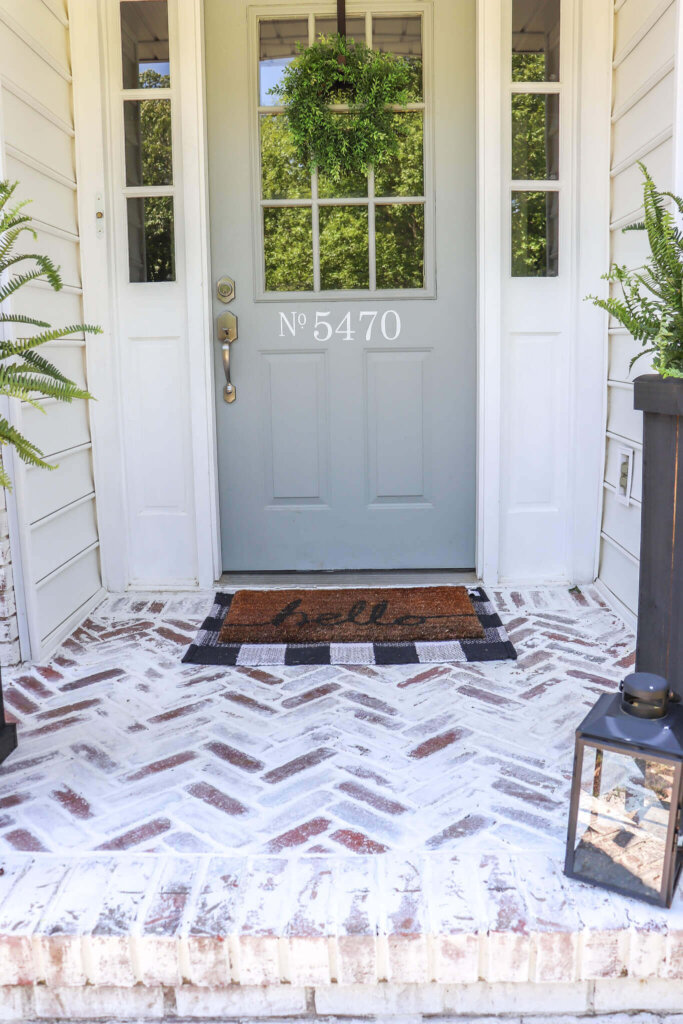
What a welcoming entry!
From sad to glad, wouldn’t you say?
Trent made these fun planters that are super cheap and easy. I’ll be sharing the tutorial on that soon!


So, I hope this encourages you to take on a project like this yourself. By learning how to install and mortar wash a herringbone brick patio ourselves, we were able to save so much on labor costs!
And now my porch makes me smile when I come home!
Don’t miss our next project by following us on Instagram. We are always sharing our behind the scenes shenanigans over there!
Other Posts you may like:
How to Limewash Your Home
How to Repurpose Exterior Iron Stair Rails
Pin This for Later!


Yes – it’s regular mortar that you use to fill in the gaps between each brick. We opted for a white colored mortar to create this look. Hope that helps to clarify! And thanks for taking the time to reach out and ask!
So…you used the same thing to fill in between the bricks as you did to ‘color’ over them to whiten them? (Might be a stupid question to some…but I just want to make sure I understand!)
Hi Amy! That is a great question. You are correct – Romabio does not recommend Limewash for walkways, patios and stairs, which is why we opted for this Mortar Wash look. The friction of the foot traffic wears down the lime wash very quickly.
Looks great! Does limewash typically not hold to the flat surfaces with high traffic like steps?? I’m about to limewash my house and we have a small brick front porch. I think we may need to do this to ours as well.
Not at all! But we also live in the south where it doesn’t get as cold as many places. However, our front porch is not covered and gets TONS of moisture from the rain. I would definitely reach out the the brick manufacturer to check. 😉
I found your post while researching adding this same type brick veneer to our back porch – however, we’ve seen where several places don’t recommend the thin brick because it is more prone to cracking due to cold & moisture. Have you run into this at all?
Hi Lisa – thanks for reaching out. Yes the mortar wash on the steps has worn, but not on the porch as much – which surprises me. This Spring, I plan to do a follow up to show how they are holding up – stay tuned!
Hi. Beautiful work! When you applied mortar wash to the brick steps (that already had mortar in the joints…wasn’t newly installed pacers with no mortar in joints), did the mortar wash hold up over time being applied mortar over old mortar? Thx!