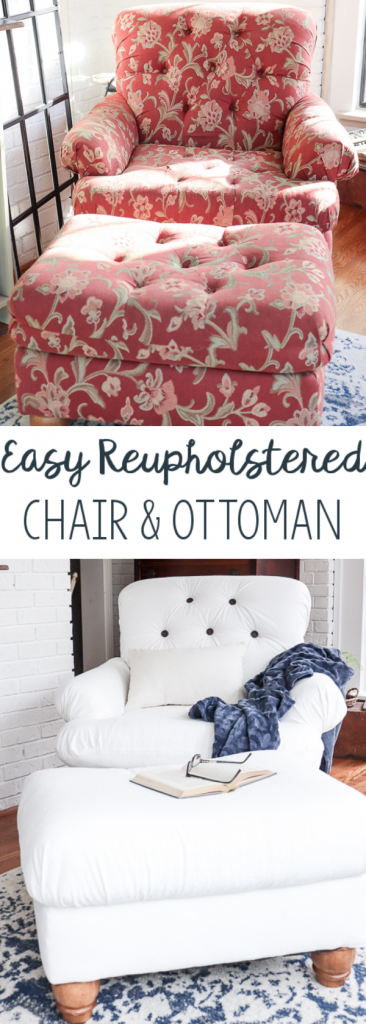
My $35 Flip: How I Reupholstered Chair and Ottoman in Just 3 Days
I found a dusty old chair and ottoman for $35 and turned it into a beautiful, custom piece using budget-friendly bleached drop cloth fabric.
This post walks you through the step-by-step process, tools needed, tips to avoid mistakes, and how I did it in just a few days—with no fancy upholstery skills required!

I Swore I Was Done with Reupholstery…
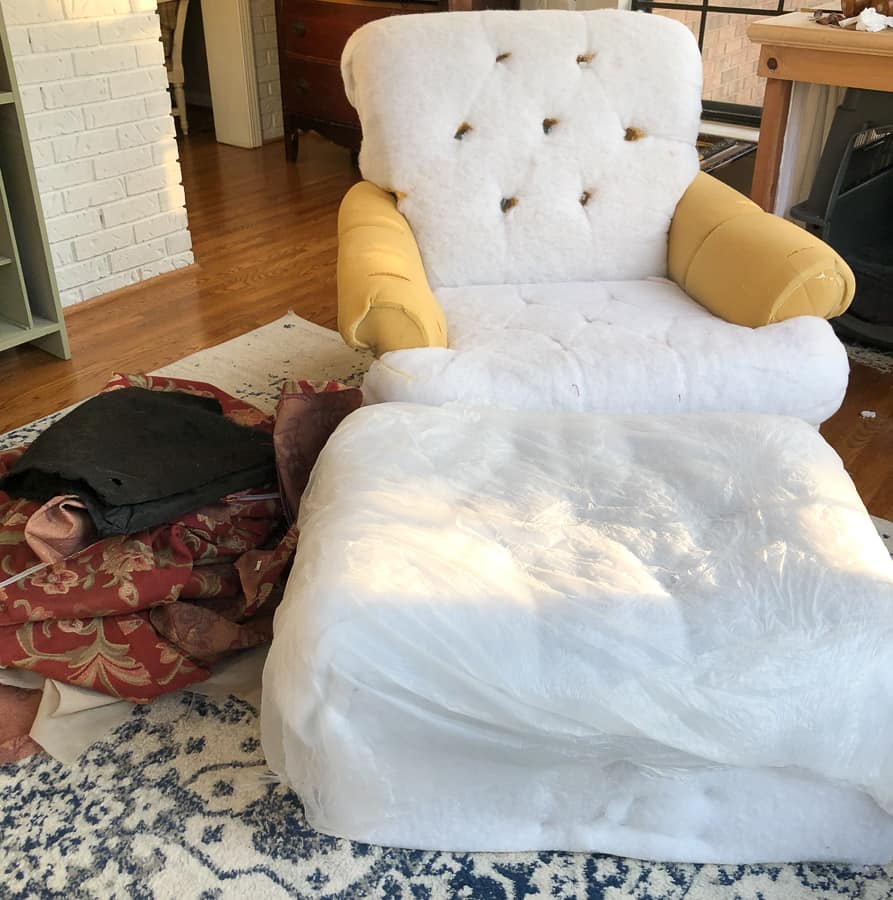
And yet… when I spotted this chair and ottoman listed for $35 on a local buy/sell/trade site, I couldn’t say no. Sure, it was covered in cobwebs and hiding in a dark basement—but I saw potential.
Despite my past vows to avoid another upholstery project (they always start out more daunting than expected!), I jumped in our 21-year-old van—windshield wipers barely hanging on, back window flapping with every pothole—and picked it up.
As per the usual – Trent was skeptical. I showed him the photo, and he scrunched up his nose in disgust. He didn’t see the vision.
But I did.
So off I went with my teen son to rescue this chair and ottoman. And just as we were leaving, I spotted a broken dresser in the corner. The seller told me I could take it—for free—as long as I also hauled away their old La-Z-Boy.
Um… excuse me?? Tears of joy, I’m telling you. If only they knew what those words meant to a DIY blogger.
FAQs: DIY Reupholstered Chair & Ottoman

Sitting With the Vision
Back home, the chair sat in the corner of our house for a few weeks. That’s how it usually goes for me.
I need time to sit with a piece before I know exactly what I want to do.
Eventually, inspiration struck: I’d use bleached drop cloth fabric—durable, affordable, and easy to work with. I follow this tutorial from Farmhouse on Boone on bleaching the drop cloth fabric.
While the fabric soaked, I got to work stripping off the old upholstery.
Want a visual tutorial of this process?
Check out my full how-to here:
Reupholstering a Wingback Chair – a No-Sew Method
Tools & Materials Needed
This post contains some affiliate links for your convenience. Click here to read my full disclosure.
- Staple Puller
- Fabric Scissors for cutting the drop cloth
- Electric or Pneumatic Staple Gun
- Staples
- Hammer or rubber mallet
- Bleached drop cloth (or fabric of your choice)
- Paper & pen (for labeling pieces)
- Optional: Tack strips, buttons and a sewing machine
Step by Step: Reupholstering the Chair & Ottoman
1. Remove the Old Fabric
This part is messy, but necessary.
Start from the bottom and work your way up – bottom, back, sides, then front.

TIP: Label each piece as you remove it. You’ll be reattaching them in reverse order.
Also: don’t forget to save your tack strips and hardware (and definitely don’t leave tack strips lying around for your bare feet to find – ask me how I know 😉)
2. Use the Old Fabric as a Template
Now that your chair is down to the bare basics, it’s time to start cutting the new fabric.
Lay your old fabric pieces on top of the bleached drop cloth and cut around them.
I set out my bleached dropcloth on my kitchen table. I would start with the last piece I removed and cut that out first.
TIP: Cut at least a half inch extra around each piece. It’s better to have too much fabric to work with than not enough.
3. Reassemble in Reverse
Now it’s time to reupholster by working backward—attaching each new fabric piece in the reverse order you removed them.
I used the original staple lines as a guide and secured the basic with my staple gun.
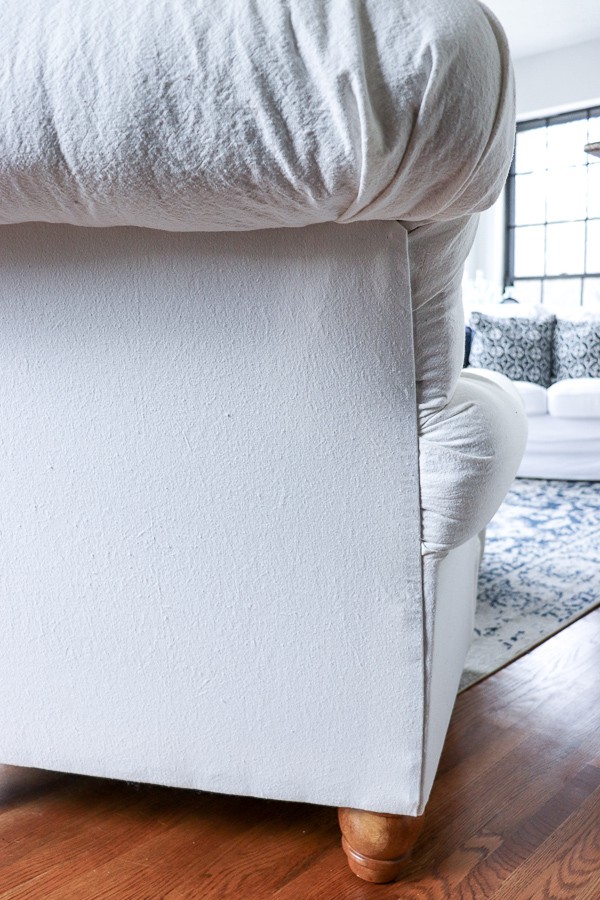
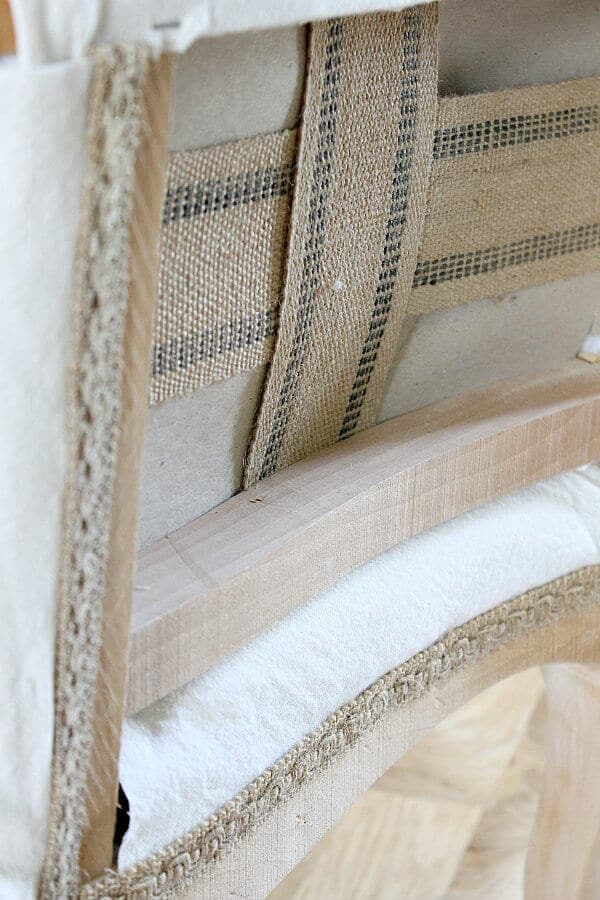
Lemme tell ya—the tack strips can be tricky!
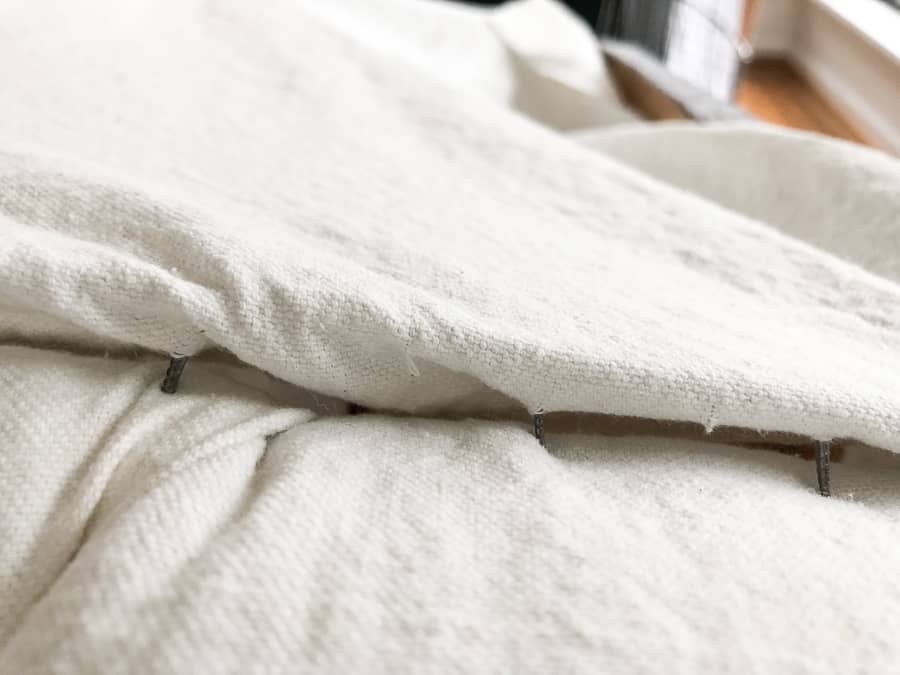
Upholsterers use tack strips to create clean edges along the sides and back.
This took a bit of thinking for me, and then a coffee break to clear my head and re-center myself.
What worked for me was to attach the piece with staples at the top, then focus on the tack strips.
TIP: Keep the fabric taut and fold edges under neatly before hammering in the tack strips.
You are left with a clean, staple-free edge on the back and sides.
Repeat the process on the other side.
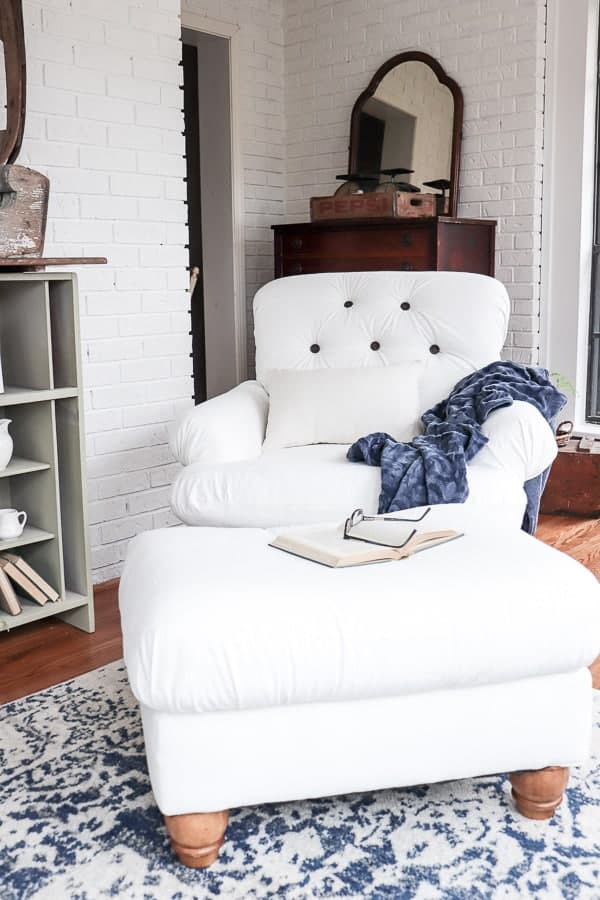
Final Touches & Real—Life Decisions
For the ottoman and seat cushion, I made a few practical changes:
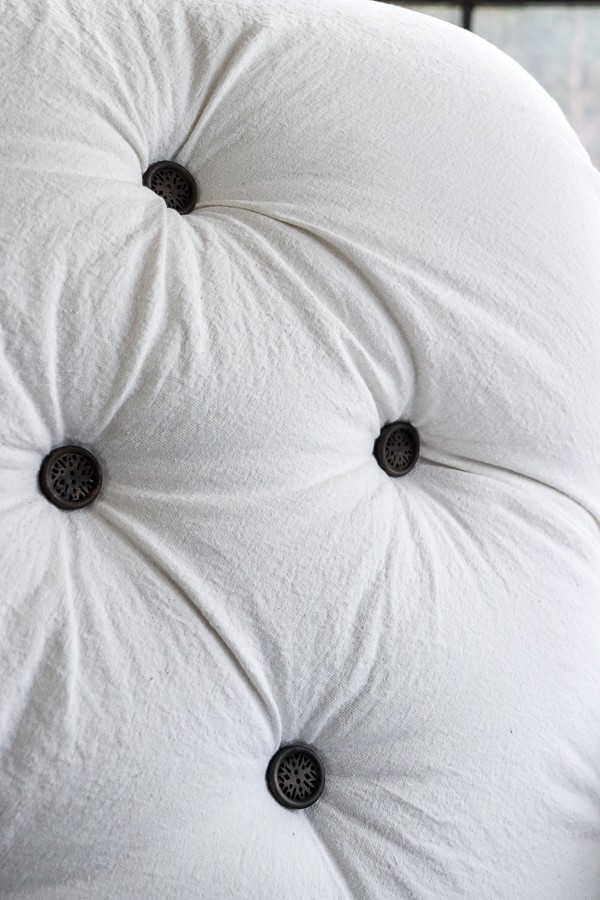
- No tufted buttons on the ottoman or seat. Why? 2 teenage boys! Our last tufted ottoman didn’t survive their chaos.
- I reused the pronged buttons from the original chair, but glued new wooden buttons on with fabric adhesive.
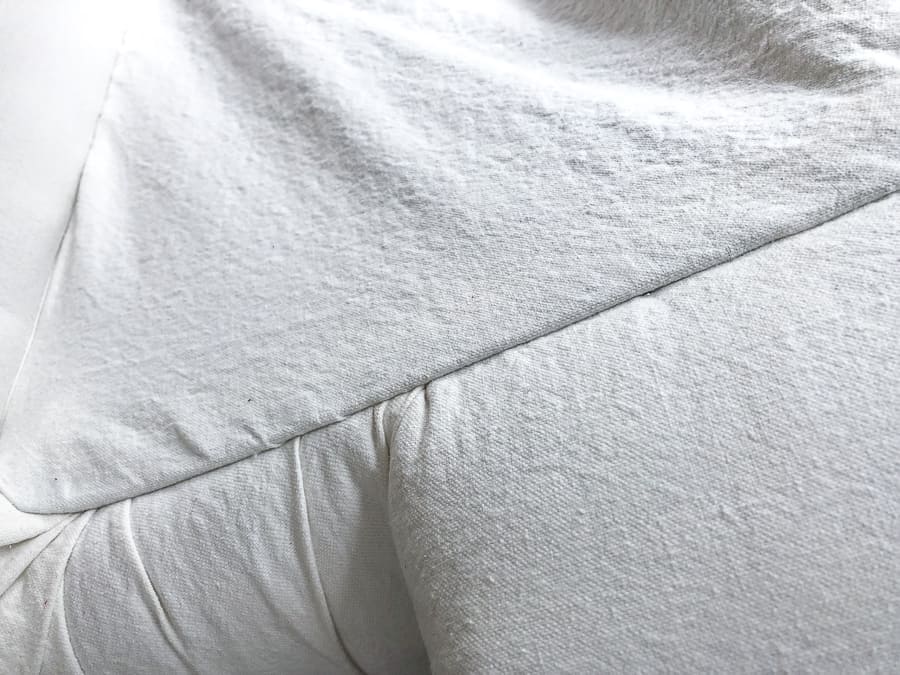
- The ottoman originally had sewn seams. I skipped the sewing which left a visible seam—but honestly? I kinda love the imperfect look.
I did pull out my sewing machine for the seat cushion (brave, I know), but the seams are hidden, so we’ll call that a win.
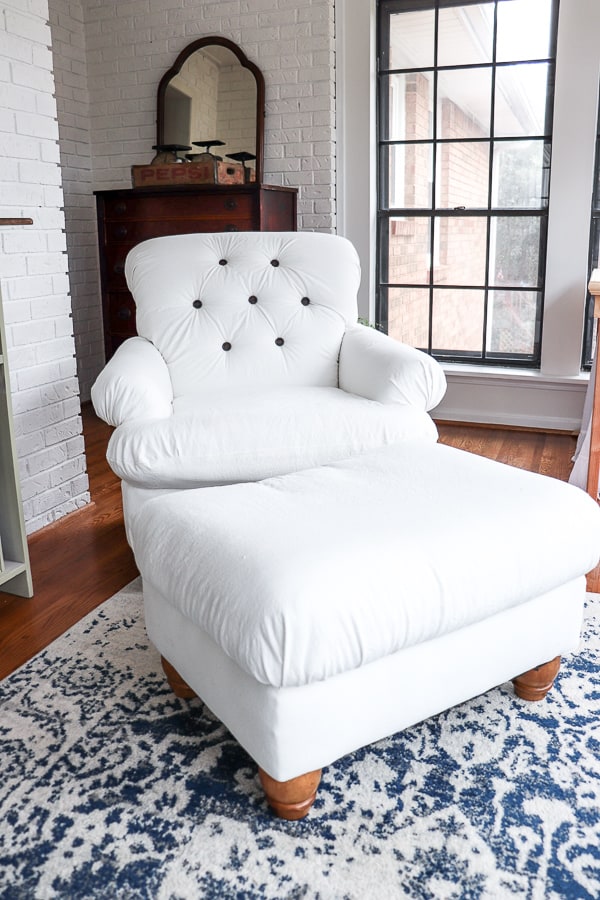
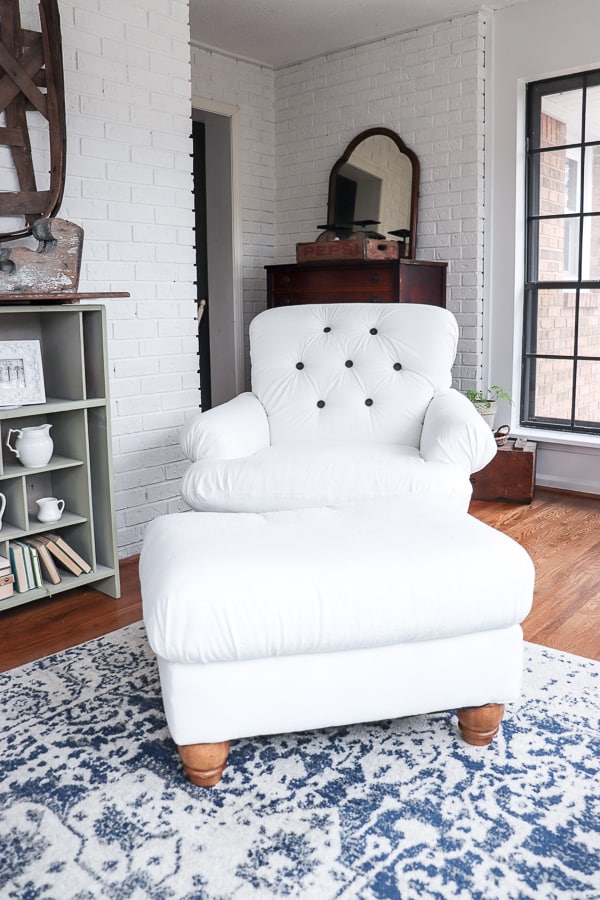
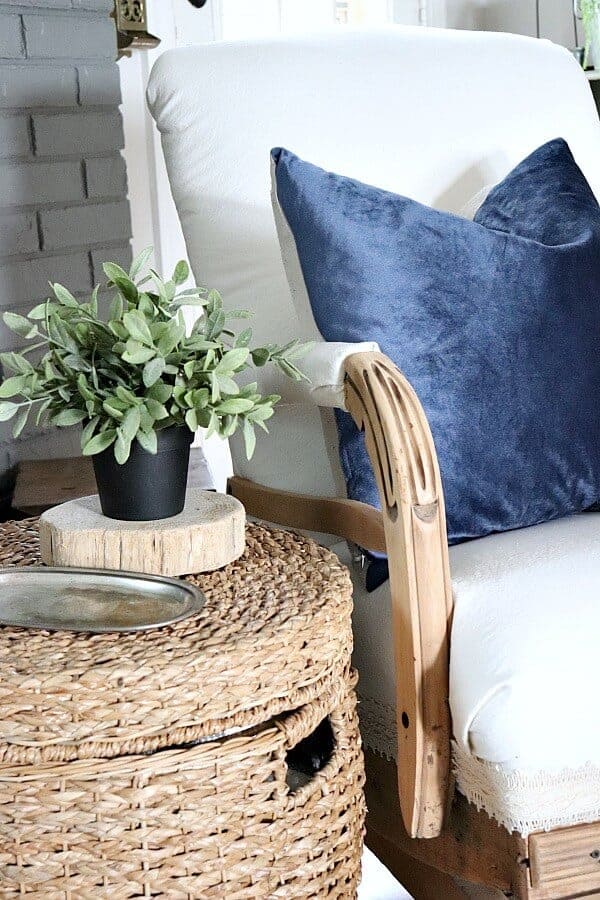
The Transformation
Can you believe it’s the same piece?
In just three days—with plenty of breaks in between—I gave this chair and ottoman a brand-new life. If I had powered through, I could’ve done it in a (very long) day, but who has time for that?
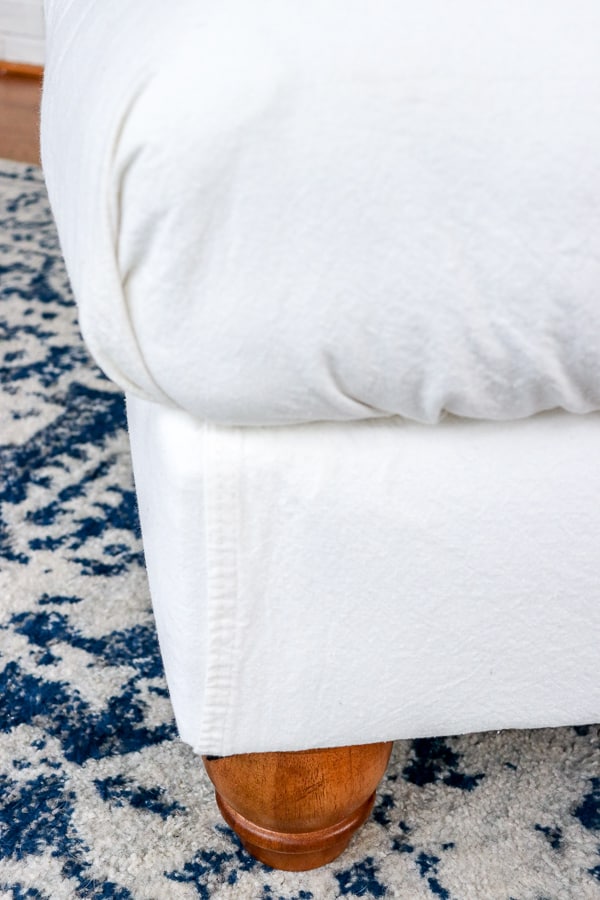
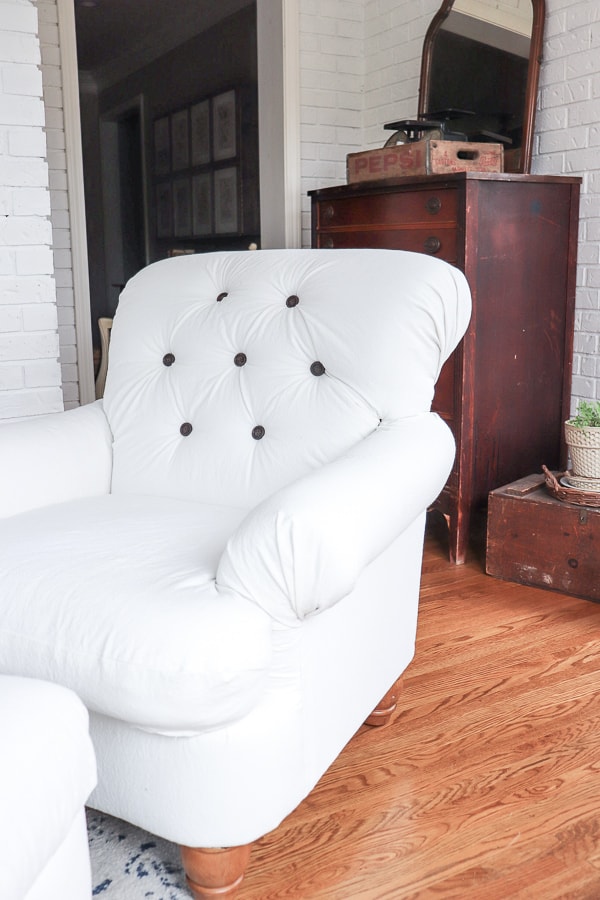
The back turned out especially clean thanks to the tack strips.
It’s one of my favorite details!

Final Thoughts
So, I swore off upholstery projects…and here I am planning the next one!
I’ve got another chair already waiting in the wings. Clearly, it’s not that daunting—or I wouldn’t keep doing them.
If you’ve been on the fence about trying a DIY like this—do it. It’s totally doable, and the results are so worth it.
Check Out My Other Upholstery Projects:
Pin This For Later!
Got questions about the process? Drop them in the comments—I’m happy to help!
Post updated 1/8/26

Hi! If you’re new here…
We’re Jen and Trent – your budget-loving, real life DIY BFFs! With years of experience transforming multiple fixer uppers (while raising 2 kids, owning 3 businesses, surviving open heart surgery, and hustling through major financial curveballs), we believe creating a home you love shouldn’t feel overwhelming – or expensive!
From small room renovations to full-home makeovers, we share approachable, step-by-step projects, honest lessons learned, and all the affordable DIY tricks we’ve picked up along the way. Because you deserve a home that makes you smile — without breaking the bank. And yes, friend — you CAN do this!


Hi! Your article showed up in my feed because I’ve been doing a lot of research about DIY reupholstering.
I am sooo glad! I had no idea of bleaching and using dropcloth!!! Your chair looks fabulous and you made it seem possible for newbies even to accomplish such! Great job and thank you for sharing! Also, did you need to replace foam/cushion? If so what did you use? Thanks and I look forward to checking out your past & future posts.
Oh I am so glad you stopped by! And bonus points for leaving a comment! This is why I love doing what I do and sharing these tutorials. If you have any questions along the way, please let me know. I’m happy to help!
Ha! I’m searching Pinterest for tufted chair reupholstering tutorials and I found this! It’s the exact chair that I’m contemplating tackling 😳
Thank you Cheryl! I wish I had the sewing skills to guide you! I wing it as I go! Hope you find a way to get your cushion to work.
Love it
When I try and make a cover and turn it right side out to put it on my cushion, it’s backwards
What am I doing wrong !
Oh thank you Pat! Your kind words mean so much!
Jen,
I love the transformation!
That seam showing on the ottoman. . .stunning!
You did a wonderful job!
Pat