Hiding a Breaker Box
I’m in love with my laundry room. My husband has caught me standing in this room swooning. It could be that I’m just amazed at our progress, or it could be all the paint fumes getting to my head! Yes, the paint is actually drying as I write this. This week I share our trick for hiding a breaker box.
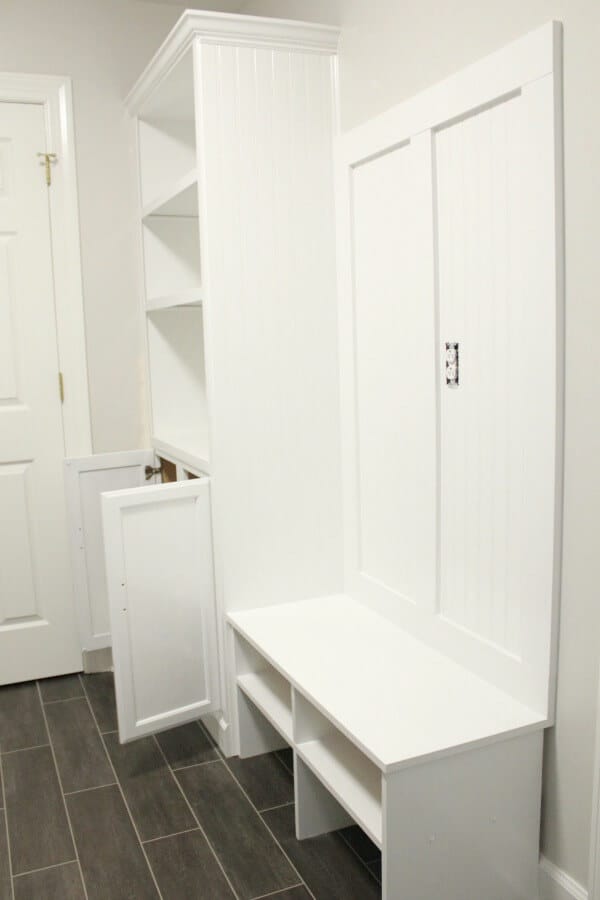
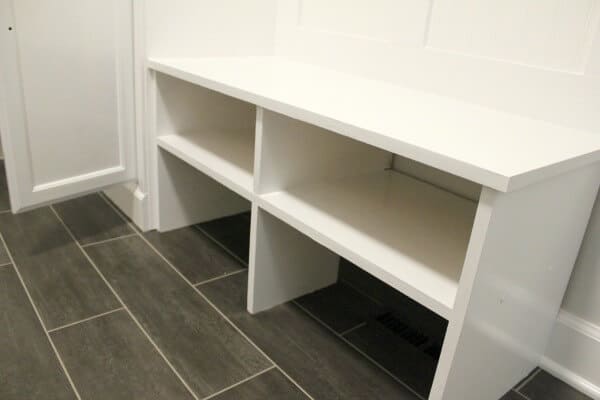
Isn’t it amazing how a little paint can completely transform something? Last Thursday, we we revealed our built-in mudroom bench for Week 4 of the One Room Challenge, by piecing together scrap wood and an unused cabinet. It was a patchwork of wood, but once that white paint covered up all the mismatched pieces, it came together beautifully!
This past week was ALL about the paint. This is 2 coats of paint on our mudroom built-in, but with the cabinet painted such a chocolatey brown before, it looks like it’s going to take 3 coats. See the back of that door? Mmm hmm… 3 coats.
And I may or may not have had a crying jag when oil based paint dripped onto our new floor, thinking I had ruined it. I’m very thankful this week for mineral spirits!! Not only did I have to paint this beast, but we also started Operation Hiding A Breaker Box where we are trying to disguise the hideous eye sore.
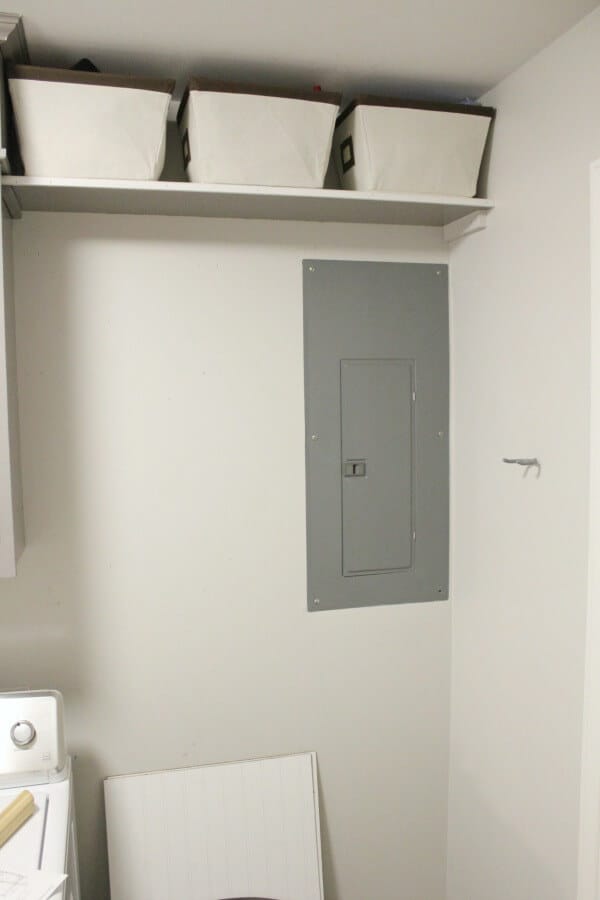
This is right outside our guest bathroom, and it’s so ugly! Let me show you how we created a useful built-in to solve our dilemma.
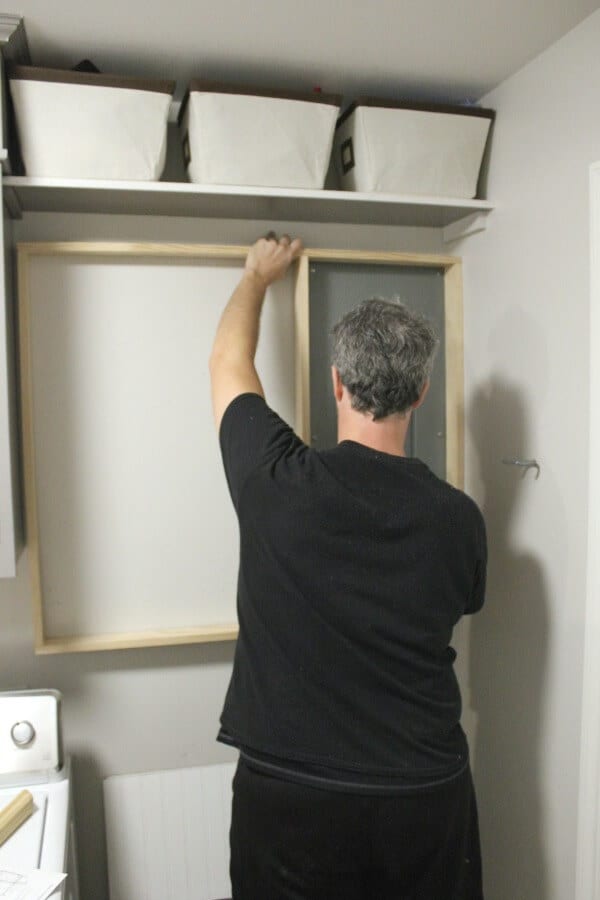
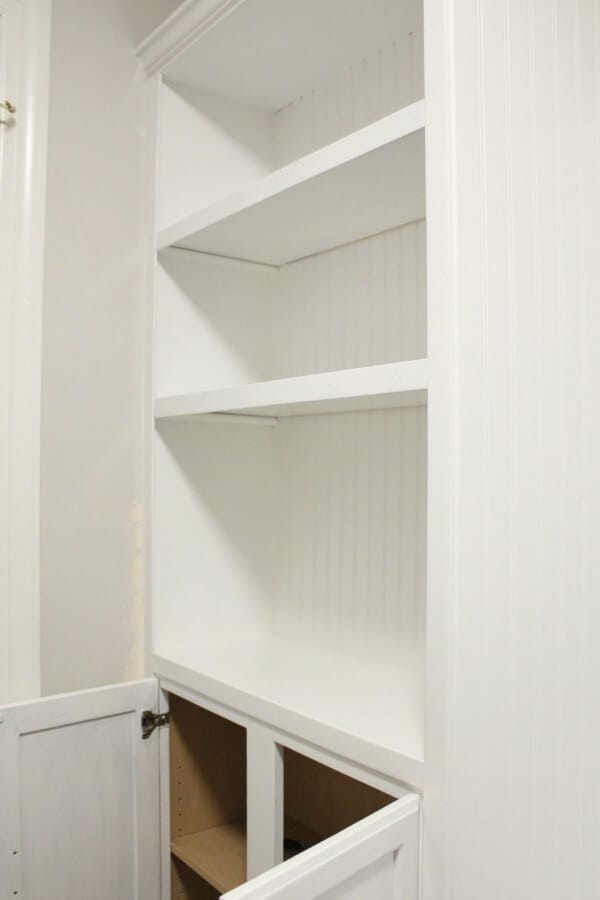
We started by building a frame to fit around the breaker box. The biggest issue is the electrical wiring that we can’t see. We were smart and purchased a stud finder that also detected the wires in the wall. Such a wise investment for that extra safety precaution when dealing with electricity!

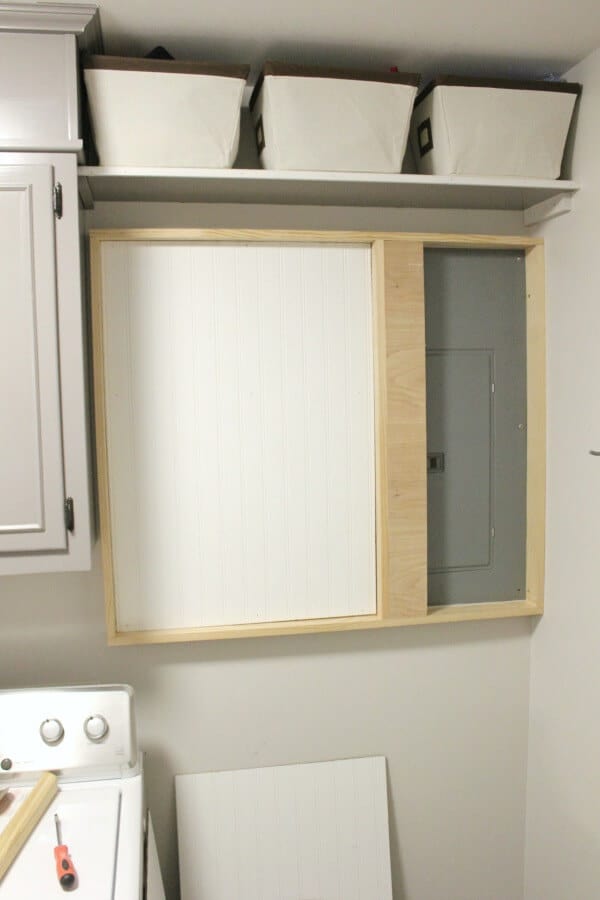
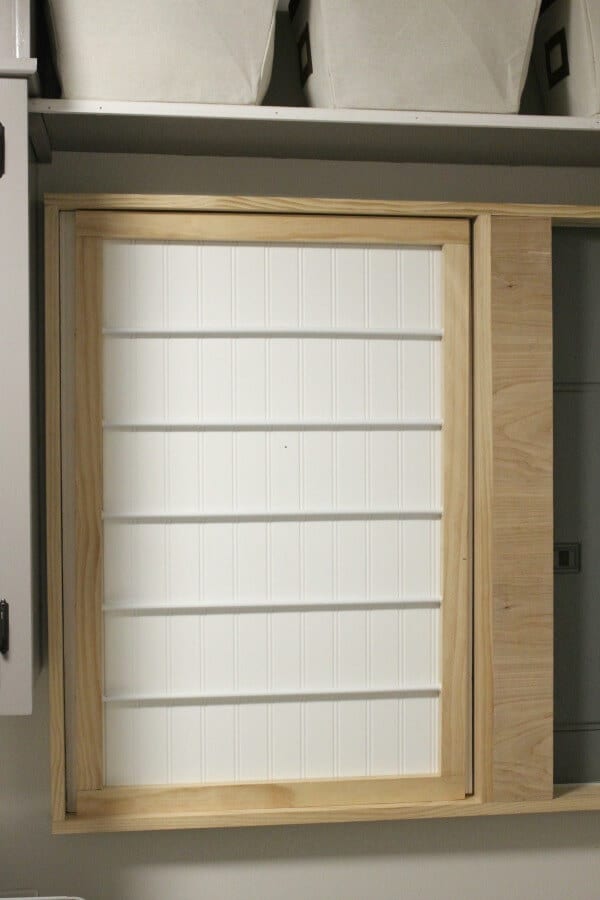
Once we knew where we shouldn’t put screws, we were able to attach the frame to the wall safely. Next came adding the beadboard.
Eeeee!!!! I am so excited! This is going to be our drying rack. I was super cheap and disassembled an old metal one that was awkward and ginormous that turned me into a contortionist each time I tried to open it. I reused the rods by screwing them into another frame we built.

After the paint is dry, we are planning to attach the drying rack with hinges at the base and a chain on the sides to allow the drying rack to tilt out for us to put the clothes on the rack to dry.
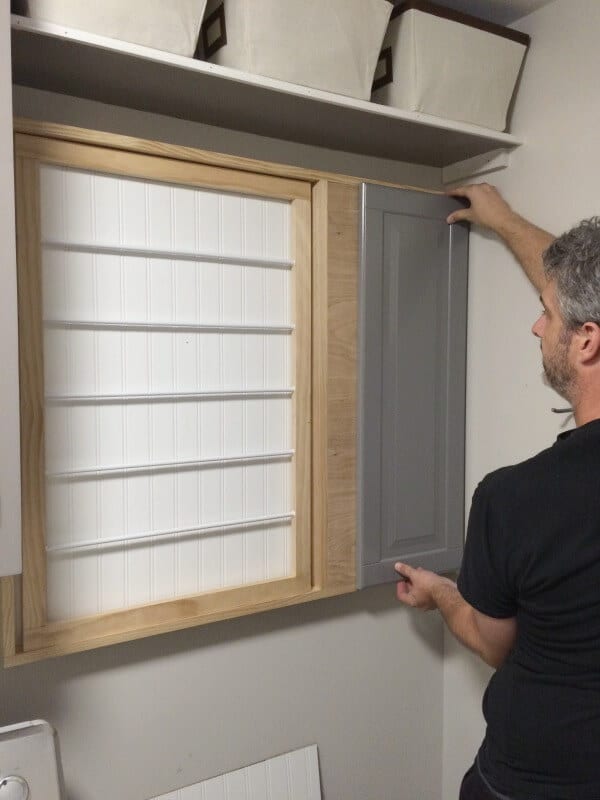
And to solve the eye-sore, I stumbled upon this cabinet door in our garage when we were sorting through scrap wood a few weeks ago. This is a door I found in the clearance bin last year on a visit to Ikea. It was 70 cents, y’all! She’s gonna get painted white as well and will blend right in while hiding a breaker box. Now for the folding table!
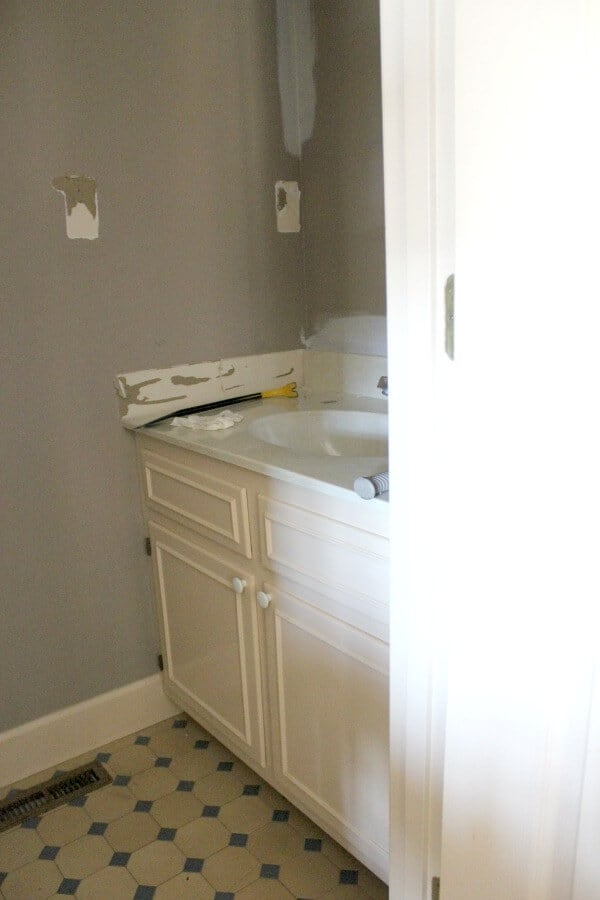
We have an unused half bath that we plan to convert to a closet in the next few months. This sink base just so happens to fit perfectly underneath that drying rack!
How awesome is that?!
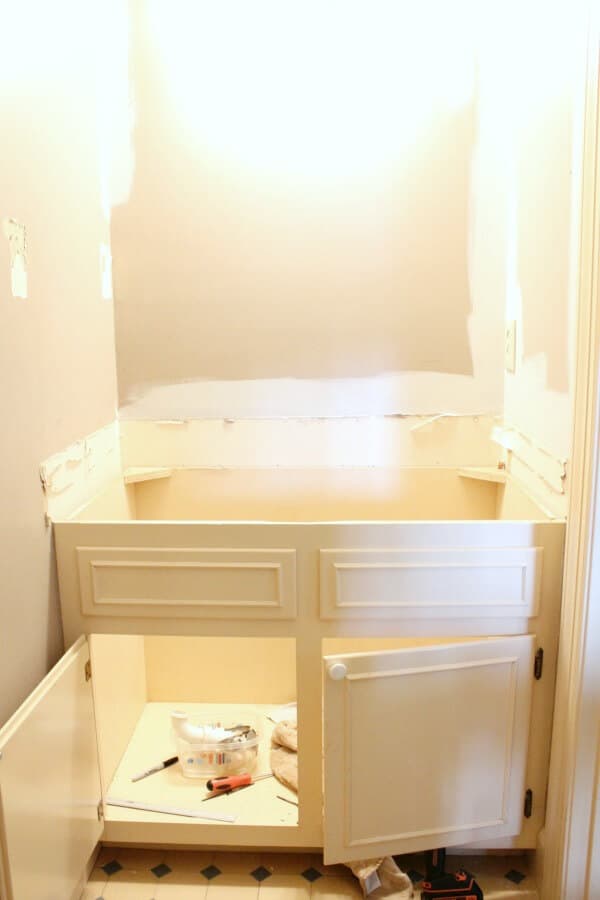
It took busting out some tile and a little plumbing to get this cabinet base out of here and into our laundry room. And guess what?! No bunny trail this time! We stayed on task and quietly closed this door to put off this project for another time. Patting myself of the back for that one! Now, just look at the cabinet in place!
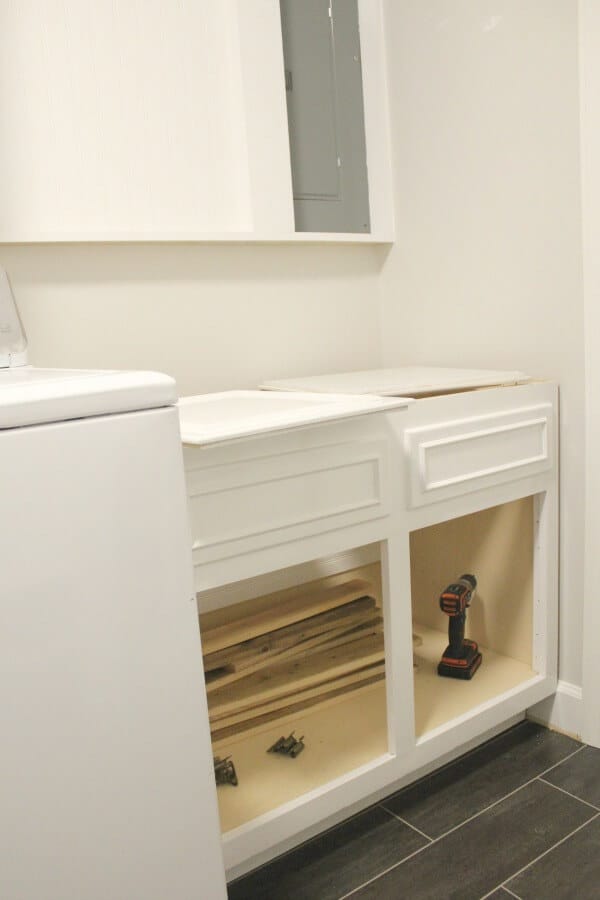
We attached the cabinet base to the wall and plan to add trim and a topper to make an unused corner into a useful folding table!

So much progress was made here in Week 5, but there is still so much to do and only 7 days to do it! There were some lessons I learned this week:
- Open a window when painting with oil paint.
- Mineral Spirits are your friend.
- Caulk solves so many problems.
- Invest in a good stud finder.
- Stick to the plan.
Progress on the Plan
- Move the Water Heater.
- Paint the existing cabinets, walls, trim and door.
- Replace the floors.
- Add to existing upper cabinets to increase storage.
- Create a built-in mudroom cabinet and bench.
- Repurpose an old sink base into a folding table.
- Find a way to hide the breaker box and hang a DIY drying rack.
- 1/2 DONE: Replace the lighting with a Pallet Light Box to match the kitchen.
- Add vintage elements to tie it all together.
It looks like a lot is accomplished, and we have completed most of the big stuff, but as you know, the devil is in the details. Now we have to tie it all together. We still have trim to add to the cabinet base and top of the drying rack (and paint it), we have to hang the door and drying rack (and paint them), we need to touch up the walls and paint the inside of the cabinet (more paint), hang the light fixture, and then add all the finishing elements! We have quite the week ahead, but are so close to the finish line!
Have you checked out the other participants in this challenge? Last week, there were over 200 entries filled with awesome transformations. You have head over to Calling it Home, and look at all the gorgeousness everyone is sharing.
Be sure to follow me on your favorite social media so you don’t miss the big, final reveal next week!

Week 1, Week 2, Week 3, Week 4, Week 5, Week 6

Sources (affiliate links-see my disclosure here): 1 | 2 | 3 | 4 | 5 | 6 | 7 | 8 | 9
This post contains affiliate links.