Easy DIY Chunky Knit Yarn Covered Pumpkins to Make
I love the changing of seasonal decor and finding new crafts to try. Here is a tutorial on how to make chunky knit yarn covered pumpkins for your home!
Today is all about pumpkins!
I am so excited to share this DIY with you!
If you know me by now, then you know I love all things budget-friendly.
Free is my favorite word.
I always hit those end of season sales to snatch up the clearance goodies at 80% off, so at the end of fall, I usually grab some craft pumpkins for the next year.
I love to decorate with them, but they aren’t the prettiest.
When I made a chunky knit pillow cover last year, I fell in love with the yarn!
I am by far not an expert knitter. It was super simple to do and inspiration struck when it came time to decorate this fall.
The other day, I stumbled upon some chunky knit yarn in a clearance bin and I snatched it up super quick!
But I wasn’t sure what I was going to use it for this year.
So when I went to pull out my fall decor, I stumbled upon a craft fail from a few years earlier.
It was a painted faux pumpkin that turned out….well…meh. Then I tried to cover it with yarn and that was another DIY fail.
But when I saw it this year, and then remembered the bulky yarn from the other project, I knew what I could do!
And you don’t need to have any knitting experience to do this!
I am sharing a tutorial video of this project over on youtube and couldn’t wait to share it with you here as well!
So if you have faux pumpkins and extra yarn in your craft supplies, then you will love this easy tutorial.
Here are the supplies you’ll need for this project.
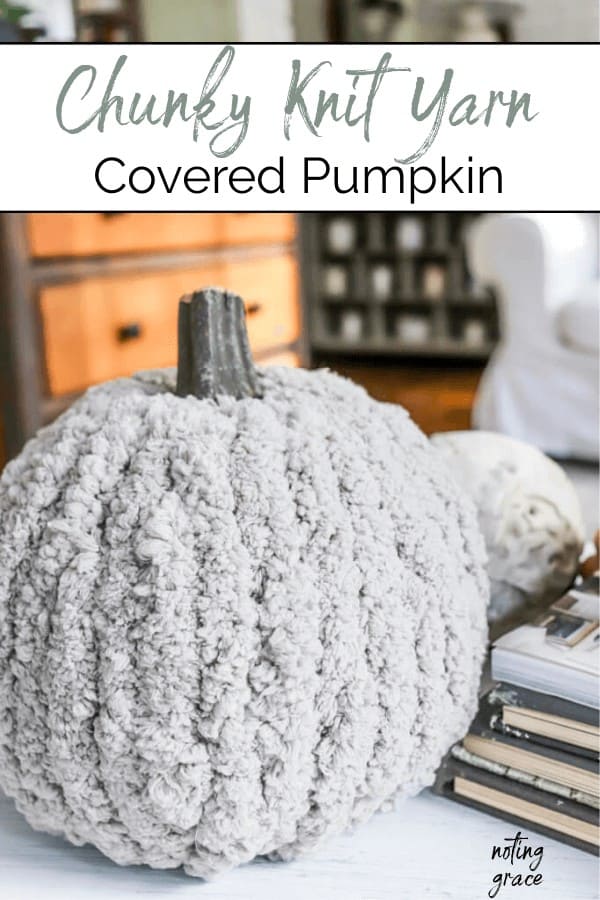
Chunky Knit Yarn Covered Pumpkins
(Some affiliate links are provided below. Full disclosure here.)
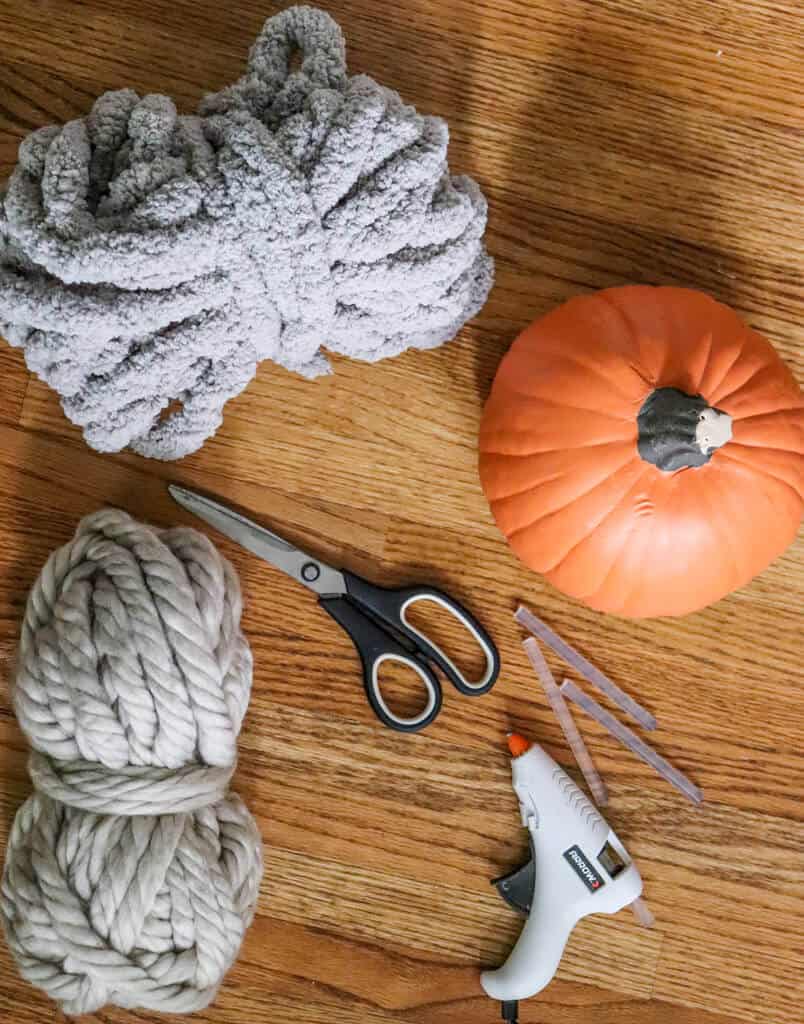
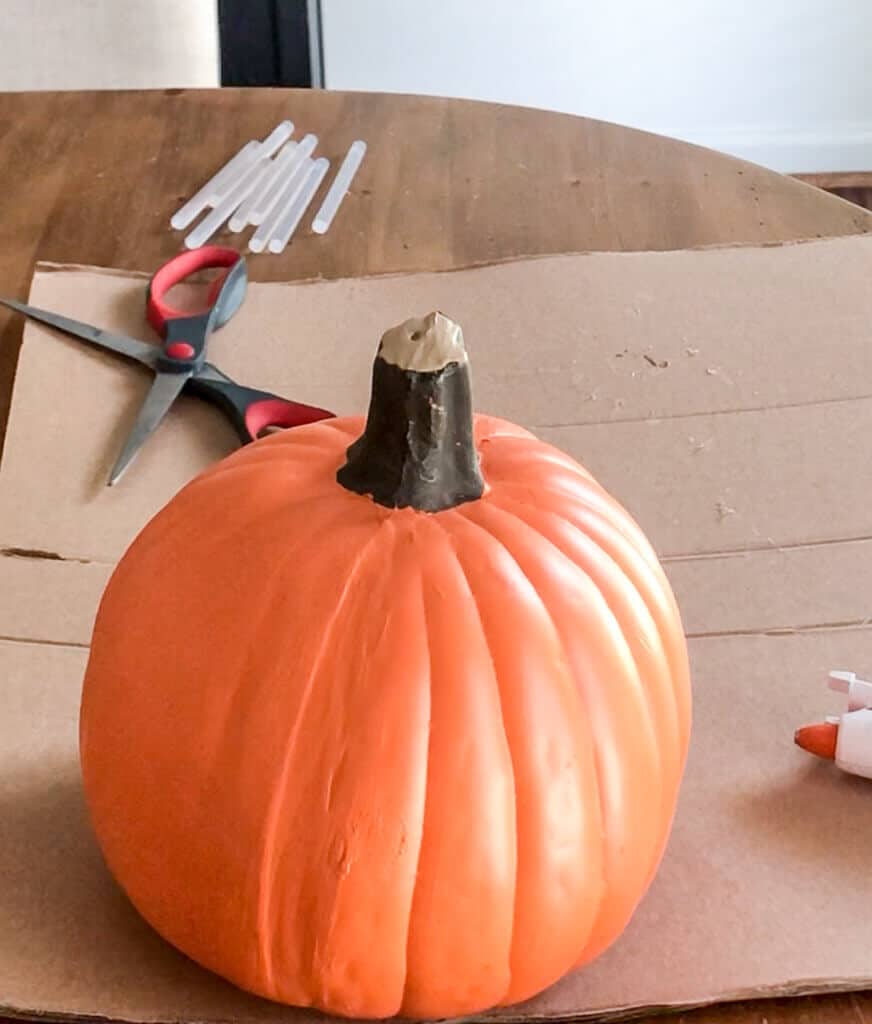
Craft Pumpkins
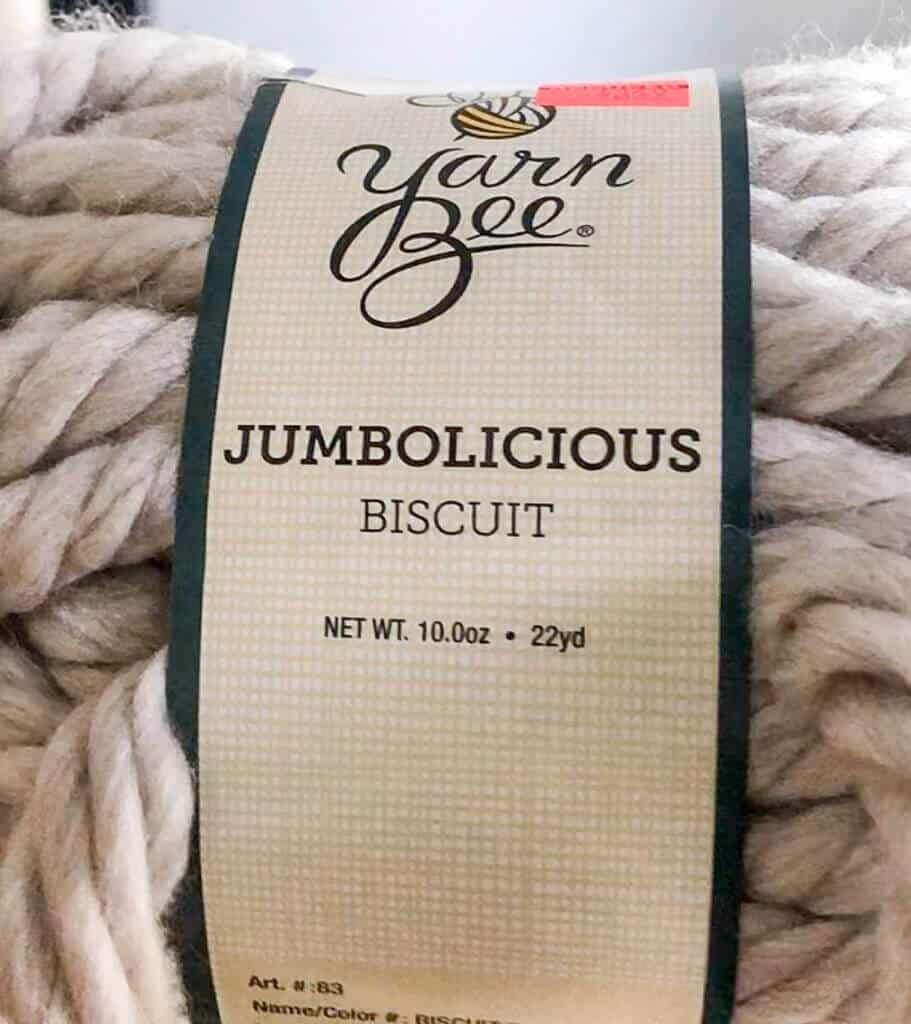
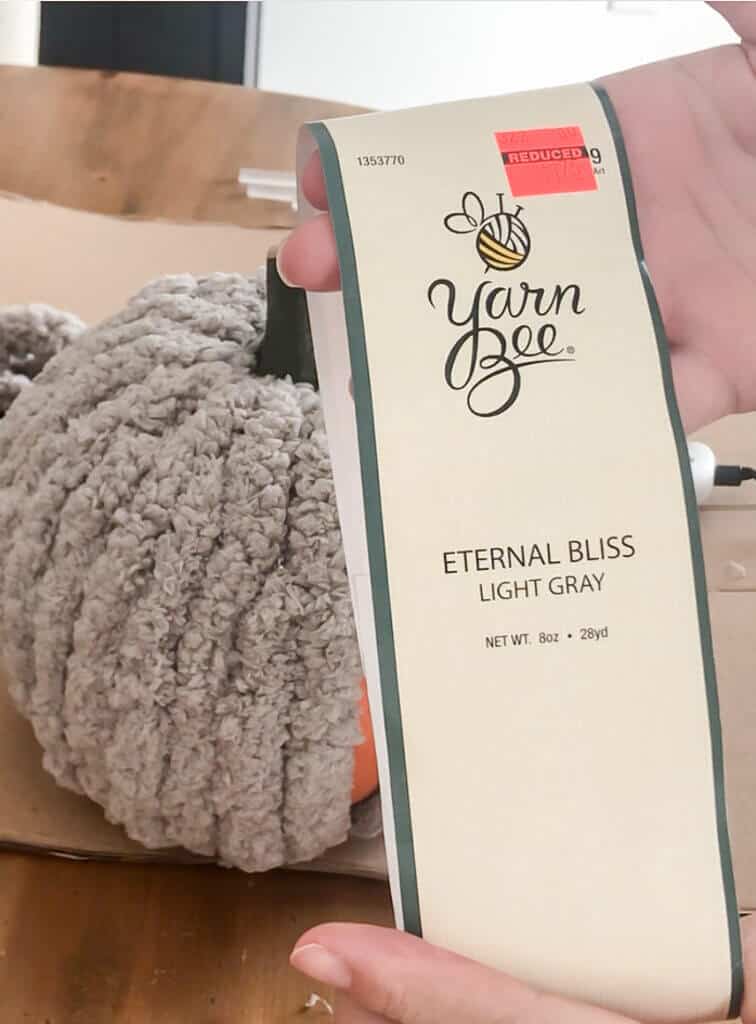
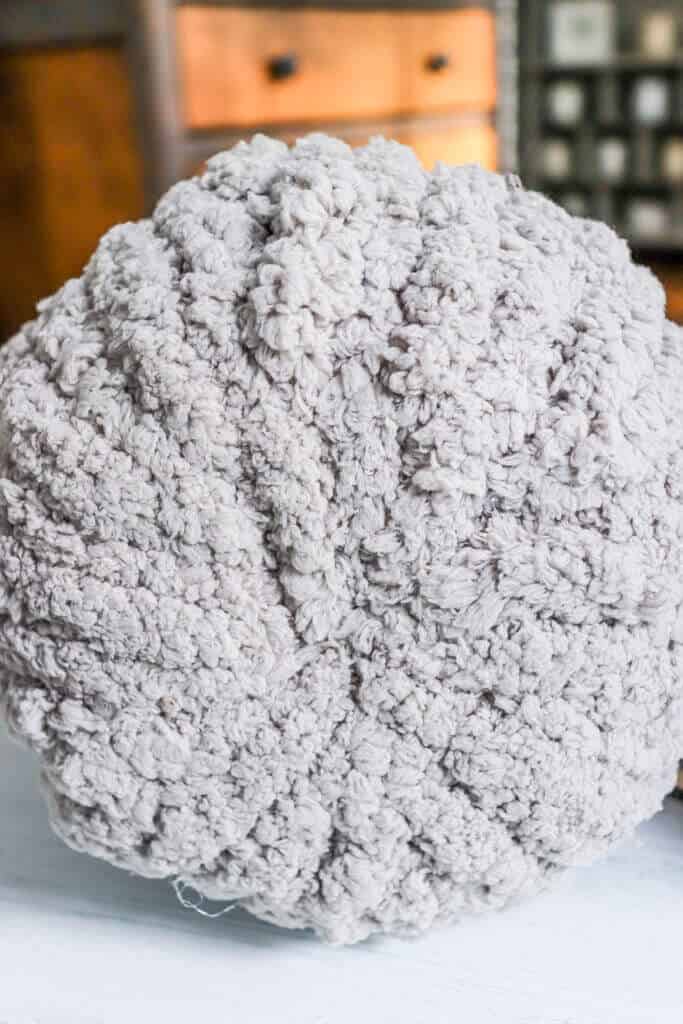
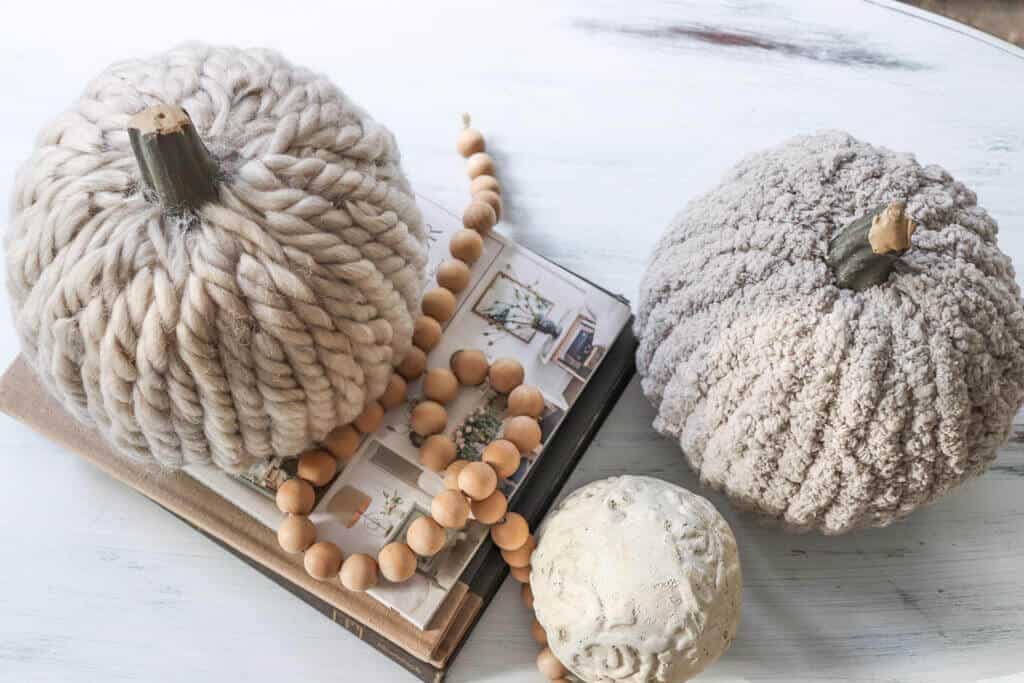
Chunky Knit Yarn – I used Yarn Bee yarn Jumbolicious in Biscuit and Eternal Bliss in Light Gray
Hot Glue Gun and lots of glue sticks
Scissors
These craft pumpkins are hard plastic, so I knew using a glue gun wouldn’t melt them like some foam pumpkins.
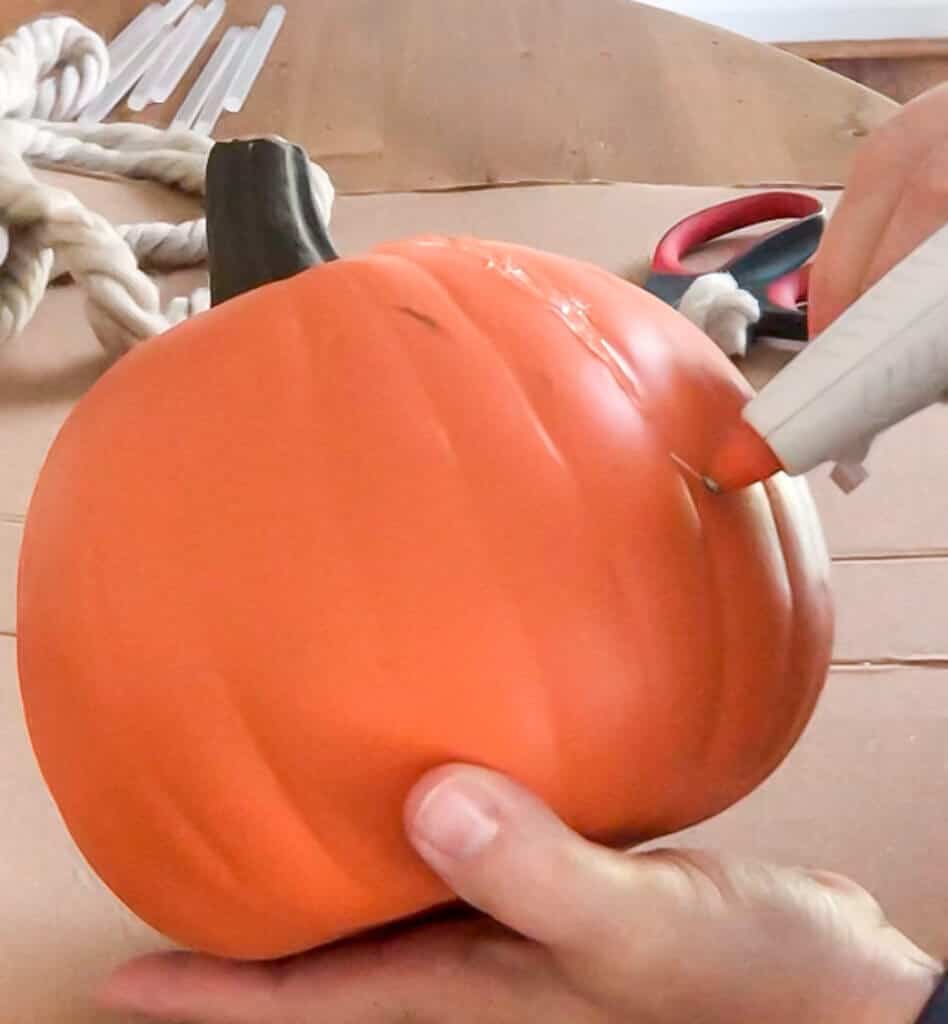
The first step is to started with the ribs, running a bead of glue from top of the pumpkin to bottom down one rib at a time.
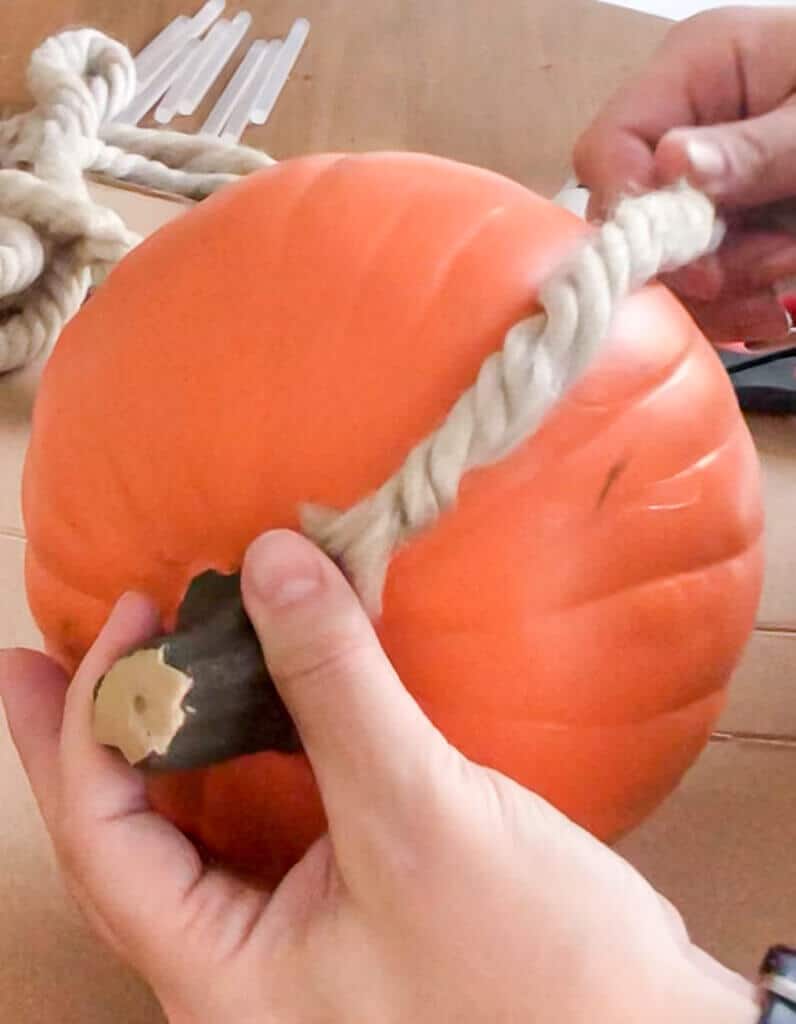
Then you simply place a piece of yarn over the bead of glue and hold for a few seconds.
Leave the long tail of the yarn loose – you will secure those areas later.

Work around the pumpkin until all the ribs are covered.
Next, you start filling in the the open areas, working around and around until the entire pumpkin is covered.

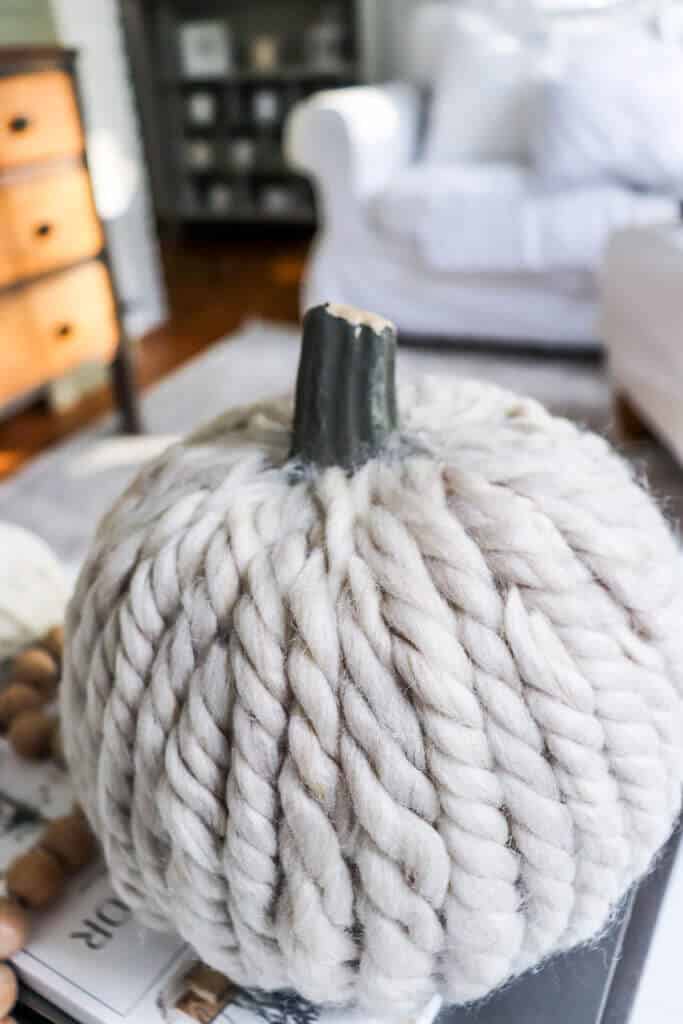
I did find the twisted chunky yarn to be a bit difficult.
Well, maybe not difficult, just a bit time consuming.
Definitely more time consuming.
When I would cut the yarn, I noticed that the yarn would come untwisted.
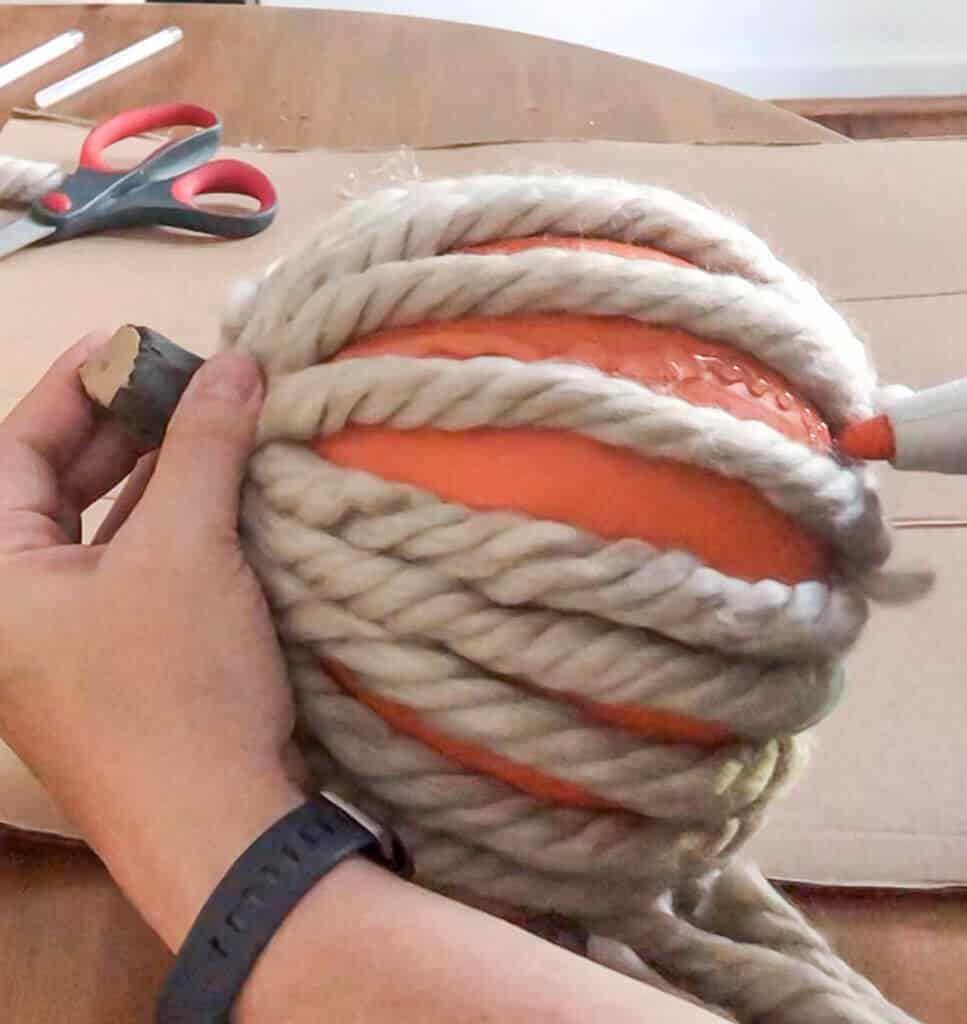
So I found myself doing a lot of re-twisting and tucking and gluing, but it works!
It just needed a bit more love and attention to get it to look just right.
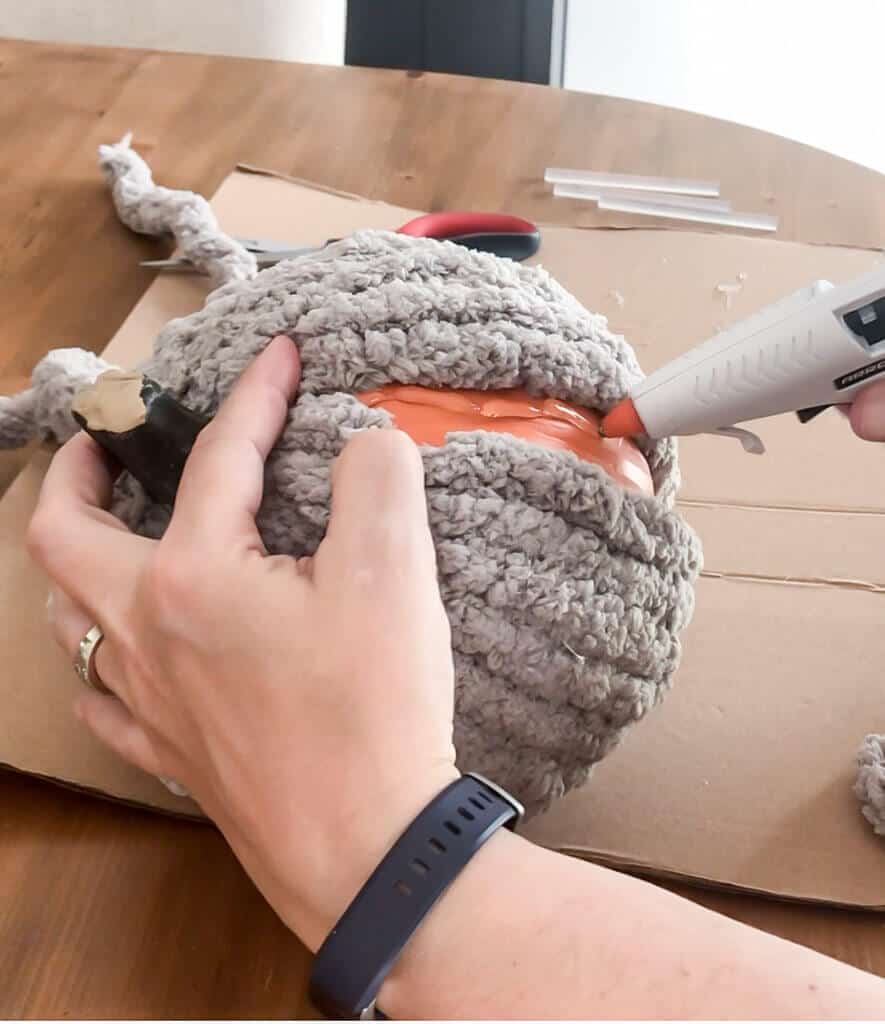
The other chunky knit yarn was much easier to work with.
This is the Eternal Bliss yarn in Light Gray.
As I worked around the pumpkin, I noticed that each strand of yarn was pretty much the same.
Quick Tip: One time saving tip I found was to cut about 5 or 6 strips of yarn ahead of time making each length of yarn equal.
You may need to add a few smaller pieces to fill in all the gaps.
Now for the bottom – you have all those dangling tails and that won’t do.
The last step is to finish off the bottom center of the pumpkin.
Take your time and work the pieces together to have the entire bottom of the pumpkin covered.
You don’t want to overlap the pieces or it won’t sit flat, so there may need to be some extra trimming done to get it just right.
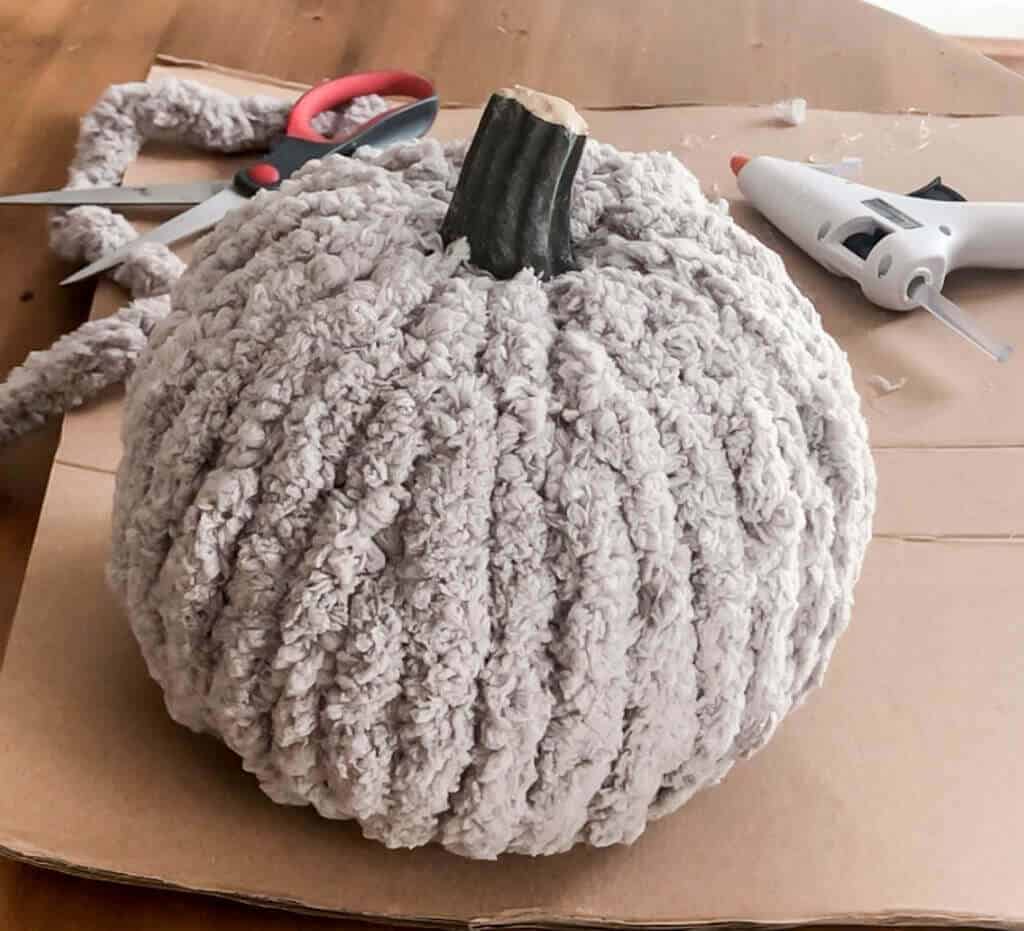
One the pumpkin is fully covered, make sure you glue any loose pieces down, especially around the stem.
This entire project took less than an hour each pumpkin.
I just had a hot cup of coffee on hand, a crime solving podcast playing and enjoyed myself.
This would even be great for crafting with the kids!
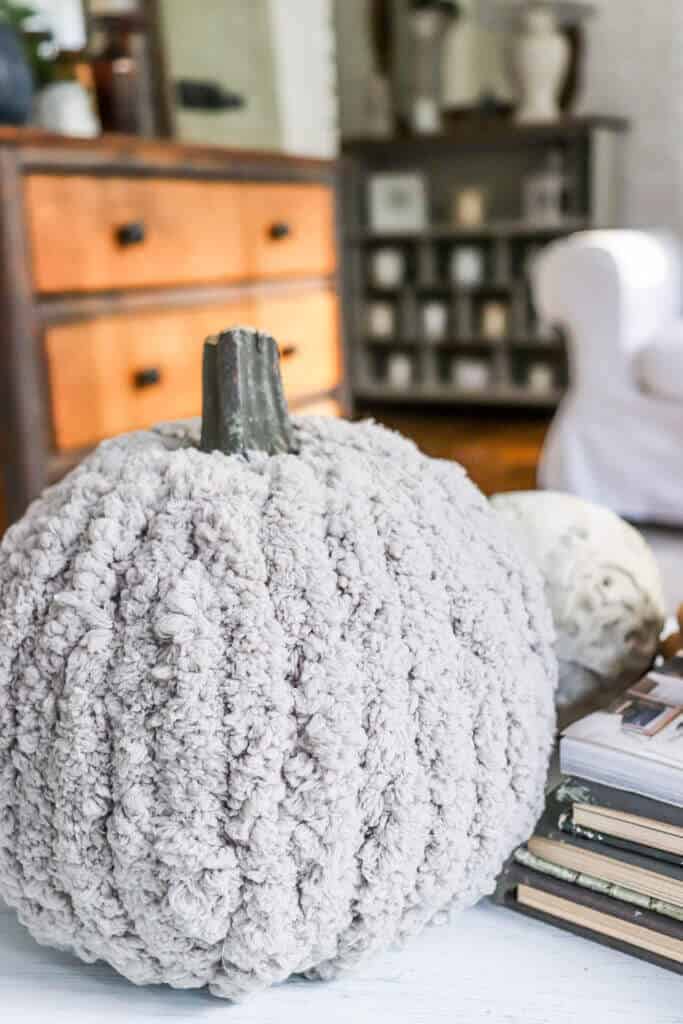
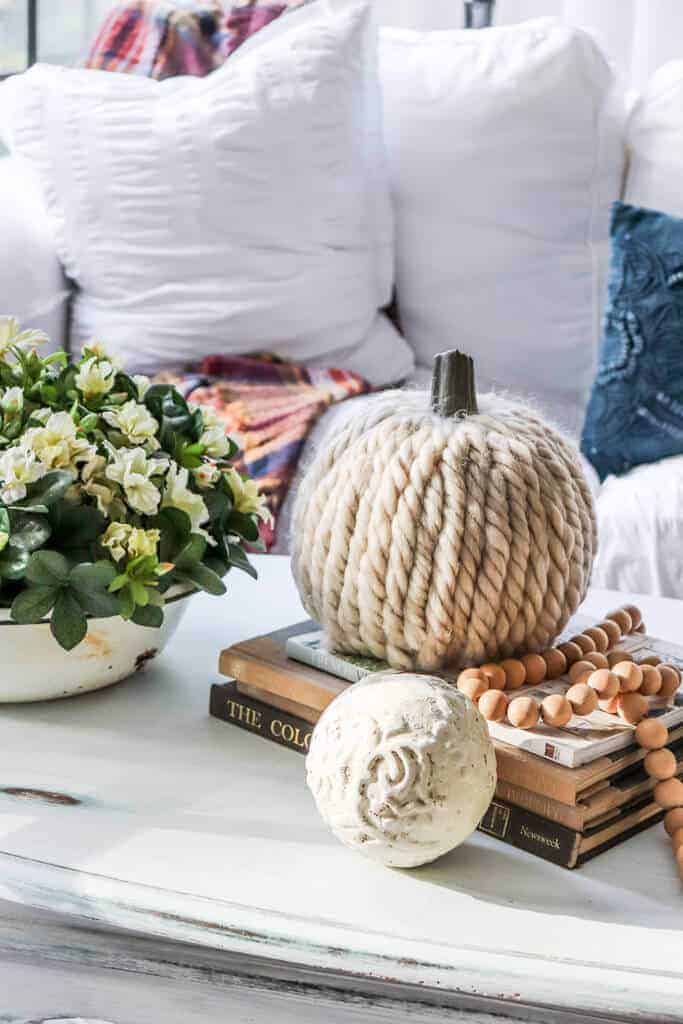
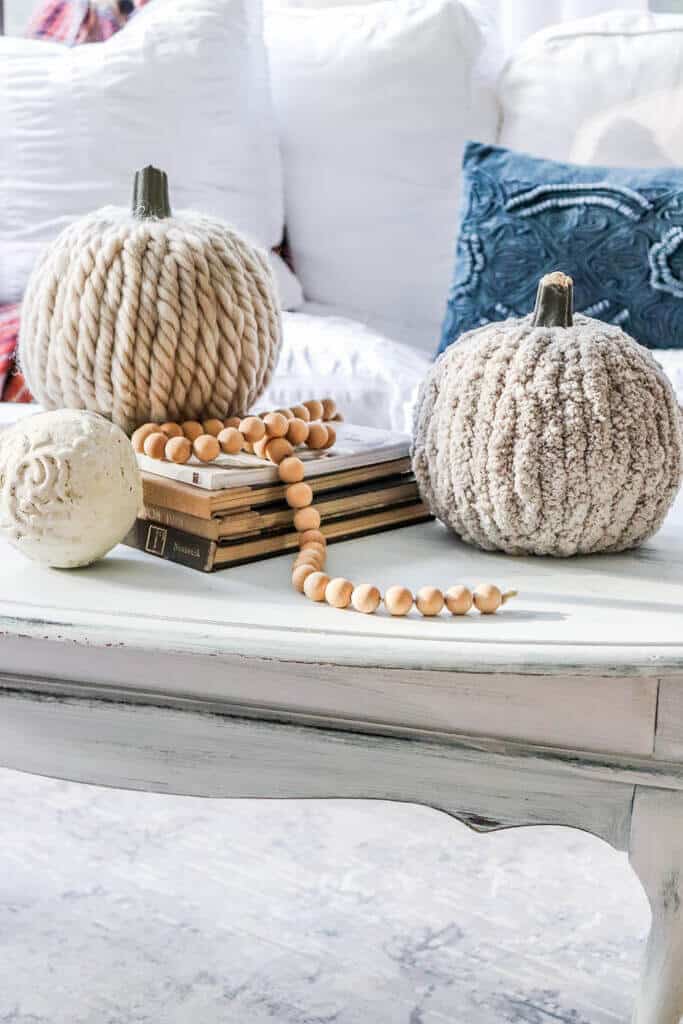
I love how soft and squishy these yarn covered pumpkins are!
And the texture is fun, too! It’s the perfect fall decor!
While I used neutral colors for my pumpkins, you could try a lot of different colors. I think it’s a neat way to customize your colors for your fall decor!
What are some other ways to cover plastic pumpkins?
If chunky yarn isn’t your thing, why not consider these other covered pumpkin ideas?
- Crochet Pumpkins: Do you have knitting skills? Why not create a cover for your craft pumpkins.
- Consider a different kind of yarn: Chenille yarn, Faux fur yarn, or make yarn braids.
- Use excess yarn: save various scrap pieces of yarn to create a kaleidoscope of colors!
- Swap out the stem: Remove the base of the stem and replace it with something different, like cinnamon sticks, a wood stem, or a real pumpkin stem.

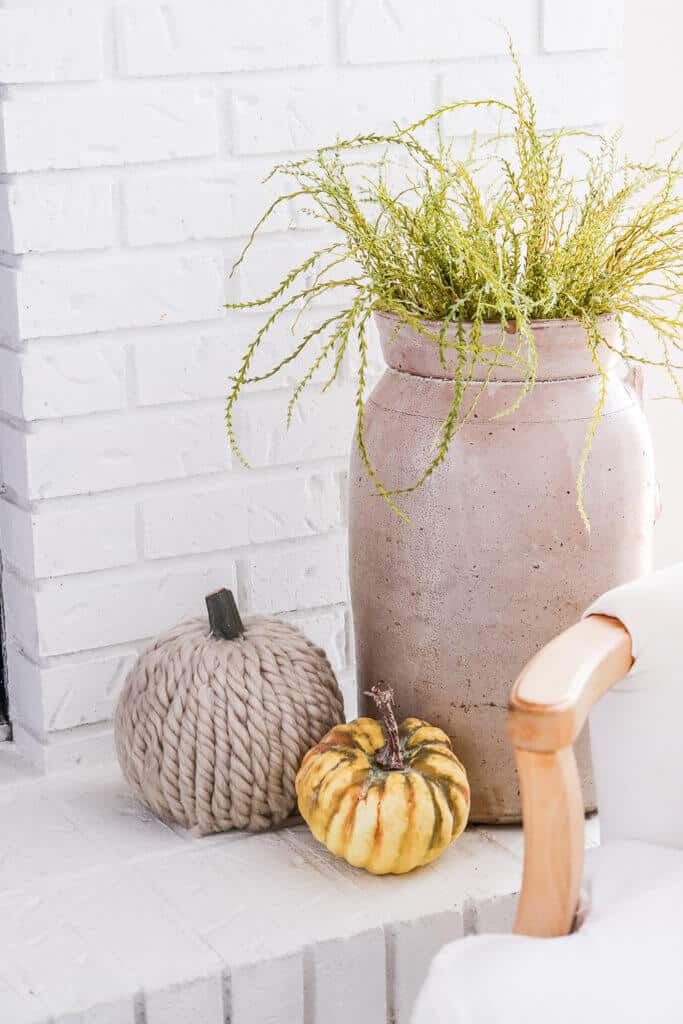
One of the great things about this project is that you can use any pumpkin size – small or large pumpkins – and any yarn color you desire.
It’s a fun way to customize your fall decorations and a great project to do with your kids!
I hope this gave you some crafty inspiration this season and happy crafting this season!
I’m always so very thankful that you read these posts and follow along. We couldn’t do this without you, so I wanted you to know how much I appreciate you and your visits to my blog.

Pin this for later!
I am so glad this inspired you! Hope you have a blast creating your own yarn pumpkins!