How We’re Slowly Transforming our Fireplace
The fireplace is supposed to be the focal point of the room, the heart of the home, but when we bought our home almost 3 years ago, it was the complete opposite! By painting a brick fireplace, we are slowly transforming our fireplace from roadie into rockstar!
I instantly go back a few years every time I pull up one of these old photos.
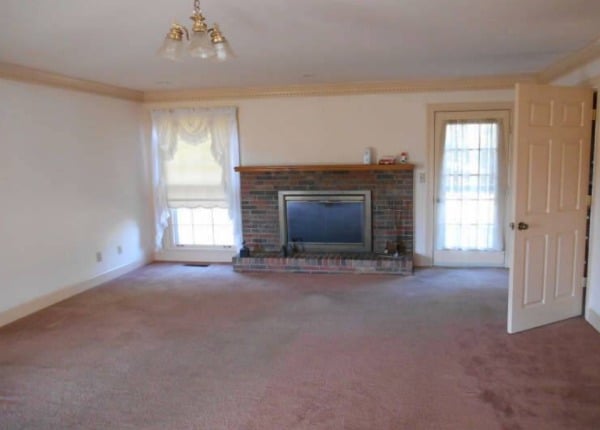
This is a picture of our home when it was on the market.
That pink carpet, cream trim and walls, and dark windows get me in the gut every. single. time.
When we first moved in, the priority was installing our hardwood flooring, which put the fireplace lower on the list of priority.
Next came the paint, and then our Farmhouse Kitchen Makeover, and on and on and the poor fireplace just didn’t make the VIP list.
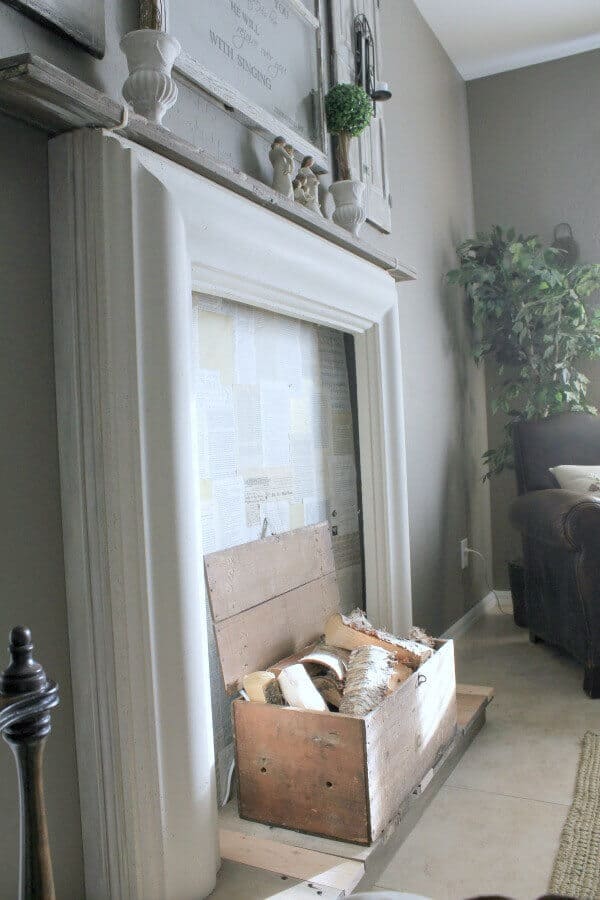
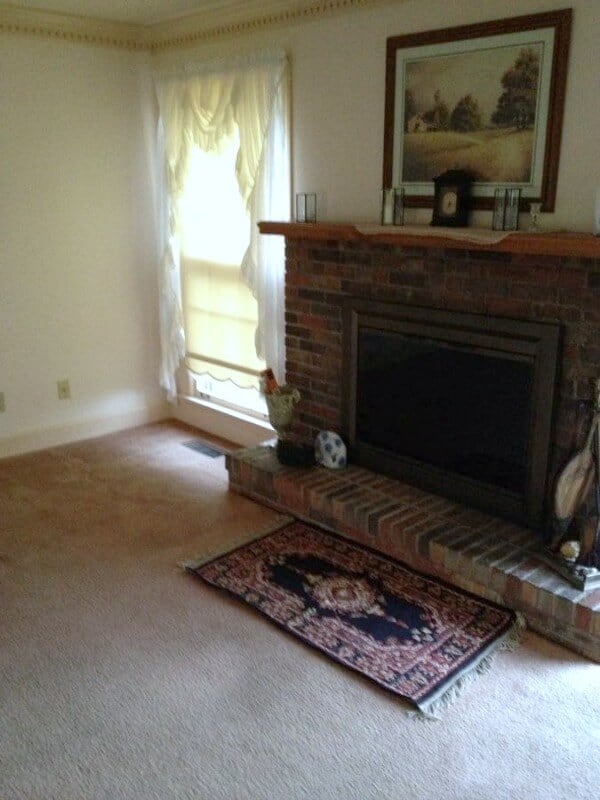
So I tried my best to make do with the fireplace as it was. This is what it looked like during this first phase.
And, before I get too far into this post, let me do you all a favor. Since this was my first home with a fireplace, I had no idea what the parts of a fireplace were called, so let me save you the search time and educate you.
Mantel – The shelf above the fireplace. (Don’t be like Jen. Jen gets it wrong…a lot. It’s a homophone and Jen confuses it with mantel all the time and still misspells them.)
Hearth – the floor of the fireplace – also known as your child’s perch where they sit to get their backs blazing hot and then try to snuggle with you.
Firebox – where you place the wood to burn. It’s also where my husband breaks into his Tom Hanks impression from Castaway.
Insert – the fireproof box or doors to make the fireplace more energy efficient. (See also eye sore.)
So now that you know a bit more about the parts of the fireplace, let’s move on.
Our fireplace was in such bad shape. Not the firebox itself, but the brick surround was not doing well. First, it made the room have a sort of orange-y glow with the brick color.
And there’s the aged brass insert.
It, too, was in great shape, but had never been throughly cleaned and had stains that wouldn’t come off.
And then, there were the cracks….
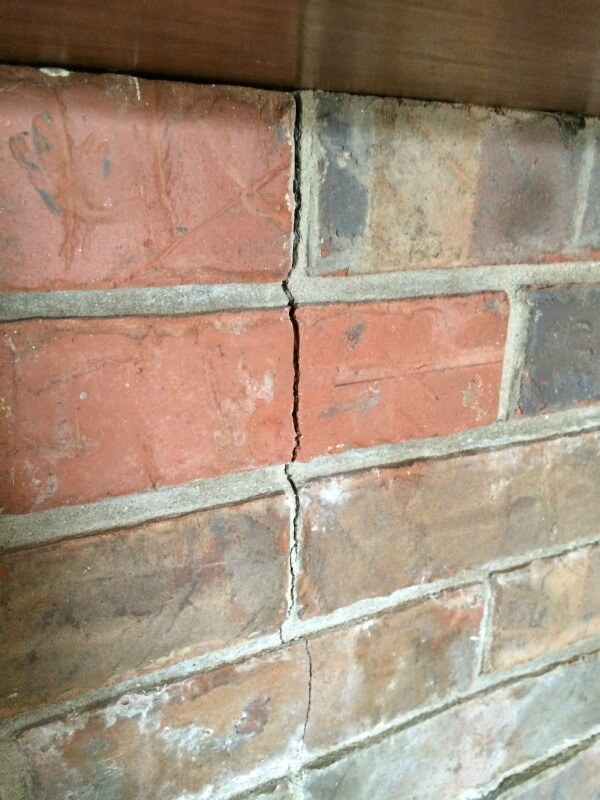
Those cracks in the brick had to be addressed, which meant filling them. Having those lines of filler staring at you like Harry Potter’s scar wasn’t an option for us.
Not that I hate the scar – the scar is cool… on him, not so much the fireplace. So, our option was to paint the brick.
I know I just heard a few gasps.
There is a big debate going on in the design community about painting a brick fireplace and what it does to the value of your home. I say, it’s your home, your space that you are going to live with, so make it pleasing to you!
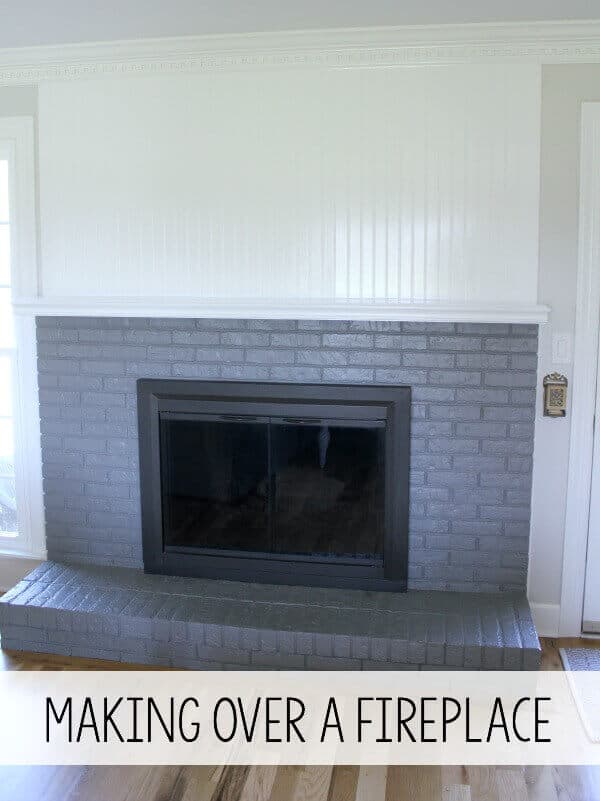
We removed the doors and gave the brick a good scrub as well as the firebox. I was instantly singing “Chim-Chimney” the whole time. Soot is no joke, y’all! Be sure to have drop cloths and rags on hand and wear a mask and eye protection!
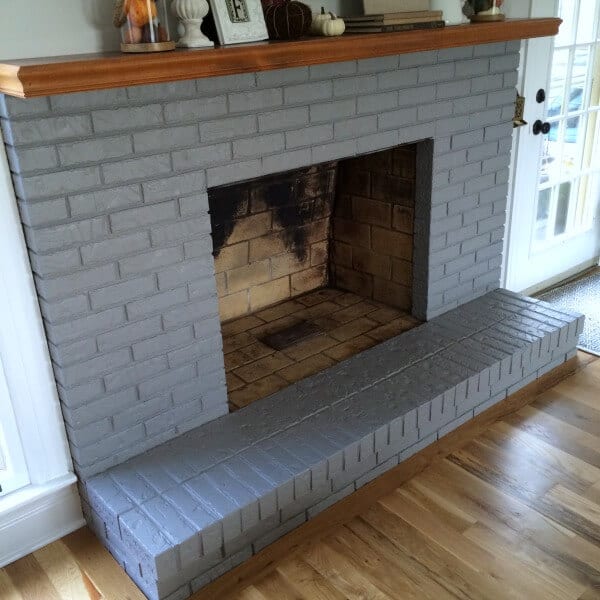
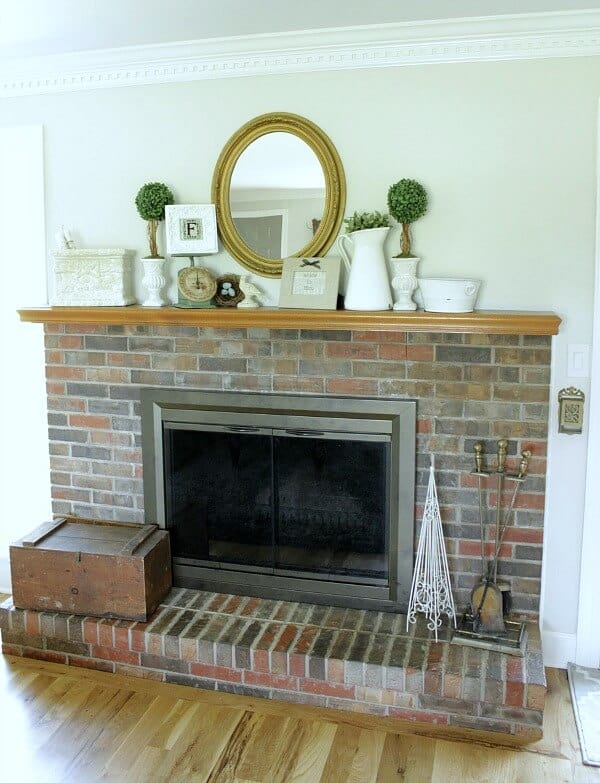
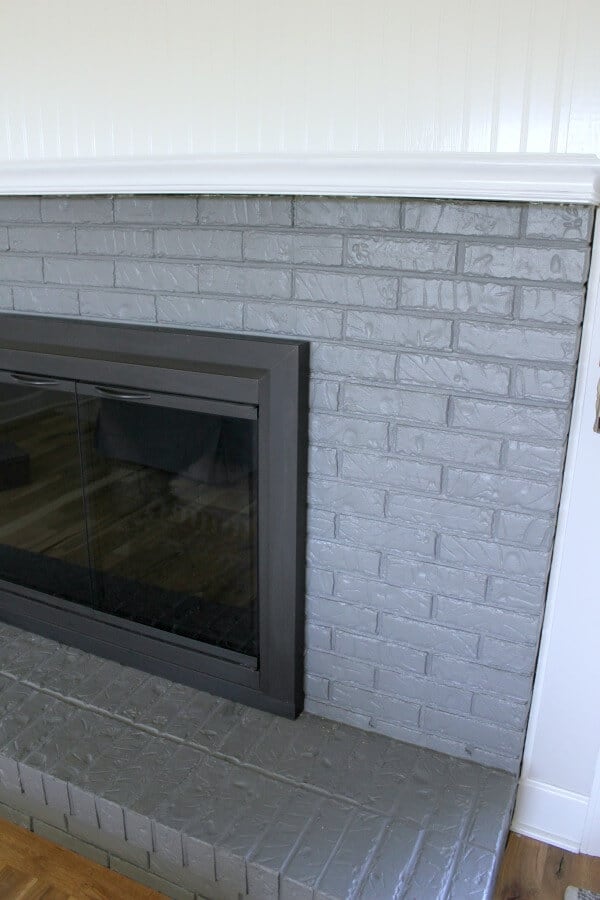
I painted the brick a custom gray color. I started with Dovetail from Sherwin Williams, but it was too bright for the space, so I created a custom mix, adding a bit of black paint until I saw the color I loved.
Now, this is where I wish I could show you how we removed that insert (aka eye sore) forever and painted that firebox black and show it off with beautiful dried wood logs.
But alas. It’s not happening.
The day I chose for painting a brick fireplace was rather cold and not only get I get a steady breeze blowing my hair like Beyonce in a music video, but the thermostat dropped 5 degrees while those doors were off.
sigh (sad trombone)
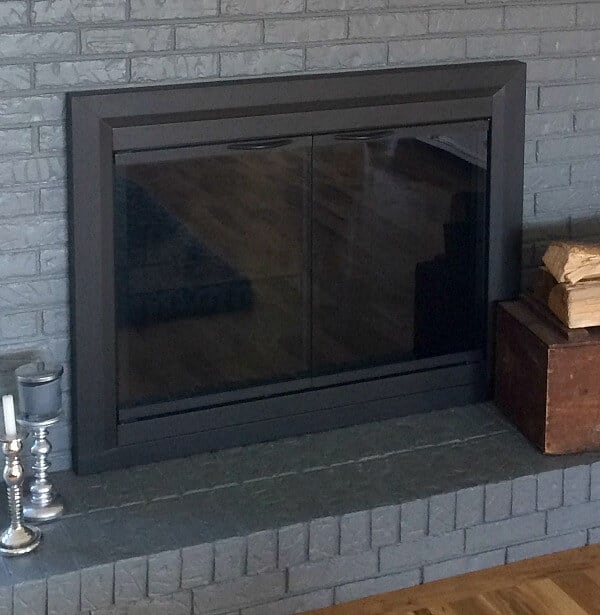
We had a chimney sweep come and weigh in on the issue. Seems like our flue is slightly warped, which is a common happenstance and an expensive repair. So those doors have to stay for now until we can figure out a different option.
But, just when you think all is lost, something super cool happened.
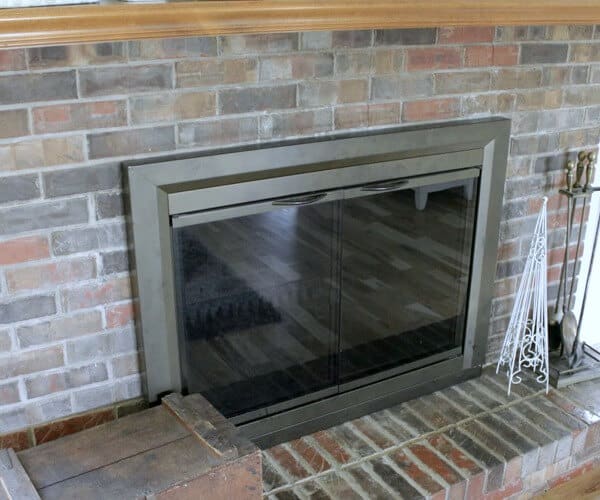
Trent took those old brass doors outside to sand and prep for spray painting. After sanding one panel, he realized that underneath that brass was a gorgeous, oil-rubbed bronze-esque finish! We didn’t have to spray the doors at all! SCORE!
So that was the end of the second phase of the fireplace. The cost of the chimney sweep ate into the rest of the fireplace makeover budget and we had to make do with our partially transformed fireplace for a while.
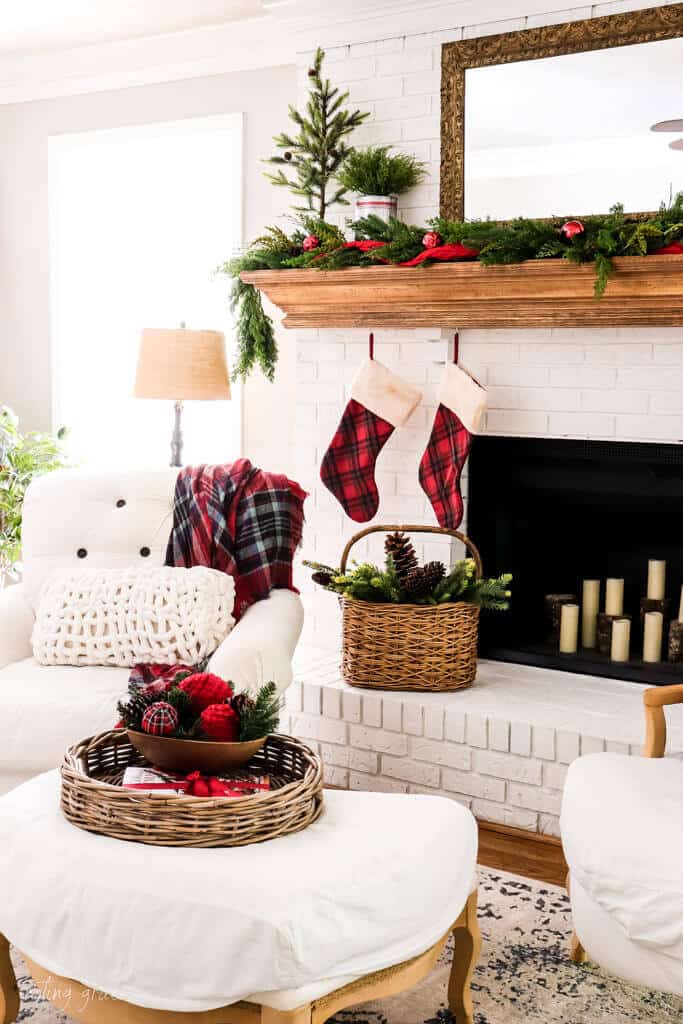
Such an improvement. No longer a roadie, and not quite a rockstar, but this little fireplace could definitely book a gig at a coffee shop.
So let me show you my inspiration of what I want my fireplace to look like when it grows up. This is a gorgeous transformation from Traci at Beneath My Heart is one of my favorites of all time!

I love how the brick is still visible, but the firebox is framed in. And the wood above the mantel draws the eye upward.
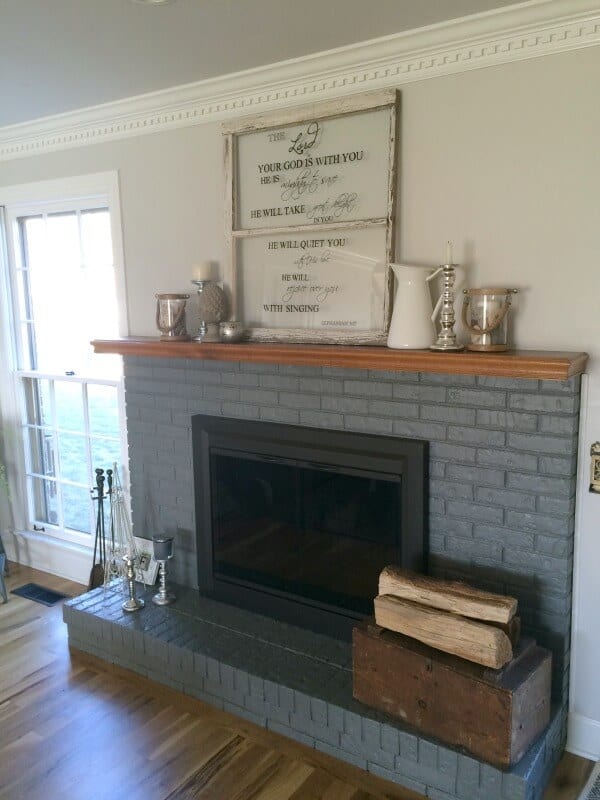
So for Phase 3 of our fireplace, we started adding beadboard above the mantel and painted the mantel white.
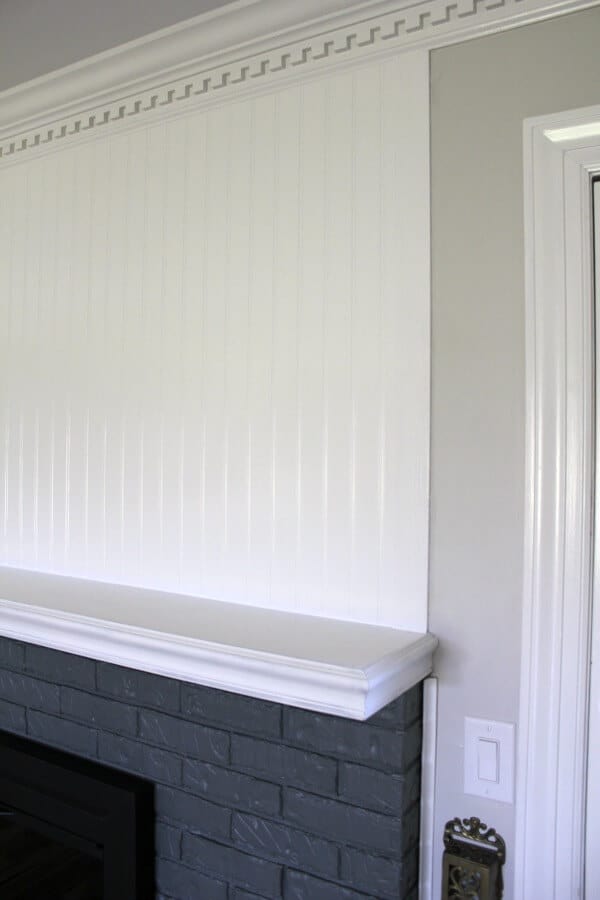
The tricky part for us was the existing crown moulding. I didn’t want to remove or cover it up had to find a solution that was thin enough to match the tapered edge of the moulding. (Learn tips on how we painted our dentil moulding here!)
Since we have beadboard in our kitchen and mudroom, it seemed logical to continue that element above the fireplace and I love how it turned out!
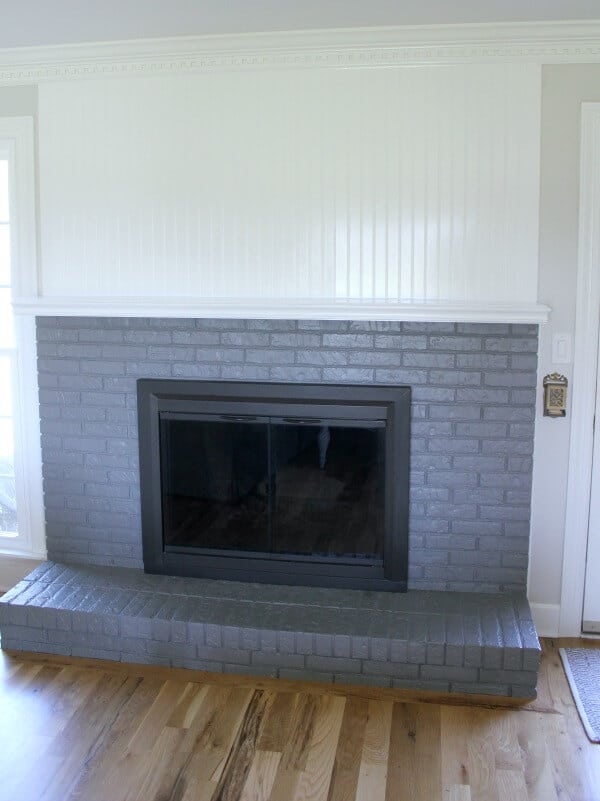
No record deals just yet, but this fireplace is on it’s way to rockstar status!
Just imagine the trim surrounding the firebox. Won’t it look just beautiful?
So, this is where is have to push pause on the fireplace makeover again, but painting a brick fireplace has been a huge improvement!
We are planning on participating in the One Room Challenge again, like we did last fall with our Laundry Room Makeover, and we need to focus our energy and money on this upcoming challenge.
Let me break down the costs so far for you:
Painting a Brick Fireplace Total Cost:
PHASE 1 – $0
PHASE 2 – $175
Filler and cleaning supplies and paint – $25
Chimney Sweep $150
PHASE 3 – $28
Beadboard Paneling – $20
Trim – $8
Paint and supplies on hand – $0
Total so far – $203
Our goal is to finish out the framing around the fireplace this summer. I’d love to keep the costs as low as possible, preferably right around $100. Wish me luck!
Next week, I’m participating in a Spring Home blog hop and I’m filling this gorgeous space up with beautiful spring decor and I can’t wait to show it off to you! Be sure to follow along so you don’t miss seeing how the fireplace looks styled.
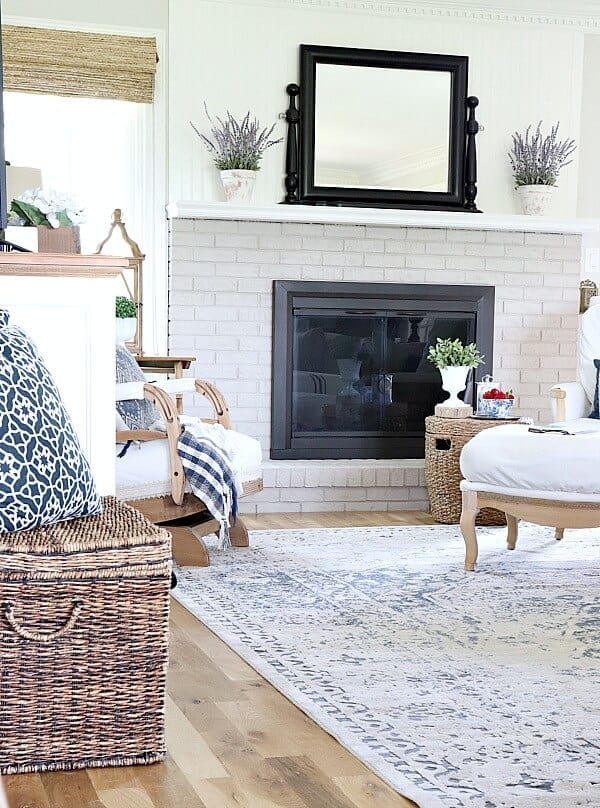
UPDATE!
You should see how the fireplace looks now!