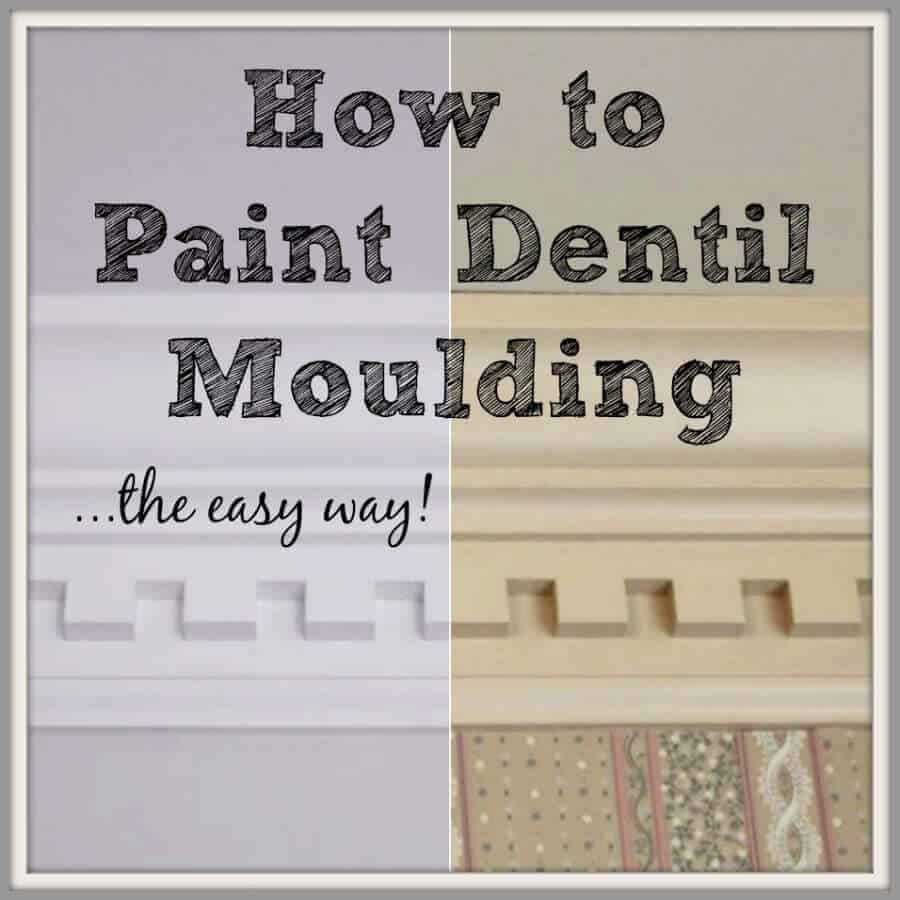
How to Paint Dentil Moulding – the Easy Way!
We have started a complete overhaul of our dining room and are so excited to show you an amazing trick we found! Here’s how to paint dentil moulding, the easy way!
Painting Dentil Moulding can definitely be a daunting task.
All those nooks and crannies to painstakingly deal with are a lot to consider painting.
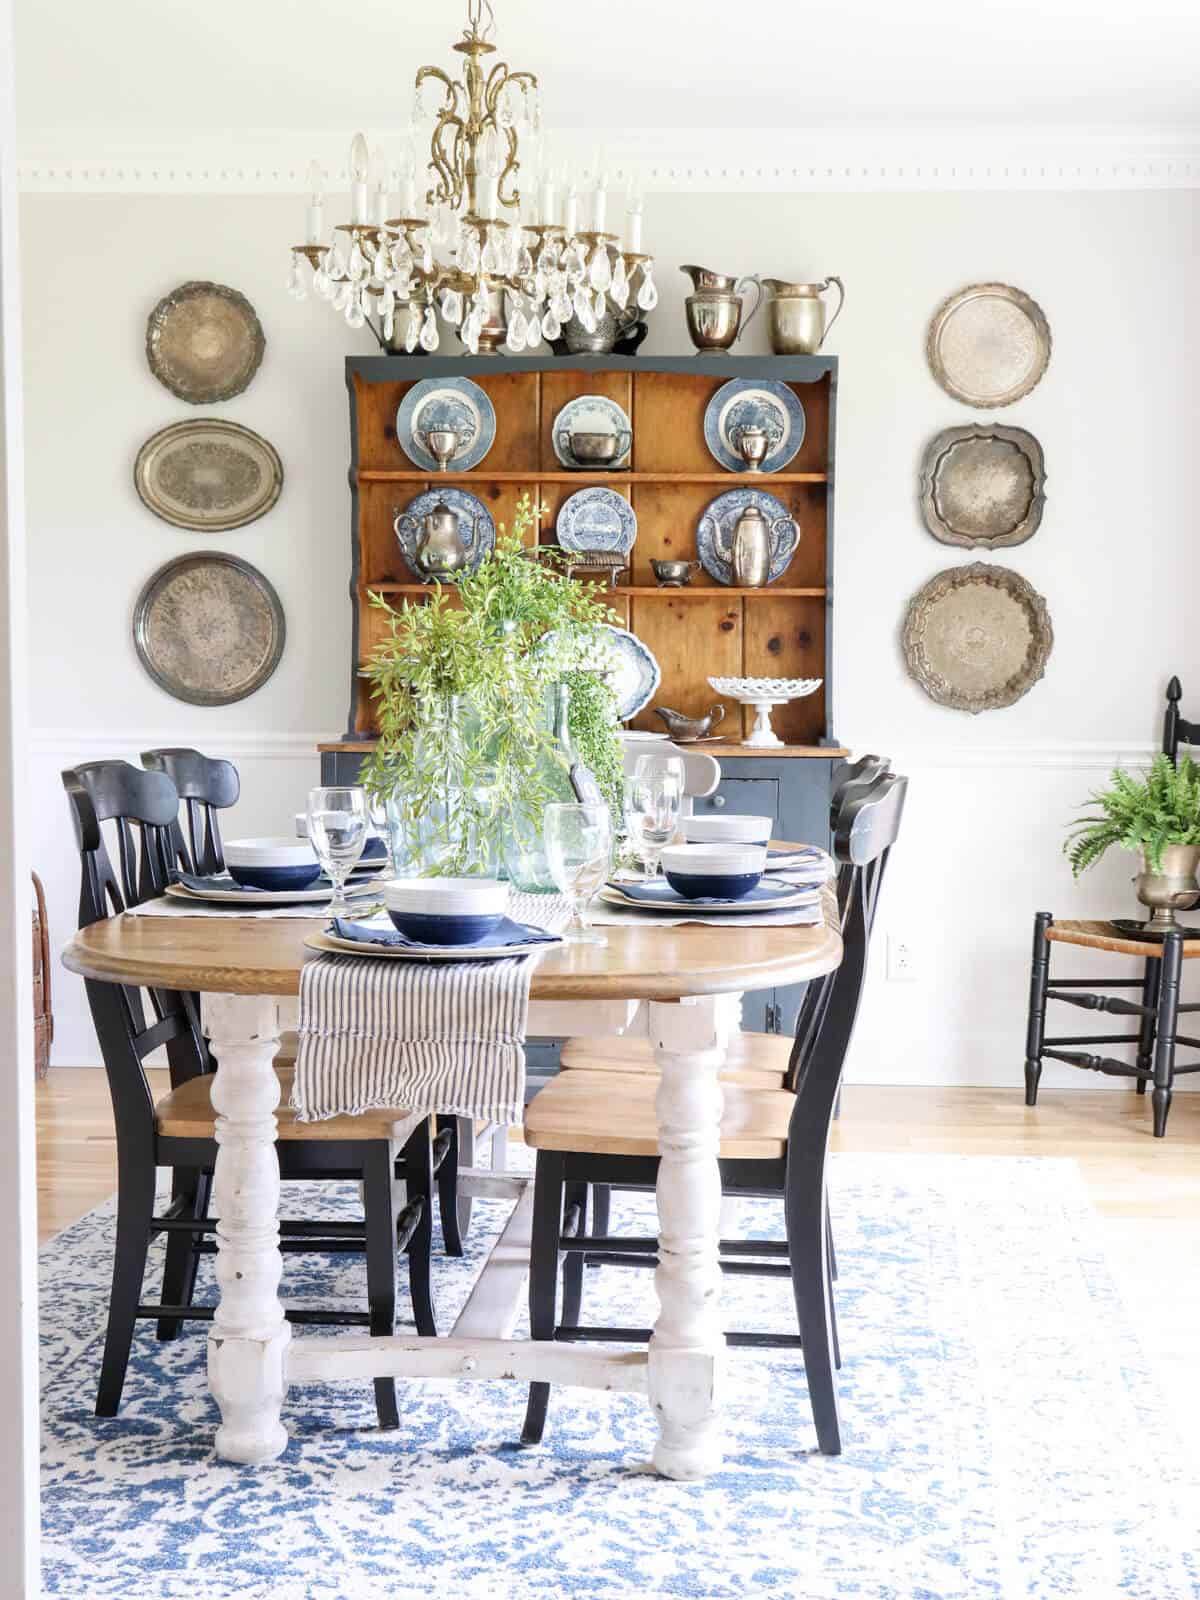
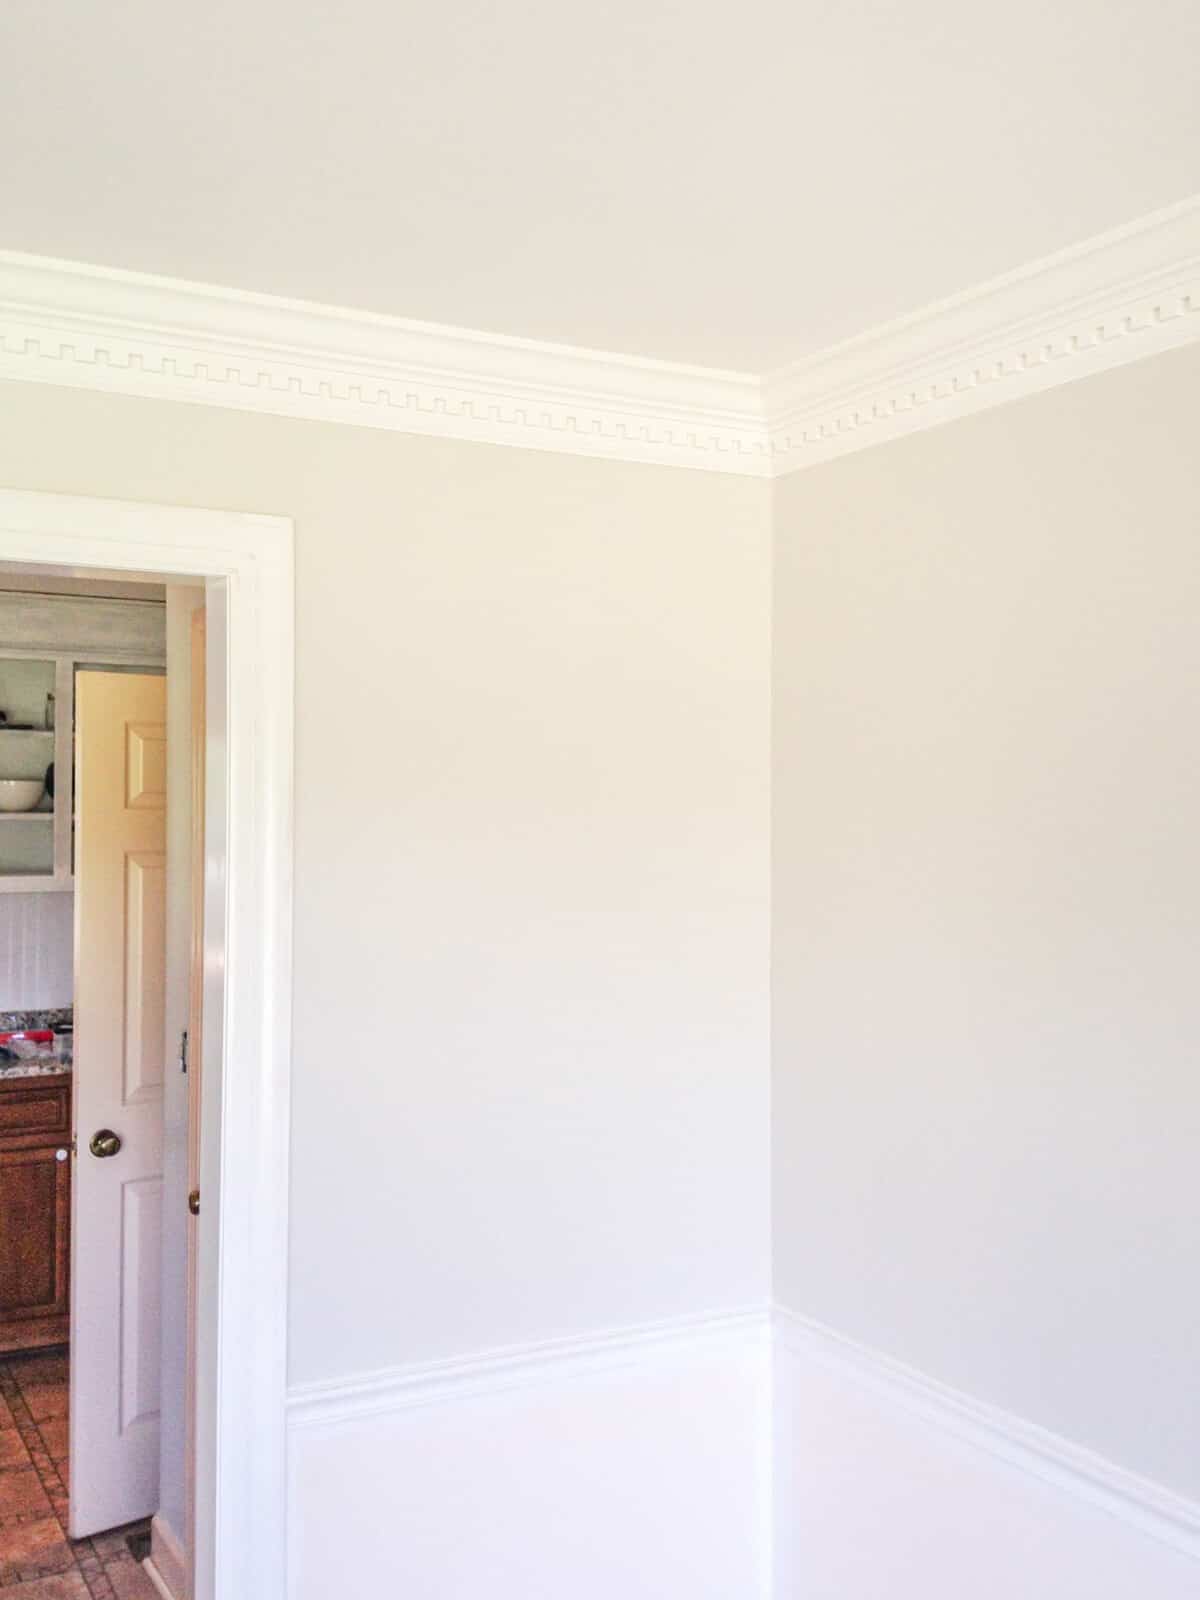
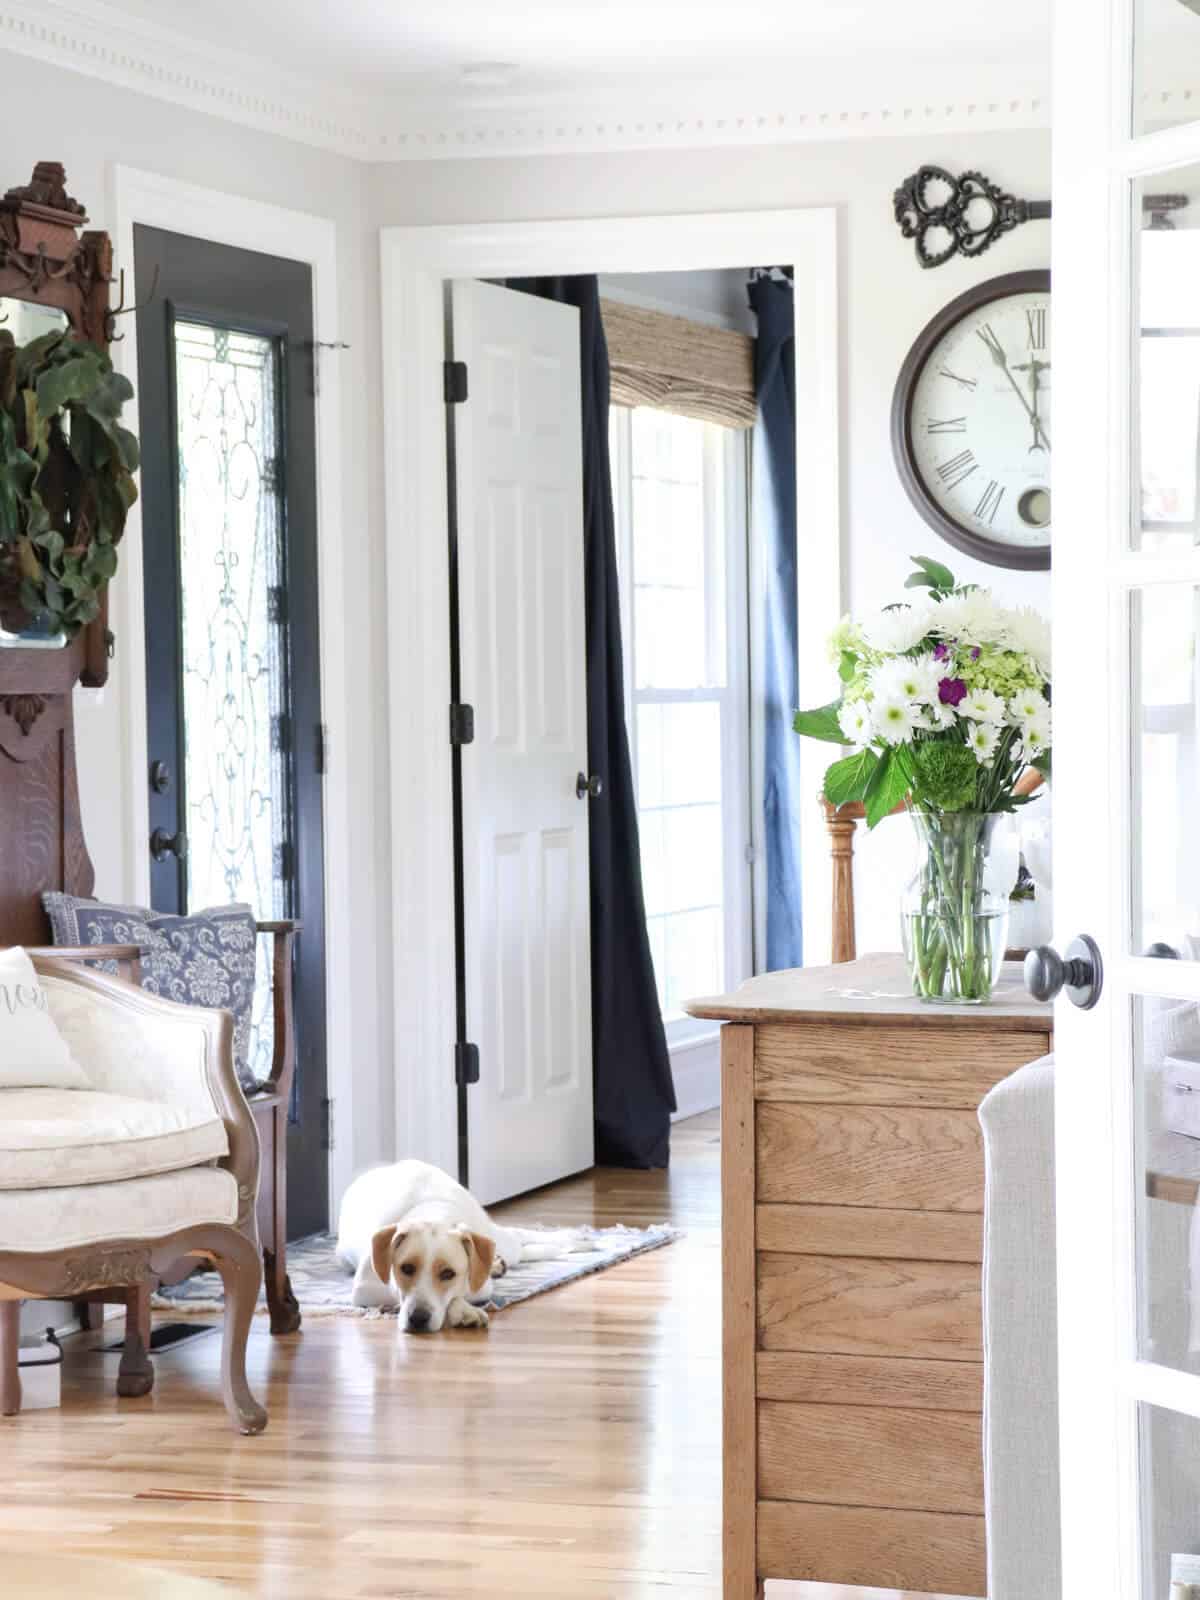
Looking at this picture – it’s definitely worth it, but it wasn’t always this way.
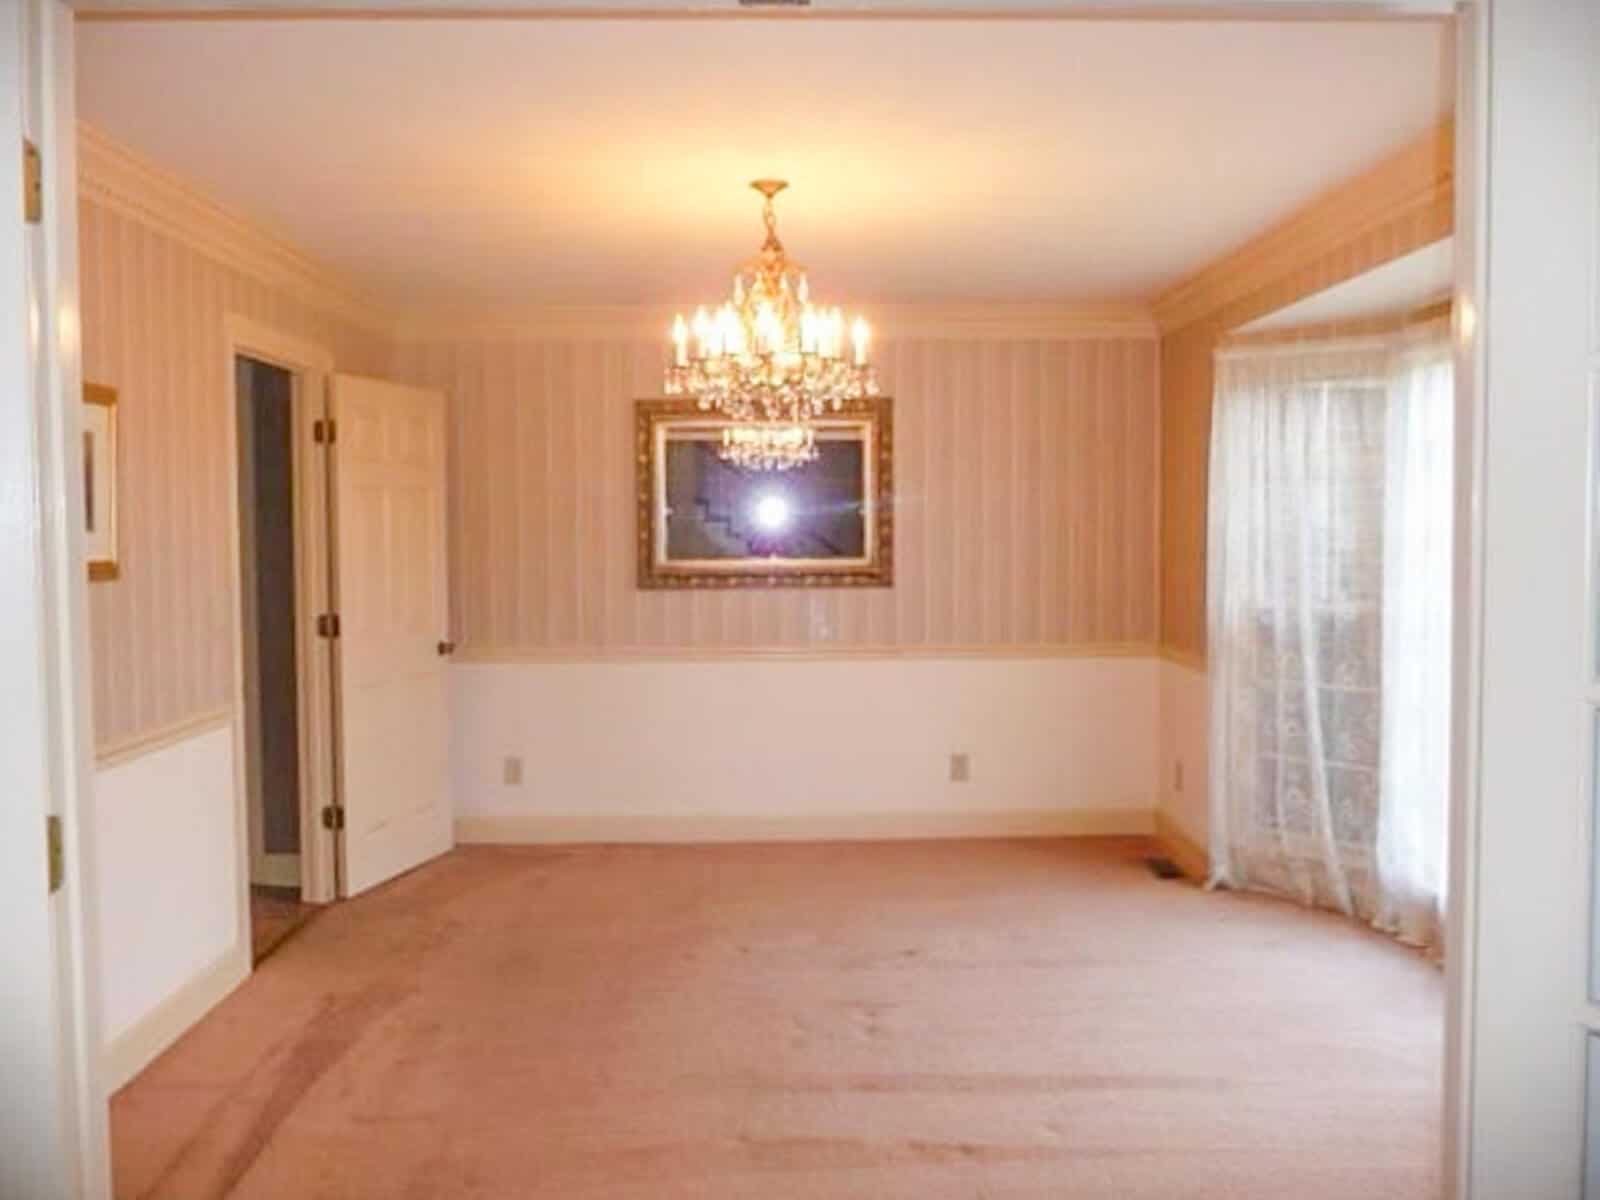
First, let’s take a look at our starting point from when we first moved into our Tennessee Home.
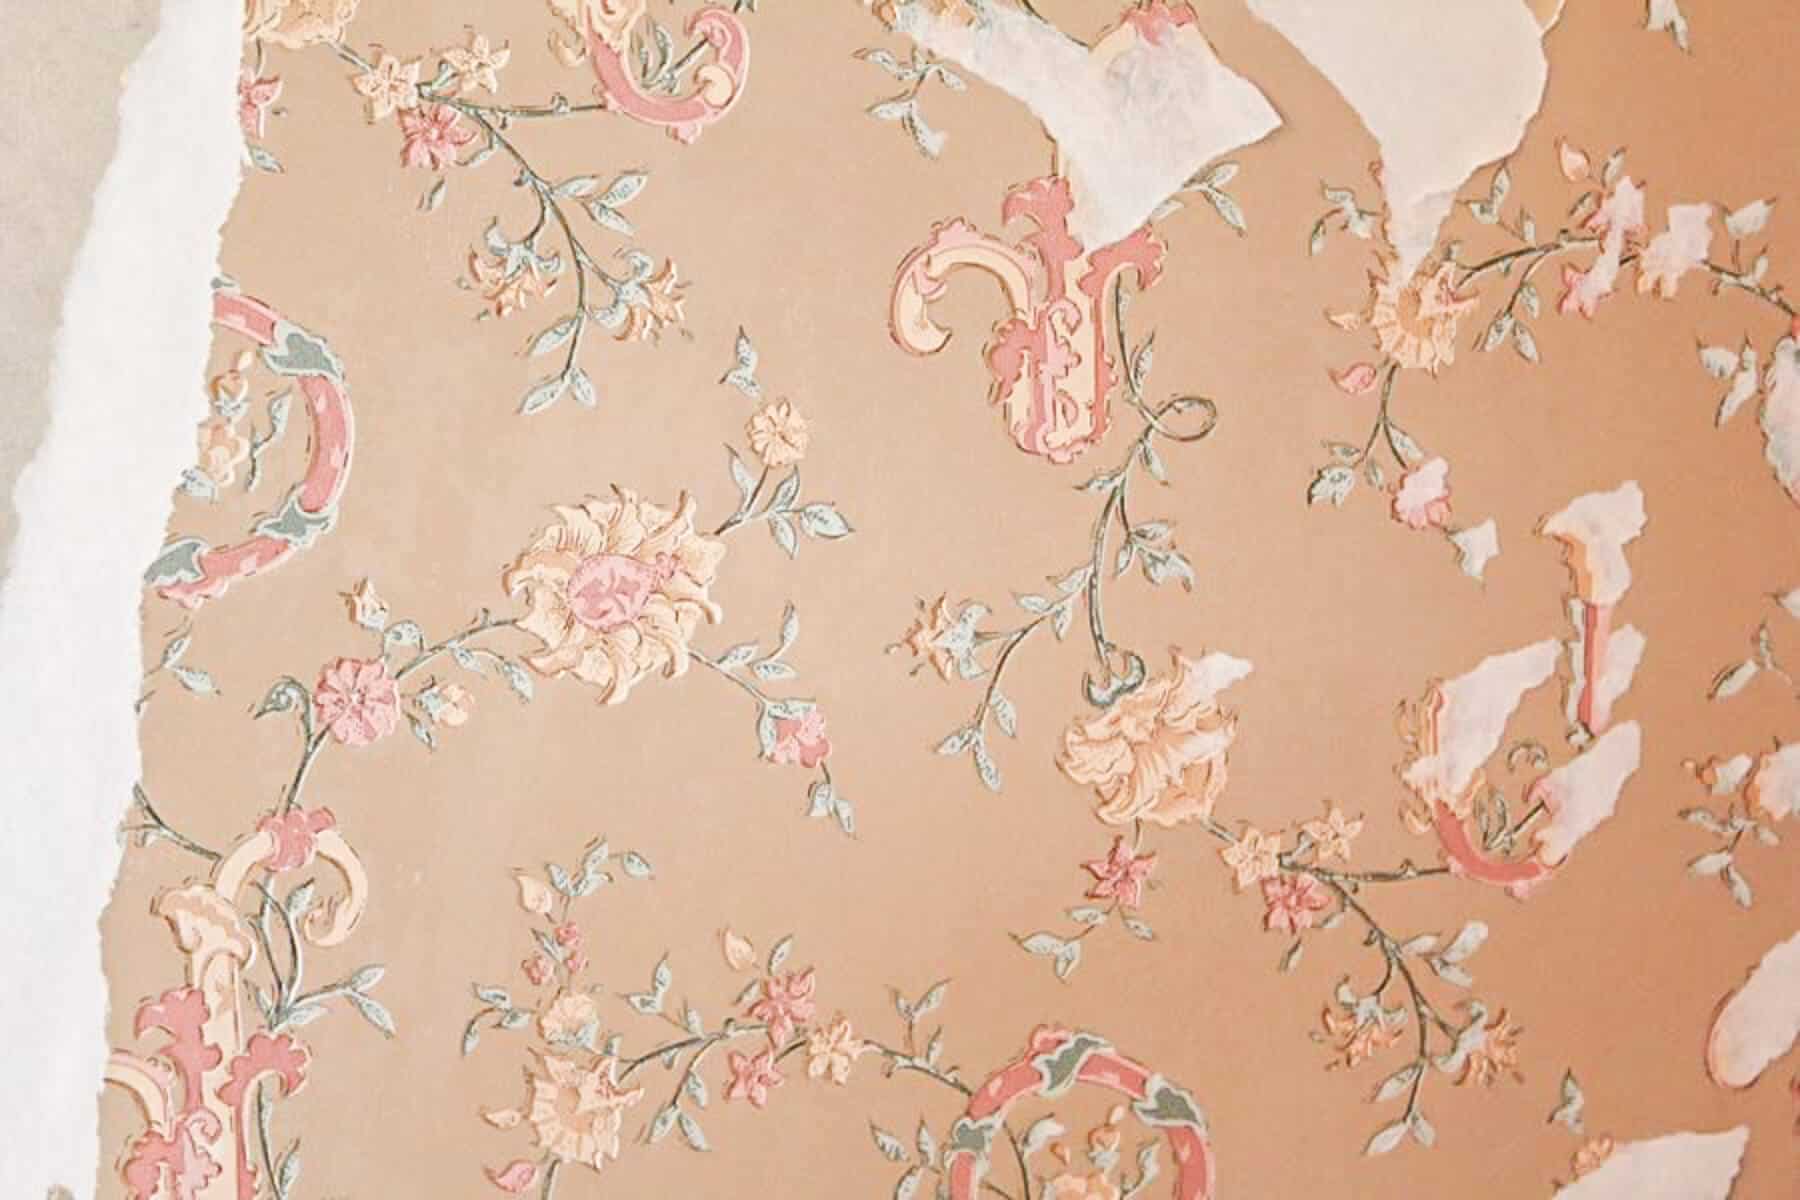
It was a time warp straight back to 1985.
Pink Carpet – Creamy Beige painted trim, dated wallpaper – this little house had it all and then some!
So why would be buy a house with so much work?
Other than the desperate need to be closer to our families, there was one draw for me personally to this fixer upper.
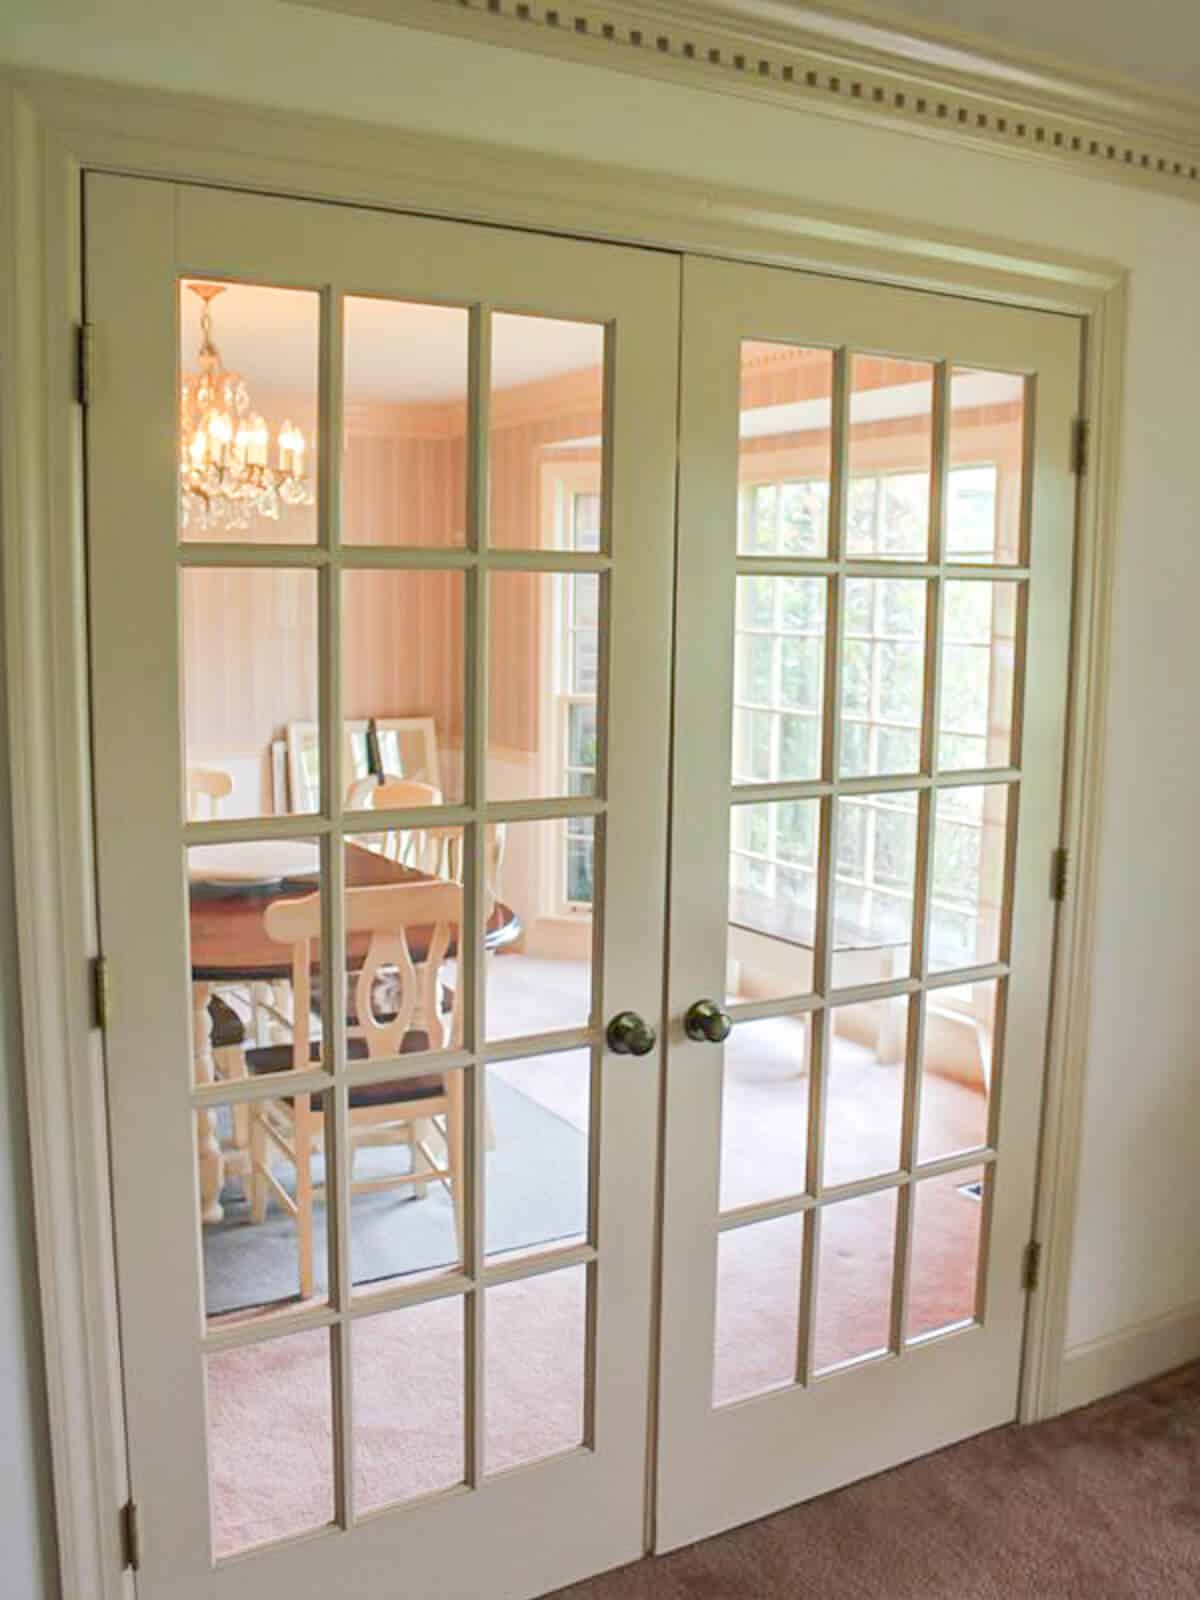
These doors.
These doors sold me this house.
Okay, not really, but I did swoon quite a bit over these French Doors.
They are the entryway into our dining room and I fell in love with them immediately.
They magically blocked out the peach trim, pink carpet and flowery wall paper and called out my name.
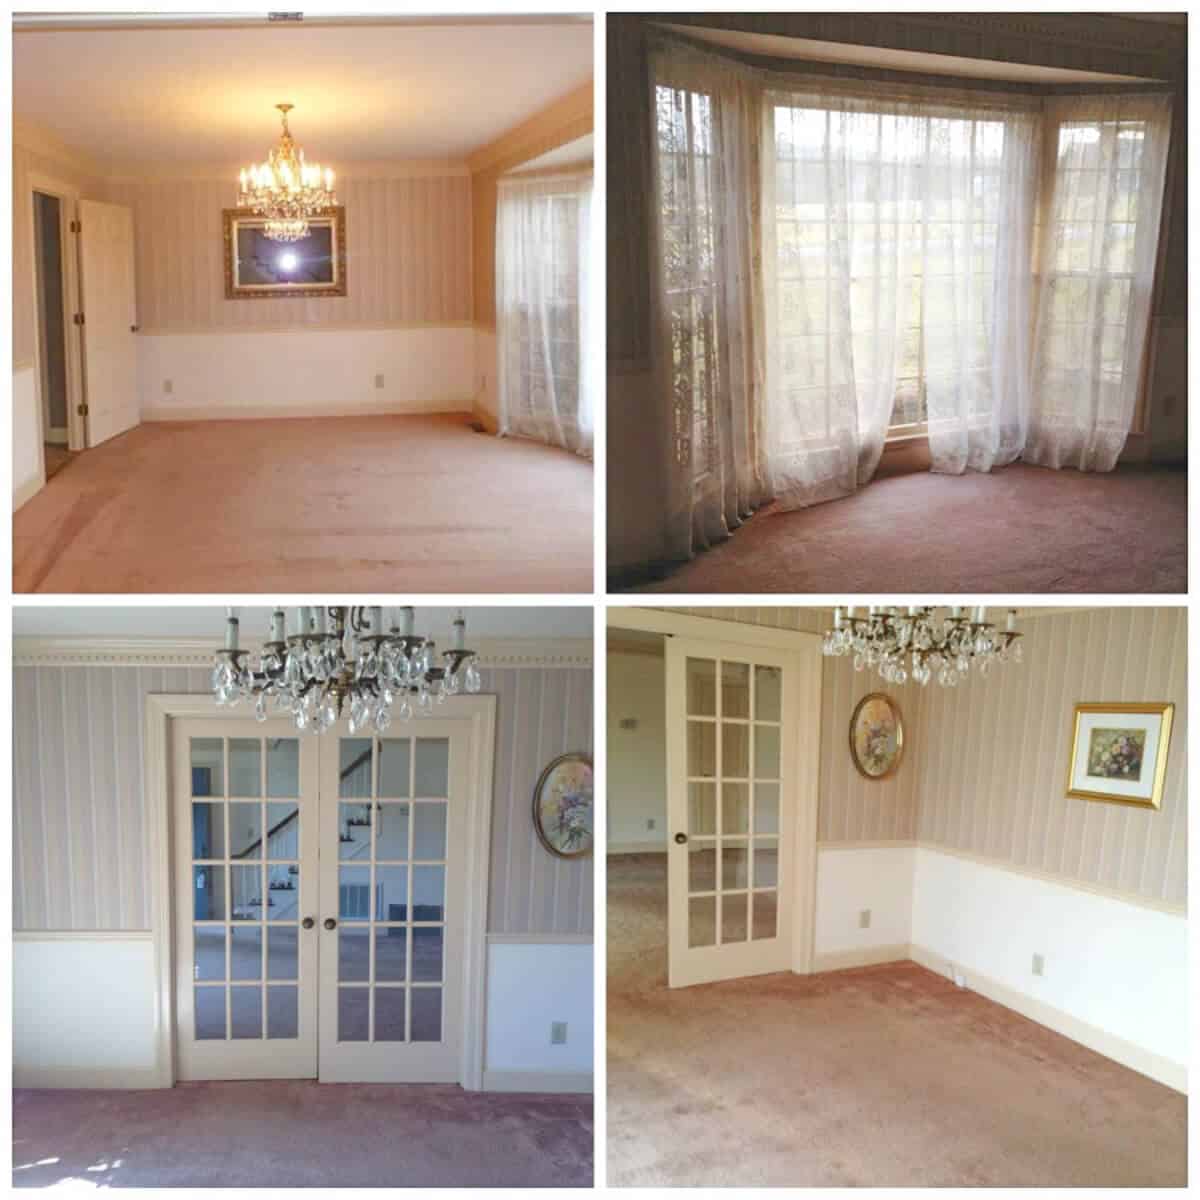
This is where we started, before we moved in.
It was built in the 80s and stayed in the 80s, but I saw good bones and knew I could make this my own.
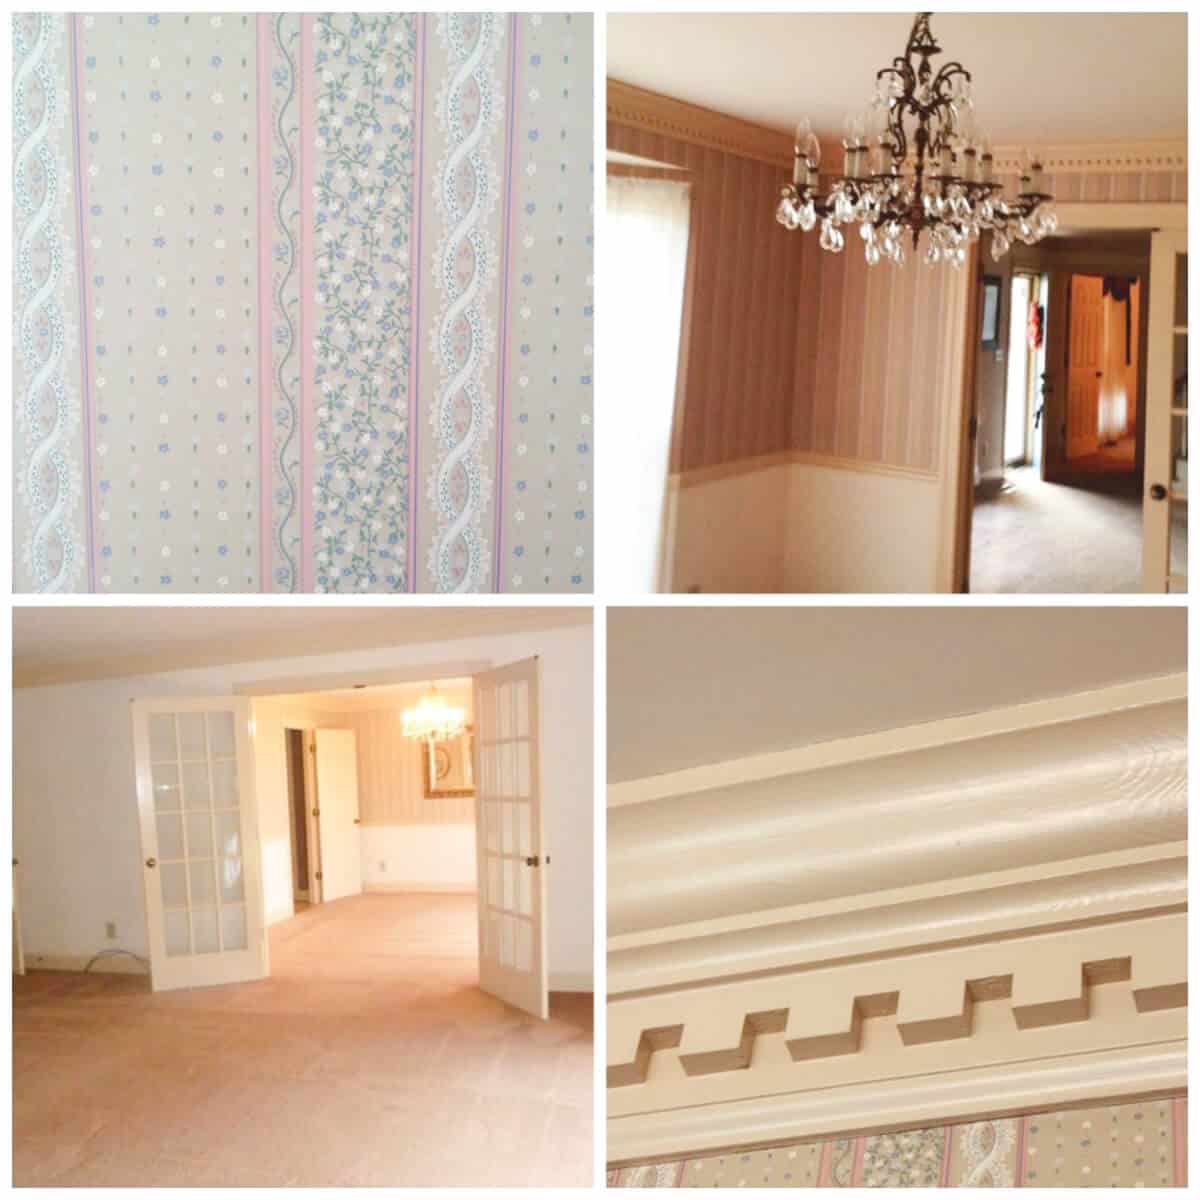
Look at that wallpaper and cream trim!
Not only were the colors so wrong, but we learned that it was oil-based paint.
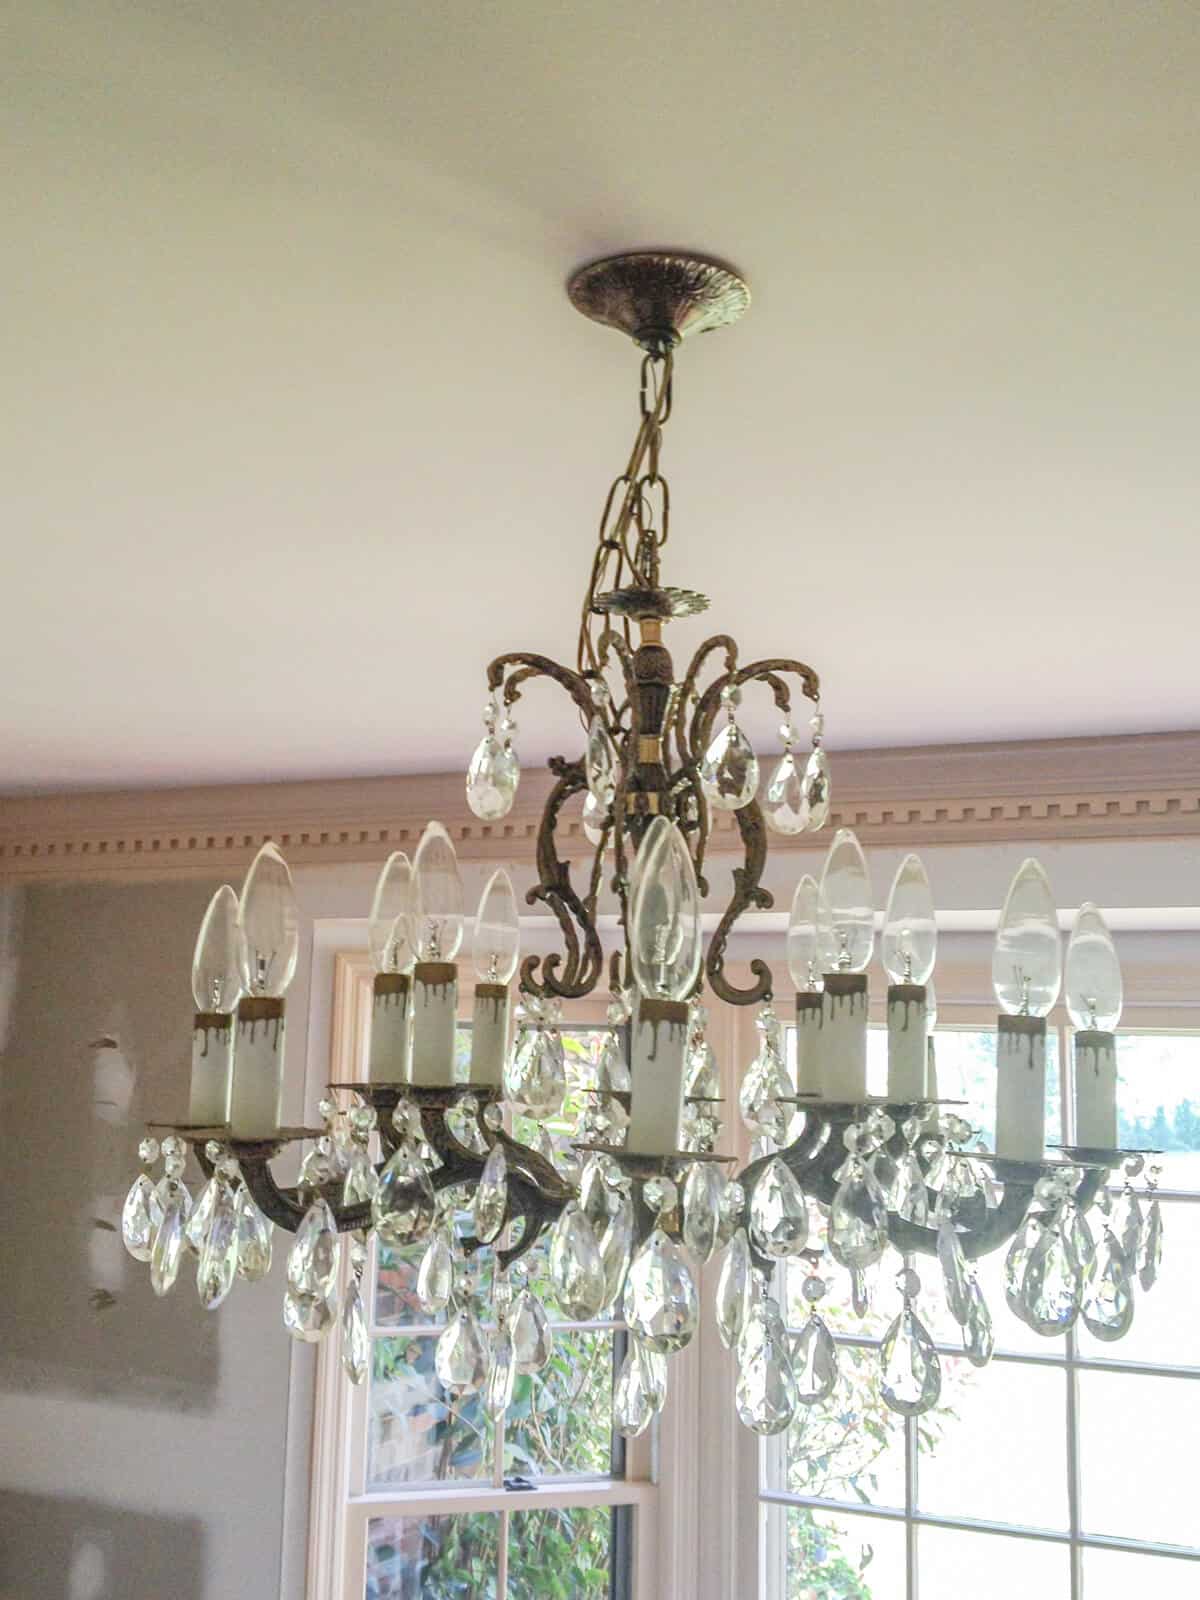
While I loved my beautiful vintage antiqued brass chandelier complete with crystals! But it wasn’t enough to detract from the huge redo we had ahead of us.
First we had to strip the wallpaper.
I used a steamer I had on hand to heat up the paste.
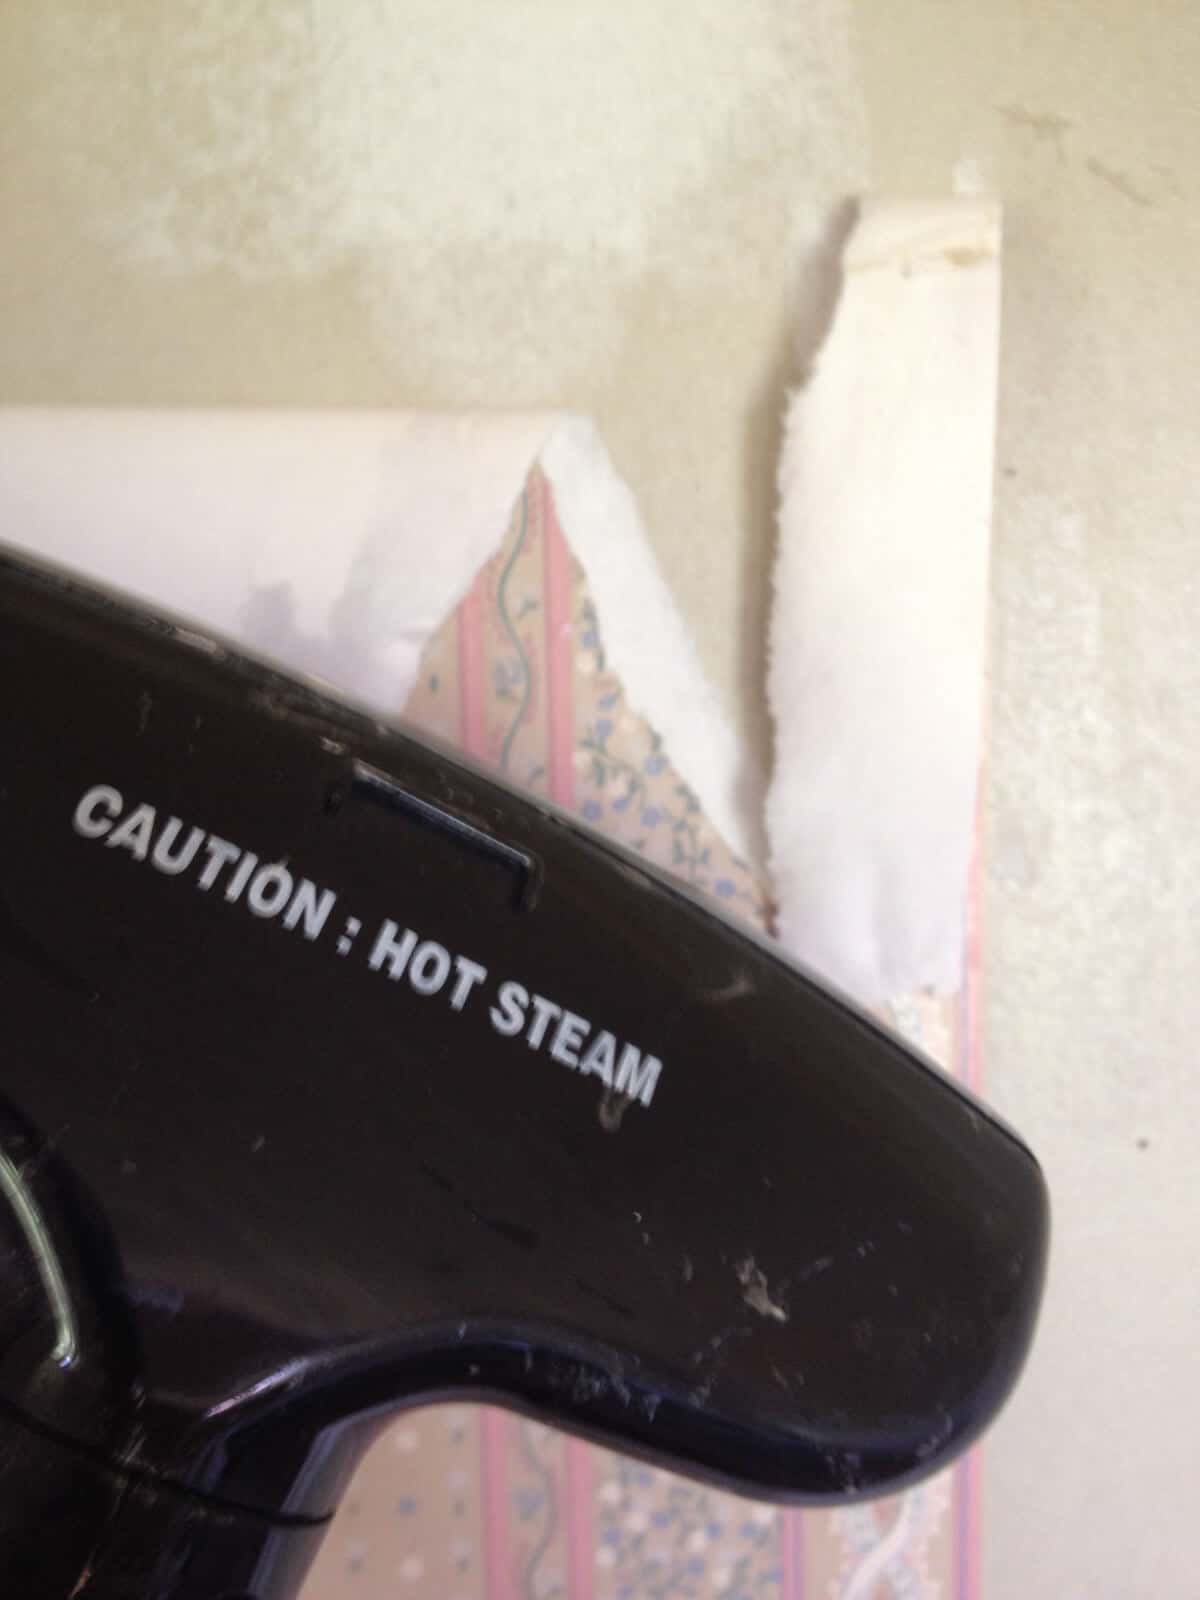
At first, we were hopeful that this home improvement was going to be super easy.
That steamer took the paper off in clean sheets until…

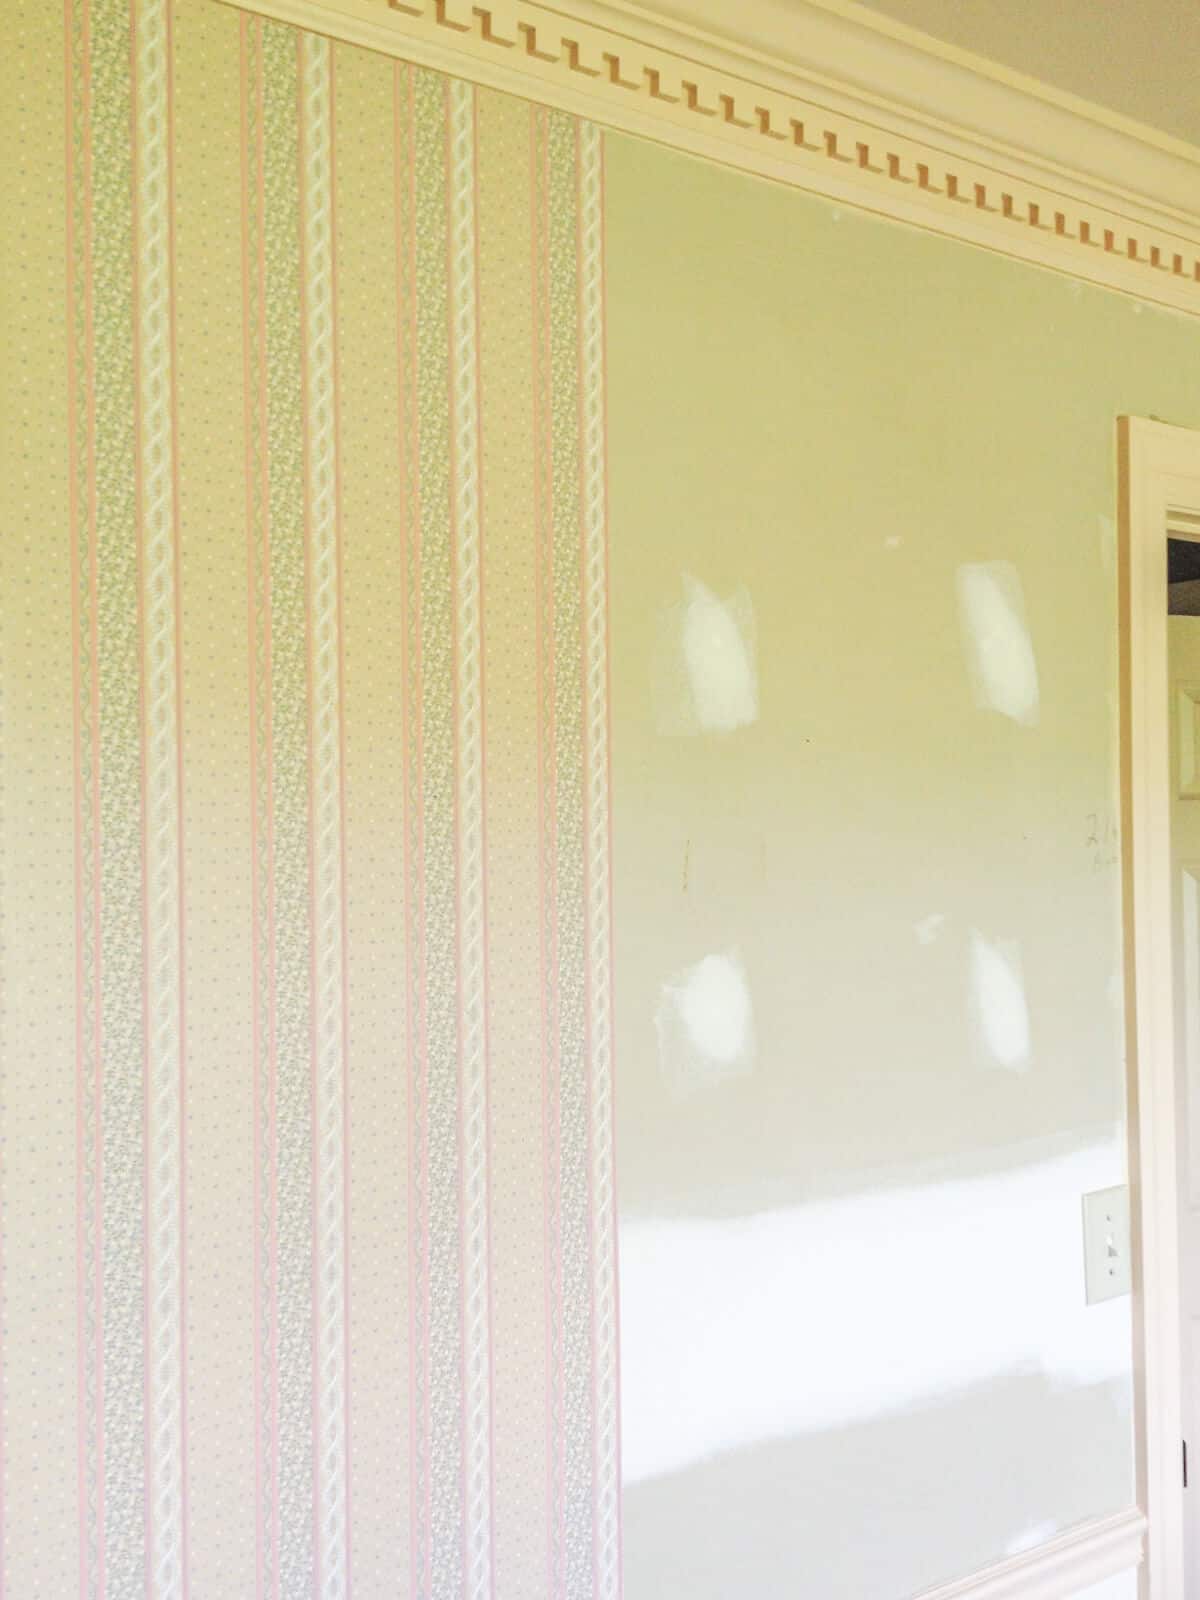
Yup – we found a second layer of wallpaper underneath!
It only partially covered the room so our guess is the original owner changed their mind.
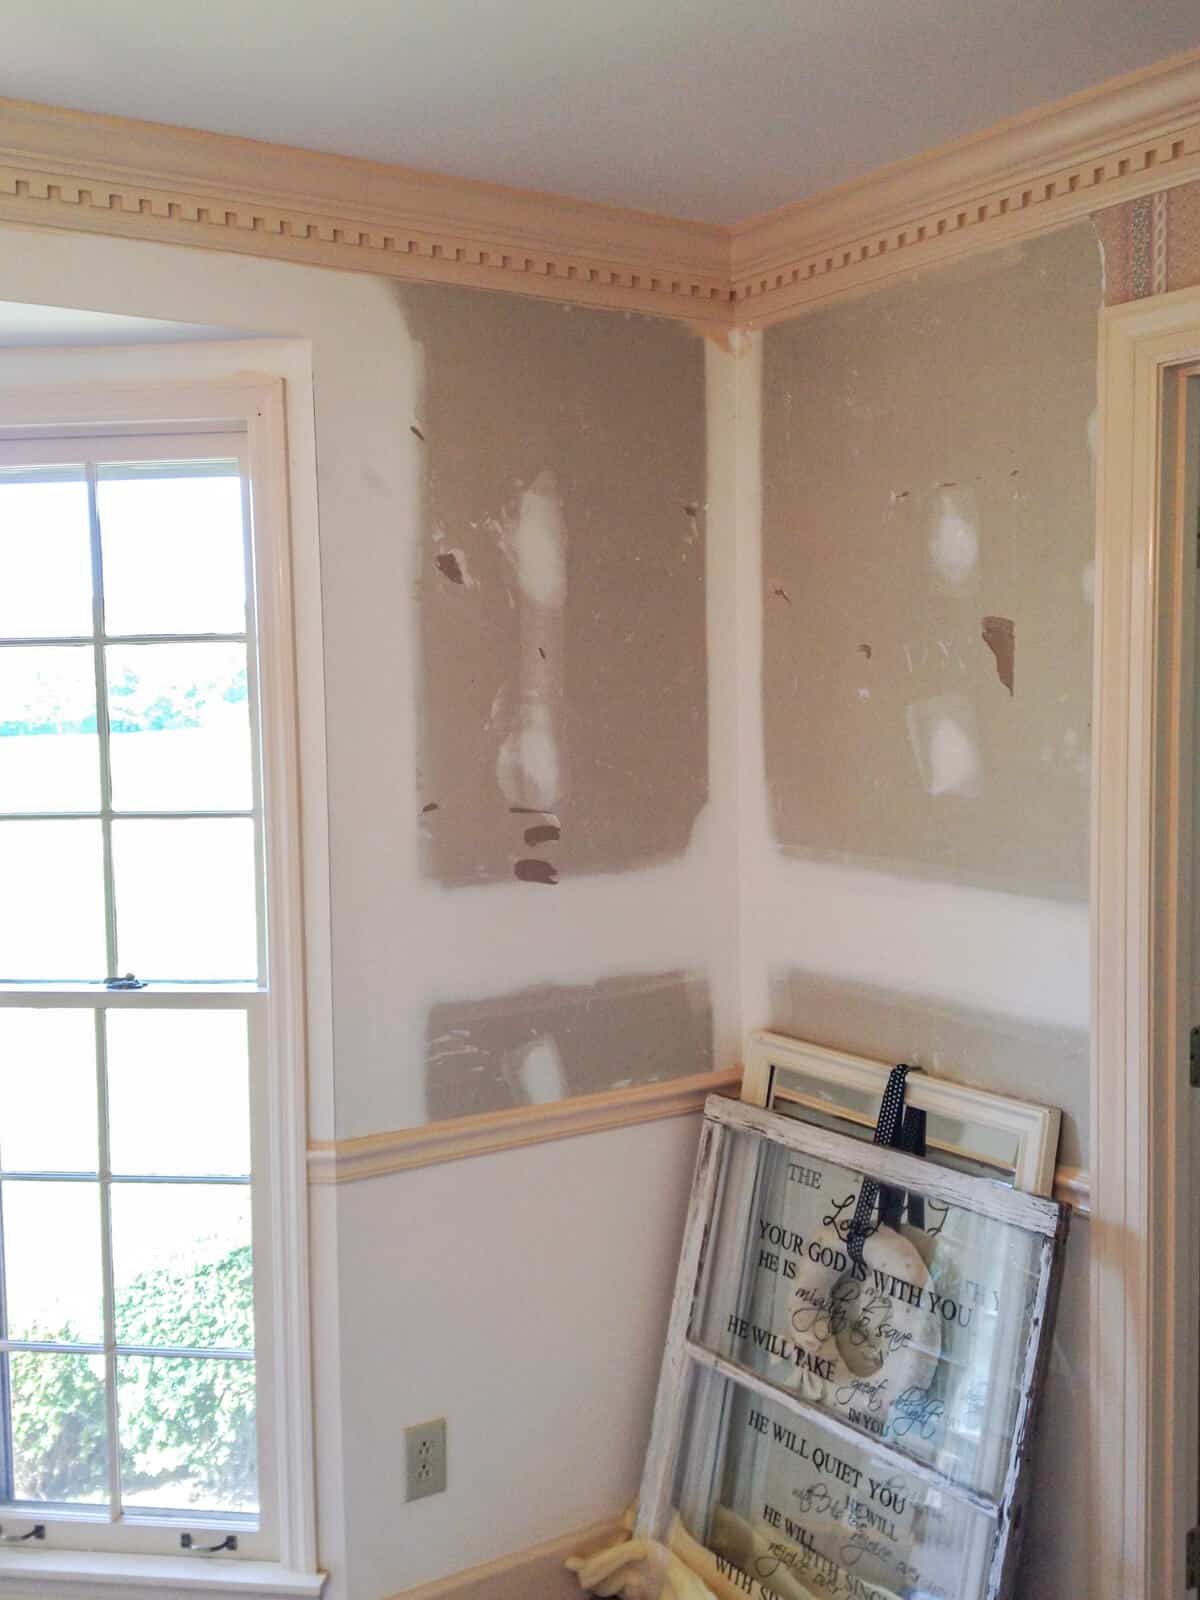
This second layer was much more difficult to remove and ended up damaging the drywall paper.
Little pieces of drywall paper came off with the wallpaper which left us lots of places that needed repair.
So to replace all those rips, we had to skim coat the walls.
That means applying light coats of drywall compound in multiple coats and lightly sanding them before we could prime and paint.
But with that wallpaper gone, you could really see how peach our trim was!
It was such a good idea to remove the wallpaper, just so we could see how much painting we had in front of us.
But first, we needed to finish juggling another project.
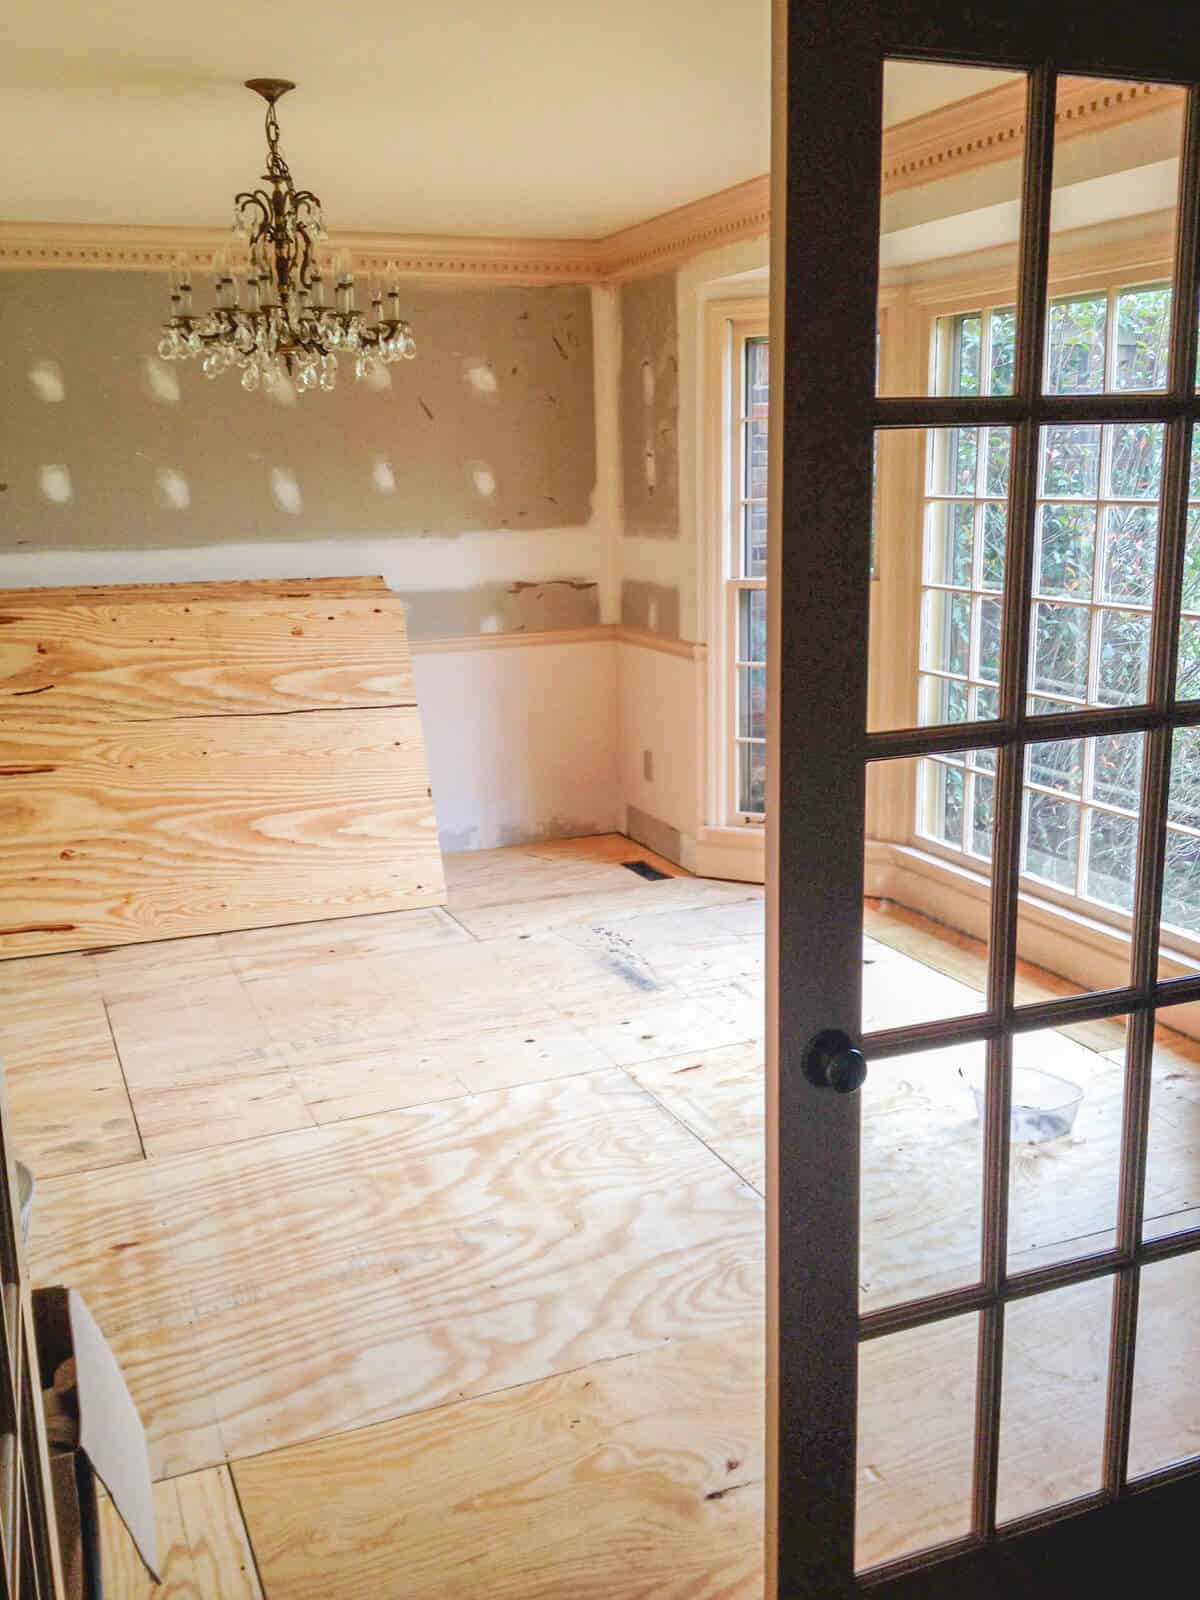
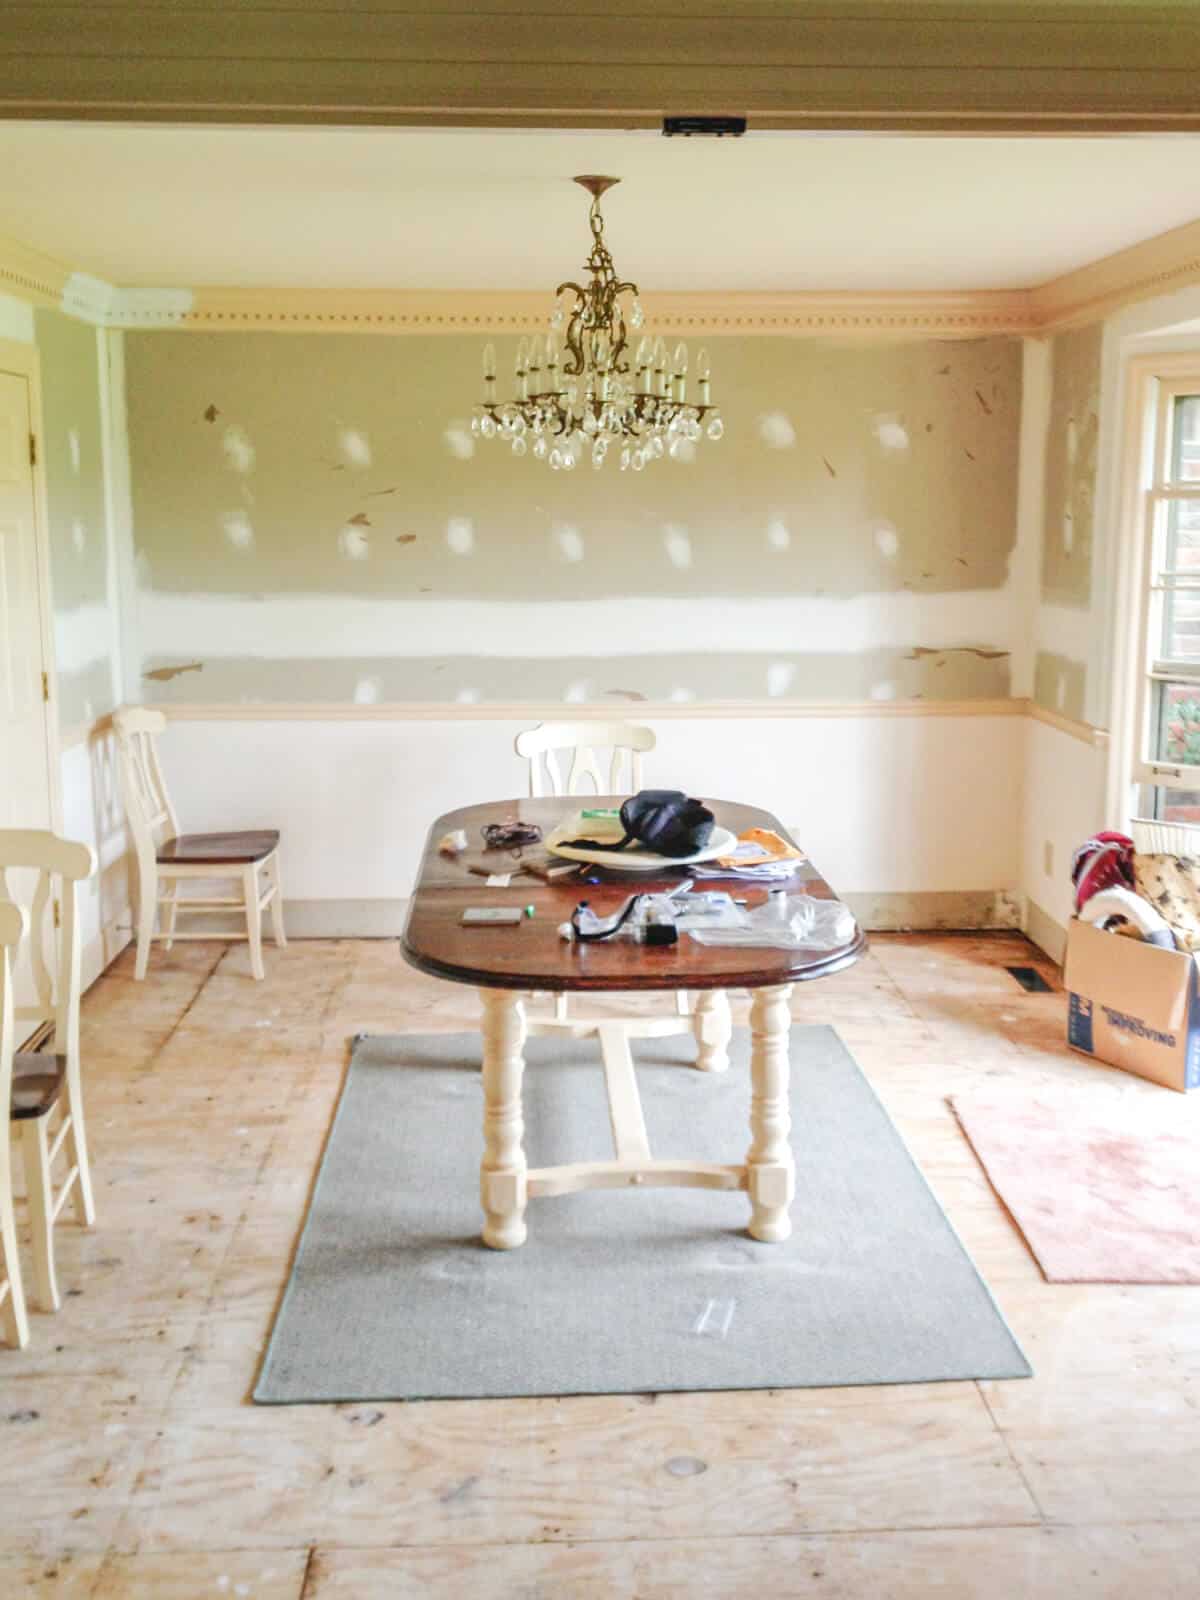
During the same time of addressing this dining room, we started working on replacing all that ugly carpet with Hardwood Floors in this room as well as our bedroom and living room.
After opening our wall into the kitchen with a Pass Through, we skim coated the walls and primed where the wallpaper used to be.
Just look at that dentil crown molding now!

It’s screaming to be covered.
So once all the wallpaper was removed, skim coated and primed, and our floored were installed and not sealed, we were able to start on the dentil moulding.
How to Paint Dentil Moulding
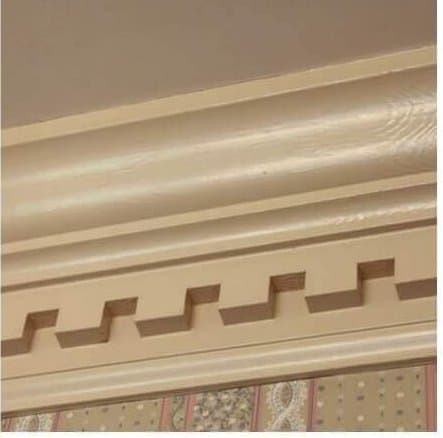
Dentil Crown Moulding is so classic and pretty.
But that’s oil paint y’all with coats and coats of paint!
Painting with latex would have been easier to work with.
But the prep work for painting latex over oil is a multi-step process, which starts with cleaning the surface, scuffing the paint, applying a coat of primer and then painting over all those little grooves with latex.
That would take weeks to prep let alone paint and would have been so tedious.
So we opted to paint over this with oil and I’m so glad we did.
But how was I going to paint all those little grooves?
Trying to get my paint brush into each nook and cranny of the dentil moulding was painstakingly slow and oil paint is notorious for drips and runs. I think I painted about a foot of moulding before I had to search for a solution.
I was instantly discouraged once it dawned on me that not only did our Dining Room have the dentil moulding, but our family room did as well!
After looking at a painters forum community board for tips, I found things like, “Just turn on some music and take your time.” Or, “Unless you have a commercial sprayer, you’re in for a long haul and a lot of work!”
That didn’t make me hopeful and I didn’t have a commercial sprayer.
I was really stressing about this until I found this genius product that has forever changed my life!
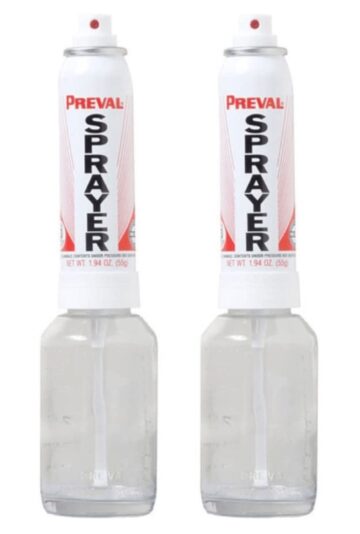
These little sprayers saved my life!!
We stumbled upon this product at our recent trip to our big box store and snatched it up right away.
We followed the instructions on how to mix the paint for oil using mineral spirits and started spraying.
Blogger Fail
I did NOT take photos of the during, because working with oil is VERY messy and gets on everything. So let me tell you exactly what we did in detail!
We chose to paint over the icky peach oil with Sherwin Williams Pure White SW 7005.
First, expect a little overspray from working so high if your moulding is already installed like ours.
What is overspray?
It’s the teeny, tiny little dots that go where you DON’T want your paint to land. The mist from paint sprayers causes this phenomenon. Those tiny particles are light enough to float around in the air and land where you don’t want it to go!
So prepping the area is key!
We started by using painter’s tape and paper and taping off the walls beneath the dentil molding. We thoroughly covered the floors and any pieces of furniture nearby.
It was mainly our ceiling we hoped to protect, which we were painting flat Latex in basic white.
Latex and Oil are sworn enemies and don’t mingle well at parties, so we wanted to make sure they were kept separated.
We used a piece of cardboard as a shield against the ceiling to protect any spot we didn’t want the overspray to land.
Here are the walls skim coated and primed, and the first coat of paint is sprayed on the dentil molding and then brushed for any drips.
And you can really see the discoloration of the ceiling.
This is before we put on a fresh coat of white paint.
After the first coat of oil paint was dry on the molding, we painted our ceilings.
What a difference, right?
When we painted the walls and ceiling, we could really see the shy spots from the first coat on the dentil moulding.
At this point, we truly thought we were good to go ahead and paint the walls, but we quickly learned our lesson.
That peach is just barely peeking through! So we knew we needed a second coat.
But we also needed to change our application method.
The photo above shows our attempt at spraying it straight on instead of angling the spray gun to get into each and every groove.
As you can see, the notches did not get full coverage, so we were sure to angle the Preval sprayer from this point on.
Our objective was to spray 2 coats on the ‘teeth’ of the moulding and then follow up with the two coats with the brush for the upper, smoother portion of the wood molding.
First we sprayed from the left and followed up brushing the first coat of oil on the remaining trim. Allowed it to dry overnight, and then sprayed from the right and applied the 2nd coat with the brush.
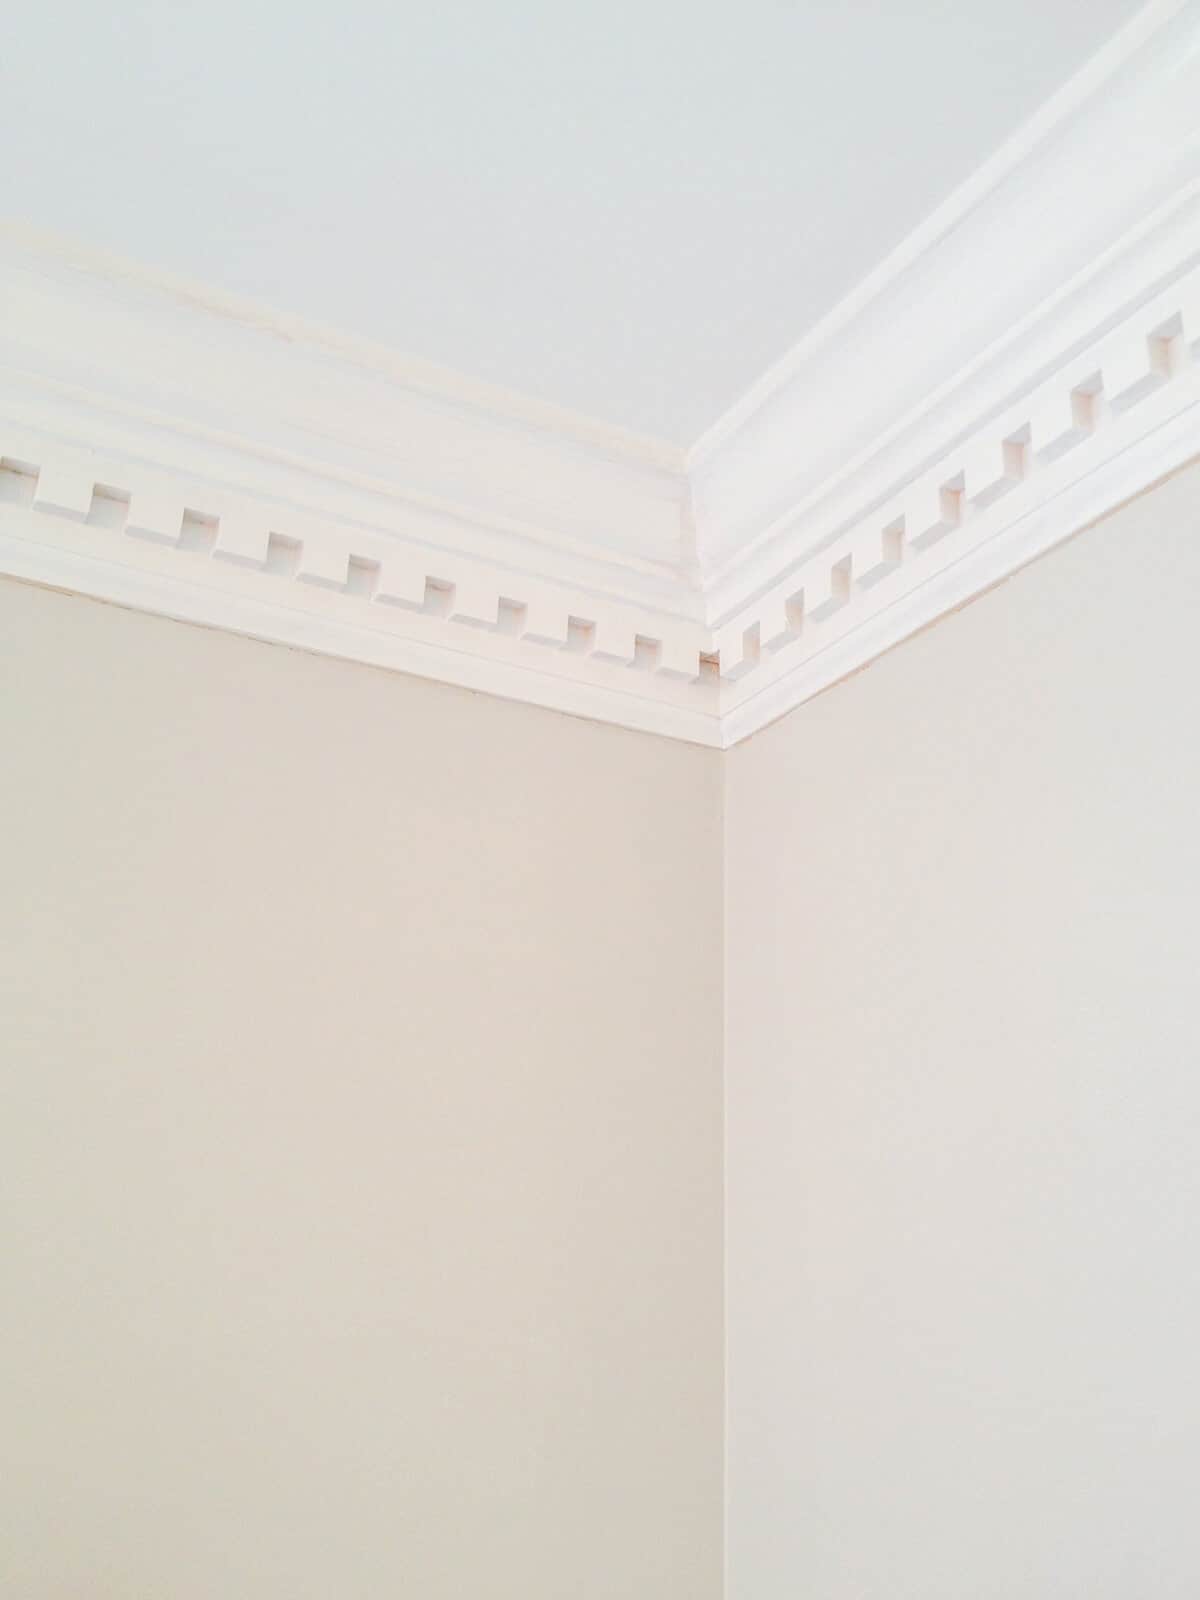
Here’s how the final coat of the oil on the dentil moulding looked.
That’s it! Making that final decision to use the Preval Sprayer completely changed this labor intensive process.
And this little tool does such a good job and gave us the best results as well as save us tons of time!
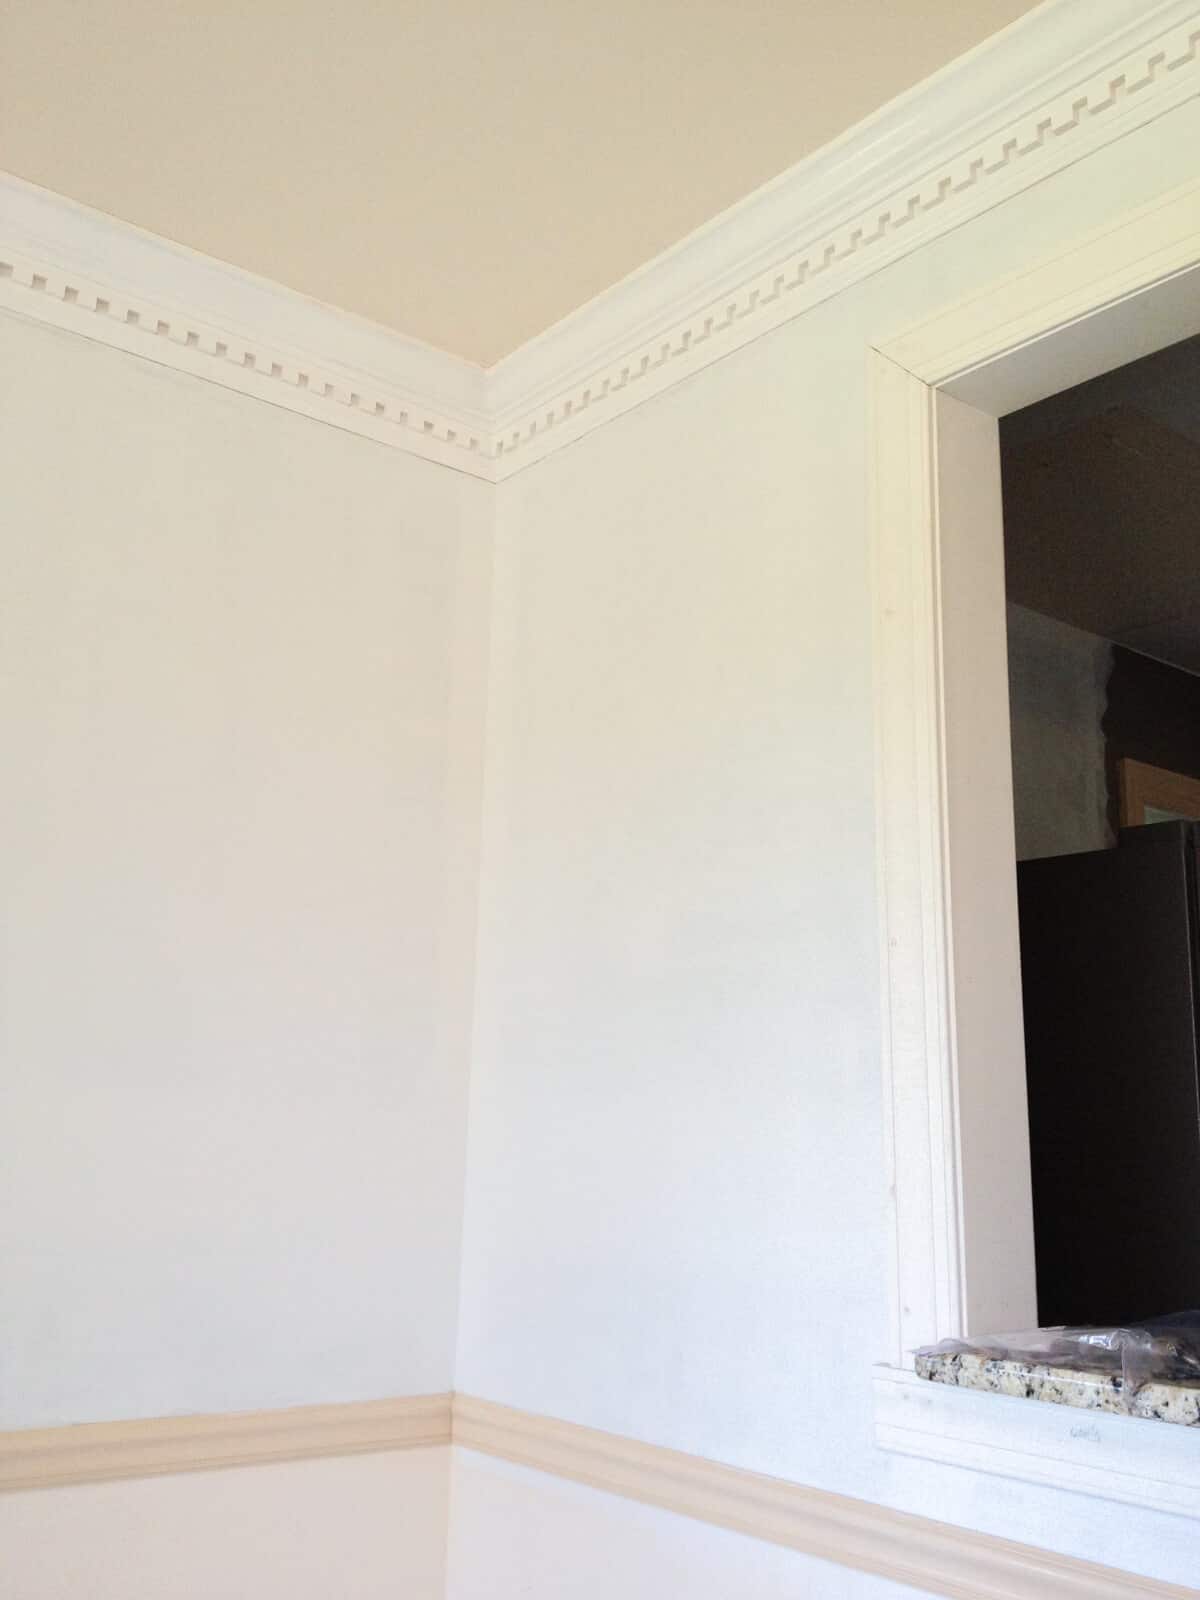
Here’s what it looks like all gussied up with everything having a fresh coat of paint!
We used this same technique in our Den.
It made the painting process take hours instead of days with the help of the Preval sprayer!
That would have taken us weeks!
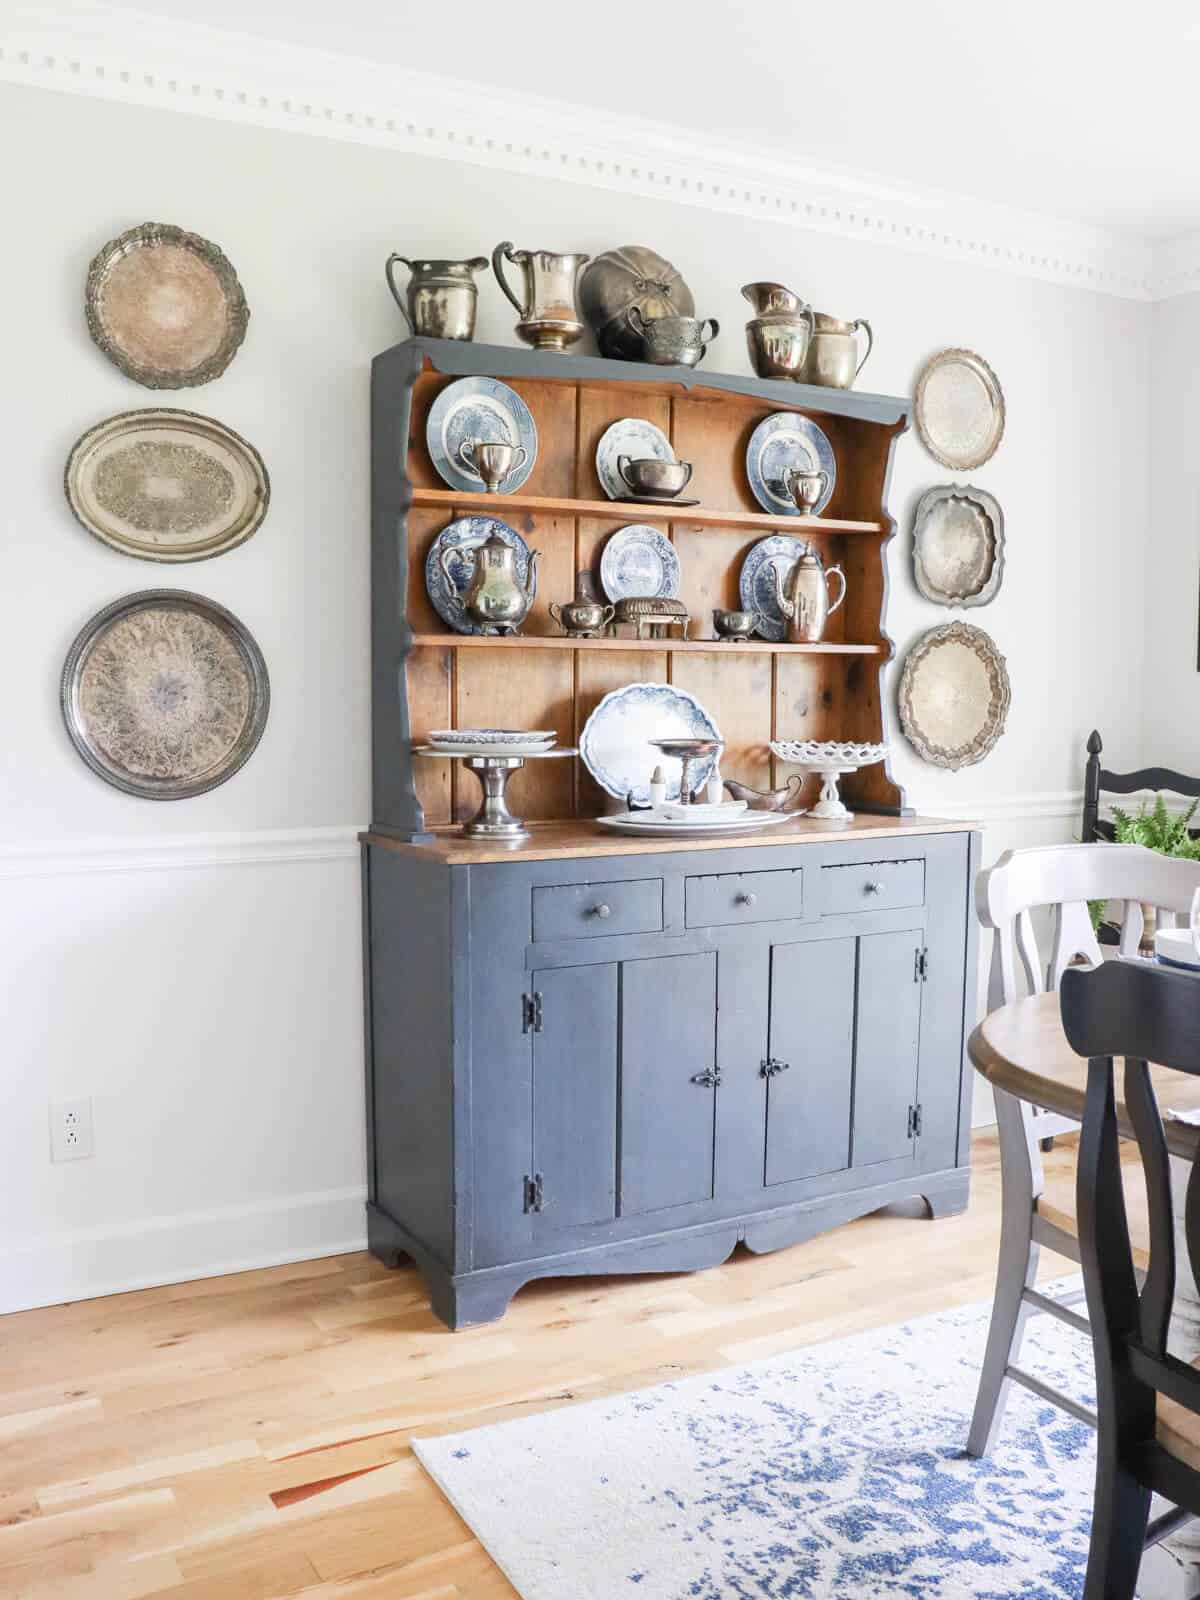
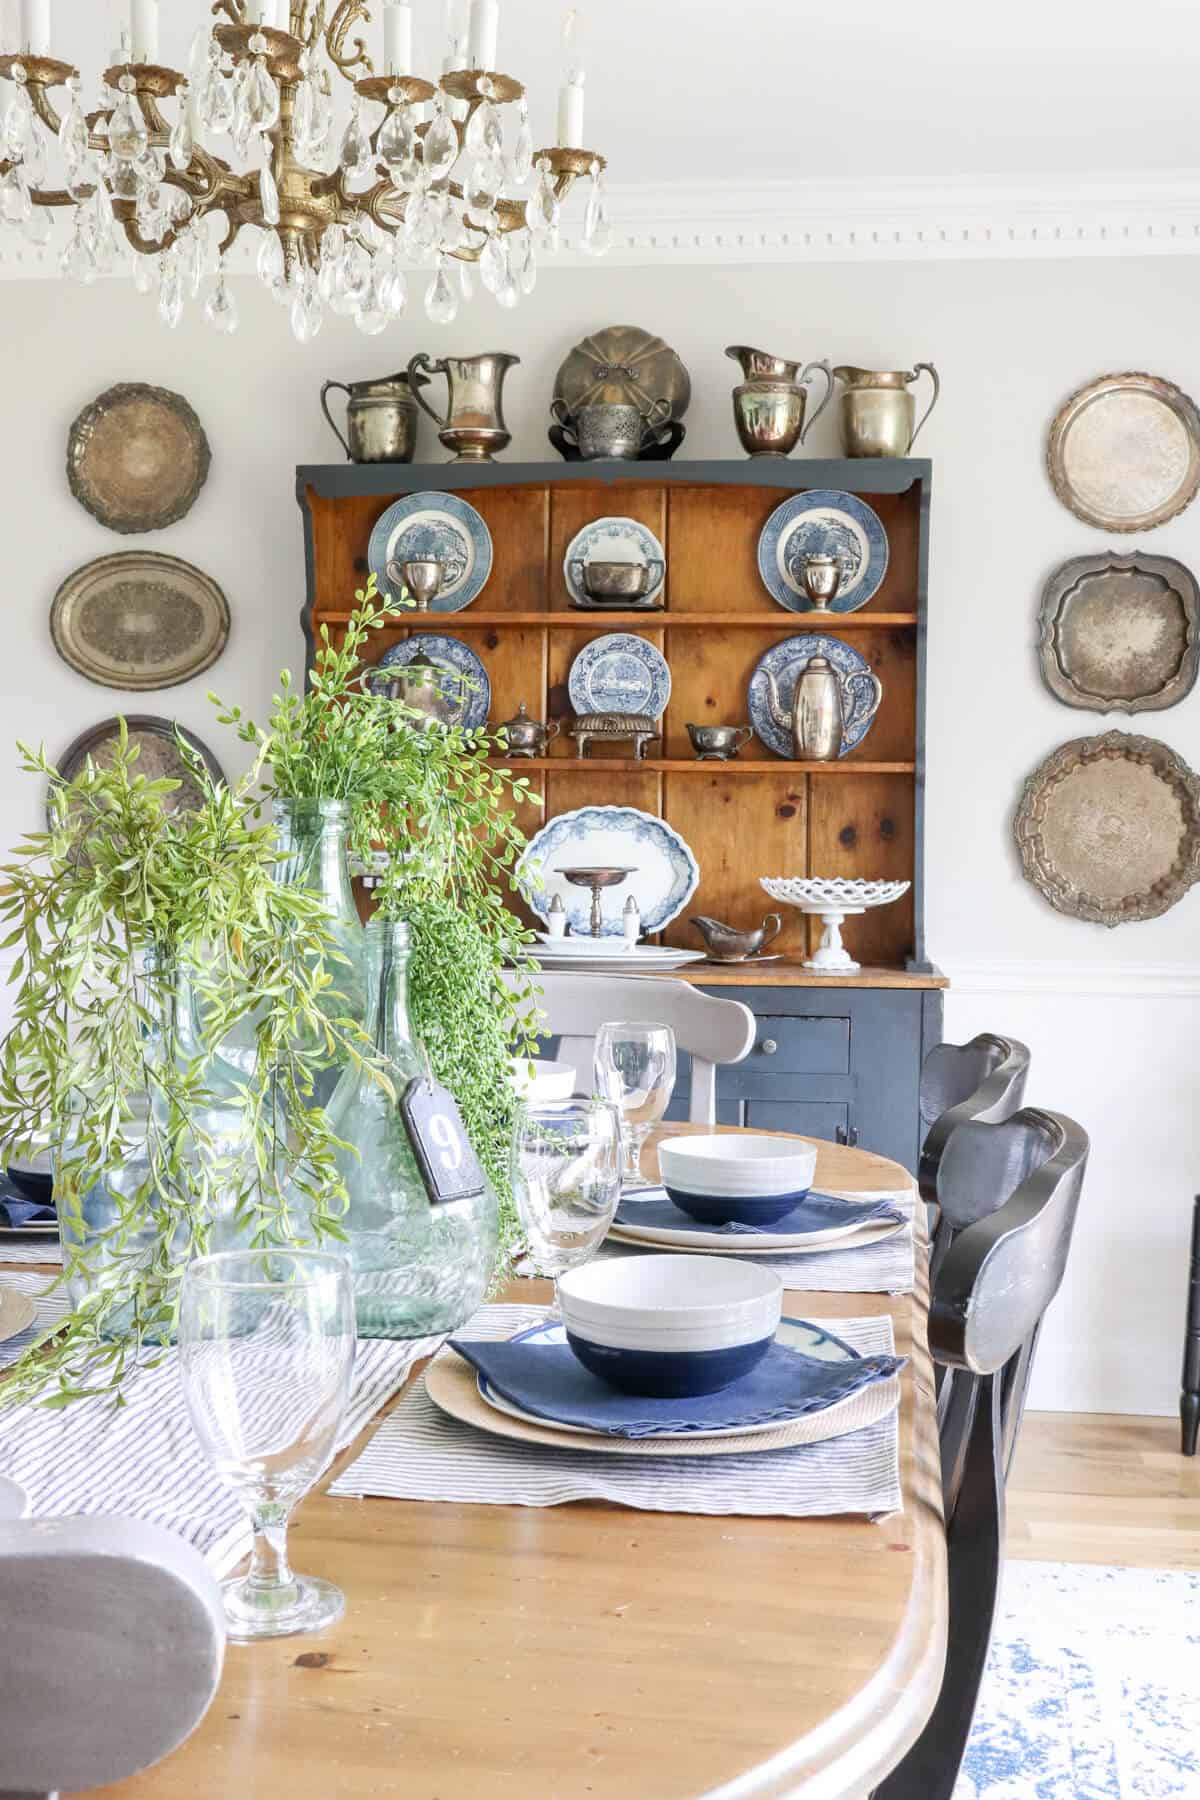
Here is how our Dining Room looked for a while, but be sure to check back in a few days as I will be sharing the Vintage Hutch we received as well as how we turned this Dining Table into our dream Farmhouse Table!
Frequently Asked Questions
What is dentil moulding?
Dentil moulding, also referred to as dentil molding, is a type of crown molding with an architectural accent detail that has lots of small, square embellishments or rectangular blocks. You can find it a lot in Greek and Roman renaissance era times.
It became quite popular with greek revival style homes and in many homes built in the early 80s in crown dentil moulding installation.
It’s still used today – in fact, the White House is one of the most famous building in the US to use dental molding.
Is Dentil crown molding out of style?
I don’t think crown moldings ever really go out of style. I can see if someone likes a more modern style of home that they wouldn’t like this in their home.
Honestly it’s a personal preference and can add any classic flair to your own home.
What does dentil molding look like?
It’s a type of wooden trim that has blocks shaped like teeth – which is why it’s so similar to the word dental!
Both interior and exterior applications still utilize dentil molding today!
What is the Wall Color you used in your Dining Room?
We painted all the walls of our lower level Tennessee Home with Sherwin Williams Crushed Ice SW7647.

We painted the lower wainscoting and chair rail with the same color as the trim paint in Sherwin Williams Pure White.
How much paint did the sprayer use?
Since we essentially painted this with 3 coats, it did use a bit more than expected.
But it wasn’t an overwhelming amount. For both the dining room and family room, we used about 1/3 of a gallon of the oil paint.
What steps are needed to paint over oil based paint with latex?
Had we used Latex here would have been our steps:
- Sand and clean up the surface
- Clean with TSP and allow to dry
- Clean once again to remove traces of TSP and dry overnight
- Prime
- Then finally paint
I hope these tips help you if you are wondering how to paint dentil moulding in your own home!
Good luck with your project and be sure to ask me any questions if you have them! I’m more than happy to help out!
shop our favorite home items
shop now
More PAINTING TIPS you might like:
- Painting Kitchen Cabinets White
- Painting Knotty Pine Tutorial: How My Hutch Got a Makeover
- Spray Paint Your Fixtures for an Easy and Affordable Update
- How to Easily Paint Central Vac Outlets
Hey Daniel! We used the PreVal sprayer and it was the best thing! Hope that helps!
Hey Jenni! I’m so glad you found this post. That small sprayer that I recommended in the post was a HUGE game changer. However, if you are going with the same paint and finish for both the walls and trim, it would be worth the investment to rent a good quality sprayer for the weekend from Home Depot or Lowes to get the job done quickly.
Hope that helps! Good luck with your project. If any other questions come us, reach out again! We’re happy to help!
Jen