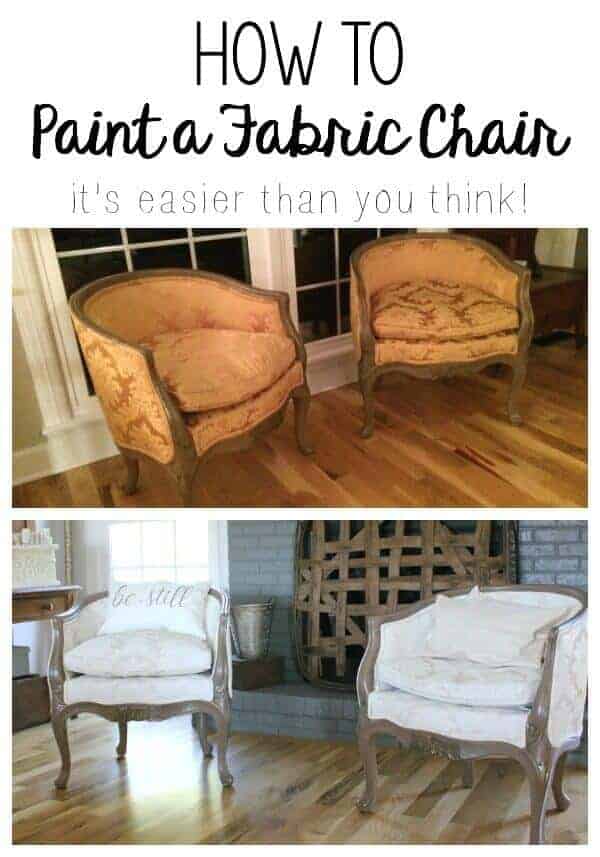
How to Paint a Fabric Chair- It’s Easier Than You Think!
Painting a Fabric chair shouldn’t be intimidating! I’m sharing how I took vintage Louis chairs and painted them to match our decor.
It took one weekend to paint a fabric chair only to change my view on thrifted upholstered items. Will this change your mind, too?
I love when I get gifts from family, don’t you? Especially when they are sentimental, vintage and beautiful.
When I was gifted two, gorgeous Louis bucket chairs, I jumped for joy! I knew exactly where I wanted them to go, and couldn’t wait to put them in place to see how they looked.
Unfortunately the color wasn’t working for my decor, so here’s how I transformed them into stunners simply by painting the fabric!

Let me tell you about myself and color. I LOVE color! Pinks and aquas bring joy to my face. I can’t tell you how many times I’ve added pops of fun color here and there in my home, only to pack it up and return the pieces to the store.
When I put these yellow, damask bucket chairs in place, I thought, ‘this might be my color! I’ve tried all the other colors – but not yellow! This may be the one!’
nope
After a few days, it just didn’t suit me. I have tried and tried and tried to insert it into my decor, only to find myself putting it away. I think I’ve come to grips with the fact that I tend to not like color in my decor.
Why is it that I don’t care for color in my home? Maybe because my mind seems to never stop going that I need something calm and neutral to rest my eye on.
All I know is that it just doesn’t make me happy – and that’s what your home should do – be a place of rest, and bring you joy and happiness!
After my other reupholstery project, and remembering what a feat that was…..soooo many staples…… I just wasn’t ready to tackle 2 more chairs. Plus, I loved the look of the damask and didn’t want to cover that up.
So what was my solution?
Fabric Paint! Say what?!
Before you click away and dismiss the idea – let me tell you all about how I did it and show you the final results!
Paint a Fabric Chair Tutorial
This may post contain affiliate links.
While I may receive a small compensation, all prices remain the same for you. Thanks for supporting me!
Supplies
- Delta Creative Textile Medium
- White Acrylic Paint
- Chip Paint Brush
- Iron
- Sealable tupperware container to store mix between coats
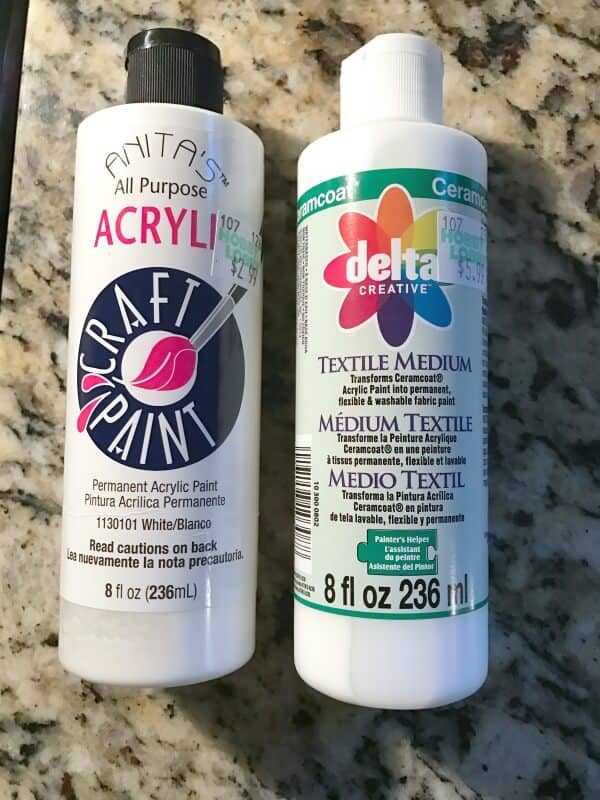
You take fabric medium and acrylic paint in any color you want – I chose simple, plain white. I purchased 3 bottles of each not sure which formula would work best on this silky damask upholstery.
One cushion had a stain one the bottom side that wouldn’t come out, so I used that side as my tester, since I knew that side of the cushion would always be hidden.
*Always test your fabric first, y’all!
The first application is always the scariest! Follow instructions on the bottle, but be willing to alter it a bit if needed. I started with 1 part fabric medium: 2 parts acrylic paint. After the first coat, I could visually see that I had to increase the paint ratio just a little bit, so for these chairs, I used 1 part medium:2 1/4 parts paint. Not much of a difference, but enough to work with this fabric.
As you can see below, the first coat really soaks up the paint. I read on other sites where bloggers dampened their fabric first to help the paint to adhere better. When I did that, it turned out more stiff, probably due to the nature of the silk fabric. So after the first sample, I did not dampen the fabric.
I used an inexpensive craft brush and mixed the paint in a tupperware container that I could seal between coats. You simply paint a fabric chair in smooth even strokes.
After the first coat – allow it dry thoroughly before reapplying. I waited at least 24 hours, if not longer between coats. You can see the difference a second coat makes!
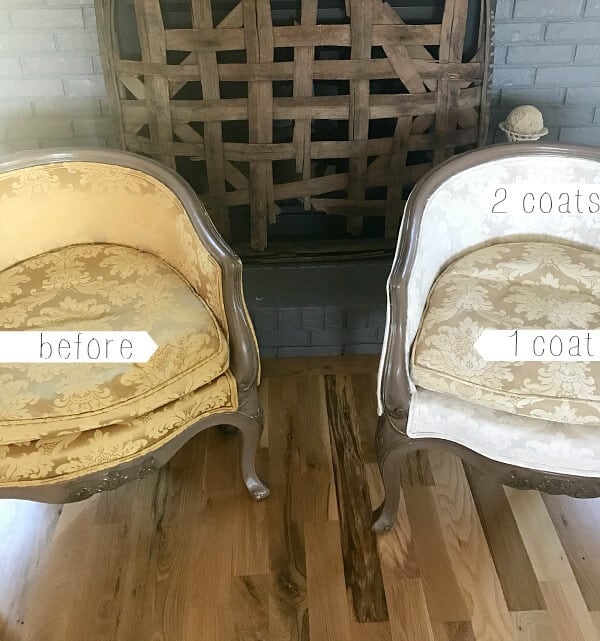
I thought I would need to apply three coats, but something beautiful happened after the second coat.
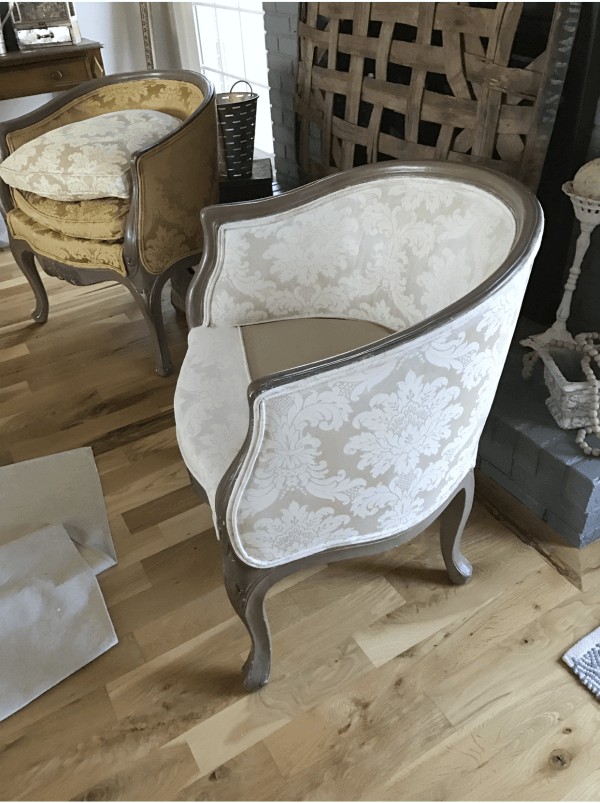
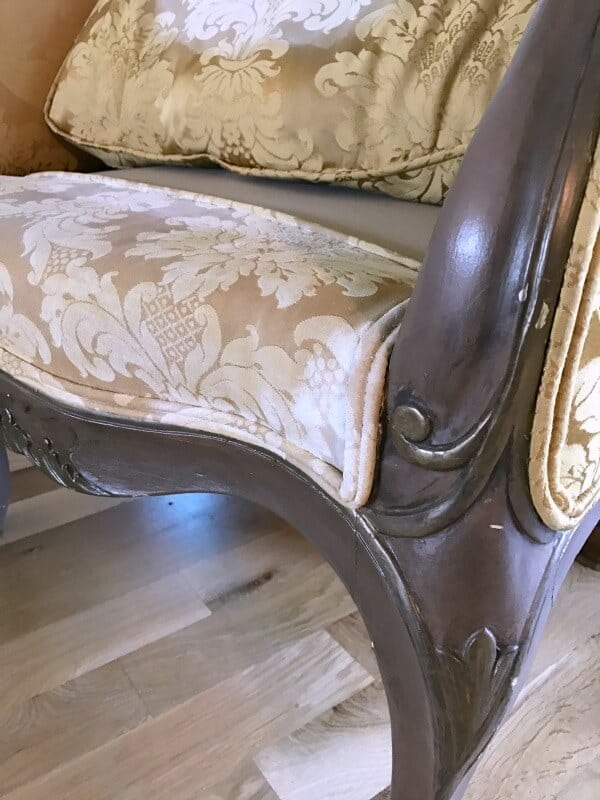
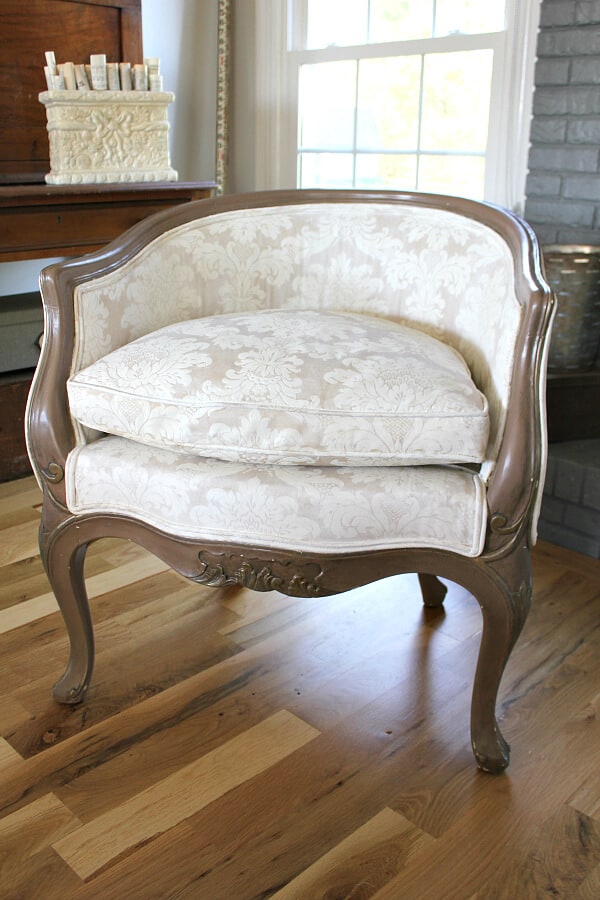
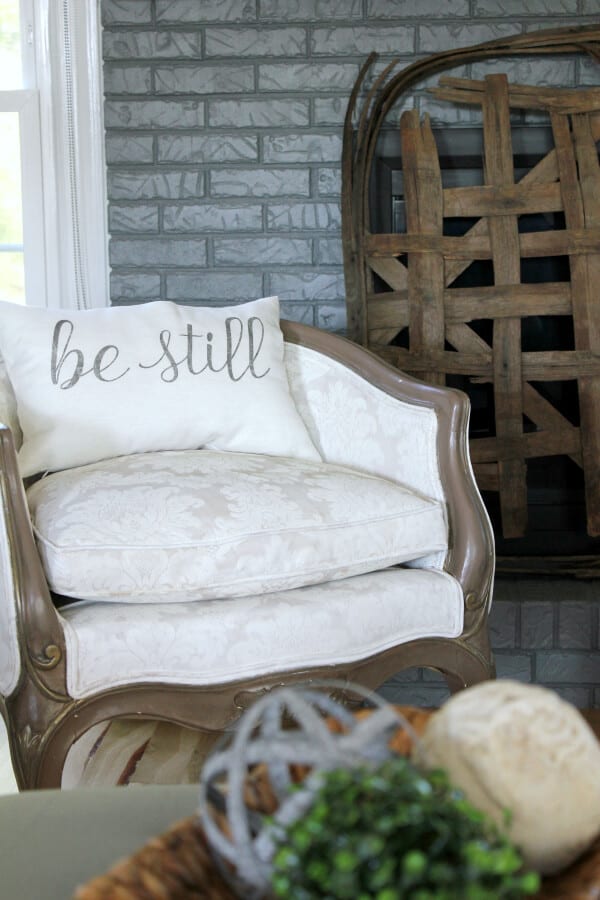
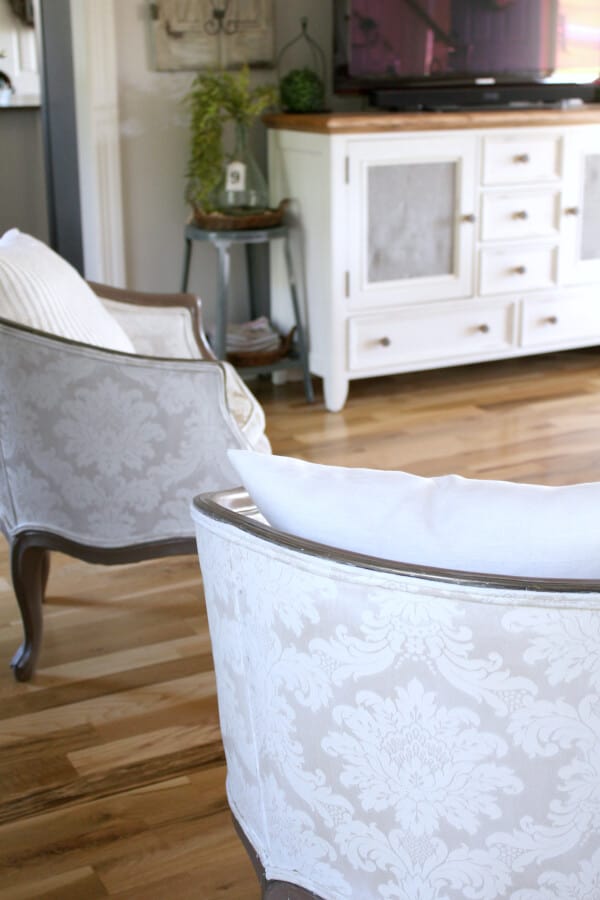
The damask pattern soaked up the paint beautifully, but the plain silk transformed into this gorgeous champagne color, making the chair slightly two-toned in beautiful neutrals.
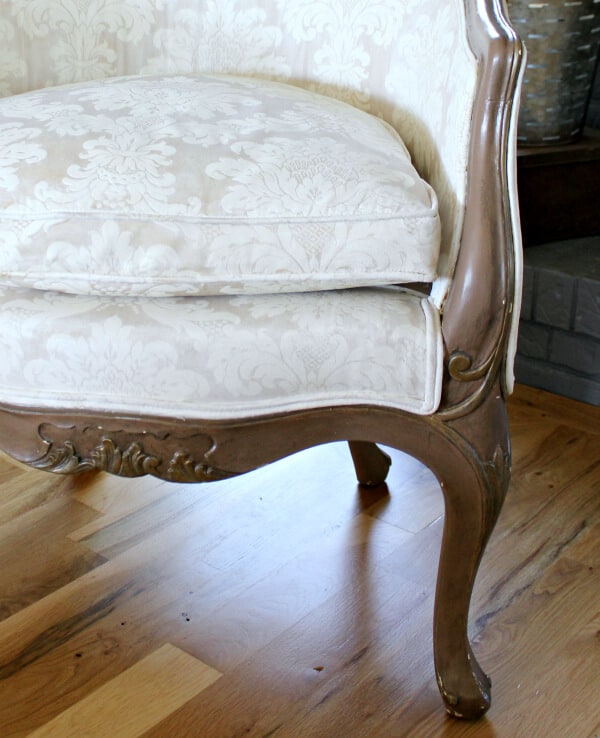
The detailed carvings on the chair were previously painted with a golden faux finish to allow those embellishments to pop and that champagne color looked just perfect against those hints of gold. So I went on to the final step of sealing it to see if I liked how it looked finished.
To seal the chairs, you iron them. Isn’t that wild?! That sets the paint and softens the fabric. Now, lemme tell ya – ironing an armchair isn’t the easiest thing to do. So many angles and curves.
I had to flip these chairs in all kinds of positions just to reach all the fabric. And ironing a chair with a new, curious puppy really isn’t an easy task! It was difficult keeping him away from the hot iron, so I may have missed a few spots.
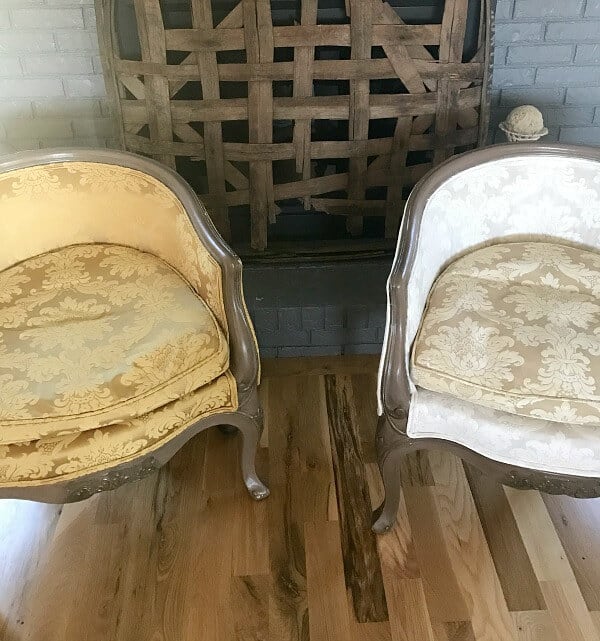
Here’s the only side by side shot I captured of the two chairs – and even at night – they are stunners!
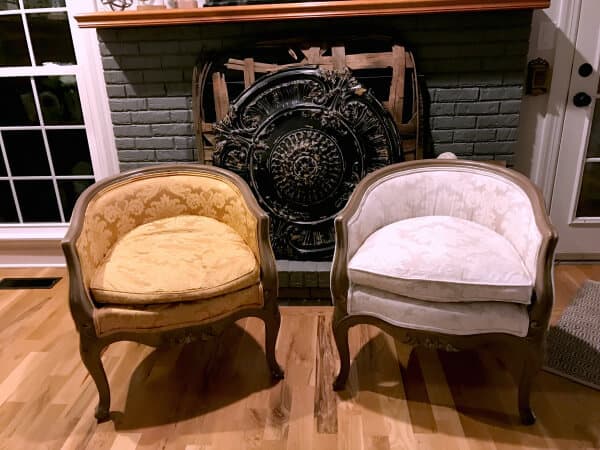
Didn’t they turn out just beautifully? Who knew painting a fabric chair would make such a statement?
Ready for the Reveal?
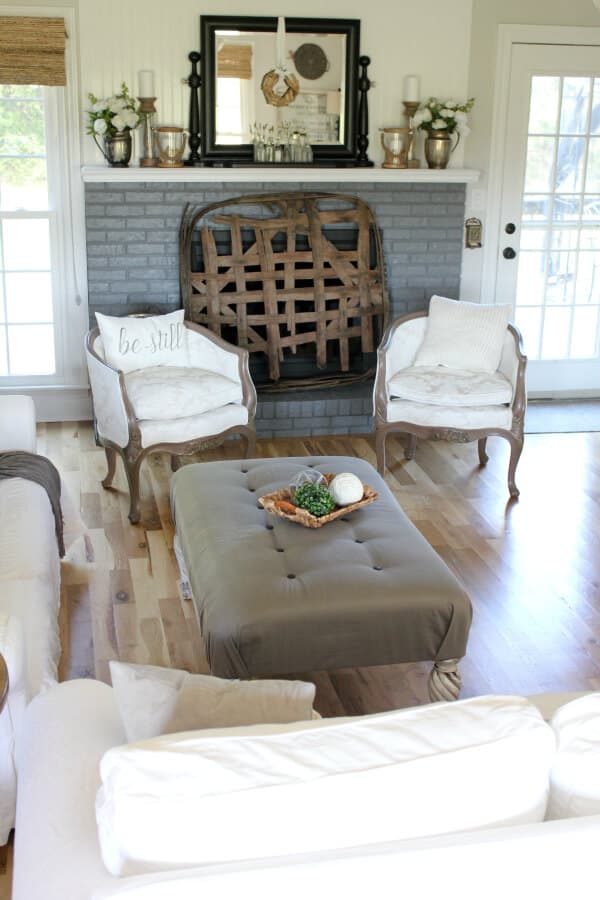
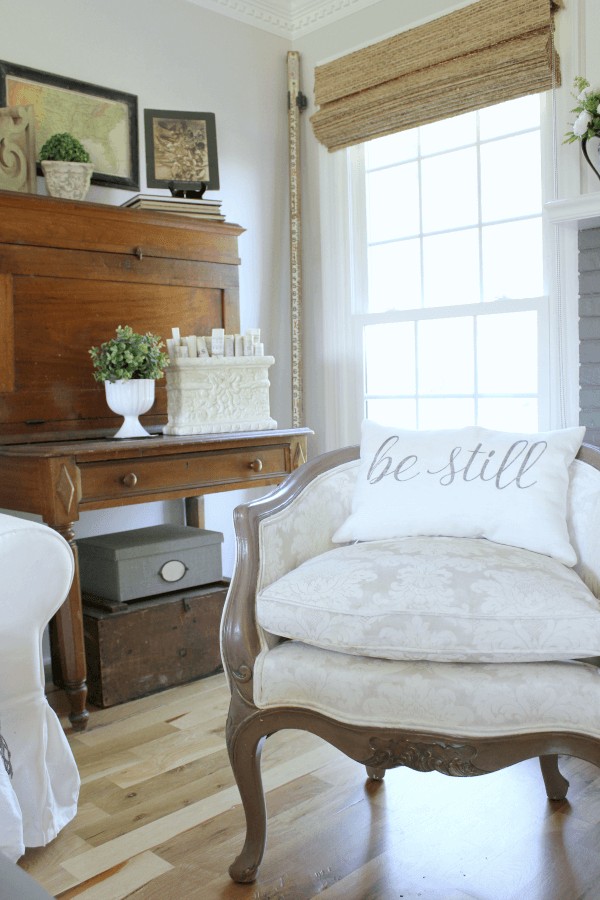
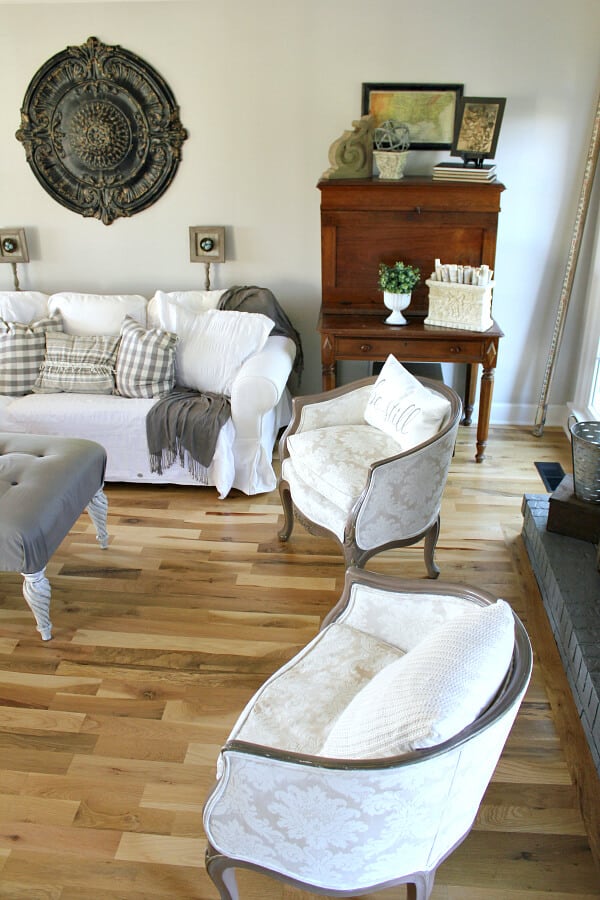
They frame in my fireplace so beautifully! The height is just perfect for my space and I love the lines and curves! And I think the fabric turned out to be quite nice.
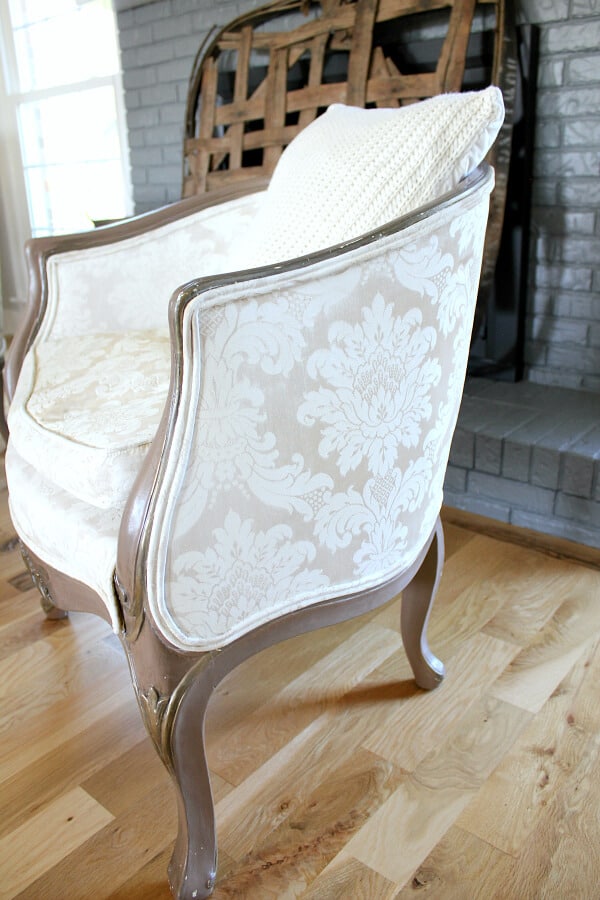
Now I will tell you this – they DO NOT feel like silk. If you’ve ever spilled something on a silk shirt and let it dry, that is similar to how this feels. Not crunchy or stiff, but also not soft like typical silk. Painting fabric does change how it feels and I noticed the more I ironed, the softer it got.
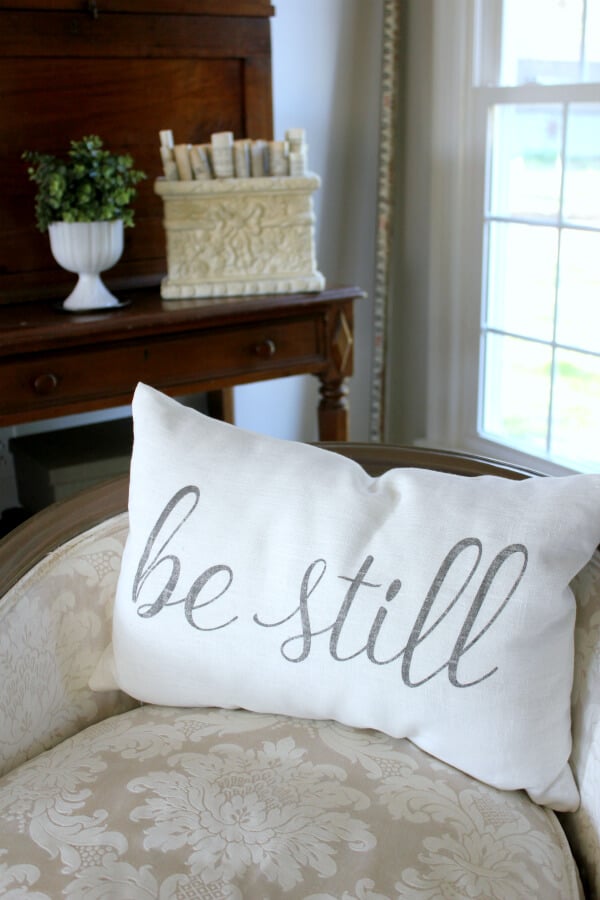
They are still comfortable and pair it with some beautiful pillows and they are the perfect occasional chair. I was chosen as a brand rep for Cover Love Pillows, made by a sweet instagram friend, Courtney, and I ordered this amazing ‘Be Still’ pillow in Ivory Linen and y’all – the quality is superb! The print is gorgeous and the linen is some of the softest I’ve ever felt! I love it so much, I’ve ordered another one for the other chair that will read ‘And Know’ – won’t that be the cutest?!
The chairs brighten up my living room and look nicely with my updated Entertainment Center and our Spring styled home.
So the next time you pass by a chair at a thrift store because of the color, or refuse a hand me down because of the fabric – you may want to try to paint a fabric chair! You may be like me – amazed at the results!


Hey Mima – sorry I missed this comment. I’m so glad this inspired you and I Hope your chairs turned out beautifully!
I’m not sure. Since I didn’t give the steaming a try, I don’t feel confident to say one way or another. But I’m always one not afraid of trying new things. I say go for it! 😉
Thanks for taking the time to comment!
Will a steamer do, or no steam at all?
You have inspired me to do it! Your method is Affordable, Easy to follow and with Fabulous results. I have 2 chairs that needs TLC cause I won’t replace them. Both have Damask fabric, one white and one brown. I’m thinking the brown will become like a mustard/sun yellow color and the white will probably looks good in an ocean blue. My walls are light grey. Wish me luck!
Hey Jean –
It was on the website of the craft medium where I saw someone mention the ironing in a comment. But it’s not on the bottle itself.
Hope that helps!
Jen
Hello, Was it the craft medium that suggested the ironing?
Thanks,
Jean Andazola
Thanks Kimberly! It’s such an easy DIY and you can definitely give your chairs a quick update without the hassle of reupholstering.
Wow they turned out so amazing. I guess you’re right, just taking that first step is a bit scary. I was worried it would make the material feel stiff and hard and, crunchy. My chairs not fancy like yours but totally wrong color.
Hi Tammi,
I used about 2 and half of the 3 bottles. If it were me – I’d buy more than I need – you could always return it!
Hope that helps!
Your chairs look great! I was wondering how much of the 3 bottles you used for this project? I have two wing chairs I’d like to paint, but am uncertain of how much to buy. Thanks.