My Experience Using Oven Cleaner to Strip Furniture
I jumped on the band wagon of this instagram trend and was amazed! Here’s my experience using household oven cleaner to strip furniture.
Have you seen this crazy trend on instagram?
People are using oven cleaner to strip their wood.
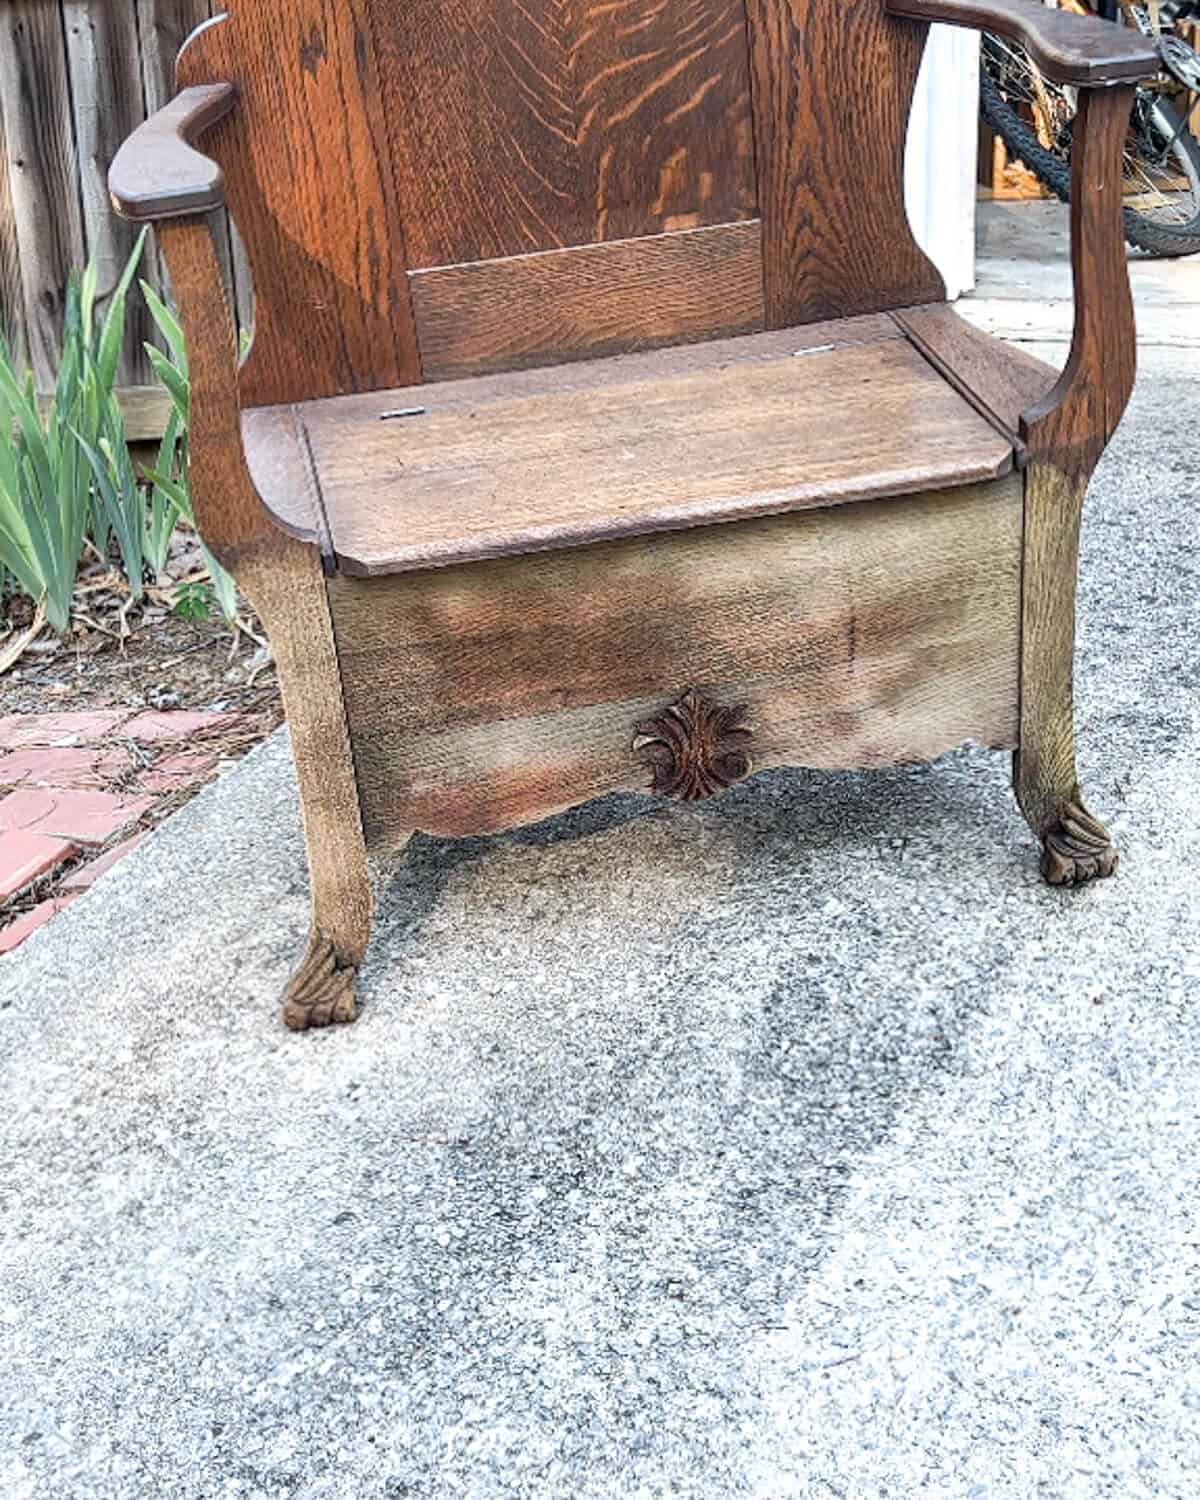
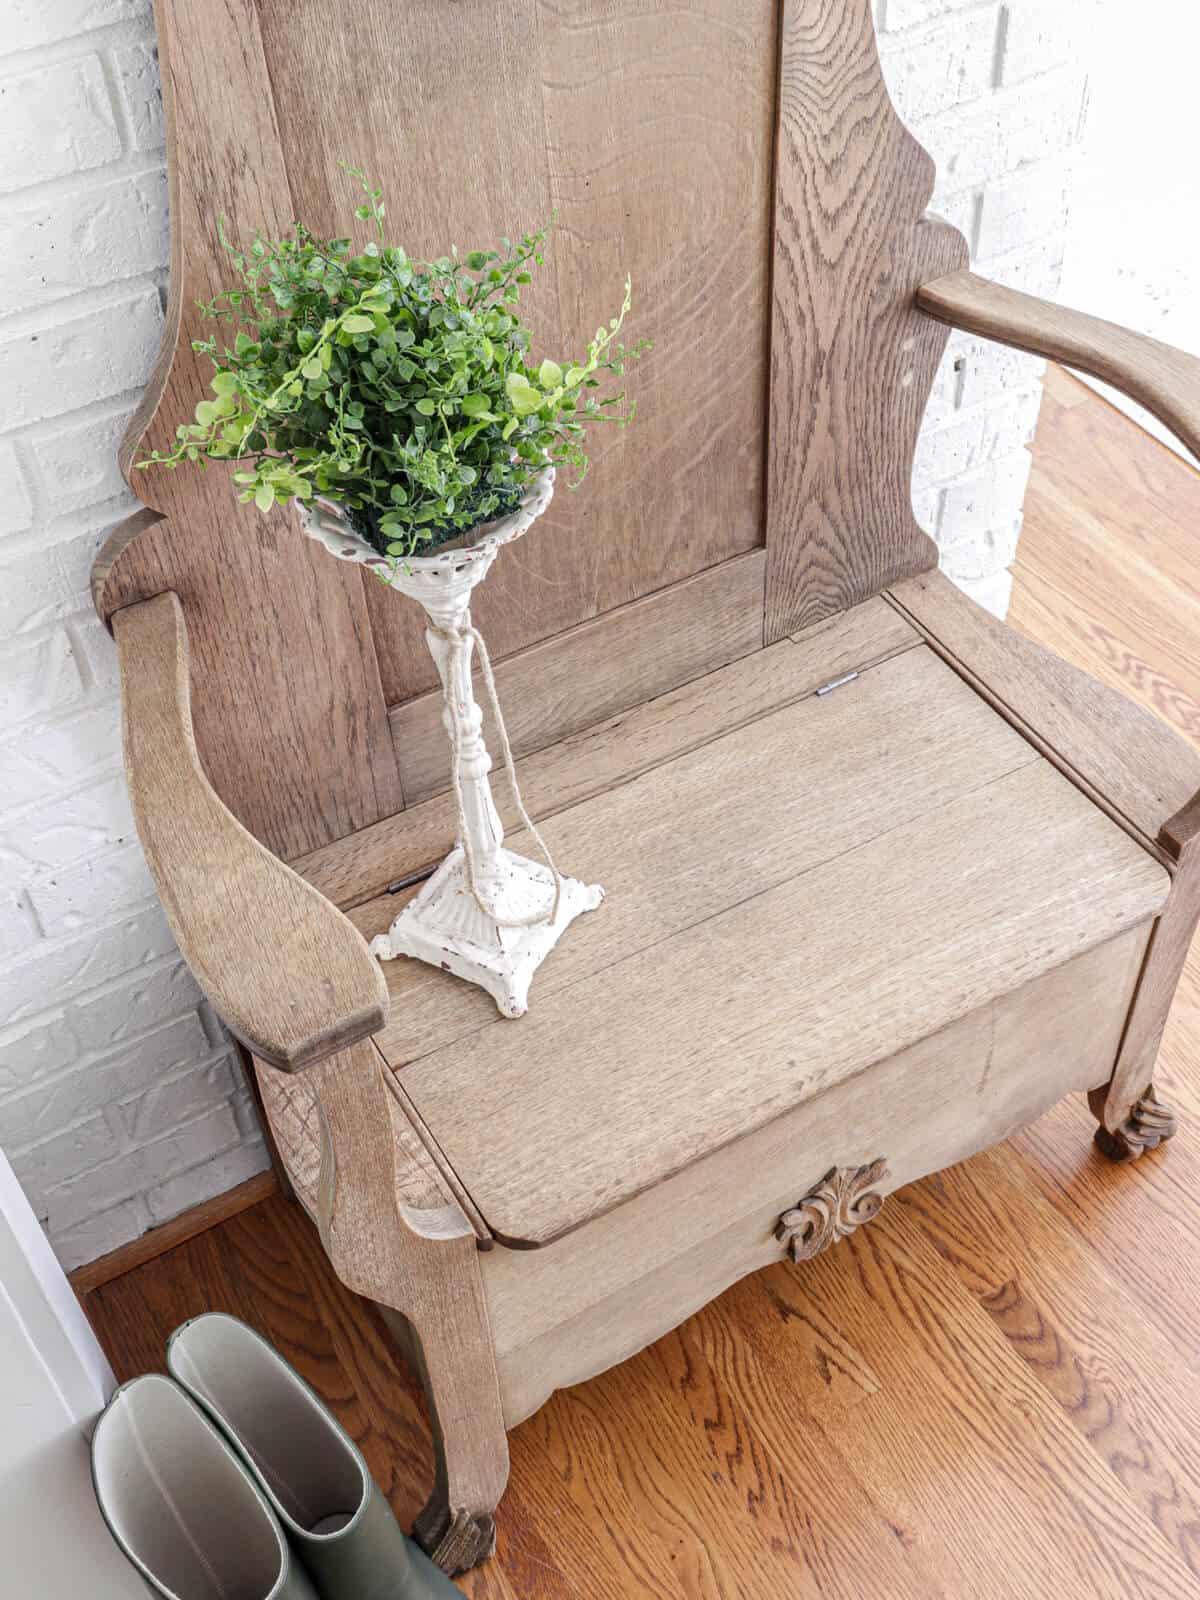
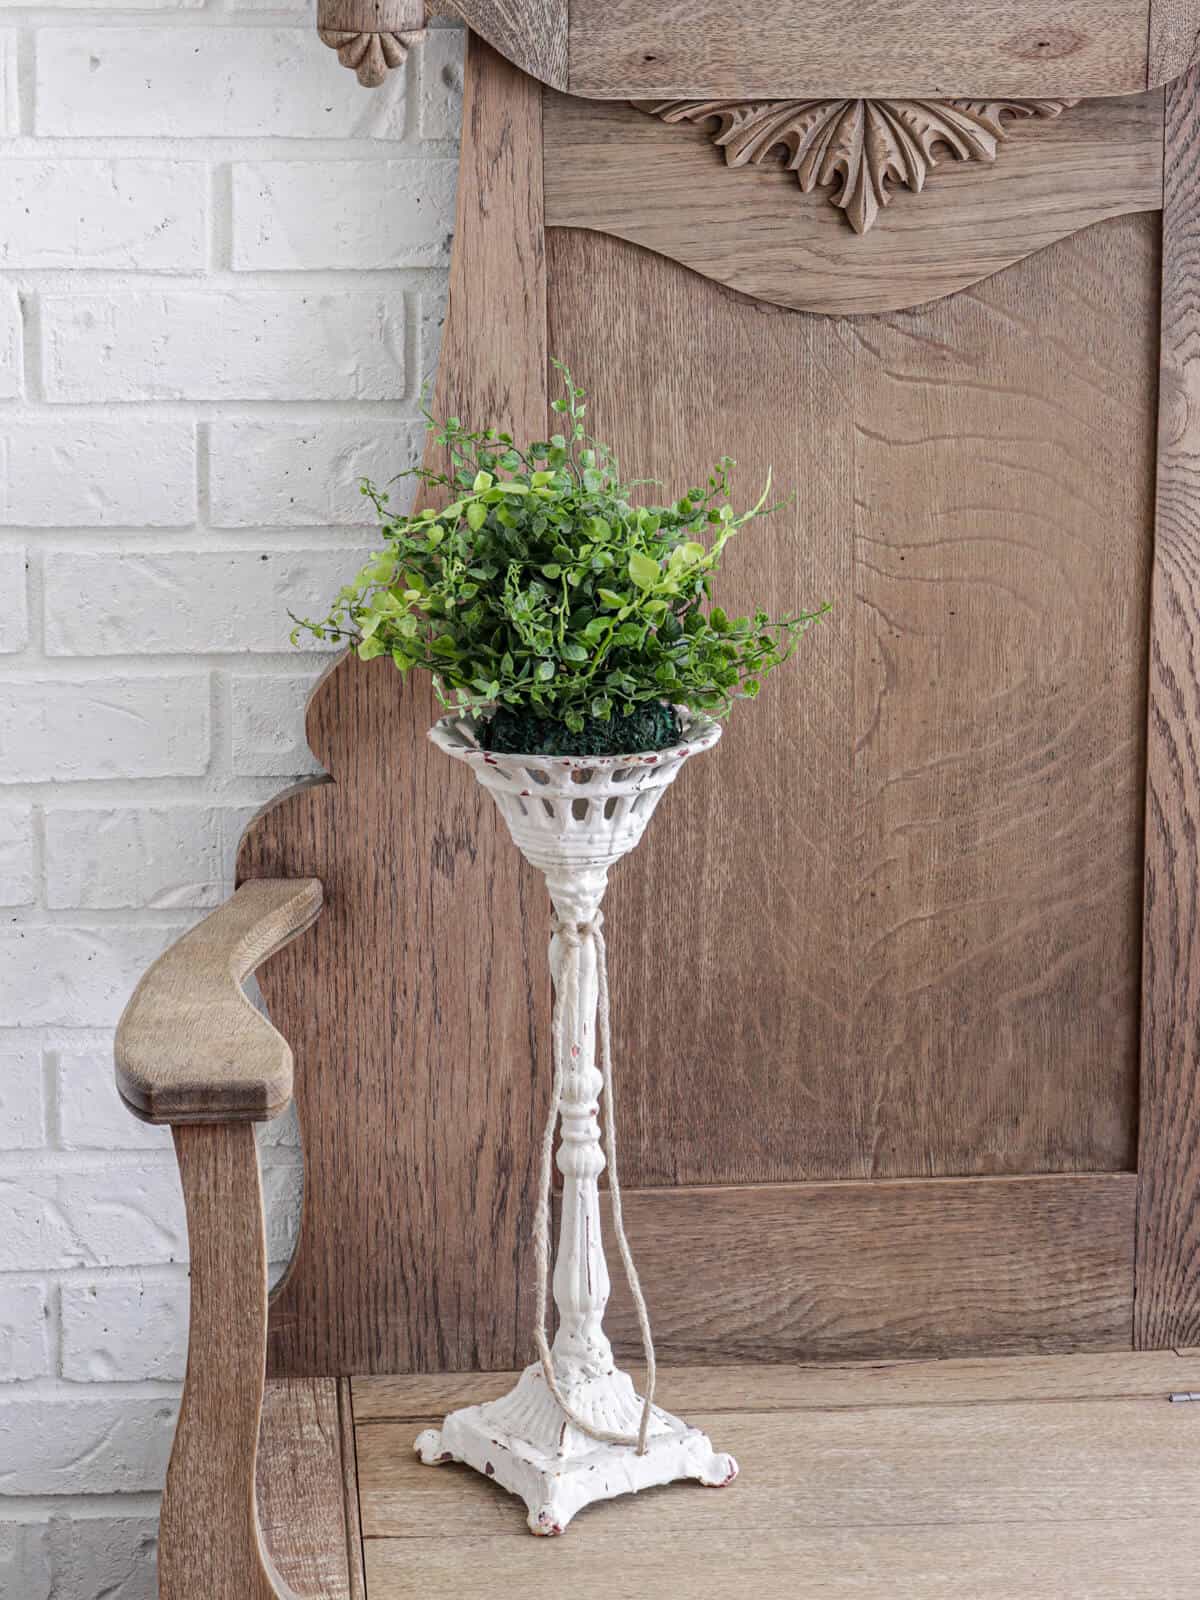
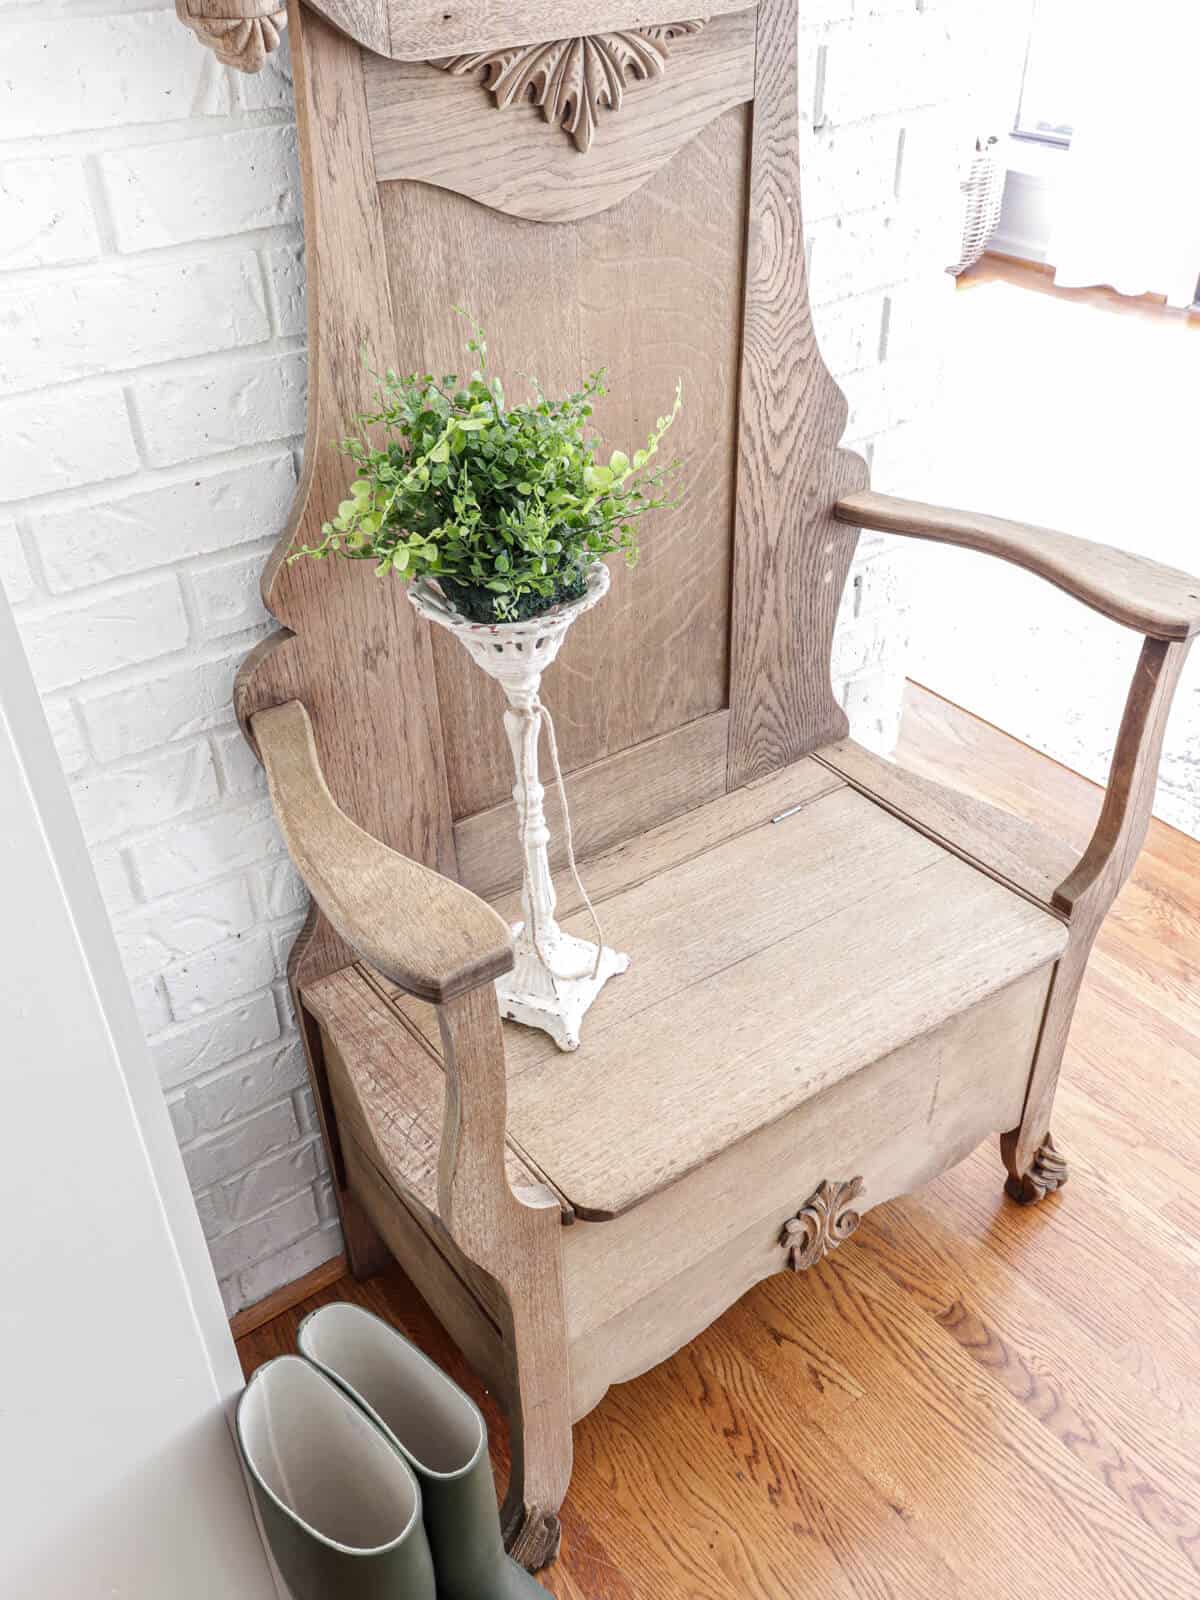
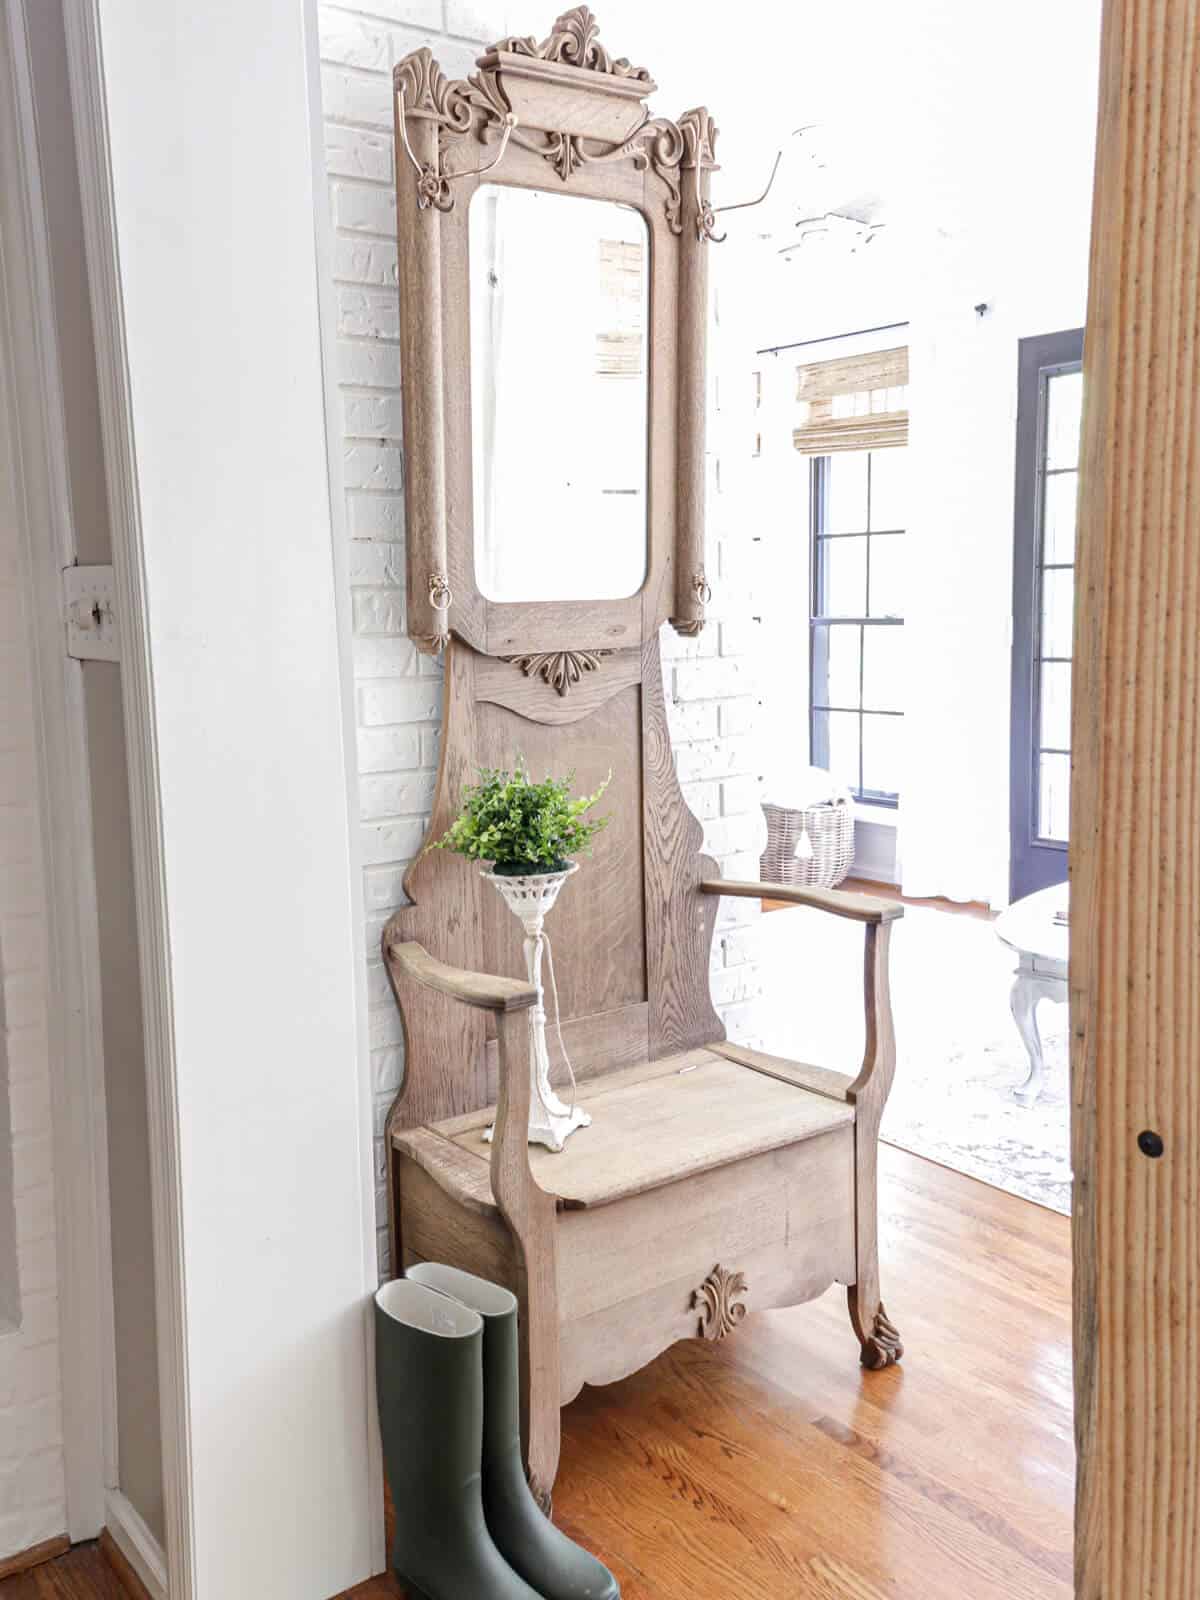
I’ve had this vintage hall tree in my home for the past few years.
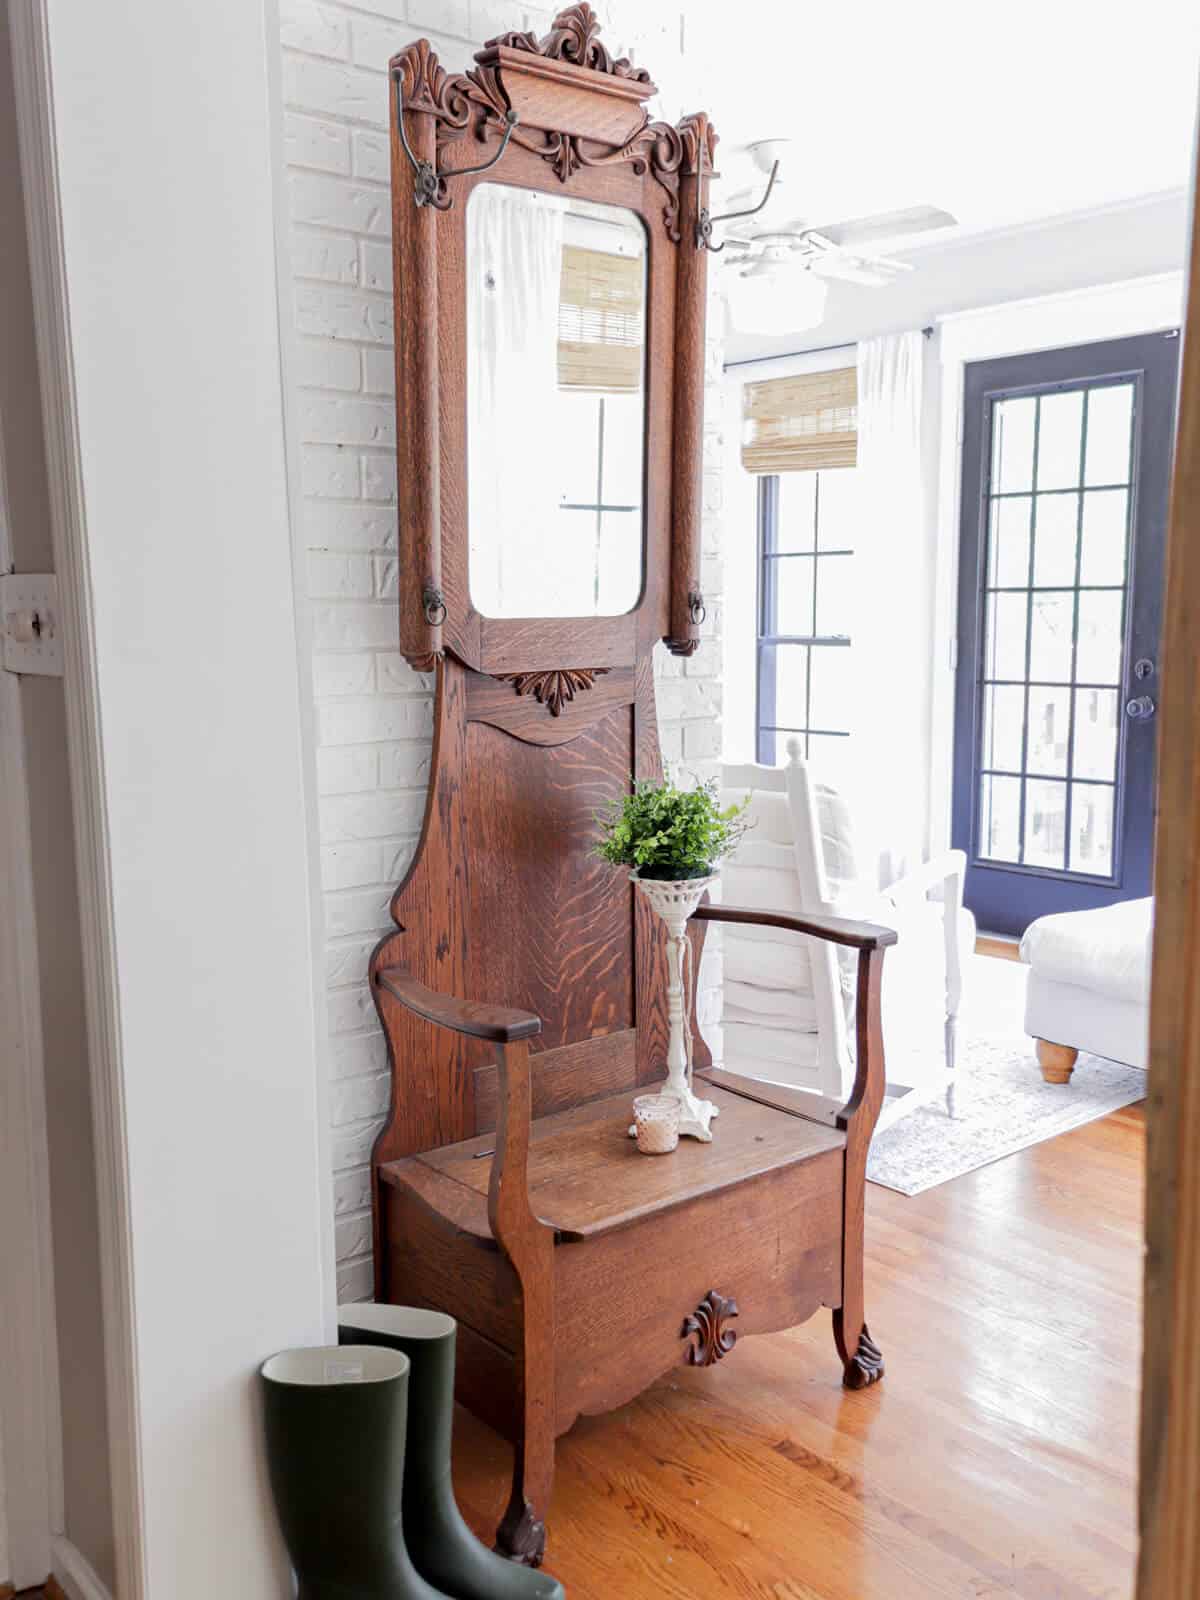
I love it because of the back story.
This was in Trent’s home when he was growing up. His favorite memory as a child was sitting in this hall tree pretending he was Conan on his throne.
So that little memory makes me smile when I see the hall tree.
But the orange-y finish – not so much.
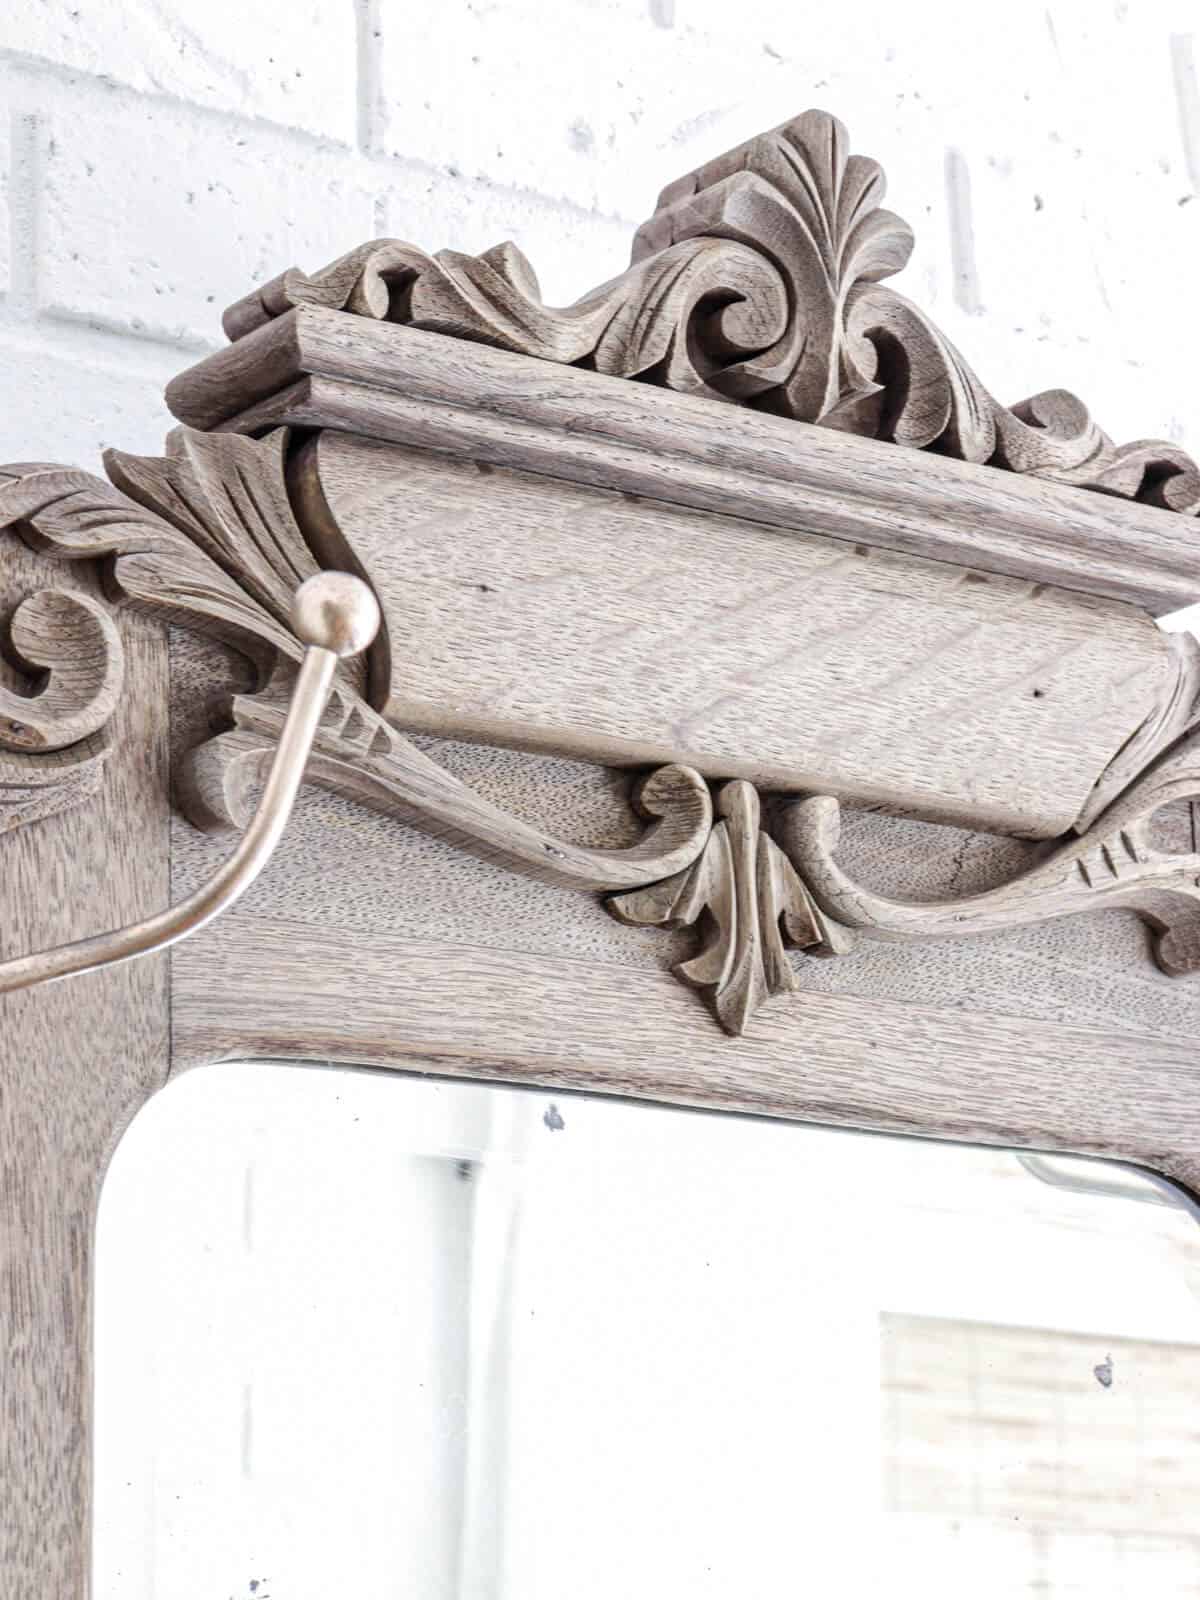
The idea of sanding all that carved wood always made me hesitate when I thought about refinishing it.
That is, until I saw the oven cleaner method as a paint stripper.
This was made famous by my friend Natalie from the Vintage Porch in this blog post.
I’ve watched her instagram stories many times and have seen all the others who have followed her with great success.
So why not give it a try?
How to Use Oven Cleaner to Strip Furniture
(Some affiliate links are provided below. Full disclosure here.)
Since this requires the use of water and a hose, Trent and I carried our hall tree to our driveway to work.
Luckily, our hall tree mirror separates from the base.
These are the supplies you’ll need for this project.
- Oven Cleaner – I used Easy Off Fume Free
- Scrub Brush
- Bucket of Water
- Hose
- Sandpaper or scuff pad – I love this mini one from Gator!
- Gloves and goggles if you have sensitive skin
Instructions
Lemme tell ya, the first time you spray the oven cleaner on the old finish, it feels like you are going against anything normal.
But trust the process – any new technique is worth trying!
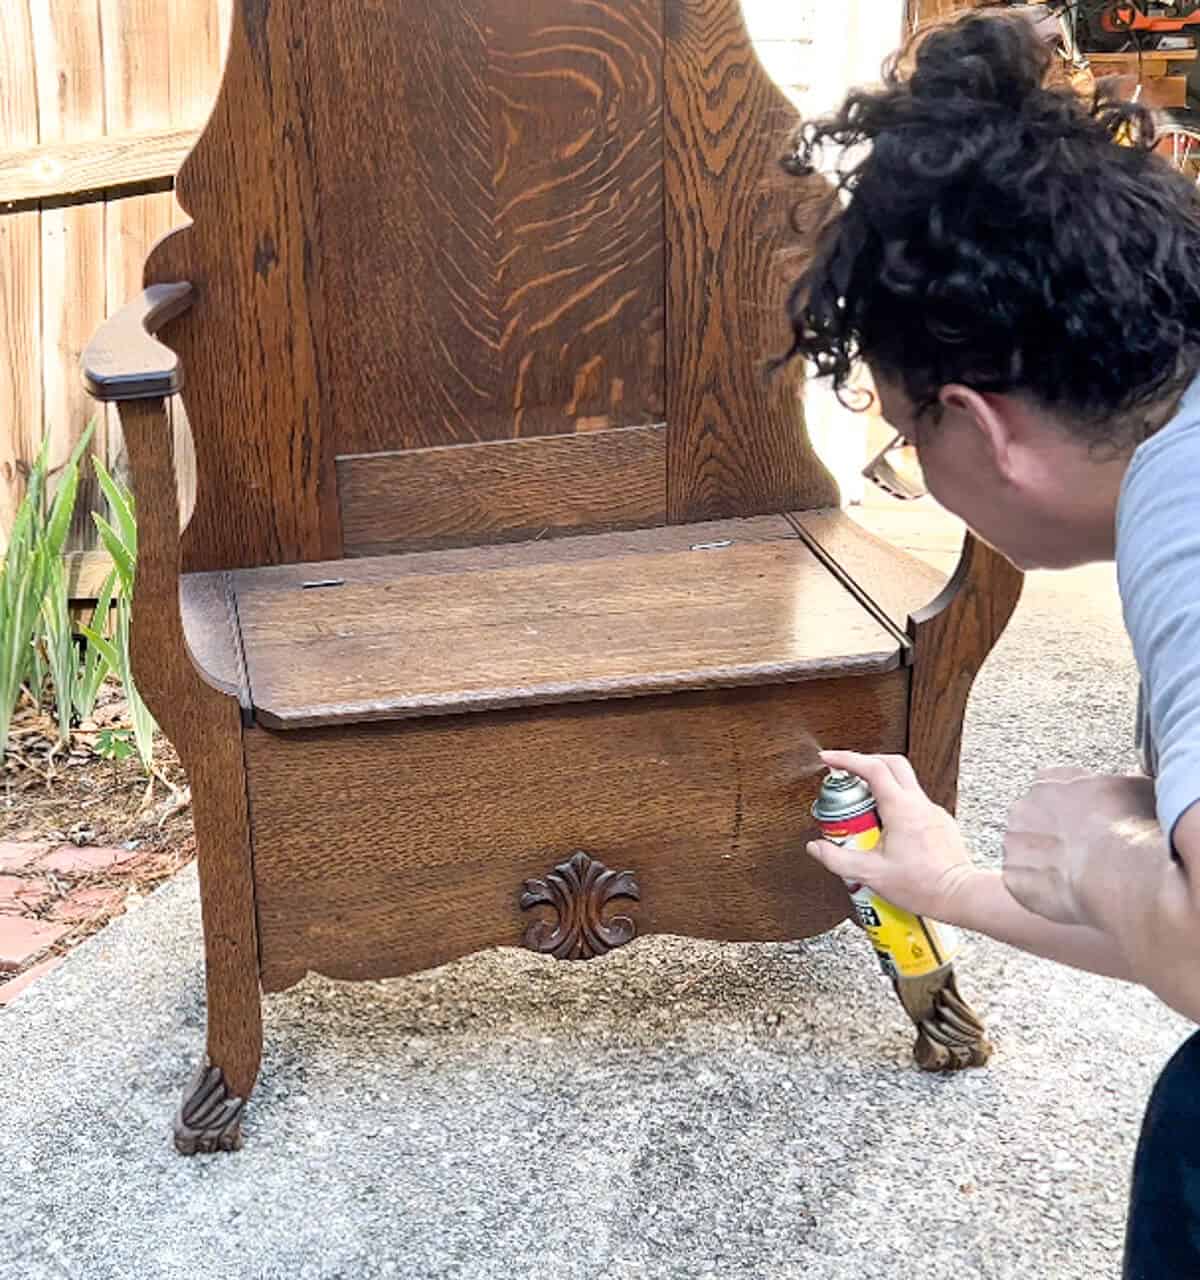
You want the oven cleaner to saturate the entire piece of furniture, so spray one coat of oven cleaner liberally.
For this piece, I ended up using 2 cans of Easy-Off Oven Cleaner.
Start by working in small areas.
Allow the cleaner to sit on the wood stain for 15-30 minutes.
Then you are ready to scrub.
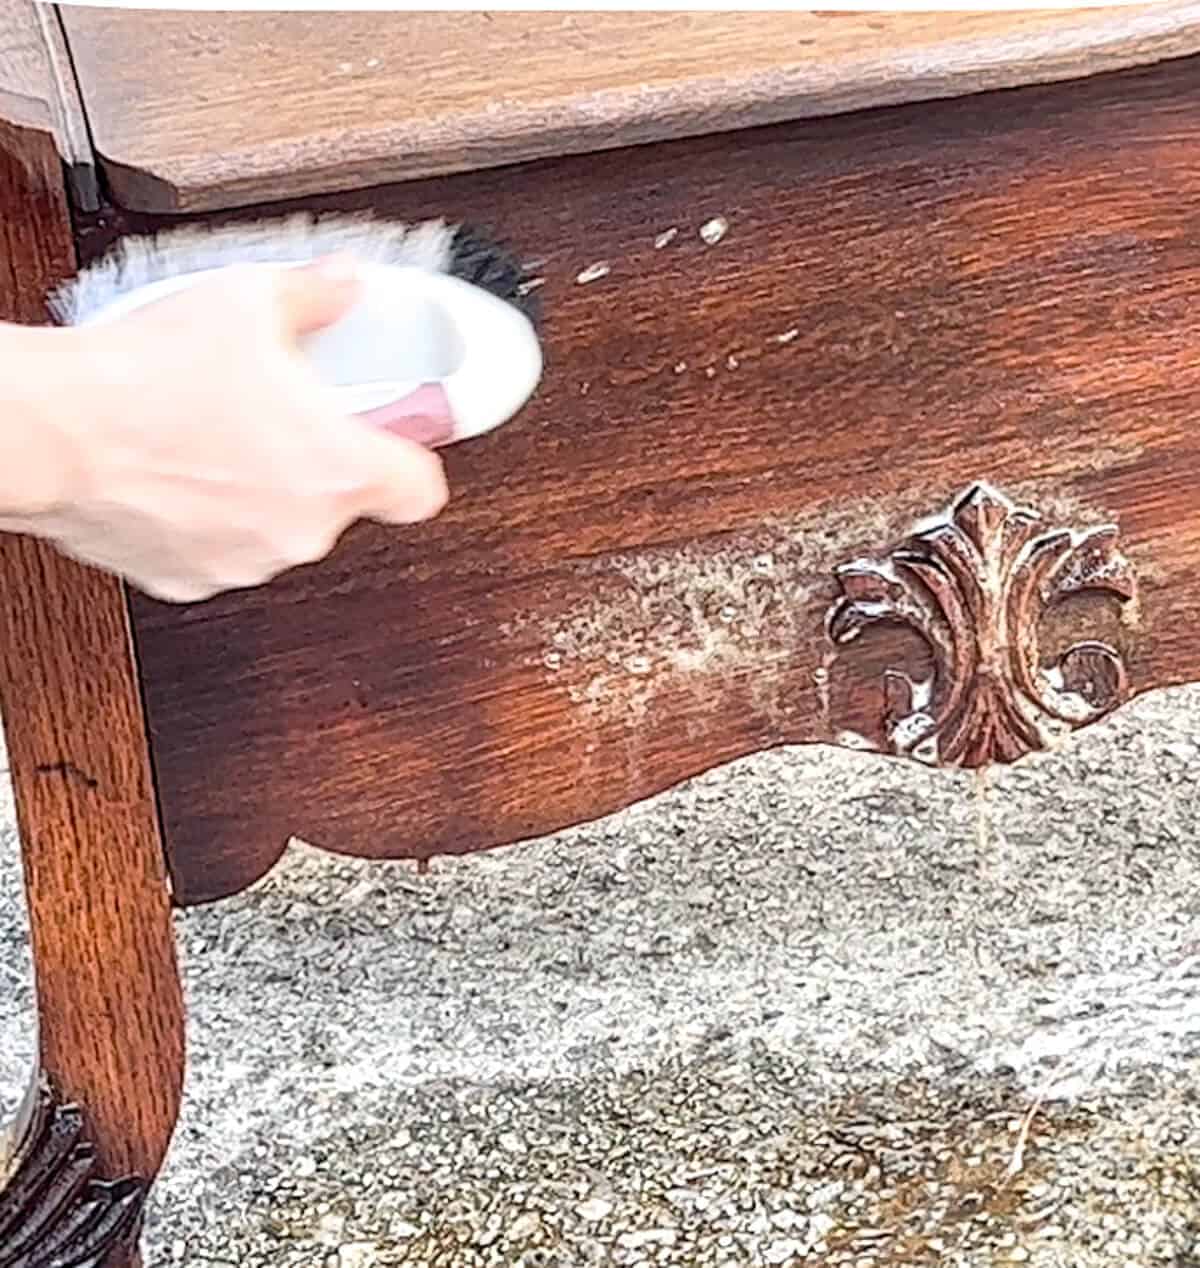
I filled a bucket with warm water and used a large scrub brush to work in the cleaner.
You will immediately begin to see the old stain start to lift off the wood.
Hint: I highly recommend using eye protection when scrubbing. You do not want any chemicals to land in your eyes!
I noticed right away that my bucket of water started to turn brown after dipping my scrub brush in a few times.
I swapped out my water about 3 or 4 times throughout the process.
Once you have scrubbed, now you are ready to grab your water hose and rinse.
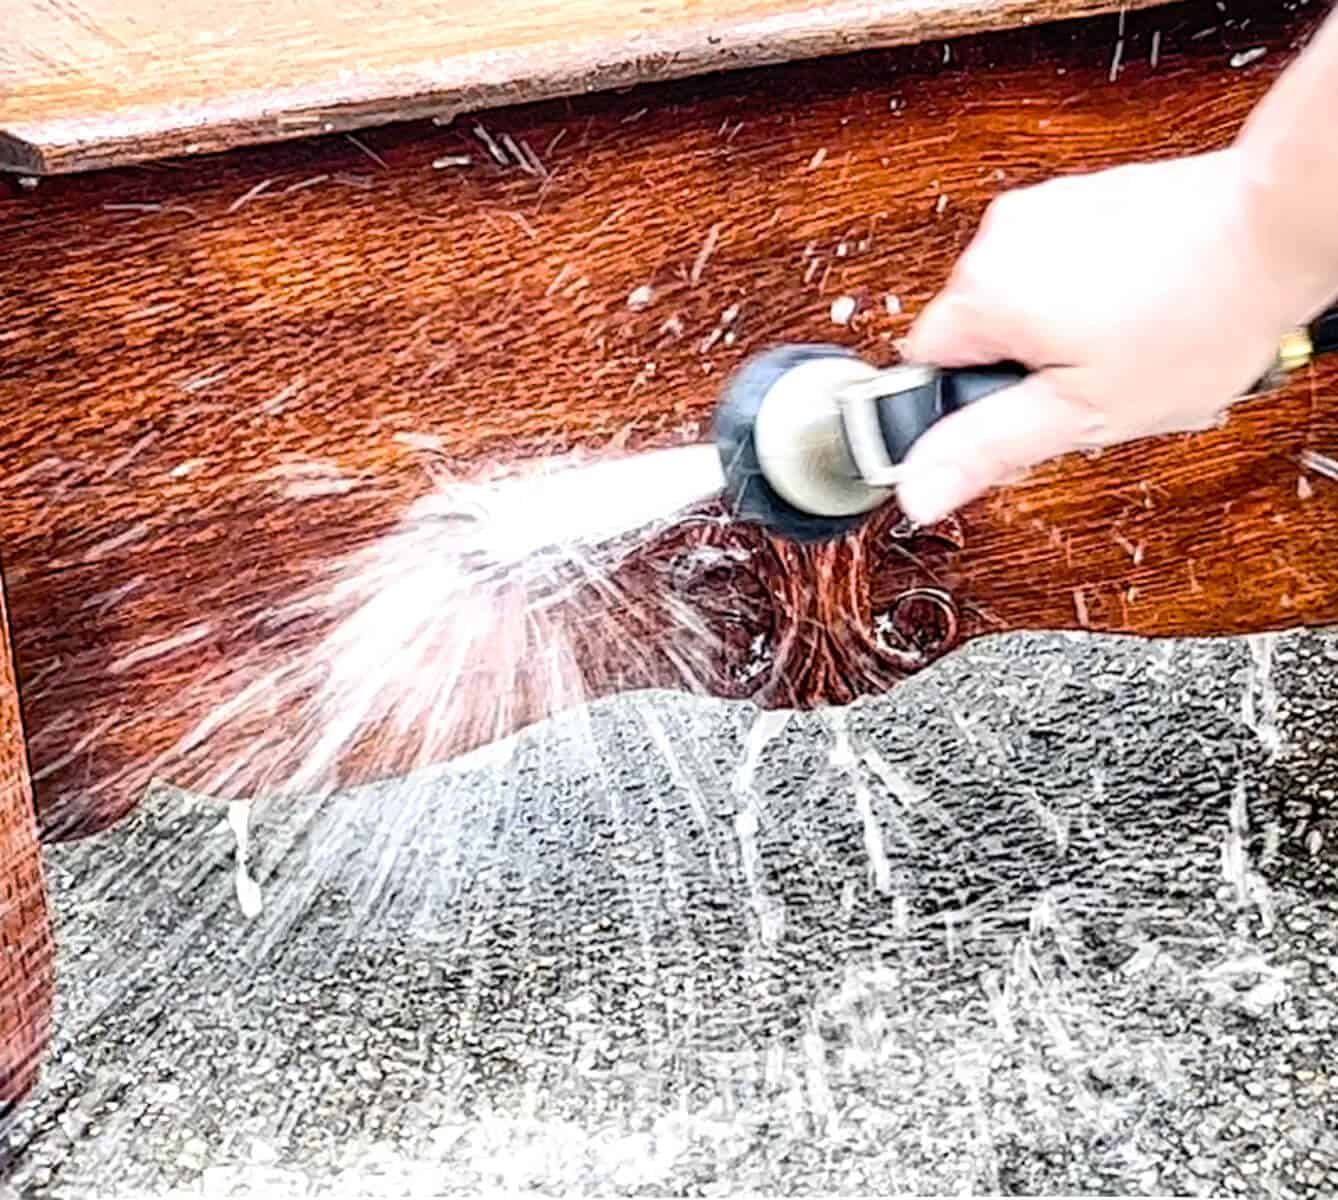
Again – this feels like a dystopian world hosing down vintage wood.
But I trusted the process and made sure to rinse thoroughly until the water ran clear.
Since our hall tree separated into two sections, I placed the mirror on a work bench.
Having it lay on a flat surface was the easiest way to scrub.
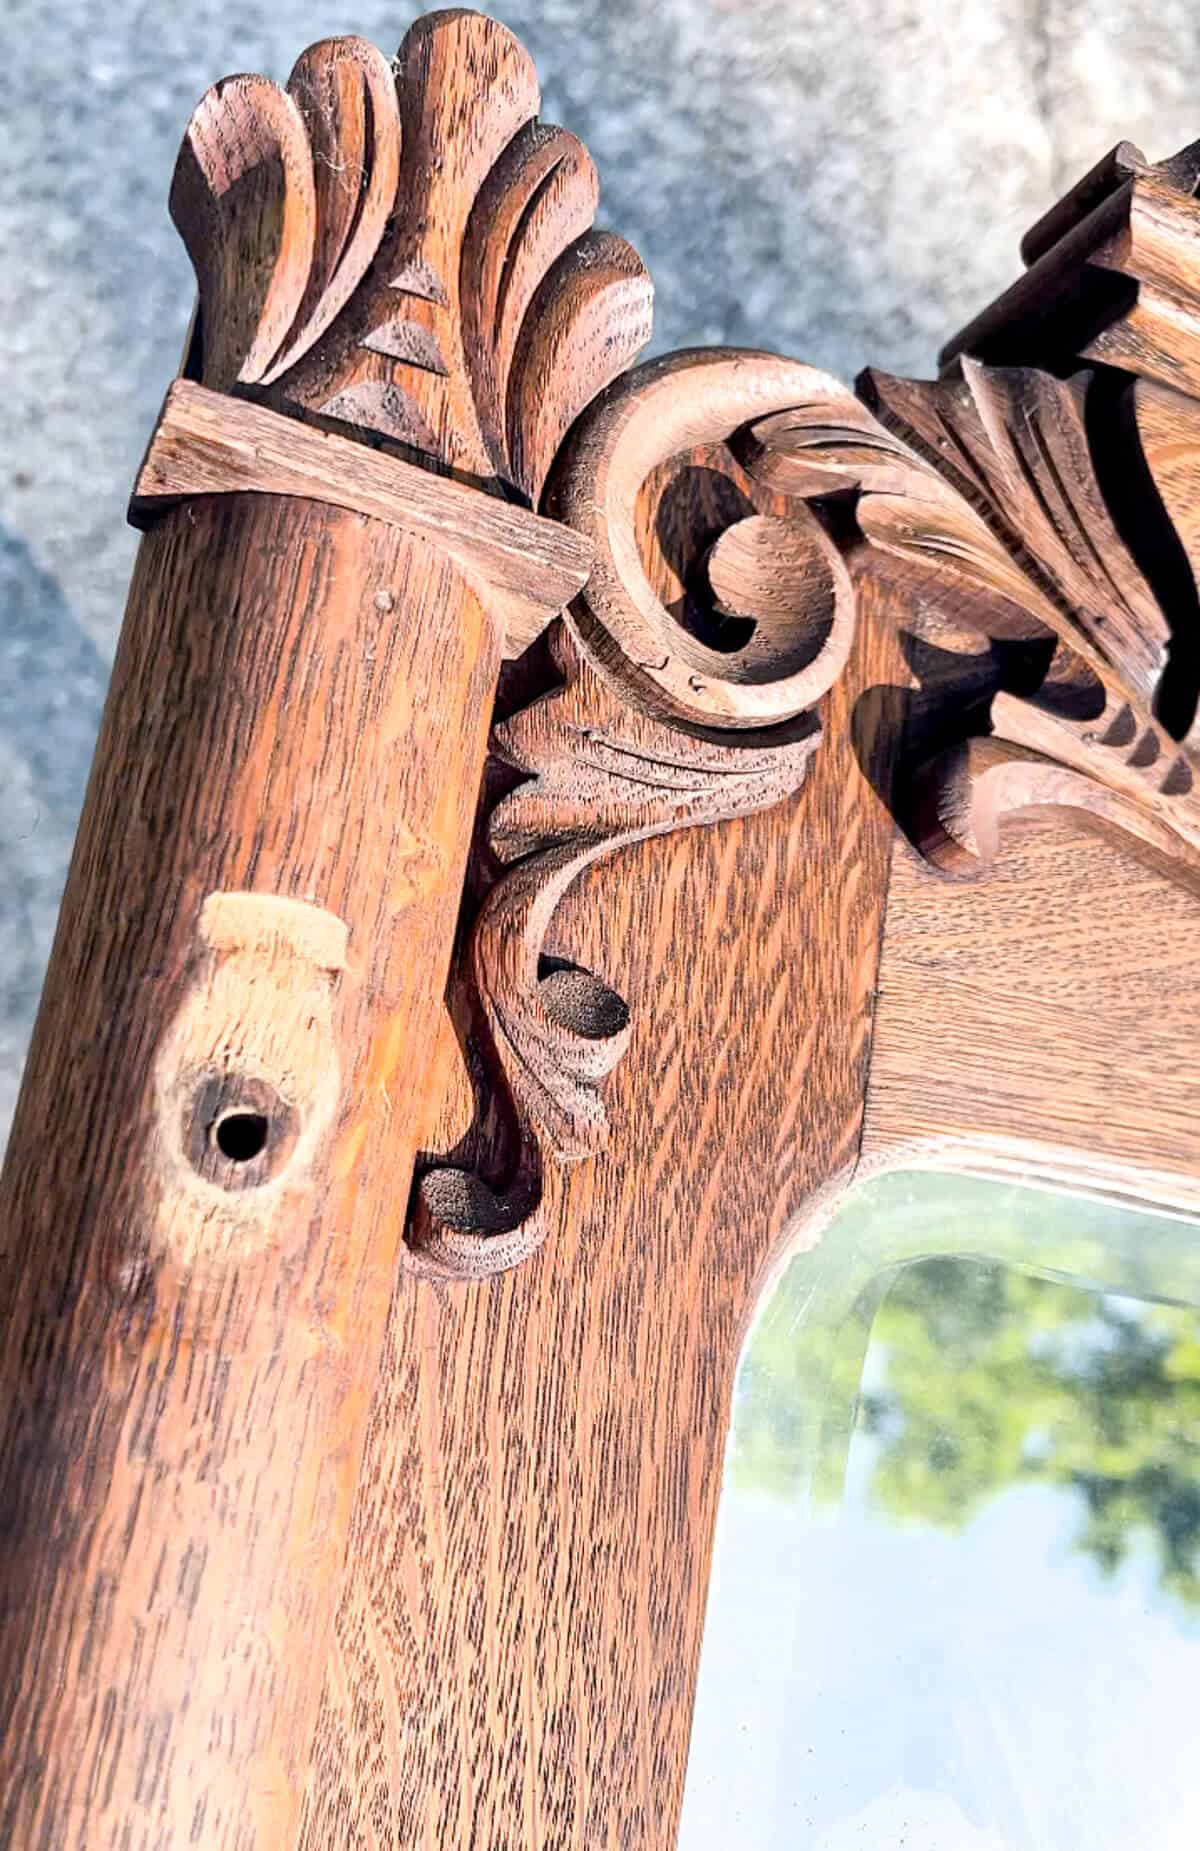

TOP TIP: If your piece has ornate detail like my wood carving, you may need to use a smaller brush to get into the nooks and crannies. I ended up having to apply 2 coats of the oven cleaner and give it a good scrub again with a toothbrush.
Next you want to sit the piece in the sun or a warm area to dry.
After 10 minutes of drying, I started to see that raw wood finish peeking through.
It was amazing!
Here it looks after it was totally dry – which was about 35 minutes for the excess water to evaporate.
I was so blown away, friend!
One thing I noticed was that the wood grain was raised.
This makes sense since you are using so much water.
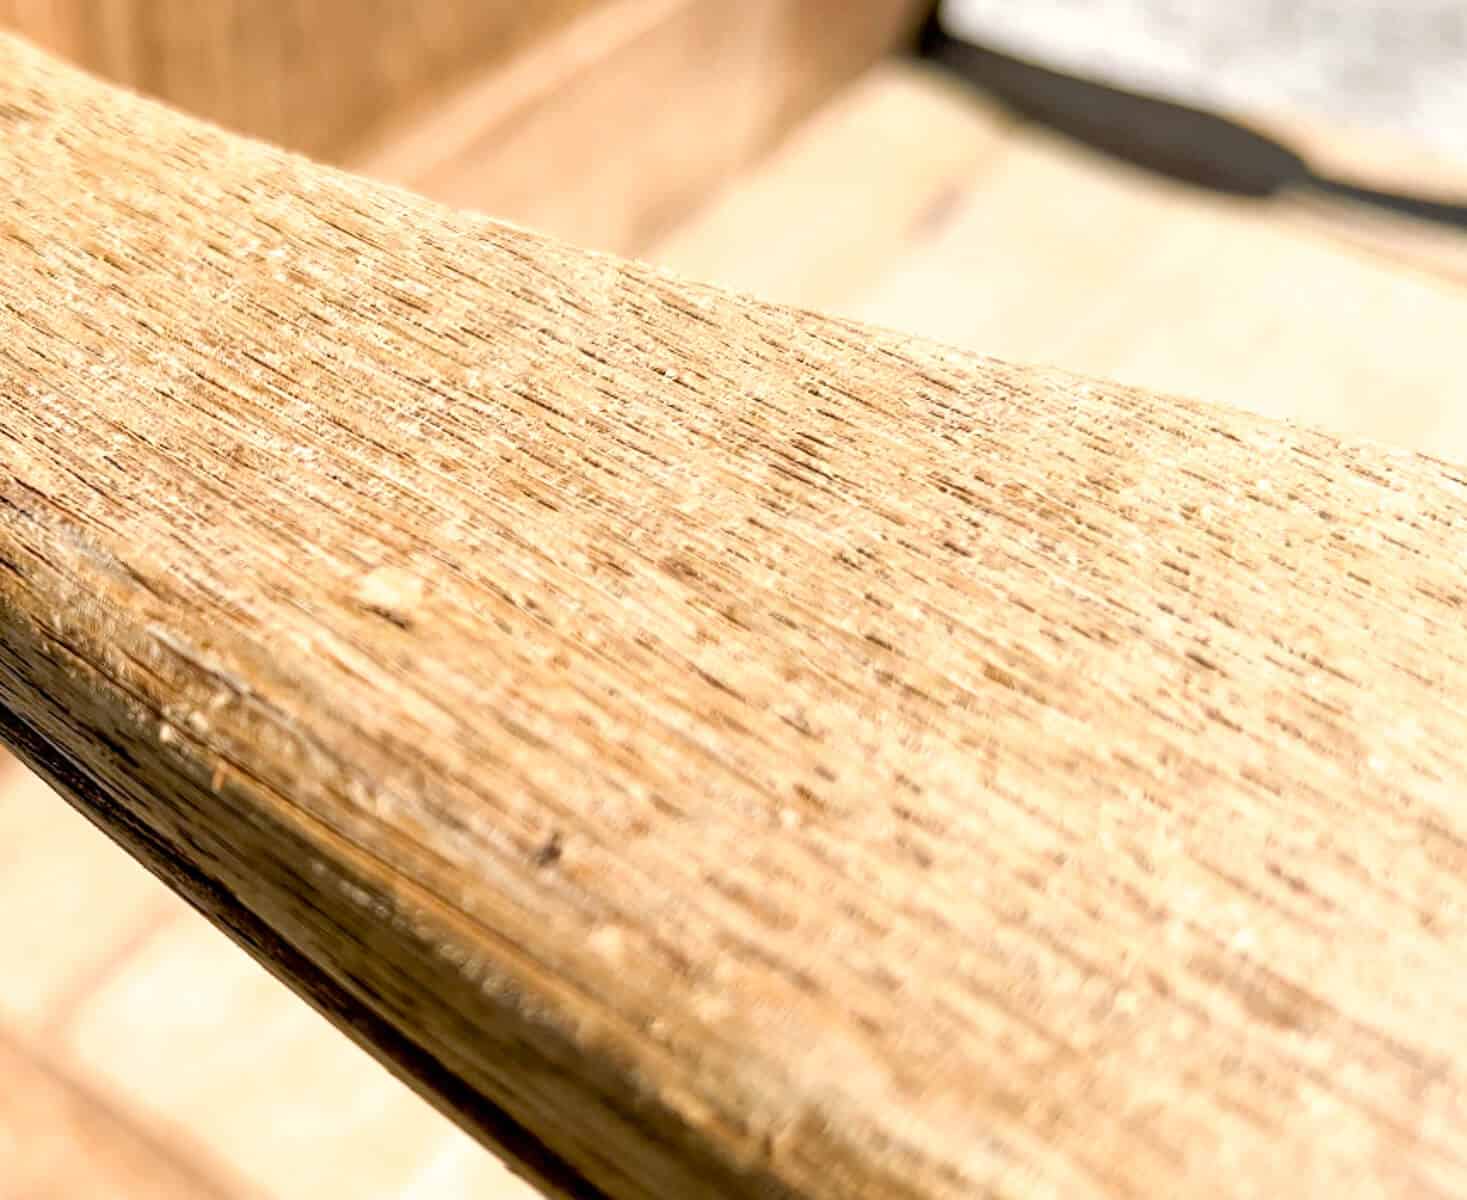
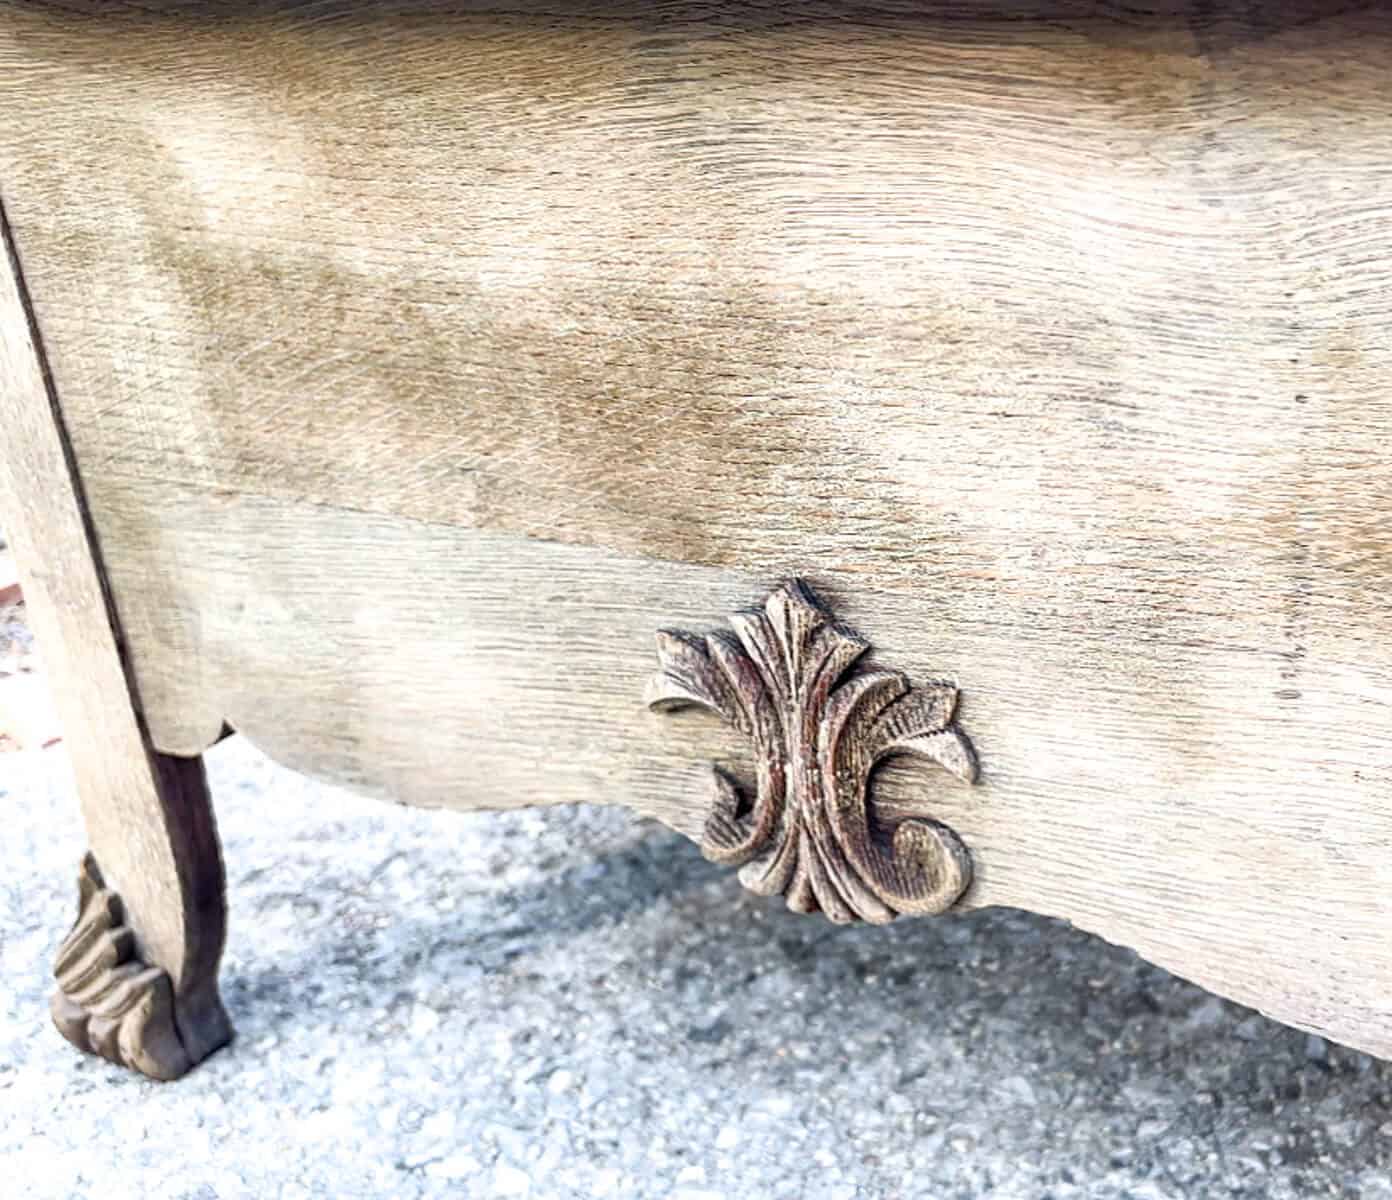
So the last step in the process is following up with a light sanding.
Now I know what you’re thinking, because I thought it too.
Why go to this trouble if you have to sand anyway?
Well, this is not like sanding a finished piece with layers of stain and a protective layer of poly.
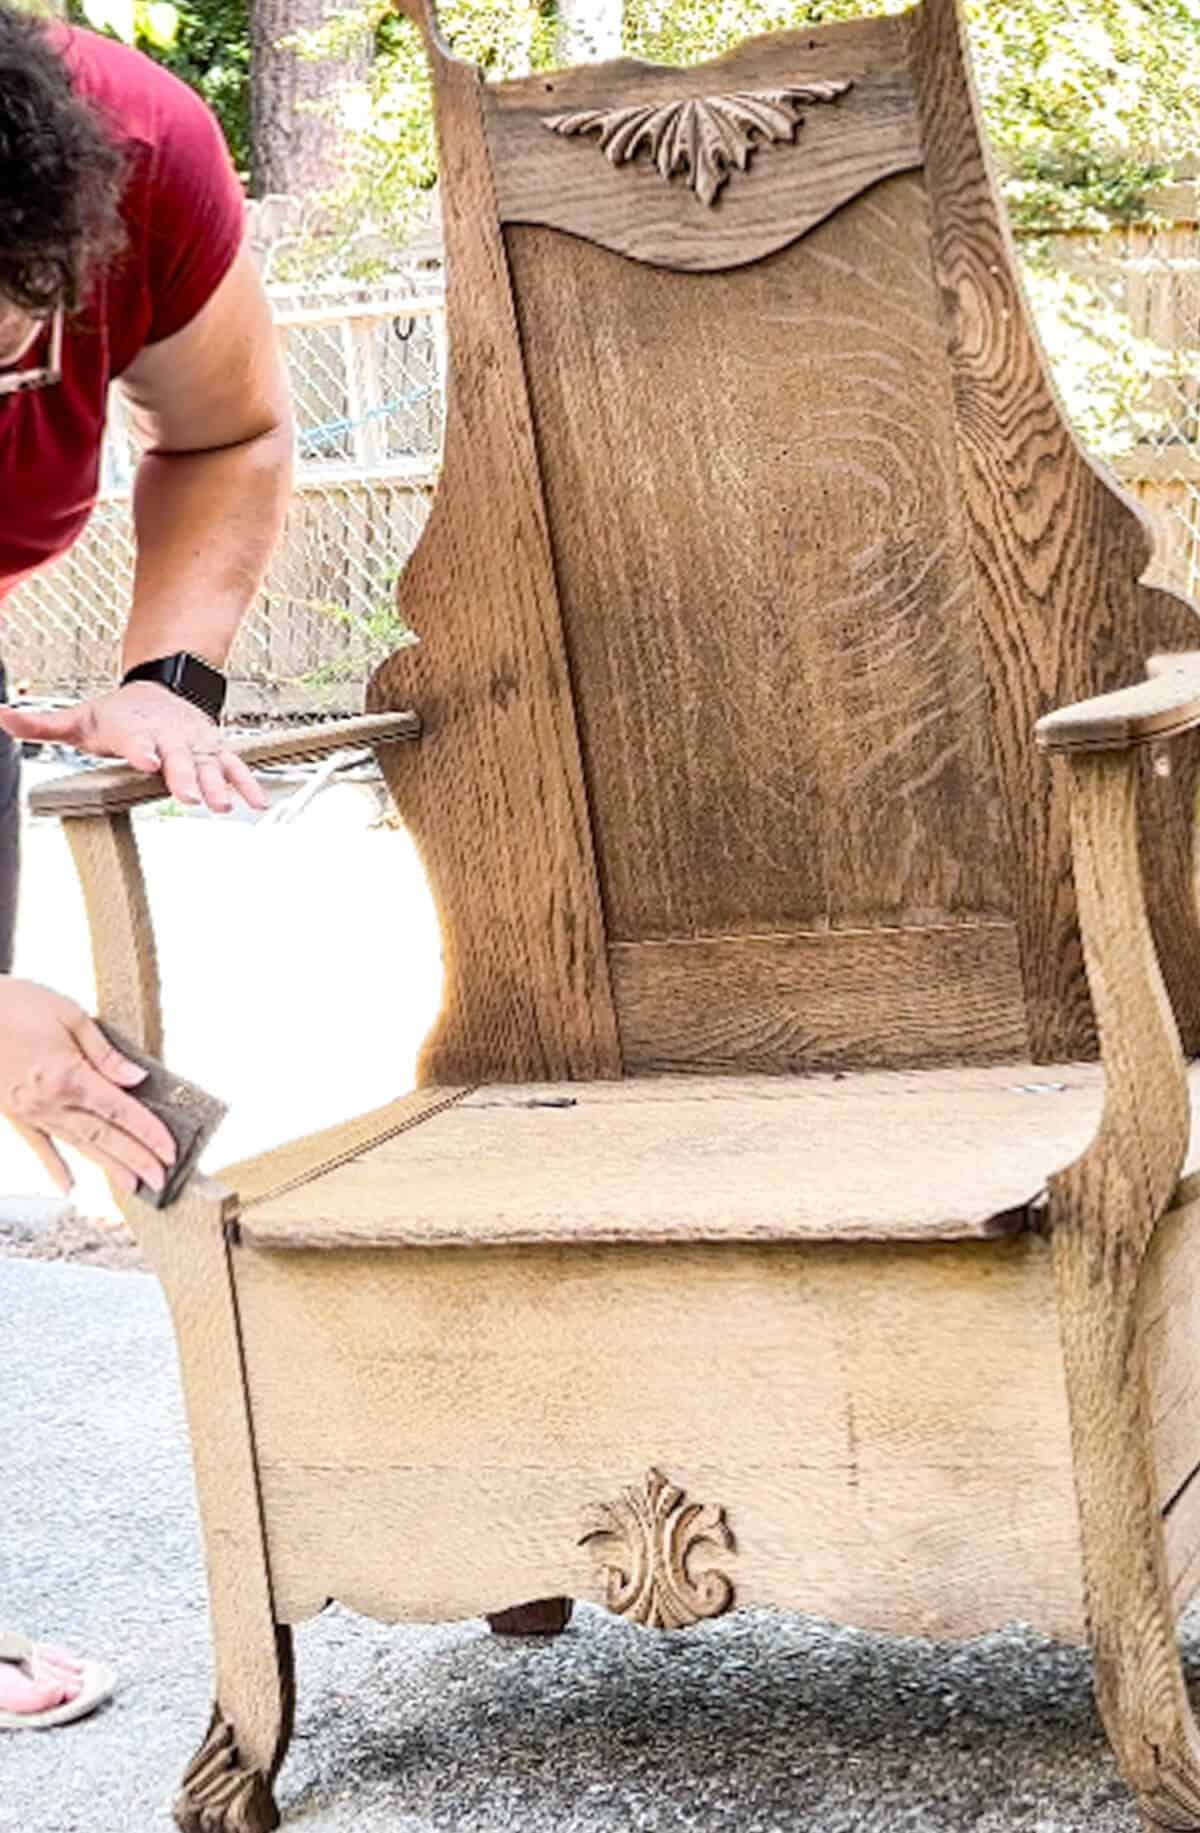
But I was able to use a scuff pad and had the entire piece sanded in about 20 minutes.
For the carved areas, I used this fun little flexible sanding block from Gator.
The base is made of foam and it fits in the your hand so easily. I used a fine grit sand paper and followed the curves of the carved area.
I wiped off any sanding dust and allowed the piece to sit in the sun for a little bit longer.
Since our hall tree has a bin, I opened it up and made sure it was fully dry on the inside.
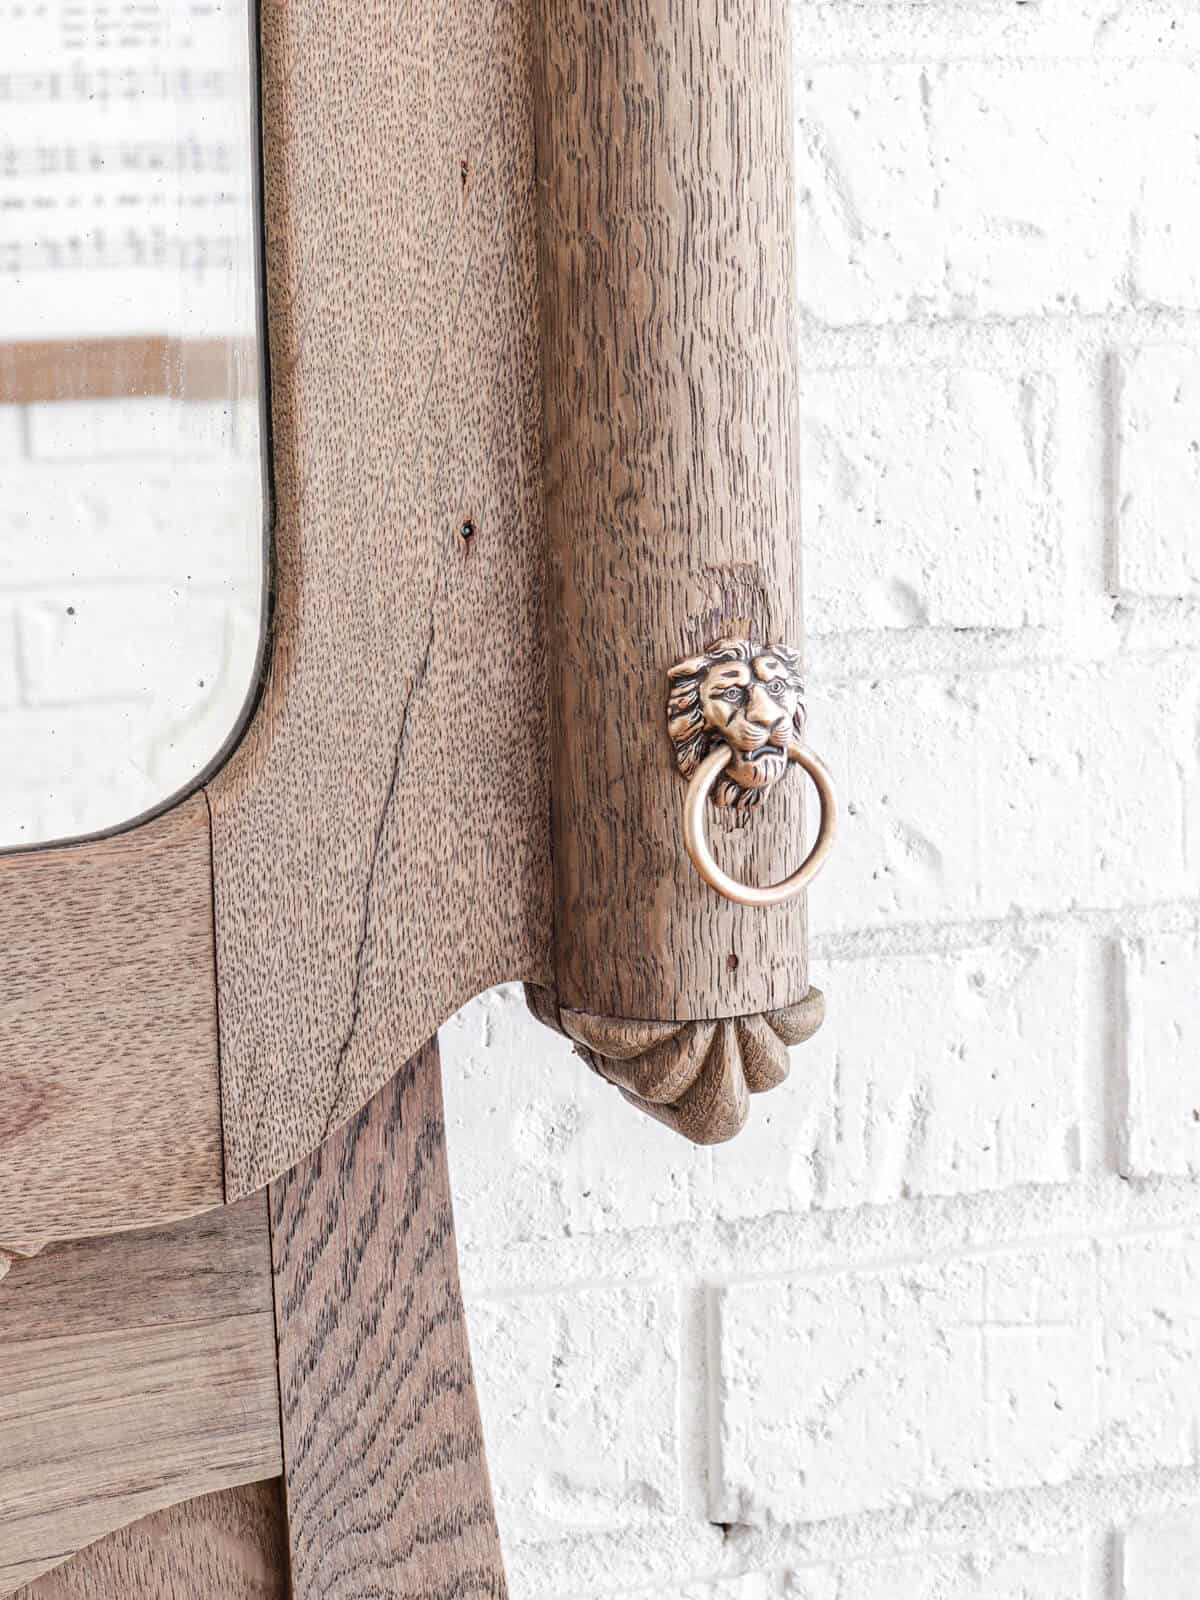
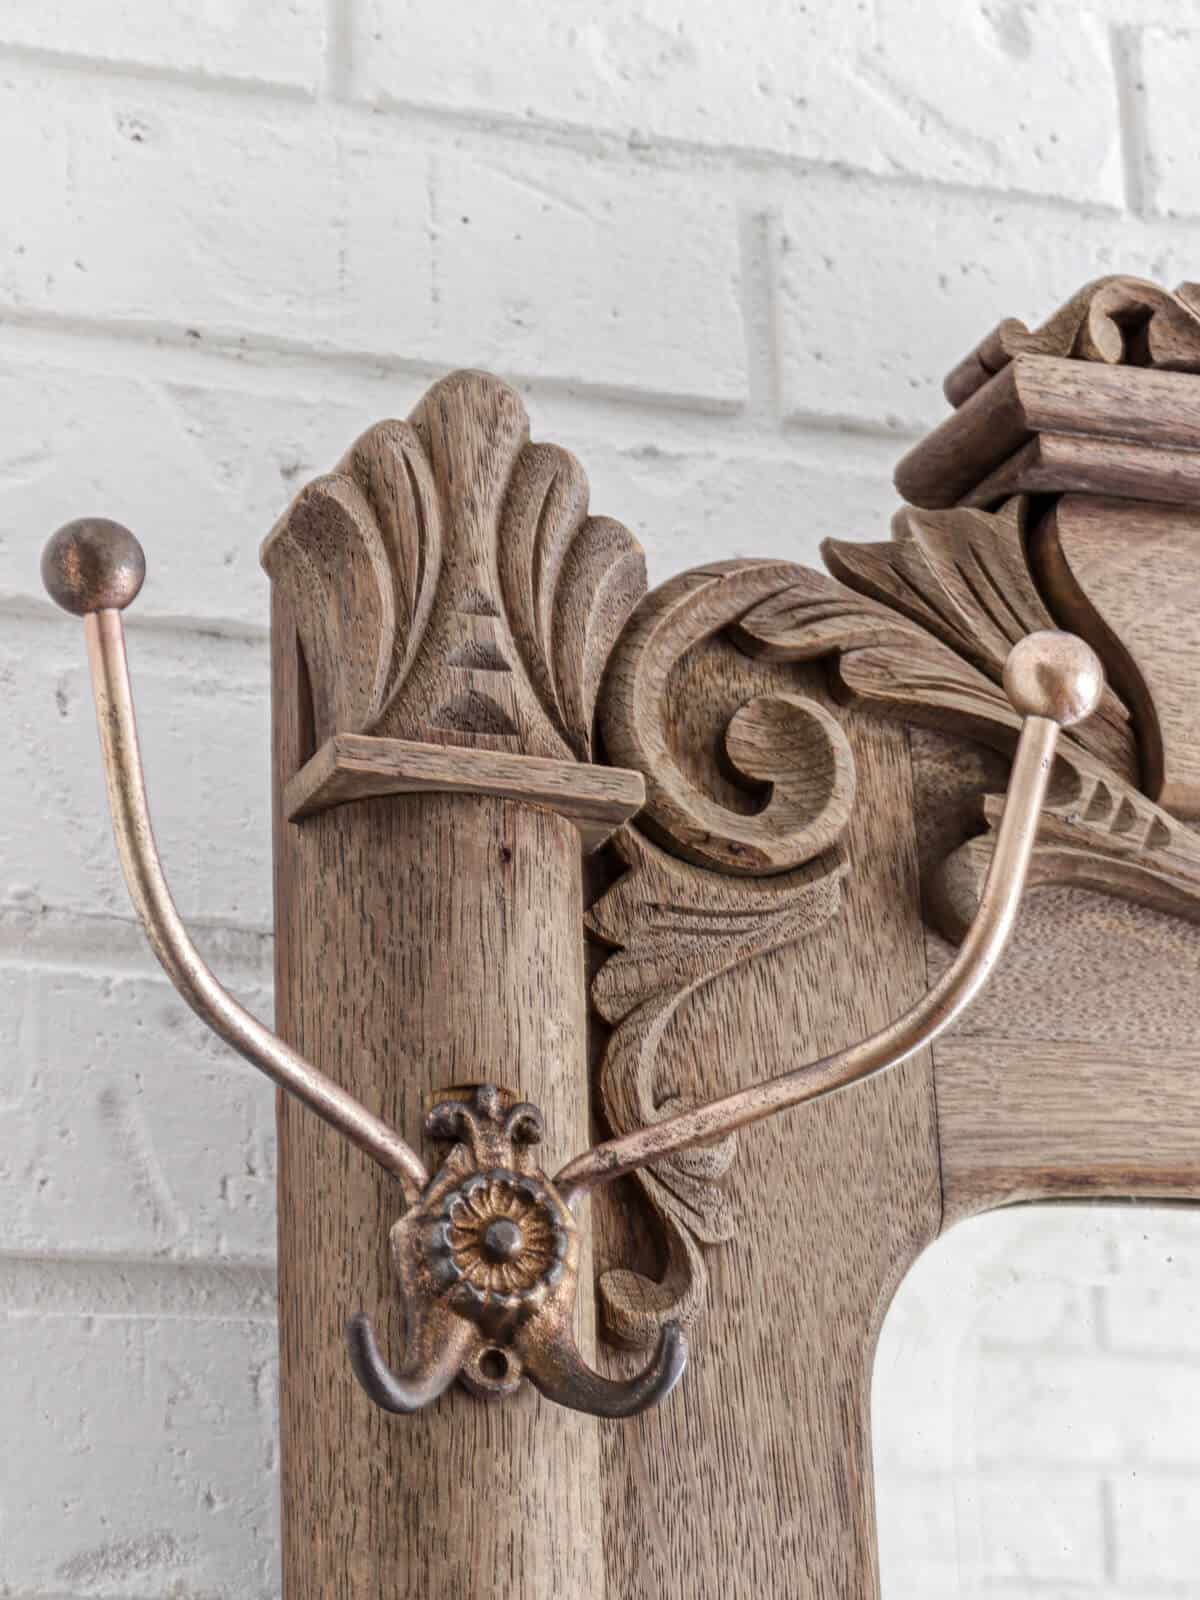
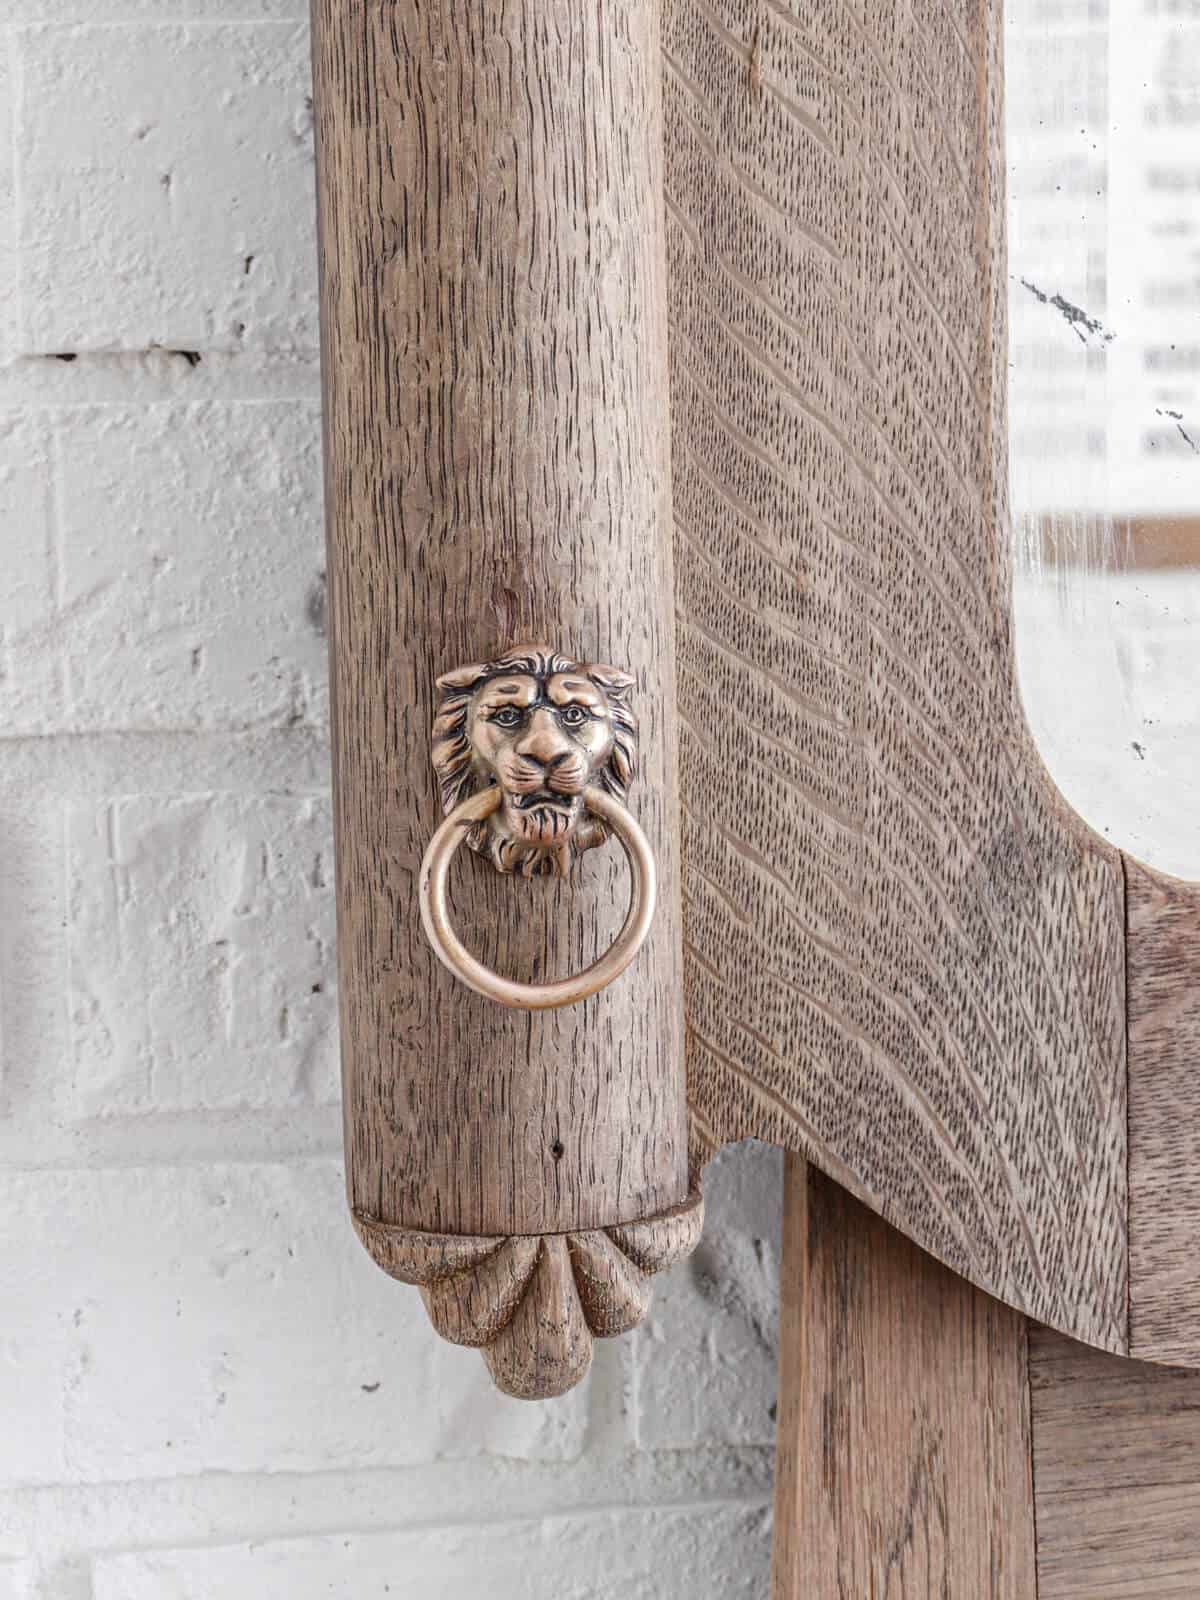
Next, I moved indoors to address the hardware I removed from the hall tree.
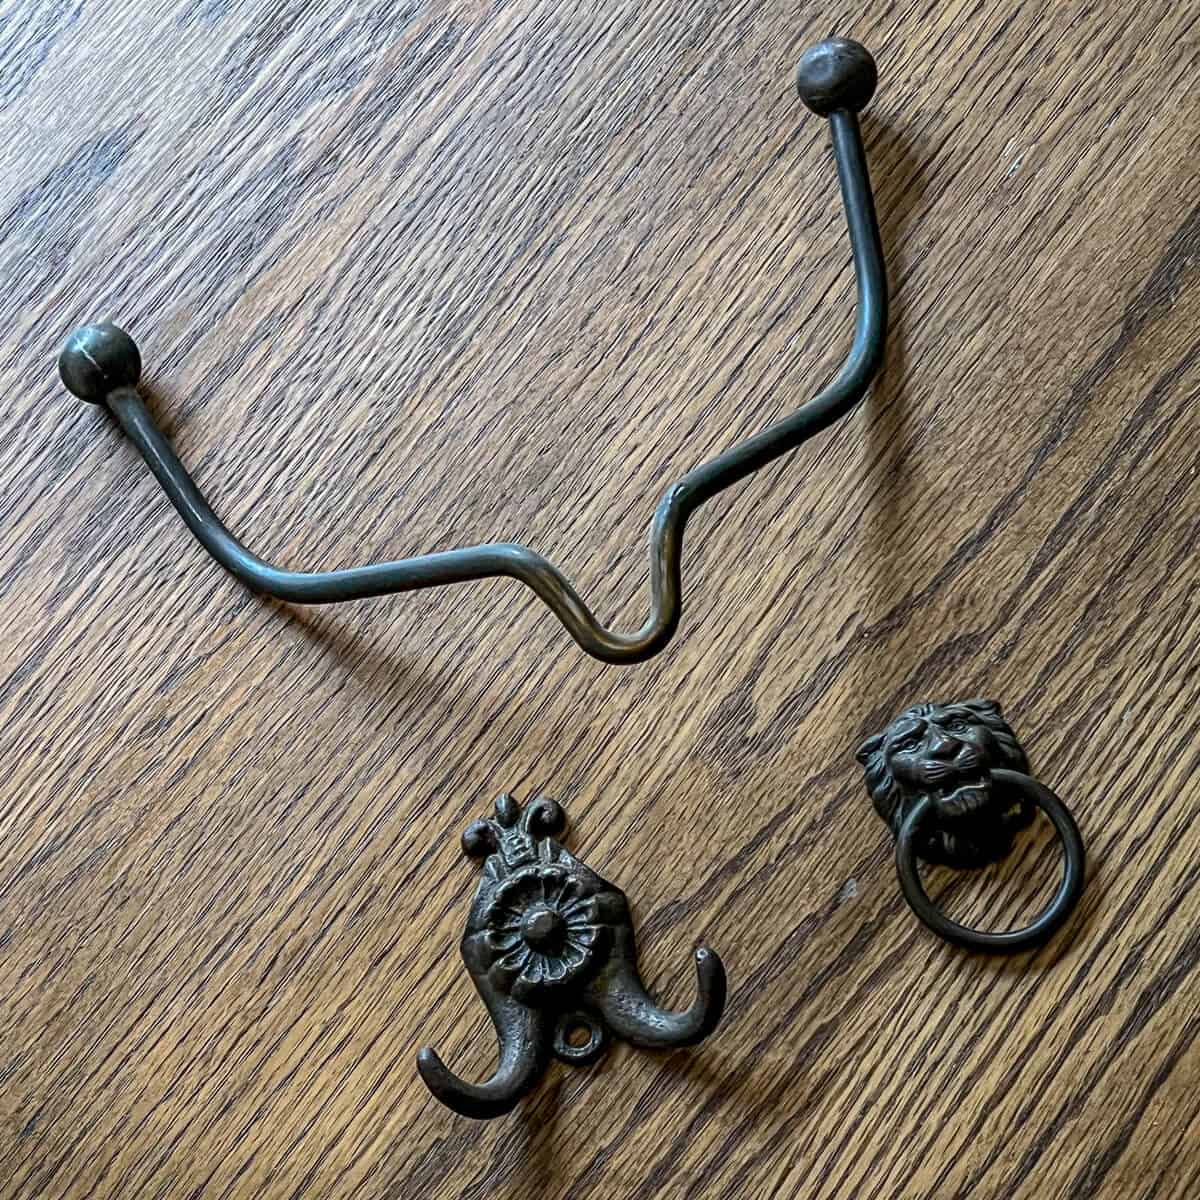
The hat hook and decorative pieces were tarnished beyond recognition.
So I took some Barkeepers Friend and gave them a polish with a soft toothbrush.
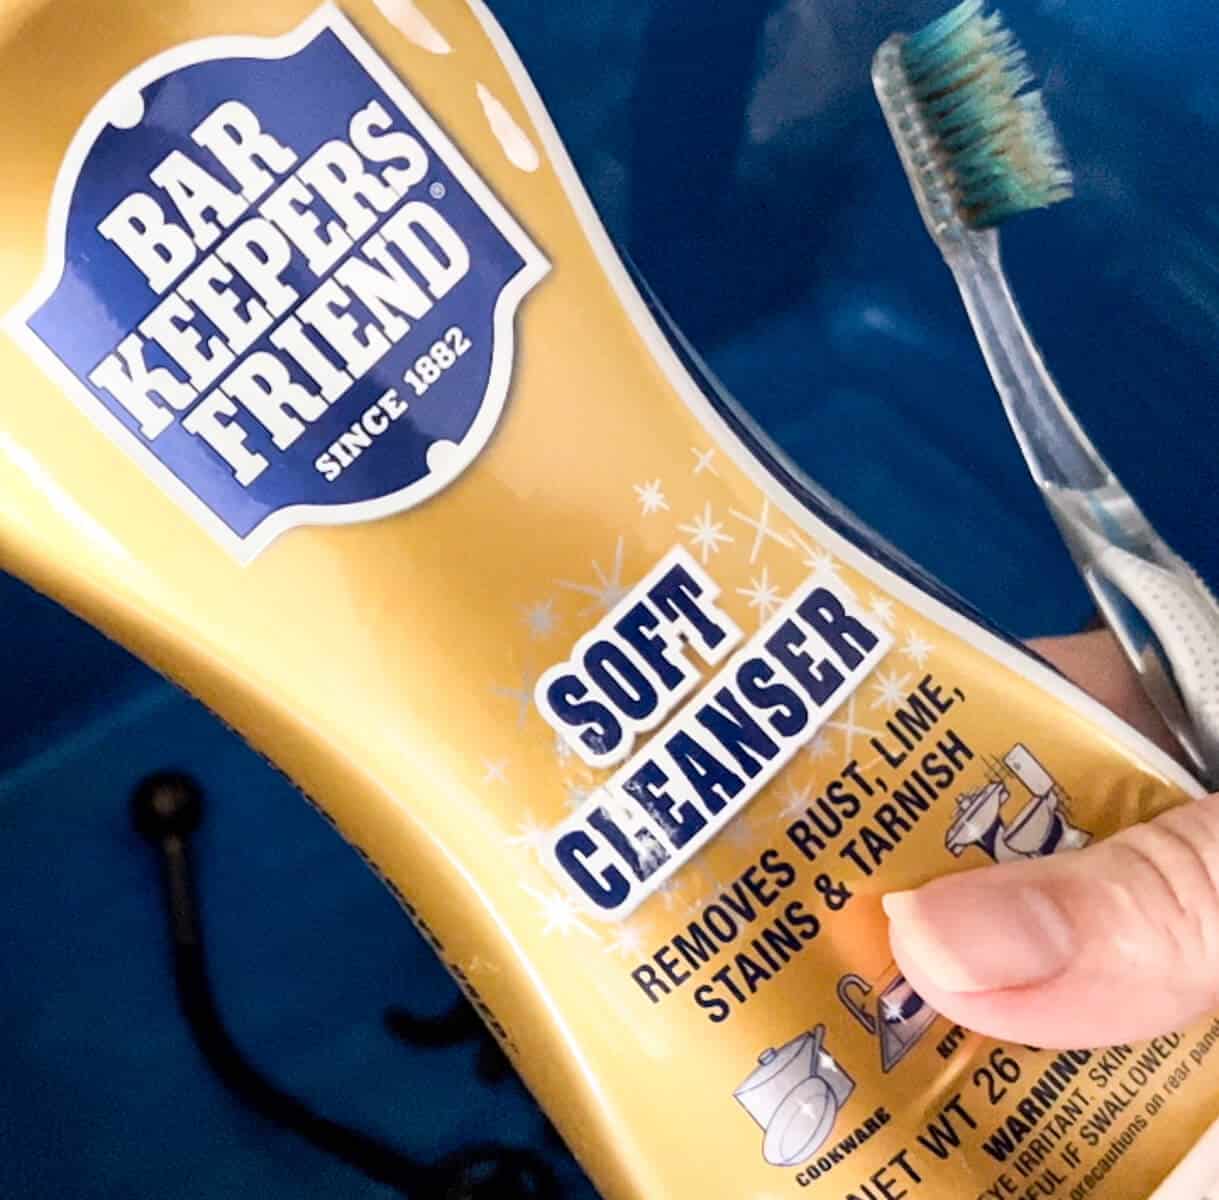

Look at that brass beauty shine through.
The right side is after one scrub and the left after two. They look stunning!
Once I finished polishing the brass, I moved the piece inside and reassembled all the elements together.
So do you want to see how it looks?

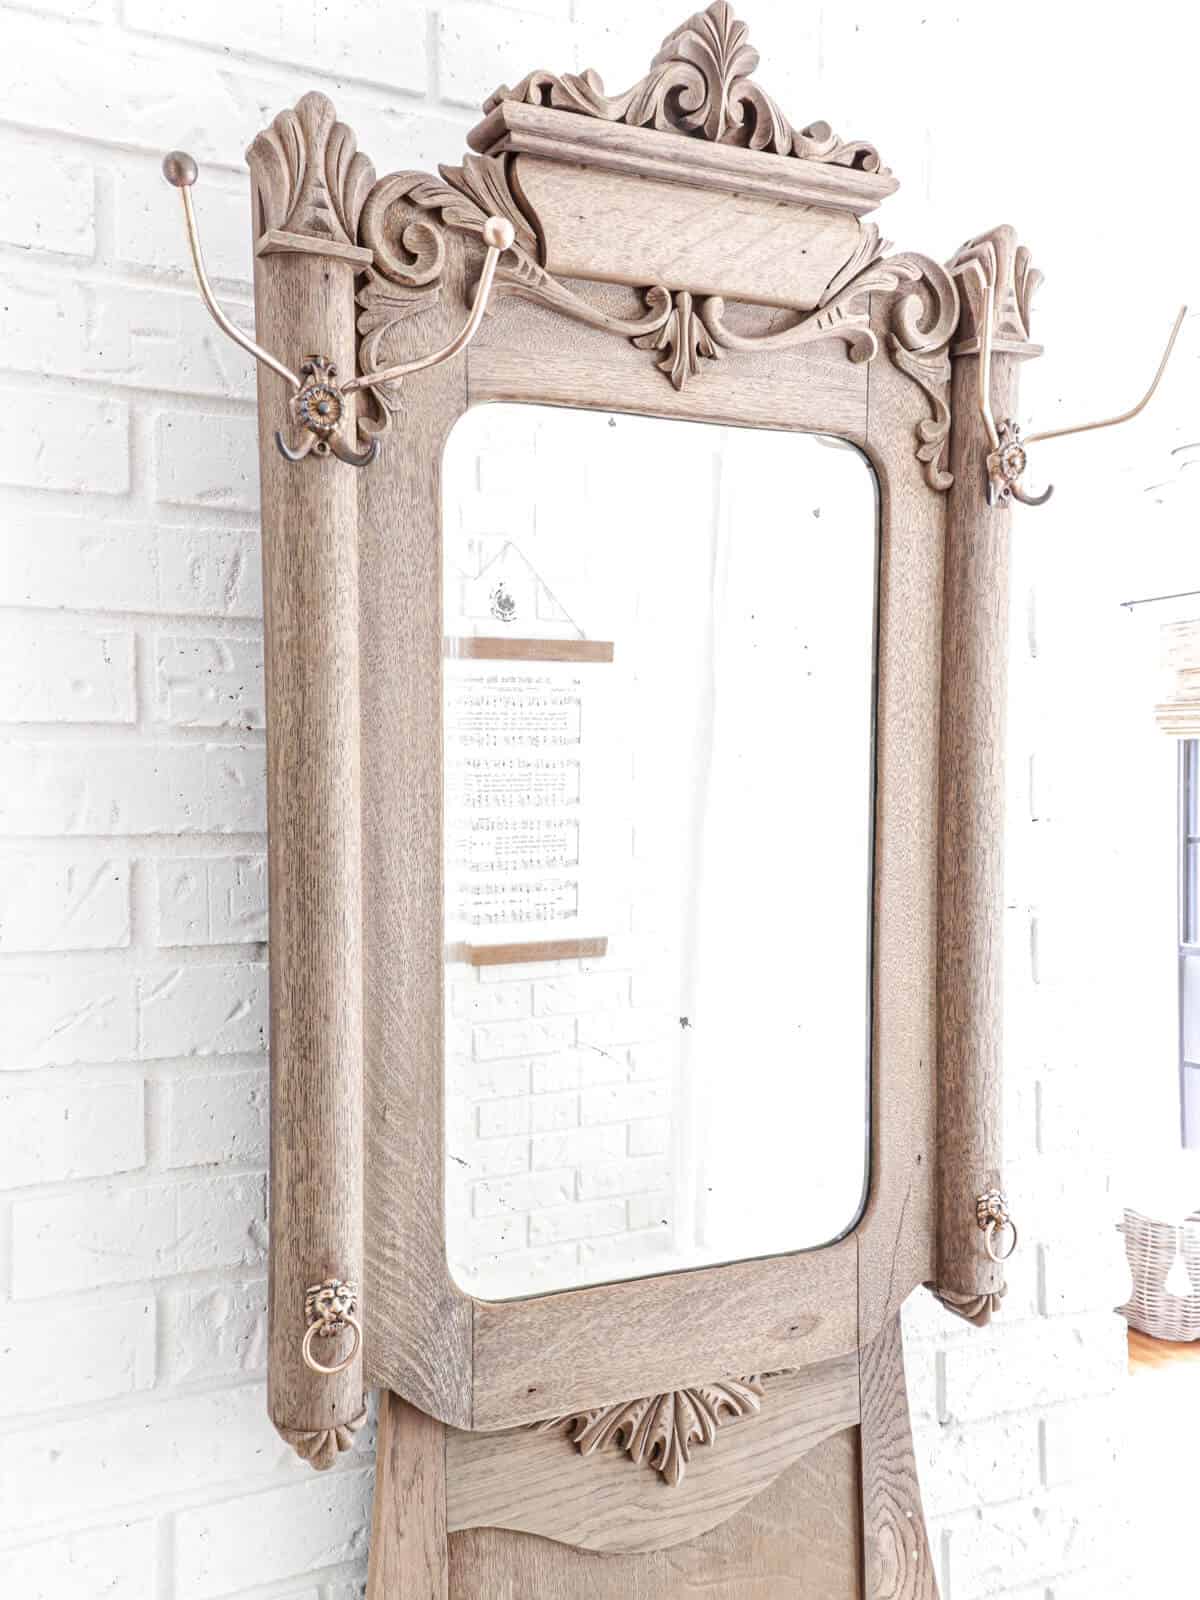
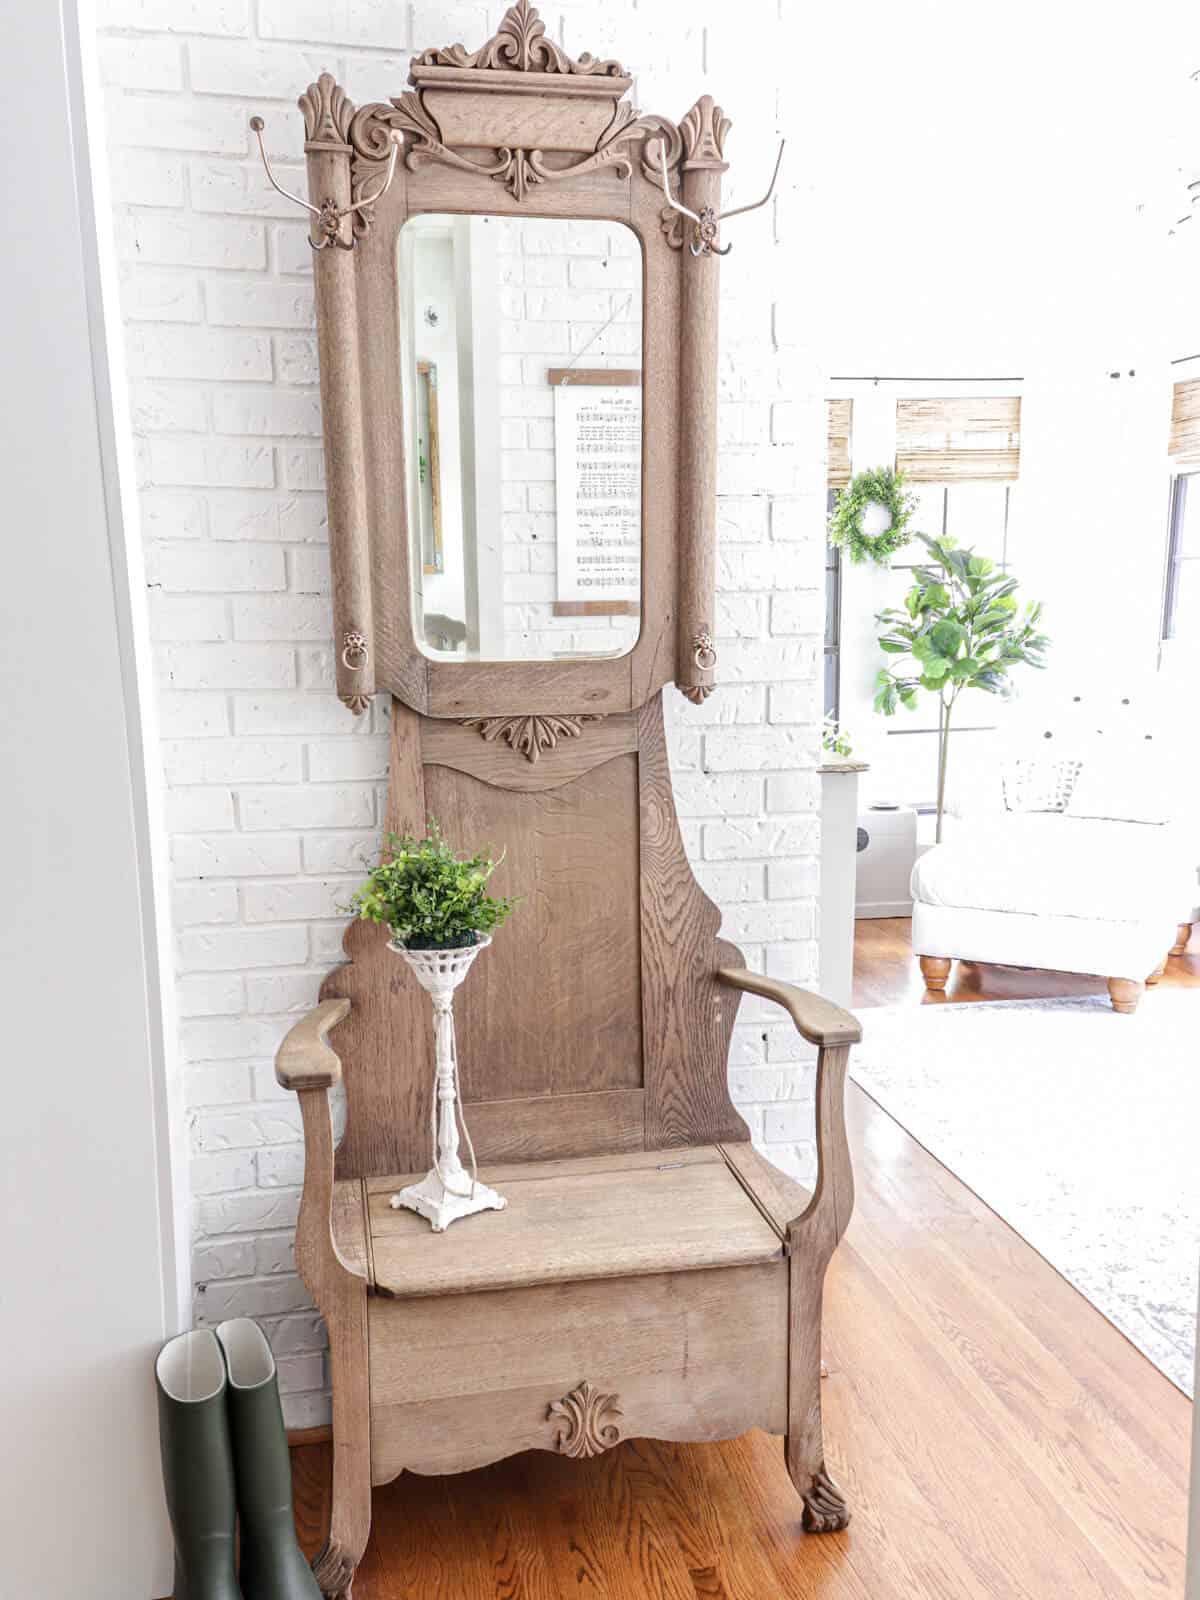
BAM!
Complete gorgeousness in just one morning.
This quick project didn’t take a lot of time at all – just a few quick hours, including scrubbing the hardware!

Admittedly, I didn’t believe that using oven cleaner as furniture stripper would work.
But this easy DIY project brought out the natural wood look in way less time that it would have taken me to sand the entire piece.
I especially recommend this step by step process if you have the carved, old wood character like this piece has.
This was my first attempt using oven cleaner to strip furniture, and now I’m completely convinced you can get excellent results on your furniture projects.
Suggestions if you are hesitant
I get it! I have seen this going around for months, but couldn’t bite the bullet and try it.
But in hindsight, I wish I would have known about this easy process sooner.
So here are a couple of ideas to baby step into the process to see if it works for you.
- Start on smaller projects with an affordable find. Search the Facebook marketplace or a thrift store to find something you can practice on for just a few bucks.
- Extra steps are needed for certain surfaces. If you are wanting to tackle a high traffic piece, like a dining table, then you will need to apply wax or poly to the top of the table so that the finish stays
Frequently Asked Questions
Would this work on painted furniture?
While I have not tried this myself, I did read another person’s post on instagram stating that the oven cleaner does not seem to penetrate through layers of paint.
You may need to use a different stripping agent or the old fashioned way of sanding if your furniture piece is painted.
What about pieces of furniture with wood veneer?
I would be hesitant to try this on wood veneer. Since this requires a garden hose to rinse the oven cleaner off, that process may lift the wood veneer causing unsightly bubbles.
I recommend using a piece of solid wood furniture for this simple process.
Could you use oven cleaner on newer pieces of furniture with multiple coats of stain and factory finish poly?
Maybe not. My friend, Lindsey, from Repurpose and Upcycle tried this technique on a buffet that was not made of a material that strips well. The heavy duty factory finish did not respond to the oven cleaner well.
So that being said, choose your pieces carefully.
So what do you think? Will you give this trend a try?
Or have you tried it already and want to share your experience?
Leave me any questions or comments below and I would love to connect with you!
shop our favorite home items
shop now
Join Our Community
Don’t miss the next DIY! Receive exclusive content, including behind the scenes photos, our favorite home decor DIYs and more!


Thanks Anne! We are so excited with the final result!
Right? Me either, but when I did – I had to give it a try!
Thank you, Barbara! I was quite surprised with the results myself! And I did leave it unfinished without a top coat. I have another piece I did a few years ago that I left unfinished and it has held up wonderfully.
What a fabulous transition! Love it. I’ll be trying soon! So, for the hall tree, you didn’t use any top coat or sealer?
I had never heard this! Thanks for the tip!
I’m blown away every time I see how the oven cleaner works on antique wood pieces! Your hall tree is stunning with its fresh new look. Love all the unique details. Pinned to give this a try soon!