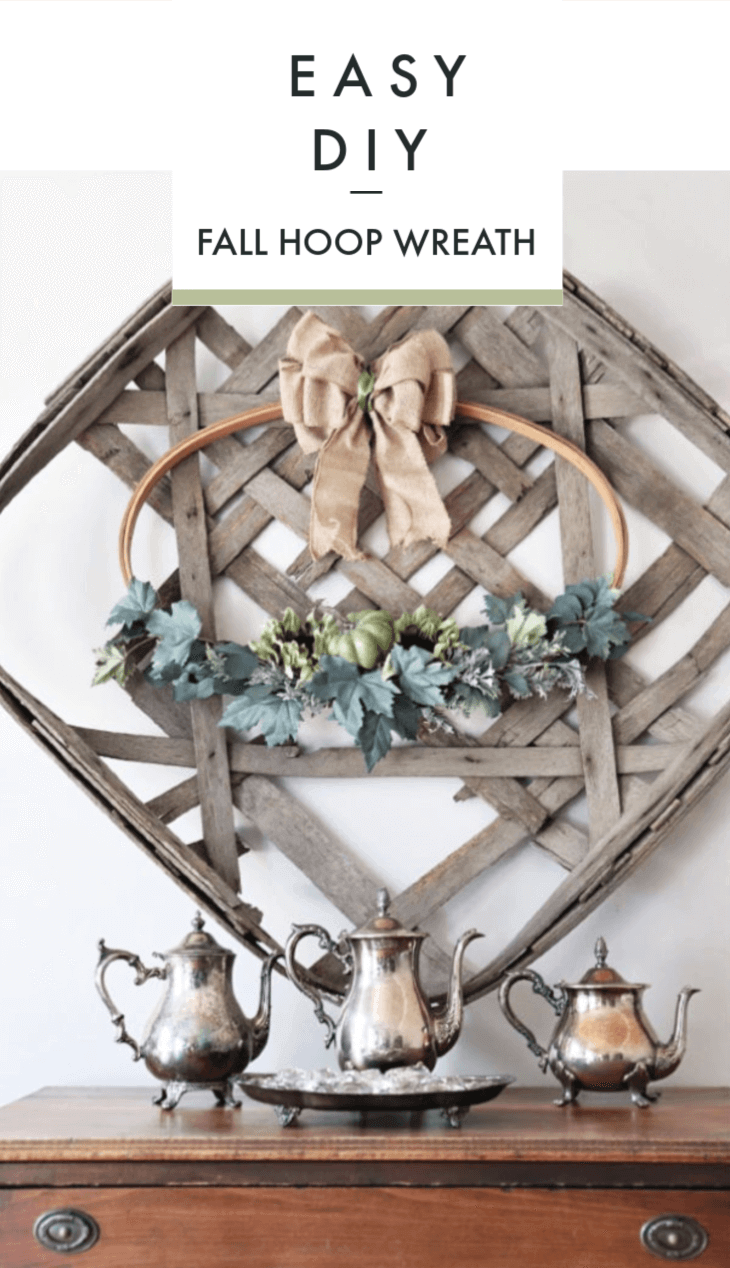
Easy DIY Fall Hoop Wreath
Looking for a Fall project to try? This Easy DIY Fall Hoop Wreath is a quick and gorgeous way to bring fall into your home.
I love the change of seasons.
Redecorranging all over my house.
Swapping out decor.
But most of all, it’s because I get to share in an amazing blog hop with friends where it’s a round robin of blogs sharing their latest projects with you all.
So, another round of I DIYed that is in full swing and there is lots of Fall decor inspiration to find today.
I’m Jen and this is Noting Grace – where I share ideas on how to renew, create and decorate your home while finding beauty in the blemishes. You can learn more about me here – and I’d love to get to know you too. So leave me a comment below if you’re new to my blog.
Today, I am so excited to share an easy peasy, budget friendly way to DIY a wreath.
Easy DIY Fall Hoop Wreath
Supplies: Some affiliate links are provided for your convenience.
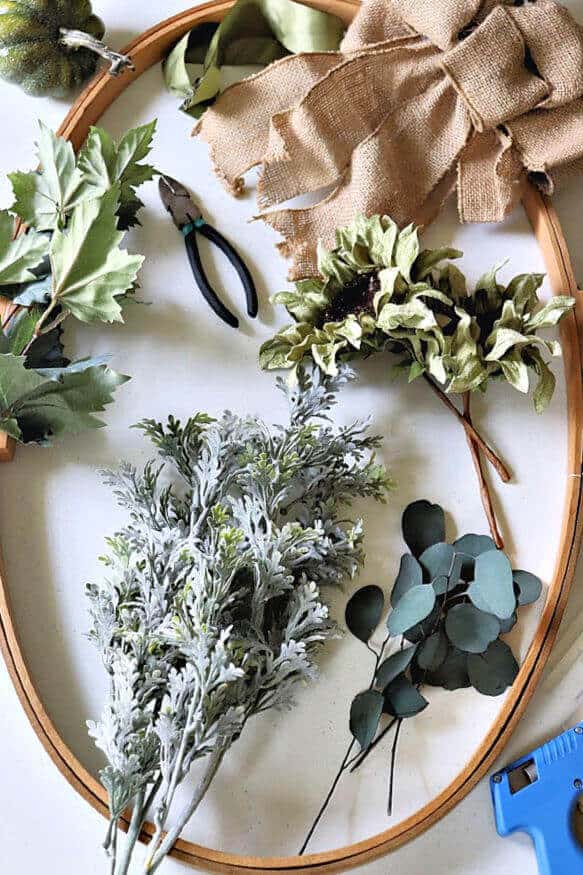
Oval Embroidery Hoop
Preassembled Burlap Bow
Greenery of your choosing
I used Dried Eucalyptus, Dusty Green Maple Leaf, Lambs Ear Bush, Sage Green Pumpkin, and Green Sunflower Stems
Glue Gun
Wire Cutters to trim each stem

To begin with, I started by trimming each stem. It makes this DIY so much easier, working with single pieces rather than a large bundle.
Plus, you may have leftovers to use on another project!
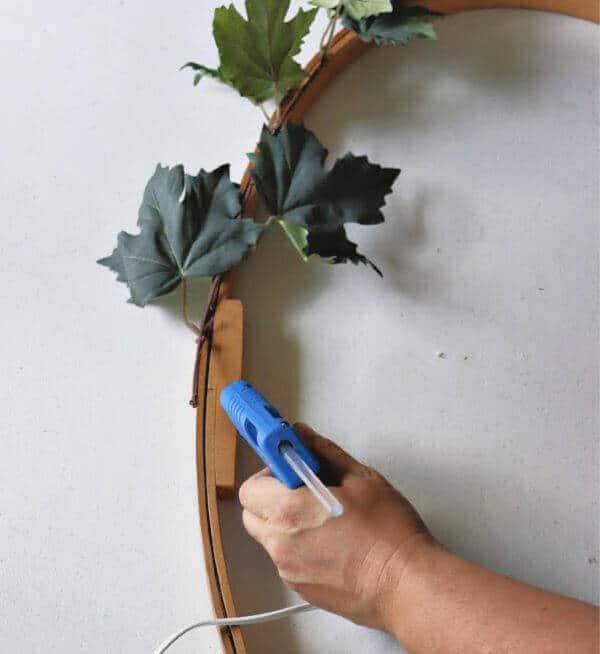
Then you want to hot glue your greenery directly to the embroidery loop.
So I like to start with the larger pieces and work my way to smaller stems.
At the end, you’ll have a hefty amount of hot glue, but that’s easily covered with a big piece of greenery.
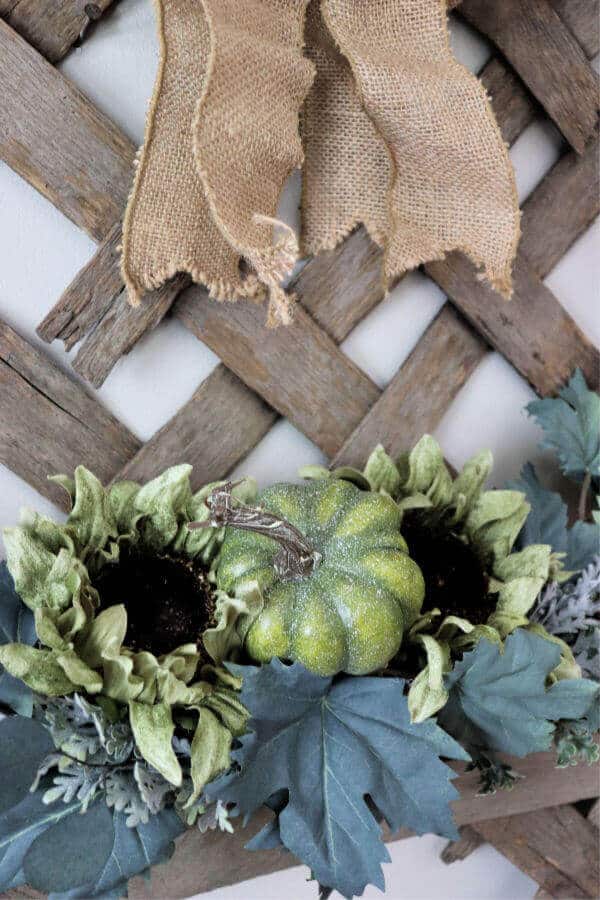
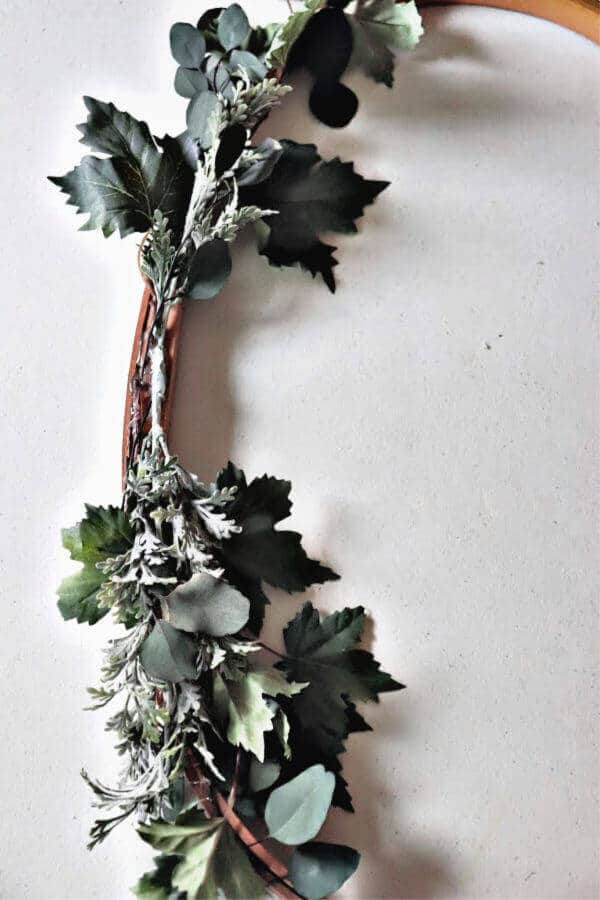
My pumpkin and two sunflowers came with long wire stems.
I simply wrapped them around the hoop, secured them with hot glue, and placed a leaf over top to hide the wrapping.
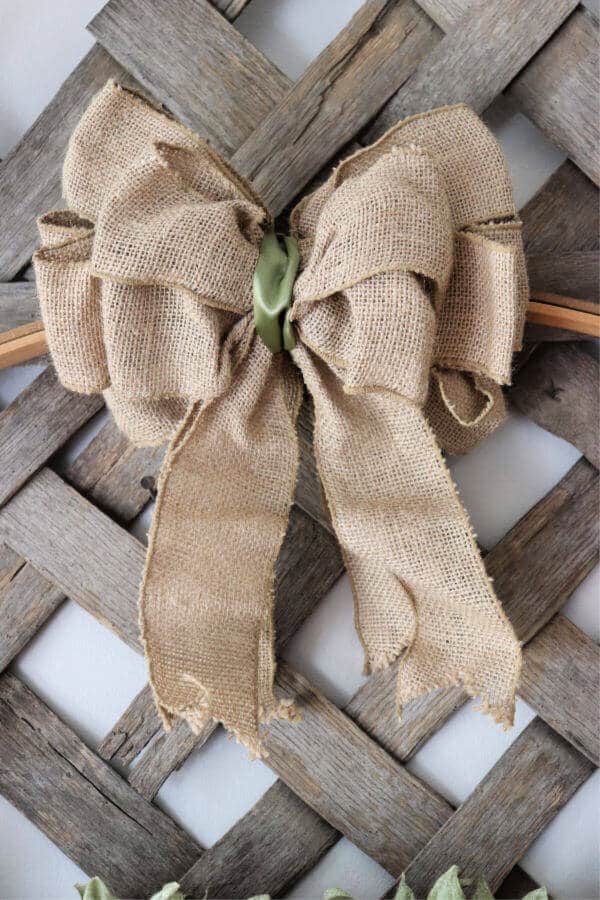
These premade bows are the best!
Since I am not very gifted at bow making, then if there’s an easier solution, I’ll take it.
So I added a hint of sage ribbon to compliment the green hues.
That’s it! Isn’t it so lovely?
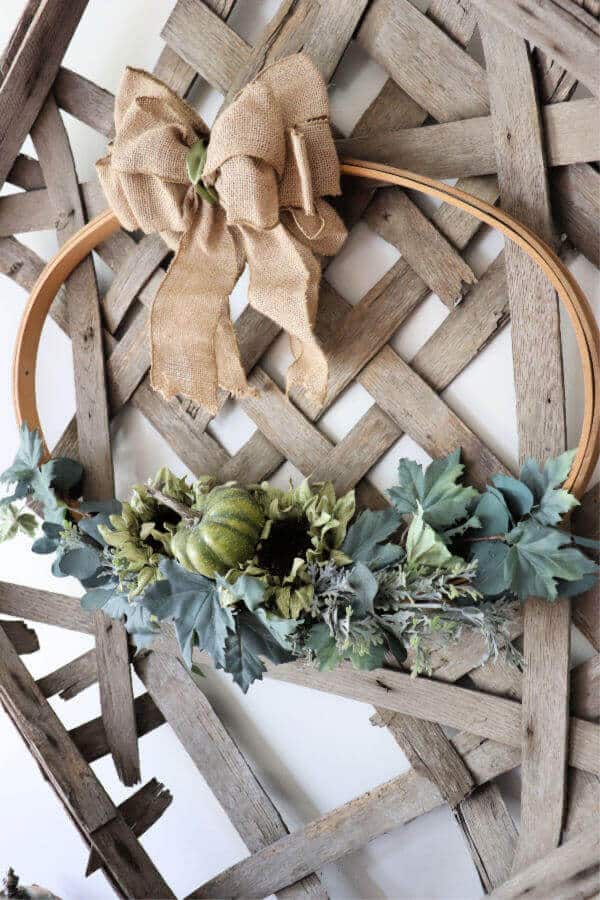
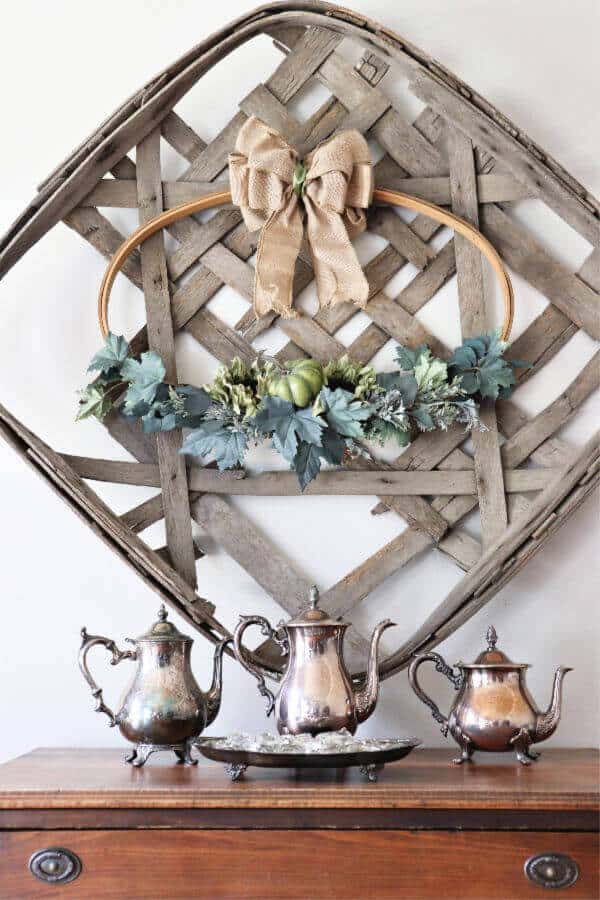
That oval hoop is a rock star! There is so much real estate to place different greenery.
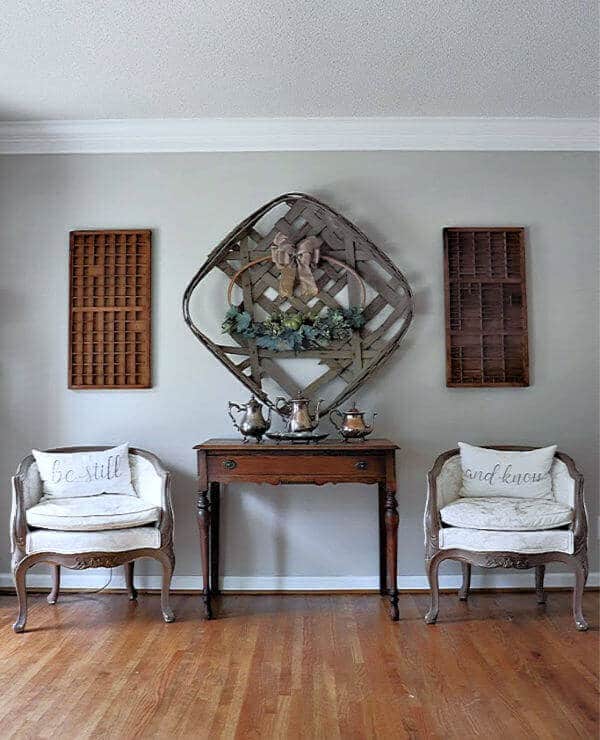
I adorned the wall with my tobacco basket in addition to these vintage printers tray.
This Easy DIY Fall Hoop Wreath was the perfect centerpiece!
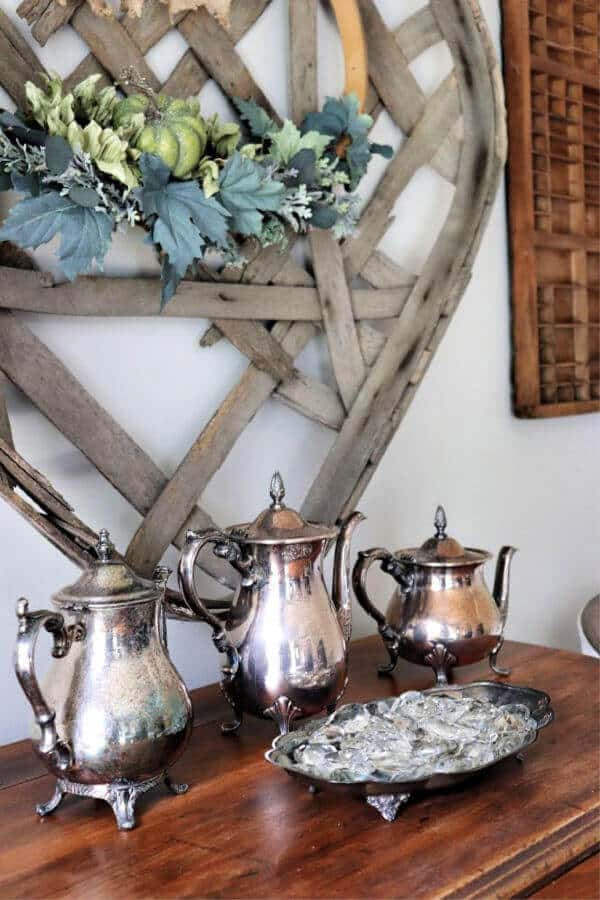
Finally tarnished silver and a tray filled with old chandelier crystals are the icing to the cake!

Simple, easy, monochromatic.
Plus – since it’s made with hot glue, you can swap it out with each season! I see lots of Hoop Wreathes in my future!
Here are some other awesome bloggers to check out. Everyone is sharing their fall DIY and you can check them all out by clicking below.

I DIYed That Fall Blog Hop
Jordan from A Blue Nest
Amy from Cuter Tudor

Kendra from Joy in Our Home
Areeba from Mint Candy Designs
Jennifer from Noting Grace
Bree from The Homemaking Momma
Kelly from The Tattered Pew
Taylor from Uniquely Taylor Made
Save this post for later! And follow me on Pinterest!
Featured on The Pioneer Woman.

11 Comments