DIY Faux Marble Vanity Tray
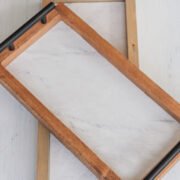
This DIY Faux Marble Vanity Tray took me just a few minutes to create but give such a classic statement! Here’s how to make one for yourself.
I love when I find easy DIYs that work!
And this one is Easy like Sunday Morning!

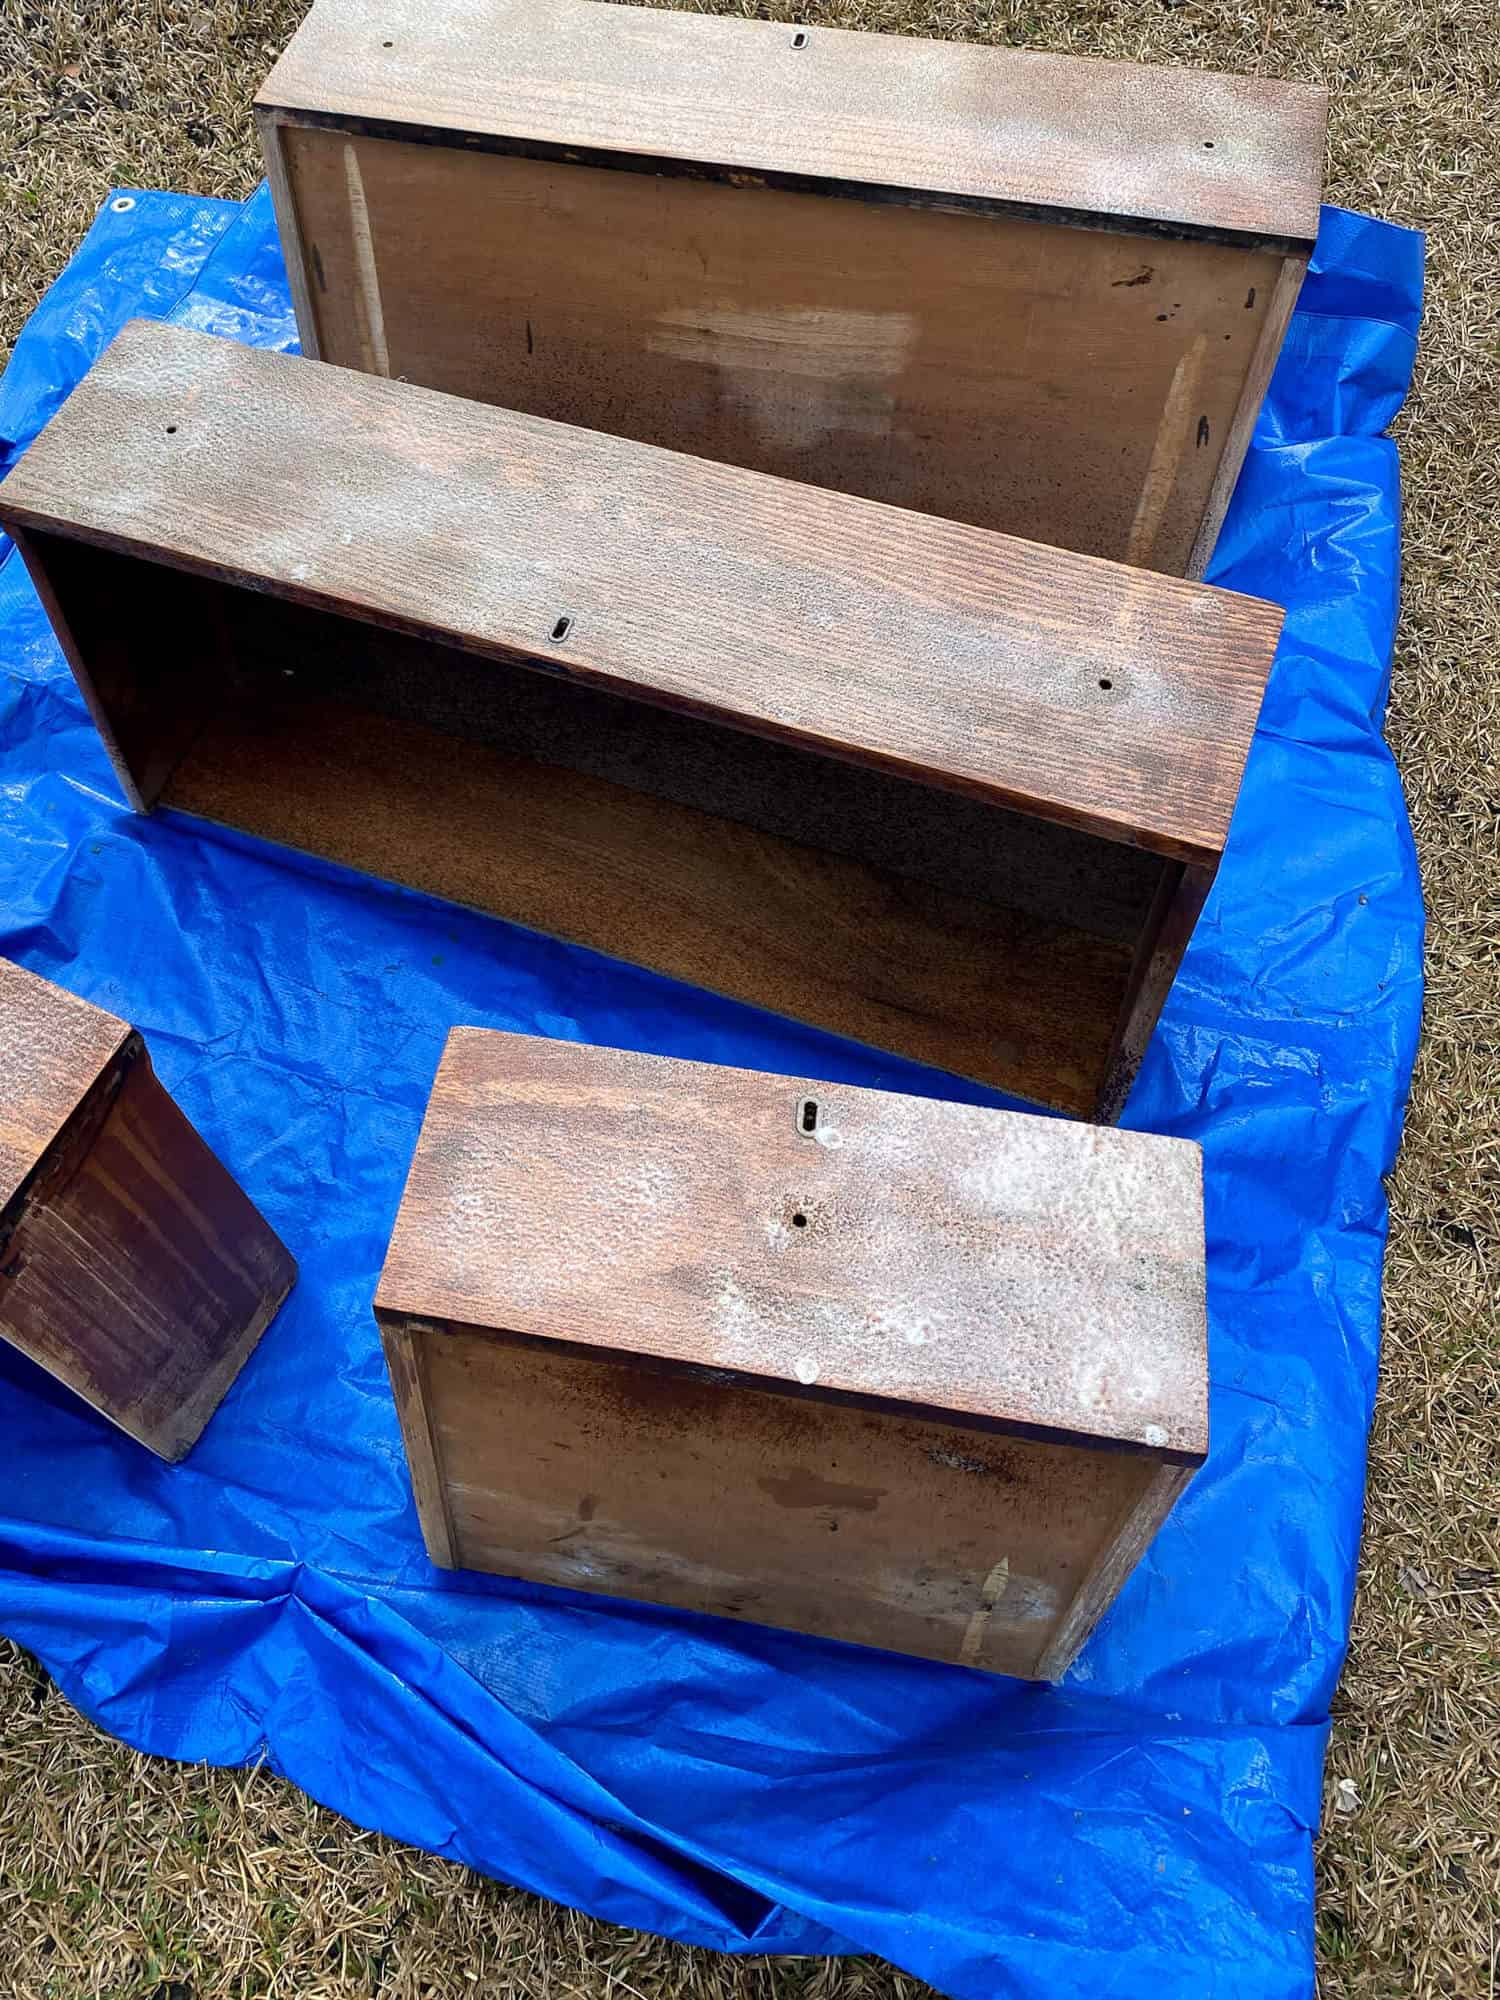
I was going through old decor to either sell or donate and stumbled upon some old wooden signs that I haven’t displayed in years.
Instead of throwing them out, I thought – why not try to repurpose them in some way.
I grabbed some faux marble contact paper I had along with a few leftover drawer pulls and decided to create my own DIY bathroom vanity tray!
DIY Faux Marble Vanity Tray
(Some affiliate links are provided below. Full disclosure here.)
I have been loving the look of marble bath accessories.
But have you seen the price of some of them? Especially the high end trays.
I knew that I could create my own decorative tray with supplies I already had in my home.
These are the supplies you’ll need for this project.
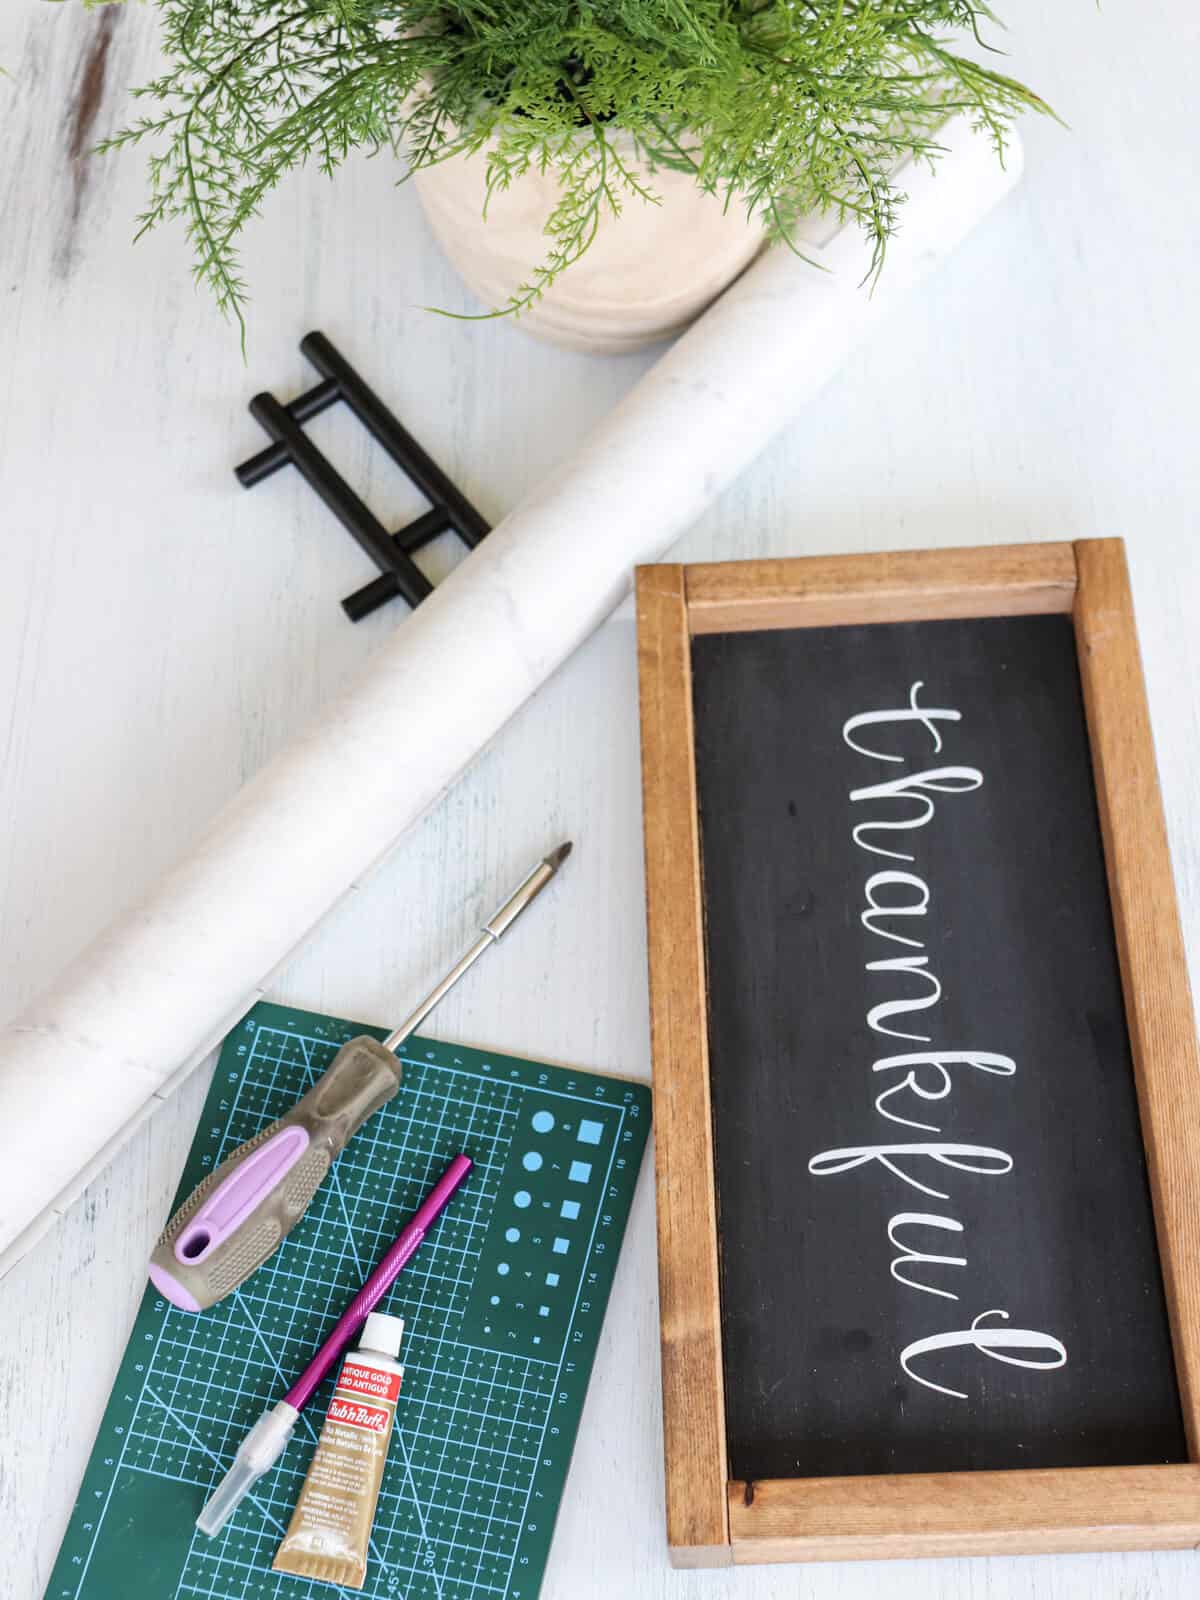
- Old wooden framed sign
- Marble Contact Paper – this is the kind I used
- Drawer Pulls
- Scissors
- Exacto Knife
- Drill and screwdriver
- Optional: Rub n Buff
Instructions
This faux marble tray took me about 30 minutes to make and that includes both trays! It’s one of the easiest DIY project I’ve done in a while!
I started by wiping any dust and dirt from the sign and removing any hanging hardware from the backs.
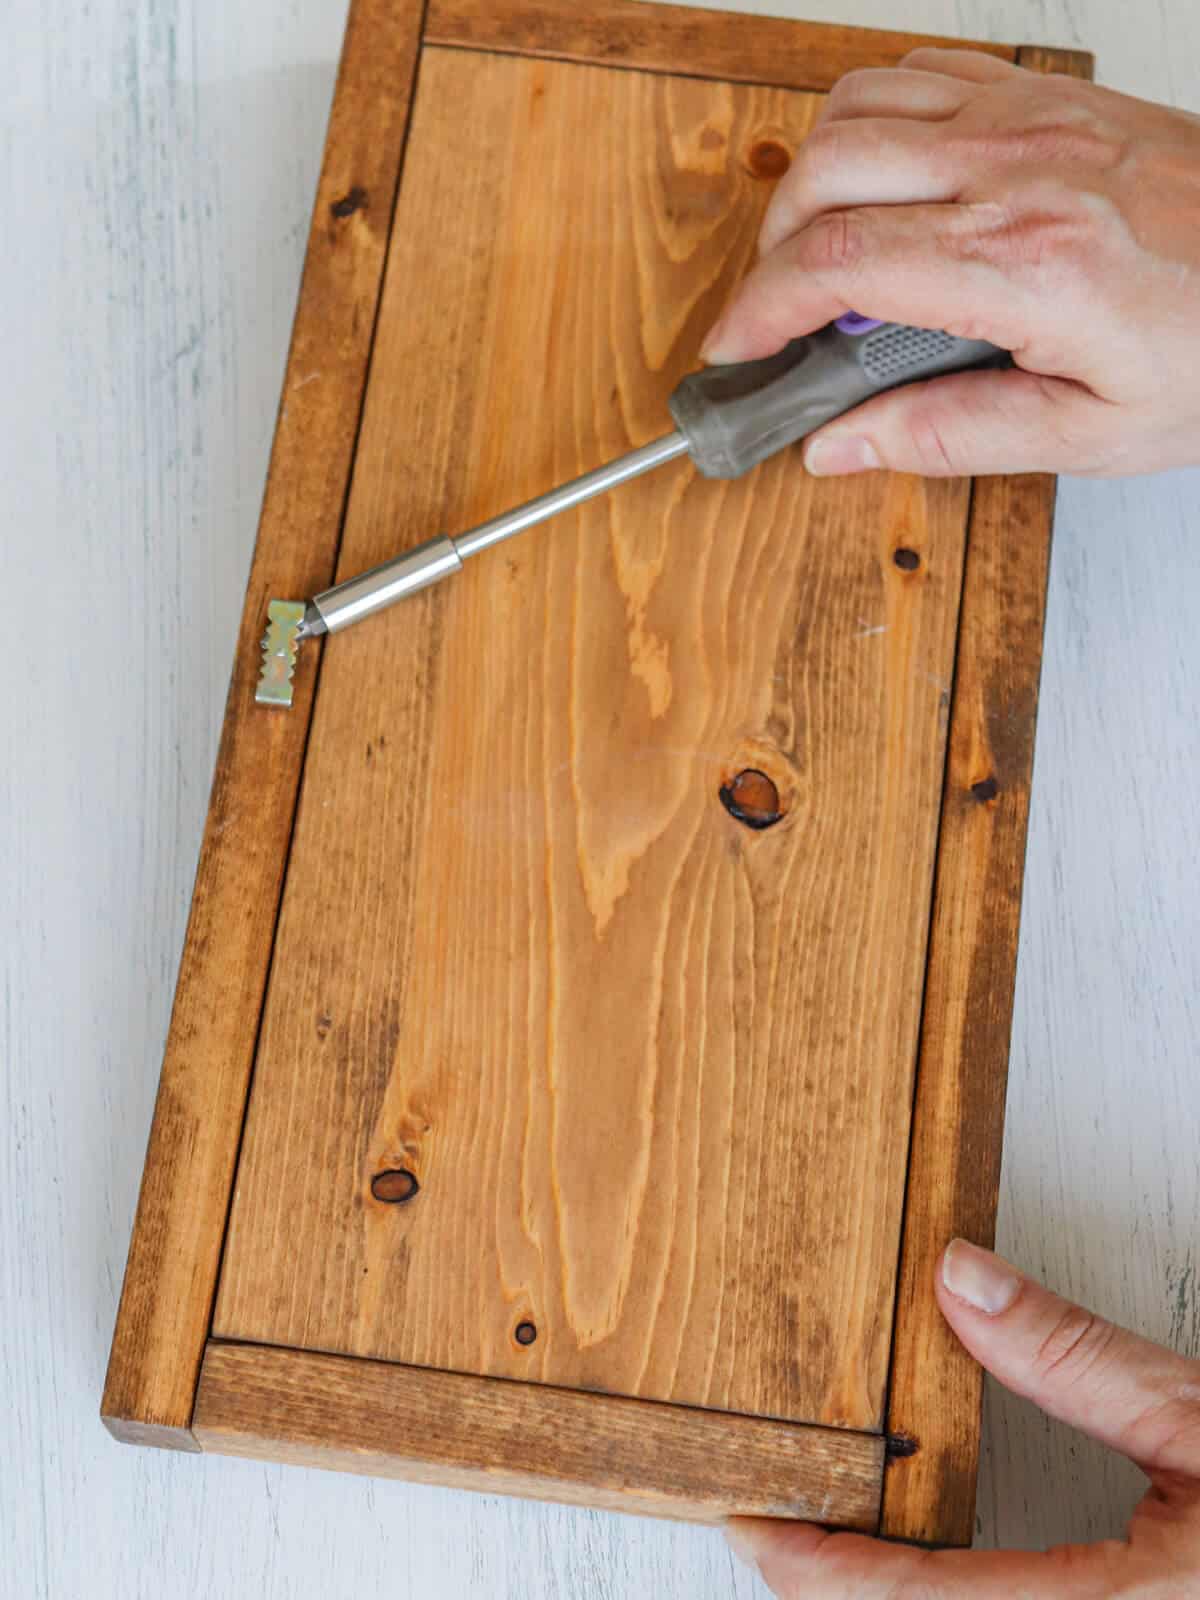
One sign had a sawtooth picture hanger on the back and other had eye hooks.
Super simple to remove both of those.
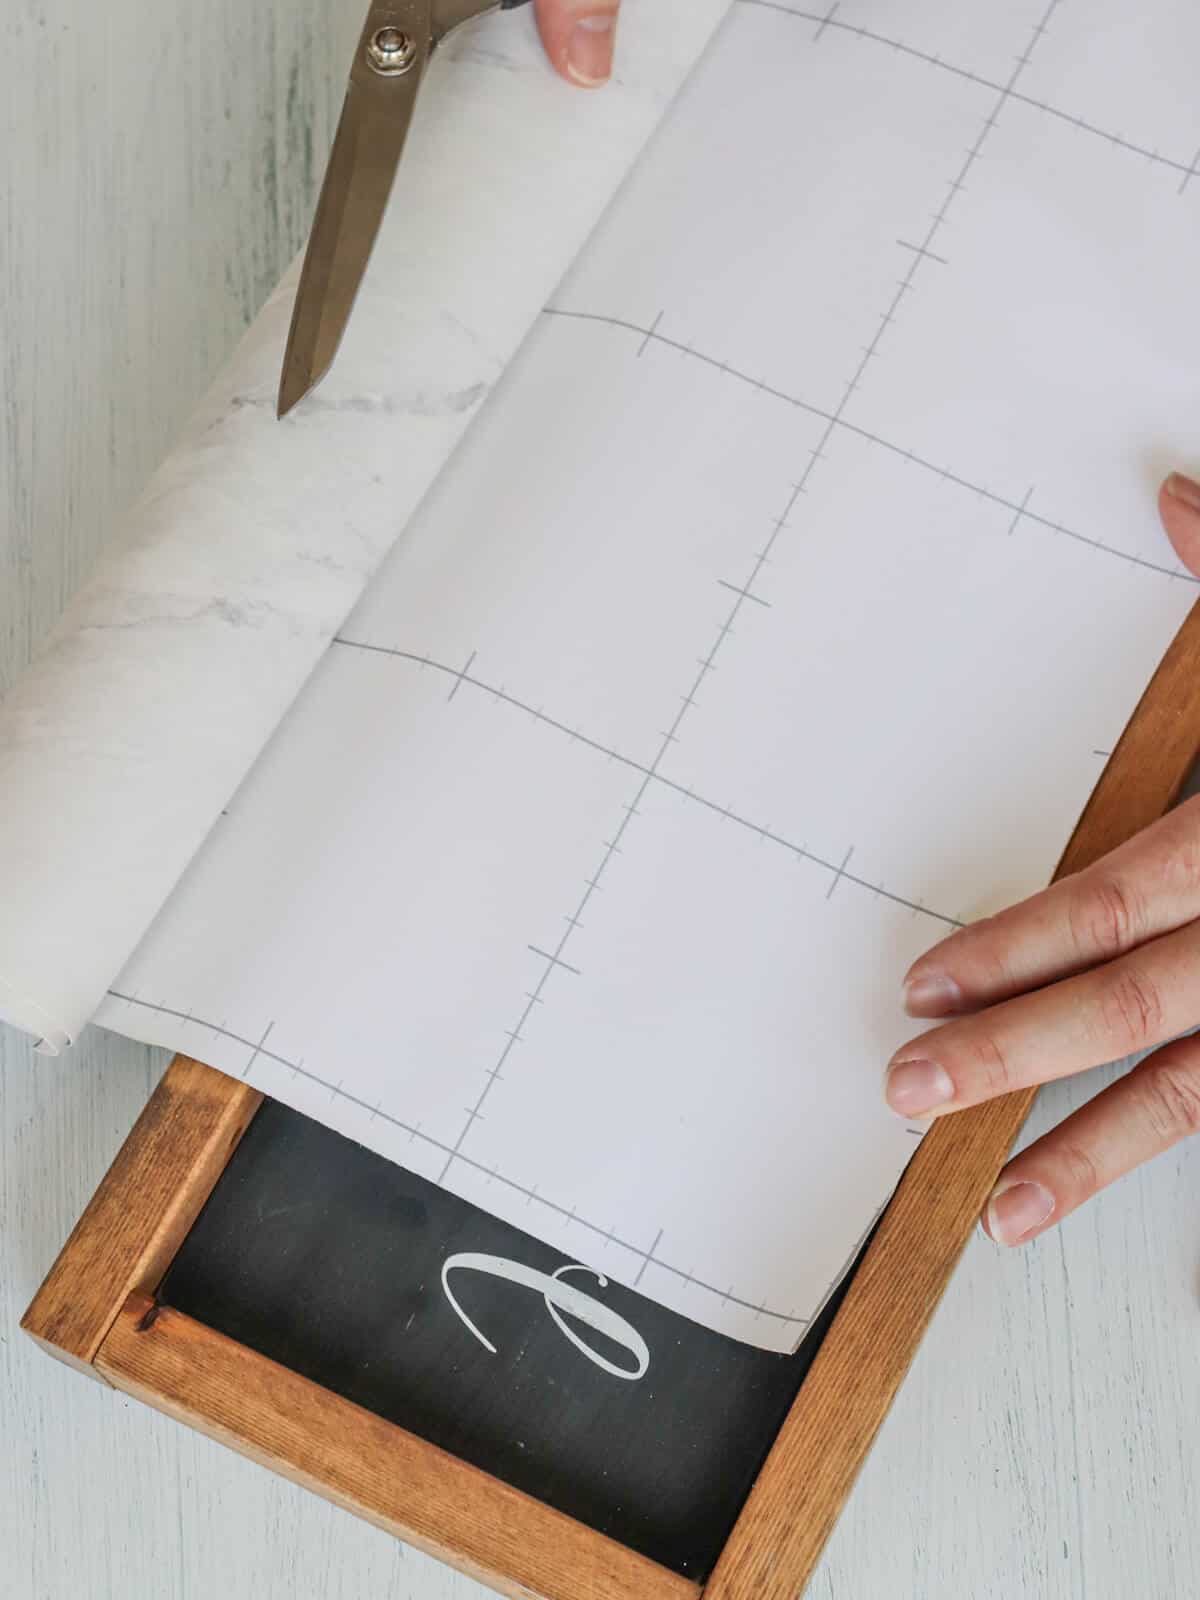
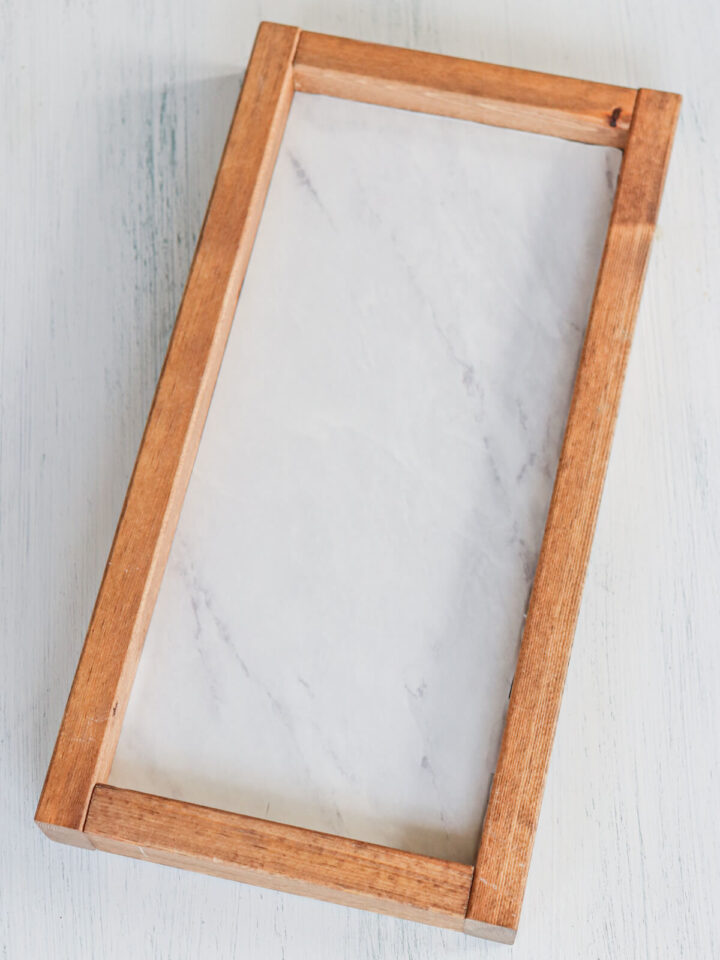
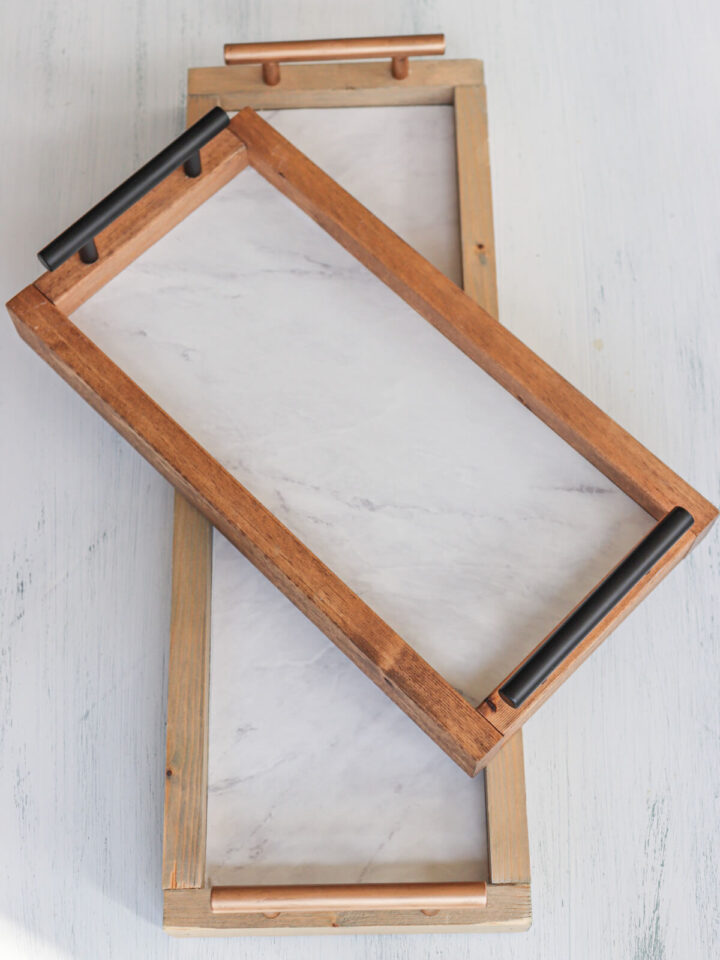
Next I took my trays and figured out the size I needed to cut from my marble contact paper.
This is the same paper I used to make our DIY bathroom counters in our boys’ bath a few years back and they still look amazing!
It’s heavy duty and super easy to wipe down. Plus the marble look is very realistic.
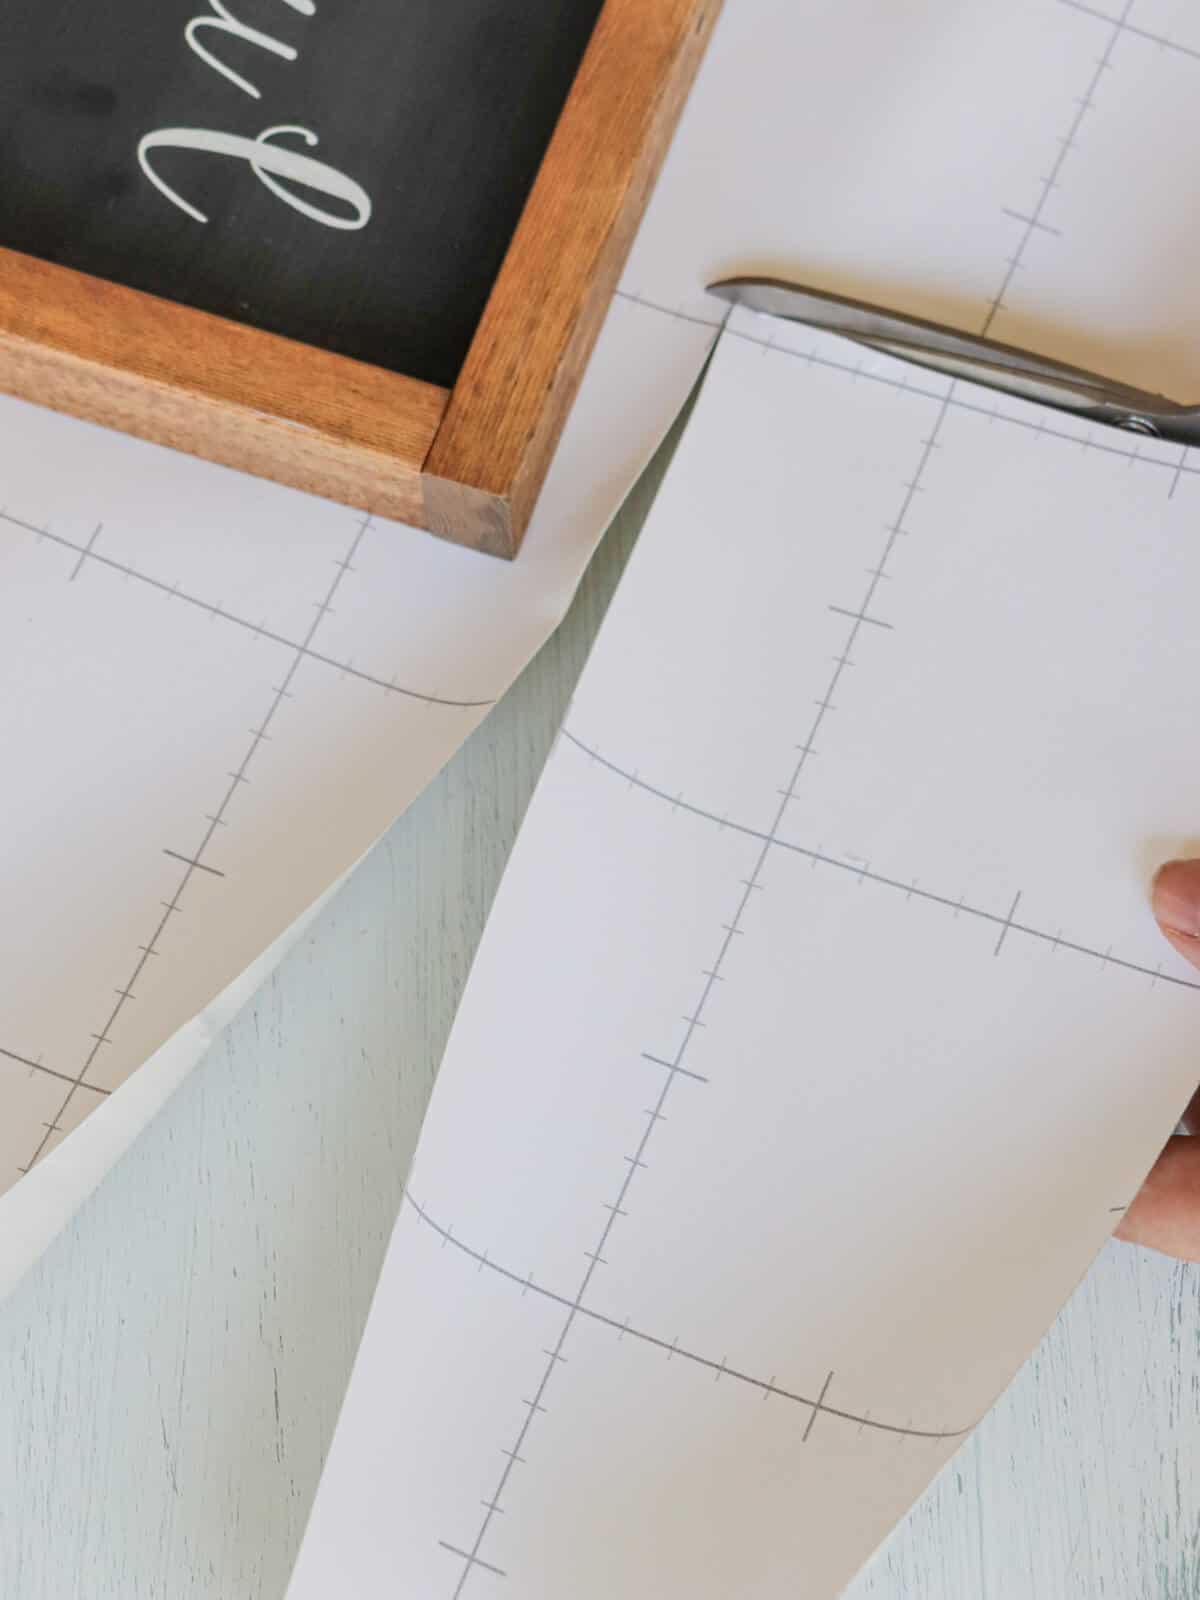
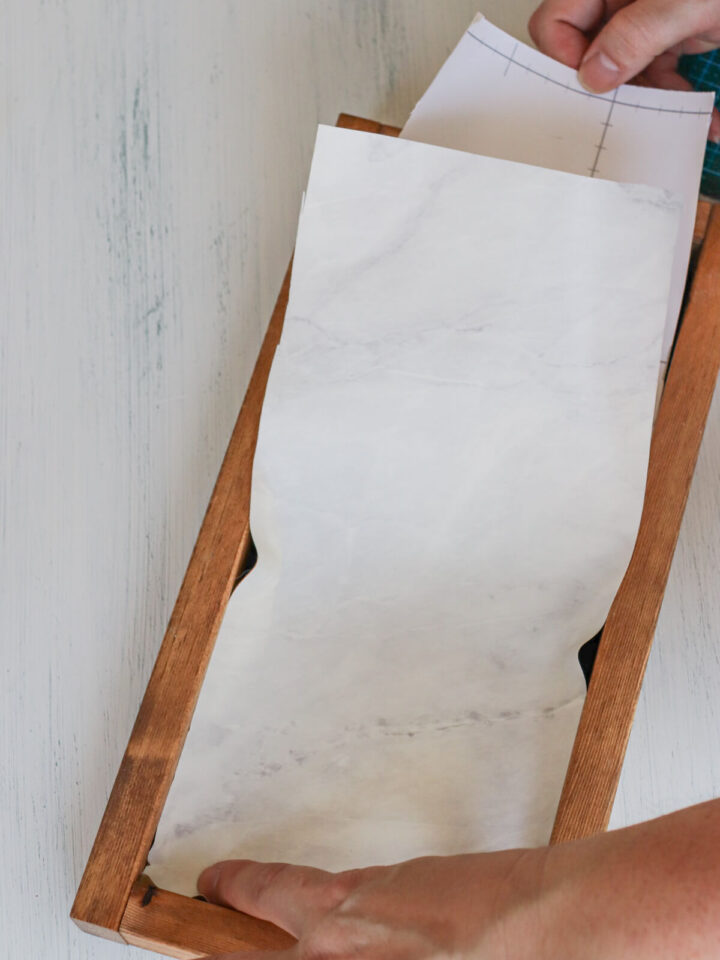
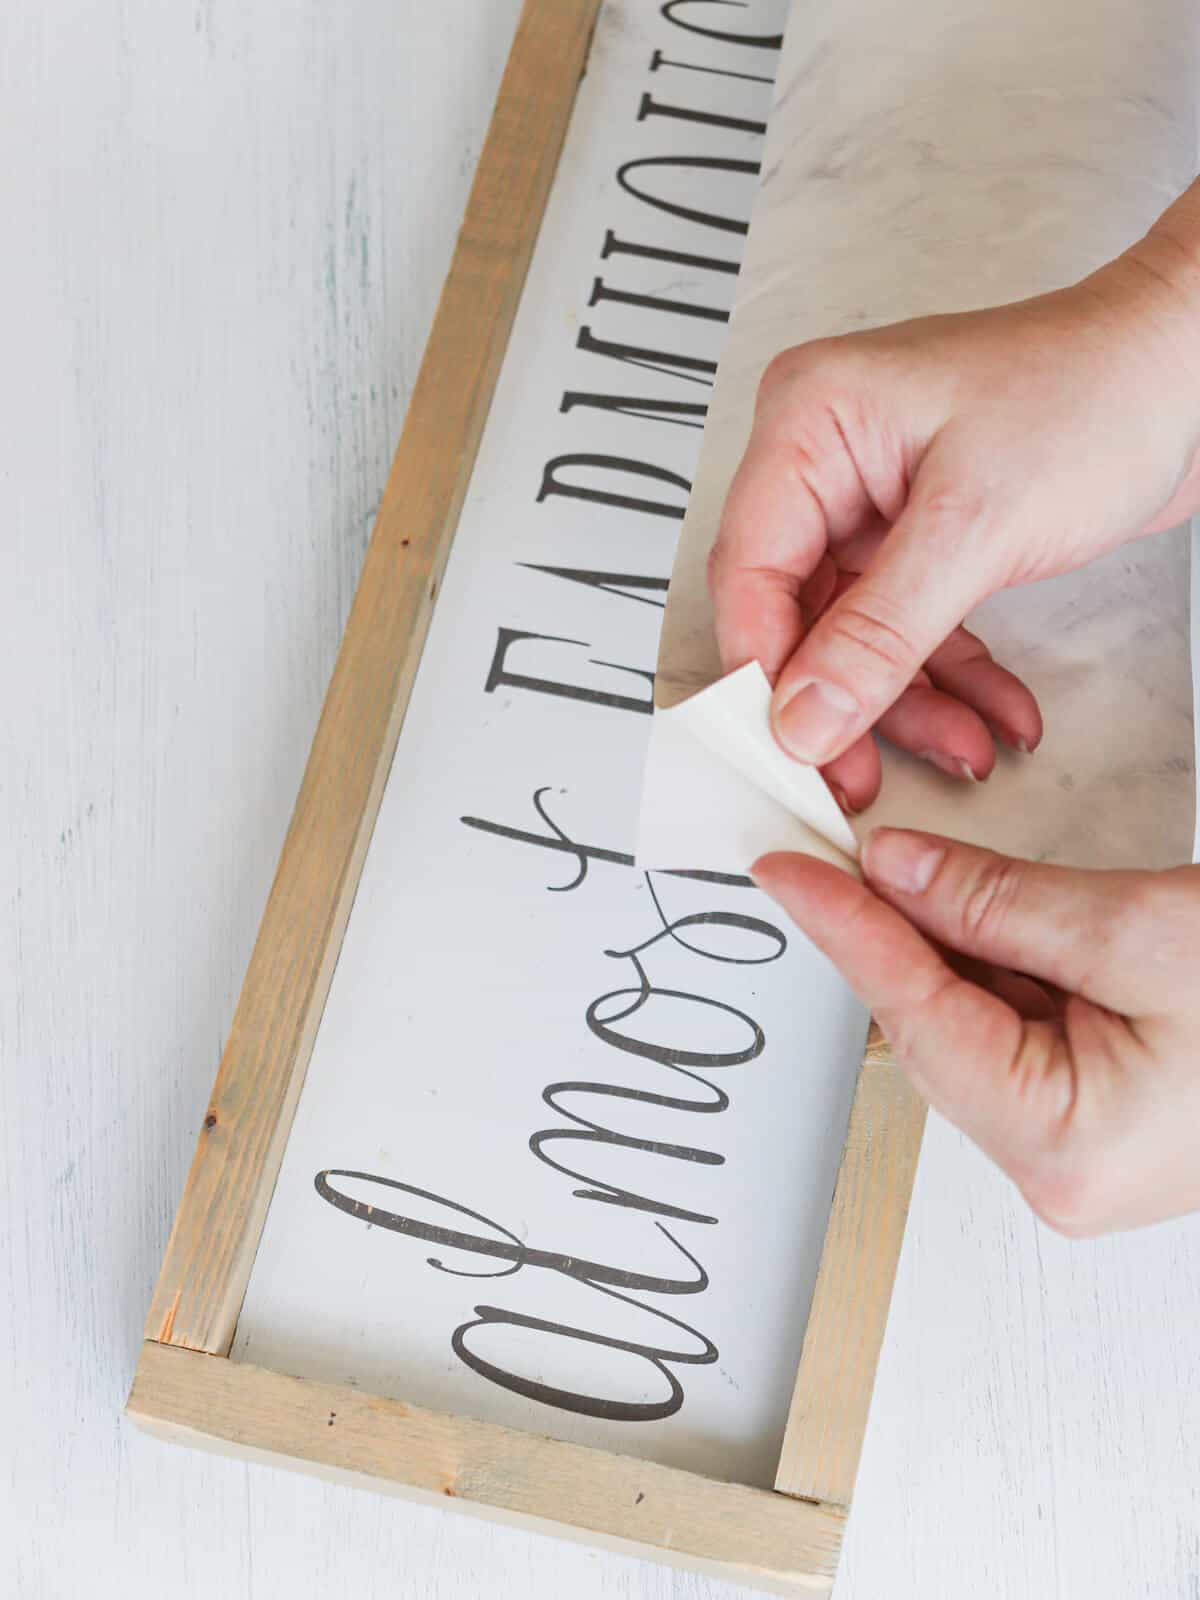
Cut a piece of your marble contact paper as close to the correct size as possible.
You want your bathroom tray to look like it has a marble slab, so the correct sizing is key.
I speak from experience because my first cut was too small and you could still see the black sign.
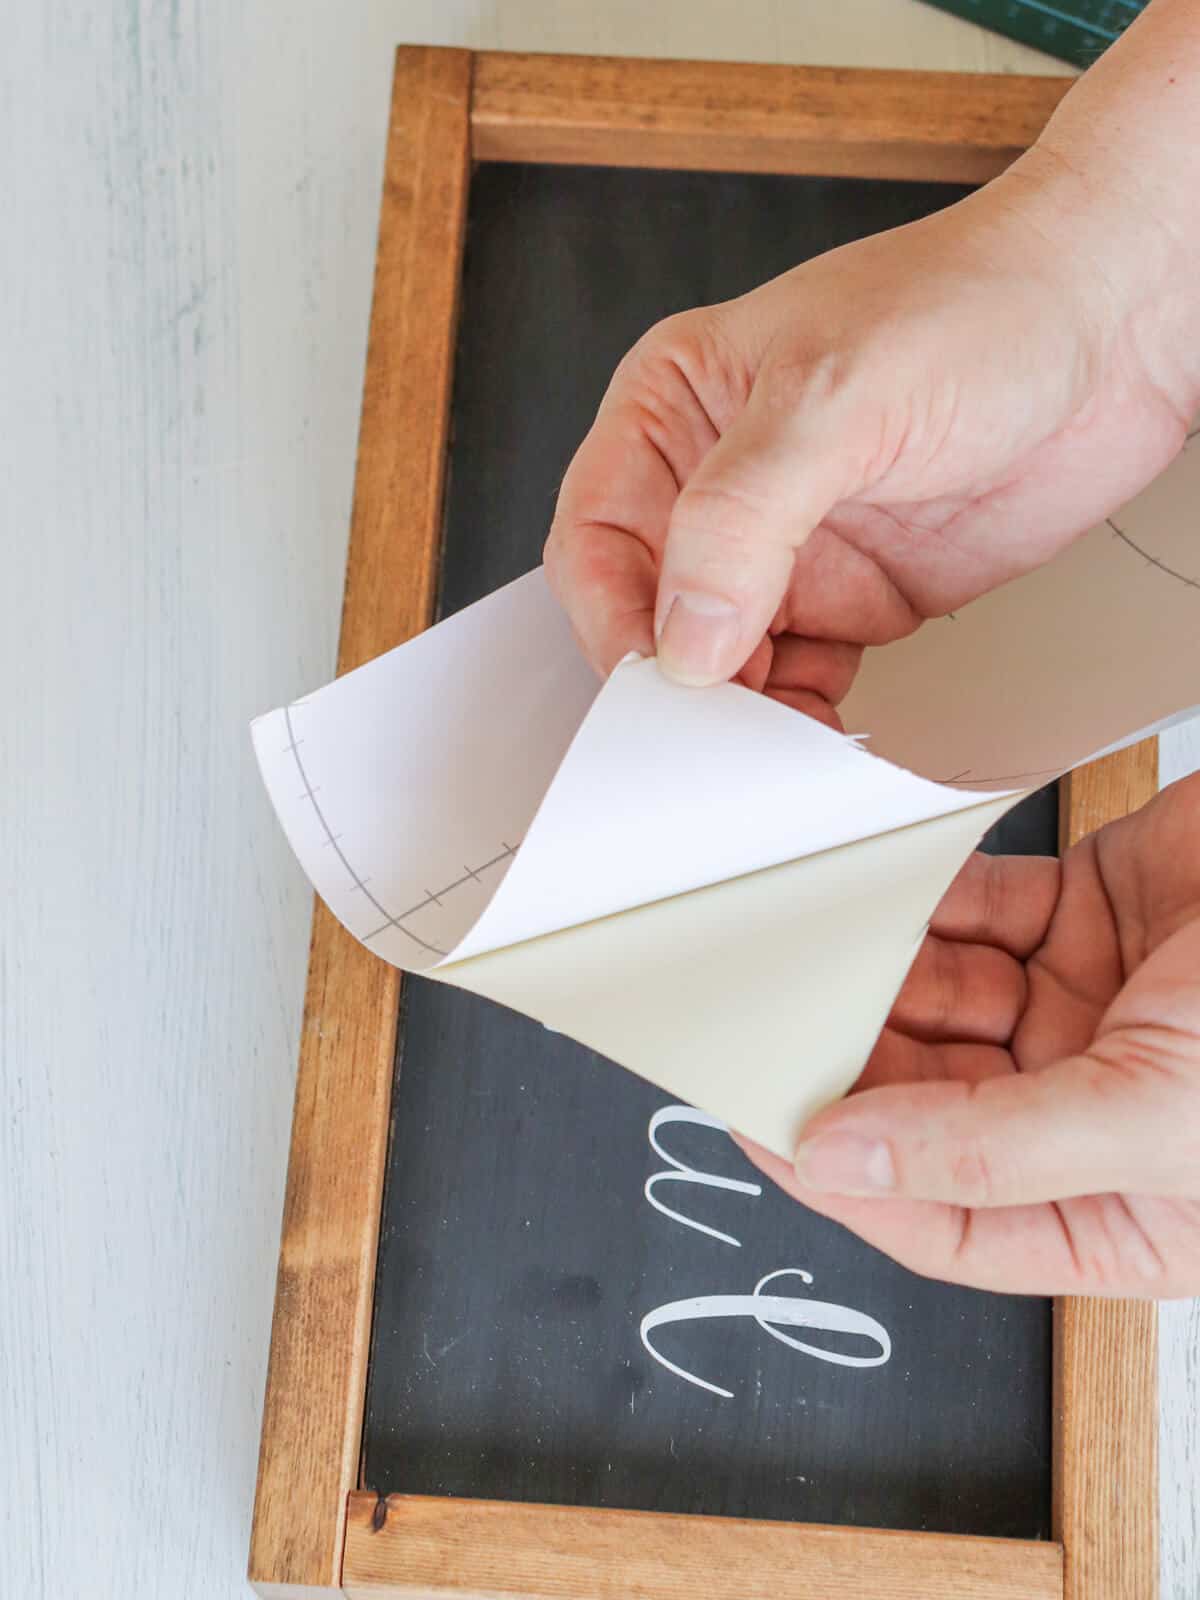
Start in one corner and peel the back away just a few inches.
Then line that up with one side of your old sign.
TIP: You don’t want to pull all the backing off before placing it. It could result in bubbles or end up being misaligned.
Take your time and slowly peel the paper, smoothing as you go.
Smoothing helps get any air bubbles out from behind the contact paper.
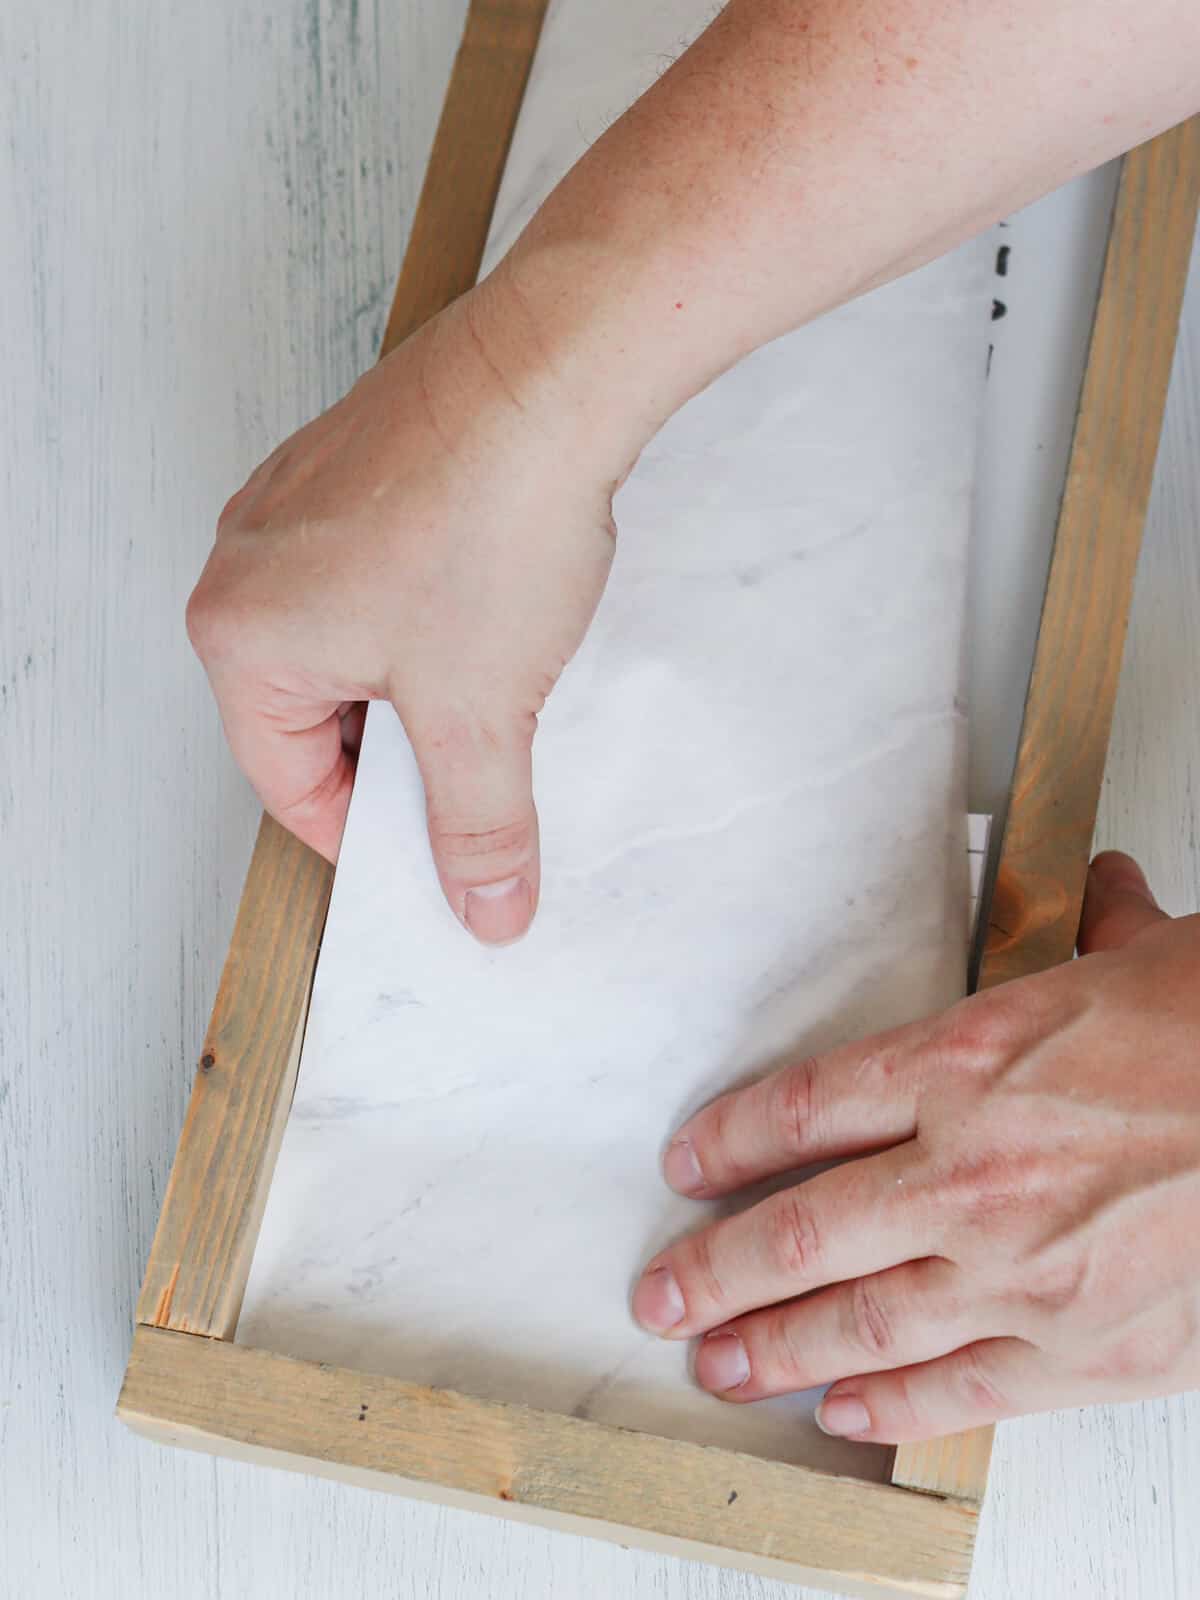
You could use an old credit card or one of my favorite things – a pot and pan food scraper.
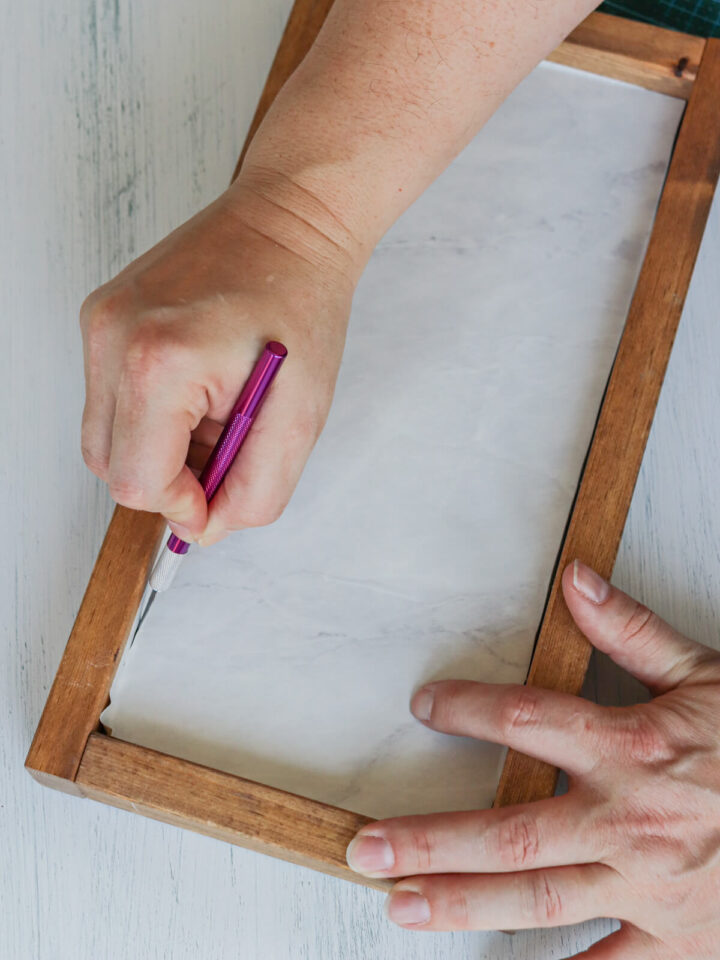
If you have any excess, then you can trim the edges carefully with an exacto knife.
Just follow the edge of the wooden sign to keep a straight edge.
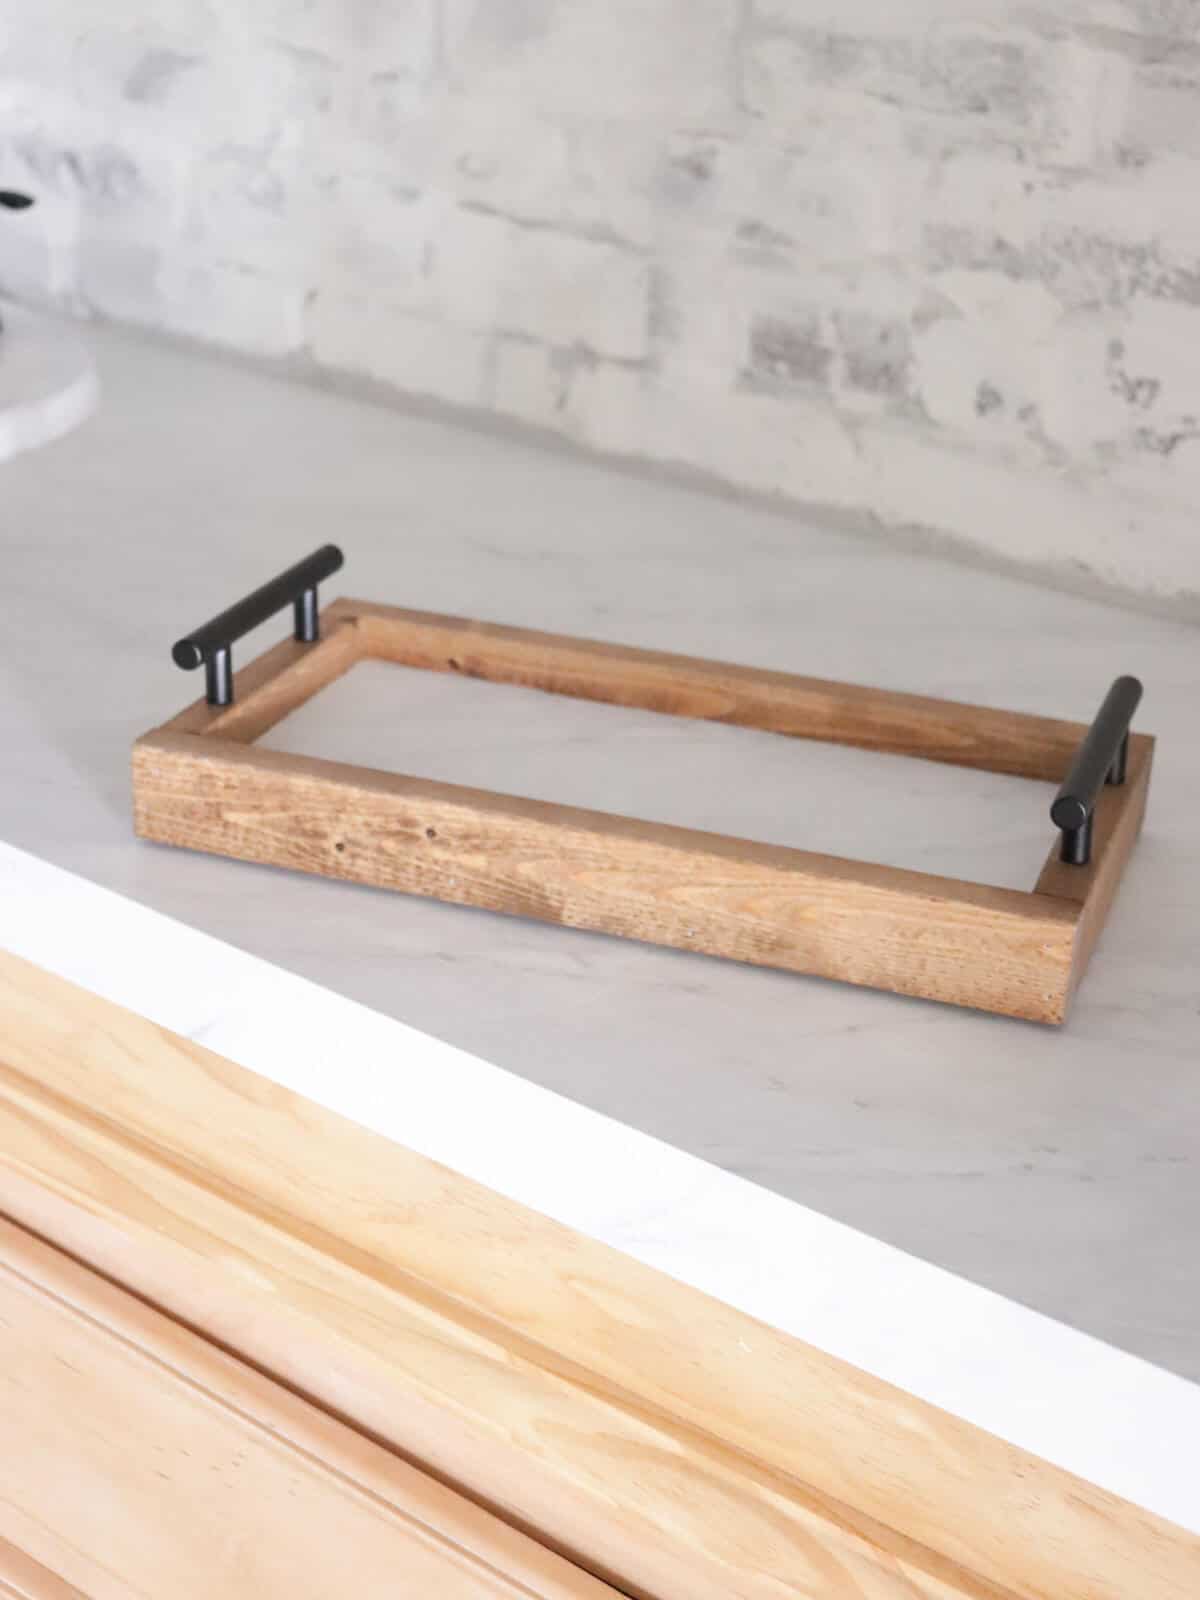
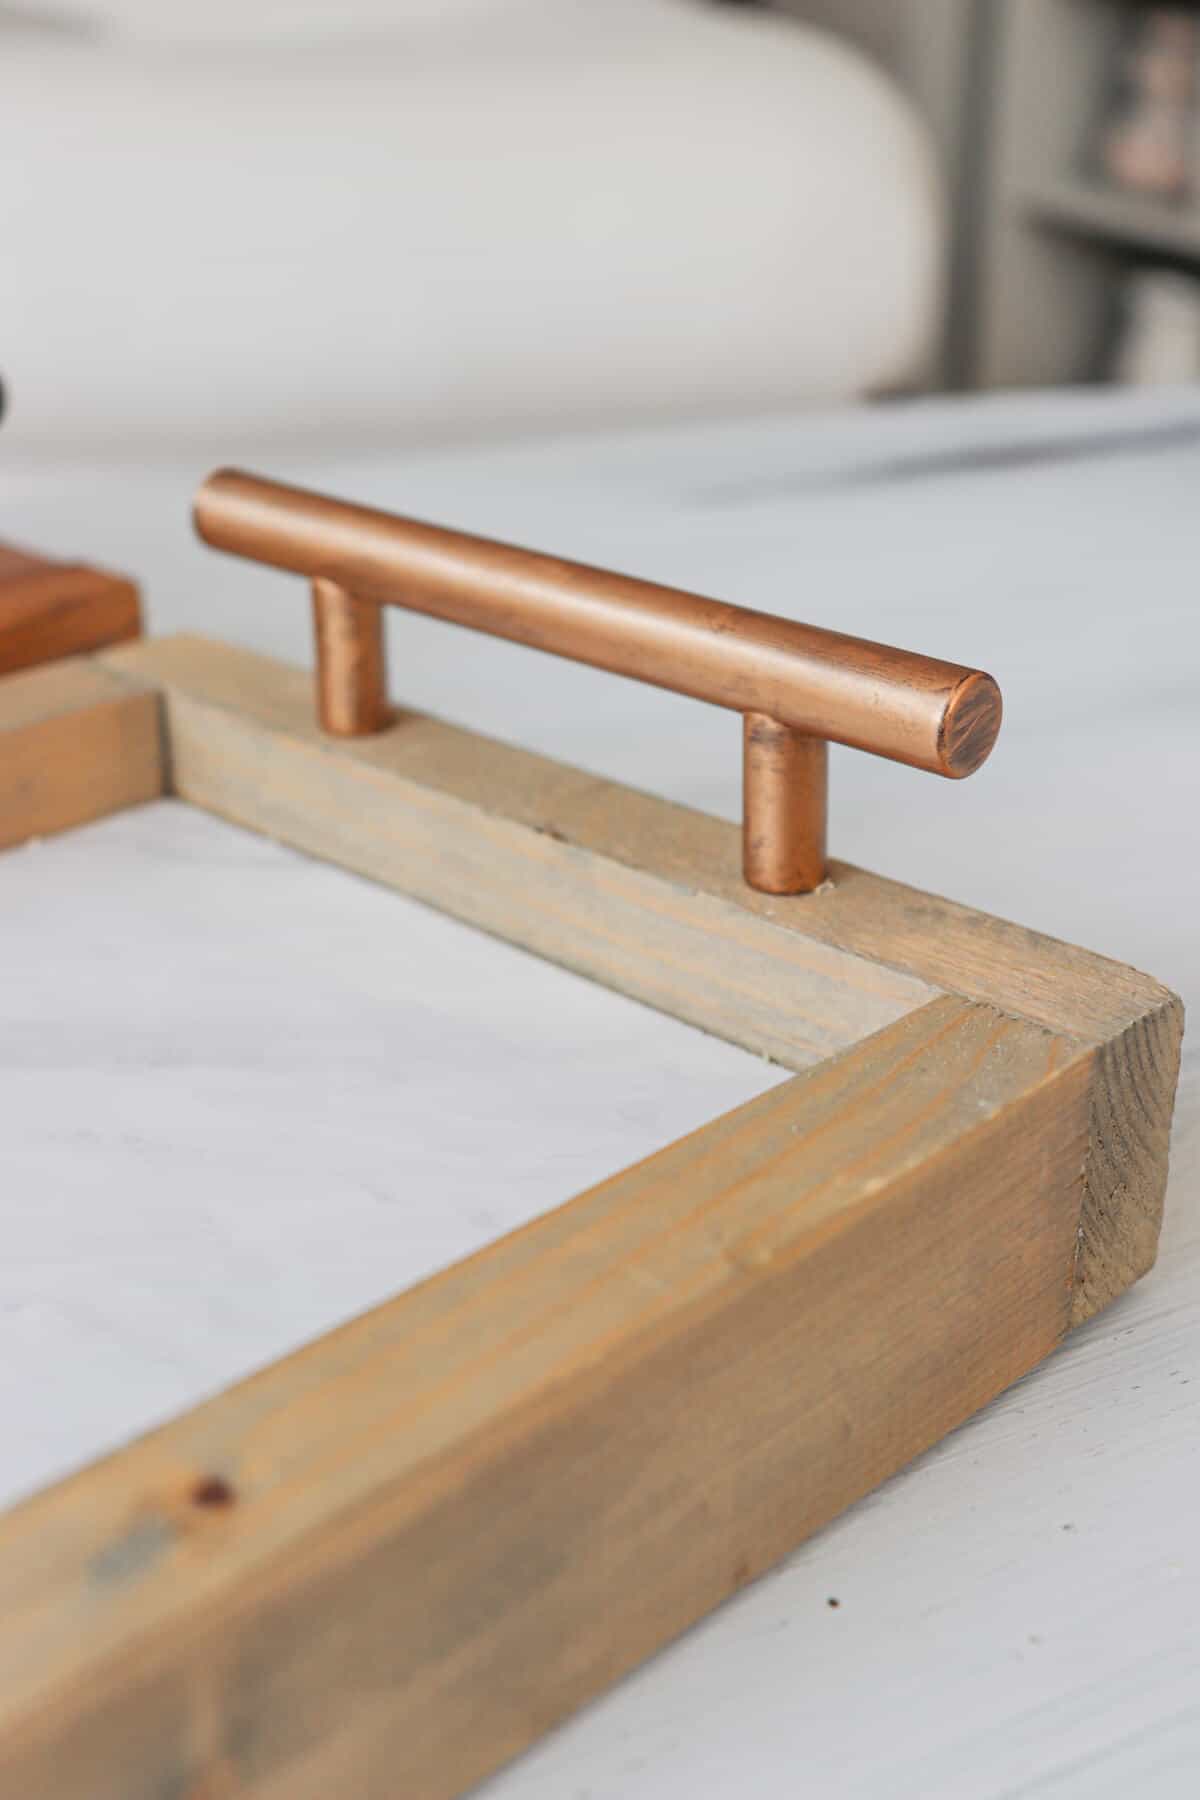
Now I was ready to add the drawer pulls for handles.
I used a drill to make pilot holes and then screwed the handles in place.
Here’s how it looks in my boys’ bathroom.
You can also see the DIY countertop using the same contact paper. I can’t believe it has the look of authentic marble!
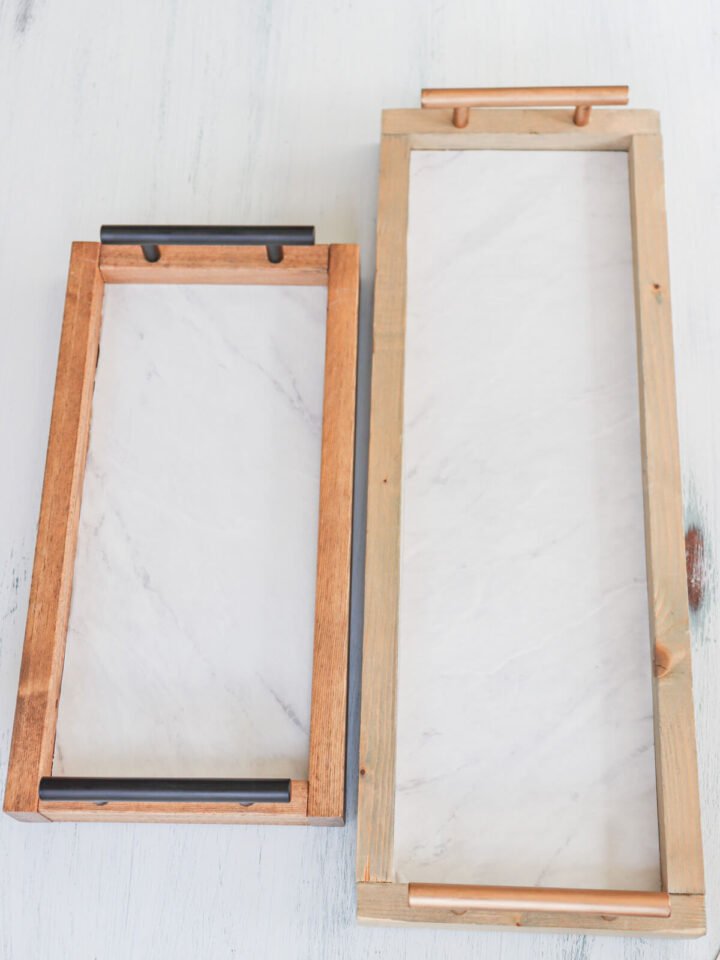
Since I had a second wooden sign on hand, I wanted to create another tray with a slight variation.
More of a chic vanity tray!
I followed the same steps outlined above.
So as you can see, the DIY Faux Marble Vanity tray turned out very similar to the first one.
But I wanted to add some pizazz!

I had some antique gold rub n buff on hand and wanted to see what the handles would look like gold.
TIP: Wearing rubber gloves helps control the gold mess a bit better!
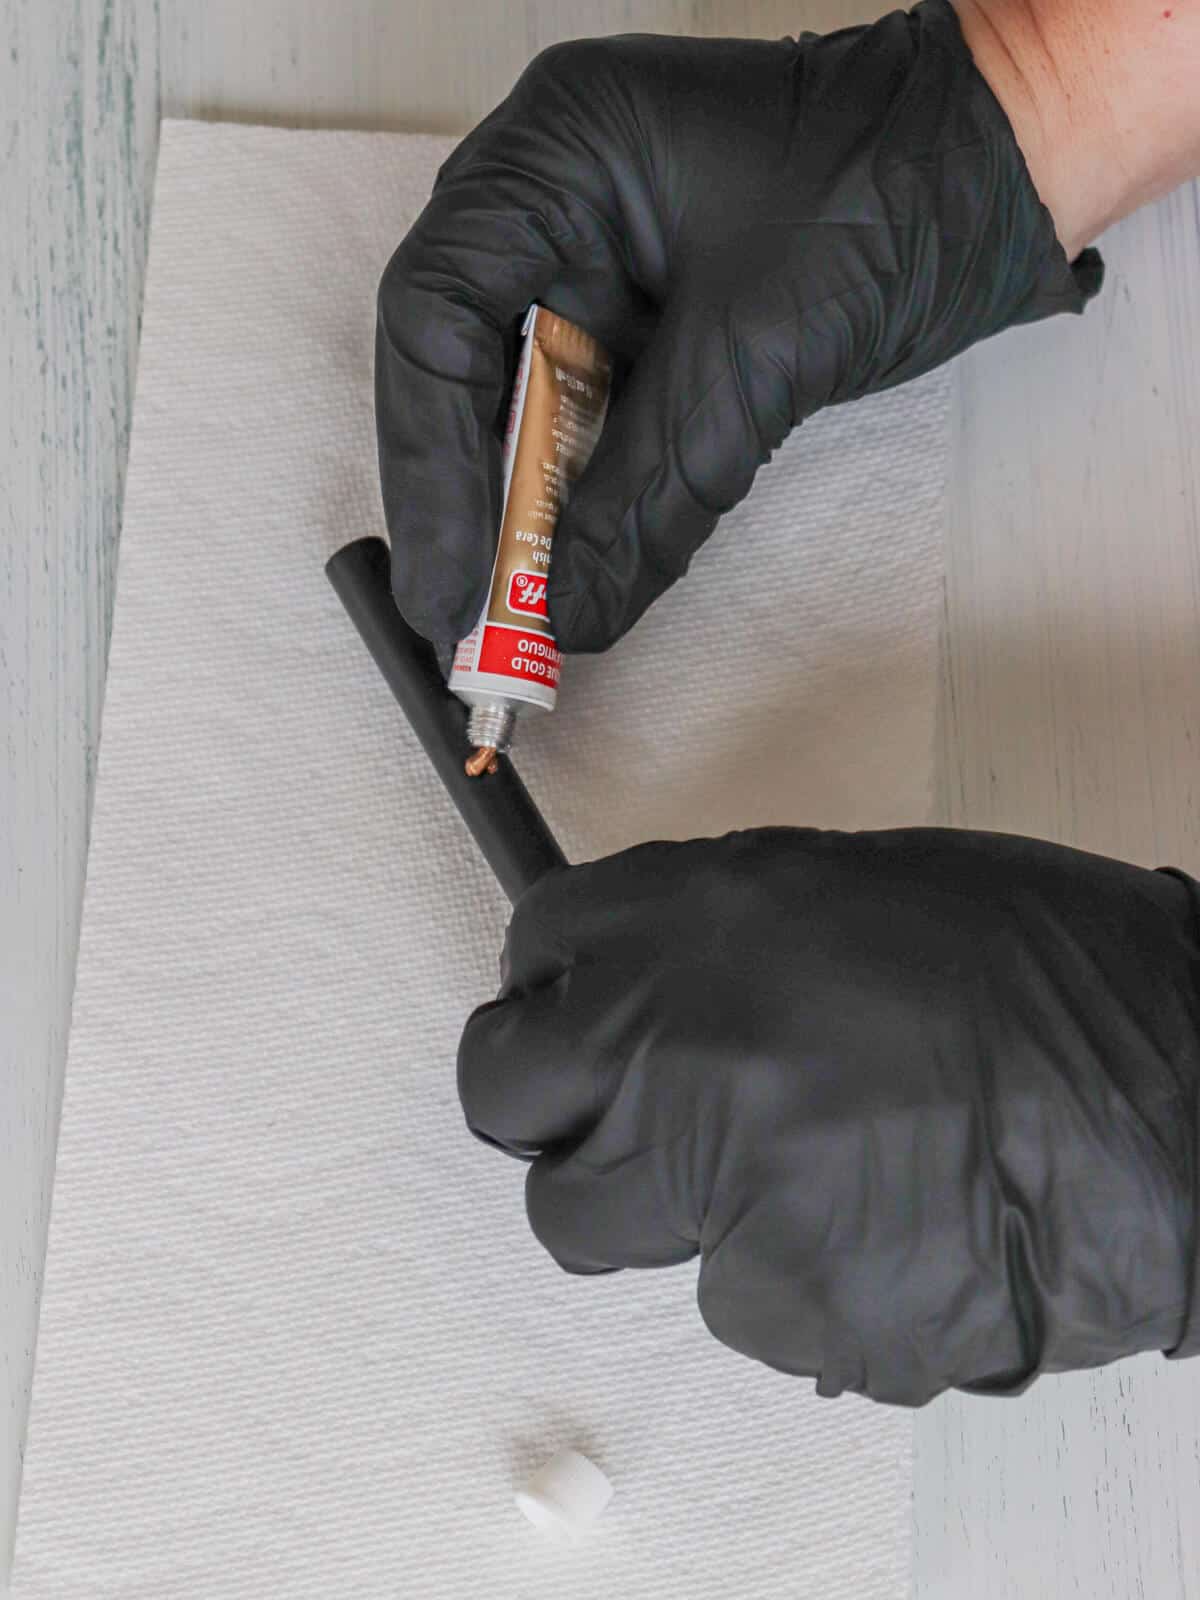
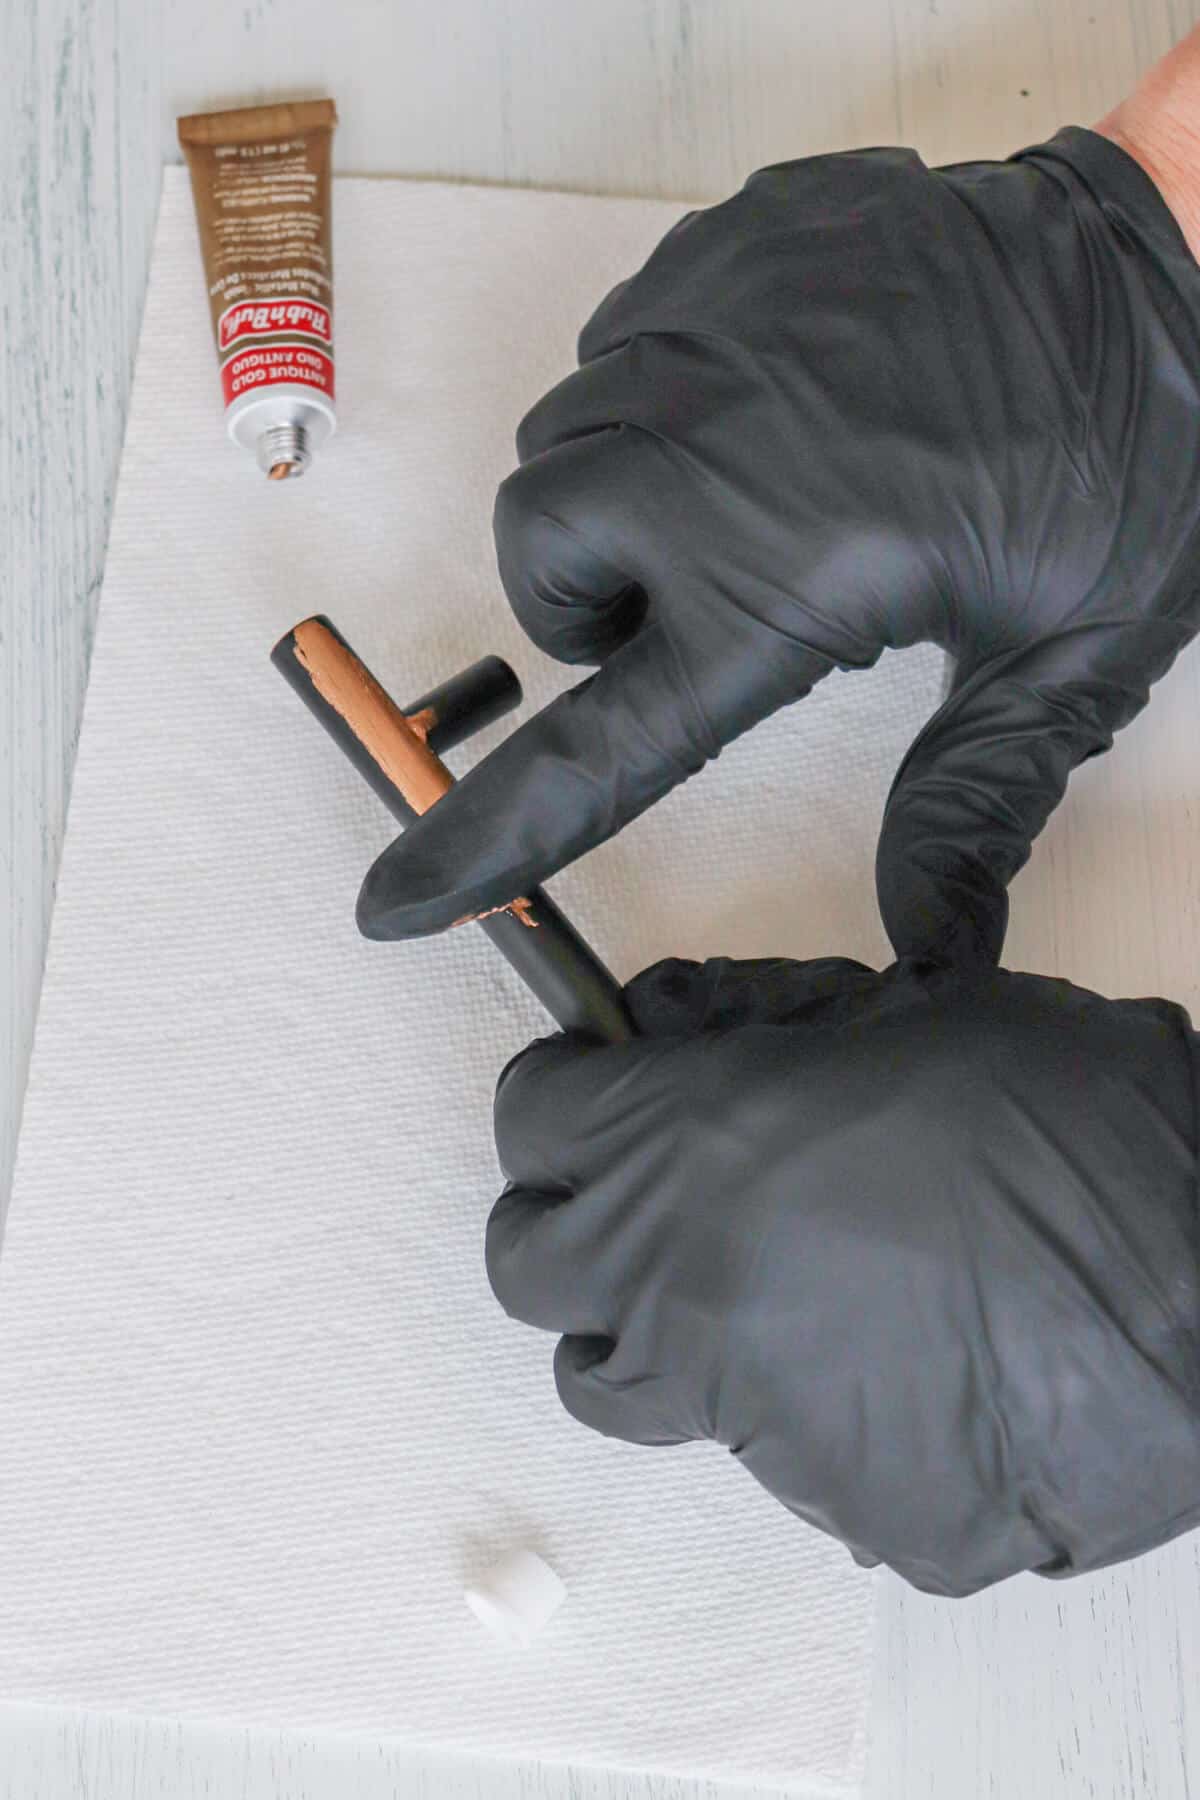
Start with a very small amount and rub it into the drawer pull.
Follow it up with a quick buff from a soft cloth. And this is how it looks!
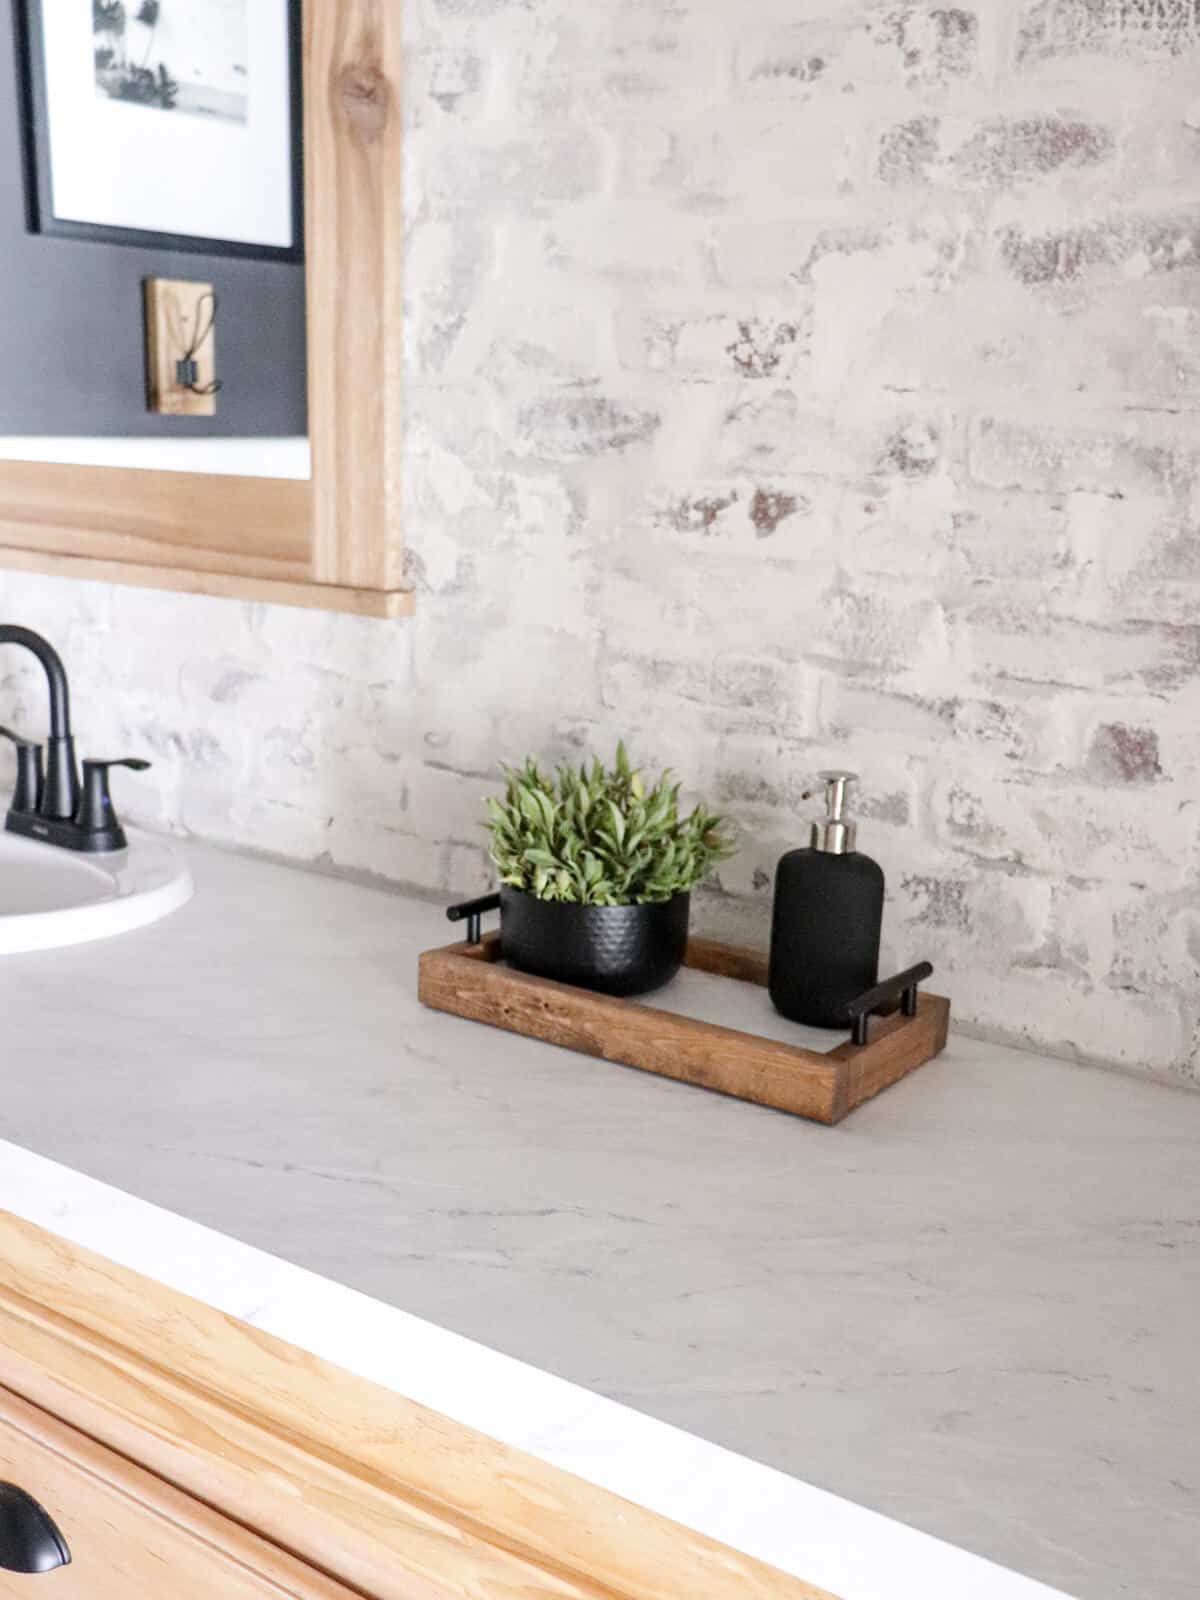
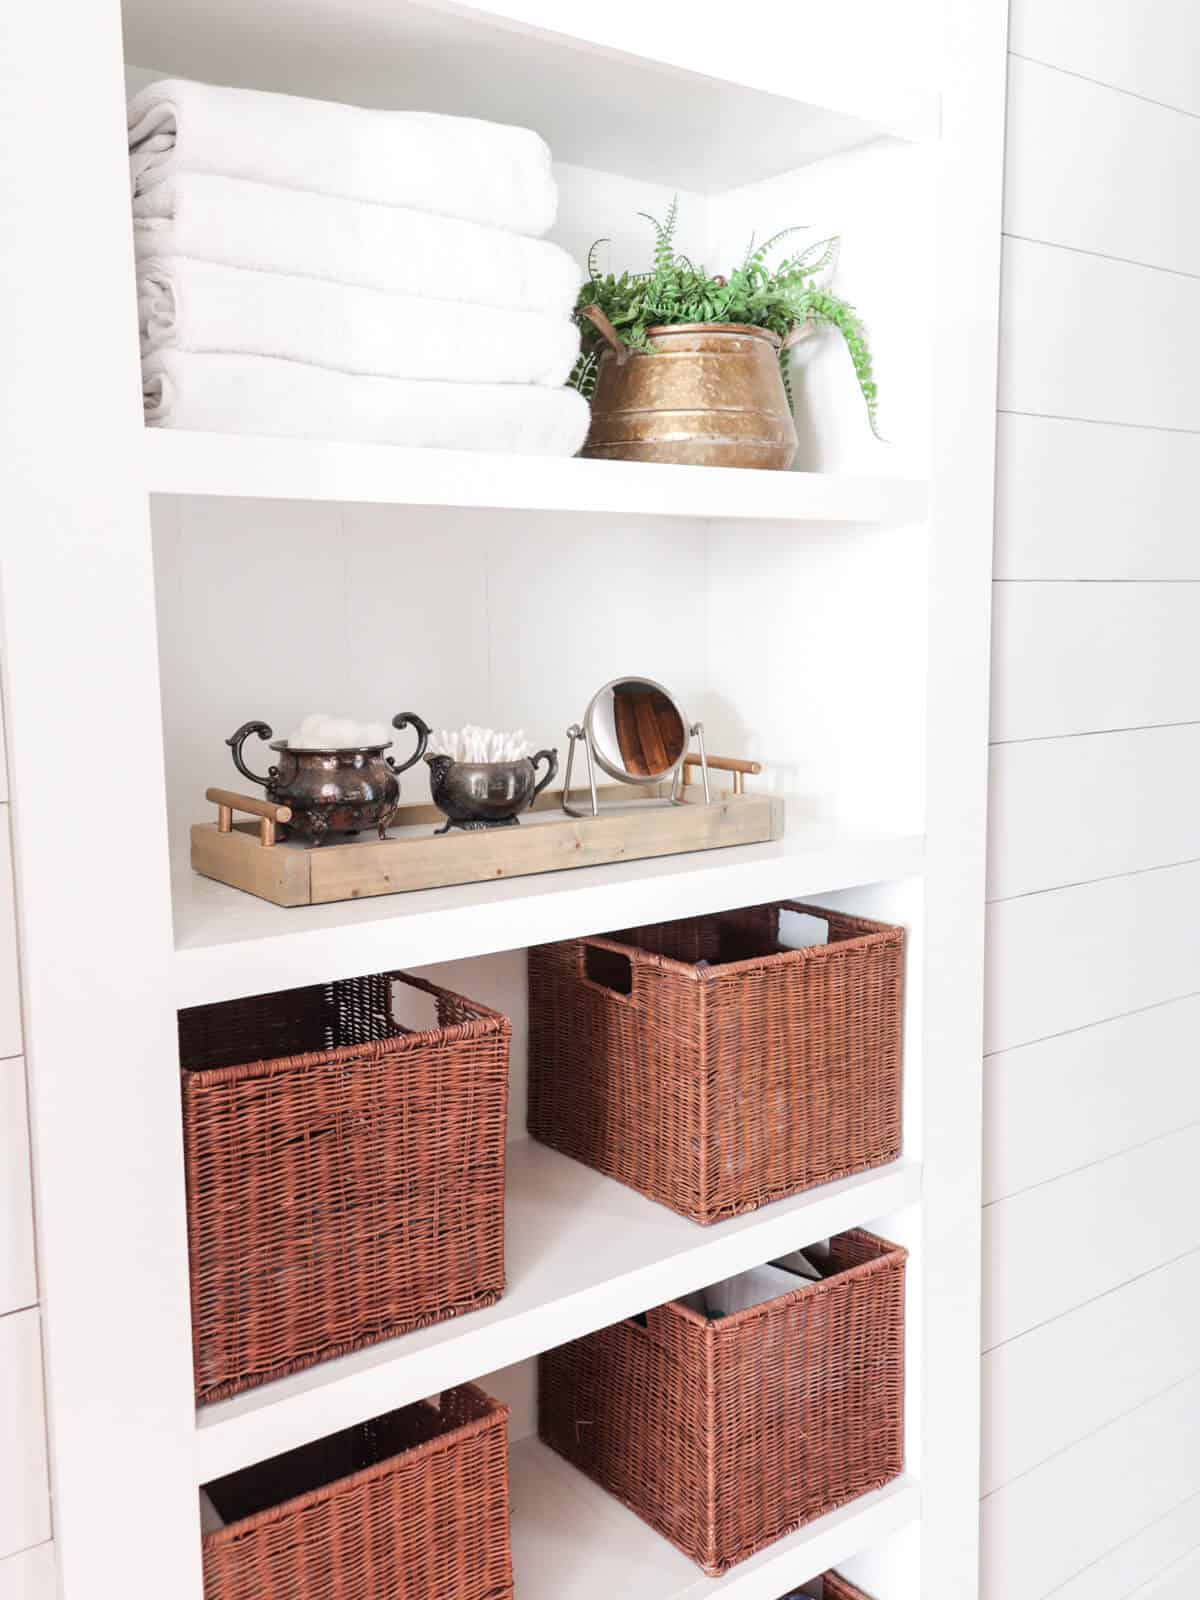
I placed the second tray on the shelves in our bathroom and I love how it looks!
We use tarnished silver serveware to hold our cotton swabs and q-tips.
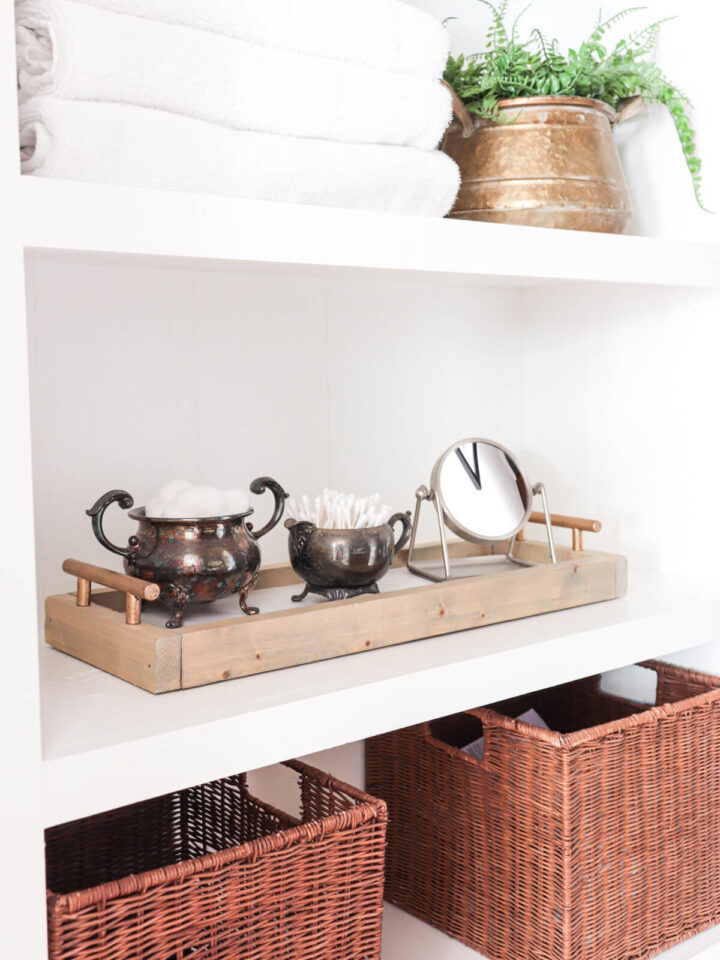
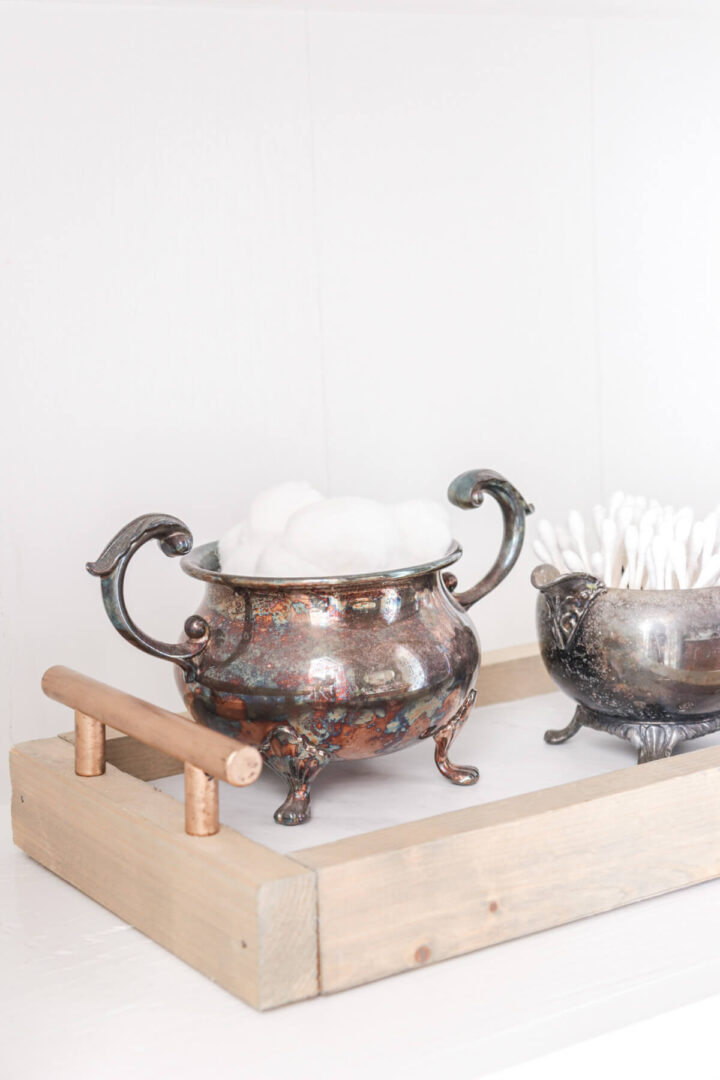
I love to collect tarnished silver and have it sprinkled throughout my home.
The variation of the antique gold and tarnished silver help bring out those rainbow colors of the silver tarnish even more!
Substitutions
If you don’t have the same materials on hand as I did, then here are some other ideas for you to explore.
- Marble tile – if you have any old tile leftover from a bathroom remodel, the tiles would work nicely as well!
- Spray Paint the wood – add a clean, classic color by spray painting the old sign to create a seamless match for your decor
- Leather Handles – this could add a rustic flare to your diy tray!
Variations
While I started with this bathroom counter tray idea, I also think this would work in other areas of my home. Here are some versatile tray placement variations to consider.
- Bedside Table – a place to put your earrings or loose change at the end of the day
- Coffee Table Tray – if your sign is particularly large, create a cohesive look by adding this to your decor
- Kitchen counters – these would also work perfectly in a kitchen setting gathering your utensil holders and salt and pepper shakers

So, I hope this inspires you to give your decor items a second look before giving them away.
And you’re in for a special treat!
I am joining a few of my friends as we are each sharing something that we are updating, making over, or refreshing in our homes. We’re calling it New Again, where we are giving new life to something.
Enjoy the posts below!
New Again

Cribbs Style / What You Need to Know Before Using Oven Cleaner to Strip Furniture
Noting Grace / DIY Faux Marble Vanity Tray
The Roots of Home / Vintage Thonet Inspired Bentwood Stool

This is brilliant!! I love how you repurposed something you already had making this useful and updated tray! I’m a huge fan of repurposing! Pinned 😊 Feel free to share this post on Tuesday Turn About Link Party this week!
Jen, this is brilliant! I just love this idea. Thanks for the inspiration!