Sanding Our Bed: 7 Tips for a Successful Refinishing Project
We just tackled our largest refinishing project to date and boy did we learn some lessons. Here are our 7 tips for a successful refinishing project.
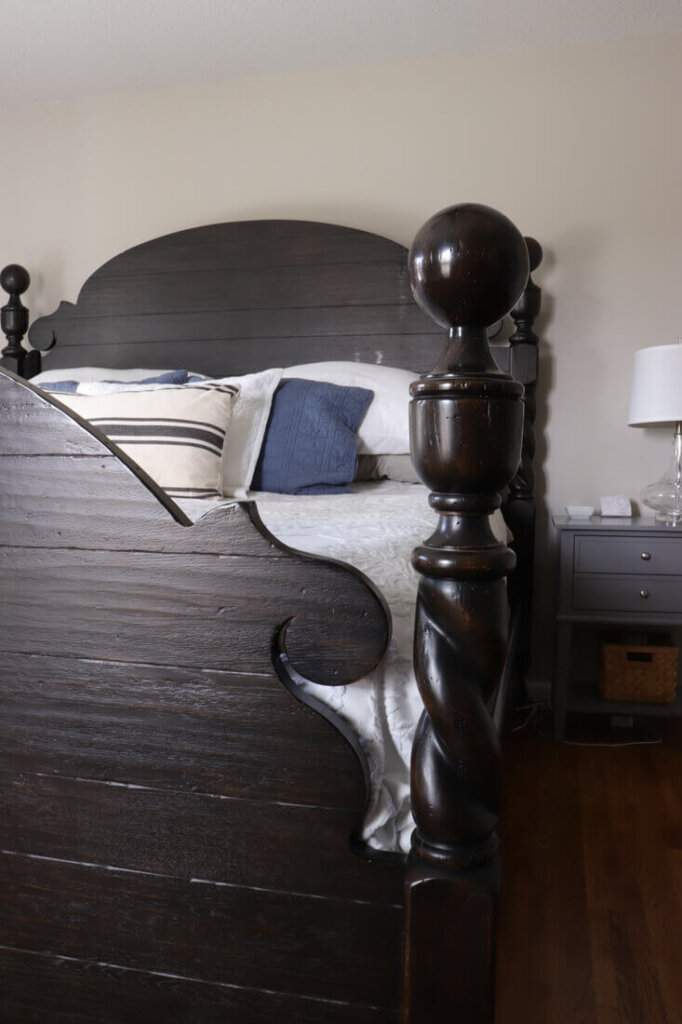
We almost sold this beautiful black bed a few years ago, and I’m so glad we didn’t!
This bed was our first grown-up furniture purchase we made back in 2007 after years of cheaply made ‘affordable’ furniture.
Since purchasing it, we’ve moved this bed 7 times.
And this bed is a beast. It’s made of wood and is heavy!
On move 5 of the 7, we discussed selling it to make our cross country move easier. I had listed it for sale and even hit publish.
But after a few hours, I had to remove the listing. It was just too beautiful to get rid of.
But after years of living with the black bed, we wanted something different.
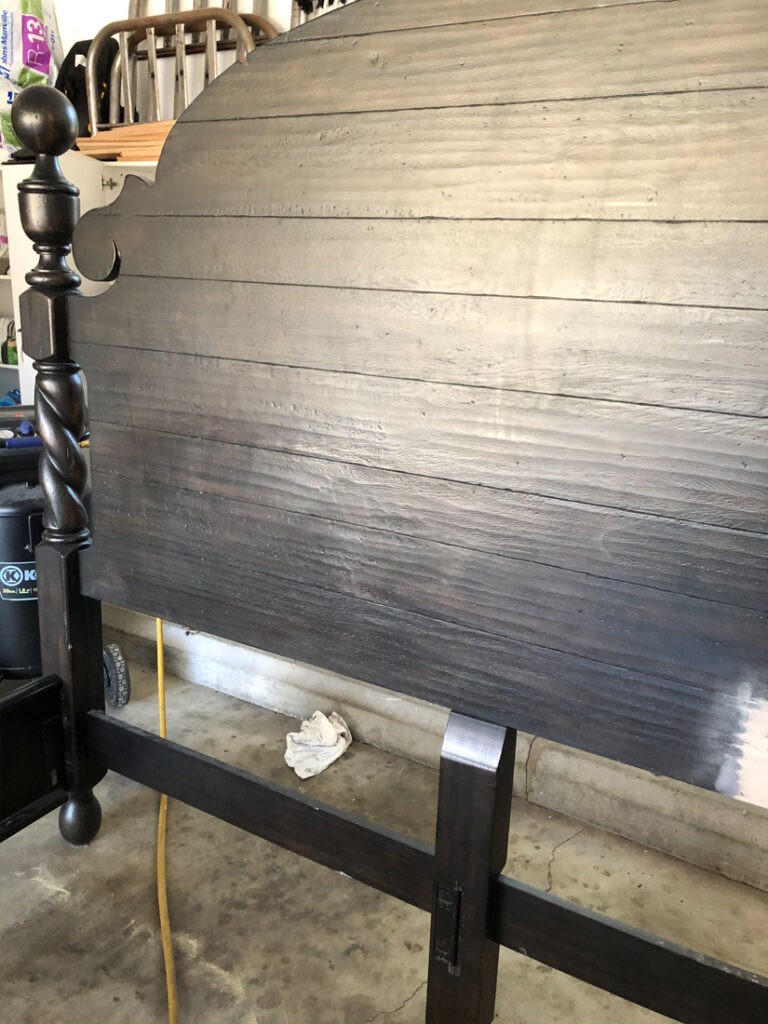
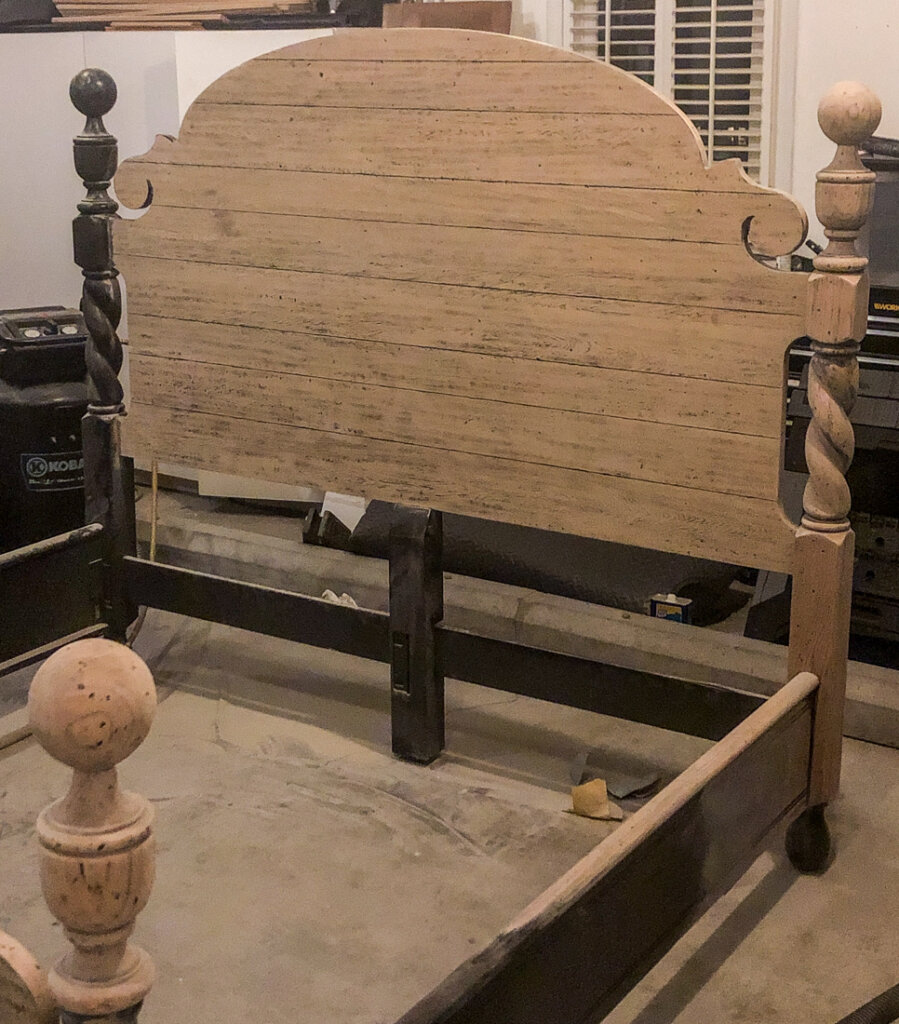
So we pulled the bed from the wall and tested a small spot on the back to see if we could refinish it.
And we were excited with what we saw! So after a few weeks of sanding, we finally have the bed completed and wanted to share what we’ve learned along during the process!
7 Tips for a
Successful Refinishing Project
(Some affiliate links are provided below. Full disclosure here.)
Tip One: Create a designated work space
When you start sanding, it gets messy – real quick! You don’t want that in your home, next to your furnace returns and air vents where it can send all those fine dust particles throughout your home.
I don’t know about you, but if I can prolong dusting as long a possible, then that’s a win!
So, in order to avoid the dust storm, we moved the beast of a bed out to our garage.
Tip Two: Find the right sandpaper for your project.
Sandpapers range from low grit to fine grit and you may need to test a few to find out what will cut through your piece of furniture.
A medium grit (120-150) removes most finishes and is a great place to start. After testing an area, we realized we needed to use a lower grit sandpaper.
Low grit sandpaper (60-100) is used for old thick finishes. This would be pieces with many coats of paint or poly/shellac.
We found that 80 grit was able to cut through the black finish immediately.
After you remove the initial stain or paint, work your way up to a finer grit (220) for paint or 300+ for stain before refinishing the piece.
Tip Three: Use the right tool for the job.
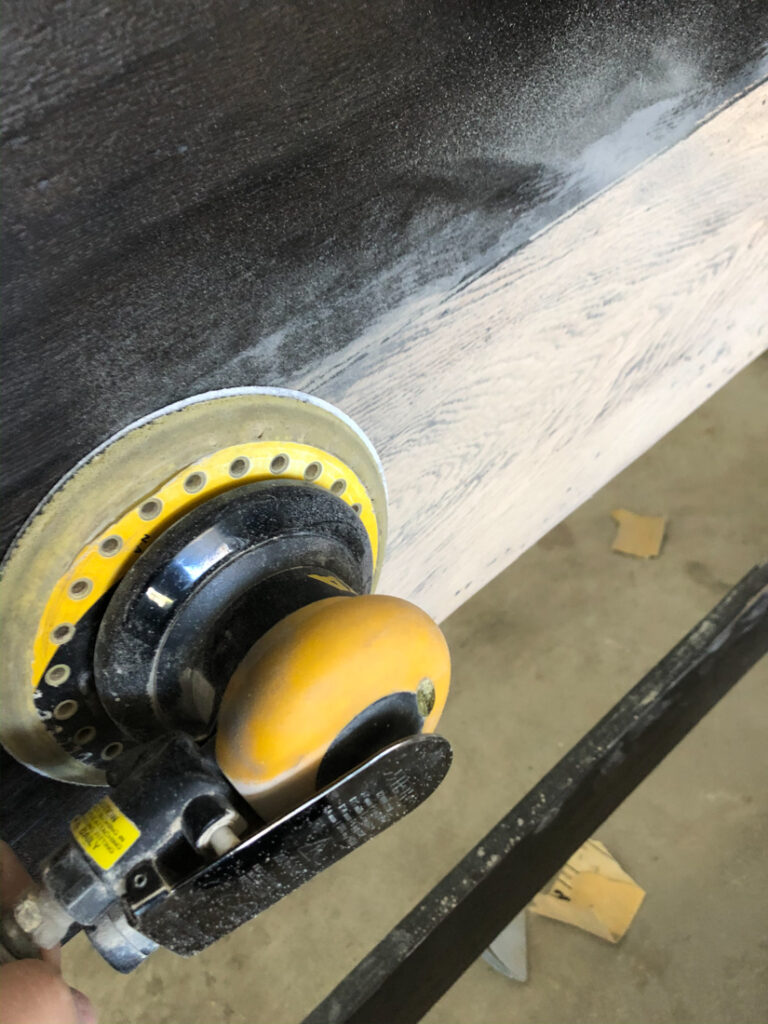
As I started sanding this piece, I immediately knew we needed to pull out the big guns.
For larger projects, you will tire yourself quickly if you try to do this all by hand. Even a sanding block requires your arm to move it.
If you have a big piece of furniture, it’s worth the time and energy saved by investing in a palm sander or an orbital sander, like we used.
Let the sander & sandpaper do the work for you. Always sand in the direction of the grain.
And make sure the sandpaper is secured tightly to the sander or your sanding block.
Our little sander helped us get this bed finished in a few days, versus a week of non-stop sanding.
Tip Four: Be careful with intricate carvings.
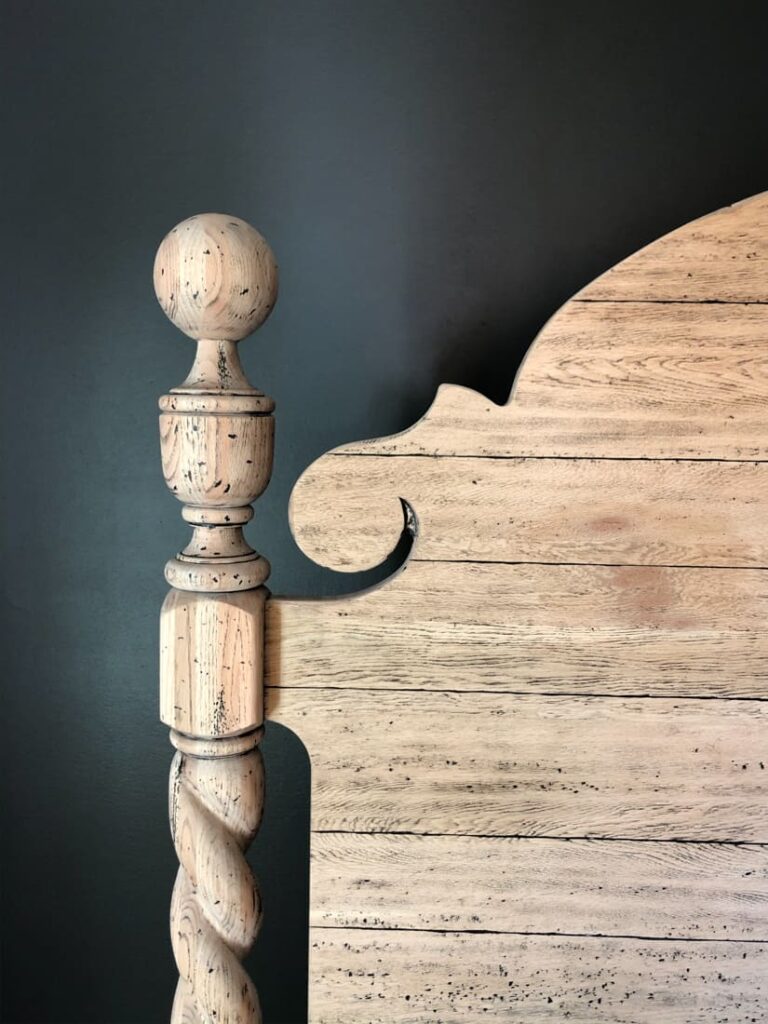
Even though we used our orbital sander to remove the majority of the black finish, we had the carved posts of our cannonball bed.
You risk changing the shape of carved or detailed overlays if you use a powered sander.
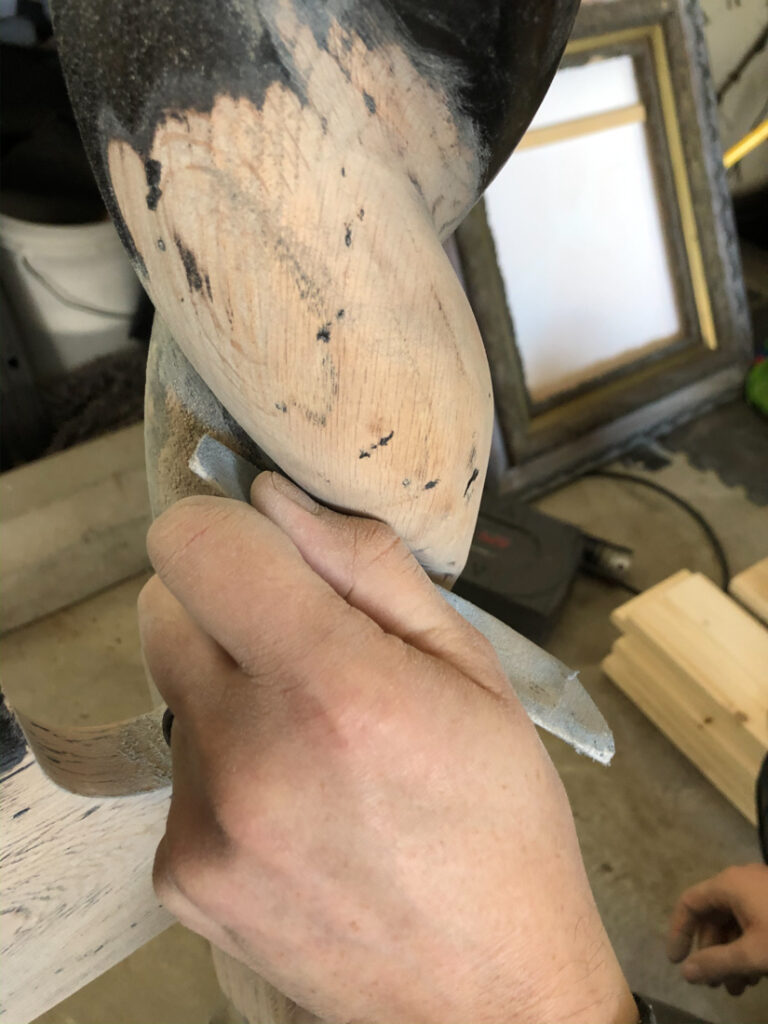
Whether sanding by hand or sander, apply light pressure and keep sandpaper flat to the wood for smooth results.
We saved left over pieces of sand paper from our orbital sander and hand sanded those carved posts.
Which brings us to tip numbers five of 7 tips for a successful refinishing project.
Tip Five: Change out your sandpaper often
As you work across your piece, you will notice that the sanding gets tougher.
Either you need more elbow grease, or you are making multiple passes over the same area.
More effort from you means you need to work the sandpaper instead of the sandpaper working for you!
Save your energy and make sure to change our your sandpaper often.
Tip Six: Keep a handle on your dust
While you are sanding, take a break to sweep or vacuum up your dust.
You will be refinishing the piece and dust is the enemy! You don’t want dust to get in the final polyurethane finish.
Getting control of it while you are working can help avoid headaches down the line.
And before you begin to refinish, remove ALL the dust with a vacuum and tack cloth before staining and/or paint.
Tip Seven: Choose your top finish wisely
The topcoat is what protects all the hard work you’ve done!
After sanding all the finish off our hand-scraped wood bed, we loved how some of the black finish remained in the grooves.
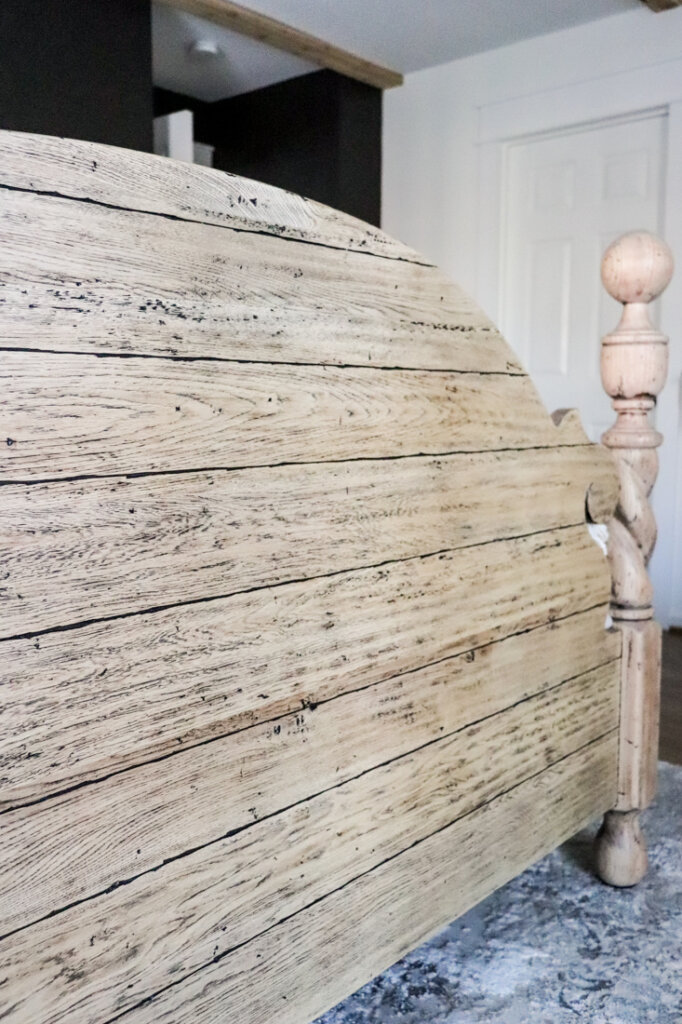
So we opted to skip out on staining it and just applied two coats of water-based polyurethane over the piece.
Water-based finishes are practically odor-free and have the added benefit of soap and water clean-up. Don’t over brush them because they do dry quickly.
One way to apply these finishes quickly and smoothly on flat surfaces is by using a foam painter’s pad.
One last side tip: Protect Yourself.
Be sure to suit up properly while tackling this project.
Wear protection for your ears, eyes and lungs. Goggles, ear muffs or plugs and a breathing mask will prevent any particles from harming you.
Another thing I learned the hard way was to take off any jewelry. I forgot to remove my wedding band and the 80 grit sandpaper scratched it!
And if you have an air compressor, having a blower nozzle attachment is such a smart add on. It’s only about 10 bucks, but it’s great when you are covered in sanding dust to head outside and blow all the dust off before going back into the house.
I hope these 7 tips for a successful refinishing project help you when you are tackling a large project!
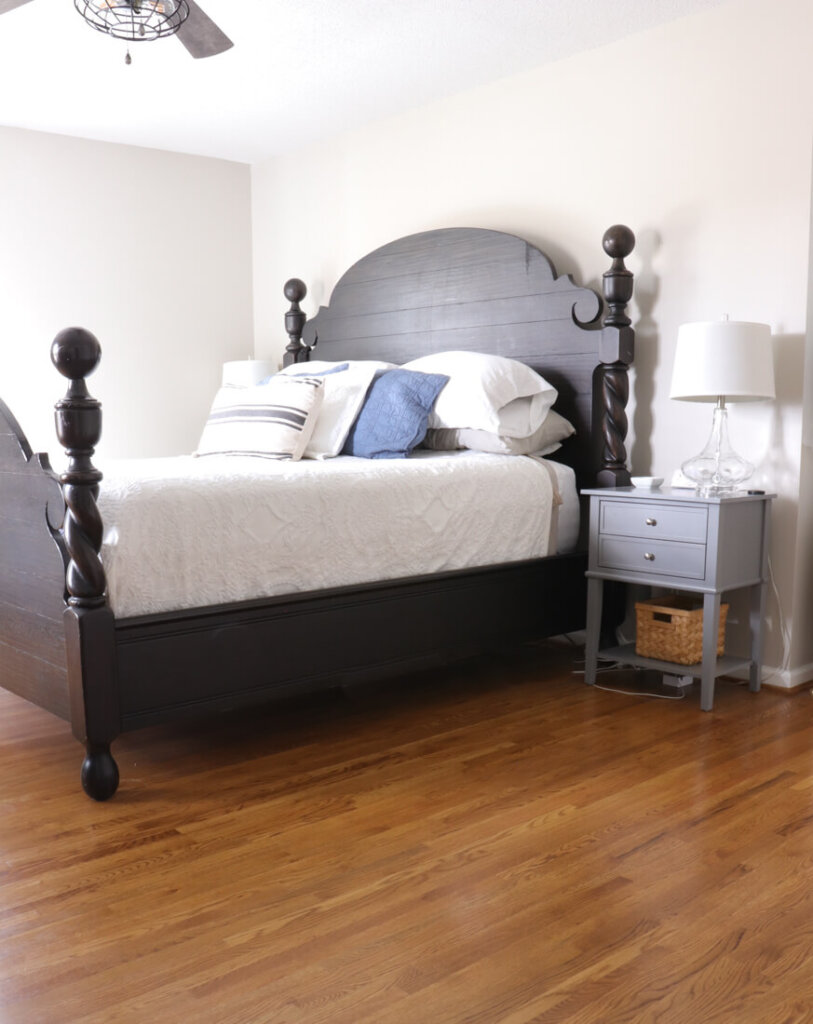
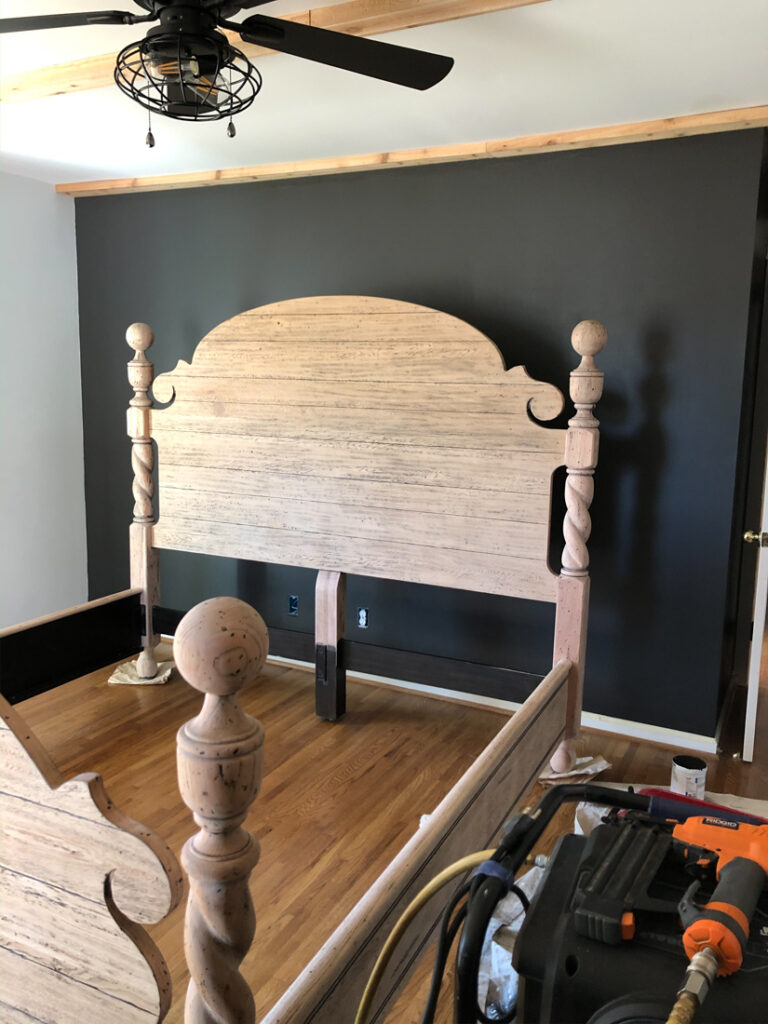
It feels so good to have this bed finished and slowly start to put this room together.
The ceilings are scraped, the wood beams are installed and now the bed is in place.
Doesn’t it look just lovely against that accent wall? That is a color from my custom collection with Romabio Paints called Iron City.
Now it’s time for the fun stuff!
Putting it all together! I have a few more DIYs to share with you before the reveal, but we are so close, friends!


I’m so glad this inspired you! Good luck on your project!
What great tips! I have a similar red rock maple bed frame I’ve been wanting to tackle. You have inspired me!