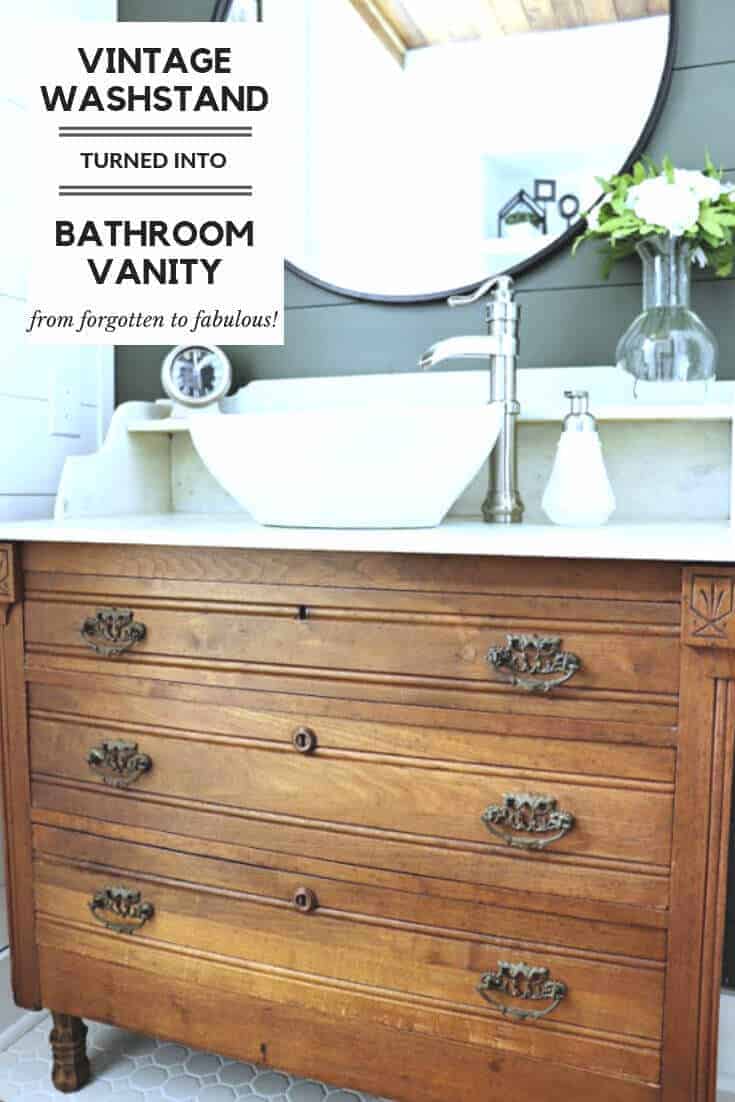
Vintage Washstand Turned Bathroom Vanity
We found a forgotten item tucked away in someone’s basement and turned it into something fabulous! Here’s how we made our Vintage Washstand turned Bathroom Vanity for our master bathroom makeover.
Sometimes life comes in and leaves you running ragged.
And then something amazing happens to help it all fall into place.
That pretty much describes the ups and downs of our Master Bath Renovation.
And that also is a perfect picture of how this marble top washstand made my heart go all pitter patter.
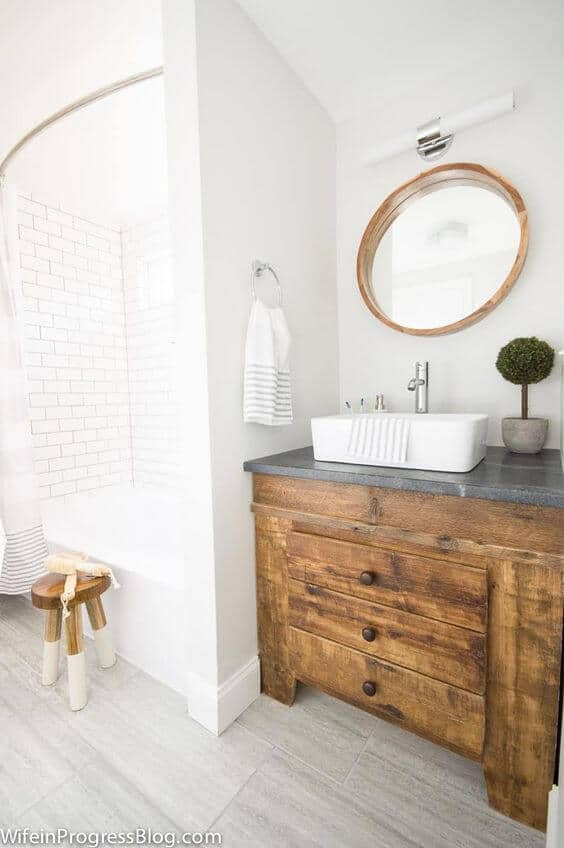
So when we started ripping our master bathroom down to the studs, we knew we had to keep the budget in mind. Our first idea was to build our own vanity, like this one from my friend Jenna.
First, I googled and sleuthed DIY vanity plans and found a few that we could try. After that, I ordered a laminate top from Home Depot to keep costs down. However, when it arrived, we realized we had some big problems.
Just like us, our house certainly isn’t perfect. The walls in our vanity area weren’t square.
At all.
In fact, it was more of a parallelogram, so finding a top for our vanity we hoped to build was suddenly becoming an impossibility.
Then I saw her.
The Inspiration Piece
She called out to me from the Facebook Marketplace, and I came and rescued her.
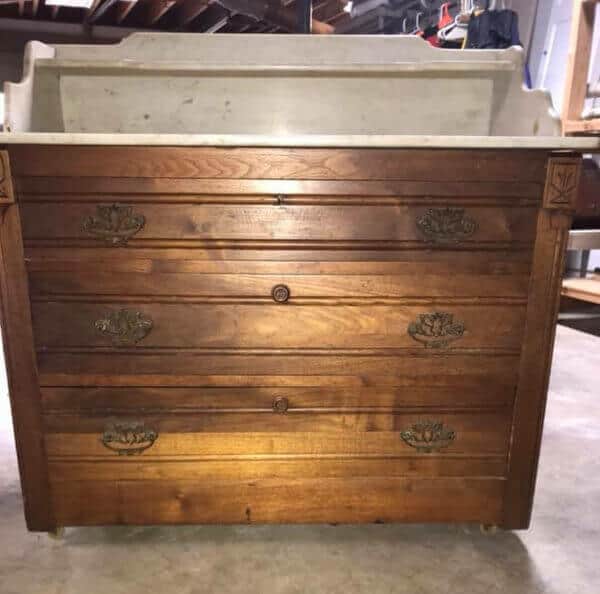
This vintage marble topped washstand stopped me in my scroll and took by breath away. I’m not sure of her exact age, but the little research I did puts this piece in the late 1800s.
She was moldy, chippy and stained and I loved every square inch of her.
Trent was not seeing the vision I had. He prefers the perfect and pristine, and I long for the things with marks, mars and blemishes.
Because they have a story to tell.
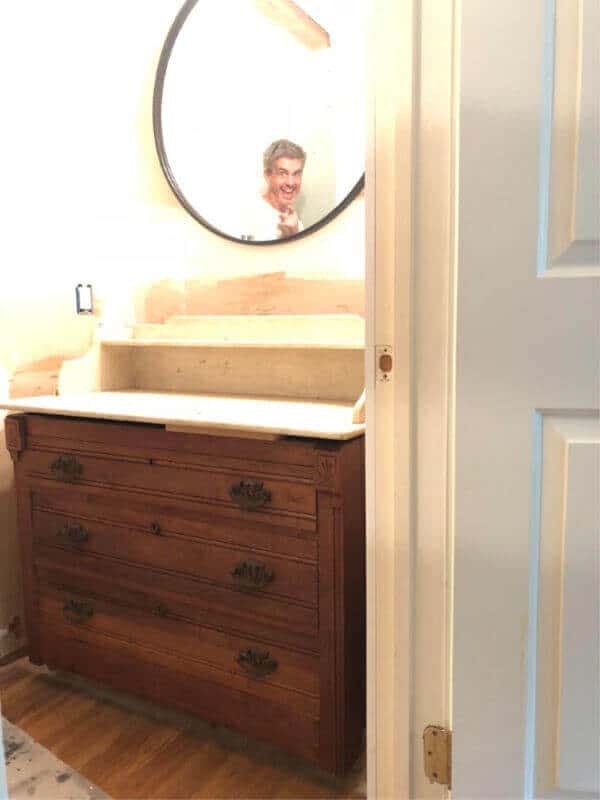
We loaded her into our junky van that’s perfect for hauling our vintage finds and brought the washstand inside to see how it would fit.
It was almost perfect!
The width and depth were spot on, but we would have to raise the height quite a bit.
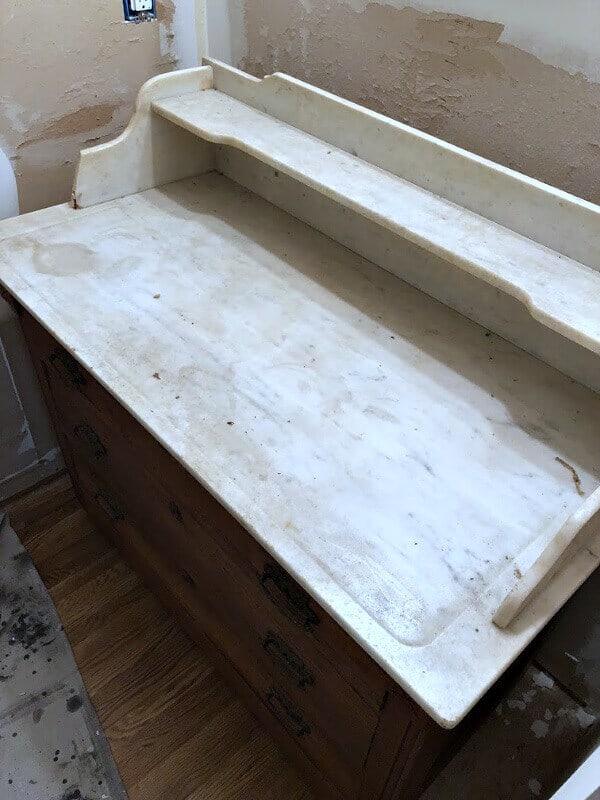
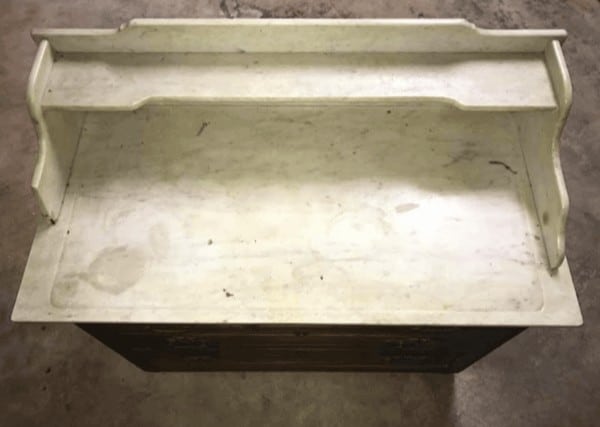
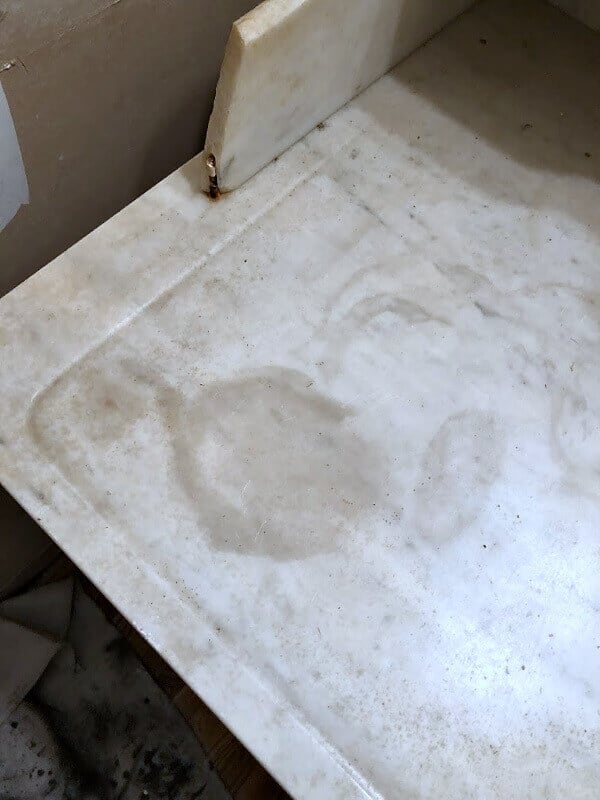
And the marble top was in need of repair. It had been a well used piece complete with stains.
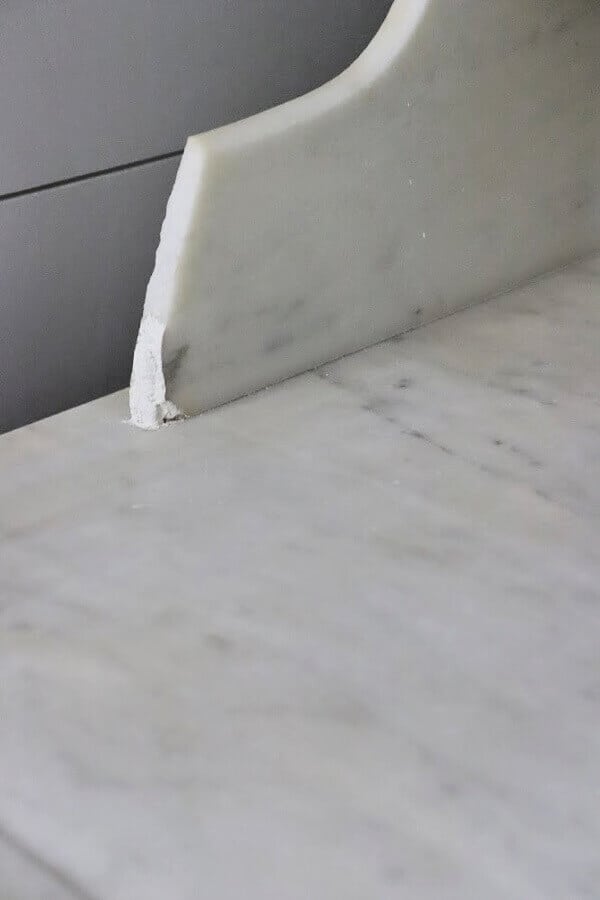
And that rusty screw popping out was what almost killed the deal for Trent. It had calcified to the marble after being originally built over 100 years ago. It wasn’t budging. So some creativity would be needed for this repair.
That gray stain took some elbow grease. It had etched the marble top and was pretty deep. Here’s how I cleaned it.
Removing Stains from Marble
I started with a light cleaning of vinegar. That removed the crud, but didn’t touch the stain.
I tried a trick I found online – using a magic eraser. That worked wonders on the small surface stains, but didn’t do much to the dark, etched stain.
Then I moved onto a mixture of bleach and water – just a teeny, tiny bit on that stain. That lightened it a hair.
But what finally worked was a mixture of baking soda and vinegar. I created a paste of baking soda and water and let that sit on the stain for 30 minutes and then rinsed it off with vinegar.
A few treatments of this finally made that stain disappear.
I finished it off with some marble polish and just look at it now!
Isn’t that amazing!?!
And I found a trick for that broken side. The rusty nail was hidden with a bit of caulk and some texture paint.
I used the caulk to prevent the rust from continuing to leak into the paint I was going to try.
Since I couldn’t fix the broken edge of marble, I tried my best to mimic the rough textured side. I used Fusion mineral paint and a product they sell called Fresco. It’s an aging powder that you add to their mineral paint that leaves a textured finish – perfect for a rough marble edge.
After the caulk had cured, I painted the caulk with an off white mineral paint and dabbed the edges using the Fresco.
So now for raising that washstand base.
After we ordered our sink and faucet from amazon, we brought them in to see the difference we would need in height which was about 6 inches. Using some 9 inch pine furniture legs , we found they were a perfect fit!
We needed to remove the wheels and placed these in the framing of the washstand’s base – which was about 3 inches deep. The legs attached simply using furniture leg brackets.
I stained them using Varathane Early American and it matched the original finish.
I was giddy with glee!
After that came the scary part.
Cutting the Marble Top
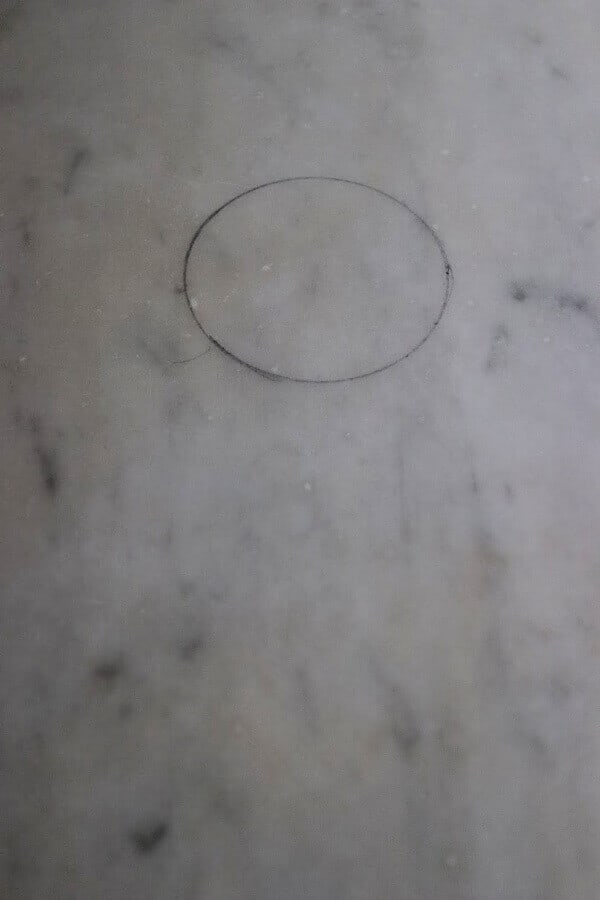
In order for the vessel sink and faucet to work, we would have to drill holes into that vintage marble.
This is where I am thankful for that busted side.
Of course, I think if the piece were in pristine condition, I would be hesitant to cut into the marble. It would lessen the value of the washstand. But since this piece was already beyond repair, it gave me peace of mind fine drilling the holes.
In order to drill through stone, you need to have diamond tip drill bits that attach to your drill. Measure to the size of your sink and faucet hole and get the appropriate bits. Ours were 2 inches for the sink and 1 1/4 for the faucet.
Mark where you will drill and then begin.
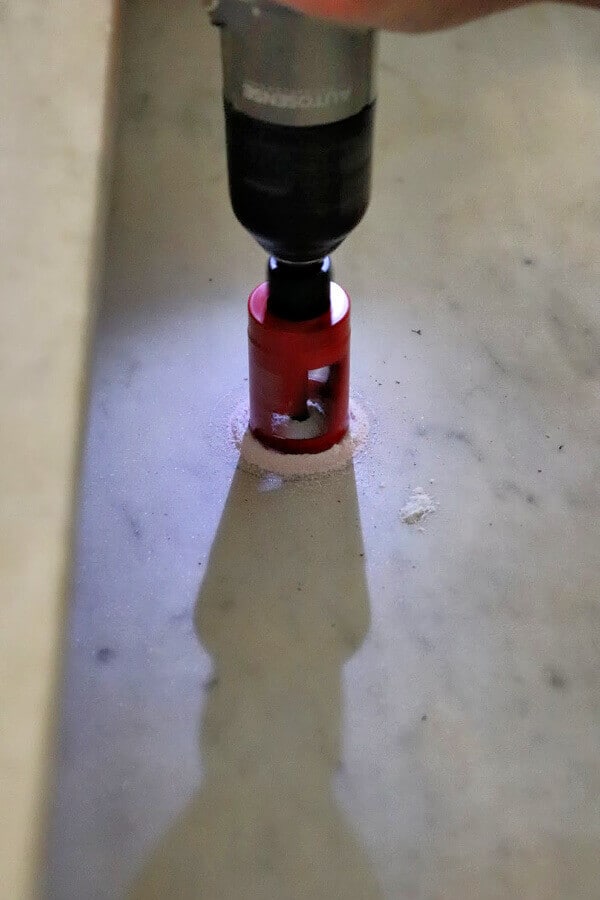
If you are anything like us – be sure to breathe.
We noticed we were holding our breath during that first cut. Have a bottle of water on hand to wet the area occasionally to aid in drilling.
The initial drilling takes a minute to bite, but once it gets started, the cut goes fast. Now we were ready to get the plumbing hooked up!
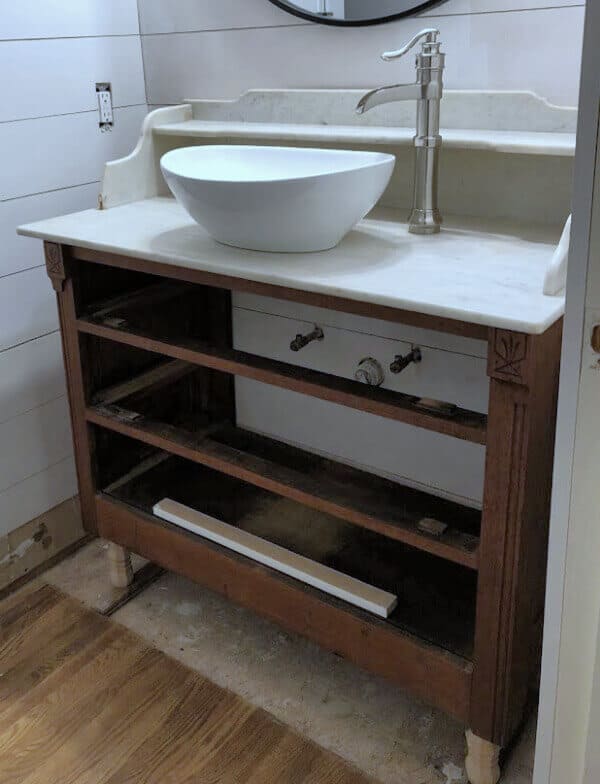
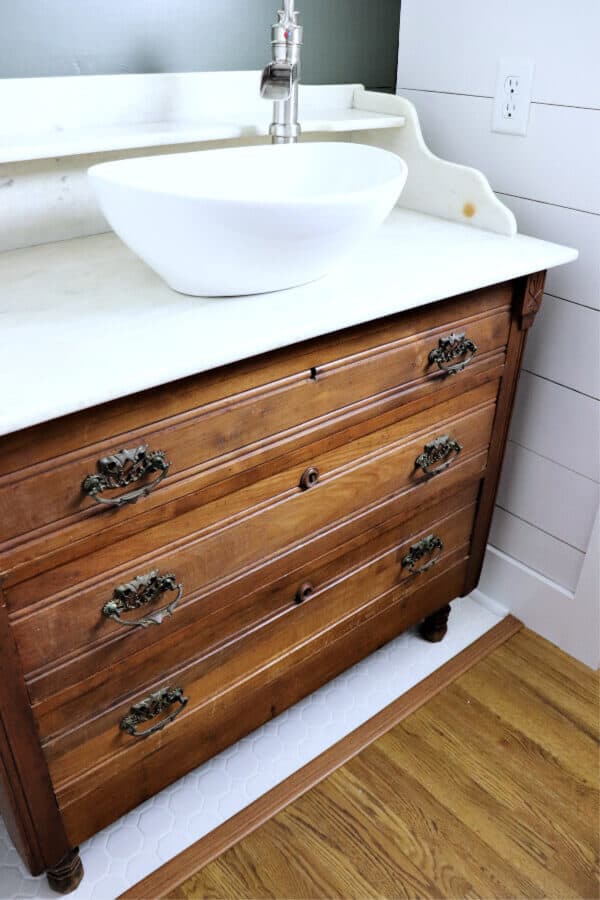
The vessel sink sat on top of the marble along with the faucet. We did add some silicone around the faucet base because it was a bit wobbly.
To our surprise, our plumber fit the sink and faucet for us, but there are many tutorials online on how to plumb these areas – which we were originally planning on doing ourselves.
This Vintage Washstand turned Bathroom Vanity was coming along!
Fitting the Drawers
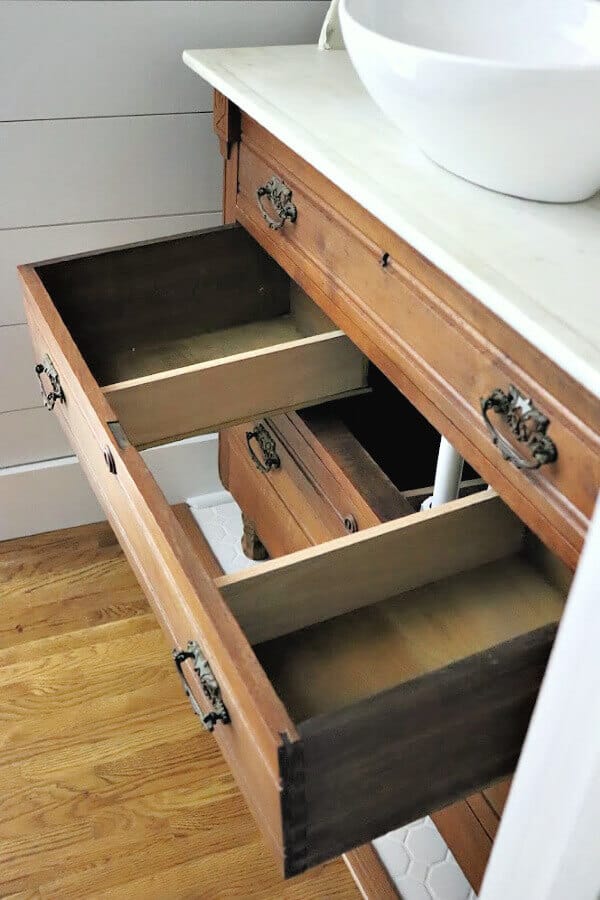
Next, we had to adjust the drawers to accommodate for the pipes.
I purchased some 4 inch wide oak strips to use as the new drawer dividers.
After marking where the plumbing was, I cut out the drawers using a jigsaw, and installed the oak strips with our pneumatic nail gun.
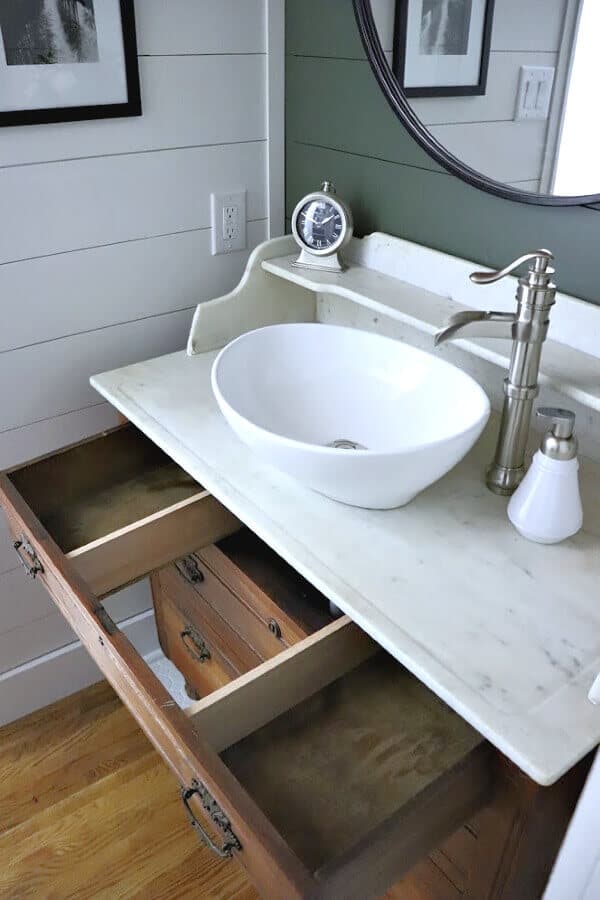
Since we raised the washstand basin, we had to alter all three drawers. And it was an easy fix.
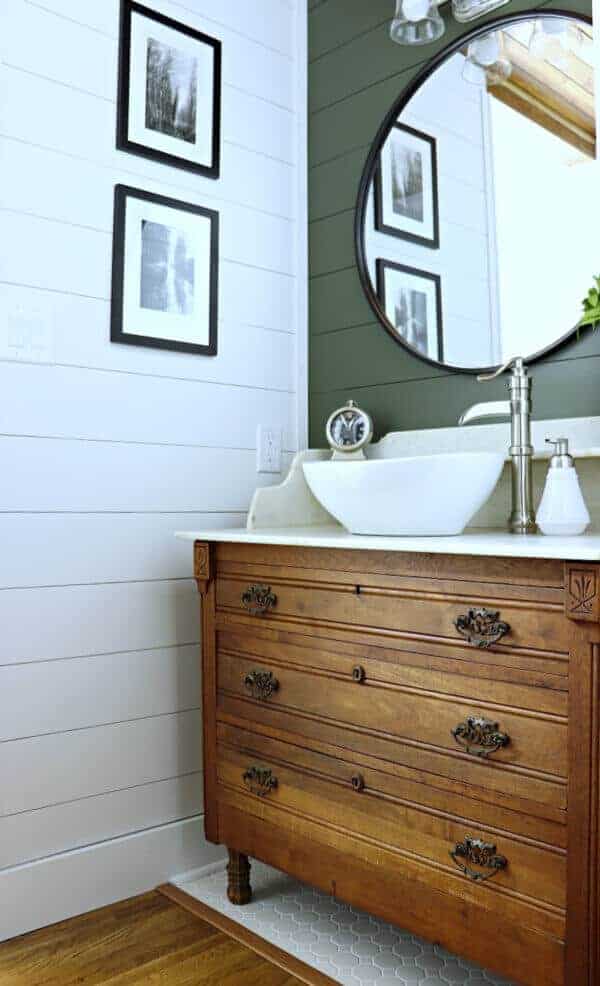
Now we have a his and hers side!
Look at those wooden keyhole covers!
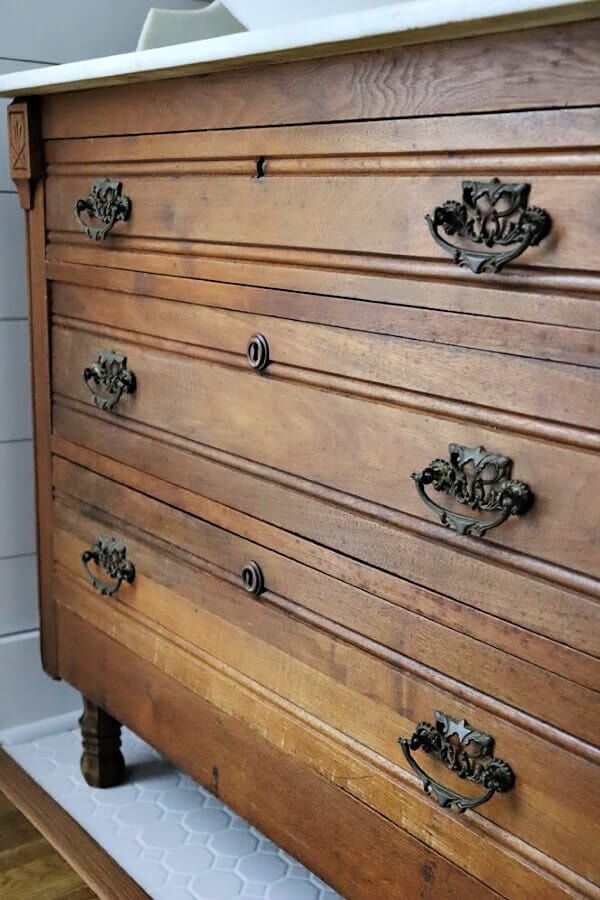
I didn’t touch the wood base or the hardware. When we brought her home, we noticed some mold and mildew from sitting in a basement.
Wearing a mask, I wiped the washstand down and set her in the sun to dry.
Once dry and mold free – I used furniture polish to give her a shine.
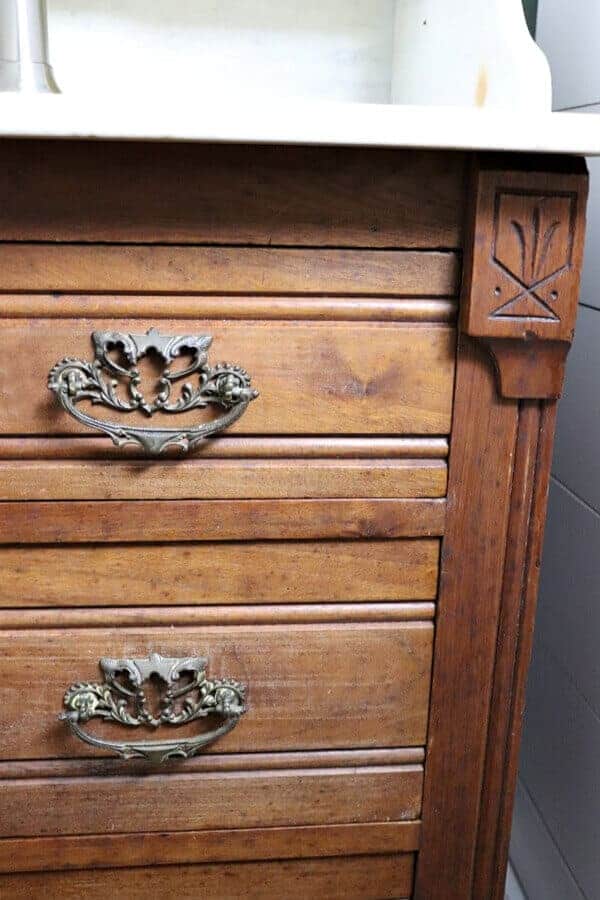
The brass drawer pulls were perfectly aged with hints of green patina here and there.
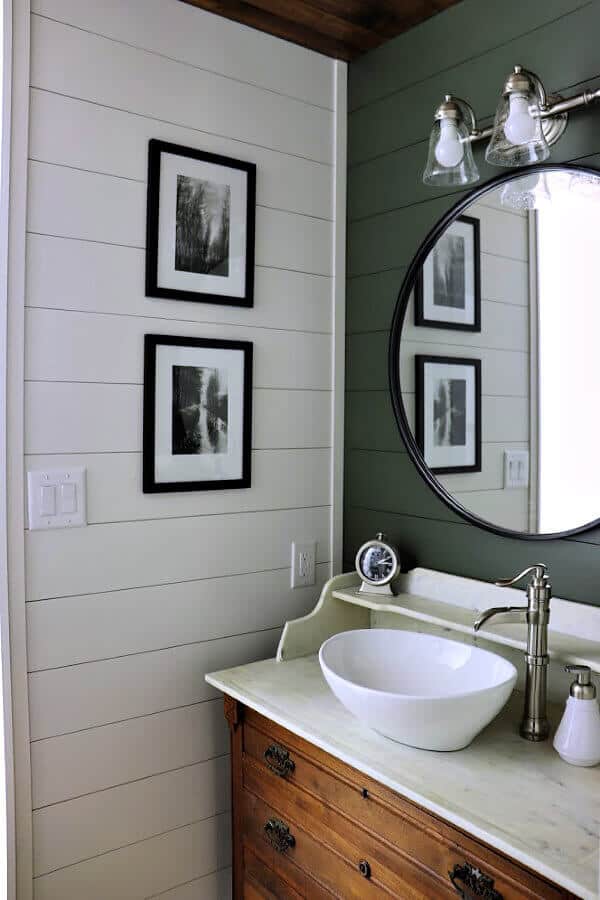
Vintage Washstand turned Bathroom Vanity Reveal
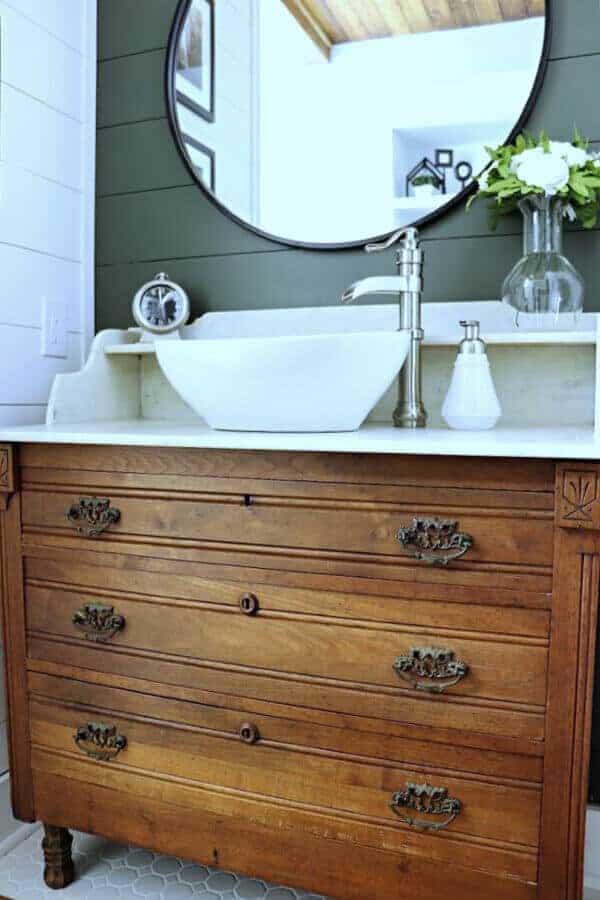
What a perfect fit for our Master Bathroom Makeover.
Above all, I think this washstand is the star of the show, don’t you?
No more stains, no more mold.
And that mix of modern and vintage revive this piece into one I will treasure for years to come.

This Vintage washstand turned bathroom vanity was a pleasant surprise for both me and Trent.
However, we never dreamed this piece would be the thing we loved.
Well, I did – but I knew Trent was on the fence. But that’s now changed!
And do you know what I love most of all?
That we took a chance. We did something daring and tried a DIY we never had before.
Even though it was scary and exhilarating, most of all, it’s a DIY we are immensely proud of!
So, what’s the lesson we learned here? Think outside the box.
If you find yourself needing a creative solution for a project you are working on – don’t be afraid to try something new! The worst that can happen is that it doesn’t work out. But what if it does?
You just may surprise yourself and find the star of your show!
Be sure to check out the rest of our Master Bathroom Reveal to see all the details of this renovation.
Vintage Washstand turned Bathroom Vanity Sources
(affiliate links are provided for your convenience)
Vintage Washstand – $150 on Facebook Marketplace
Vessel Sink – $60 from Amazon
Waterfall faucet – $63 from Amazon
Pop up drain stopper – $30 from Home Depot
Black Round Mirror – $120 at half off from Hobby Lobby
Glass globes for the existing light fixture – $17 from Home Depot
Light Fixture – Original to the house – similar one here
White Soap Dispenser – $13 from Walmart
From my Home:
Artificial Flower Arrangement – similar one can be found here.
Clock – similar one found here.
Wall Art – similar pieces found here.
Wall Paint – We used 2 colors from my Color Capsule Collection with Romabio Paints. The green is called Magnolia Leaf and the White is called Grace Note.
Pin this for later!
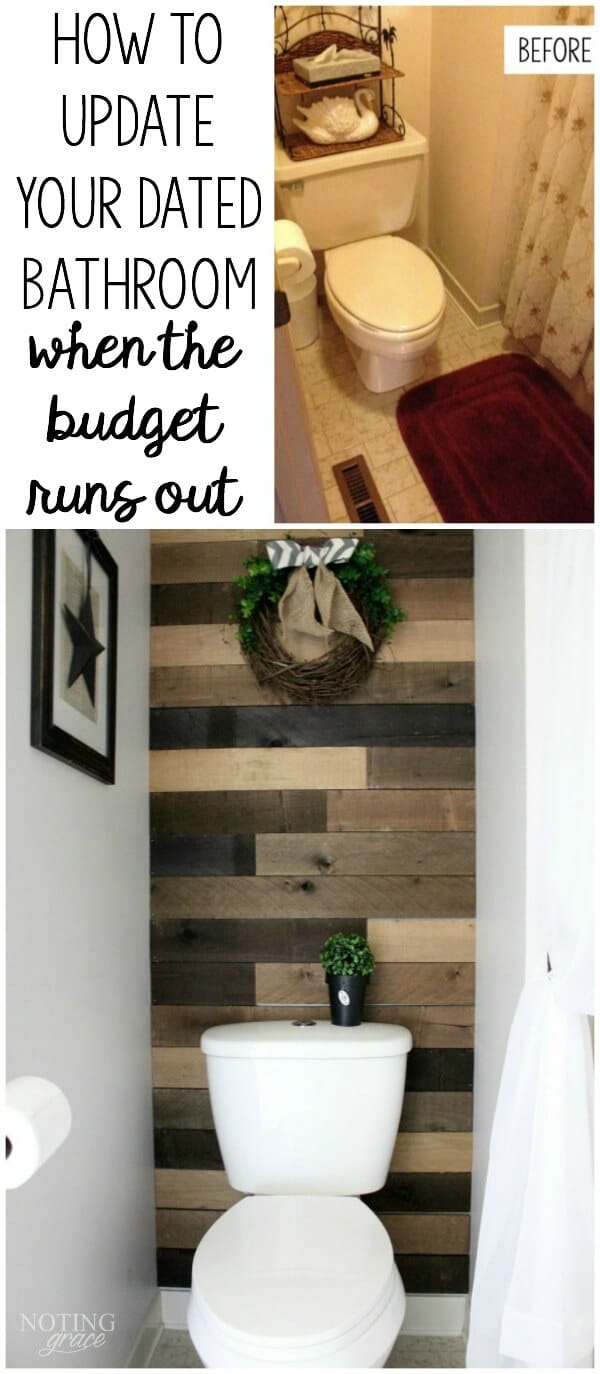
You may also like:

Farmhouse Powder Room Makeover


Hey Tanya – what a great question! From the floor to the top of our vanity – it’s 32 inches. With the vessel sink, it’s 38″, but that’s typical with a raised vessel sink being taller than the counter. I hope that helps!
Great makeover! I have a cabinet designated for a vanity makeover but am concerned it’s too tall. How tall is your cabinet from floor to top of sink?
Thanks for sharing your process!
Thank you Ivory!! Have a blessed day!
OMG, this bathroom took my breath away. You did a fabulous job. I love everything! I wish this was my bathroom