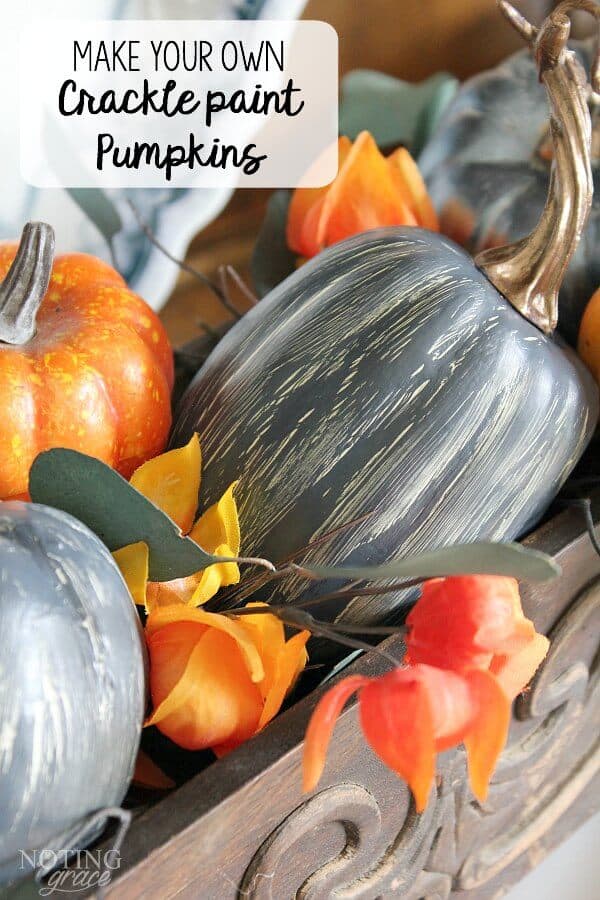
Crackle Painted Pumpkins
Looking to customize your fall decor to match your home? How to make your own crackle painted pumpkins to match your decor colors!
This morning, there was just the right amount of nip in the air that inspired me. Bring out all the Fall decor!!
Cozy sweaters, apple cider, burlap garland and pumpkins. I pulled out my decor and realized that it wasn’t going to work.
My DIY pumpkins from last year didn’t quite fit the colors of this year’s decor.
Since the budget is alway on my mind, I found a way to change my fall decor without buying tons of new items!
Here’s how I took a short afternoon, those old pumpkins and created Crackle Painted Pumpkins that match my decor!

Crackle Painted Pumpkins Supply List
Affiliate links are provided for your convenience. Read my full disclosure here.
- Plastic Pumpkin like these – I got mine from Hobby Lobby.
- Painters tape
- White School Glue
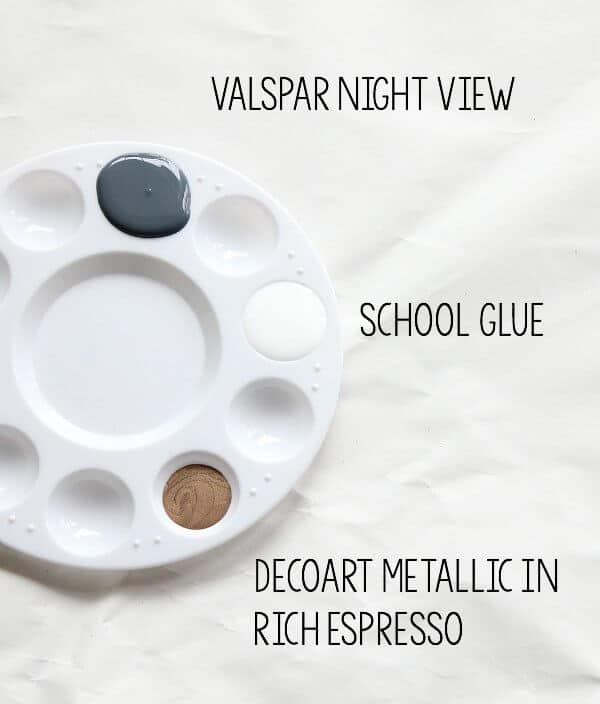
- Color Paint – I used Valspar Night View from a sample tin I had.
- Metallic Paint – I used DecoArt Rich Espresso
- Foam Brushes and Detailed Paint Brush
First, you tape off the pumpkin stem and then liberally apply the white school glue. I chose a pumpkin with a floral stem so I could handle it from either the floral stem or the pumpkin stem.
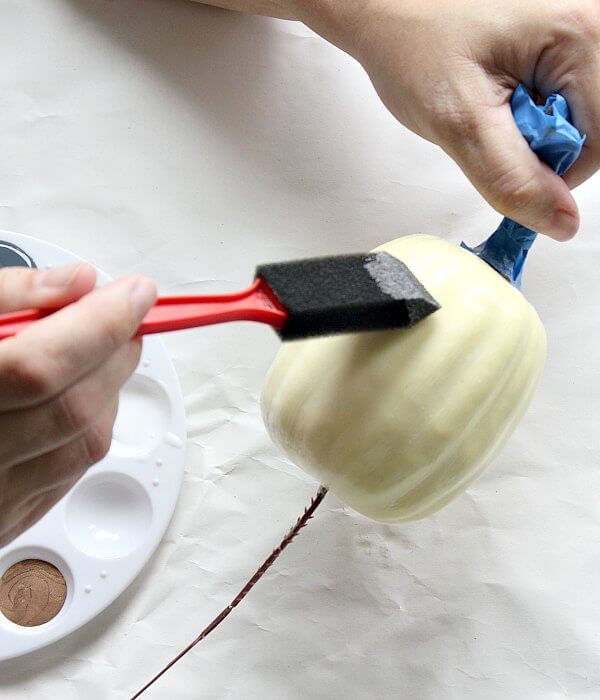
Allow the glue to try until it’s just tacky to the touch.
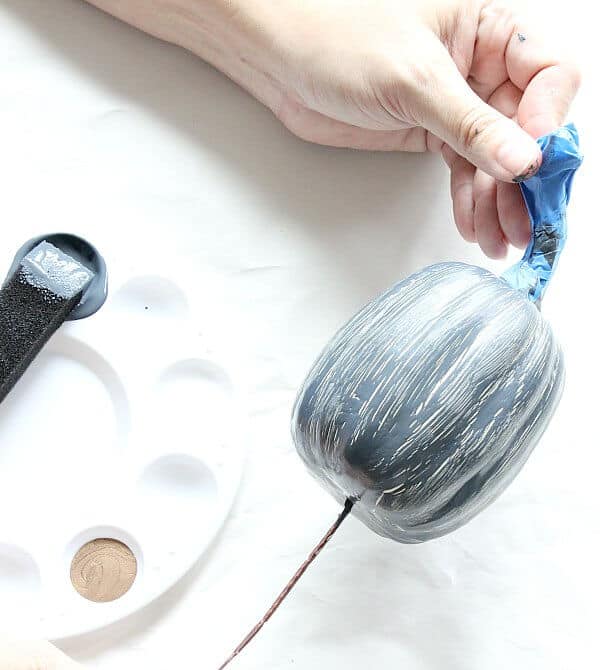
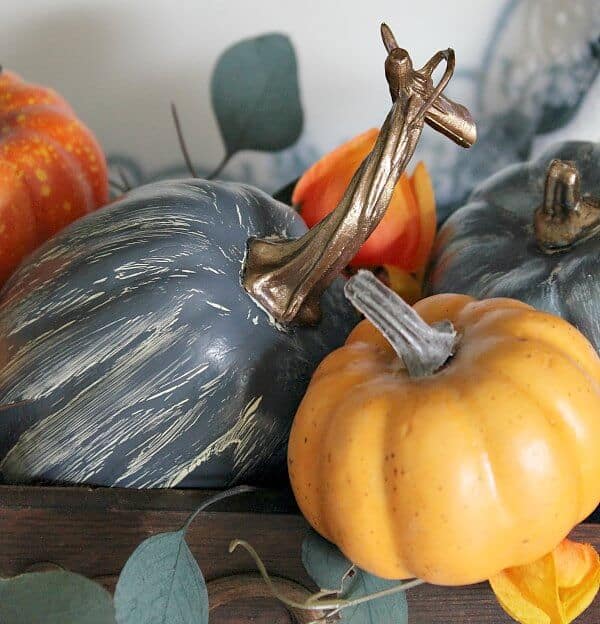
Next you paint the pumpkin in the color of your choice. I loved the smoky navy color from Valspar.
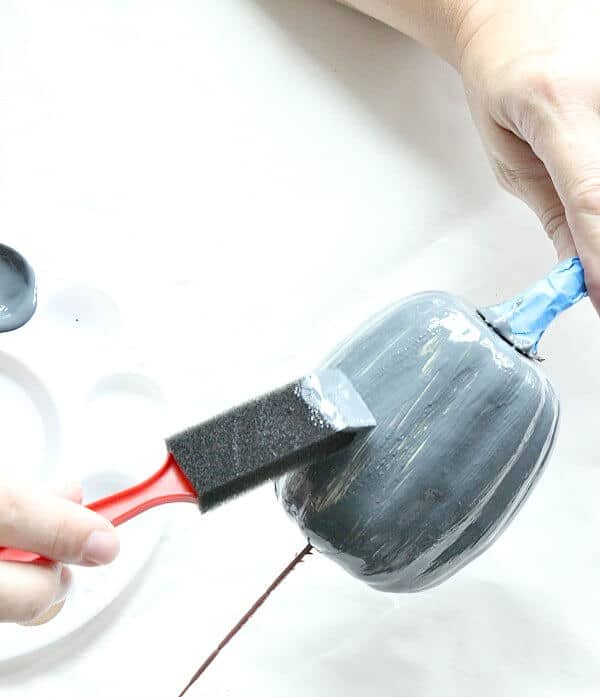
Unless you have oodles of time to hold it and allow it to air dry, I suggest using a hairdryer to speed things up a bit.
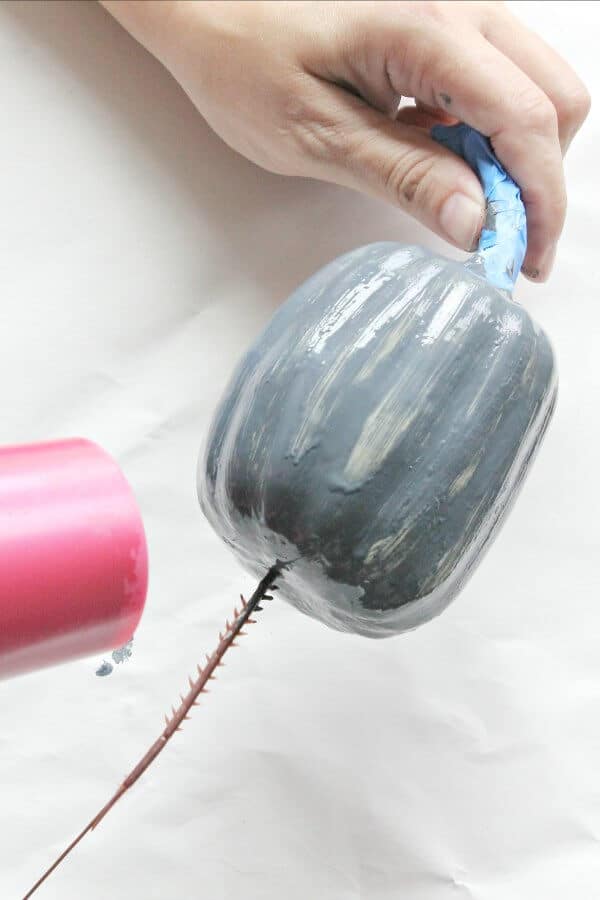
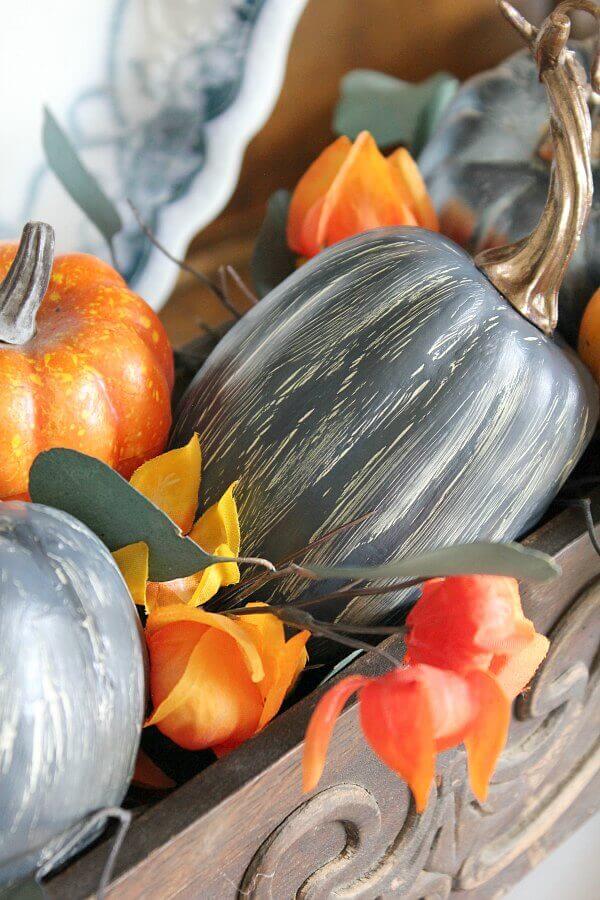
It was fascinating to watch the crackle form before your eyes! It comes out to a neat, crackle painted pumpkin!
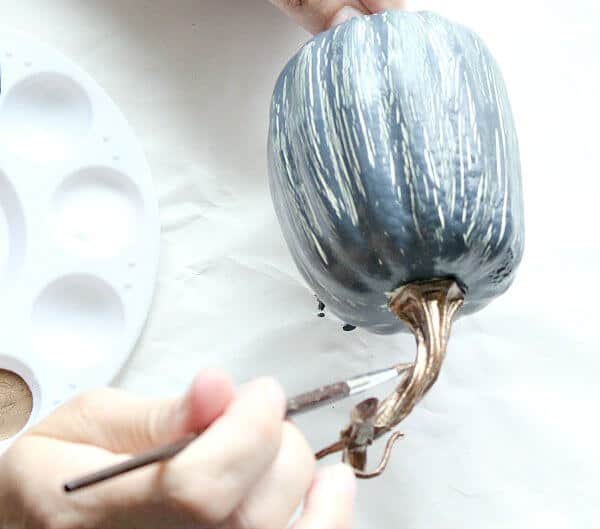
Lastly, you remove the tape from the stem and paint it with metallic paint. Since the rich espresso has a nice copper hue, I thought it would compliment the navy-ish color nicely.
Finally you style it how you like. I found this old wooden sewing drawer at a garage sale that works great as a planter. You can find a similar one here.
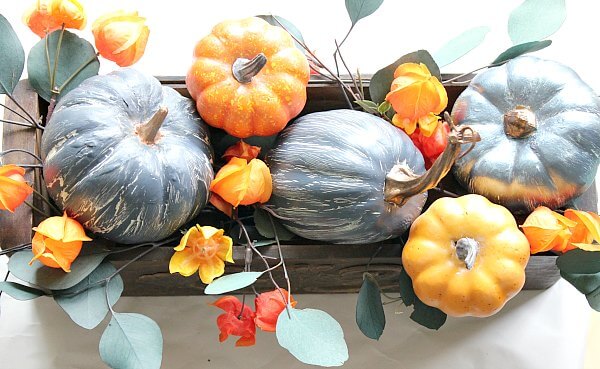
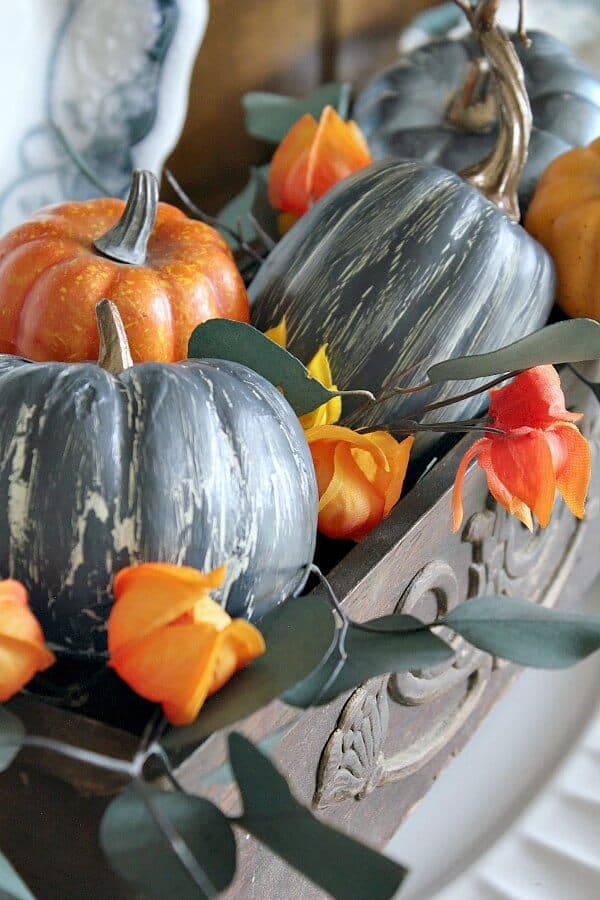
I paired my Crackle Painted Pumpkins with some mini pumpkins, dried eucalyptus and artificial orange lantern bush I found at Hobby Lobby.

I hope you enjoyed this tutorial. Of course, feel free to share the video below!
Have fun with this easy DIY! Happy Fallifying, friends!


Thank you so much for sharing my Crackle Pumpkin DIY!
I’m so honored the you stopped by and that you took the time to comment! Thank you so much and send me pics if you try it!
Hi Jennifer.
Found you on Brag About It and I’m lovin’ the smoky grey color. The crackle is perfect and I always use a crackle medium. Feeling like I need to try some white glue.
Thank you so much! I’m so glad you like them!
Wow… these painted pumpkins look cute. You did a great job. Thanks for sharing.
Thanks so much Hayden! It was a fun and easy DIY! I appreciate you stopping by and commenting!
Jen, these pumpkins are gorgeous! I love the color and the technique you chose. Such a pretty fall vignette!
Thanks so much Sandra! I always love linking up!
The pumpkins look like you paid a pretty penny for them, great project! It’s nice to be able to refresh rather than repurchase. Thank you for sharing with us this week at Celebrate Your Story and we hope you will join us again next week.