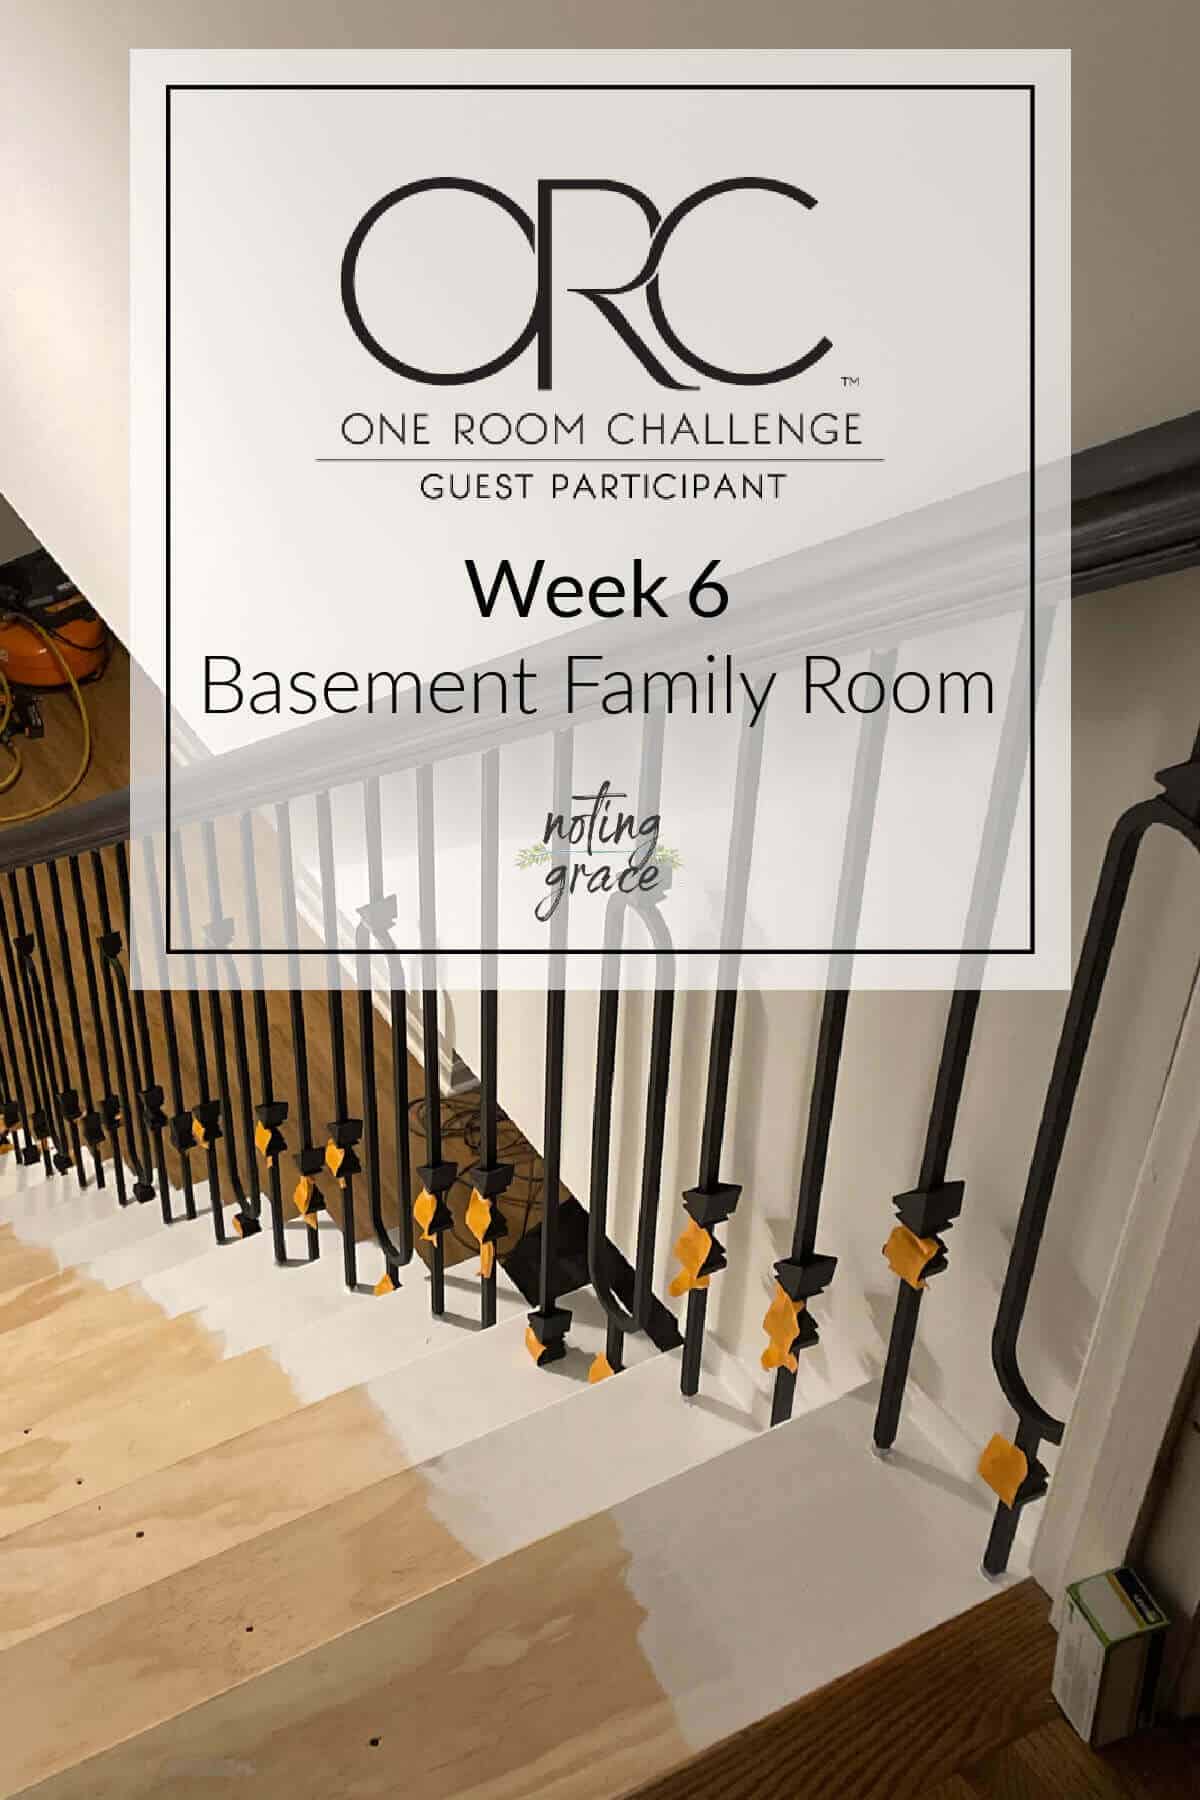
Basement DIY Remodel Progress and How to Install Iron balusters
These stairs are slowly getting finished and I can finally see this room coming together! Here is our Basement DIY remodel progress as well as how to install iron balusters.
Are man caves still a thing?
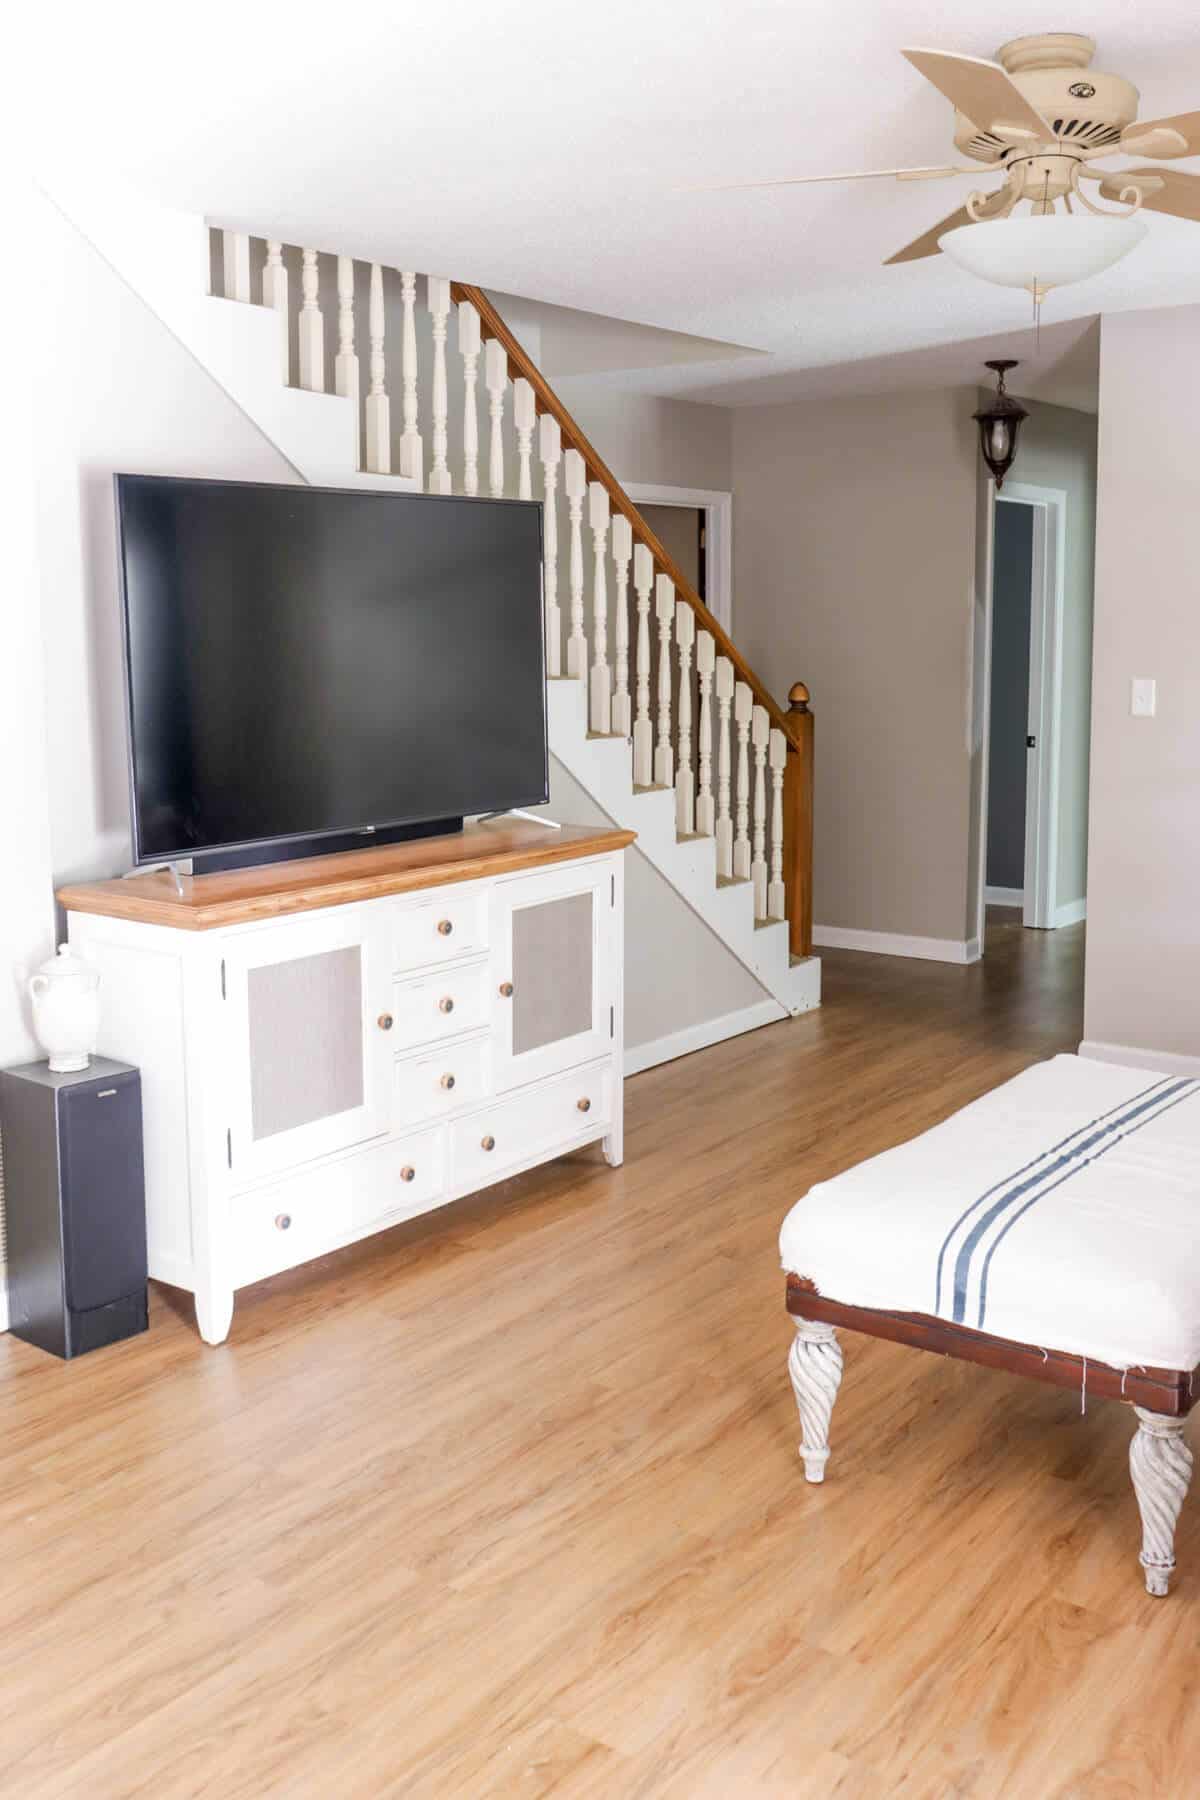
I’m not completely sure, but this basement DIY remodel definitely is getting some of those vibes.
Our family room is right next to our music studio connected by a wall with a huge glass door.
So that means, you can see into the studio at all times.
Since these rooms are so close together, I wanted there to be a slight nod to the music room without being all treble clefs and piano keys with rose petals on them.
BTW – so 90s and not cool.
This is also our home theater, so the industrial look to our light fixtures work well for this room.
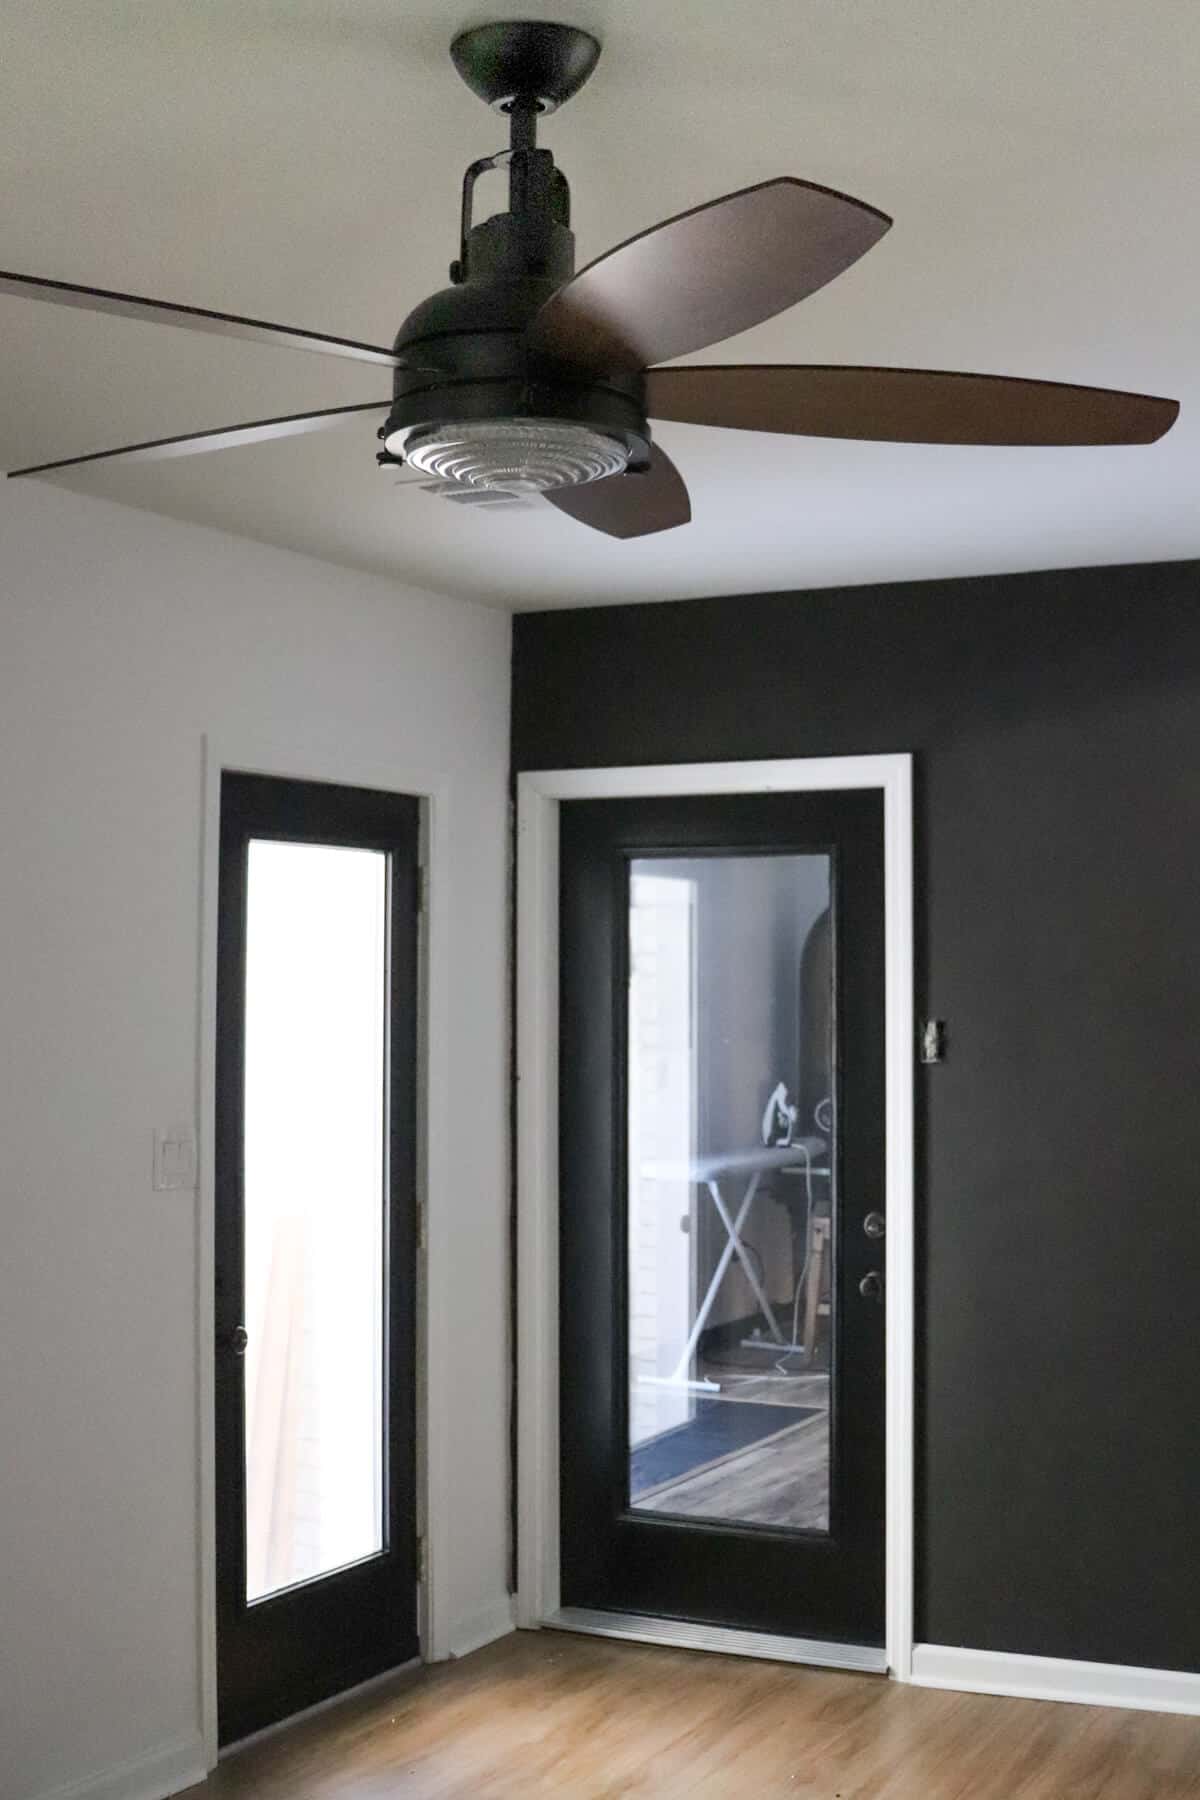
The square footage of this room is there but it’s not a large area. Plus, the orientation is tricky since it’s a long and narrow family room.
So how do you fit everything in place?
It took a lot of figuring and measuring – especially with a new sectional being placed.
We wanted it to feel comfy and cozy, but also have extra space for breathing room.
We finally got the ottoman recovered and it turned out just like I wanted.
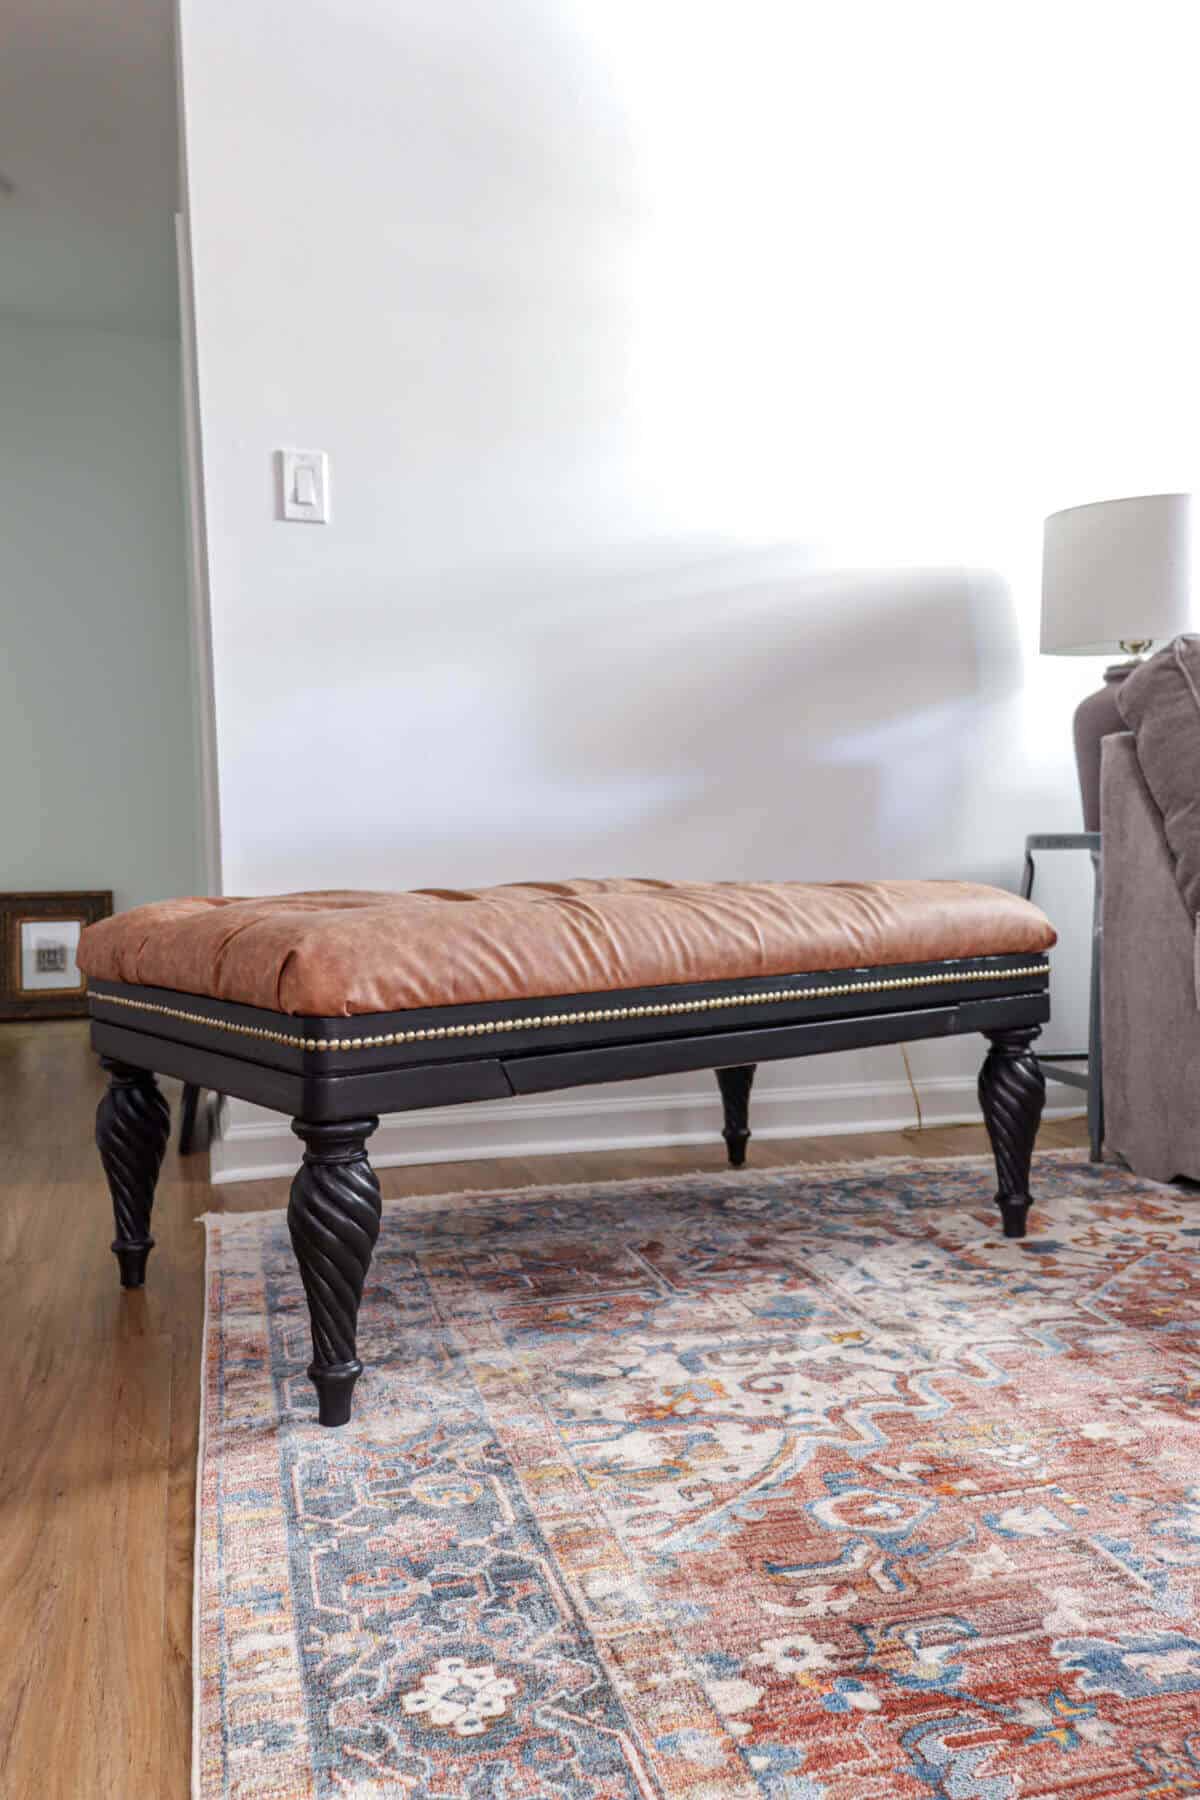
You can read the post with the full tutorial if you want to give this DIY a try.
How to Install Iron Balusters
(Some affiliate links are provided below. Full disclosure here.)
I gave a sneak peak last week of the iron balusters being installed.
And I LOVE how they look.
When we first starting pricing iron balusters, we had a bit of sticker shock.
They are expensive, y’all.
How much does it cost to replace balusters with iron?
The first few places I checked, I saw that we may not be able to replace our ugly wooden balusters simple for the cost alone.
An important factor for us is always affordability.
One website showed a cost of over $400 for the entire run!
Then I decided to check Etsy.
There is a shop called Bulldog Stairs that sold the balusters and shoes for super cheap! We got all the balusters, including the fancy oval ones, and the shoes for around $200.
They even sent me a follow up message to ensure that everything arrived okay.
It’s always a good option to shop around to get a great price.
How do you install iron balusters?
Tools you’ll need:
- Drill and drill bits – you can either use a forsner bit or a spade bit a little larger than the width of your baluster
- Level – I love this little magnetic one!
- Pencil
- Tape measure
- Metal cutter – can either be a mitre saw with a metal blade or a dremel ultrasaw like we used
- Heavy Duty Glue Gun – we just purchased this one and love it!
First start by removing the old wooden balusters.
Trent had fun doing that a few weeks ago.
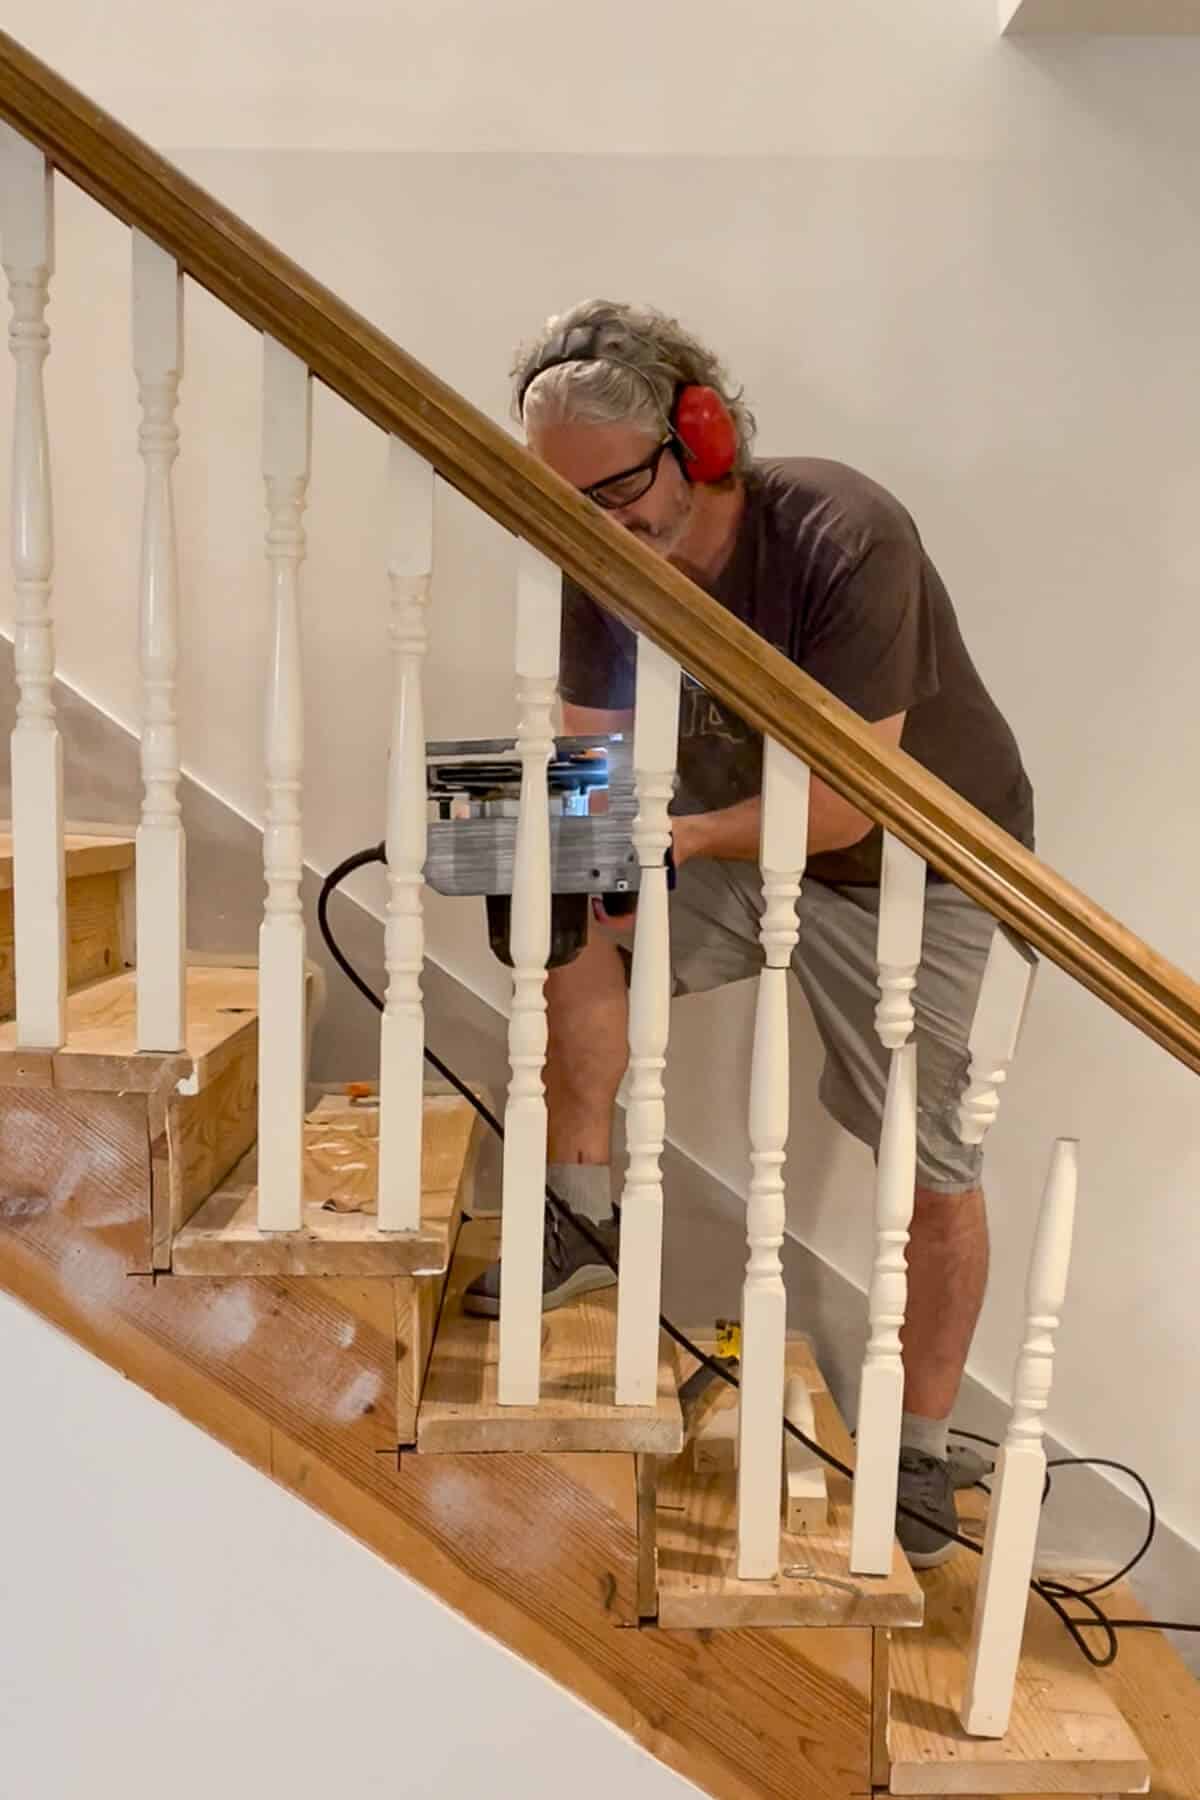
He took our circular saw and zipped right through them in about 45 seconds! You could also use a reciprocating saw.
It was so good to see those original wood balusters gone!
We went ahead and put a first coat of paint on our handrail since we knew we were painting that.
Installing iron balusters can be a tricky process, especially if you are dealing with wonky stairs like ours.
Nothing in our 35 year old home is square and level – and that goes for the stair treads and risers. It’s common in older homes as local building codes improve year after year.
Our measurements varied by 1/4 inch each step, so we finally let go of the perfection we were trying to reach and opted for an even measurement between each baluster.
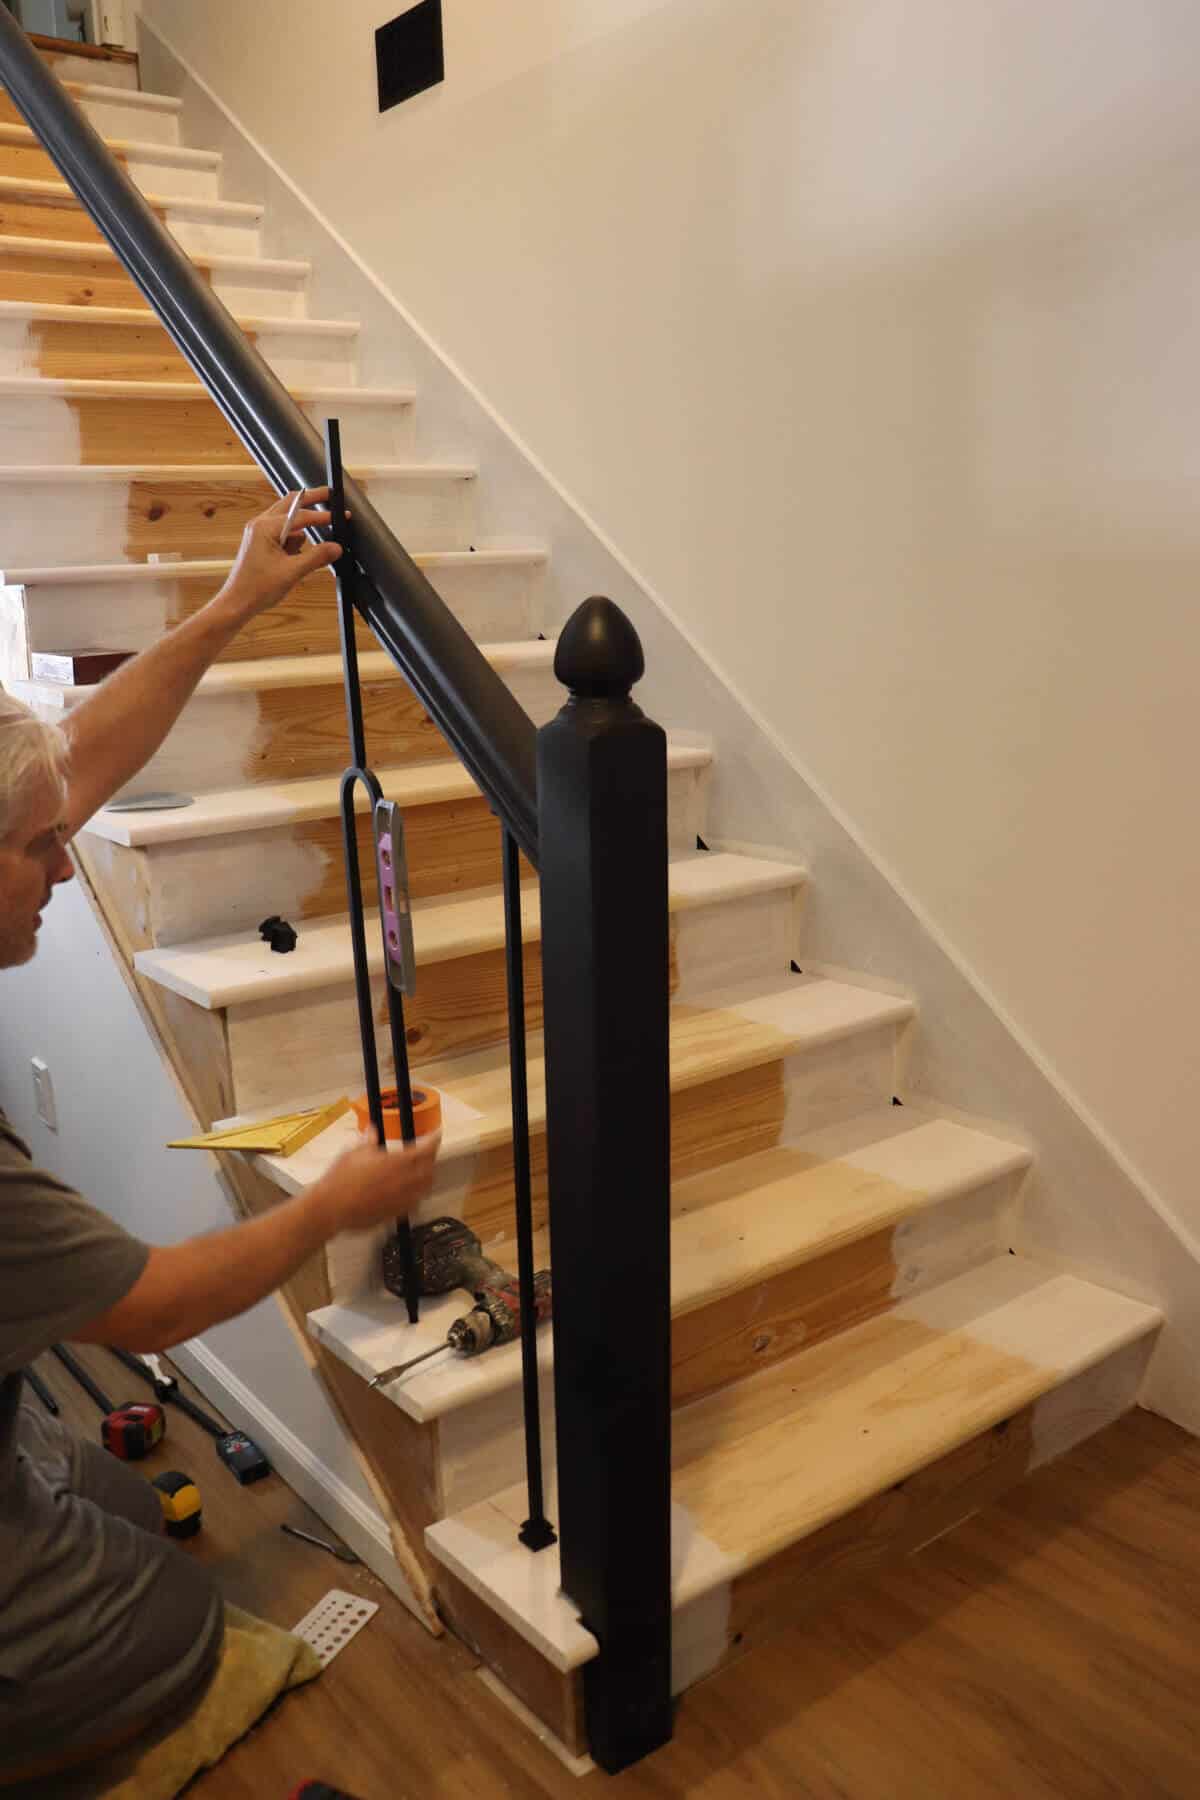
We started by making marks on the stair as well as the bottom of the handrail once we knew the baluster was level.
Once we had the measurements, Trent drilled a round hole into the stair tread followed by another hole in the banister. Make sure to measure your balusters to know which drill bit to use in order to make an appropriate size hole.
The top hole needs to be a bit deeper than the bottom hole. That makes it easy to fit the baluster in place by pushing it up further into the banister and then allowing it to drop into the stair tread.
Here’s a helpful tip:
Once you know the depth of the hole you are making, put a piece of masking tape around the drill bit to help guide you to how deep you should go. When the tape hits the tread or banister, you’ve gone deep enough.
And when drilling, it’s best to start with the minimum depth needed for your holes. You can always go back and drill a bit more.
Next he took the tape measure and checked again before cutting the baluster.
It’s always a good idea to measure twice, cut once!
The baluster length will vary with each home, so for the best results, take precise measurements for your home.
Trent went outside and used our dremel ultrasaw to make the cut baluster. Just make sure you use a metal blade to make your cuts. Our balusters were hollow so the cut was easy.
If you are using metal shoes around the iron spindles, make sure you have those on the baluster before setting it in place.
Even though we went deep up into the handrail hole, it still took some muscle to get those in place without scratching the tread surface with the bottom portion of the
There is a repeating pattern of 3 straight spindles and then 1 oval baluster.
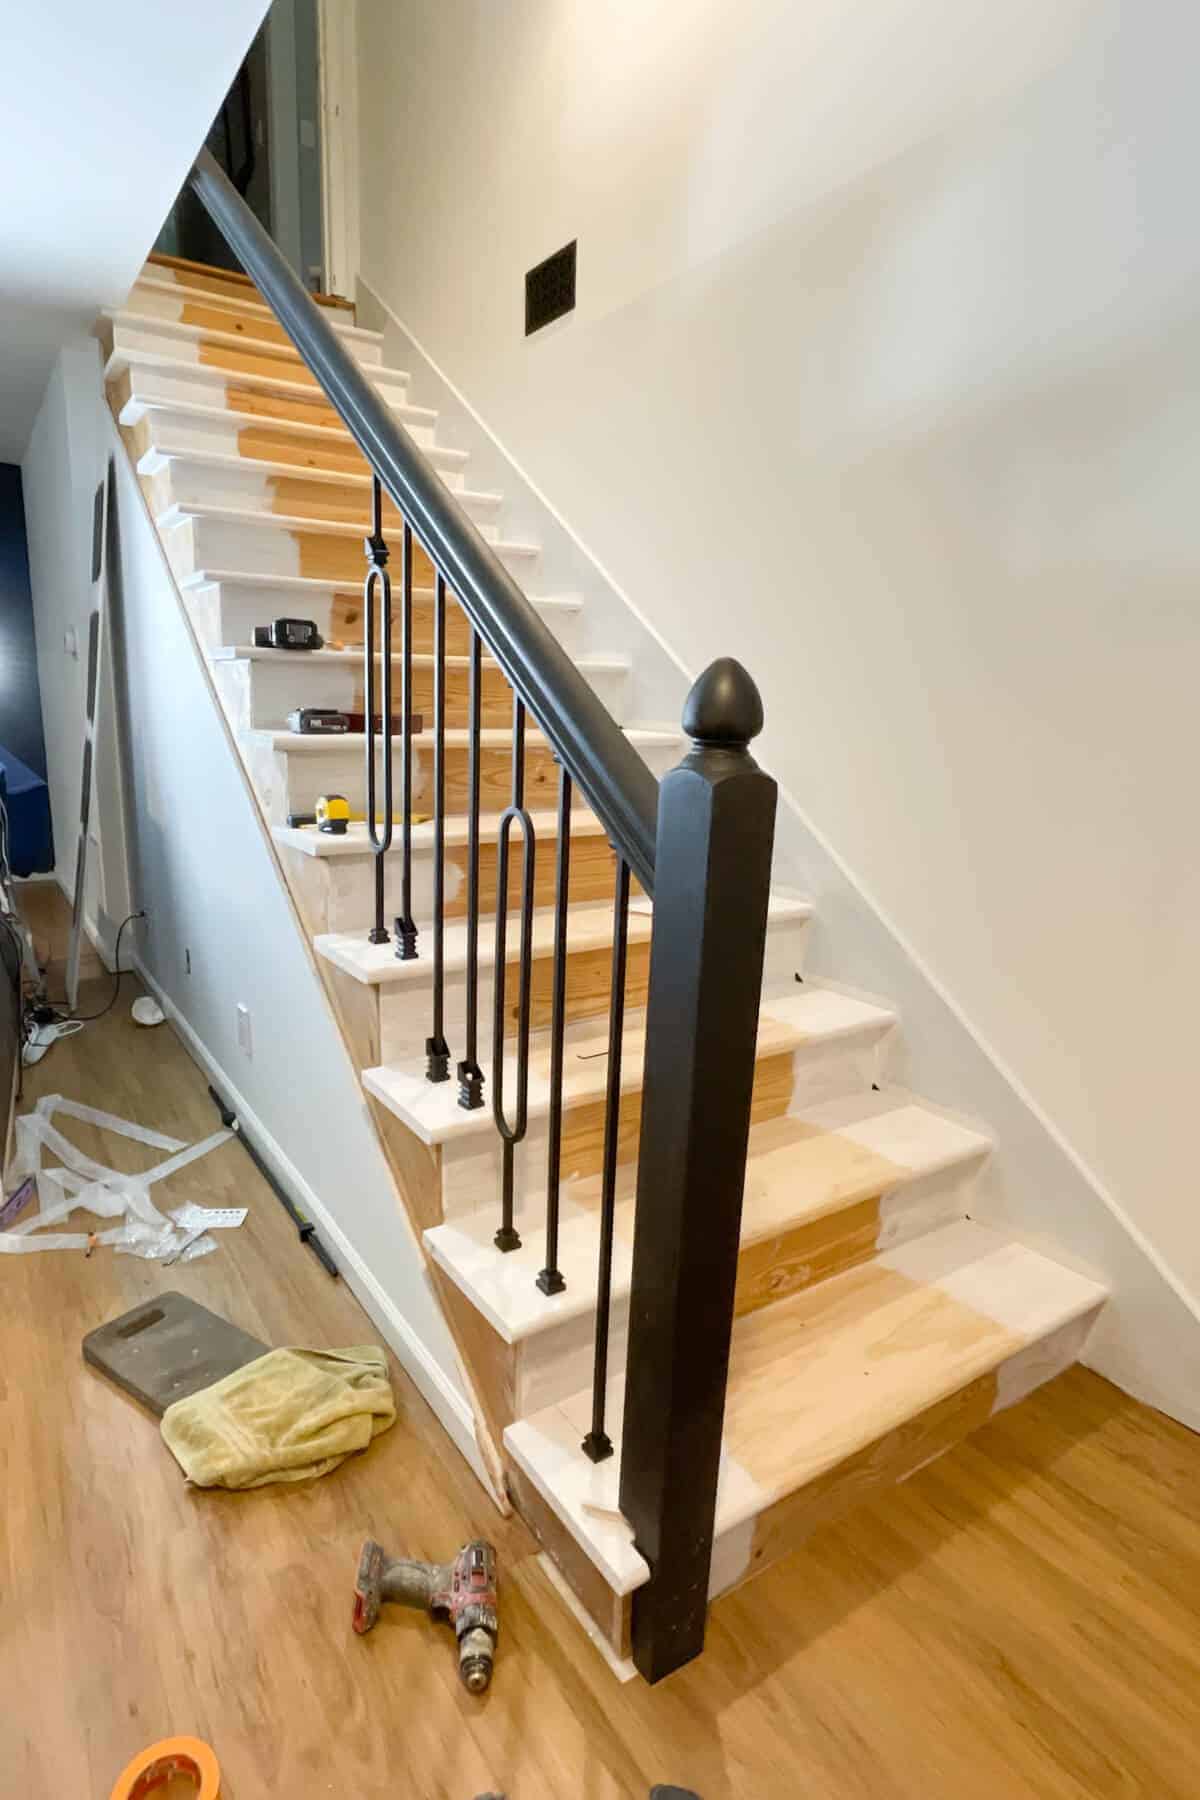
We continued with the iron baluster installation up the stairway until we reached the end of the rail.
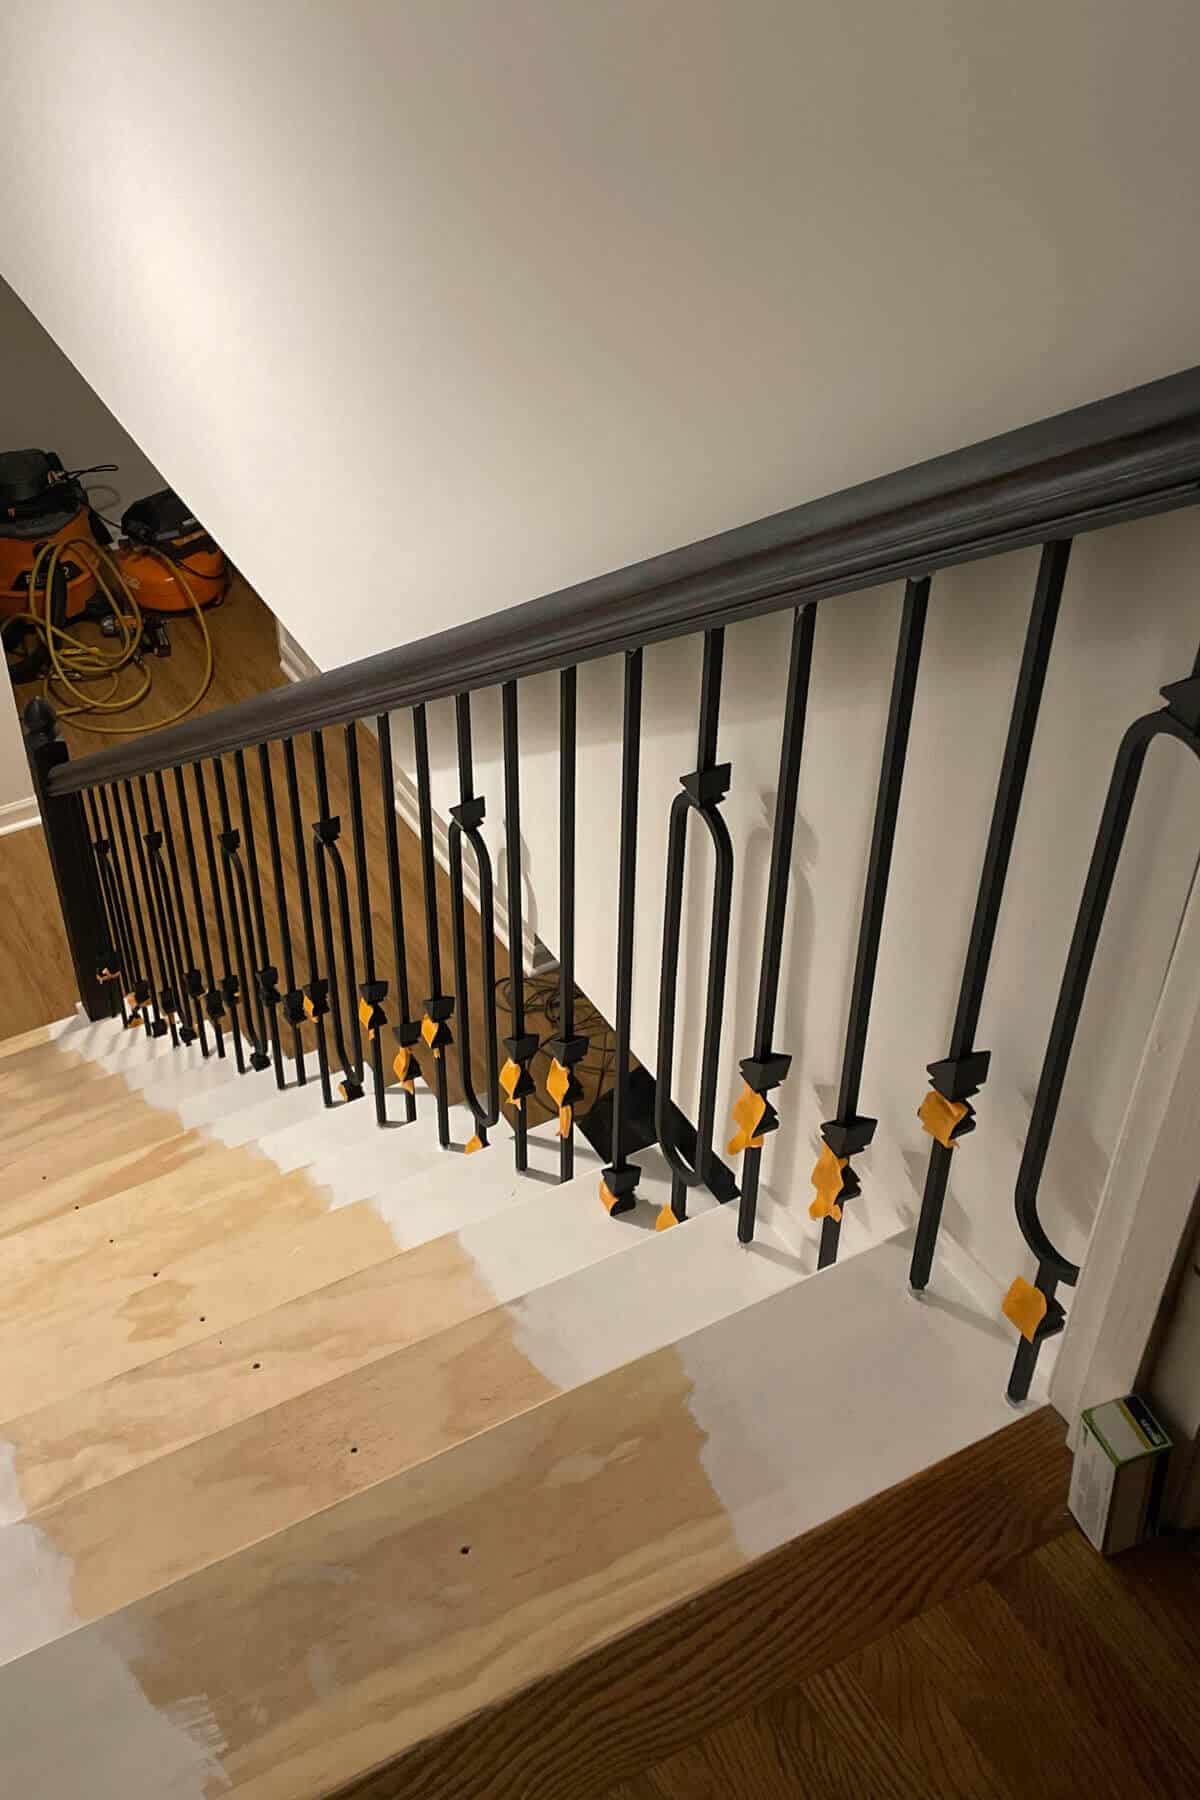
The baluster shoes are in place, but are taped up so we have room to paint without getting any on them.
One we had all the new iron balusters in place, we came back with heavy duty hot glue and glued the holes at the top of the baluster as well as the bottom of the baluster to make sure they stayed put.
Some tutorials recommend using epoxy glue or polyurethane adhesive, but I worried about it being permanent in case we ever needed to replace them.
Once we complete painting the stair treads, then we will place the baluster shoes where they need to be using the set screw it came with with an allen wrench.
How to install iron balusters without shoes?
If you are wanting a clean look without using a metal baluster shoe, then you will have to drill a square hole using a mortising bit – which is a special wood working tool that drills square holes.
Square balusters are the most common of the metal balusters and you will have to pay close attention in order to get a clean look.
So next week, it’s all about painting these steps and FINALLY getting the runner installed.
Plans for Next Week
Here are my goals for Week 7:
- Paint the entertainment center
- Finish painting the stairs
- Finally install the carpet runner
- Start putting the room together
Be sure not to miss this season’s Featured Designers and the Guest Participants links at the One Room Challenge weblink up! As always, special thanks to the One Room Challenge media Sponsor, Better Homes and Garden and to Linda – owner and creator of the One Room Challenge.

Home Pop || HANDy Products || Urban Ambiance || Affordable Blinds || Romabio Paints