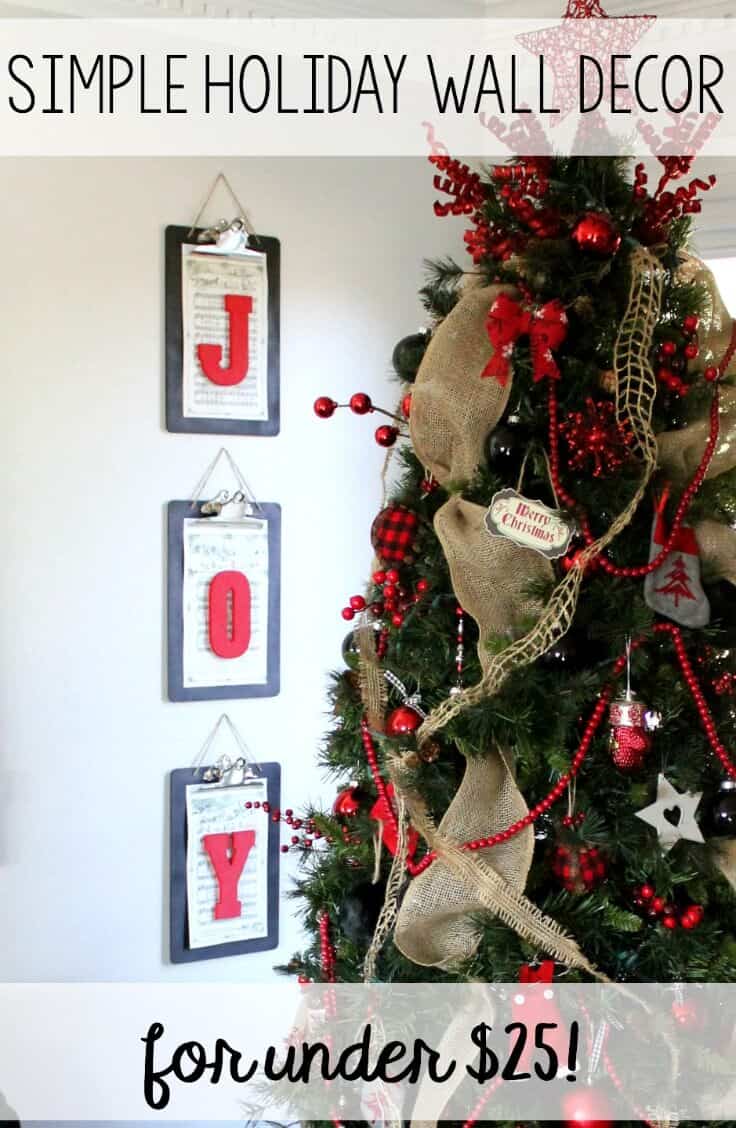
DIY Christmas Wall Decor for Under $25
Create Peaceful Holiday Cheer with a Simple, Budget-Friendly Project
Feeling stuck on holiday decor this year?
Friend, if you’re anything like me, you love the idea of festive walls that feel warm and joyful—but don’t love the price tags in the store aisles (or the overwhelm of trying to DIY from scratch).
Good news: this little project is about to meet you right where you are.
This simple wall art cost me less than $25, took just over an hour (with drying time), and used a mix of thrifted treasures and leftover supplies.
It’s proof that you don’t need a big budget or fancy tools to add meaningful beauty to your home this Christmas.
Let’s jump in—together.
DIY Christmas Wall Decor
This past week, our house was abuzz with red and green!
While out one day, getting the last of the supplies for this season, three little wooden letters and a tiny jar of red craft paint just so happened to fall into my cart!
This post contains some affiliate links for your convenience. Click here to read my full disclosure.
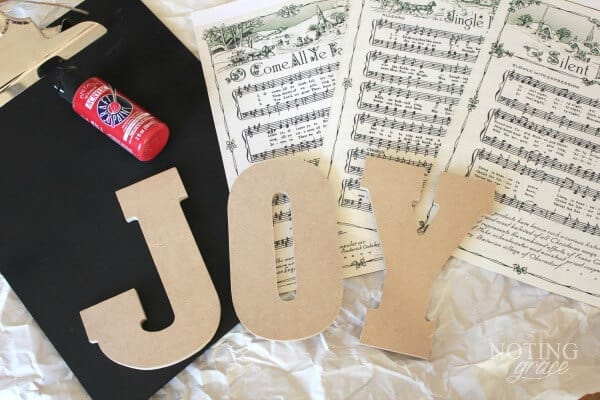
What You’ll Need

Tip: Use what you have! Leftover paint, scrapbook paper, or even handwritten lyrics can make it more personal.
Step by Step Instructions
Step 1: Paint Your Letters
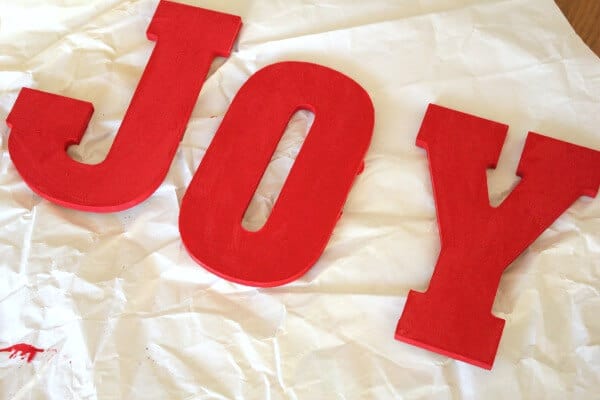
Can’t find your paintbrush? Same.
In my chaos of Christmas bins and Legos, I ended up using a paper towel… and eventually my pinky finger for those tight corners.
It wasn’t glamorous, but it got the job done—and gave me a festive (and slightly ridiculous) red manicure in the process.
Remember: Done is better than perfect.
Step 2: Print and Trim Your Backgrounds
Pick your favorites and print them using an inkjet printer.
Trim the pages to fit the size of your clipboards.
✔ No printer? No problem. Sheet music books from thrift stores work beautifully too.
While your letters dry, head over to my Christmas Pinterest board where I’ve pinned free vintage Christmas carol printables.
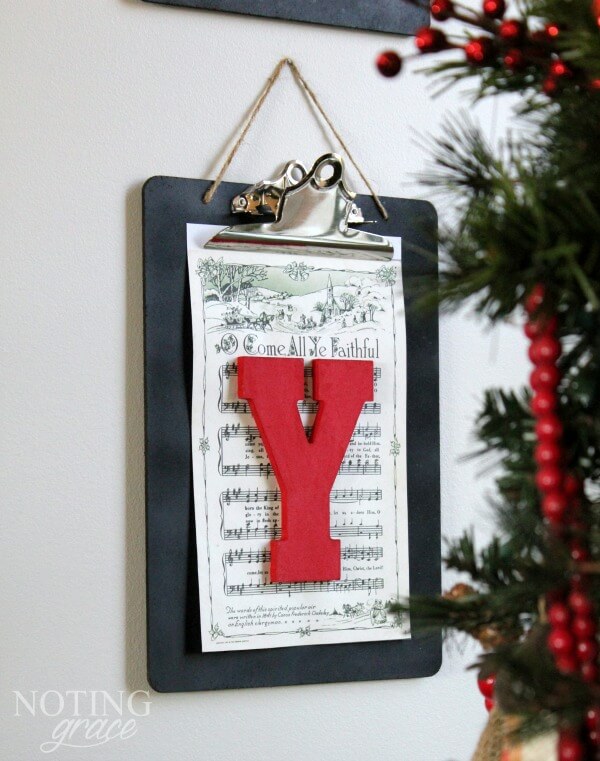
Step 3: Assemble Your Artwork
Once your letters are dry:
- Add glue to the back of each one
- Press them onto your printed carol sheets
- Let dry for a few minutes
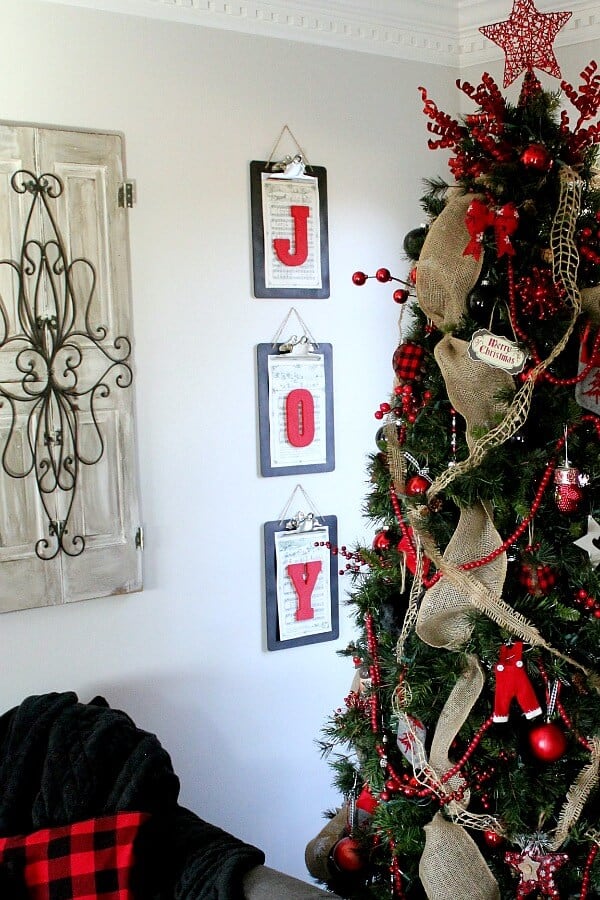
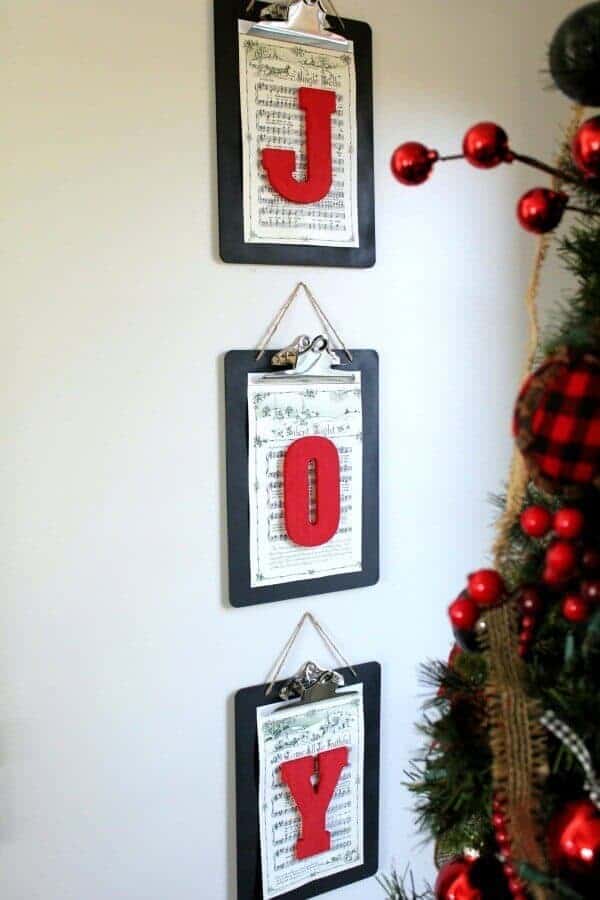
I used DIY chalkboard clipboards I’d made earlier this year (you can find that tutorial here), but any clipboard, frame or even clothespins on twine could work!
Step 4: Hang It Up & Enjoy
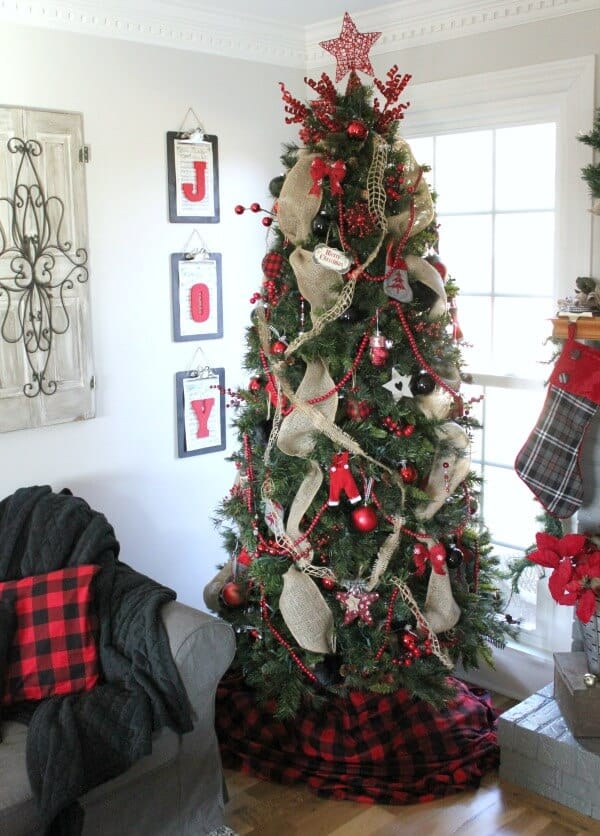
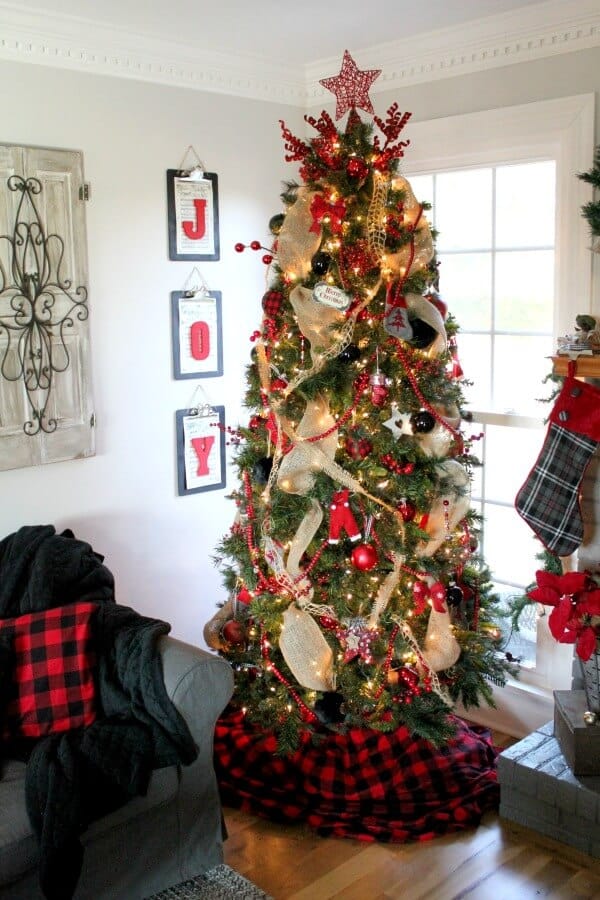
Clip your new artwork in place, hang it in a cozy corner, and enjoy the JOY (literally and figuratively).
✔ Bonus: This is a perfect project for kids, teens, or craft nights with friends.
Customize It Your Way
Want to put your own spin on it? Try:
- Glitter paint or gold foil letters
- Different holiday words like “Noel” or “Hope”
- Printed family photos instead of sheet music
- Painted frames from the thrift store instead of clipboards
Whatever your style, let it reflect you.
Here is the breakdown of my costs.
I’m also including the Chalkboard Painted Clipboards in this list, since that project was part of this DIY.
Christmas DIY For $25 Source List
- Wooden Letters: Hobby Lobby 4″ Unfinished Wood Letters (orig. $1.47) $1.03 each
- Craft Paint: Hobby Lobby Anita’s Acrylic Craft Paint in Christmas Red $.77
- ClipBoards: Officemate Clipboard with Large Clip, Set of 3 $5.34
- Vintage Christmas Carol Printables: Pinterest – free
- Craft Paint: Aleene’s Quick Dry Tacky Glue – already had – free
- DIY Chalkboard Clipboards: Tutorial Here
- Chalk Board Paint: Krylon Black Chalkboard Spray Paint (orig. $7.99) $5.59
- Twine: I had on hand – free
Grand Total: $14.79
It’s not just the budget win (less than $15!).
It’s that this little project reminded me of something deeper:
That beauty can bloom in simple places.
That creativity doesn’t need perfection.
And that joy often shows up when we stop waiting for everything to be just right.
This wall art might not belong in a magazine—but in our home, it whispers welcome.
And that’s what matters.
Creating a home that feels festive doesn’t have to drain your energy—or your budget.
Start small. Use what you have. And trust that progress is worth celebrating.
You CAN do this, friend.
Your home doesn’t have to be perfect to feel peaceful.
And the JOY you bring into it? That’s the most beautiful part.