Fireplace Makeover: Filling Recessed Mortar Joints
Our fireplace got an update a few years back, but it still needs something more. We are diving into another fireplace makeover by filling recessed mortar joints on our brick wall.
Have you ever needed to redo your DIY? It happens to the best of us.
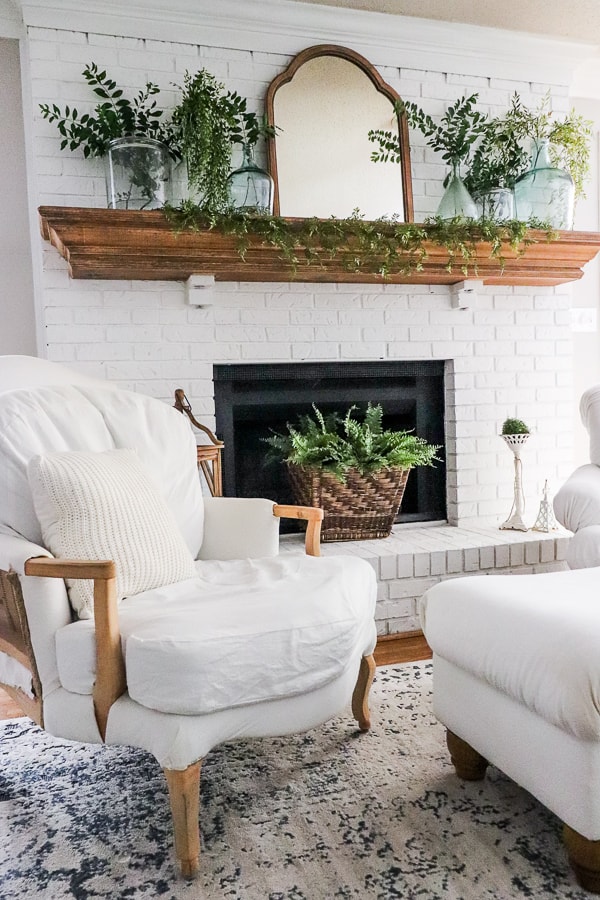
When you walk into my home, the first room you see is our living room complete with our fireplace mantel.
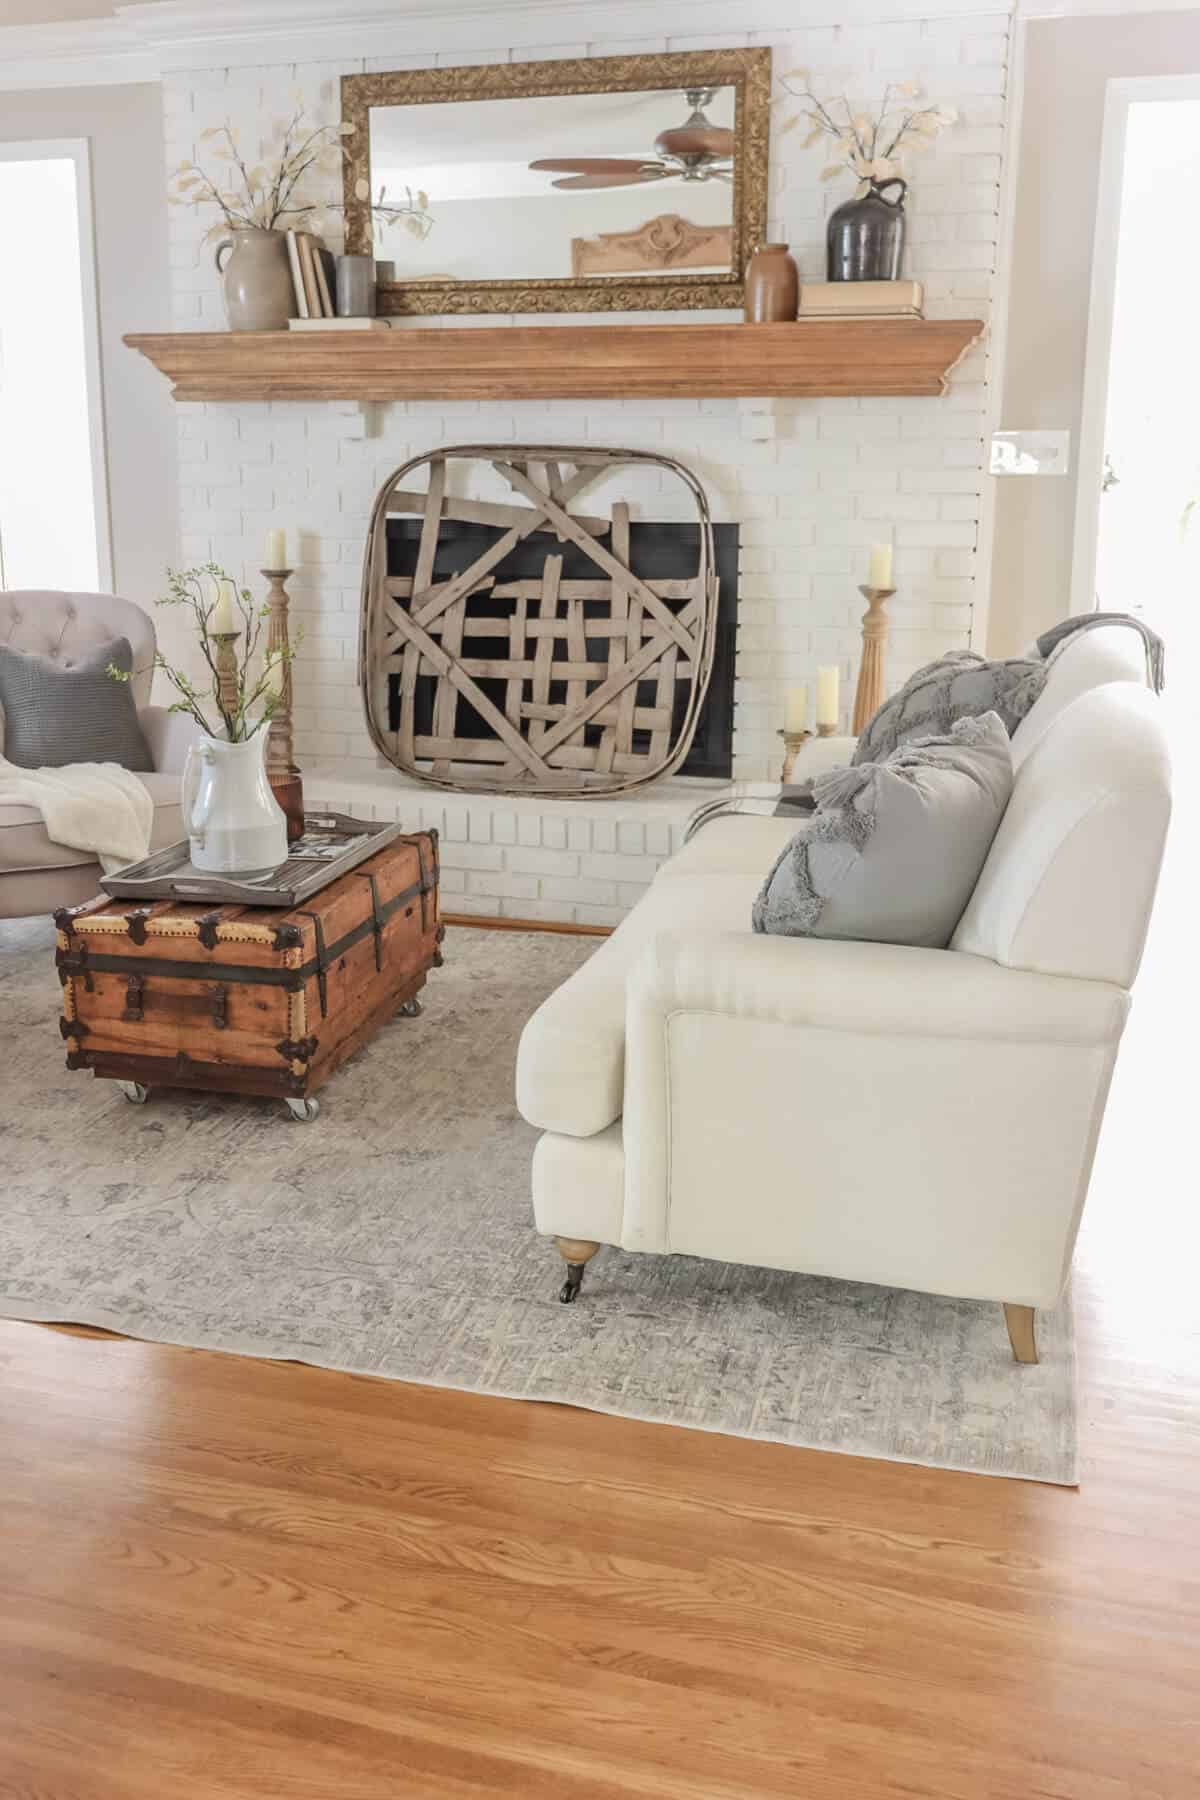
And from a distance, it looks lovely, especially after we gave it a much needed update a few years ago.
When we moved in, the previous owners painted the brick and mantel with a shiny, gray paint and made it look like an outdated fireplace.
While I wanted to give the whole thing an entire makeover, we were in the middle of other projects.
That allowed us to simply give it an updated look with a fresh coat of paint and not spend a lot of money.
We also updated our wood mantel by sanding it down to the bare wood.
And I love how it looks.
With one exception.
Well, maybe two.
The first being divots and worm lines.
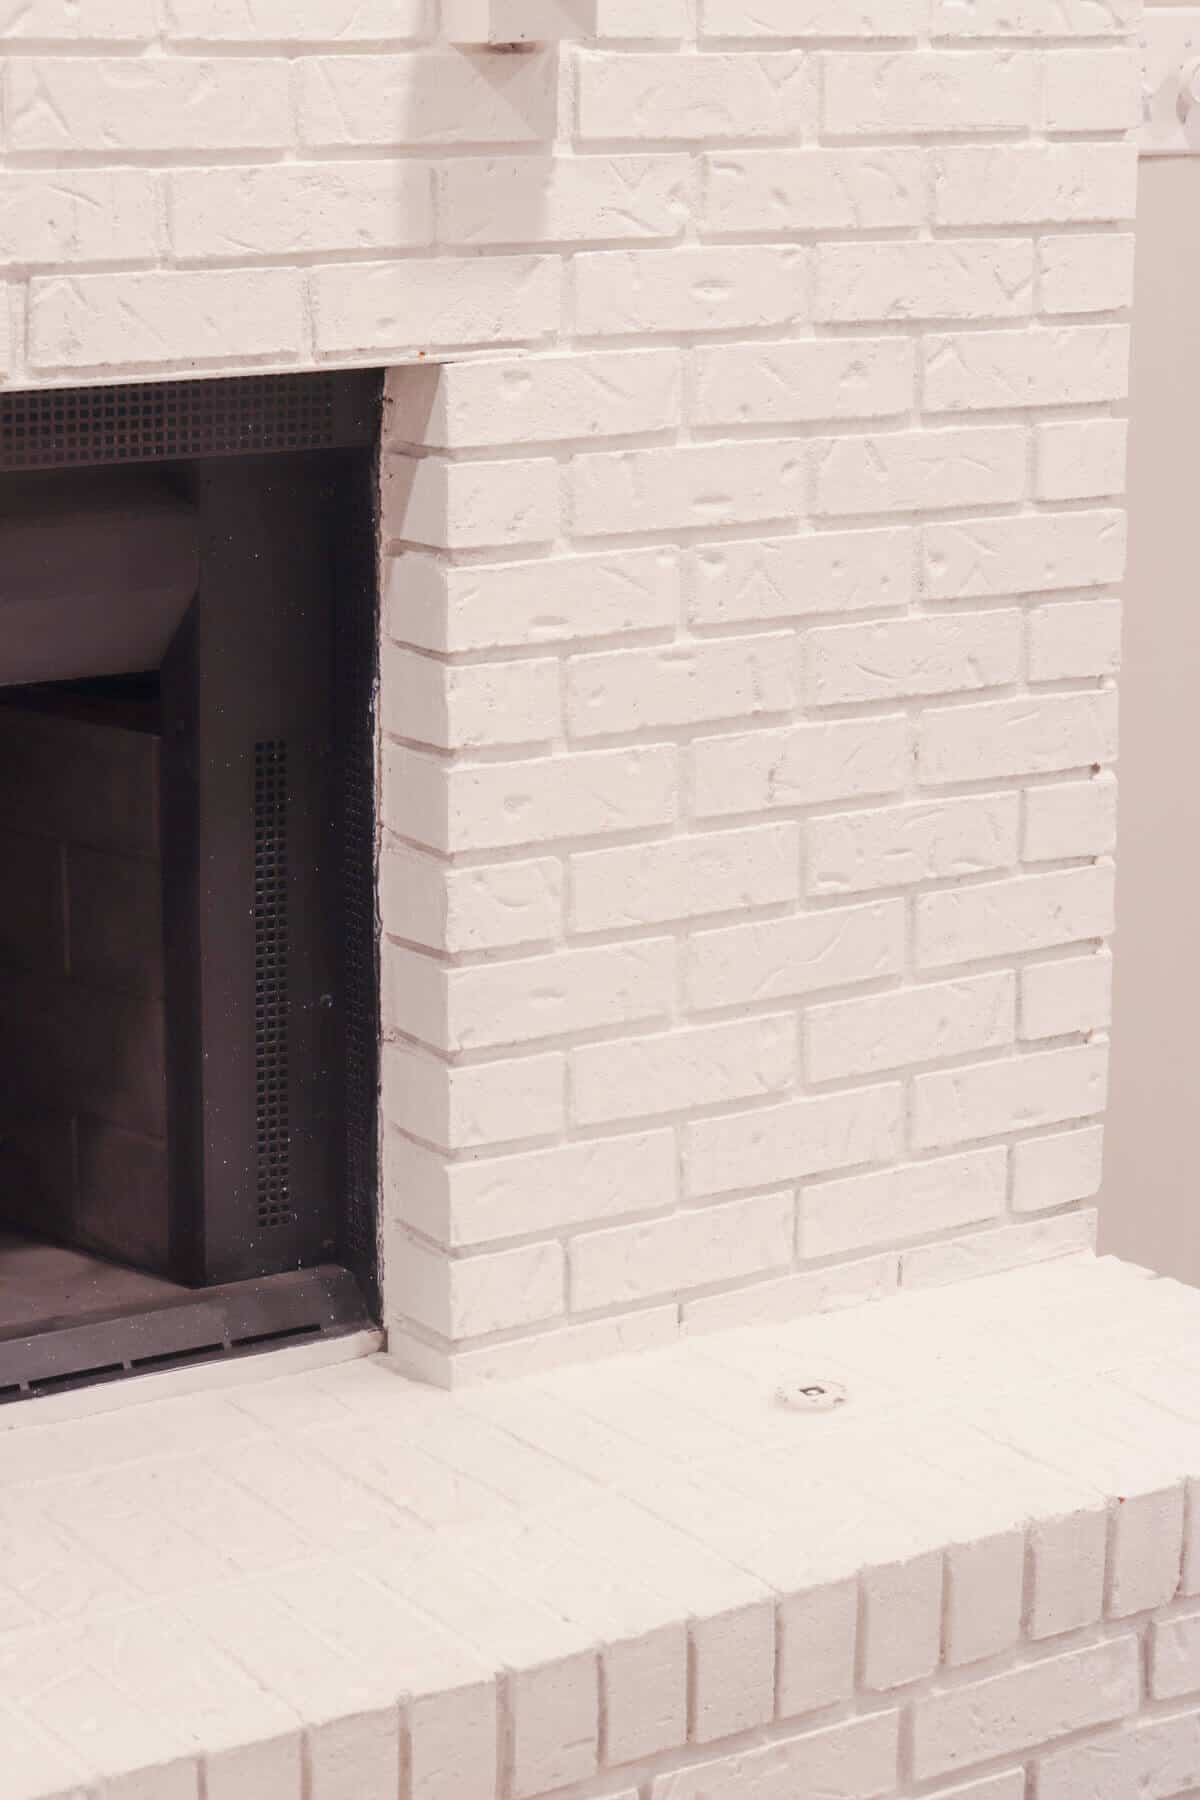
Ever since Trent started Limewashing Homes, I’ve become a bit of a brick snob. Meaning, I’m really picky about the patterns in a brick.
I think it started with our Tennessee House. Our type of brick had weird paw prints all over! Which is why we lime washed that brick home. It must have been a super cool pattern in older brick because we see it a lot.
But now, when I sit in my Jen Den, I can’t stop looking at those worm marks in the brick.
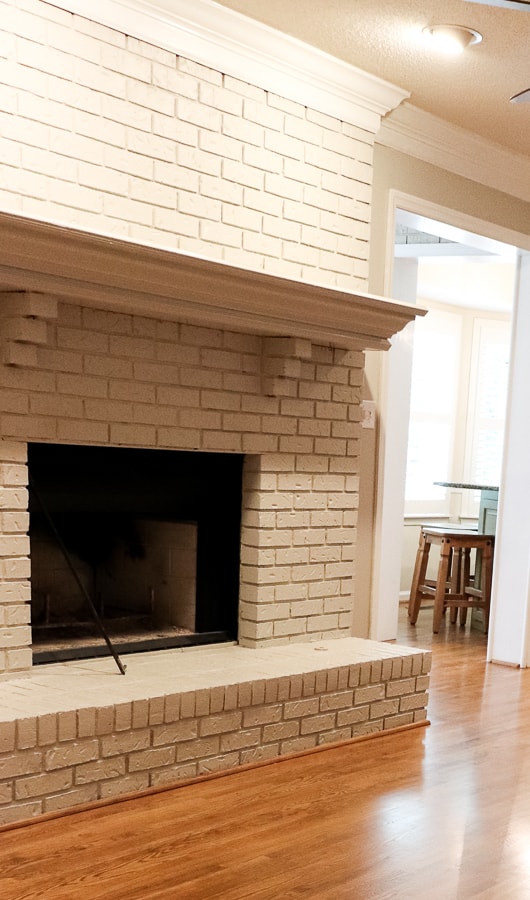
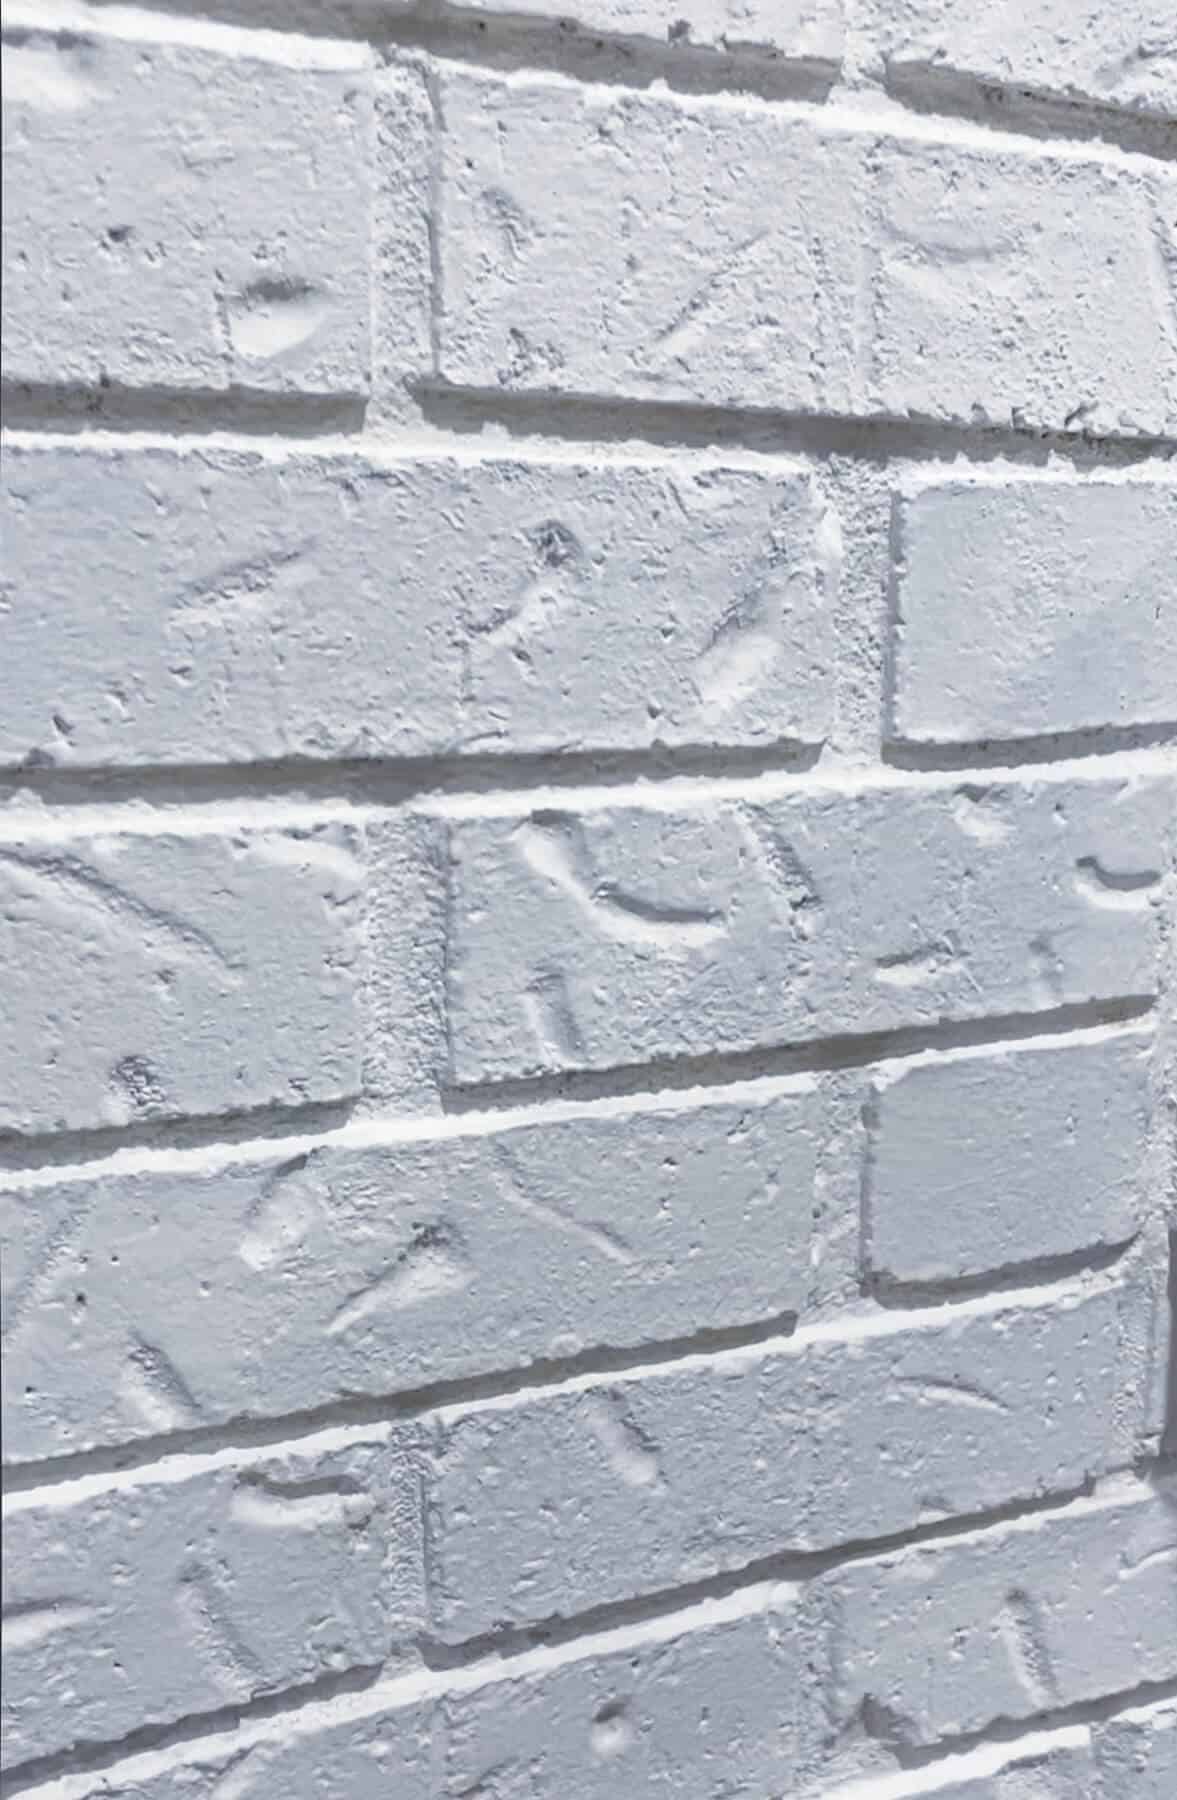
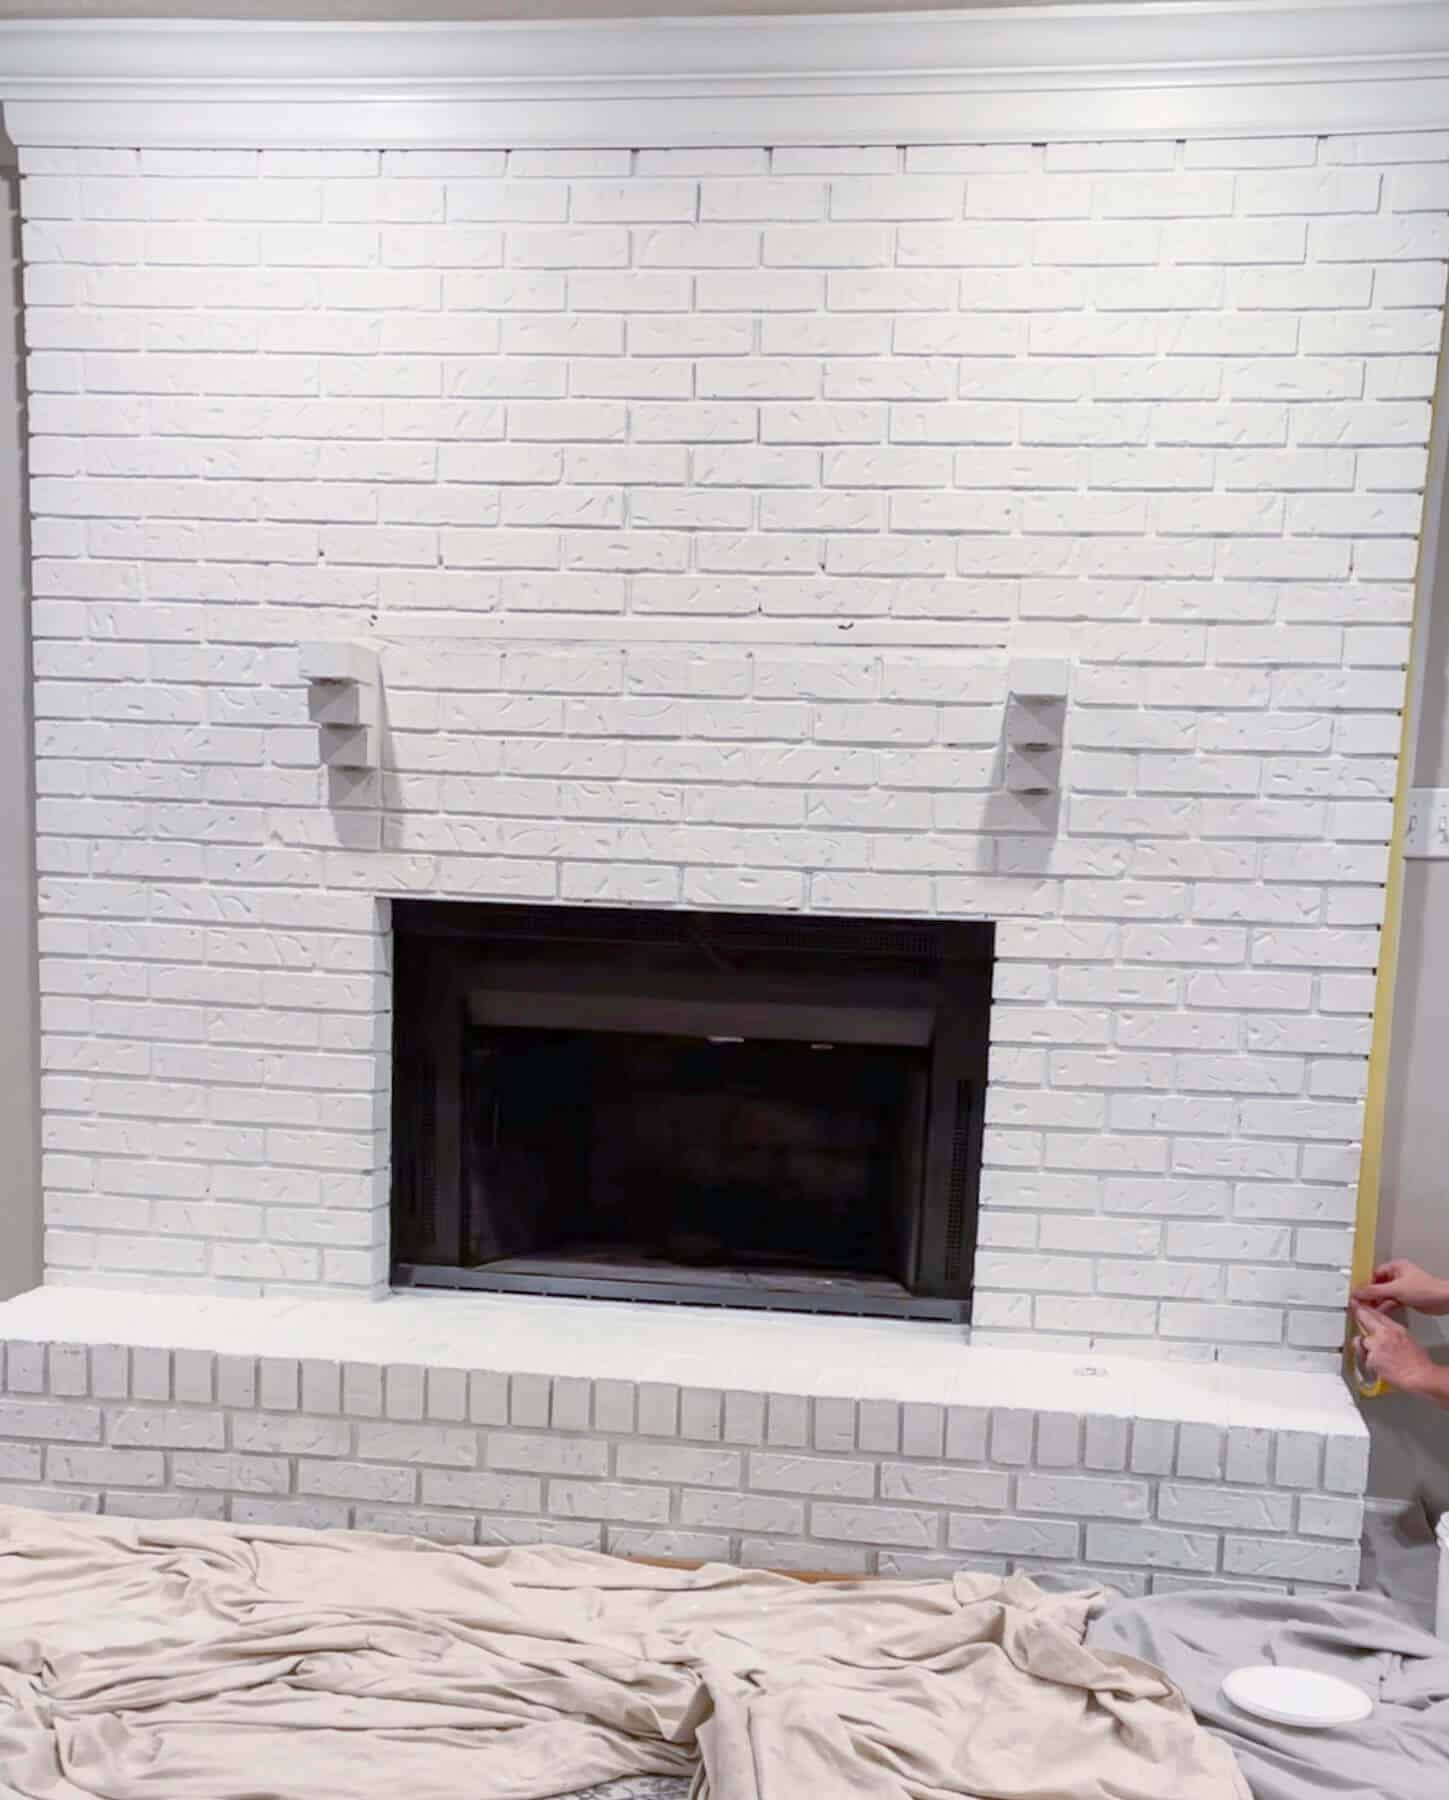
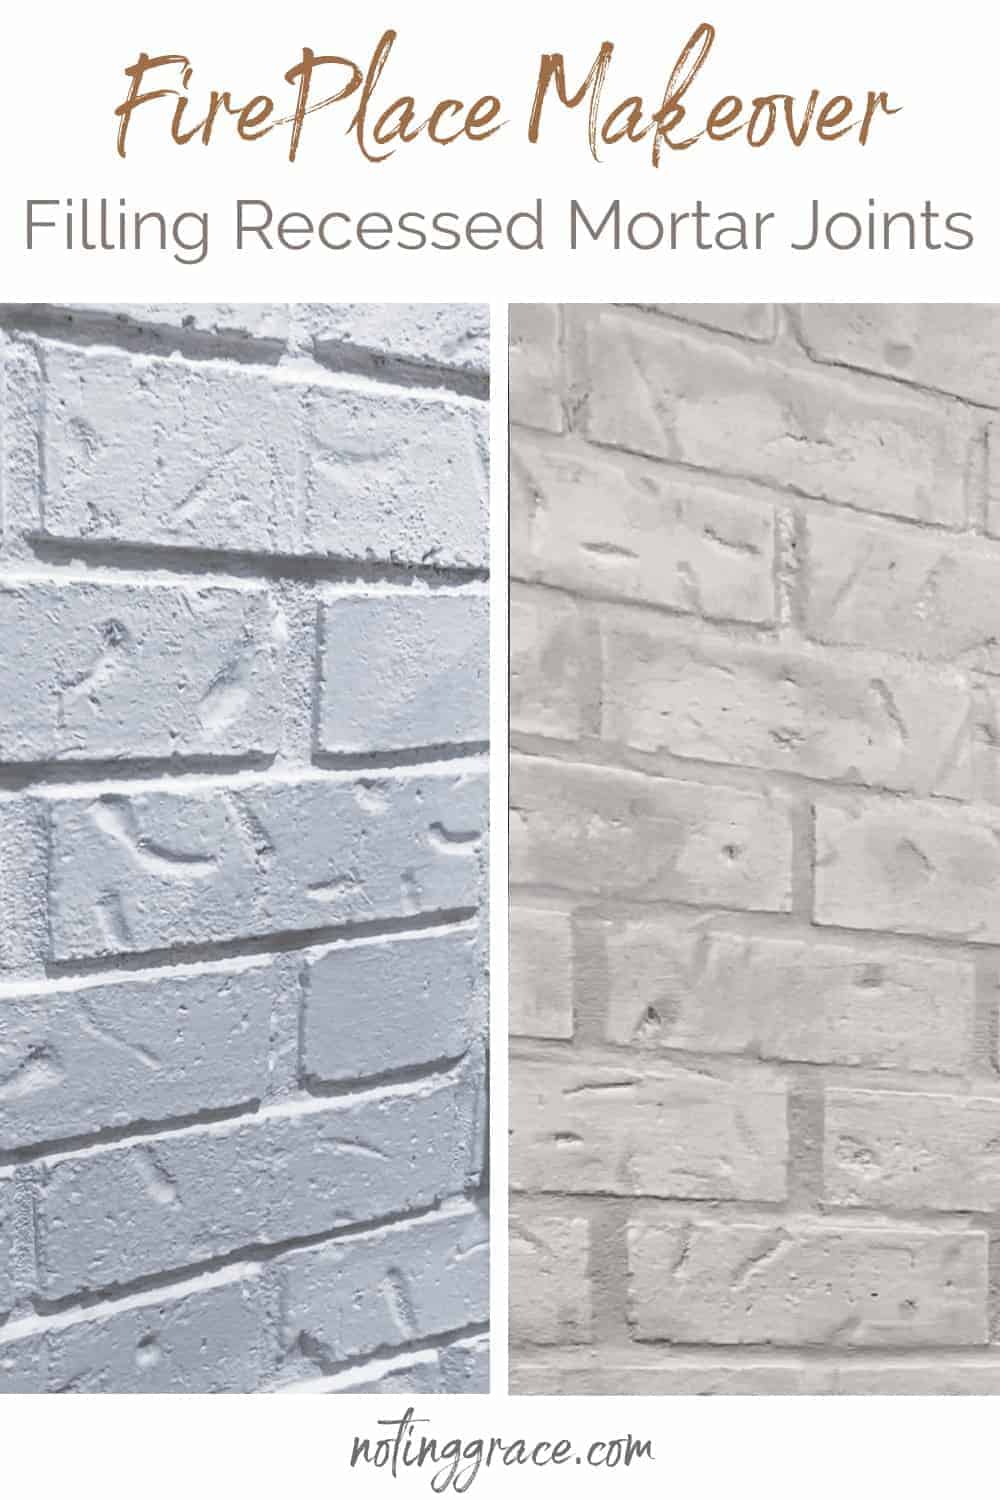
And the other issue is our mortar lines. They are excessively deep.
Like, my finger is flush with the brick kind of deep. That creates shadows that simply don’t make me happy, so that’s another issue we need to address.
So before I get into this painted brick fireplace makeover, let me go back and tell you what we’ve done so far.
Update the Painted Brick
This is a great option if you happen to love your brick, but don’t like how it was painted previously or have a dated brick fireplace that you want to update with a new color.
Paint is the easiest way to update an old fireplace.
And the latest trend is white brick with a wood mantel.
But not just any paint.
We used Romabio’s Masonry Flat and the look is stunning.
In fact, I applied the same paint to the brick in our sunroom, which is the back of our fireplace wall and it’s soft and stunning.
It is a solid finish, but still allows for the brick surface to breathe if applied to bare, unpainted brick.
But if your brick was painted, like mine – I have good news!
They have another product called Biogrip Primer. When you apply this, you can paint the Masonry Flat over top, which is what we did.
That took the shiny, acrylic paint and created a muted, matte finish that is gorgeous.
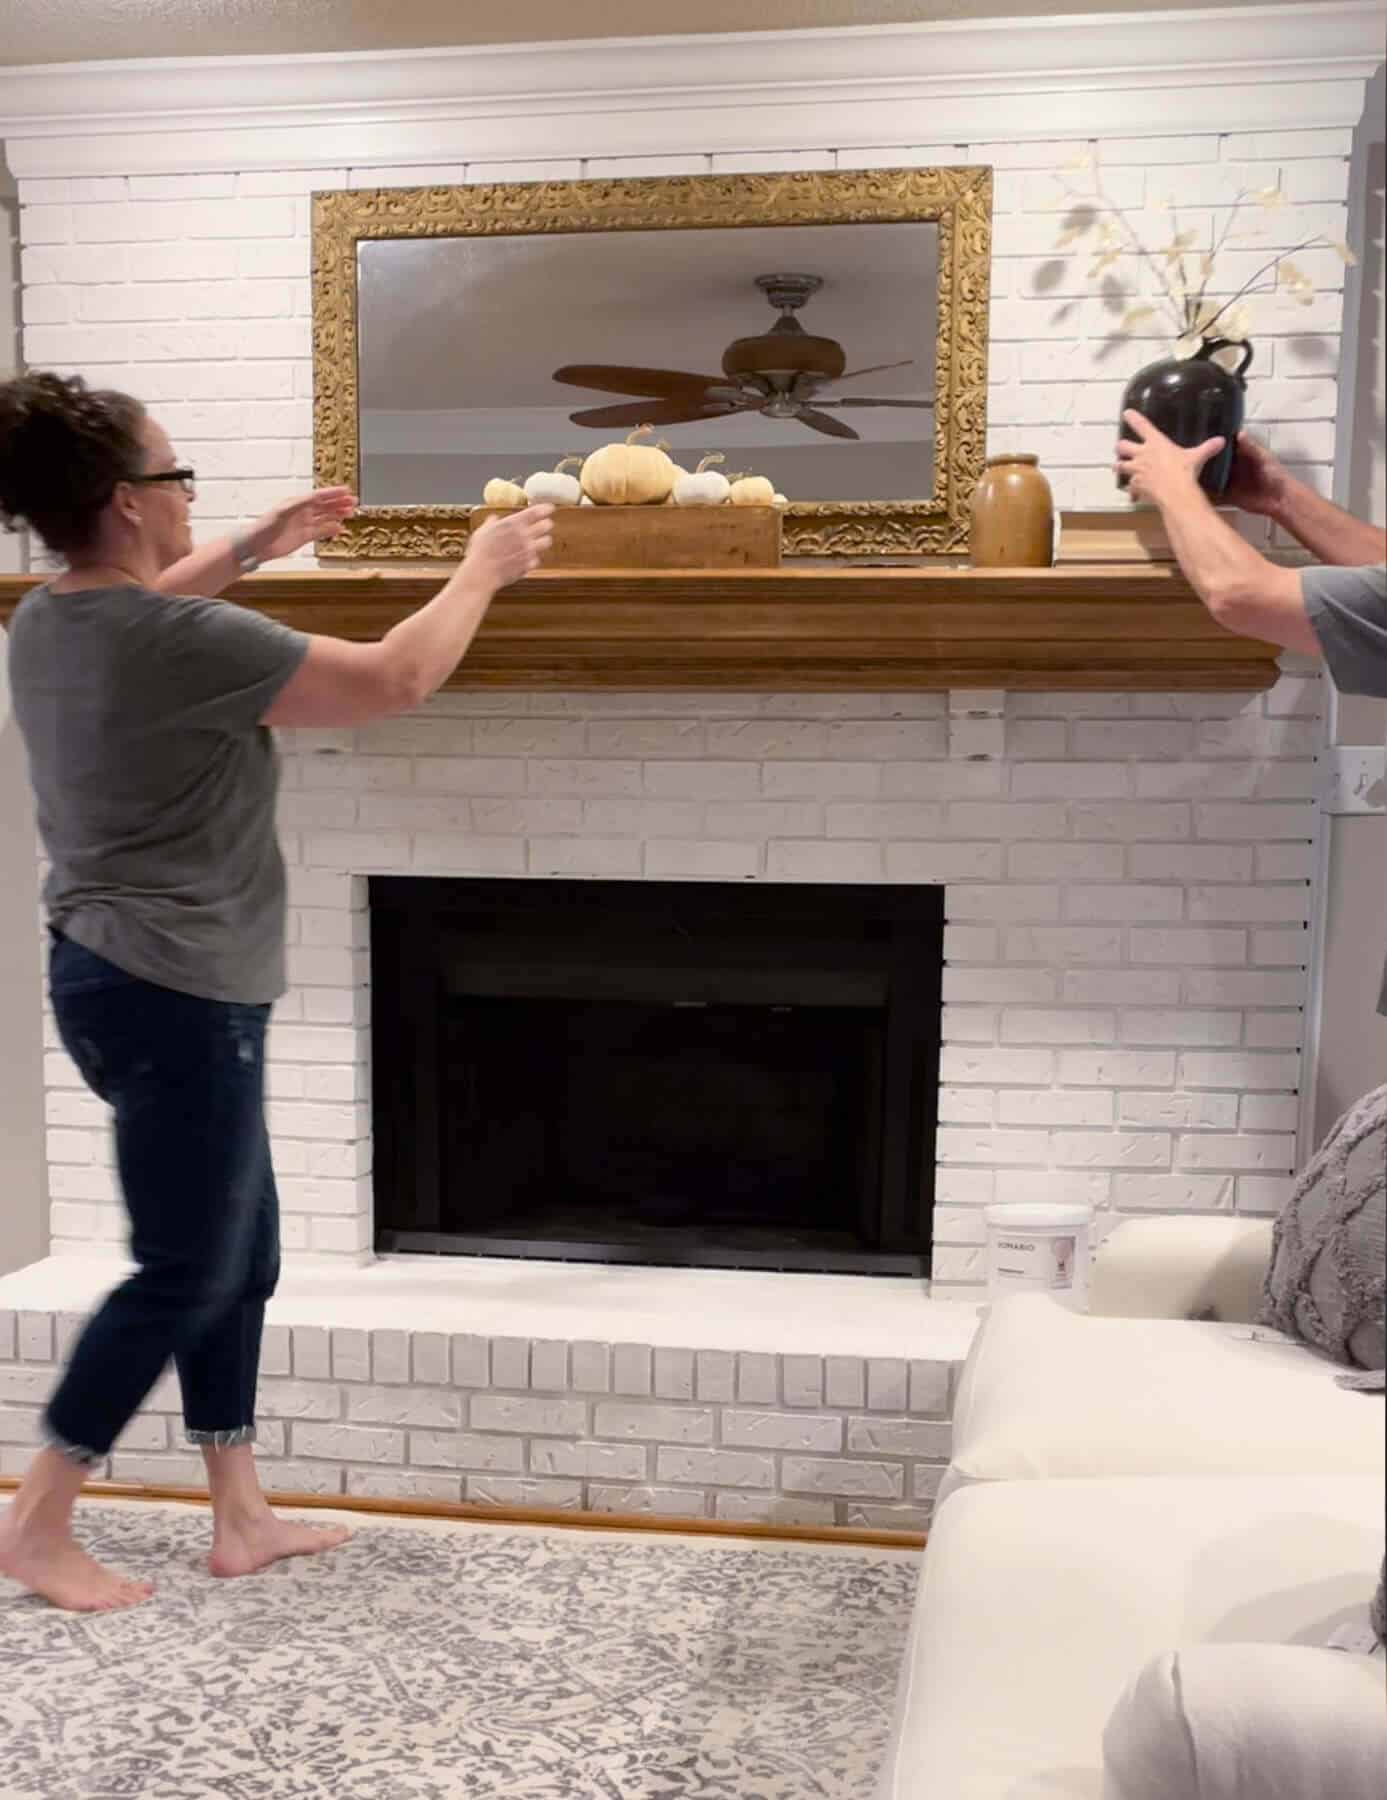
And updating to a white color was a game changer for me. Choosing a neutral color is a better option for any dated brick fireplace.
It made our entire fireplace feel like new. I also painted the inside of the fireplace black with high heat paint.
But now I am ready to create the fireplace I dream of!
Filling Recessed Mortar Joints
(Some affiliate links are provided below. Full disclosure policy here.)
Now let me be the first to say that I am not a brick mason and I don’t know much about all the ins and outs of that trade.
One internet search and I read words like raked joint, concave joint, bed joint or v joint. I’m suddenly lost.
Repointing brickwork is an exceptional trade and if you have issues with your brick that may be structural or may affect your home, then seek a qualified professional for your repair work. Mortar deterioration can cause serious issues for you.
But if you are simply wanting a cosmetic approach, like us, then I got you covered!
Our wide joints were huge! I don’t know if the person who built this home asked for a recessed mortar joint, but this is beyond extreme.
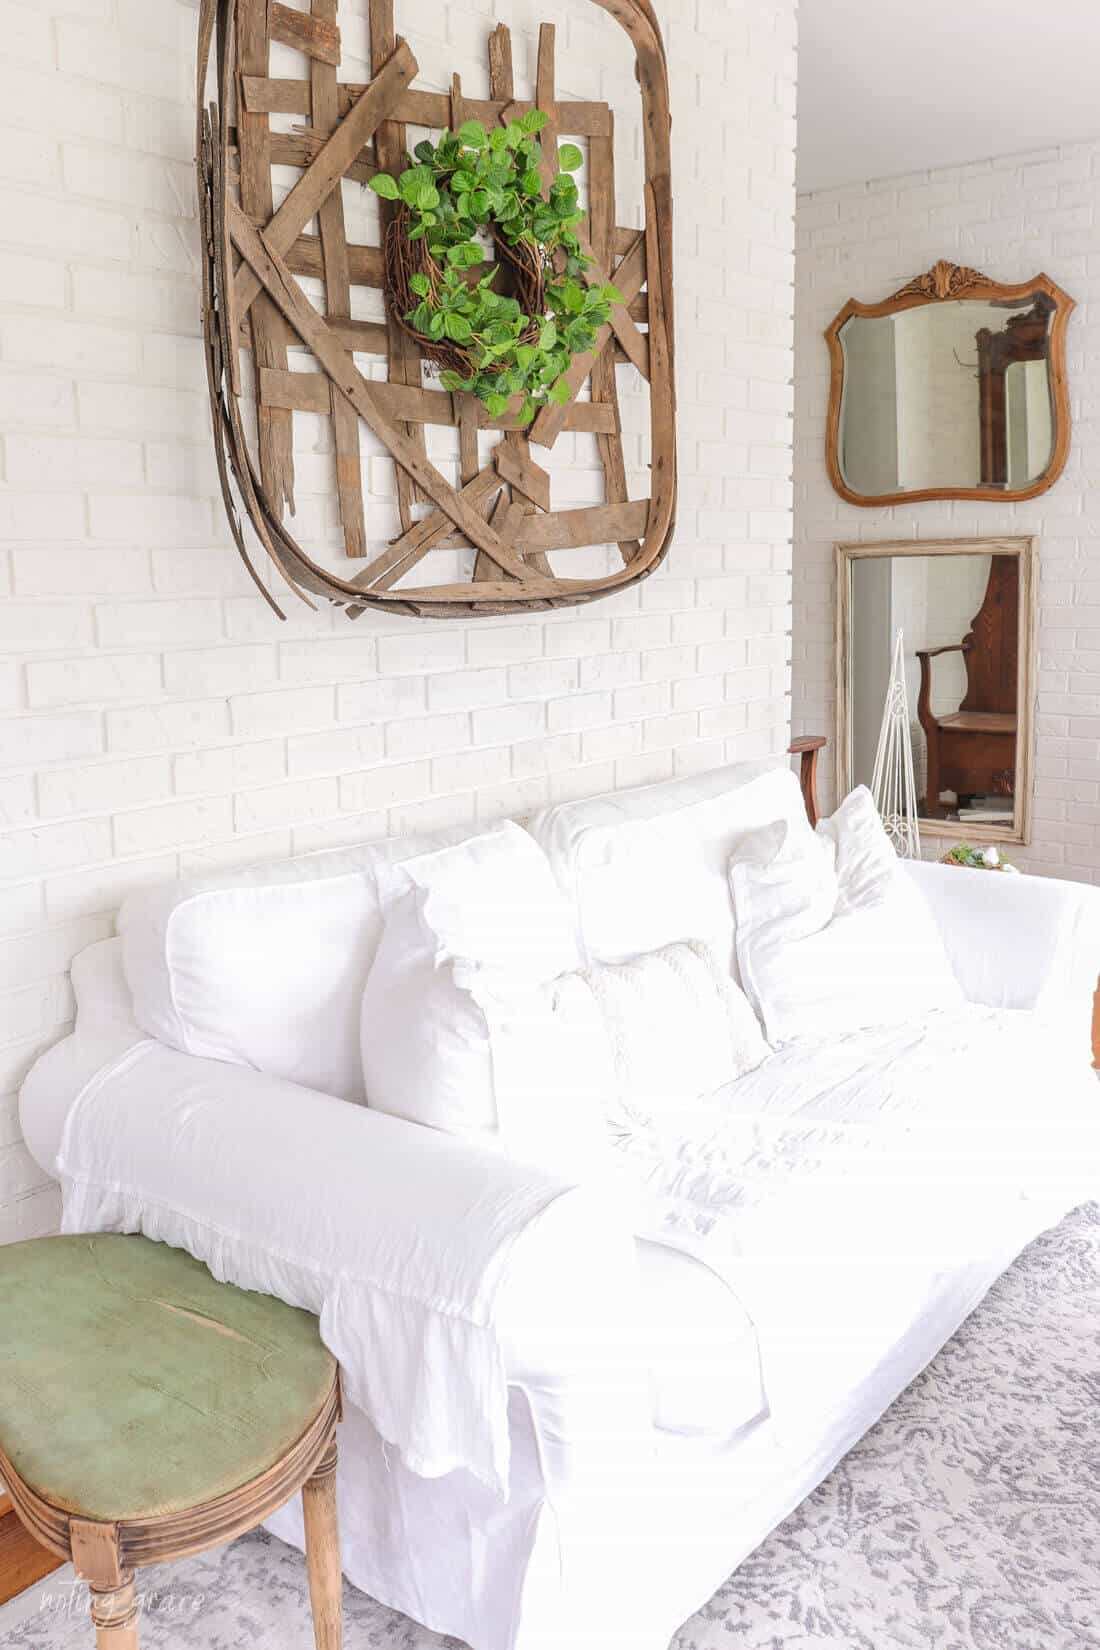
I found a solution! Check out this floor to ceiling fireplace. This is the look I am going for.
I love the smooth surface of this old plastered look of the brick fireplace. You can still see some of the brick, but it a very smooth and even finish.
We plan do this using Romabio’s Lime Slurry, and a full tutorial on that is coming. Since this is a focal point of our room, we thought this would be a great way to create a contemporary look for this old brick fireplace.
You could even go with a modern look by building a new mantel.
For us, we want that smooth surface with even grout lines.
But first, in order to get the final product, we have to create flush joints.
Here are the appropriate materials you’ll need.
Supplies
New Mortar Mix
Container to Mix the Mortar in
Rubber Float
Mud Pan
Sponges
Water Bucket
Drop Cloths
Face Mask – This one is my favorite
Goggles
Not Necessary, but helpful:
Mixing Paddle for your Drill – power tools make mixing the mortar really quick – worth the $15!
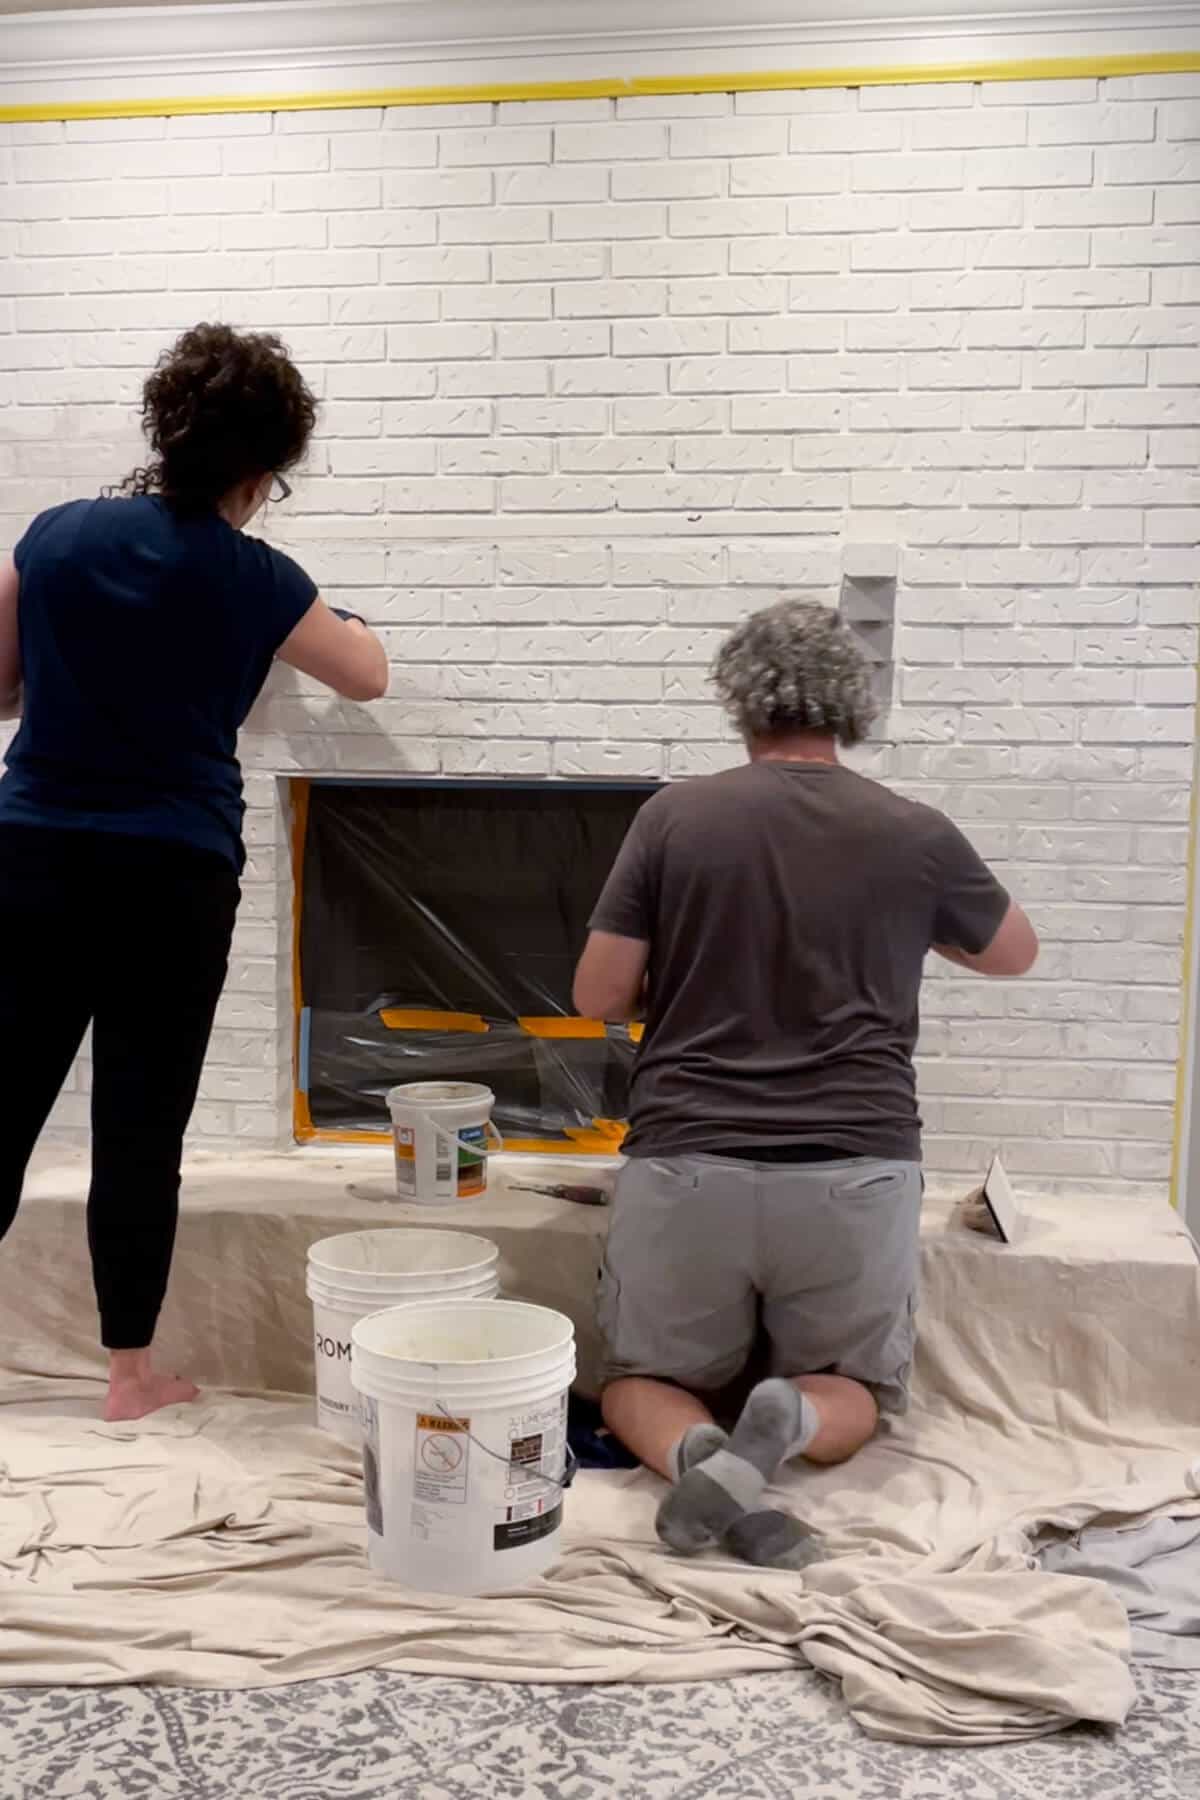
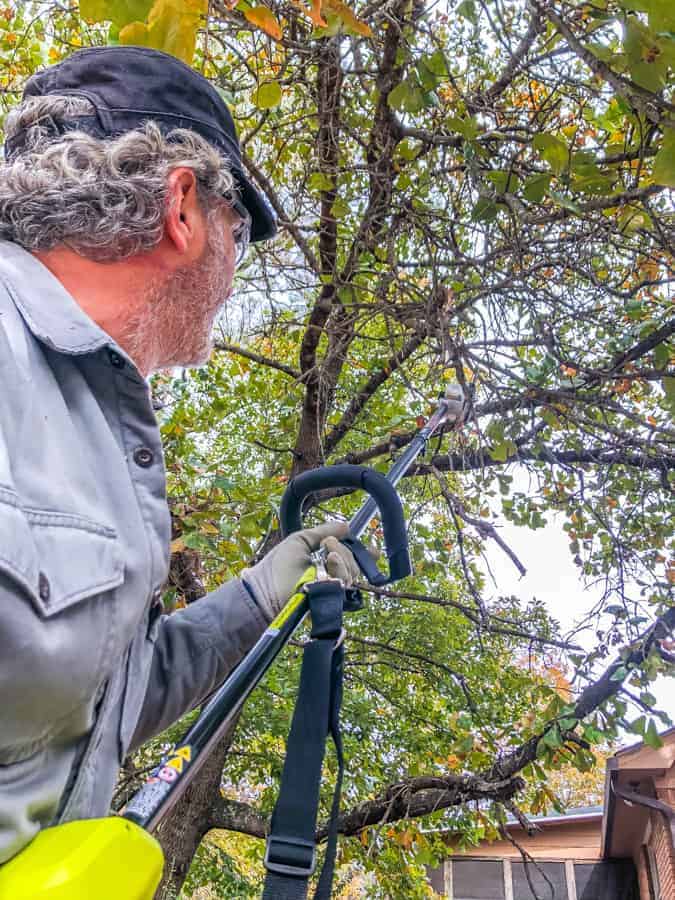
The first thing you want to do is clear your space and set down some drop cloths. This is a messy job, so remove anything from the surrounding area that you wouldn’t want to get dirty.
Next, you will need to mix some fresh mortar. Depending on your fireplace, you may be able to buy the pre-mixed mortar.
We had a little bit on hand and started with that, but quickly ran out.
So we made a mixture of water and sand mortar. Start with a small amount of mortar and a small amount of water. Too much water will make it really runny. You want the consistency to be thick, like a Frosty or peanut butter. 😉

You won’t need a huge mixture for this job and it’s better to make a few small batches instead of a large batch that you have to throw out.
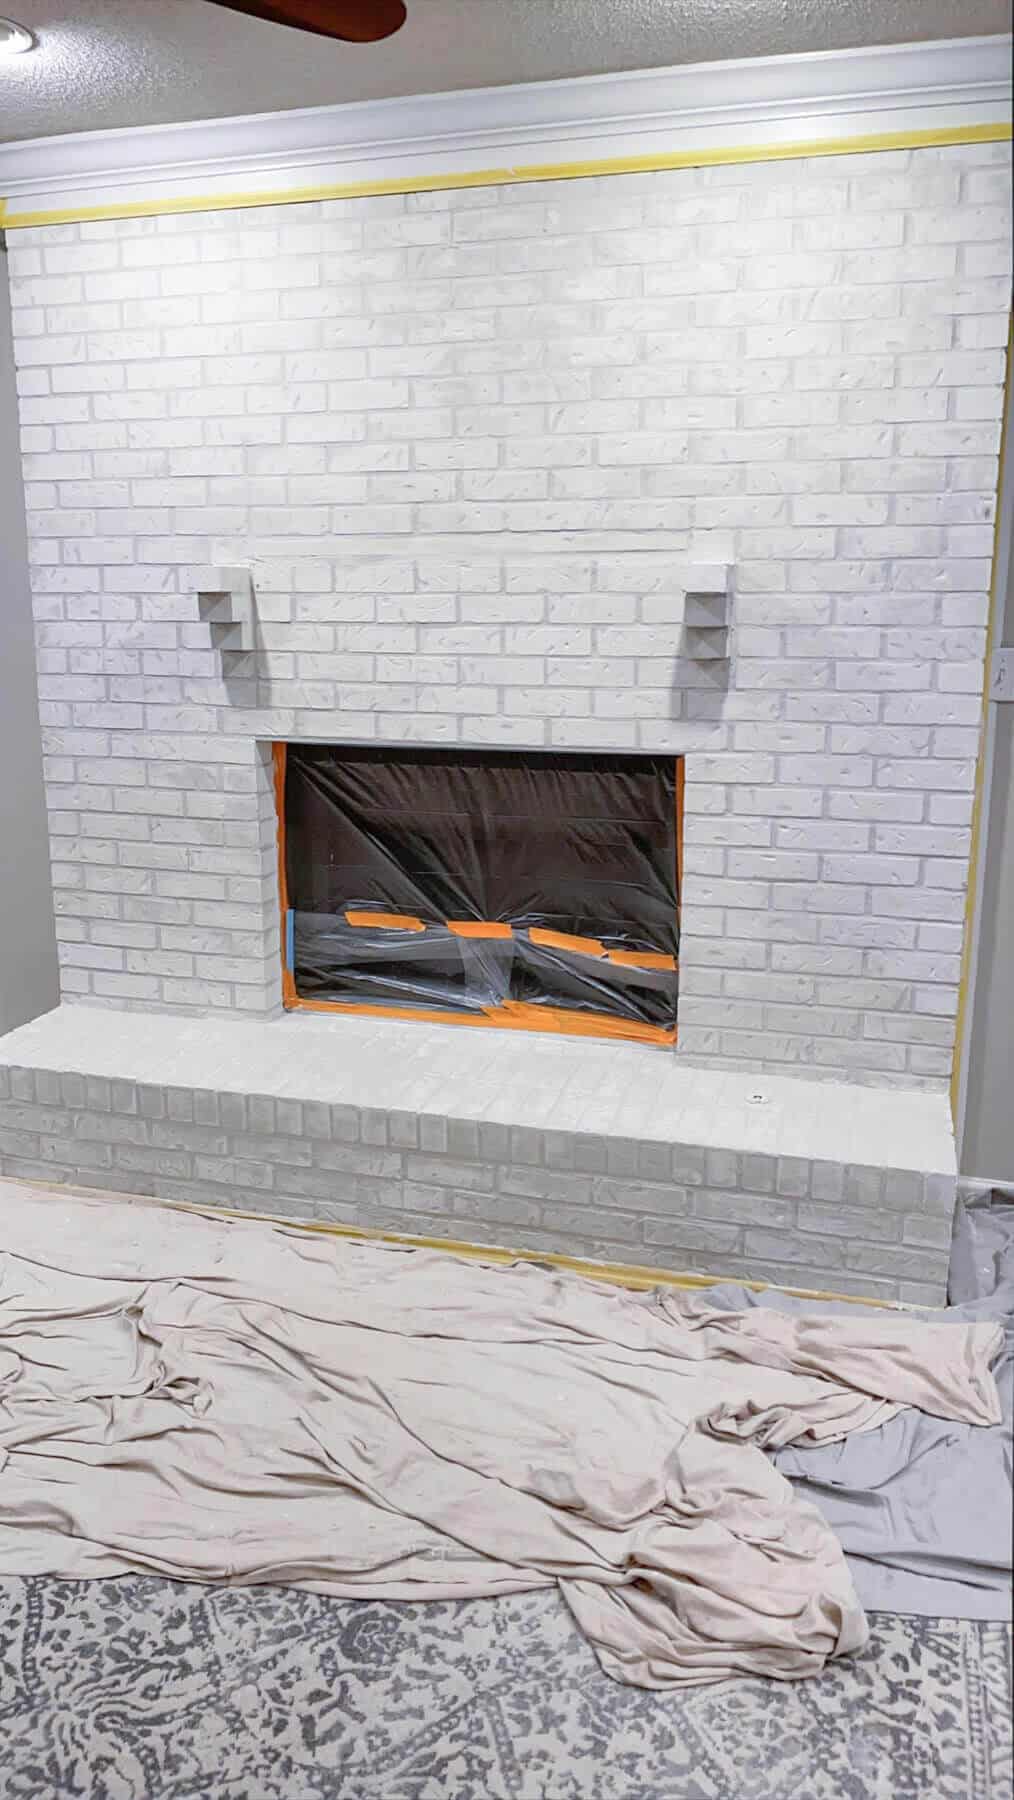
Now it’s time to apply the mortar to the brick.
You want to work it into the vertical joints as well as the horizontal joints, which is why the rubber float is super helpful.
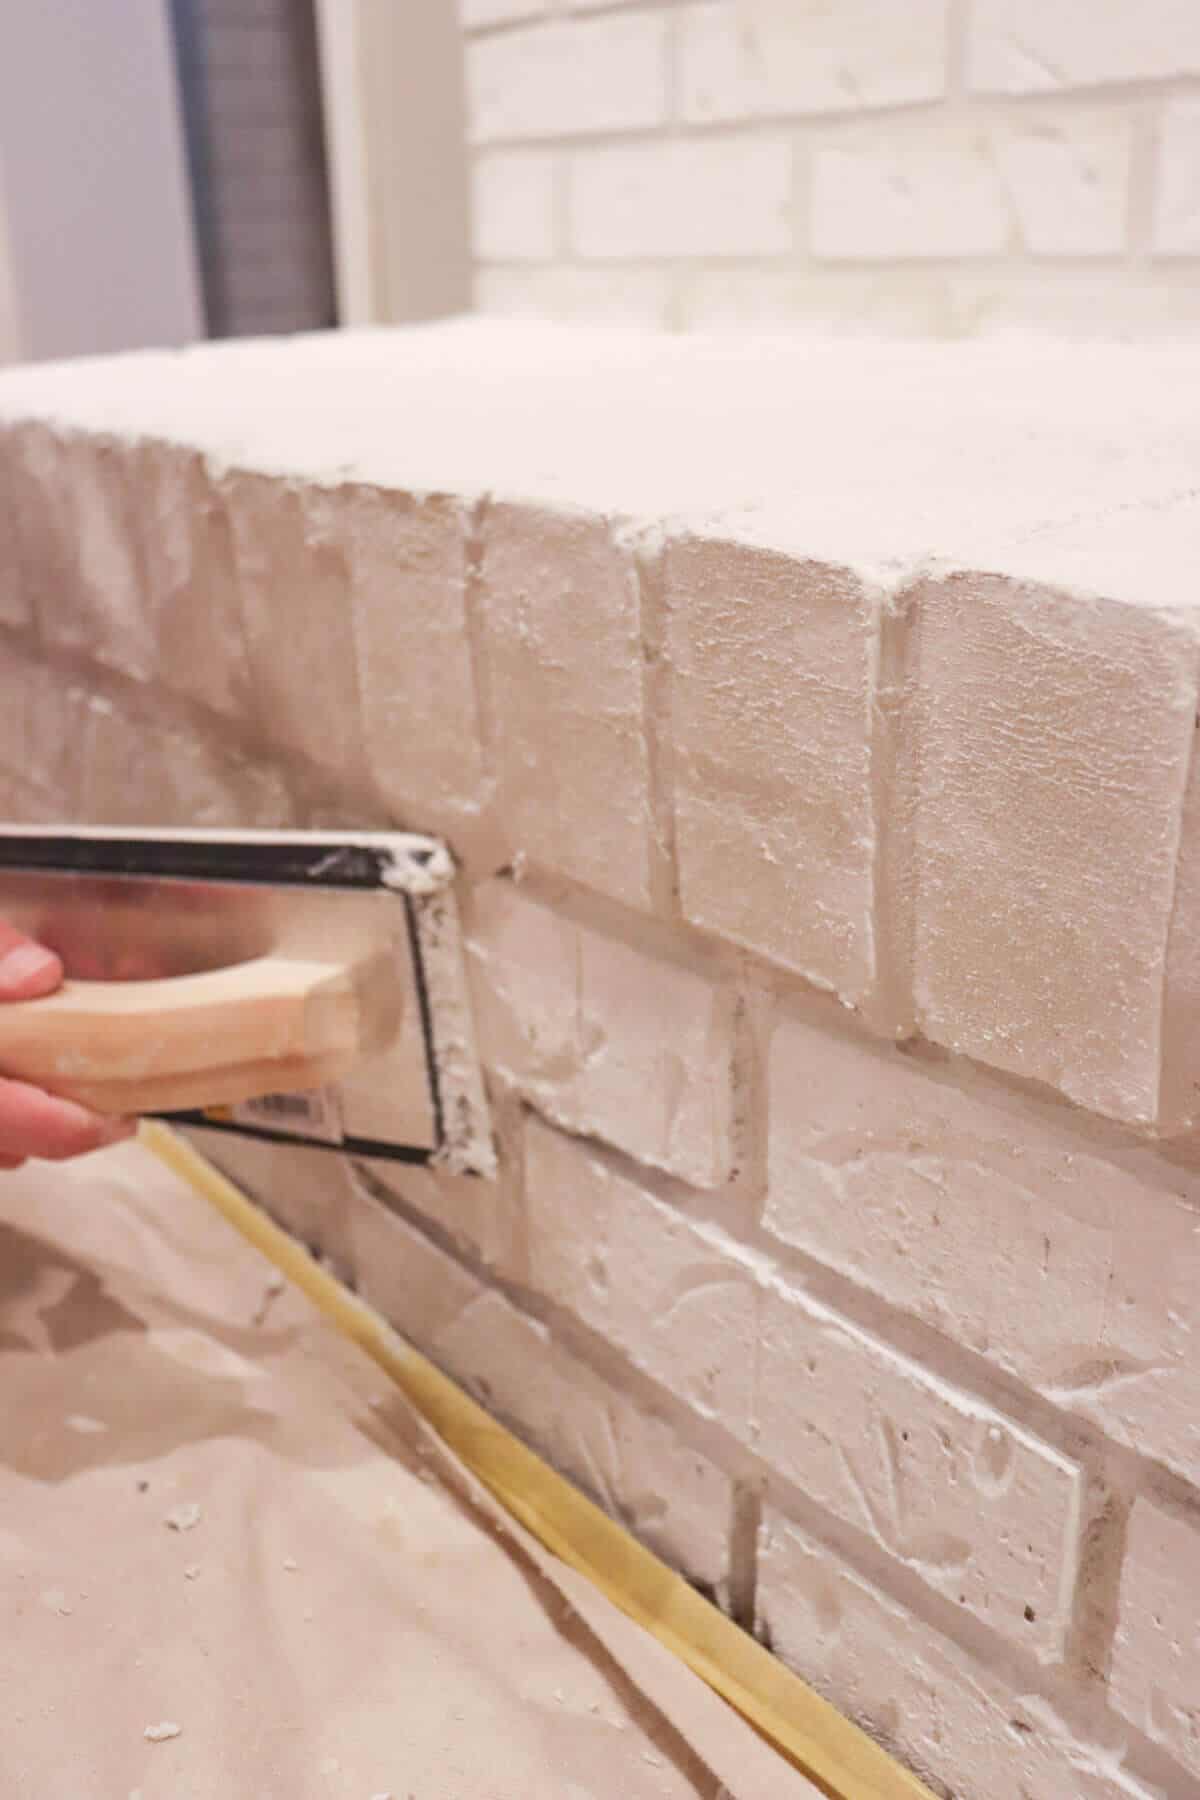
Start working in small areas. Load your rubber float and work the mortar mix into the center of the joints.
I would use the edge of the brick to help wipe the mortar off the float and into the joints.
For this project, I wanted the mortar lines to be flush with the face of the brick.
But you can play around to create a different look that suits your tastes.
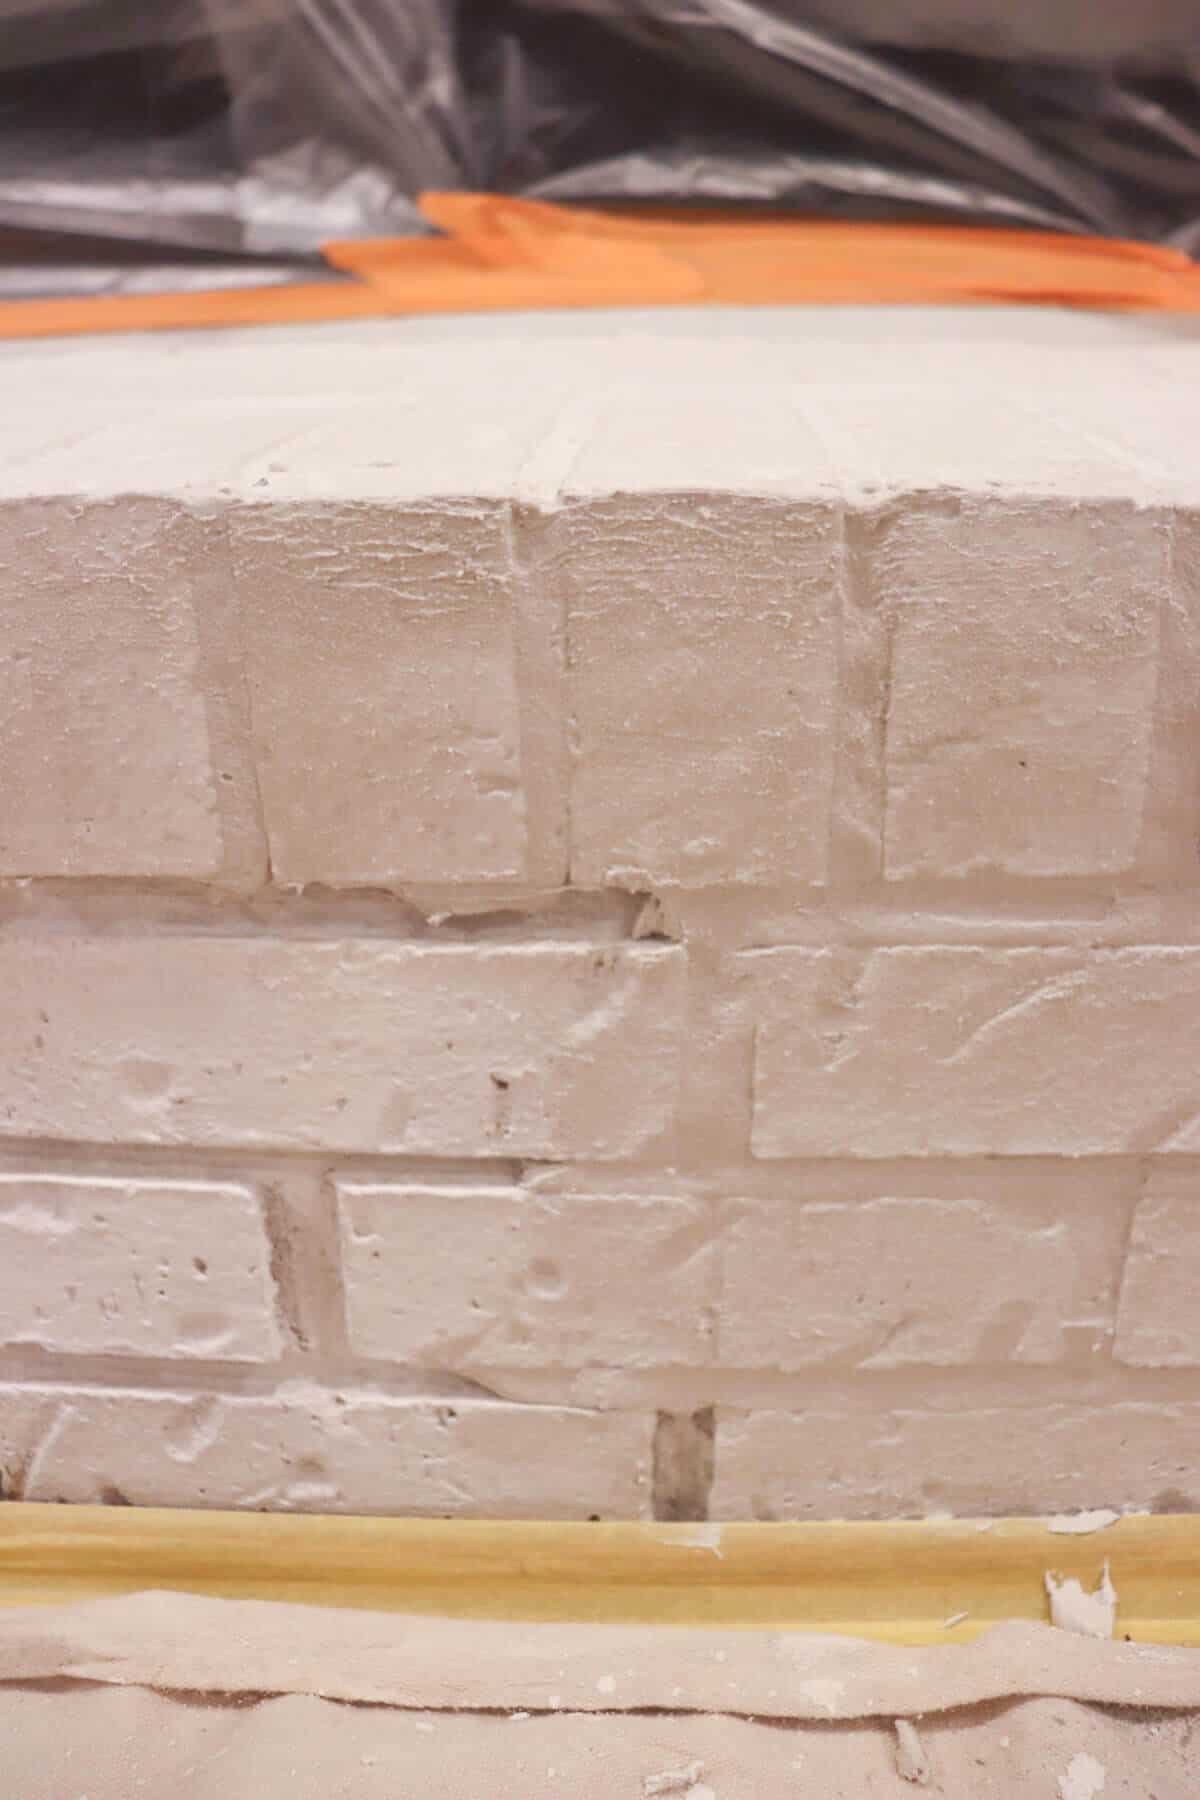
Don’t forget to wipe away any excess mortar for best results.
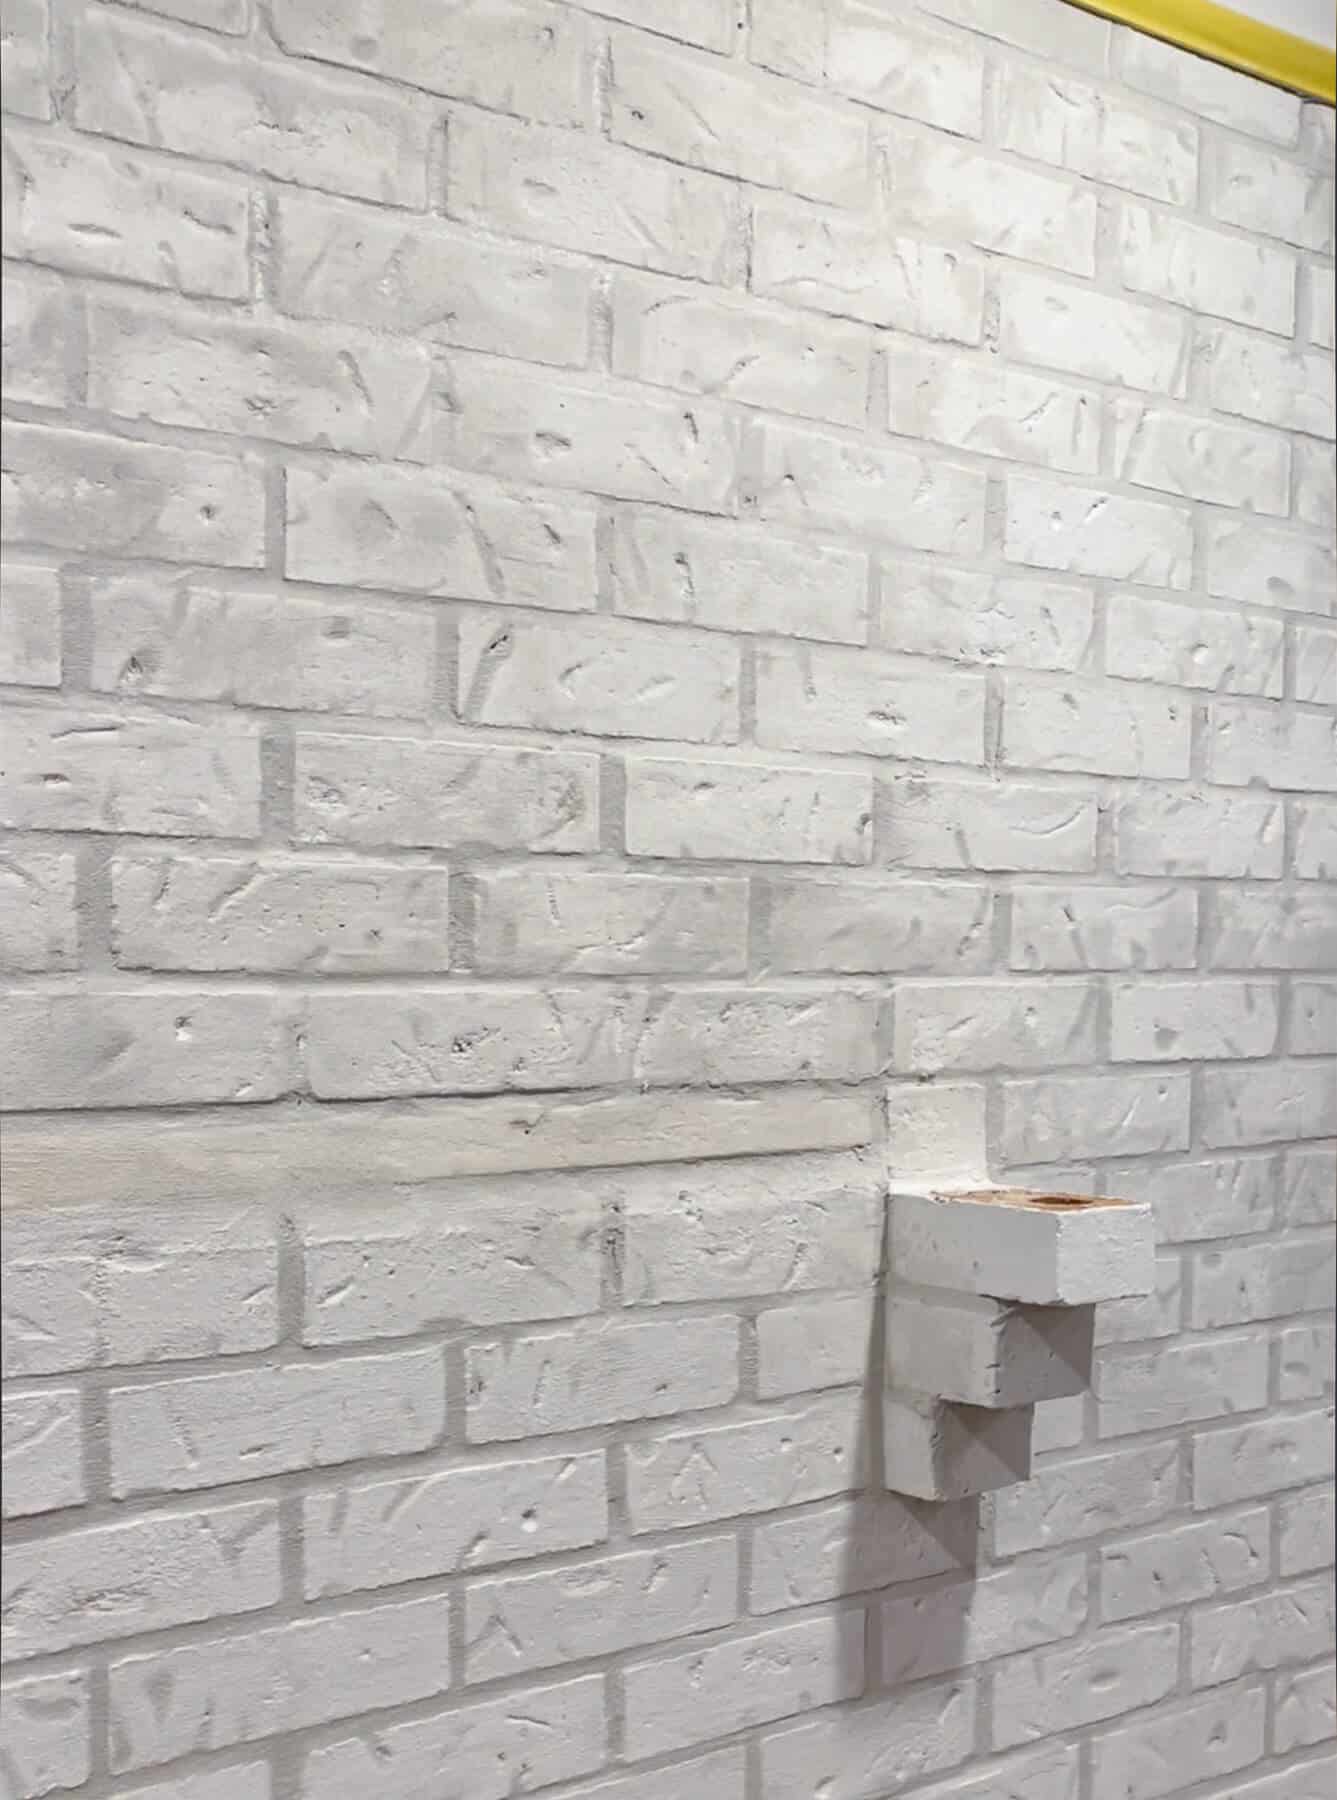
Once we had a flat surface, we were happy!
Now, since interior walls aren’t exposed to any elements, I was not hesitant to give this a try on my fireplace.
But if these were exterior walls, I probably would research to see if this would work in our environment. So if you plan to do an outdoor fireplace, you may want to double check which brick joints work for you.
TIP: If you come across any areas where there is loose mortar or hairline cracks, you may want to push pause. That may involve removing and replacing the mortar, which is a more involved masonry technique than just a cosmetic fix.
This entire process doesn’t take a long time. We finished this entire wall in just a few hours.
Check out the before and after!
Now we are ready for the next step!
We have fixed the mortar lines, but now it’s time to get rid of those worm holes and divots!
We will start the lime slurry process once this is fully dry, which is about 24 hours. So be sure to check out the links below for that tutorial.
And finally, we are getting gas logs for our working fireplace. It’s a bit of a splurge, but why have a gas fireplace and not use it? So, in the end, we will have a new fireplace with a new look that actually works! You can see the final reveal in the posts below! 😉
I hope this helps you if you ever wondered the process of a diy brick fireplace makeover and filling recessed mortar joints.
Don’t be afraid to take your existing fireplace and give it a new design.
And if you have any questions about the process, feel free to reach out. I’m happy to help!
Pin This for Later!


Hey Kelsey – so sorry we missed this comment! If it were us, we would prime the painted stone with the Microgrip primer, then mortar and then cover with Limewash or slurry. Hope that helps and thanks so much for taking the time to comment!
Hi! Beautiful transformation. I have a stone fireplace that I had painters paint, I didn’t do much research and just did a semi gloss paint… LOL. Now I need to fix it. I also realized that our mortar is too shallow and we need to bring that more flush. Would you reccomend re painting and then mortaring? Thank you!! Yours look amazing!!
Hey Sally – thanks for reaching out. And those are some great questions! I feel like we were able to completely disguise our worm lines with the rubber float. If you are wanting to have a completely smooth finish, you may want to try another coat of mortar if you feel like it’s not enough. For our fireplace, I wanted there to be a hint of brick shaping under our slurry. So building up that base layer would be key to creating the super smooth finish you are wanting.
I hope that helps and good luck on your practice application! How awesome that you have a testing spot!! Feel free to reach out if you have any other questions.
Jen
Hi, Jen. Loved your tutorial. Our house was built in the 80’s and we, too, have worm lines although our grout lines aren’t as deep as yours were. I want a very smooth, adobe type, contemporary finish without any evidence of grout lines. Will I be able to smooth the finish with the rubber float to obtain the truly flat, smooth finish and then follow with Romabio slurry finish? The good news is that our fireplace backs to our garage so I will try the new finish out there first as my test spot. I realize the effects weather may have on the garage application, but it will give me the opportunity to ‘play’ with the mortar first. Thanks in advance for your response.
Hey Allison – thanks so much for reaching out! We used Grace Note White, but their Avorio White is a nice match. You could always head to their website to see if there is a local retailer near you that sells the product. They can do a custom tint to any white that matches with your decor!
And it would be best to mortar first, and paint afterward.
Hope that helps – have fun with your DIY!
Jen and Trent
Hi, refinishing a fire place with similar deep lines and already painted with a glossy paint. I like your suggestion of the masonry flat paint and I looked up this brand. However, They have multiple shades of white. Do you know the shade you used? Also, should I paint then mortar or mortar then prime and paint ? I want some texture. I have no experience with working with brick at all.
Hey Holly – thanks for reaching out! Since that was an inspiration pic, I do not have a source for that. But I loved it too!!
Wish I could be of more help!
Jen
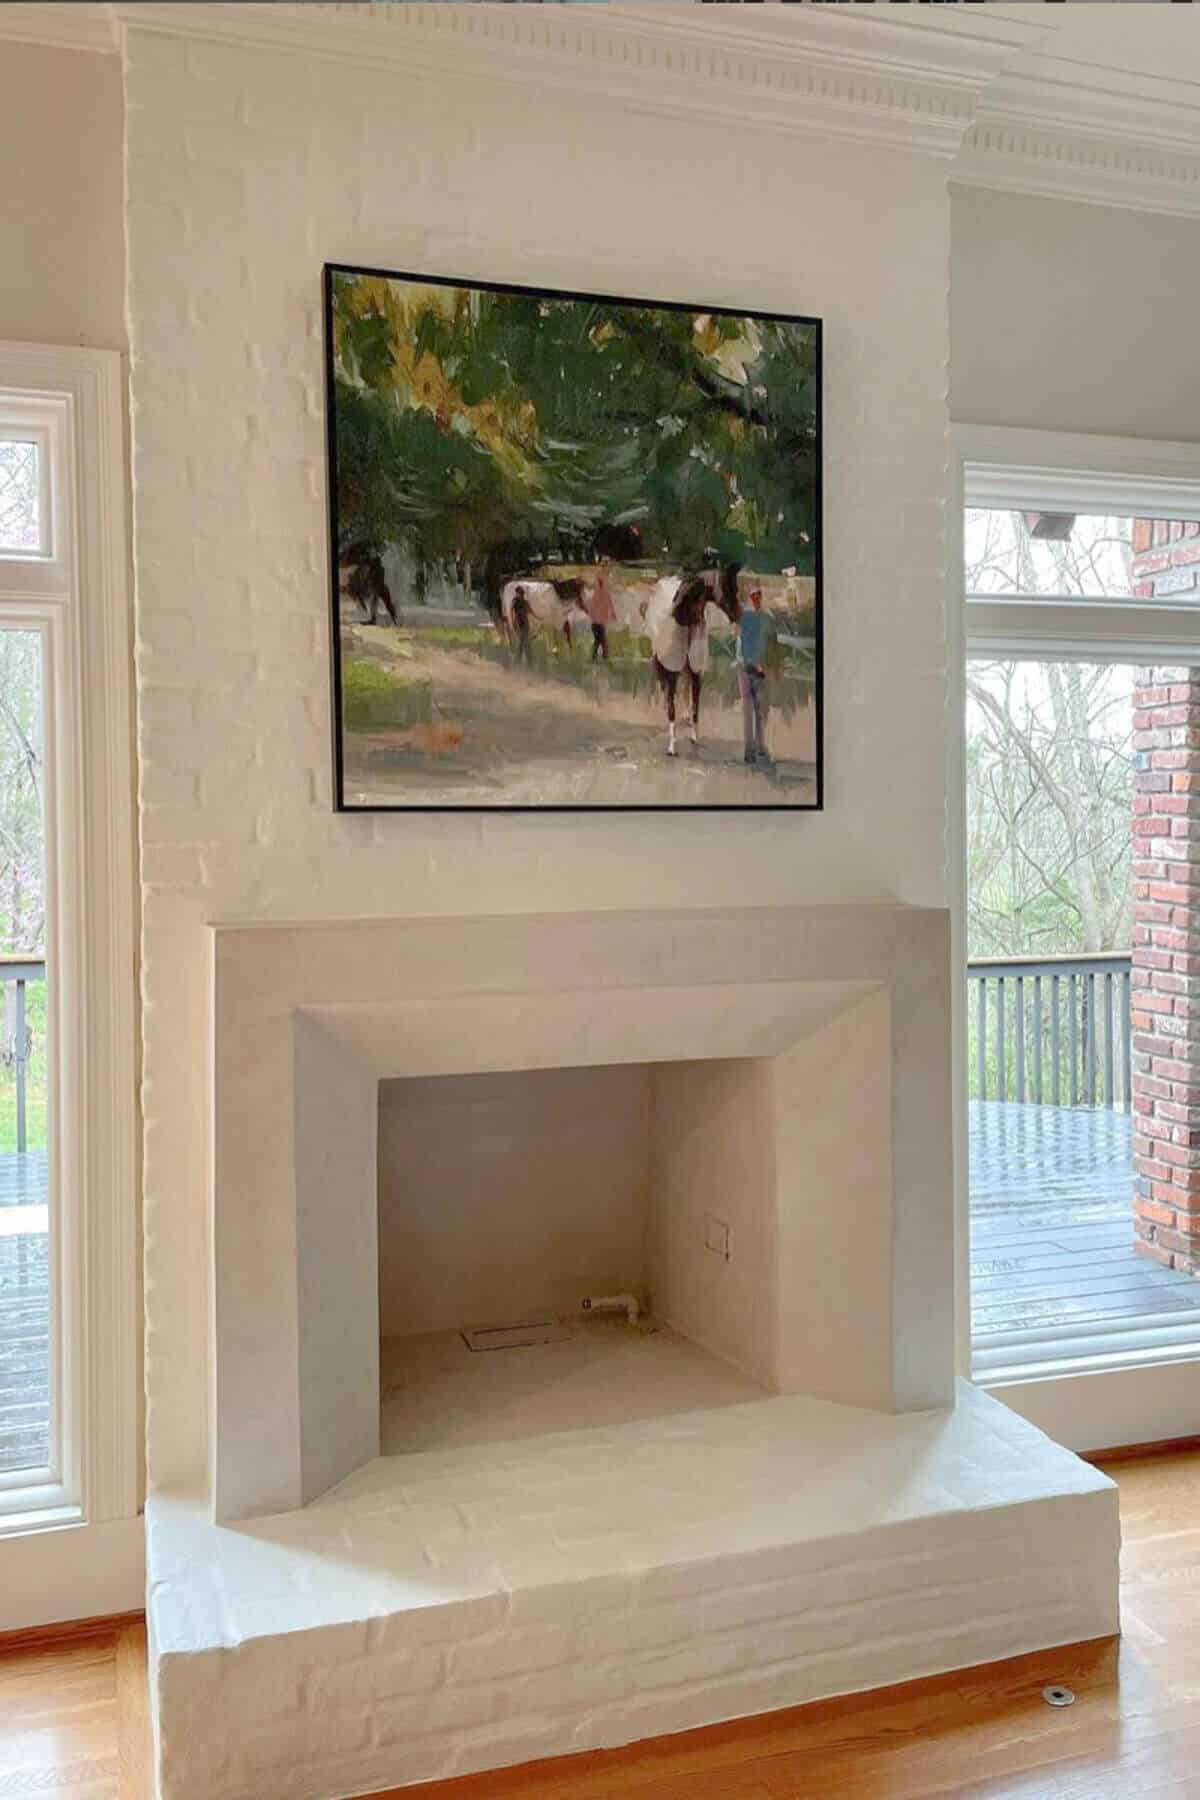
May I ask who that painting is by?
That’s a great question! And yes, I think this would work, but make sure to use the correct grout/mortar for your tile. You may need to scuff your tile first and then prime in order for anything to stick to the tile, like paint or lime slurry.
Hope that helps!
Jen and Trent
Do you know if this would work on wide grout lines on a tile fireplace. I’m wanting a smooth all black fireplace.