|

DIY Faux Fireplace Tutorial

Do you dream of a cozy reading spot next to a fireplace? Today I’m sharing this DIY Faux Fireplace tutorial to help you create a space in your home you’ll love!

DIY Faux Fireplace Tutorial | Jen @ Noting Grace shares how she transformed her living room into a cozy reading spot with a faux fireplace.

My Living Room lacked a focal point.

It needed an element that added warmth as well as a welcoming touch since this was the first room you saw when you came into our Vegas home.

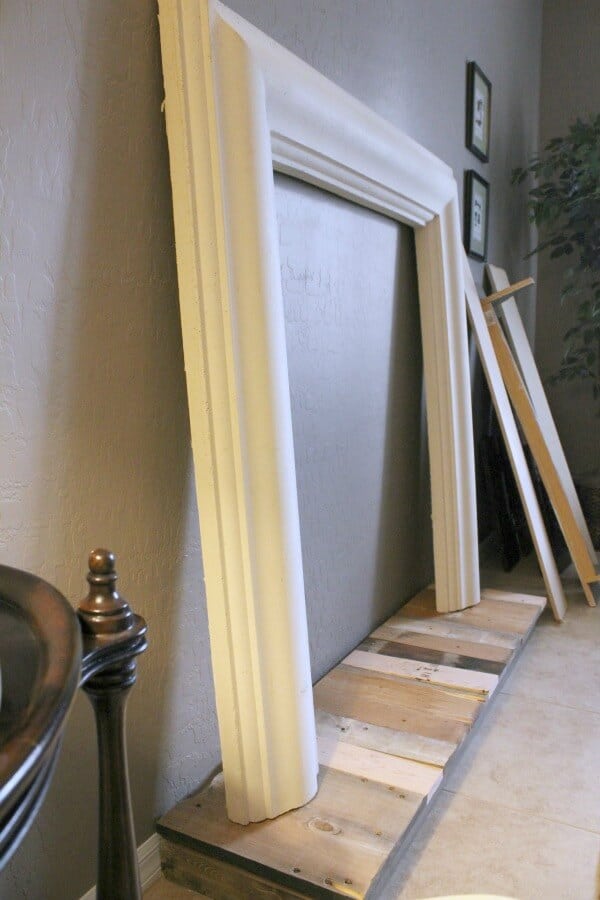
Repurposing this old concrete frame into a DIY Faux Fireplace fixes everything!

One of my Vegas besties resurfaced her fireplace, beautifully I must add! She was going to ditch the builder’s formed concrete surround and I stole… er, got it from her for only $25 bucks!

Previously, I hinted at a teaser of my big project with my Painted Window Sign blog post and today is the day I finally share with you our DIY faux fireplace and how we created it!

DIY Faux Fireplace Tutorial

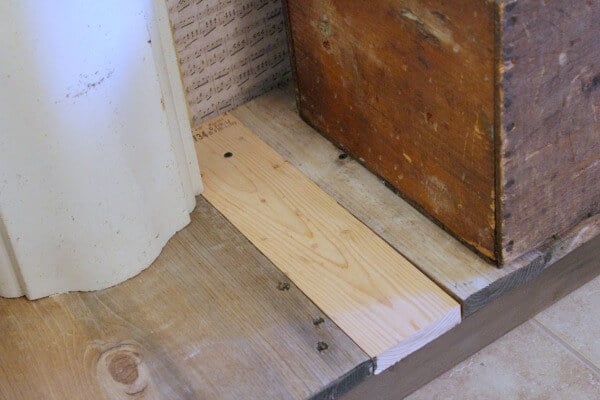
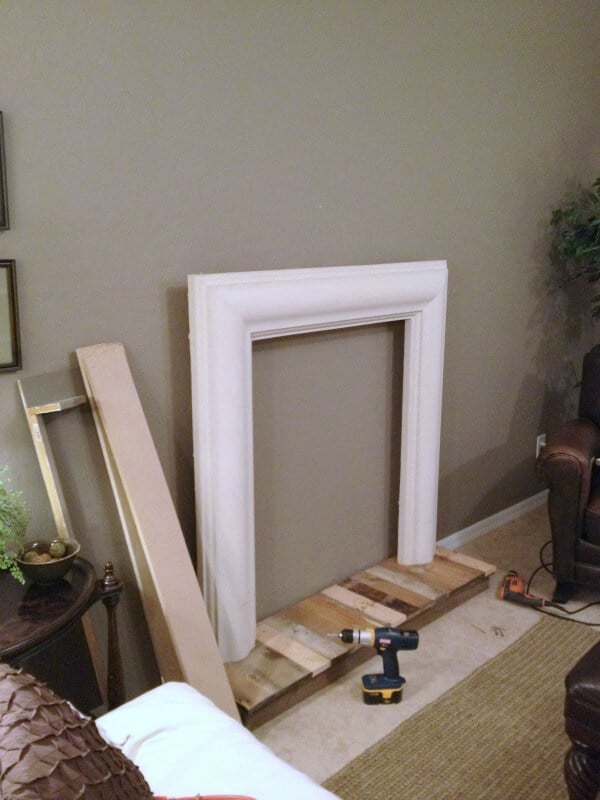
First, I built a base with a pallet wood and scraps.  I cut pieces of scrap wood we had and left all the blemishes to show for a weathered look.

DIY Faux Fireplace Tutorial | Jen @ Noting Grace shares how she transformed her living room into a cozy reading spot with a faux fireplace.

Don’t show this to any master carpenters – they would die!

DIY Faux Fireplace Tutorial | Jen @ Noting Grace shares how she transformed her living room into a cozy reading spot with a faux fireplace.

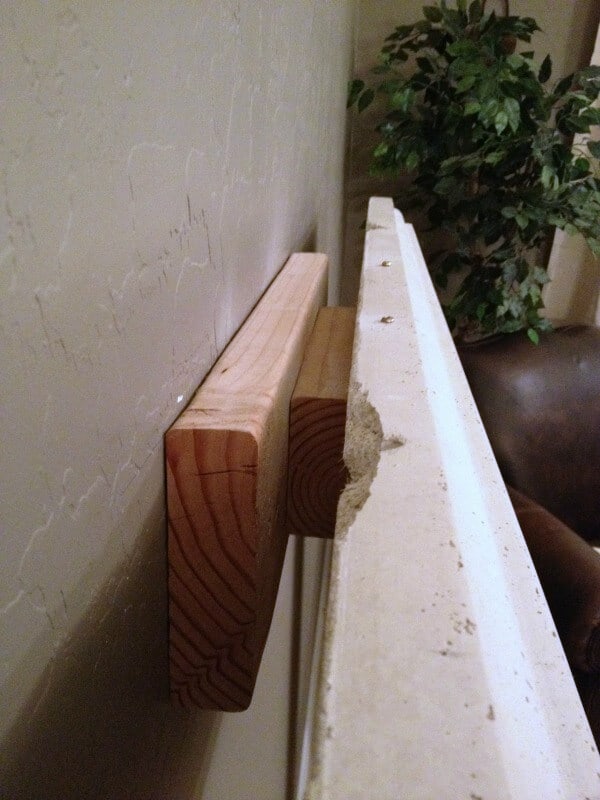
This is how I mounted the formed concrete to the wall.  

The concrete frame is rather heavy, so I’m confident it won’t move, but I first placed the 2X4 into the studs, and screwed another on top to anchor the surround. 

Here is a view from the top.

DIY Faux Fireplace Tutorial | Jen @ Noting Grace shares how she transformed her living room into a cozy reading spot with a faux fireplace.

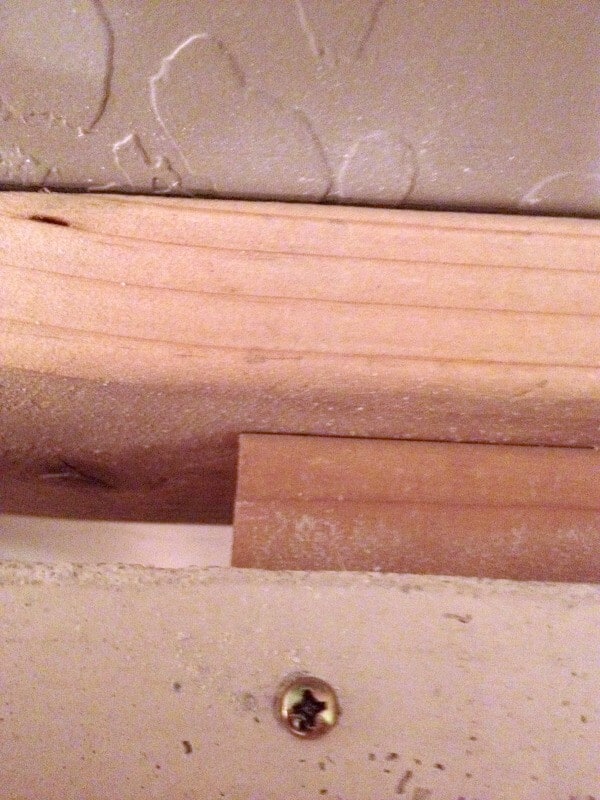
I love how my DIY Faux Fireplace looks like it’s floating there!

It’s magic, y’all!

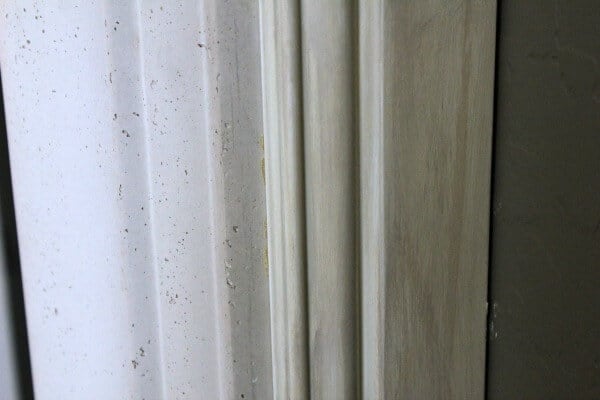
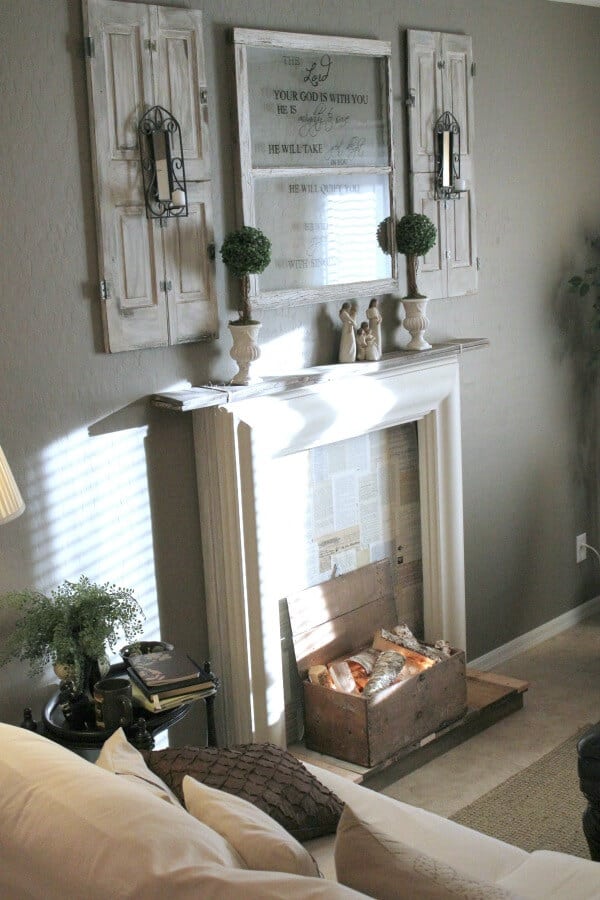
But we needed to cover those sides.

DIY Faux Fireplace Tutorial | Jen @ Noting Grace shares how she transformed her living room into a cozy reading spot with a faux fireplace.

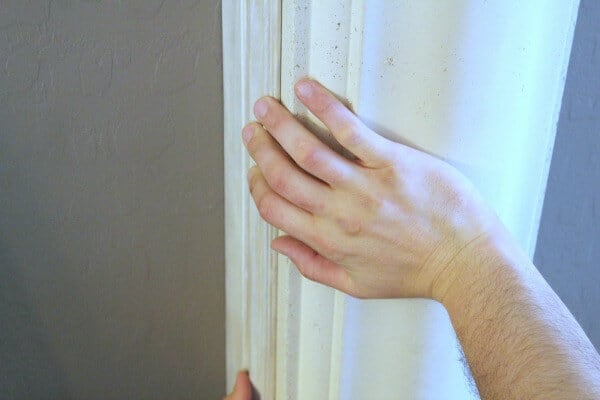
We trimmed the sides with baseboard molding that I painted, and painted, and painted to match the concrete.

Using craft paint I had on hand, I mixed it until I found the right match.

DIY Faux Fireplace Tutorial | Jen @ Noting Grace shares how she transformed her living room into a cozy reading spot with a faux fireplace.

Bad blogger moment:  I forgot to take pics for a tute on this, but I’ll tell you what I did.

I got a HUMONGO piece of cardboard from a big box store that they were just pitching.

The sales guy looked at me as if I had two heads, but if he only knew what I was going to create with this!

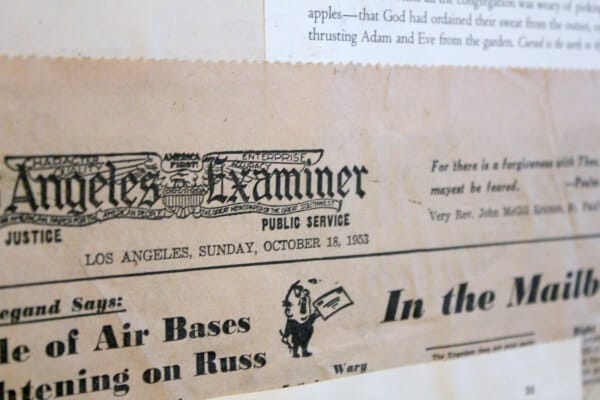
I brought it home and lined it with all types of different paper using a glue stick. Sheet music, old dictionary pages, book pages, scrapbooking paper, etc.

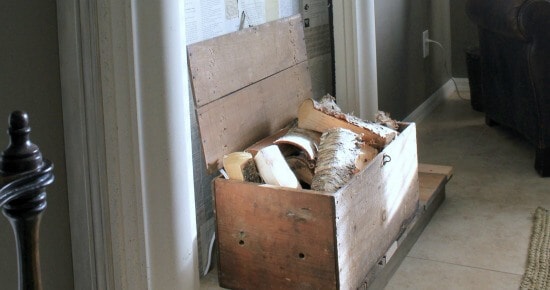
I used an old newspaper from 1953 that lined the soldier’s trunk as a centerpiece to my book page backdrop.  It’s one of my favorite parts of this piece.

DIY Faux Fireplace Tutorial | Jen @ Noting Grace shares how she transformed her living room into a cozy reading spot with a faux fireplace.

Our local grocery store had birchwood logs on clearance for a few bucks.

So I placed them in an old WWII solder’s trunk I found at an estate sale.

DIY Faux Fireplace Tutorial | Jen @ Noting Grace shares how she transformed her living room into a cozy reading spot with a faux fireplace.

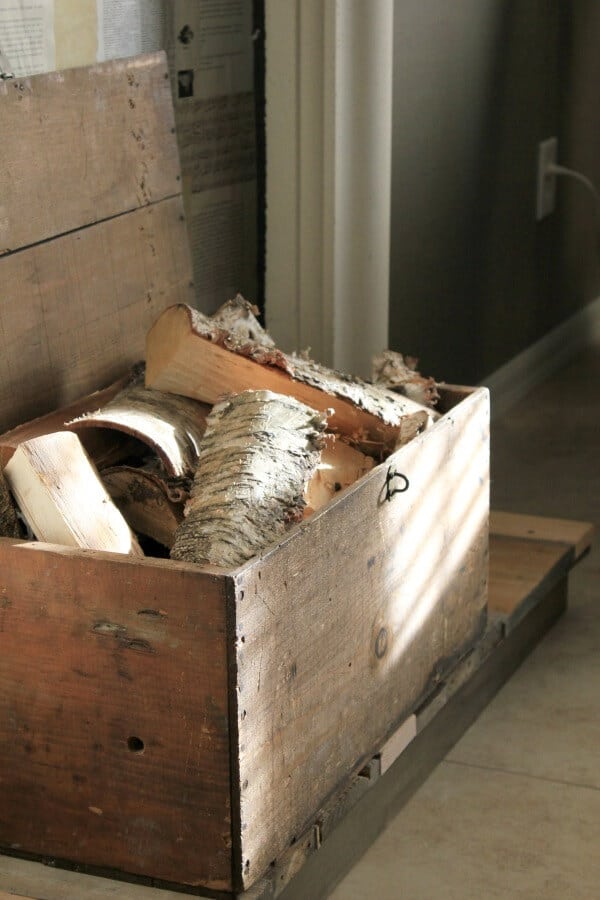
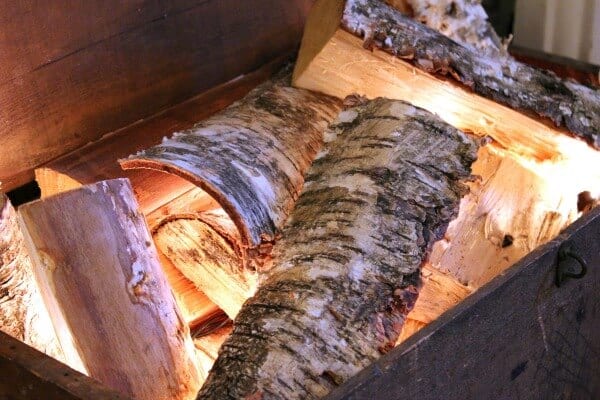
Next, I added Christmas lights underneath the logs for that fireplace glow.  

And do you know what’s cool?

Once the lights heat up the birch wood, it creates a nice, cozy smell.

DIY Faux Fireplace Tutorial | Jen @ Noting Grace shares how she transformed her living room into a cozy reading spot with a faux fireplace.

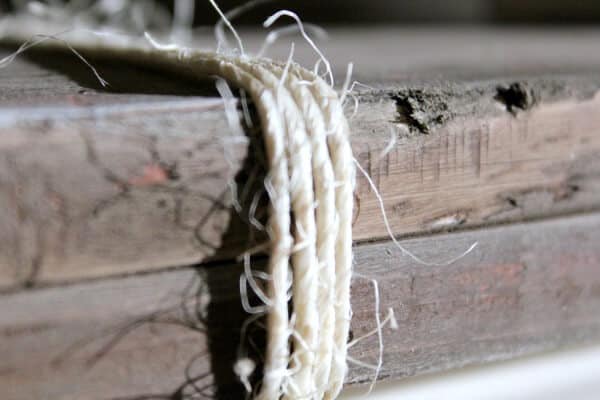
For the mantel, I hemmed and hawed about what to do and when back to my scrap pile.  I needed it to be narrow, but long.

I found 2 fencing timbers that we had left over from shed project we built that I sanded down and glazed a nice dark brown and distressed them to look like pieces of driftwood.

DIY Faux Fireplace Tutorial | Jen @ Noting Grace shares how she transformed her living room into a cozy reading spot with a faux fireplace.

Trent suggested I used twine to ‘tie’ them together.  I love the look it gave.

He has good ideas every now and then! (wink)

DIY Faux Fireplace Tutorial | Jen @ Noting Grace shares how she transformed her living room into a cozy reading spot with a faux fireplace.

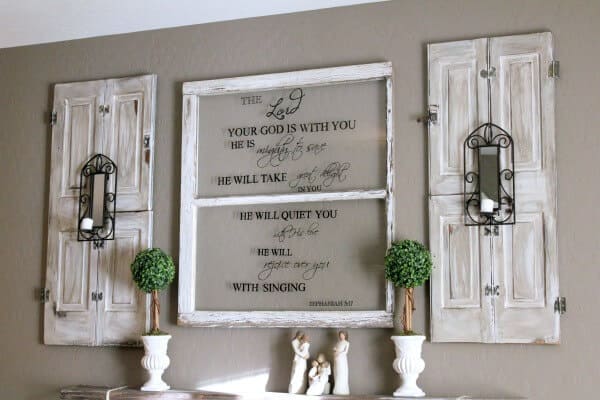
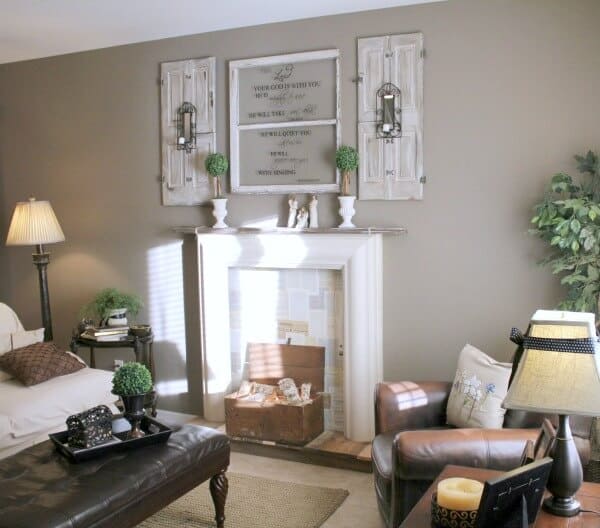
Last, I placed my Ballard’s topiary knock off’s I made along with my Painted Window Sign and Shutters. They frame the DIY faux fireplace nicely.

DIY Faux Fireplace Tutorial | Jen @ Noting Grace shares how she transformed her living room into a cozy reading spot with a faux fireplace.

Now I finally have a beautiful place to watch the sunrise and enjoy my morning coffee.

DIY Faux Fireplace Tutorial | Jen @ Noting Grace shares how she transformed her living room into a cozy reading spot with a faux fireplace.

A relatively simple project you can recreate using an old mantel surround – many times you can find one on Craigslist!

So don’t give up hope if you are dreaming of a fireplace in a fireplace-less home!

I just love this room now!

DIY Faux Fireplace Tutorial | Jen @ Noting Grace shares how she transformed her living room into a cozy reading spot with a faux fireplace.

Pin This for Later!

DIY Faux Fireplace Tutorial | Jen @ Noting Grace shares how she transformed her living room into a cozy reading spot with a faux fireplace.

Similar Posts

Leave a Reply

Your email address will not be published. Required fields are marked *

This site uses Akismet to reduce spam. Learn how your comment data is processed.

15 Comments

  1. So creative! I love the book page inset and the soldier's box full of birch & lights. Thanks for linking up! I'm featuring this on my Show & Tell superstars pinterest board.

  2. WOW! That is soooo awesome! What a great idea for the ember "glow"! Seriously, this project is awesome!!!

    –Katie

  3. This is so FABULOUS!!!….WOW!!!…all of it…enjoy…it's wonderful…
    Mariaelena

  4. How creative! I love the illumination. Thanks for sharing at Terrific Tuesdays.
    Rachel
    adventuresofadiymom.blogspot.com

  5. Jen, this is so gorgeous!! I adore everything about this piece. And aren't you clever with the birch & Christmas lights? That's awesome. So happy you linked up at Mop It Up Mondays. Thanks bunches for stopping by. Have a great day!
    {HUGS},
    kristi

  6. Great job on your "faux"-erplace. My favorite part is the lights tucked in under the wood. Love that glowing look.

    Thanks so much for stopping by my blog and commenting on my canister makeover. I'm glad you enjoyed the galvanizing tutorial.

  7. Jen

    I am the one that removed this from your friends fireplace. You have done an absolutely marvelous job with this, it is very attractive and has a wonderful "homey" appearance. I really think you should submit this idea to one of the home decor magazines, might be worth getting this idea out there.

    Nat's Dad

  8. Wow, wow, wow!!! I want a faux-erplace!!! Thanks for showing this tutorial. Looks amazing.

    I'm so glad you linked up at Romance on a Dime this week. Hope to see you next Tuesday. I'm pinning this.

  9. I have a faux fireplace, I've not ever shown it…because it looked faux. You WANTED YOURS TO LOOK FAUX?! That shows a spirit of contentment, sister!
    I've been thinking of dressing it up– I really like the book pages I may do this.
    I'll certainly link back here when I do!
    I love how it turned out. Wonderful friend you have to give you such a great deal, …and The Hunk for helping you follow through on your vision!

    –I'm taking a longer look at your blog, Pat

  10. Nicely done Jen! Especially like your window box and shutters. Wish I could see all of your beautiful home.

  11. Great Job Jen. You are so creative. I love the fact that you are not afraid to pick up the power tools and tackle a project.

    So glad you are blogging again. Love seeing your awesome decorating masterpieces.