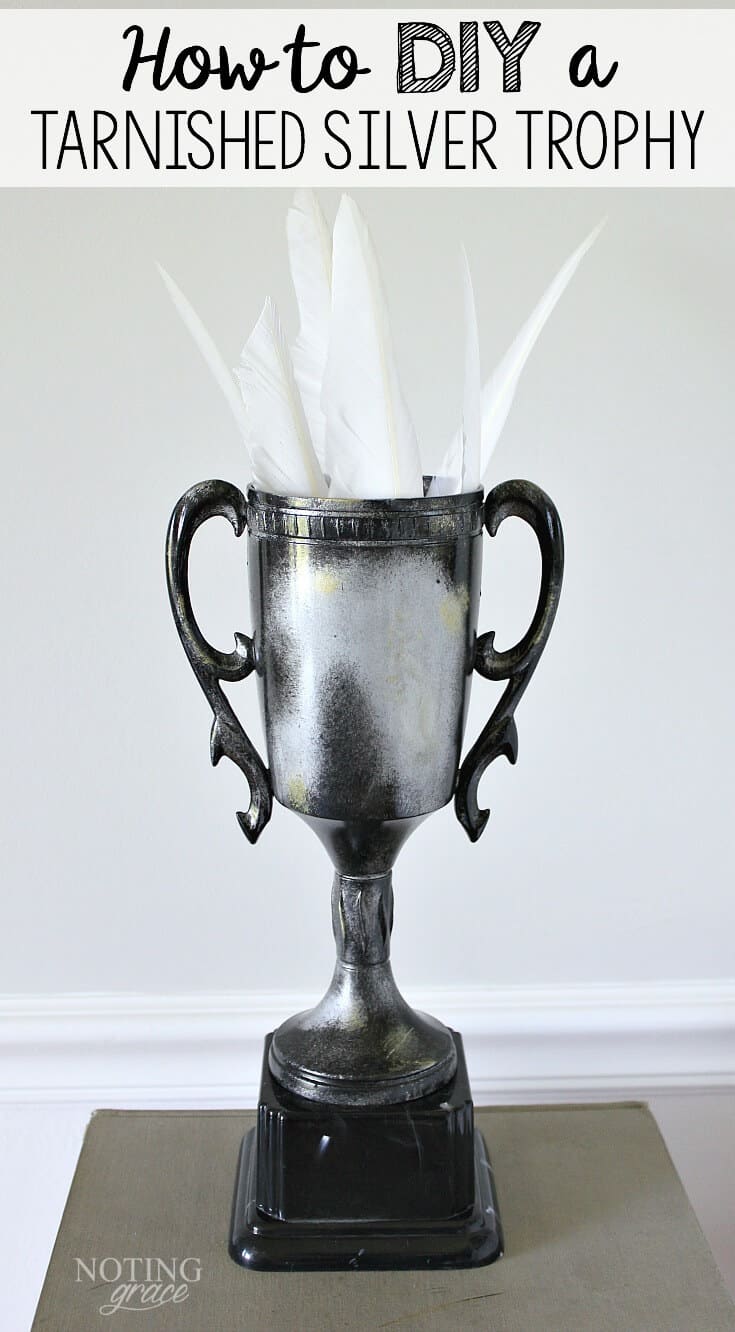
How to DIY a Tarnished Trophy
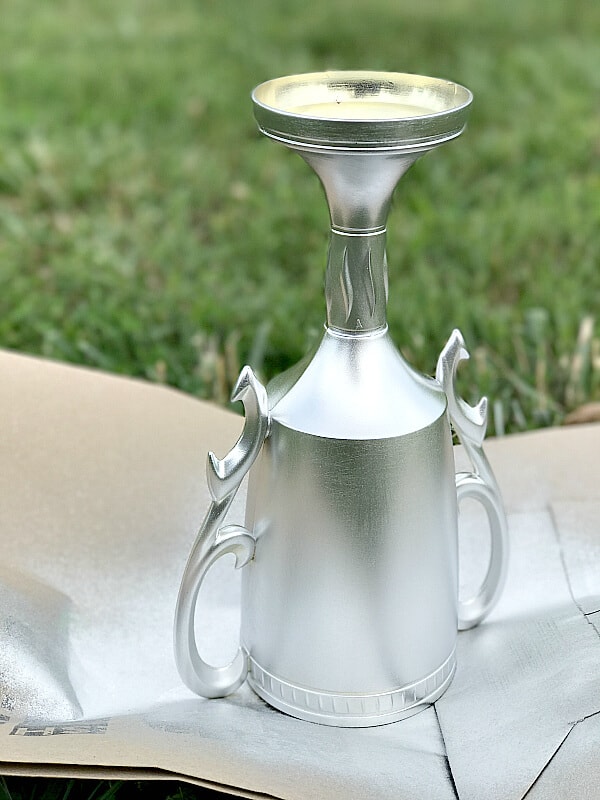
Do you have that one item that you’ve always wanted, but just can’t seem to find, but continues to haunt you? For me, I’m always looking for vintage trophies. I saw this gorgeous trophy at the Country Living Fair.
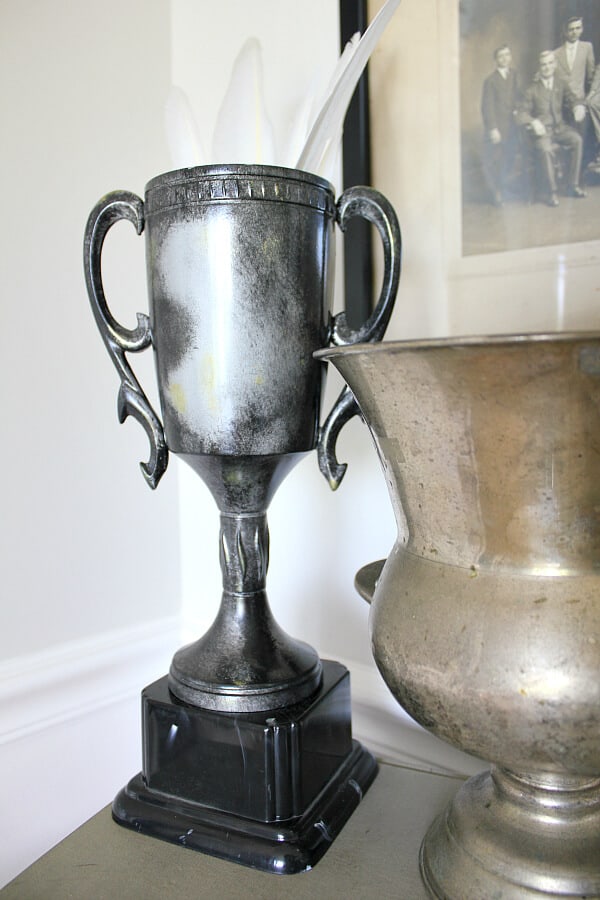
I love the tarnished silver and the curved arms, but what I don’t love is the hefty price tag. In fact, some trophies I’ve come across have prices so high that it’s laughable. This is how I took one of my son’s old trophies and made a DIY Tarnished Trophy of my own.
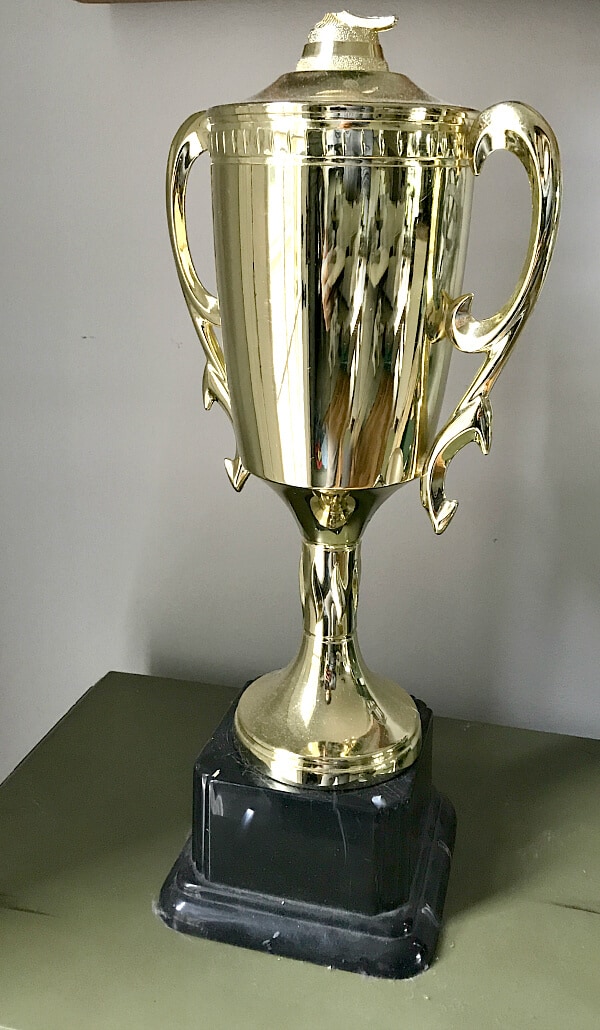
Once upon a time, my son took karate lessons…for about 10 minutes. Okay, it was a few weeks, but you get the point. The instructor created a game that would award each child would with a trophy. My son won this trophy by sharing his favorite color. Quite the award!
After that, this busted up trophy came along with us for each move and sat, collecting dust, in the top of my son’s closet. Time and years have passed and, consequently the shine on this trophy lost it’s luster in my son’s eyes. I quietly confiscated his award and decided to make it into my own. These are the materials I used to get this vintage look. Affiliate links are provided for your convenience. You can read my full disclosure here.
DIY Tarnished Trophy Supply List
- Old Trophy – you can find these at garage sales or thrift stores.
- Metallic spray paint in silver
- Acrylic craft paint in Black and Gold
- Stenciling Brush
- Clear Gloss Sealer Spray Paint
- Sand paper
First, you want to scuff the trophy with the sand paper.
This gives the spray paint something to adhere to. Next, you spray the trophy with two light coats.
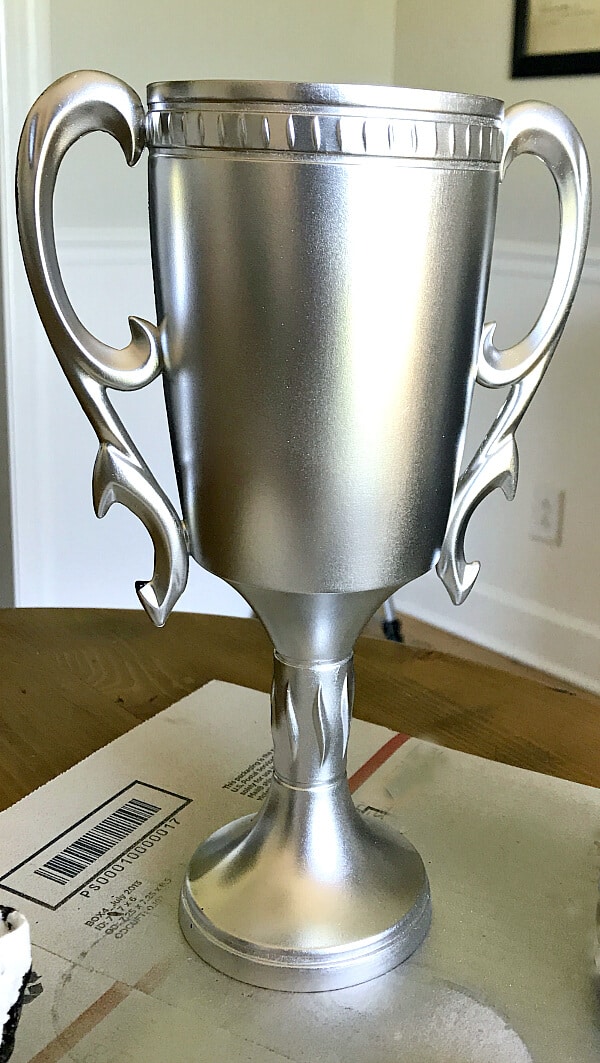
After the second coat, those scuff marks you make are finally covered.
At last – now comes the fun part!
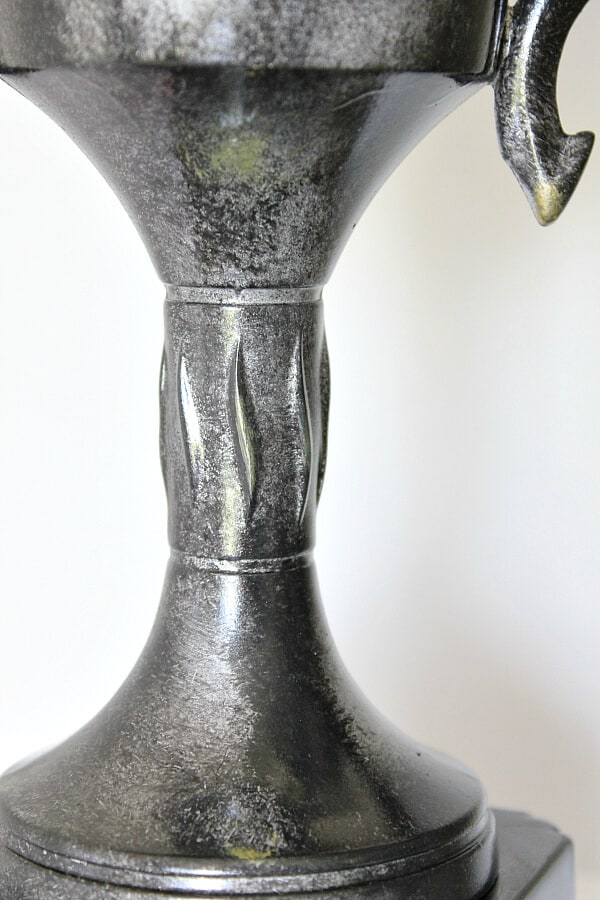
To tarnish the trophy, I used black craft paint and a stiff, stenciling brush.
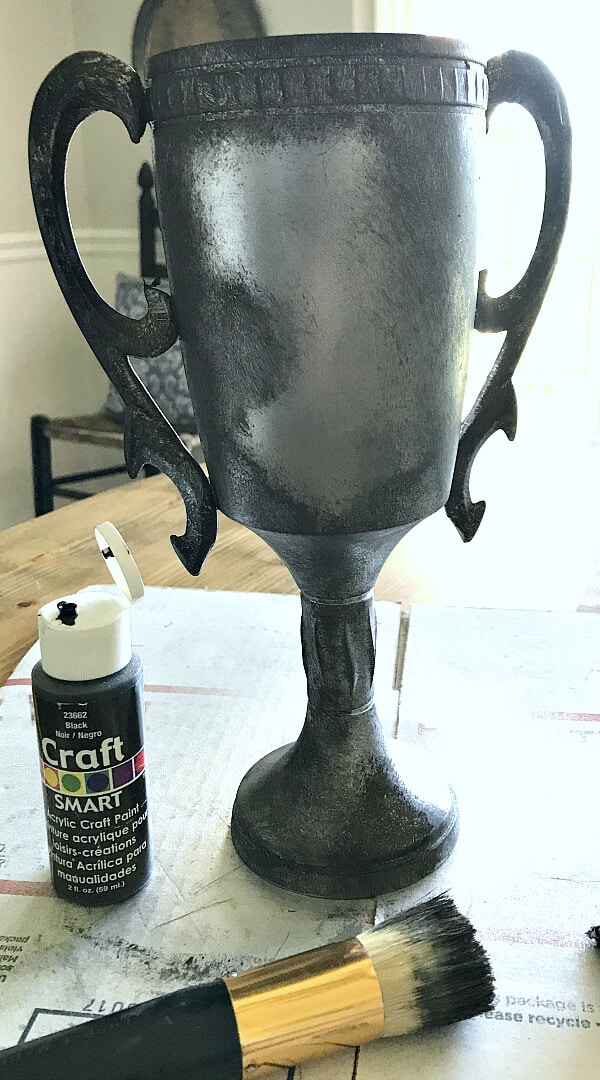
In this case, I worked in layers, adding paint with multiple coats. This actually creates a mottled, tarnished look.
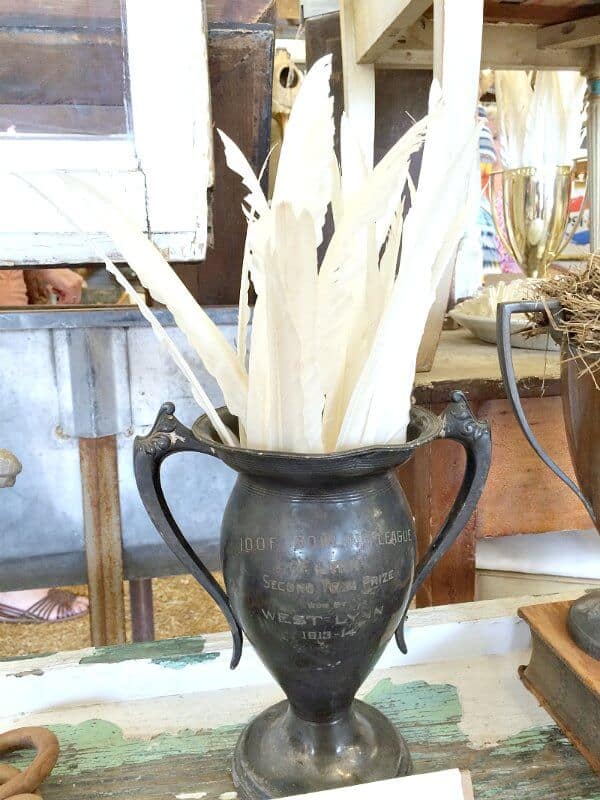
Next, you add hints of gold paint in small random spots using that same stencil brush. This glorious tarnished pitcher was my inspiration piece. By placing them side by side, I noticed that the sheen on my DIY tarnished trophy was dull.
After that, I sprayed the trophy with the clear coat.
I added touches of black paint to the inside of the trophy since it’s visible from above.
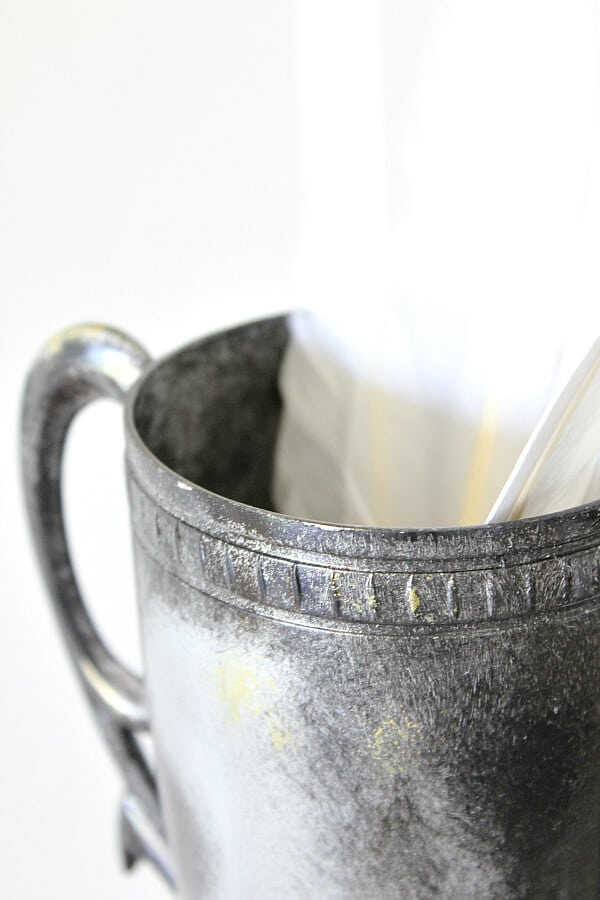
Once I added the hints of gold paint, it mimic’d faded silverplating. You especially want to add those to the edges and raised spots.
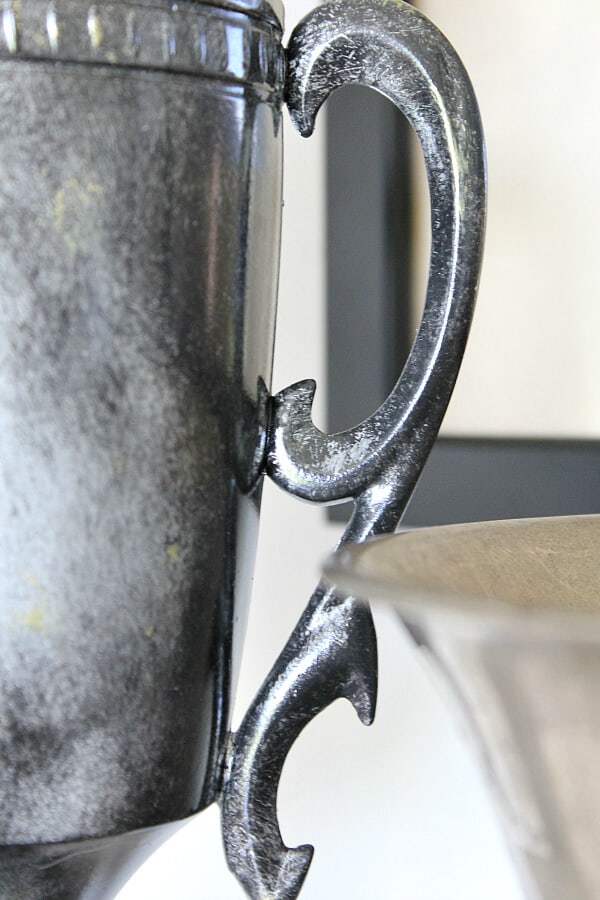
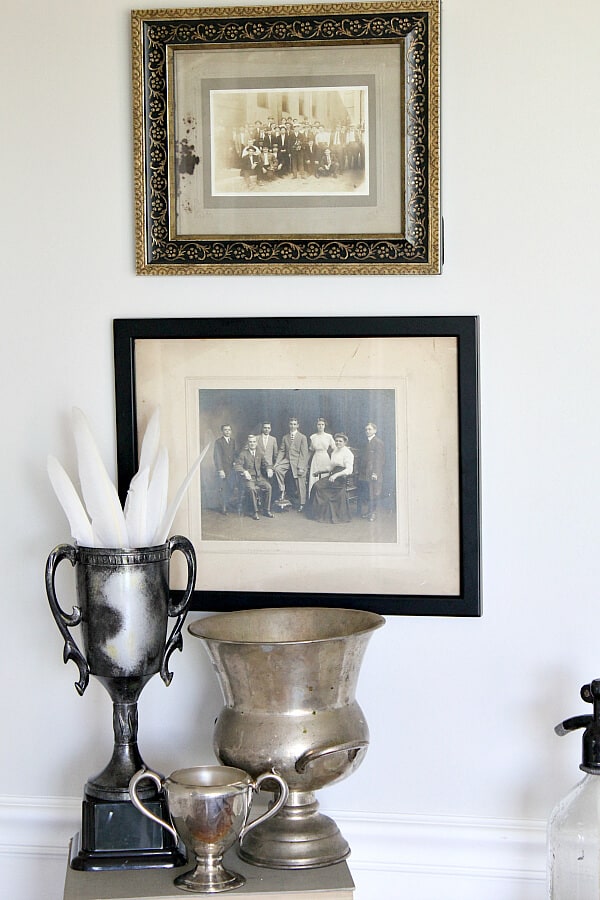
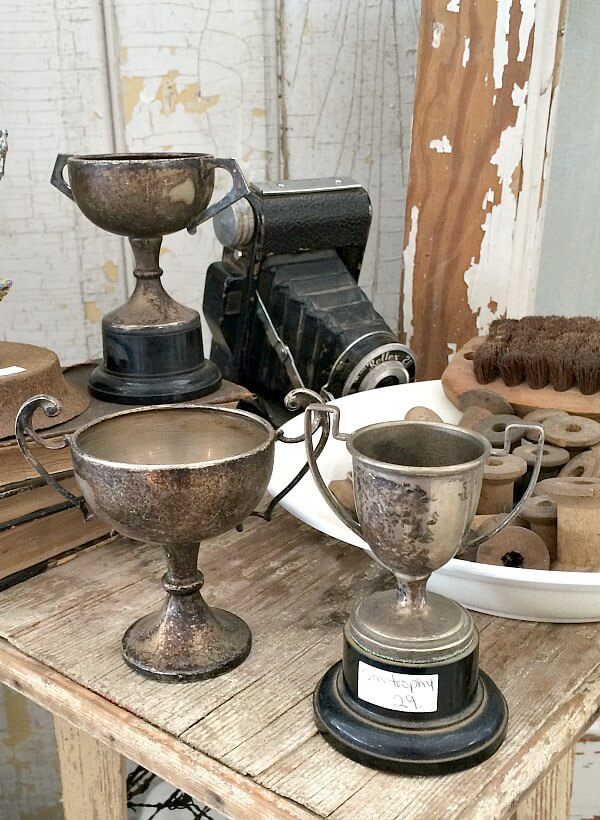
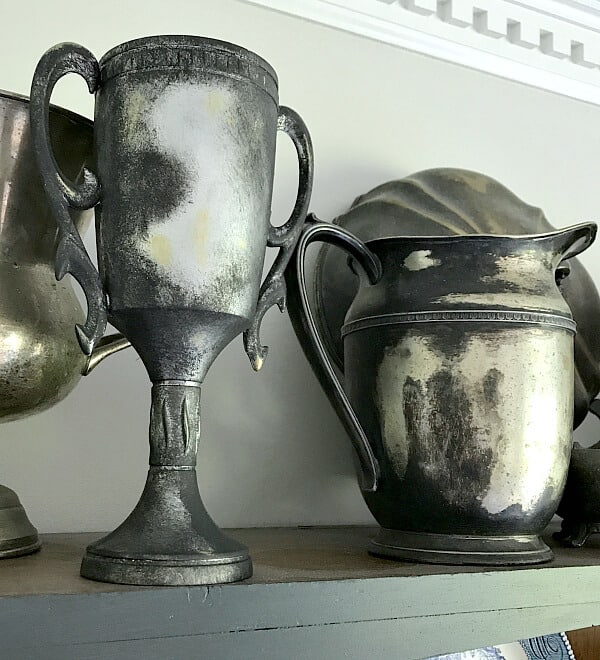
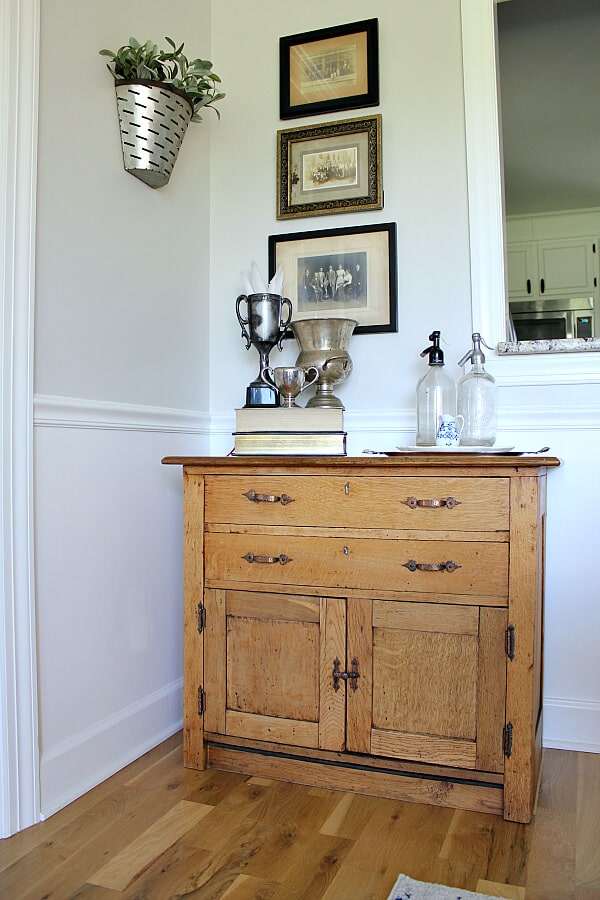
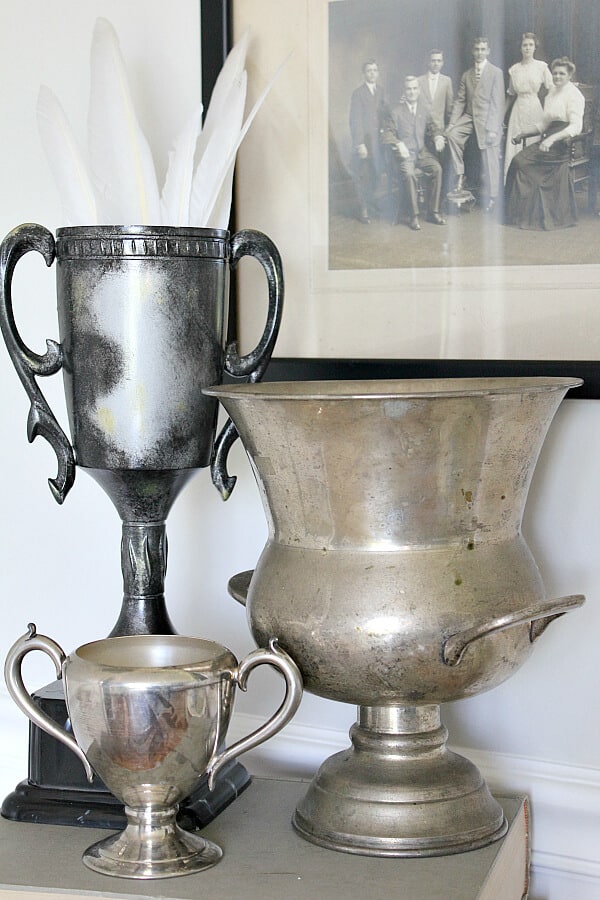
Finally, I can perch it next to two other gorgeous silver pieces I have. The small piece previously was a sugar bowl that now is pretending to be a trophy. And that larger piece was a gift. My sweet friend, Cindy from A Cottage Girl gave me this sweet ice bucket, since she’s has been with me on many a junkin’ treks!
Now I can finally put that hunt for the elusive trophy to rest!
Pin This for Later!


That’s a great question! I use small bursts while making a sweeping motion back and forth. It’s best to do many layers of light coats instead of trying to coat the entire piece in one sitting. Sometimes it takes 3 passes to get full coverage, but that’s the best option to avoid getting those dreaded runs!
Hope that helps!
How do you use a spray can to paint inside a Trophy without getting it pooling and collecting at the bottom?