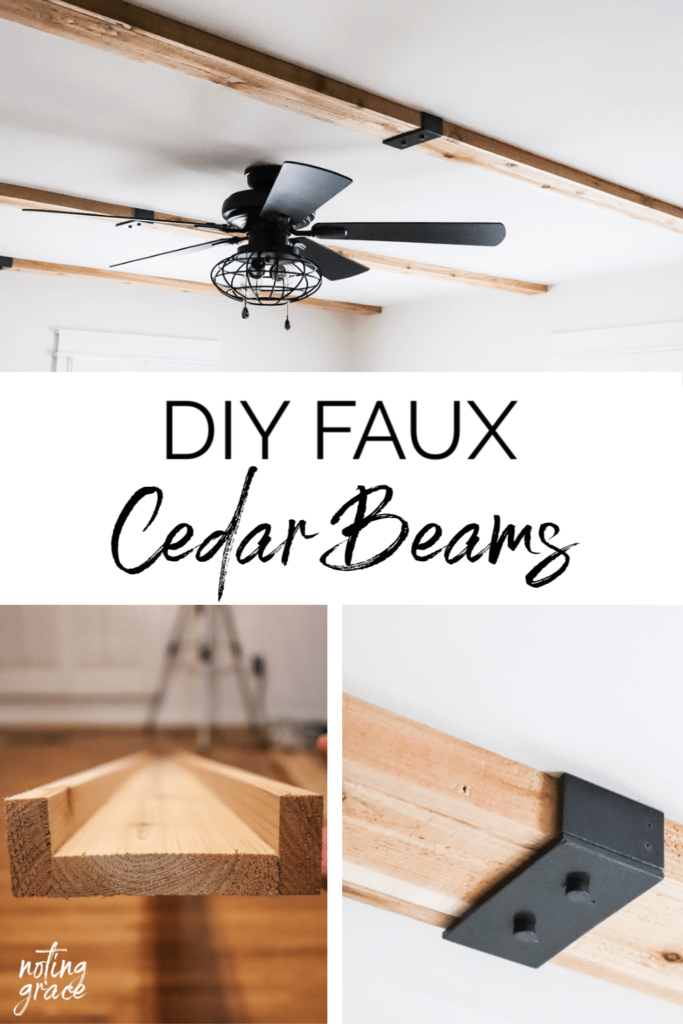
DIY Faux Cedar Beams
We are slowly making headway in our master bedroom and this simple DIY has given us our dream room! Here’s how to make your own DIY Faux Cedar Beams.

This is where I get really excited!
When I can start seeing the room come together – excitement overtakes me and gives me that boost to keep going.
Once we scraped the popcorn off the ceiling, we painted our walls using Grace Note White and an accent wall in Iron City – both custom colors from my collection with RomaBio Paints.
And before we started bringing the furniture back in, we wanted to add some DIY Faux Cedar Beams.
And friend, this may be the best $182 I’ve ever spent on a DIY! Let get into the supplies we used.
DIY Faux Cedar Beams
(Some affiliate links are provided below. Full disclosure here.)
Supplies:
1 X 4 8 foot Cedar Boards – we used a total of 8 for our ceiling
1 X 2 8 foot Cedar Boards – we used 16
Scrap wood for cleats
Scrap wood for the faux metal straps
Stud finder
Wood buttons for faux grommets
Rustoleum Matte Hammered Spray Paint in Soft Iron
Nail Gun
Step One: Build your Faux Cedar Boxes.
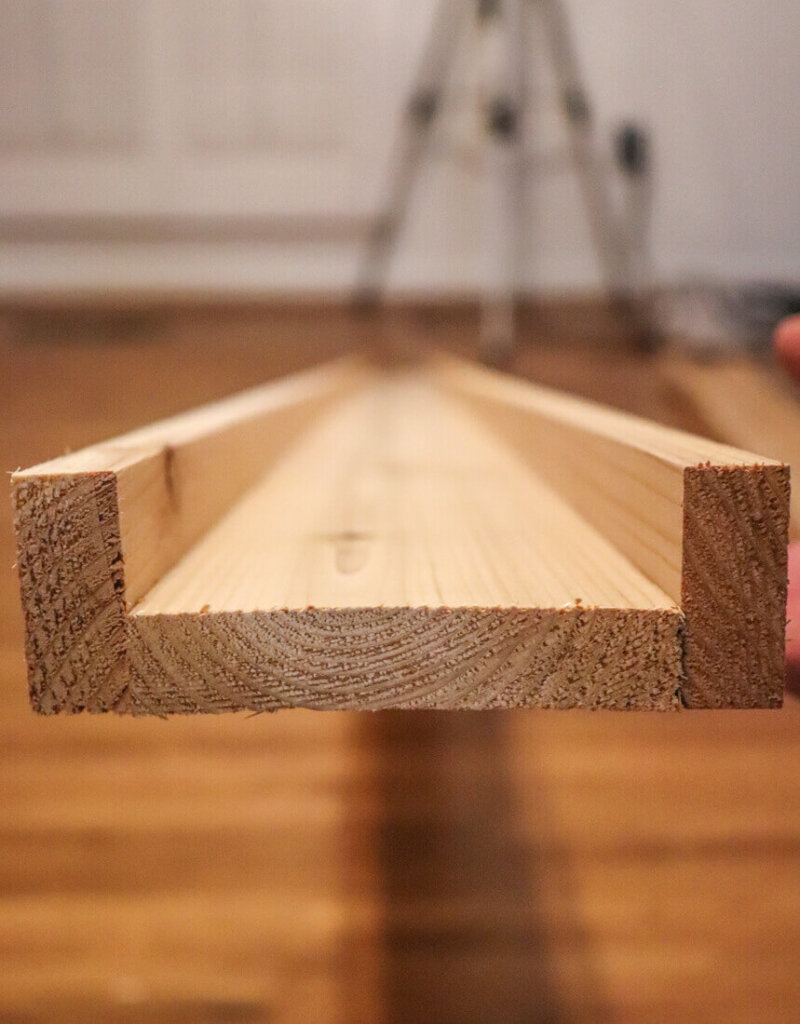
Our ceiling in our Meadow Brook home are only 8 foot high, so I didn’t want the ceiling beams to be too low.
I was afraid it would make the ceilings feel as if they were falling in on us.
So Trent built these boxes by clamping a 1 x 4 cedar board with two 1 x 2 cedar strips and nailing them together.
Having a nail gun is super helpful to make this a quick and easy build.
Step Two: Mark your Studs and Install Cleats
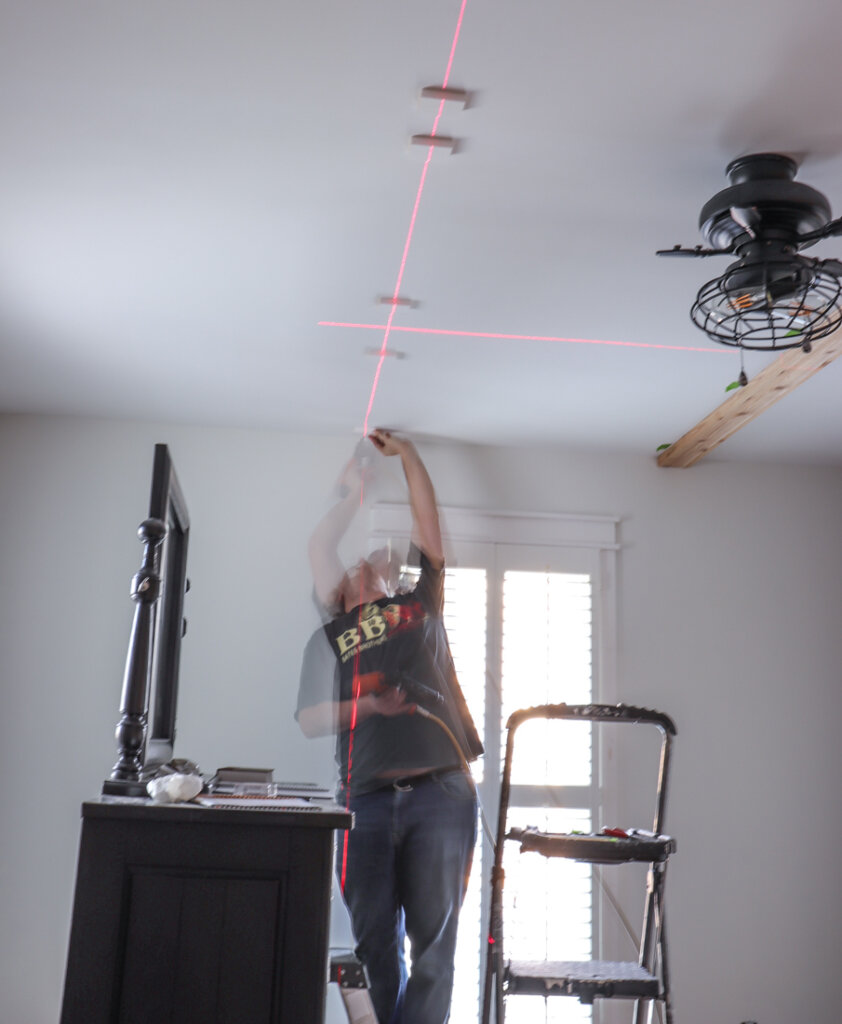
Using a stud finder, mark your studs.
Your DIY Faux Cedar Beams will run on top of each stud. Or underneath each stud since it is a ceiling. 😉
We found using a laser level is helpful if you have one. We invested in one to build our pantry cabinets and have found it super helpful!
It eliminates the need to make marks on your freshly painted ceiling!
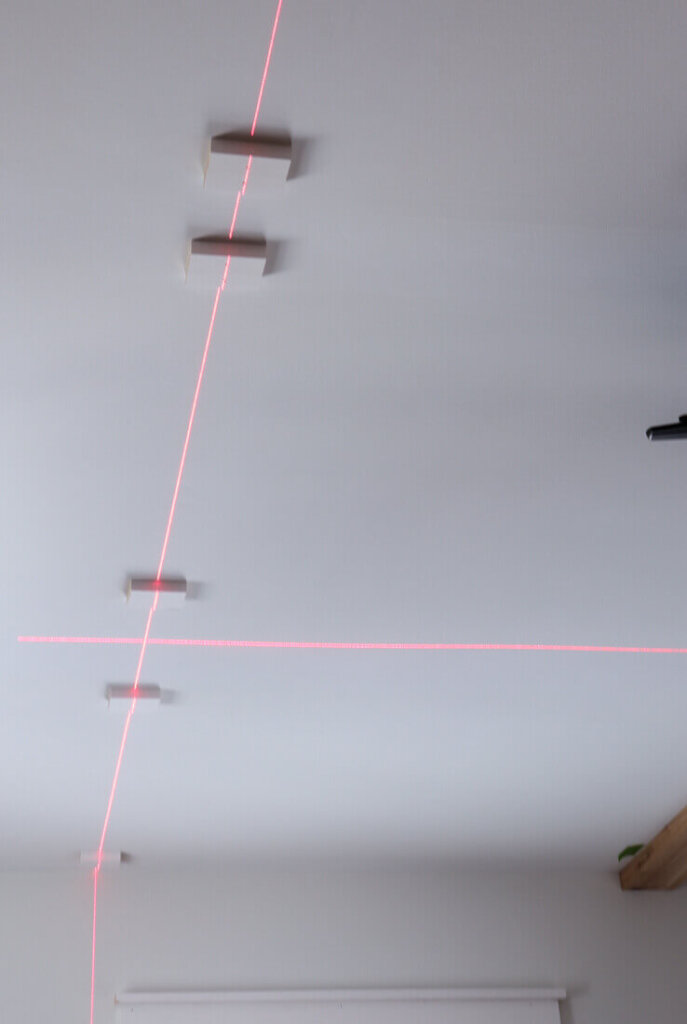
We ran the laser along the stud and installed these cleats made from wood scraps. The cleats were cut to the inside measurement of our cedar box.
Then, Trent just nailed them directly to the stud.
And now you are ready to install your beam box!
Step Three: Nail the Faux Cedar Box to the Cleats

This requires two people, but is super quick and easy.
You simply wrap those little wood cleats with the cedar box and nail it into place.
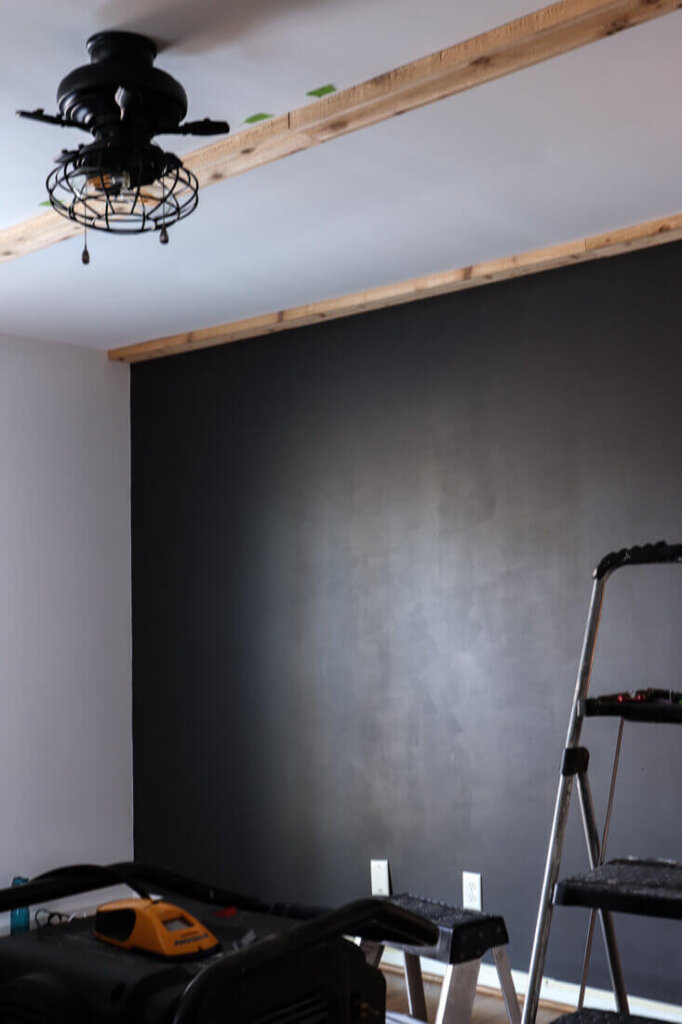
As you can see, we had to use two cedar boxes to span the width of the ceiling, so we came up with a great way to hide that seam.
We slowly worked our way across the room.
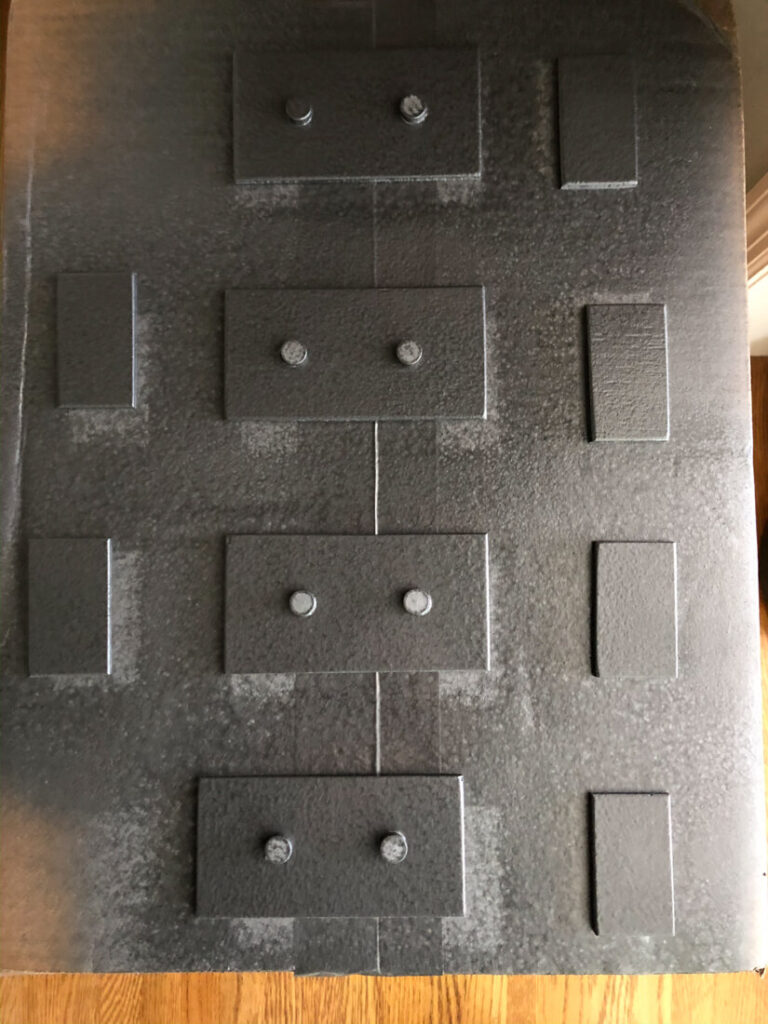
Step Four: Build your Faux Metal Straps

I had some thin plywood scraps leftover from our shiplap backsplash we installed in our kitchen.
So we cut them to the size of the Cedar box and glued these wood buttons to mimic the look of grommets.
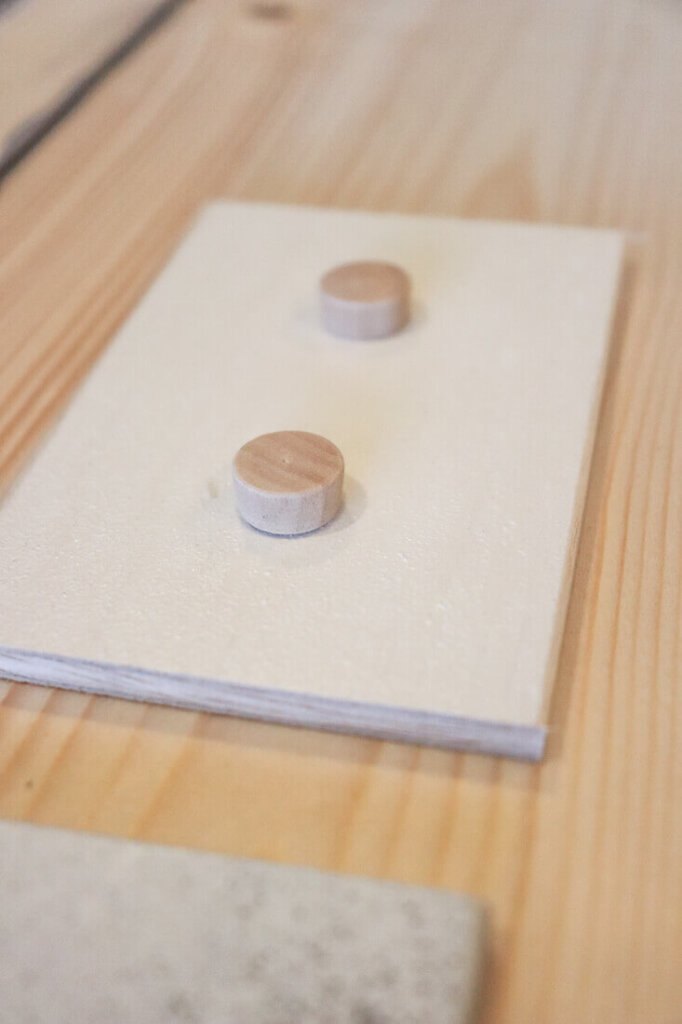
Then we spray painted them with hammered paint in soft iron.
It looks just like real metal!
Step Five: Install your Faux Metal Brackets
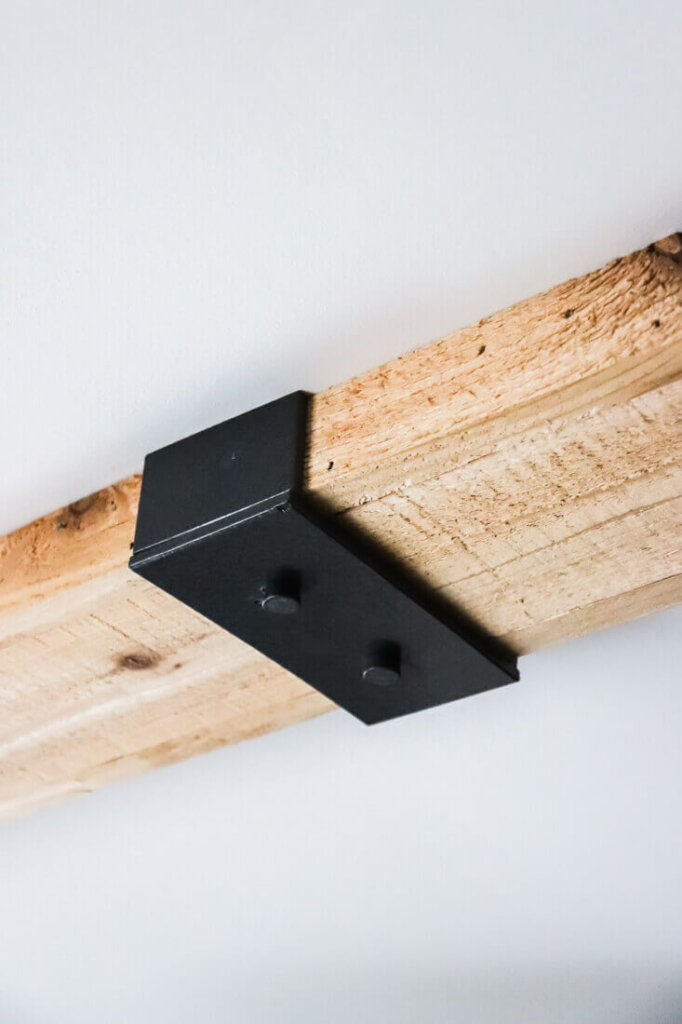
We covered the seams with these faux brackets and LOVE how they look.
Just nail them in place and it’s finished!
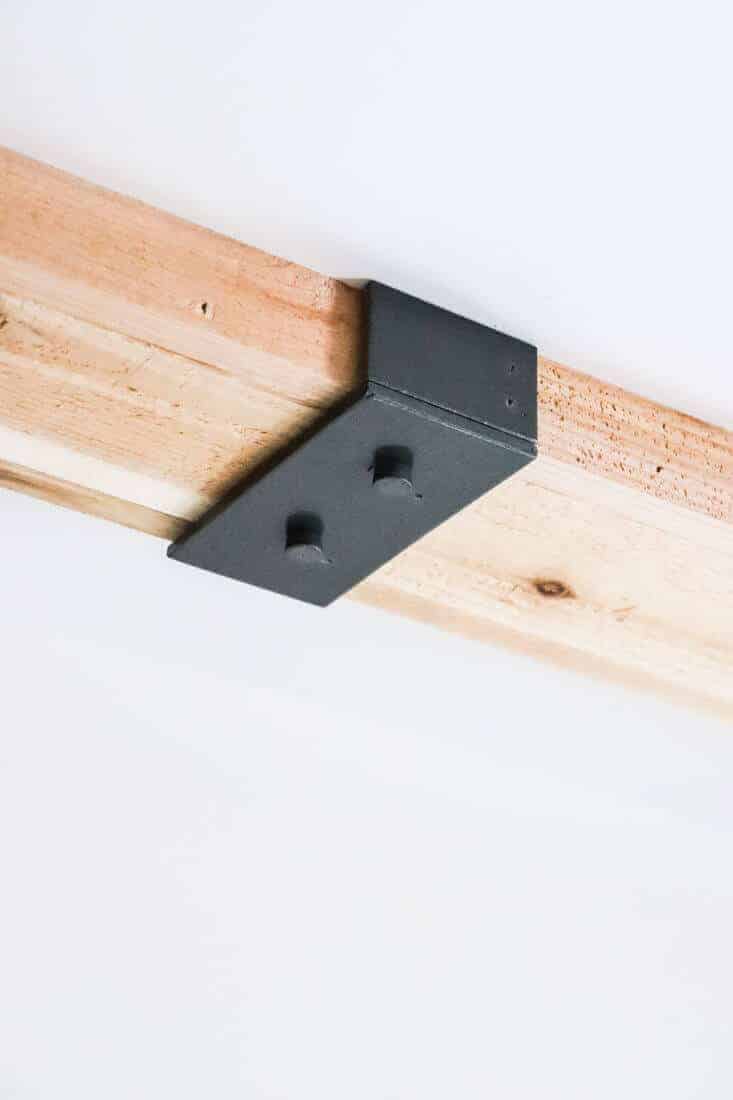
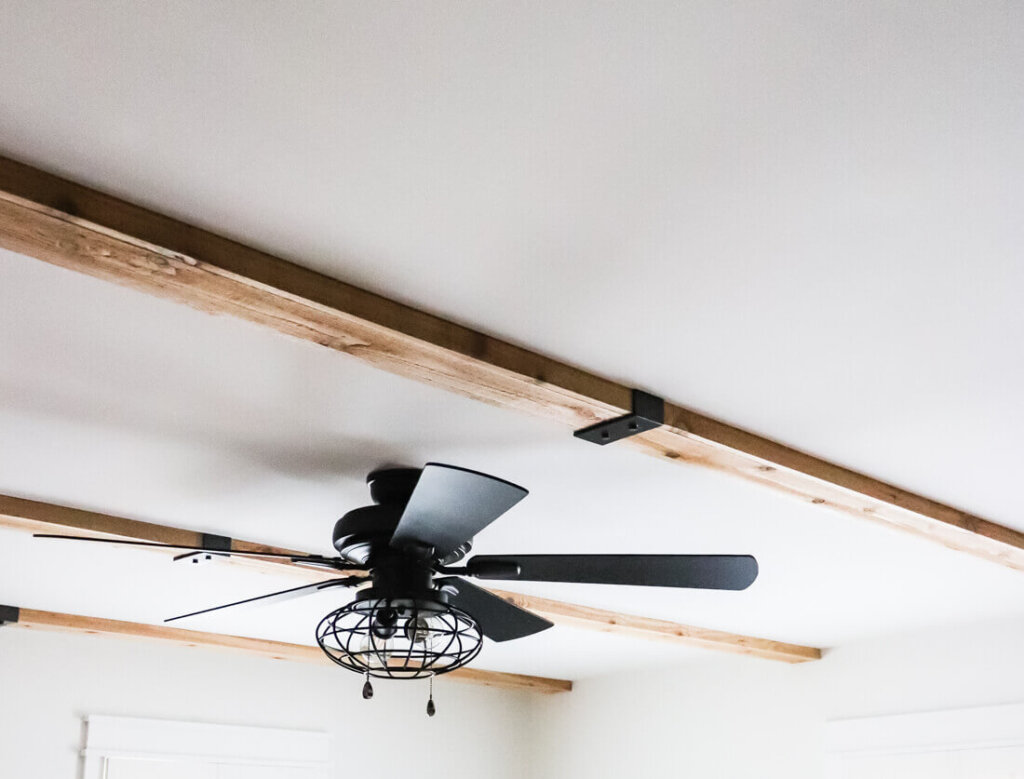
Our seams ran across the center of our room and highlight our ceiling fan beautifully!
So what do you think of this DIY?
Do you find it doable? I honestly thought it was a HUGE project with lots of math and head scratching, but it was surprisingly easy to do!
The only cost we were out was for the cedar wood – about $185 bucks- which is pricier than other kinds, but gives that true rustic look.
Would you do this project? Let me know in the comments below.
You can always follow along with our shenanigans over on Instagram or Facebook. We’re always sharing behind the scenes of our progress and would love to have you join us!
Pin this tutorial for later!


Wow, Paul! Thank you so much for taking the time to leave such a kind comment! We are so glad this inspired you!
And you have inspired us – now we’re thinking of adding beams to our living room! 😉
I absolutely love the look of the cedar! I was thinking of doing this in my living room in pine, and then staining the crap out of it so it doesn’t look like pine. But after seeing what you guys did in cedar, I may have just changed my mind. Thanks so much for sharing with the rest of us!
You have made my day, Ashley! So glad this inspired you!
This was the perfect DIY ceiling beam project I’ve been searching for! I feel inspired & thanks for the great pictures and simple instructions. Especially your creativity in designing those wood button and spray painting to look like metal – pure genius 😉
Hi Maureen – thanks so much for your kind words! Love the idea about using fence boards! I’m so glad this inspired you and am honored you took the time to comment!
Happy DIY-ing!
Jen
This looks great! I did something similar at a previous home using old fence boards. I covered the seams with custom rusted iron straps. Now I am in a home with 8 foot ceilings and am totally going to follow your instructions. I plan to do our living room and dining room. Thanks for the post.
So glad this inspired you! Thanks for taking the time to comment – it means so much!
Genius!!!! Thanks so much for posting this, I new there had to be a cheaper solution.
So glad you like this! These are easy peasy to make. Let me know if you have any questions.
Oh my goodness! I’m going to try this! I wanted a faux beam & my husband said that he’d try & make one. This is great information! Thank you!
Hi Danielle, I linked all items in this room in this post to make it easier. Hope that helps!
French Country Master Bedroom Decor Sources
Where did you get that ceiling fan?
Oh good! We were hoping for a realistic look! Thanks for sharing that!
Ha! I love it! That is awesome! I can’t wait to tell Trent! Share a pic if you do!
Wow! I am now trying to find a place to add “metal” brackets…. I love it : )
Looks great! I truly thought the ‘black iron brackets’ were really black iron!