Adding a Pass Through to a Load Bearing Wall
Welcome to our Farmhouse Kitchen Remodel Part Two! I’m sharing how we opened up the wall to our dining room to create a brighter kitchen by adding a Pass Through to a load bearing wall.
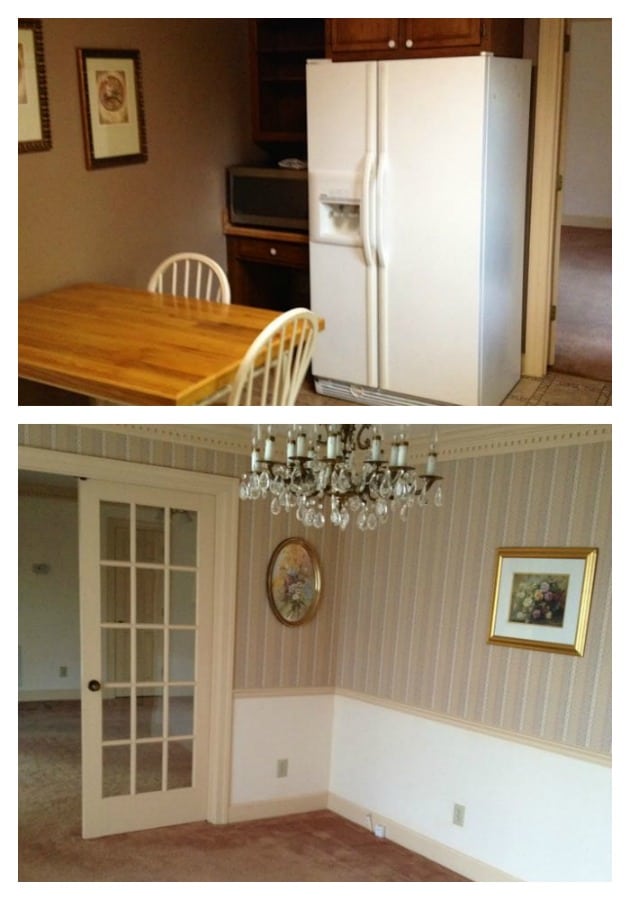
This kitchen was VERY dark. Here’s a before:
I would call it grey, because it seemed like you were constantly in the shade with no direct light.
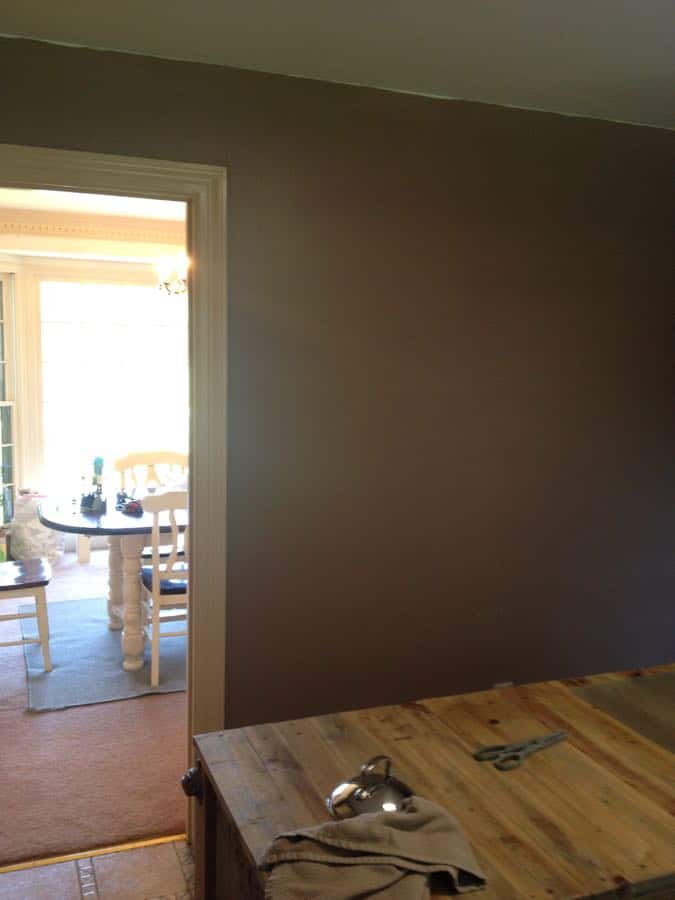
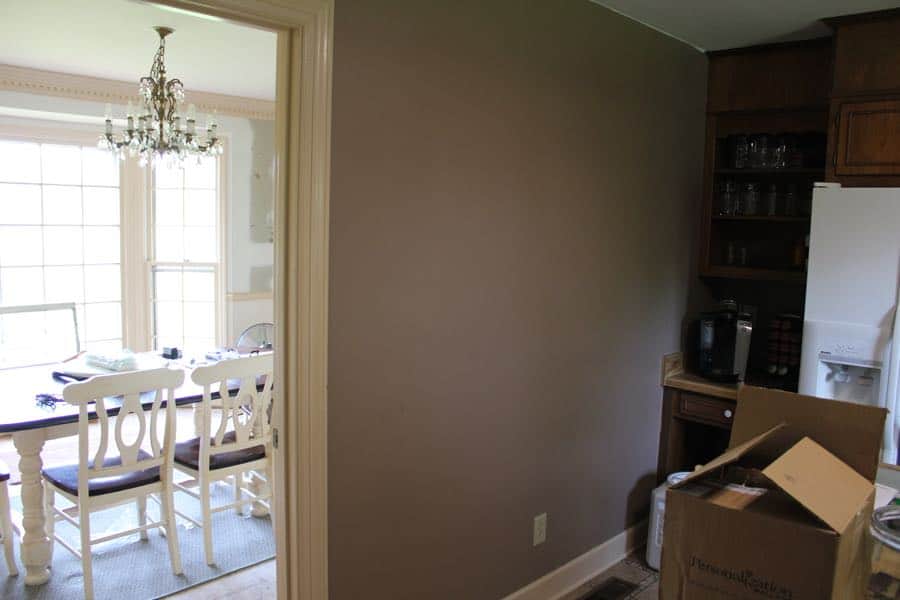
Look at all that natural light from the Dining Room! If we opened up this wall, then that light from the beautiful bay window could pour into this kitchen.
But here’s the problem:
It’s a load bearing wall!
What does that mean?
(Don’t worry – I had to look it up.)
Basically, all the weight and structural integrity of the upstairs relies on this wall.
This dark, dingy wall held up my house.
So I sleuthed around to see how to open it. We are avid DIY-ers, but when structure was involved, it scared me, A LOT.
This is an ideal time when a DIYer turns into a DIFM – Do It For Me!
So we found a Guy! He was awesome! (and licensed).
He came out to check it out and said that if we assisted him and provided all the supplies (wood, screws, etc.) that he would only charge us half his rate.
With his knowledge and our ability to be his helper, we were able to open that wall affordably with peace of mind that the top floor would not crash on top of us!
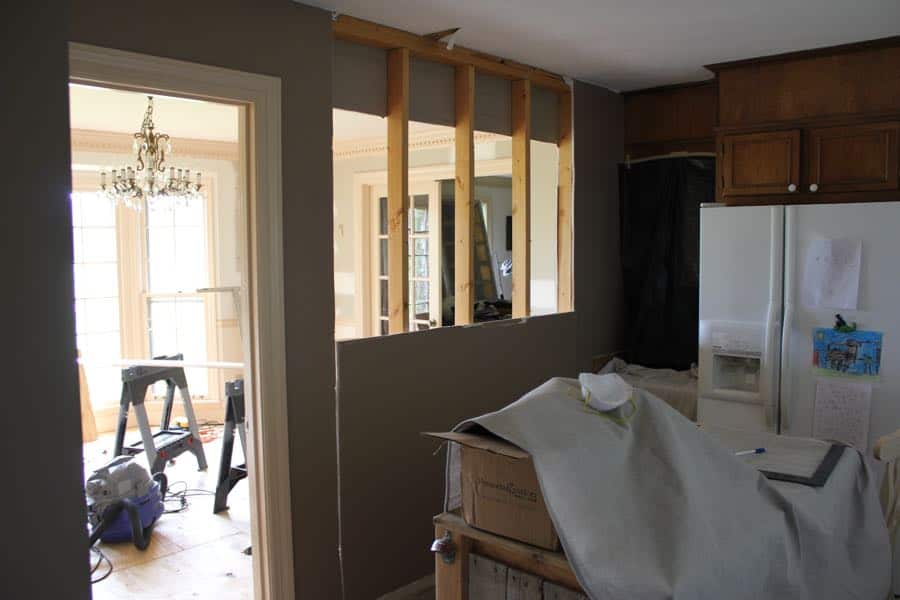
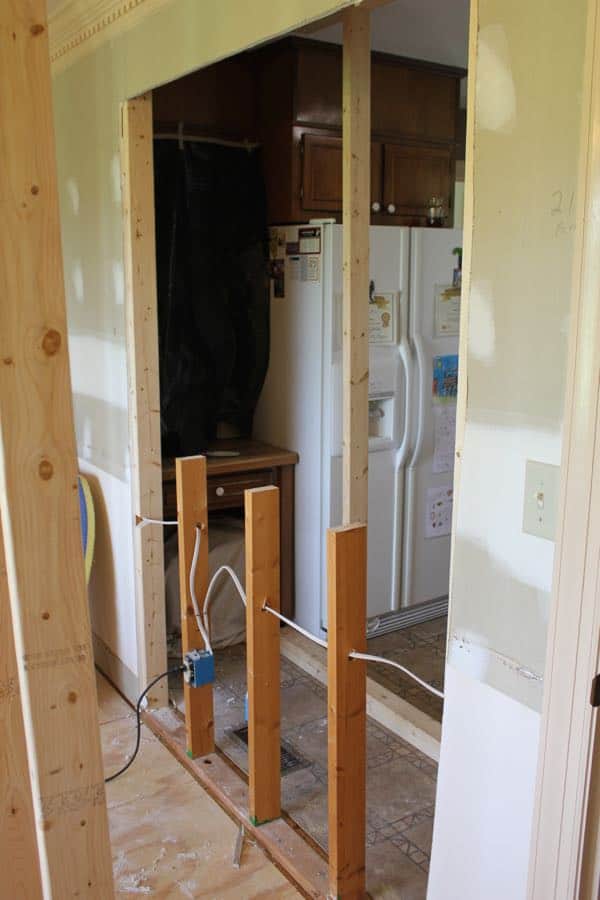
To save costs, we did the prep work first, removing all the dry wall so that it would a be a quick and easy job for the guy.
ADDING A PASS THROUGH TO A LOAD BEARING WALL
The Demo
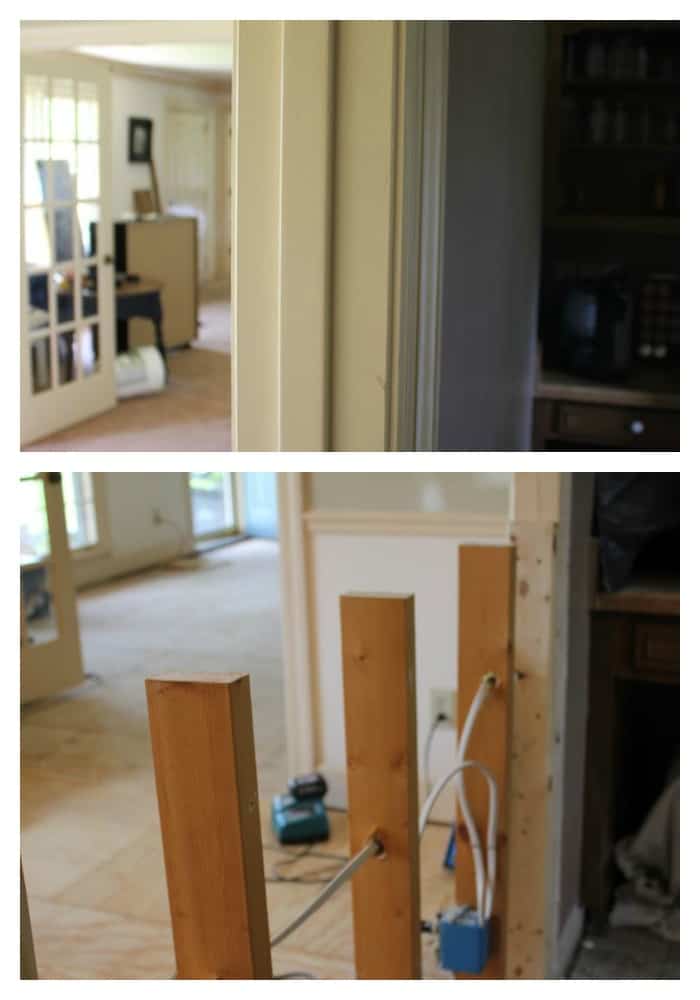
First we had to find the studs.
There’s all kinds of science-y, math-y components to this (as well as the typical Stud jokes from the Hunk himself), but I won’t attempt to explain.
Basically you can find the studs from the dry wall mud marks or using a stud finder.
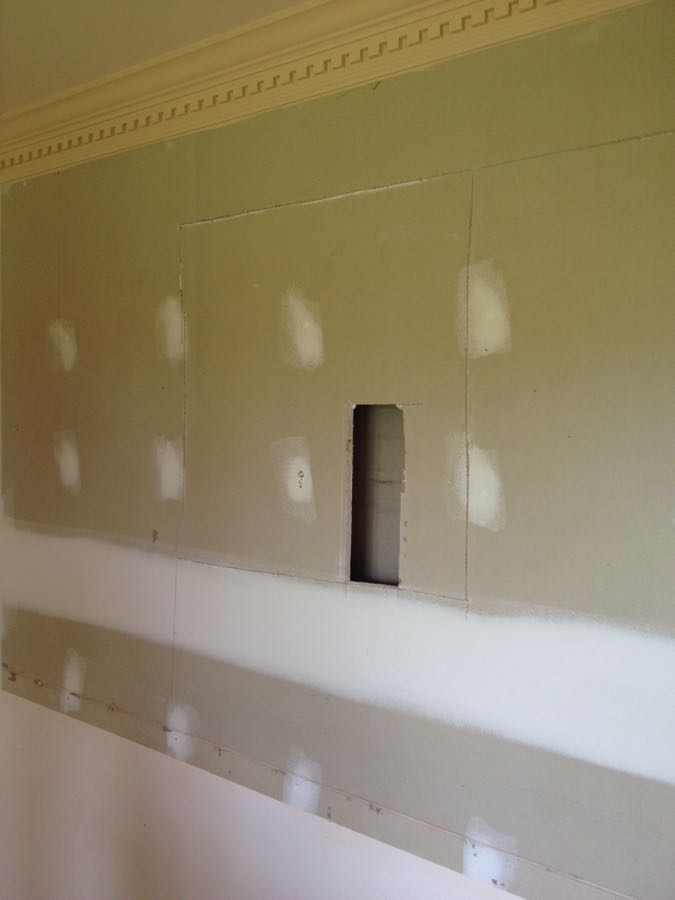
We definitely wanted to keep the dentil moulding intact, so the Guy told us to cut the drywall a foot below it.
Look how peach the trim is! It matches the pink carpet, I guess.
We used an oscillating tool to open the drywall.
Be aware of any electrical wires and make sure NOT to cut them!
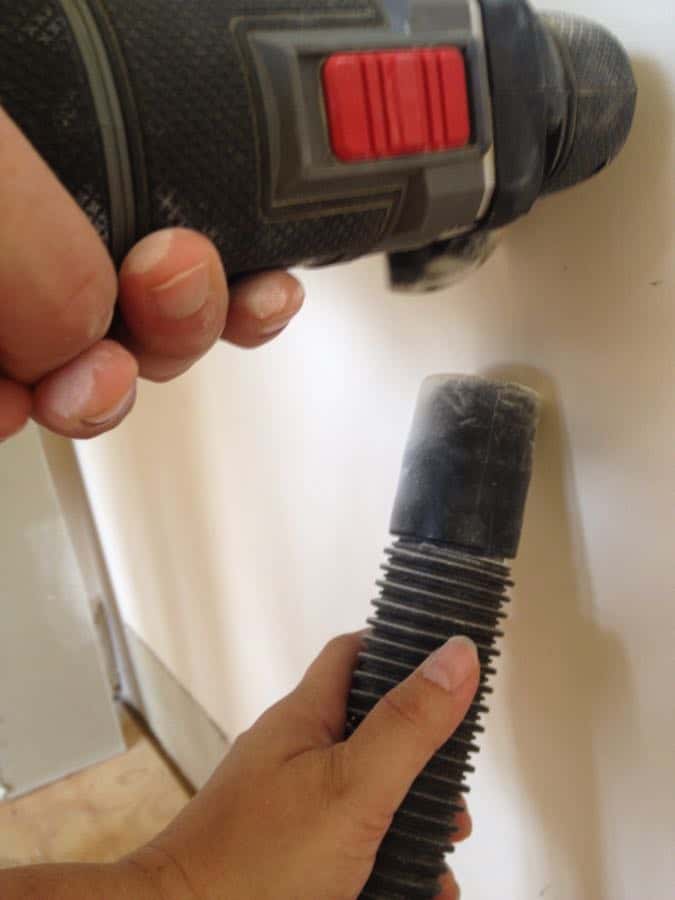
*Tip* Using a shop vac helps keep down on some of the dust mess.
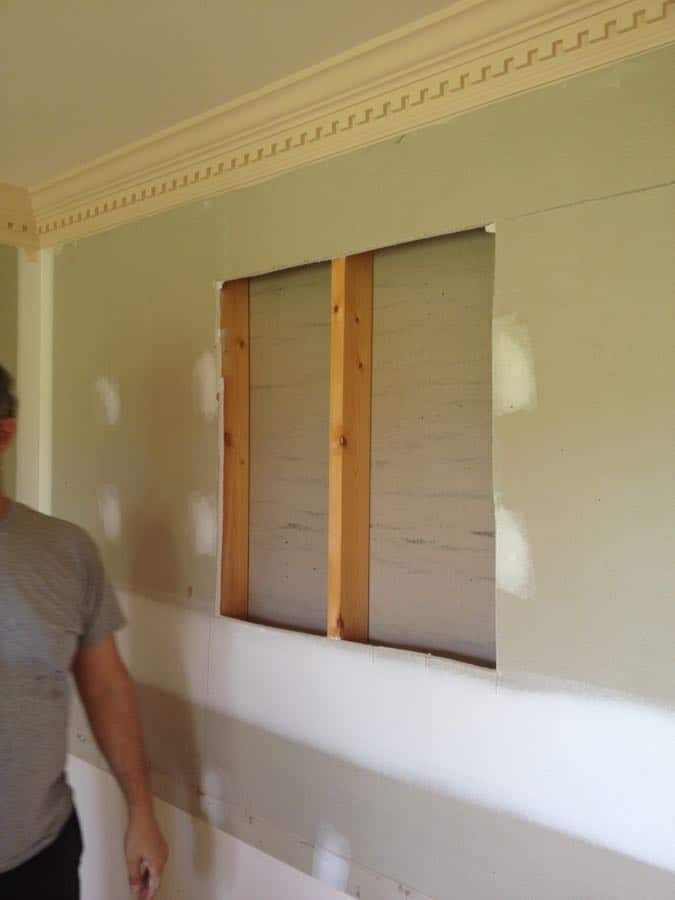
Progress!
As you can see, we did this project while we were prepping our floors for our Hardwood Install.
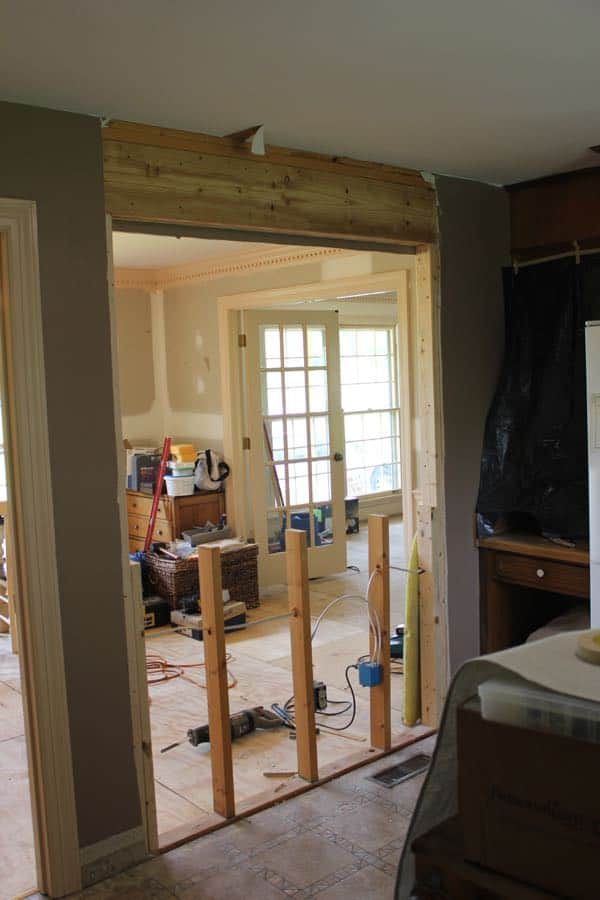
We followed the same methods for the other side. This was our sneak peek at the how the pass through would look.
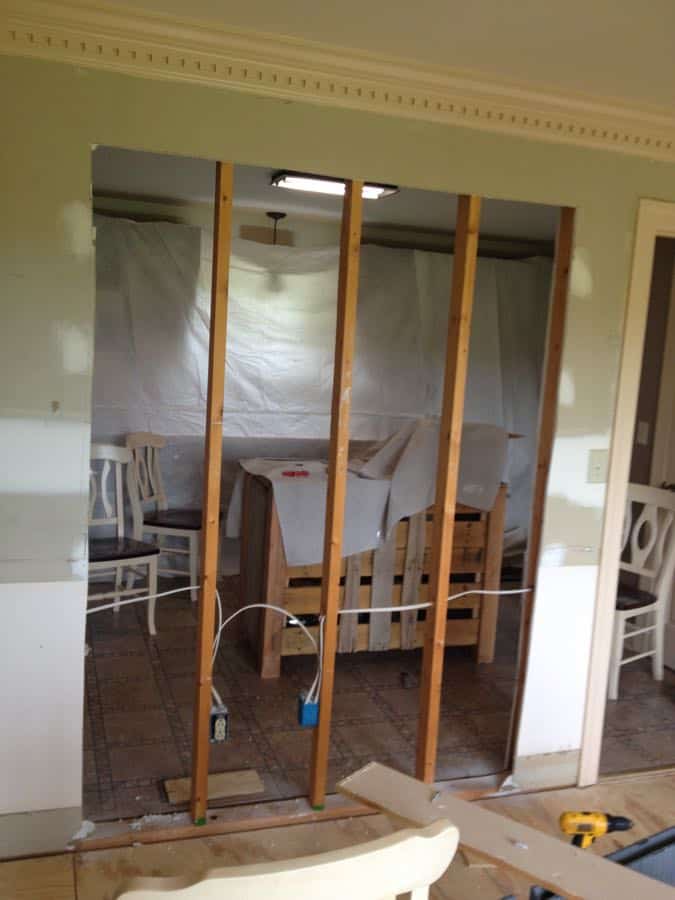
Now we were ready for the Guy to come in and sure up the wall.
Hiring Help
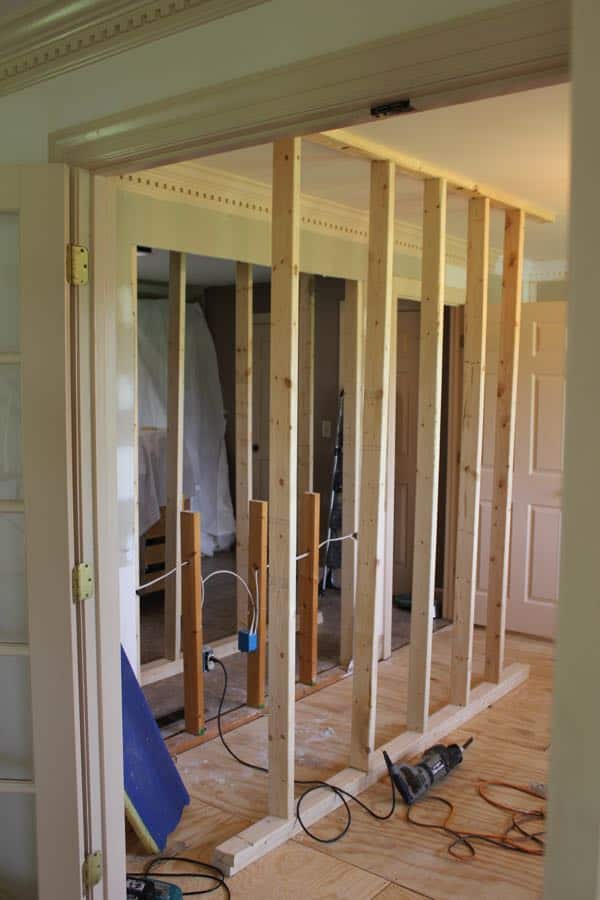
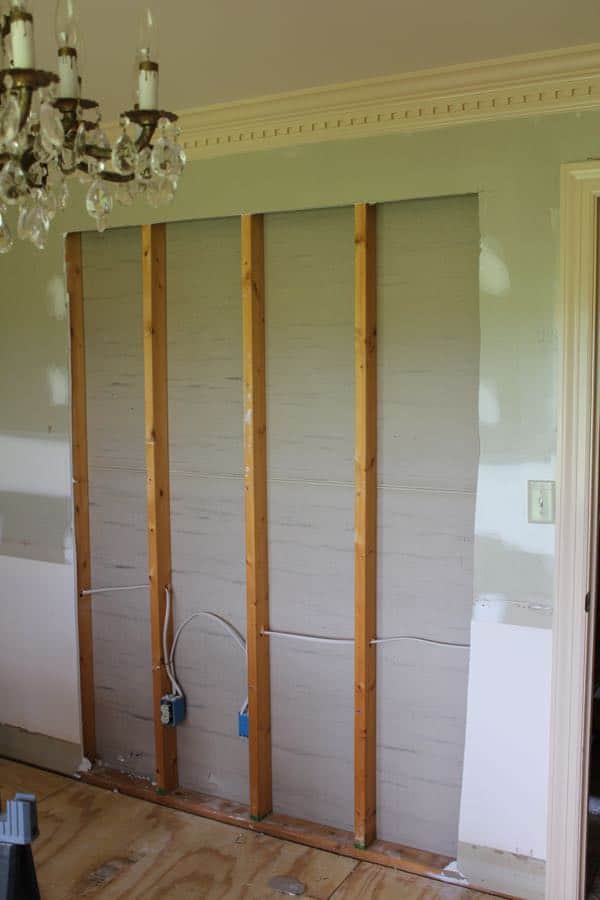
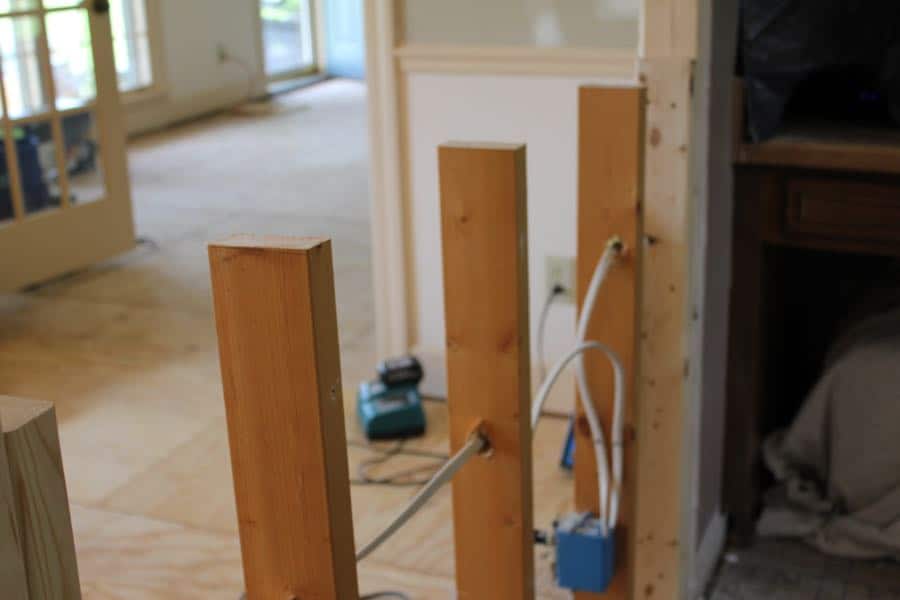
The Guy built a temporary wall in the dining room as well as the kitchen, to hold the structure in place so he could install a header.
I’m not sure the aspects of this, so consult a professional before attempting this yourself.
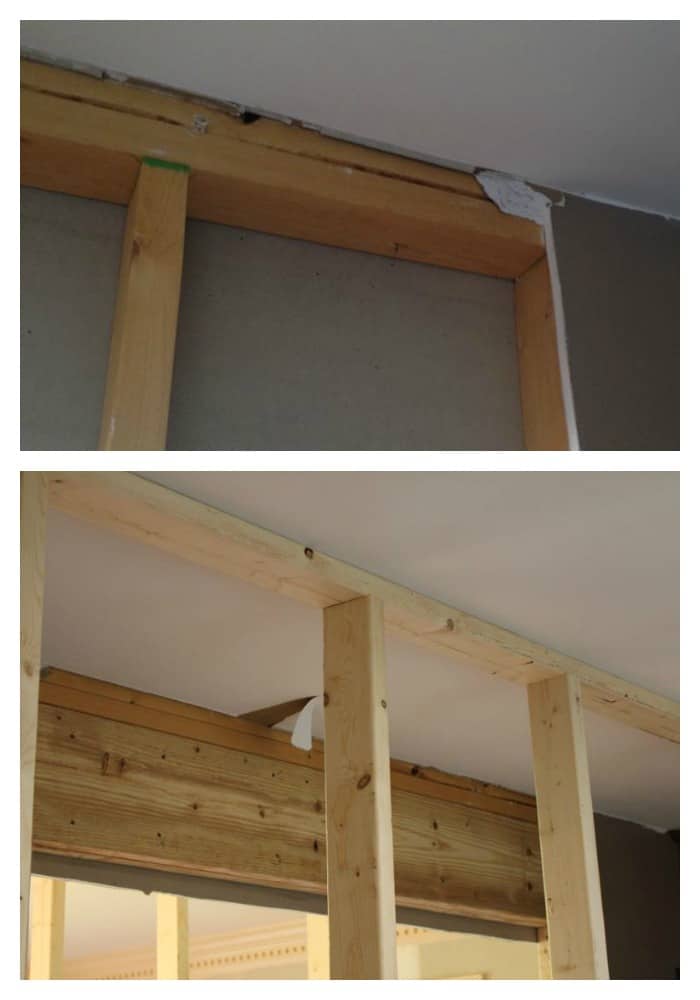
Here’s the difference between the before wall without a header and the after.
Once the header was in place, we could cut the wall studs for the pass through.
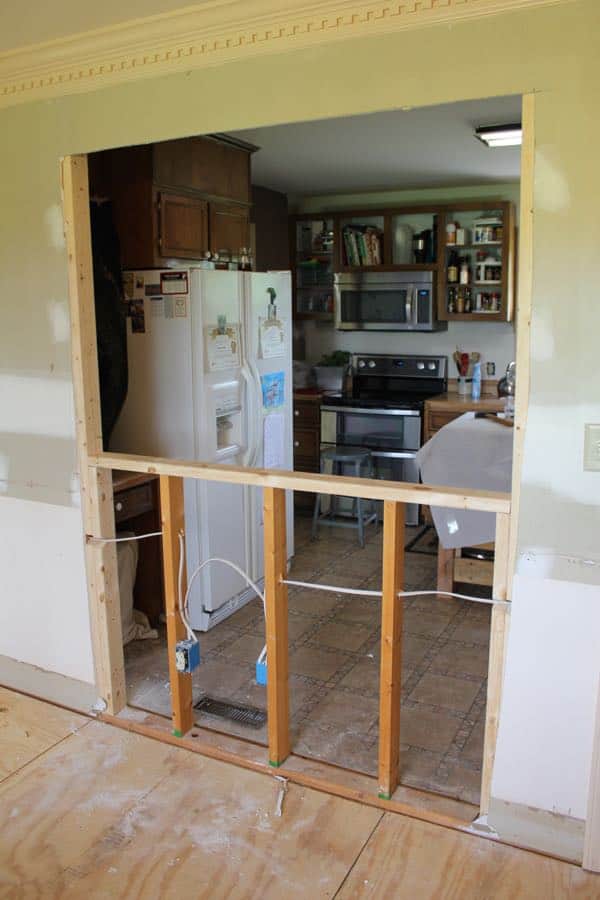
Eeee! I was so excited at this point, I did a little dance!
Finally, the Guy removed the temporary walls. Ah! Look at that light!
He capped off the the cut boards and left us to finish the project with drywalling.
Before and After
No light and Light!
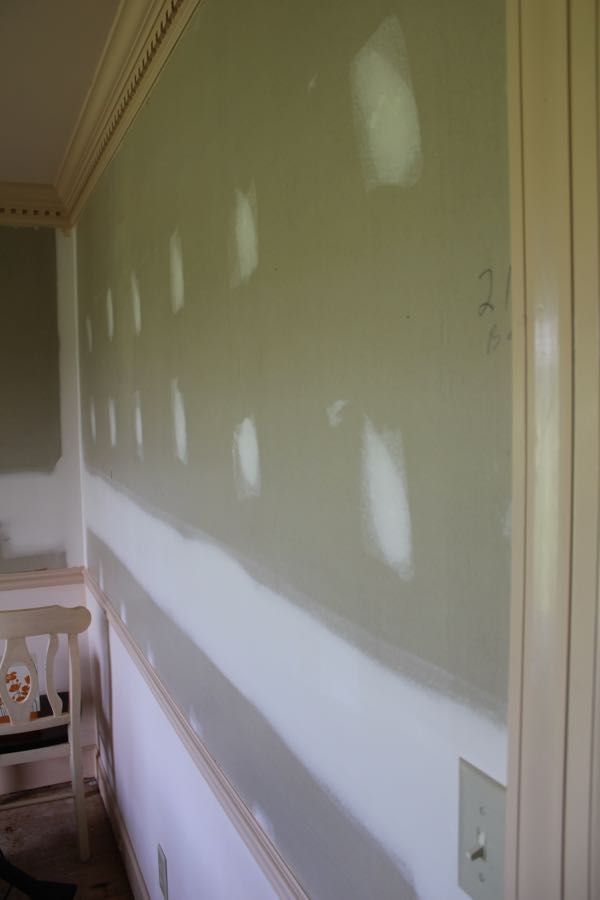
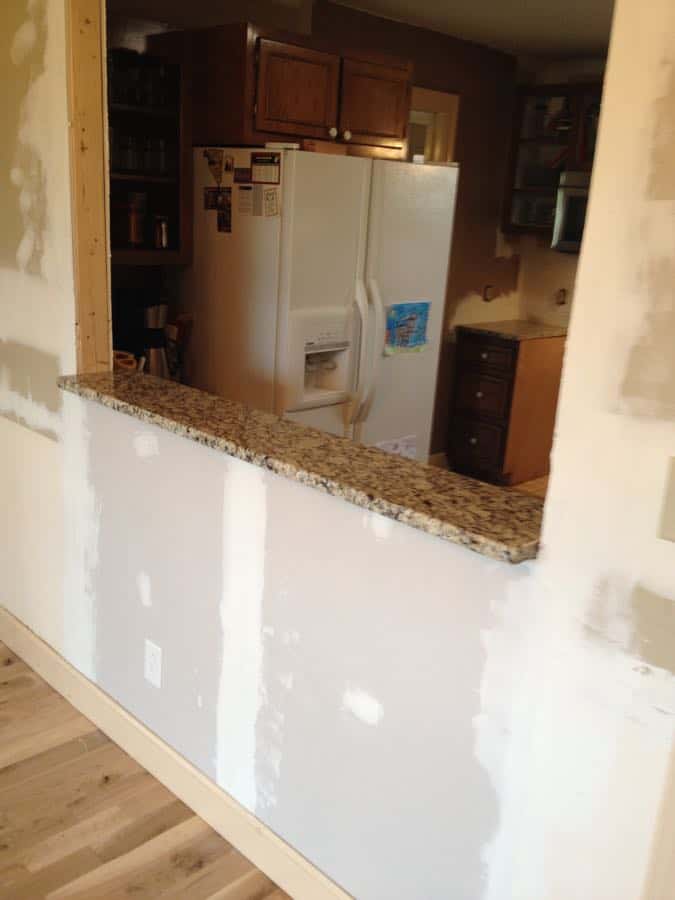
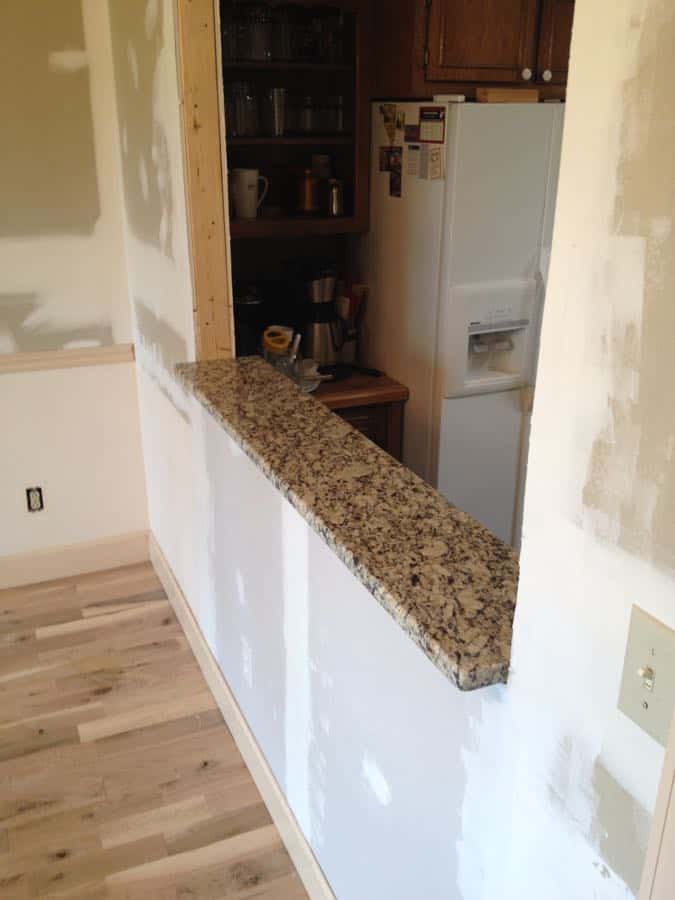
We covered the wall with drywall and got the wall ready for granite.

We got such a steal on the granite that we opted for a small bar-type feel for the pass through.
We added trim around the frame to finish it off.
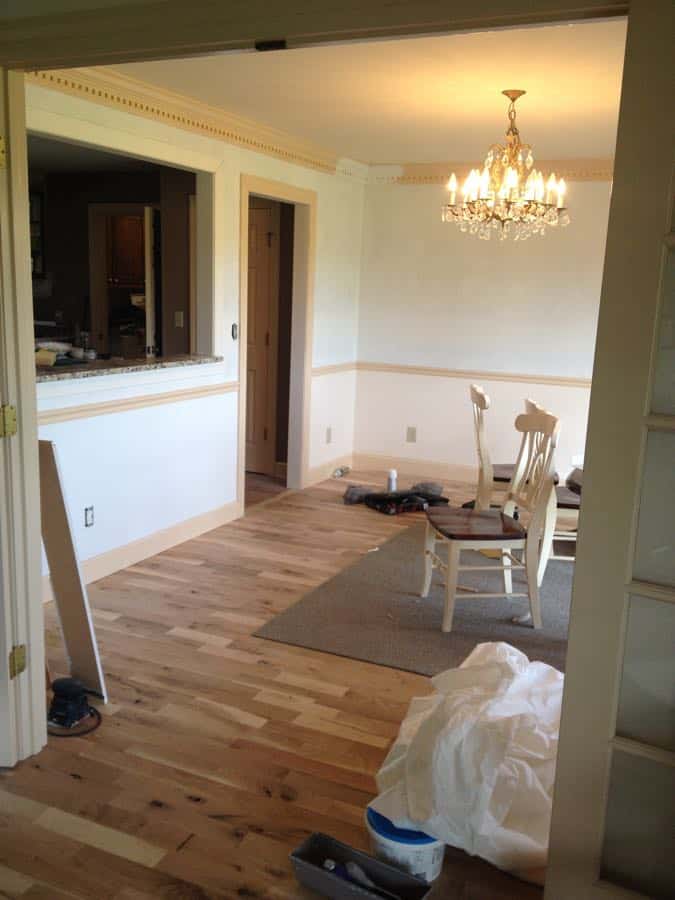
So this was relatively simple, but we knew our limits and hired help for the things we weren’t comfortable with.
Stay tuned for the final reveal of this series, where we share how it all comes together!
For more details about our Kitchen Remodel, check out these posts:
FARMHOUSE KITCHEN REMODEL PART ONE – THE DEMOLITION
FARMHOUSE KITCHEN REMODEL PART THREE – THE COFFEE BAR
INDUSTRIAL METAL LIGHT INSPIRED BY BALLARD DESIGNS
OUR AMAZING $5000 FARMHOUSE KITCHEN REMODEL


Thanks Crystal!
We worked with the existing studs that were in the wall, so ours ended up being about 5 feet wide. So the dimensions of the granite was the width of the opening and it was about 14 inches deep. I wanted it to be deep enough to set a serving platter on in case I hosted a potluck.
I hope that helps! Let me know if you have any more questions – please reach out!
Jen
Kitchen look great. I wanted to know what are the dimensions/measurements of how big your pass through is and you small granite top.
Hi Jen – thanks for reaching out – that is a great question! When I asked my contractor who assisted us if we needed to get a permit, he said that we didn’t since we weren’t completely removing the wall, only changing the purpose of the wall. I don’t know if that is correct or not, but he worked closely with the code in TN and we trusted him. I suggest maybe getting a few quotes to see if they recommend a permit and structural engineer. Even if you decide to DIY, at least you have the info. Or you may get lucky and find someone who would be willing to reduce their price like our guy did! Hope that helps!
We want to do something like this as well. Question, did you guys have to get a permit for this? Just curious because we’ve been told that if we do a permit, we would have to get a structural engineer to calculate the weight or something like that….
Certainly! We were able to have it done for about $300. By offering to remove the dry wall before he arrived and also purchase the wood for him, we were able to work a deal. Trent also offered to work as his helper while the contractor was on the job. That meant he didn’t have to bring his helper with him. Without the help and purchases, it would have been double that. Hope that helps!
Can I ask how much the contractor cost with y’all taking wall down
Thanks a lot of sharing farm house kitchen remodel part two. Good blogs.