Farmhouse Kitchen Remodel Part One
We finished our kitchen for less than $5000! We divided it into three posts for you. This is our Farmhouse Kitchen Remodel Part One.
When we purchased our Tennessee home, I knew two things had to be changed immediately — the pink carpet, and the kitchen.
However, overhauling a complete kitchen on a tight budget was going to be tricky. Our goal was to completely renovate the kitchen for less than $6000, including the appliances!
Here’s how we did it!
Farmhouse Kitchen Remodel Part One
(Some affiliate links are provided below. Full disclosure here.)
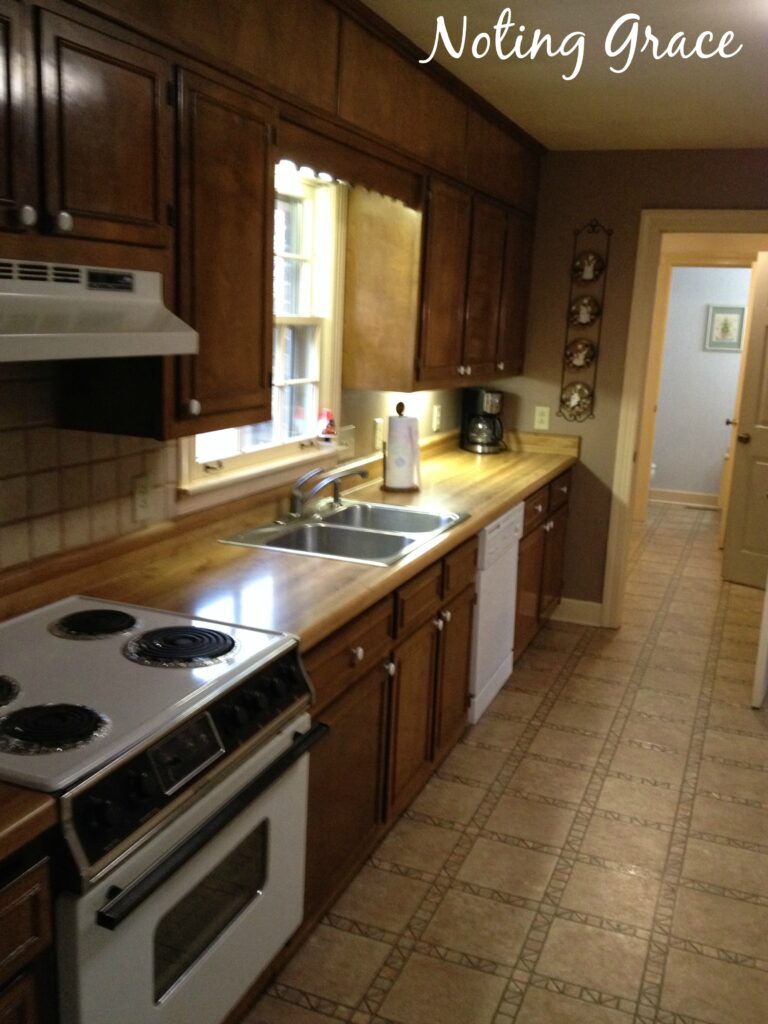
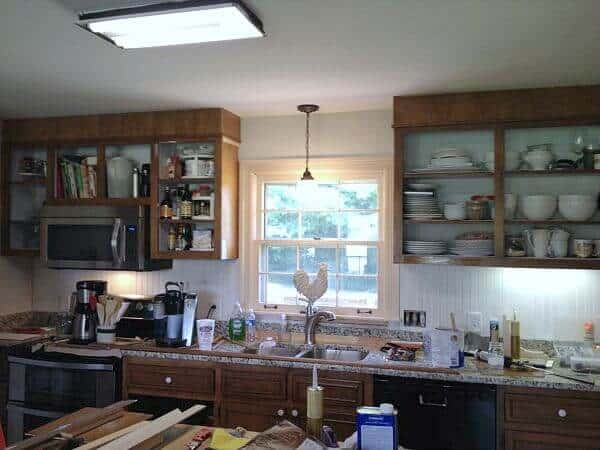
The house has good bones and the cabinets were made of real wood and in great shape.
The counter tops were laminate butcher block that needed to be replaced and the floors are in fair shape, however, not my favorite.
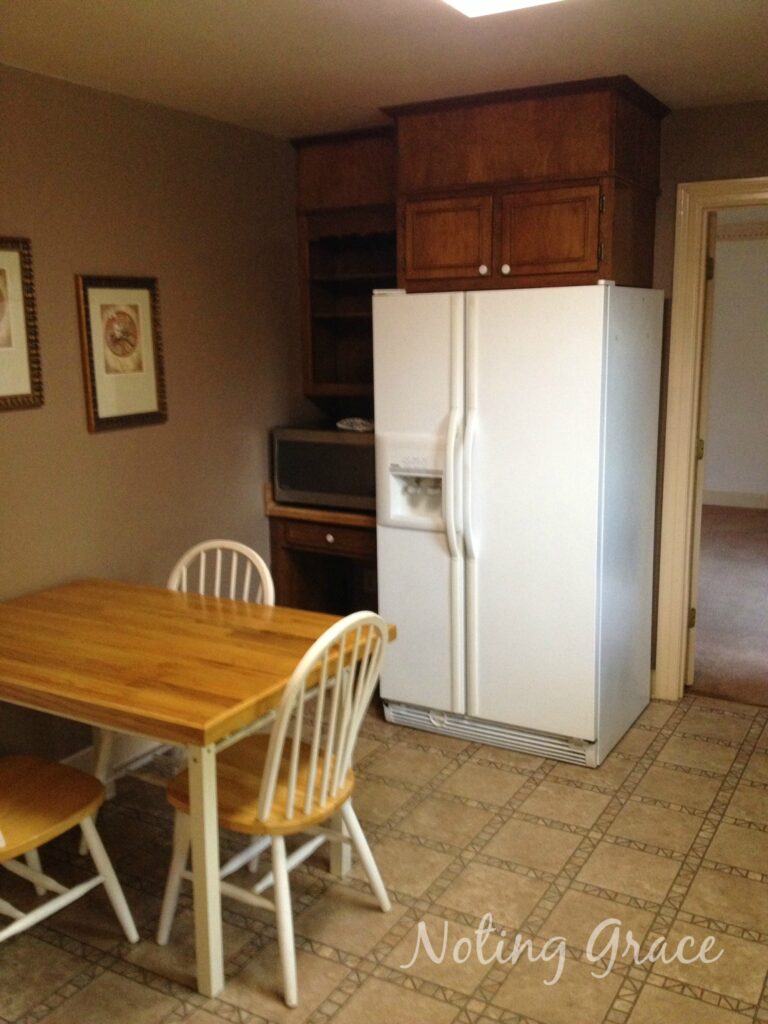
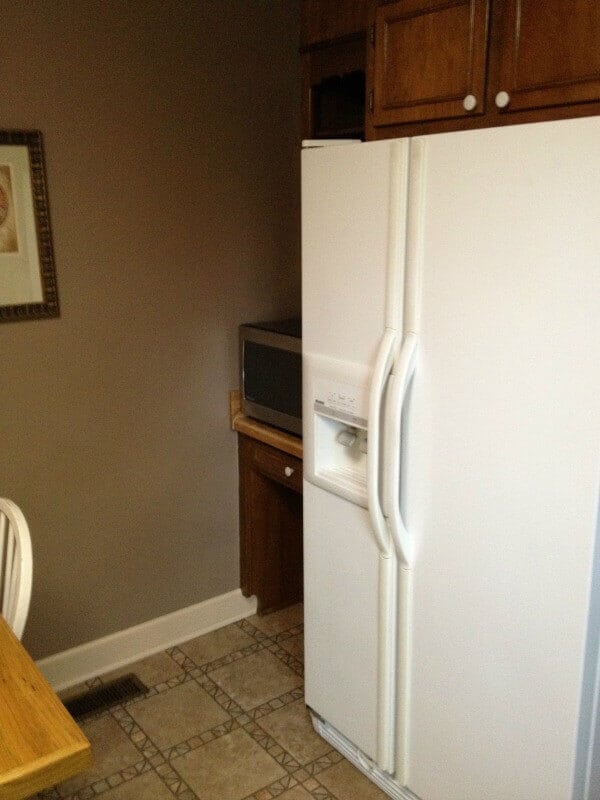
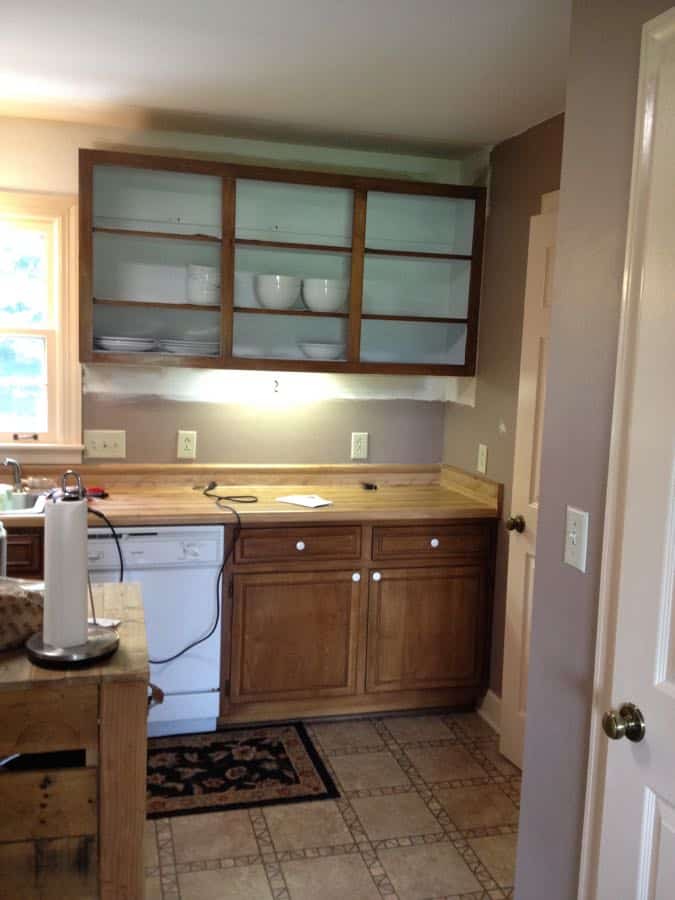
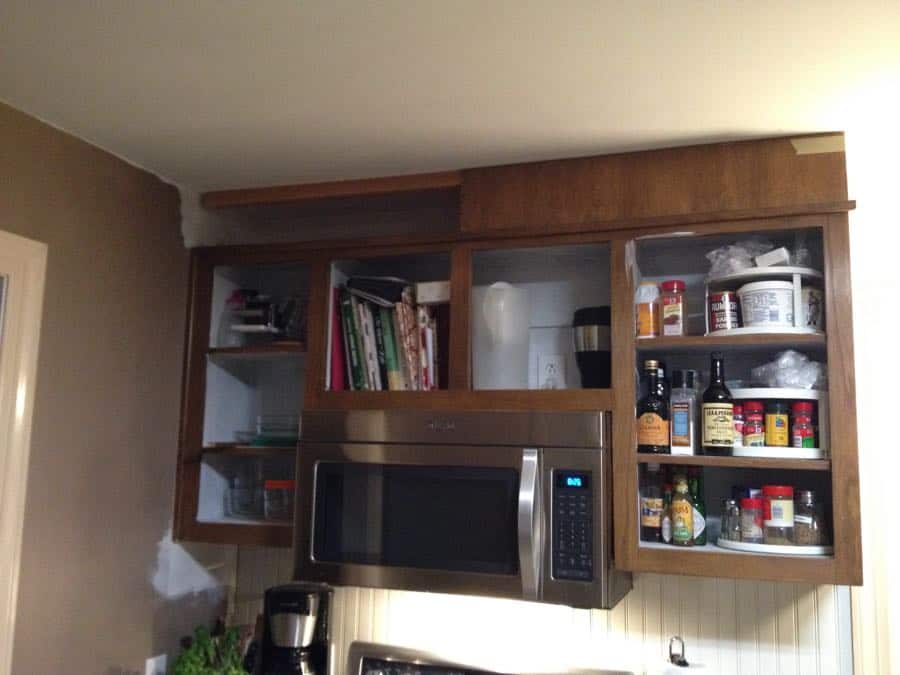
The top kitchen cabinets were really low–so low, that I couldn’t fit my coffee maker under the cabinet!
Those are fightin’ words in my world!
The cabinets would have to be raised. A typical height for cabinets over the counters are 16 -18 inches. These were set at 14 inches above the counter.
The soffit was made of wood, so we knew we could remove it and raise the cabinets.
There is one, tiny window in the kitchen which makes it one of the darkest rooms in the house. The kitchen was the only room in the house that had been painted from the builders original paint and it was a dark, chocolaty mauve.
I can’t say mauve without thinking of SNL’s Cawfee Tawk.
We needed it brightened right away.
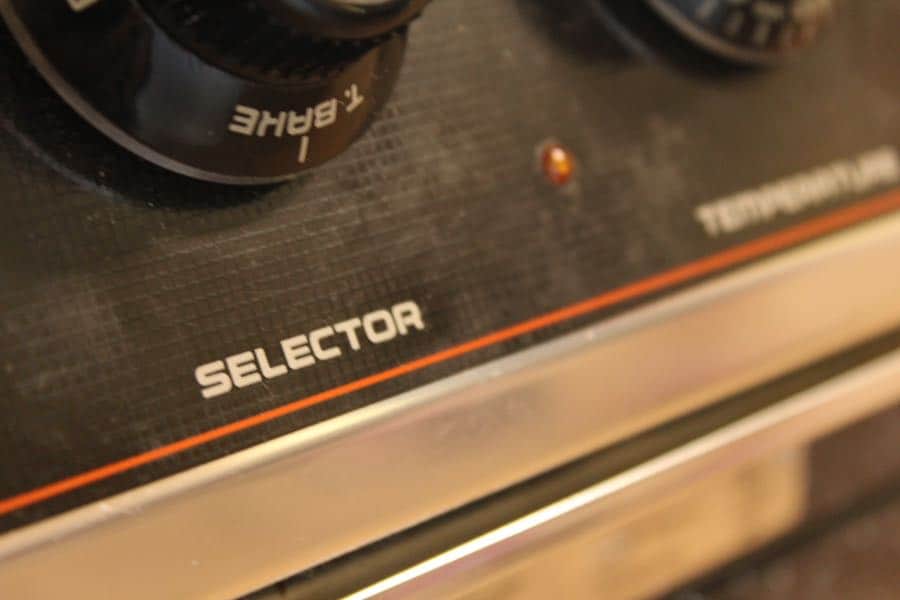
The appliances were ancient, possibly original to the house, which means they were 27-years-old. It was a drop in stove, so cutting away the cabinet to fit a regular free standing stove would need to be done.
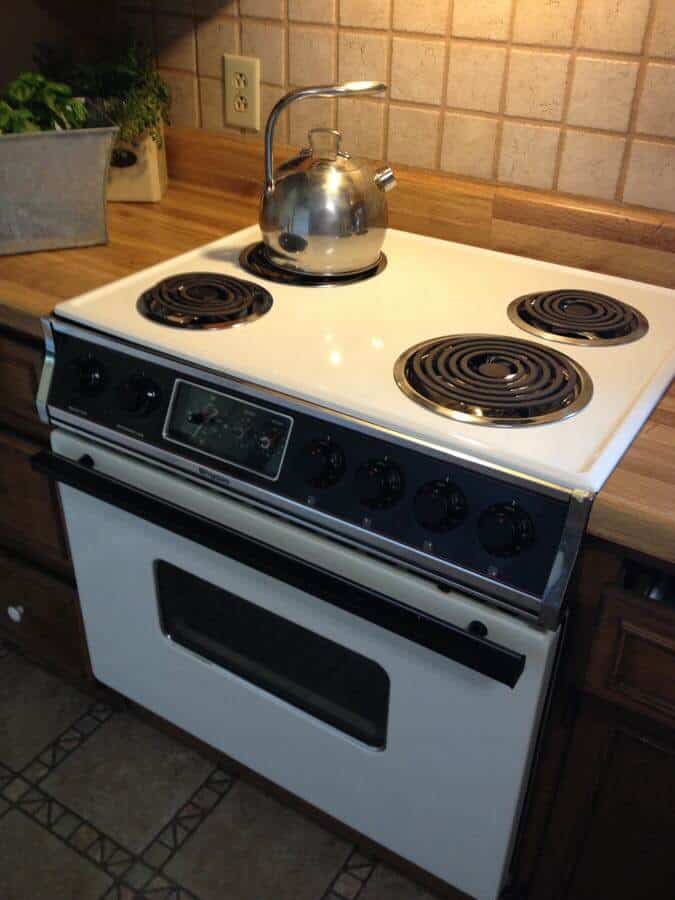
Just look at the font for the stove! I immediately thought of the 80s and Back to the Future complete with puffy zippered vest!
It was time to bring this house into this century, stat! Let’s get on to the demo!
Demolition

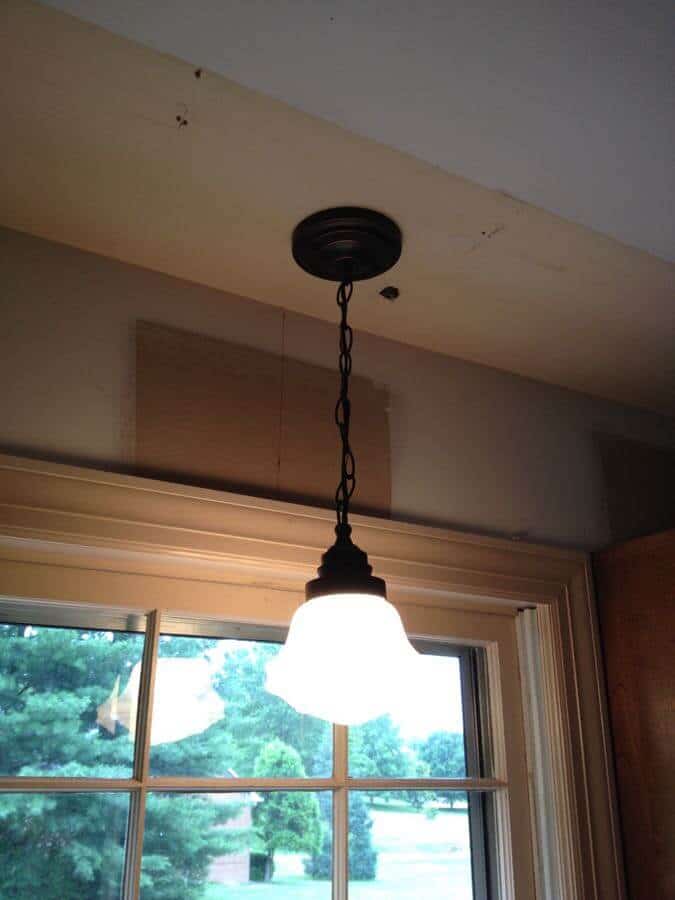
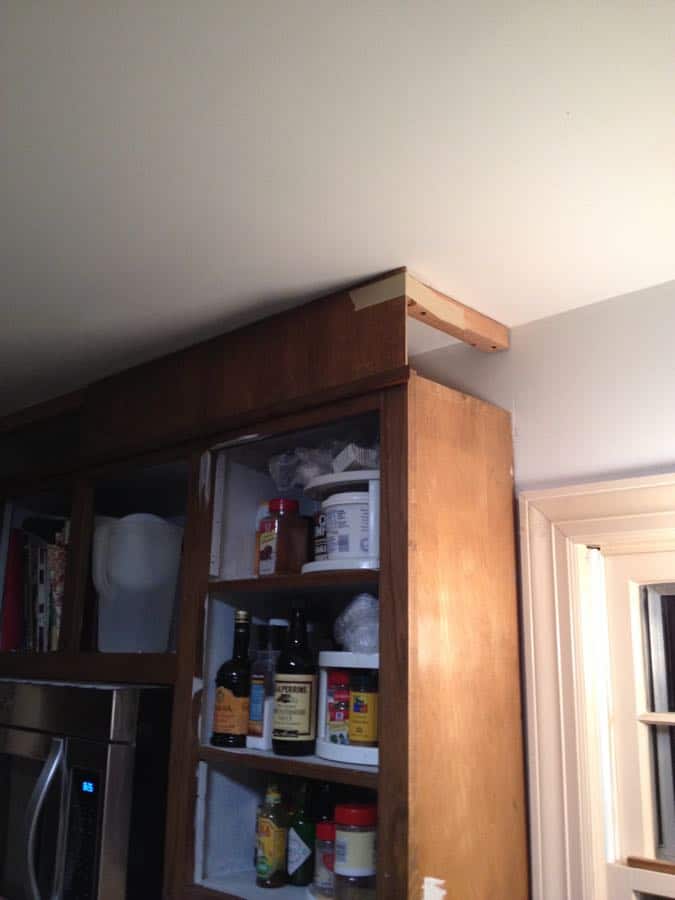
First we needed light, so we tore off the soffit and opened up the light over the window. I had to replace that buzzing fluorescent light over the sink.
In the process, we found a lovely mud dauber nest!
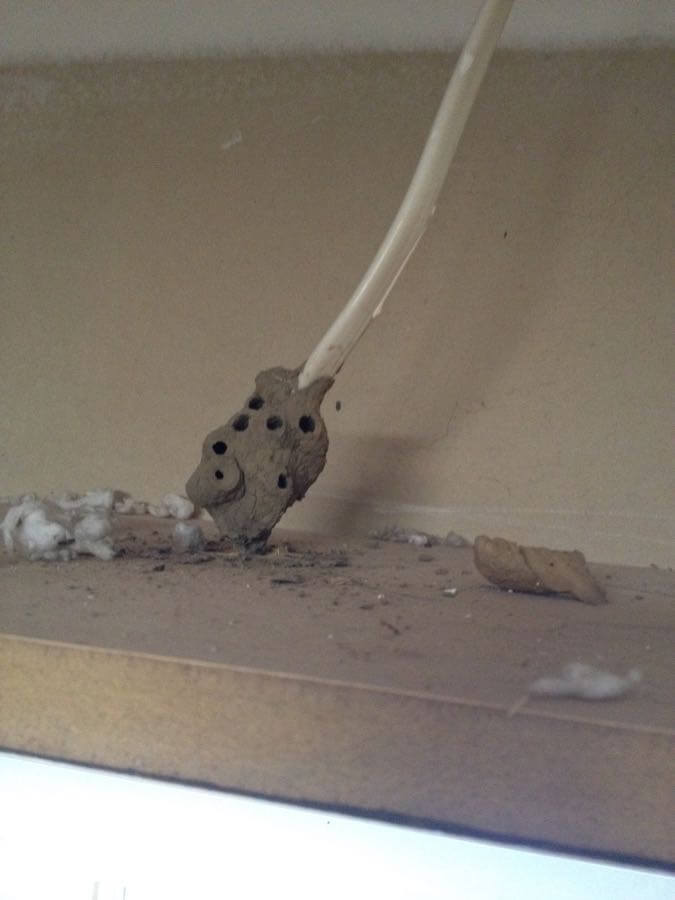
EW!
We replaced the sink light with a Schoolhouse Hanging light in an Oil Rubbed Bronze Finish.
Just removing the wood that spanned the gap between the cabinets let in so much light!
We removed the Range hood to raise the top cabinets. Then we discovered some lovely baby blue flowered wallpaper and a really safe light bulb.
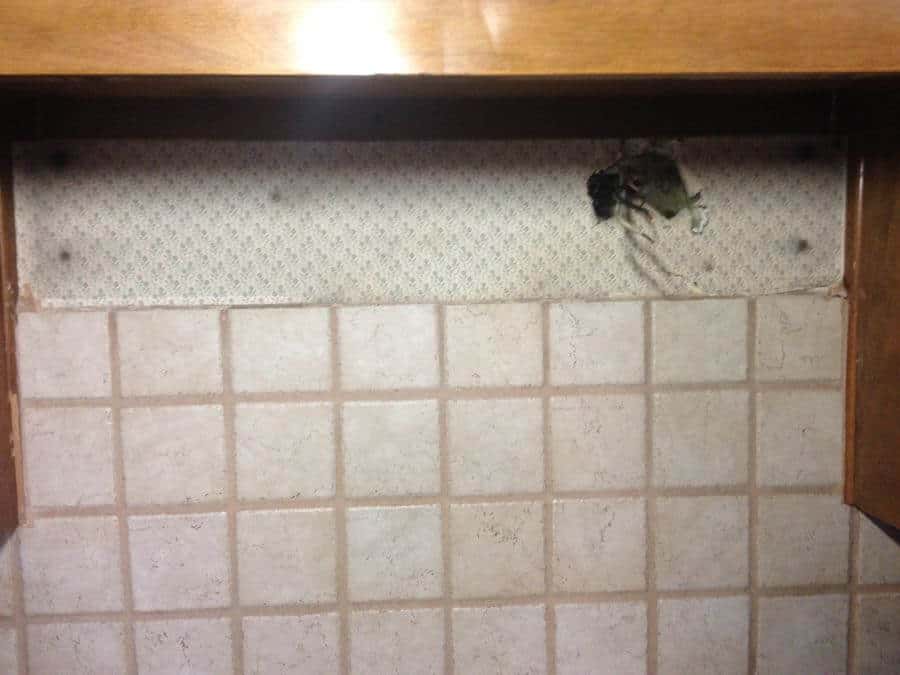

Scary!
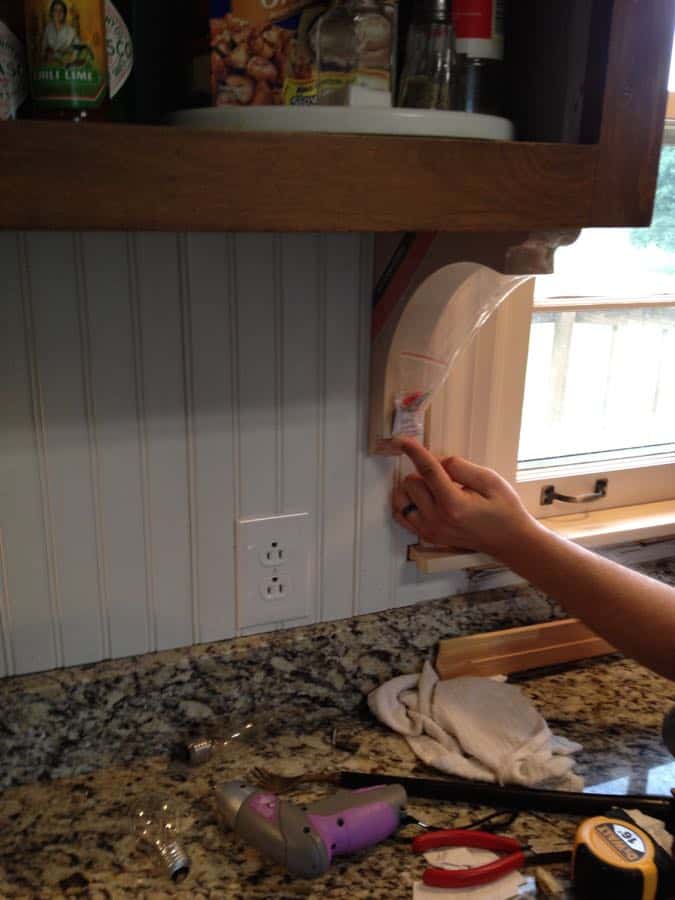
The tile back splash was a DIY project from the previous owner, or I should say a “DI-Why did you do it that way?”

They didn’t prep the wall properly and cemented the tile directly to the paper dry wall resulting in this:
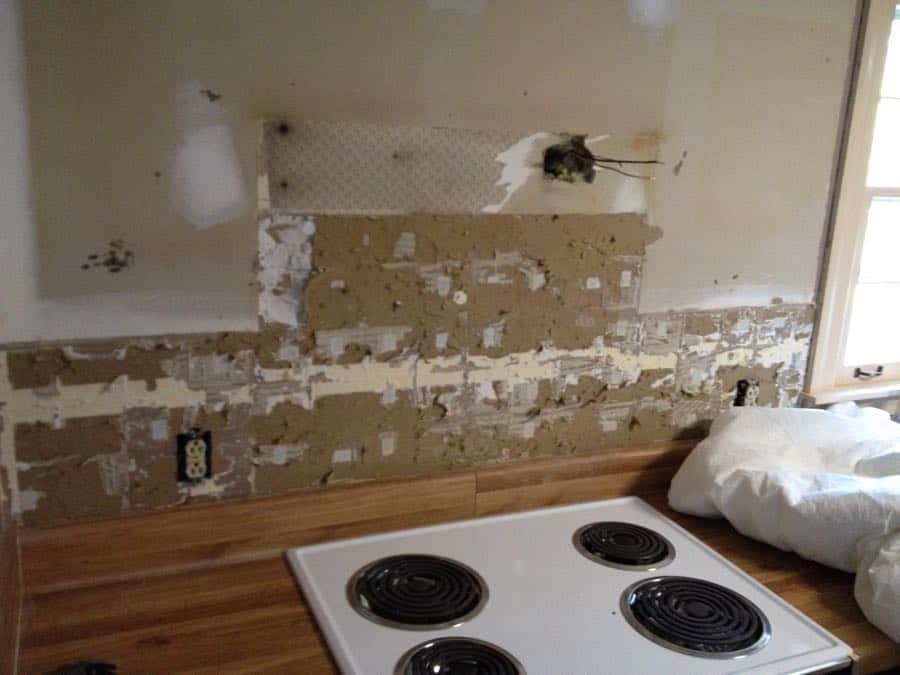
*sigh*
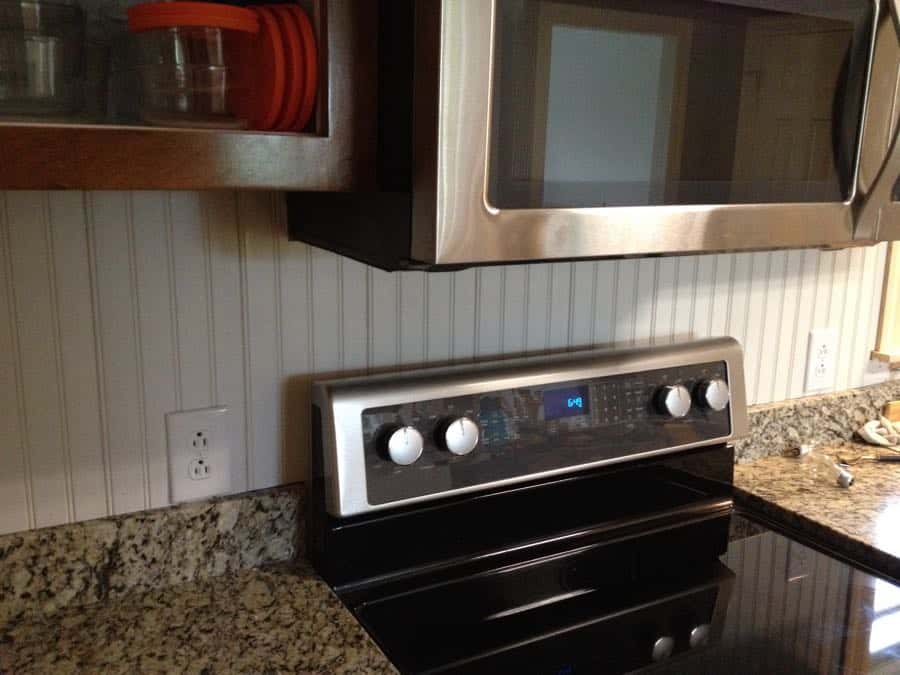
We were going to put subway tile as a back splash, but trying to minimize costs mean that left no room to replace the drywall, so we opted for a beadboard backsplash, which was my second choice anyway!
I primed the inside cabinets while Trent repaired the drywall as best he could.
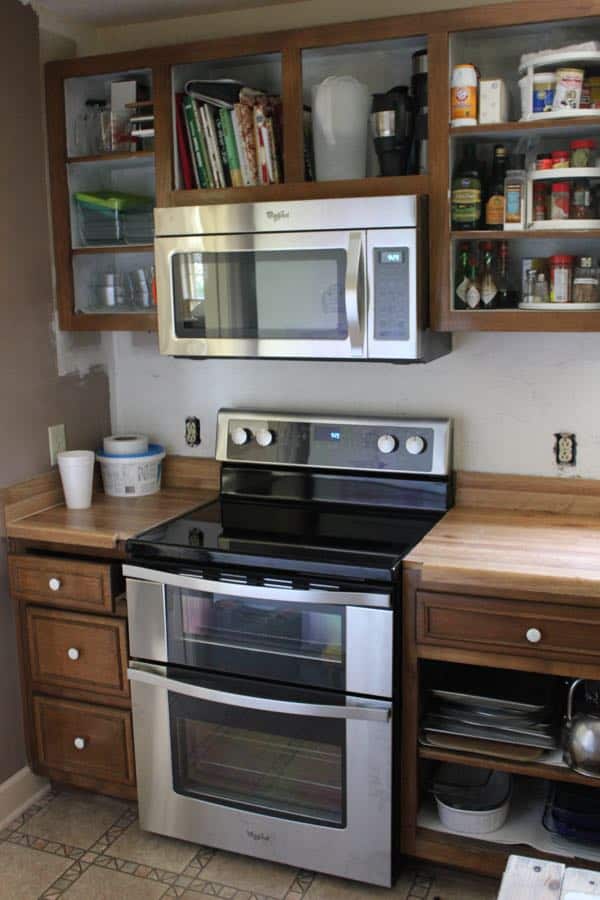
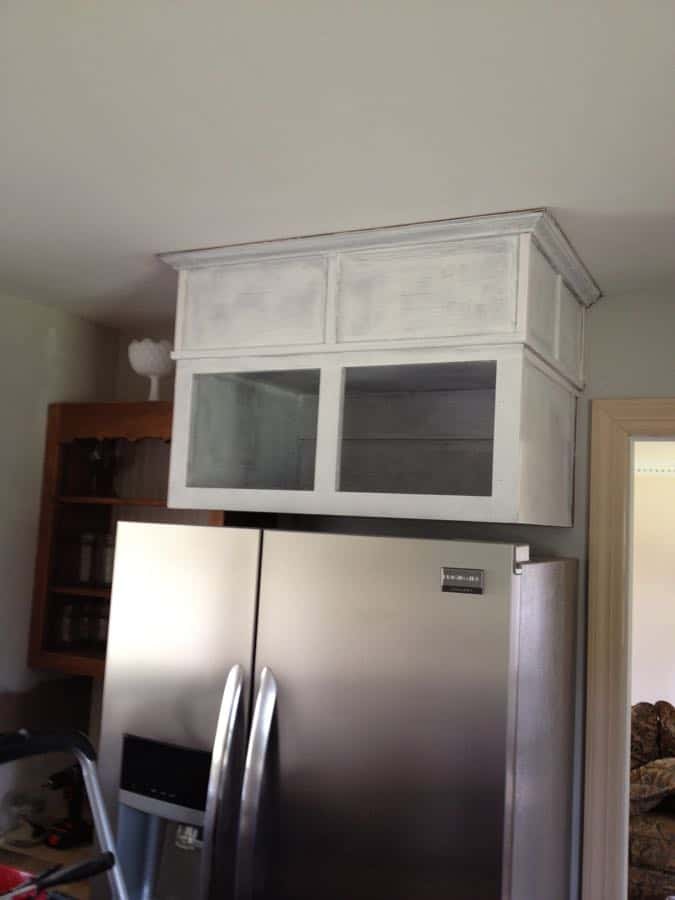
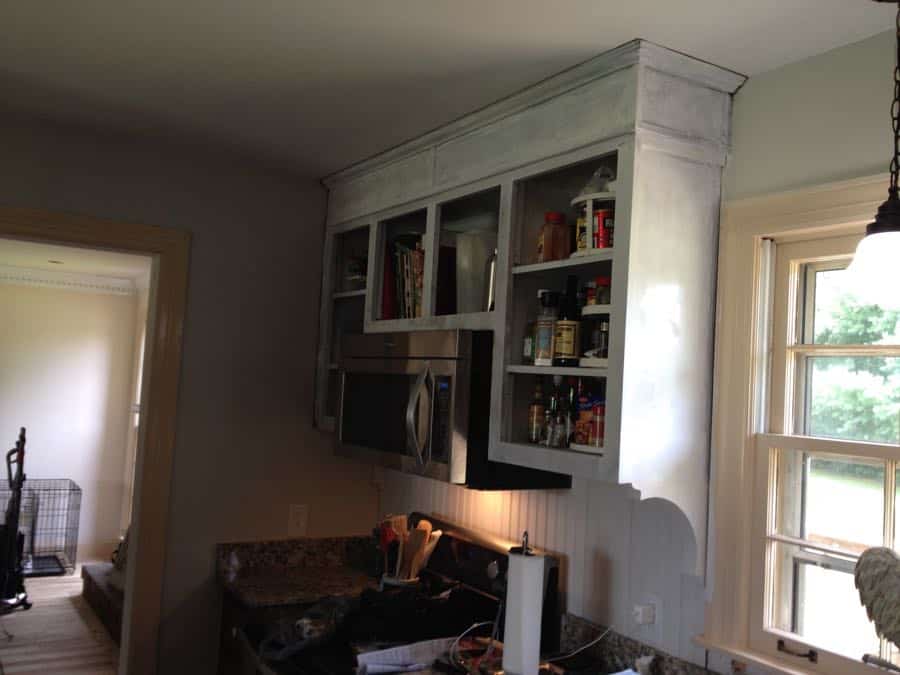
Finally we were able to raise up the cabinets and install a microwave oven we found in the clearance section of the Big Box store.

Since both Trent and I are tall, we went a bit higher to accommodate the cooking space over the range.
We settled on 20 inches from counter to base of the top cabinets, but it is 18 inches from the base of the microwave to the range.
Next was the stove! It was a beast and we removed it ourselves to save on installation costs.
We purchased a flat top range with the double ovens.
It was a splurge, but since we cook a lot, it was an area we were willing to go a bit higher in cost.
When we cut away the lower cabinet that was housing the drop in stove, we found a lovely rose pattered linoleum that they had covered with the current linoleum.


I bet it matched nicely with the baby blue nosegay wallpaper from before.
Isn’t it beautiful!
So much better than the space ship dinosaur cook range from before.
Next were the countertops.
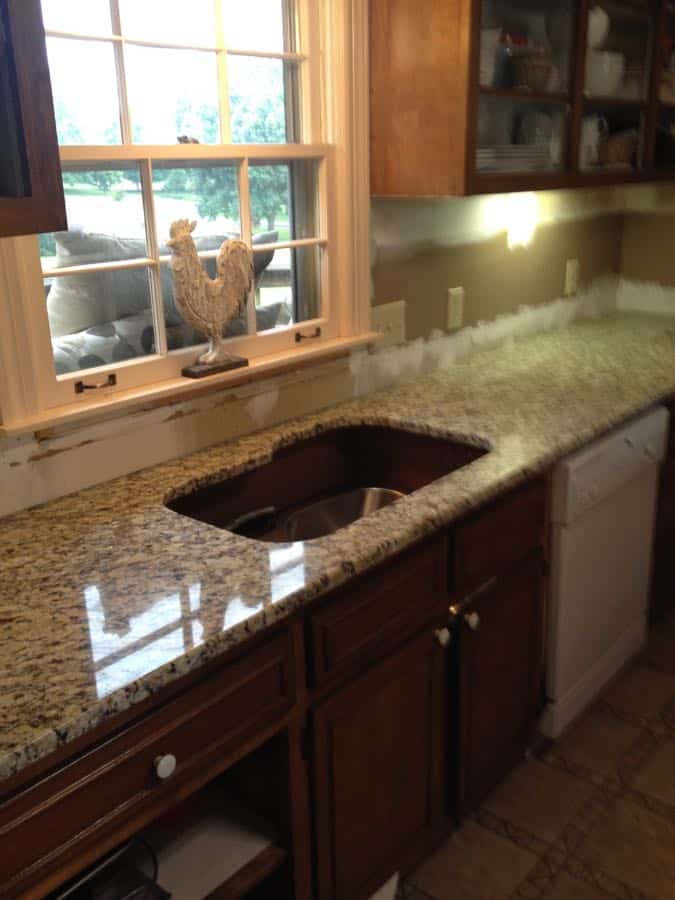
A local store was running a special on granite, so we got the deal once it posted!
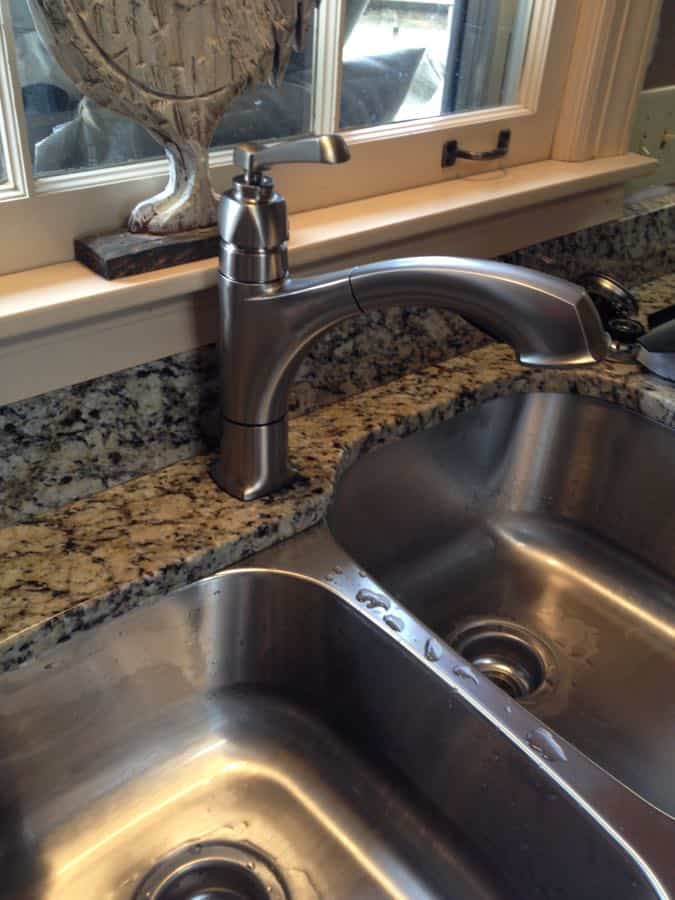
We saved money by removing the existing countertops and installing the sink and faucet ourselves.
When we were shopping for a new fridge, they had just put out a fancy dishwasher in the clearance bin because of a microscopic scratch.
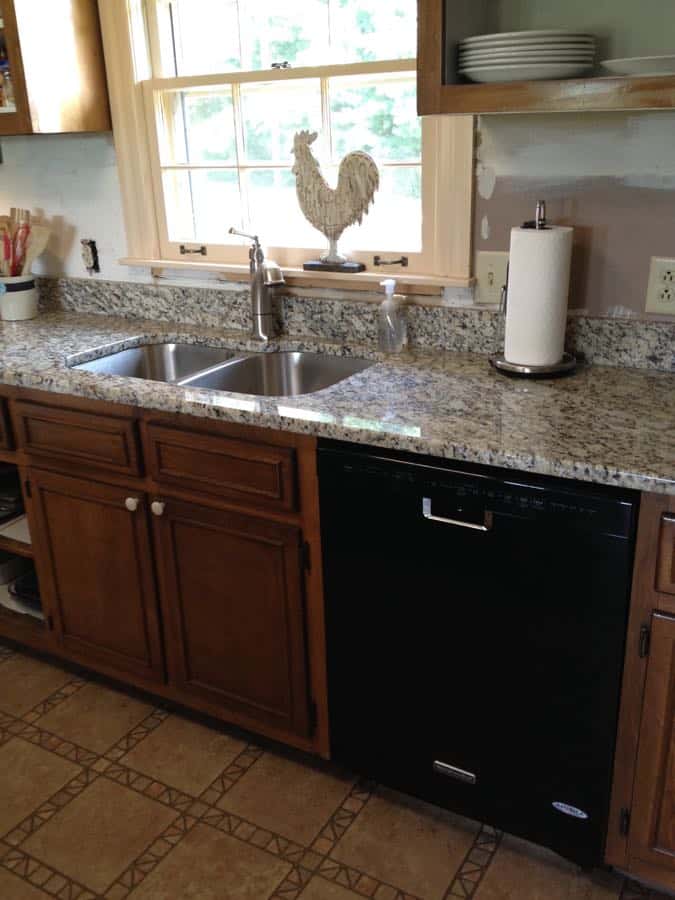
It was a $900 dishwasher that we purchased for $325!
We installed it ourselves the same time that we got our new fridge delivered.
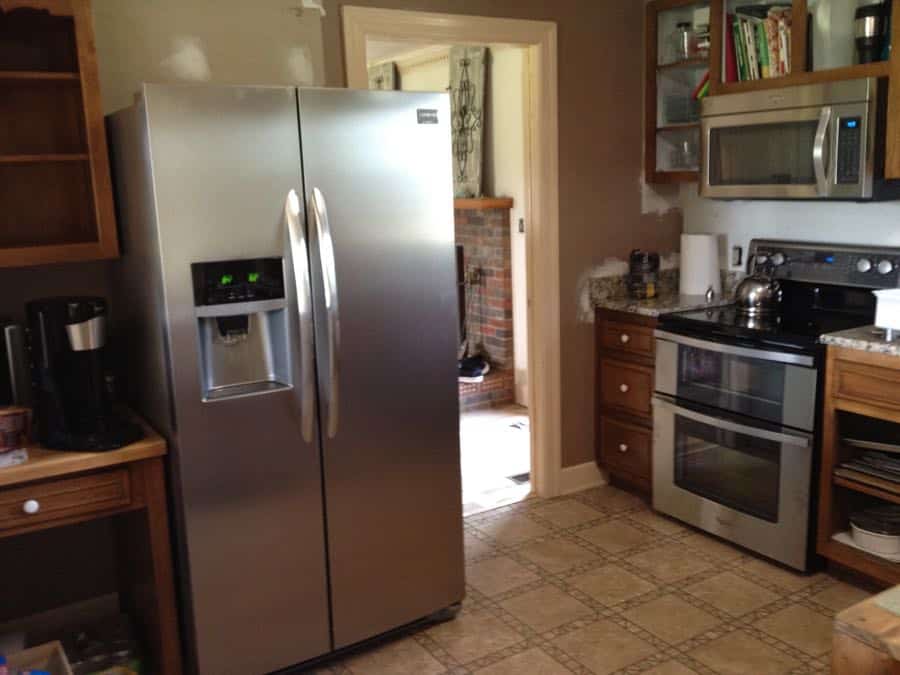
This is a low profile refrigerator, which means it is cabinet depth.
That also means it’s taller than average, so we had to raise the cabinet over the fridge as well to have a good fit.
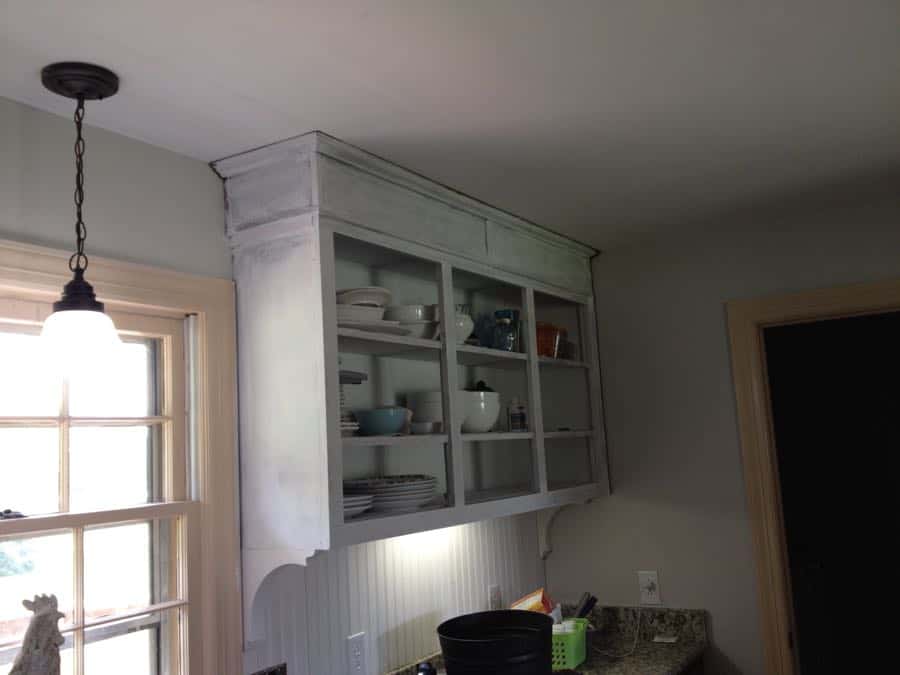
We installed the beadboard backsplash and added wood corbels under the upper cabinets to add to the farmhouse charm we were trying to create.
We also cut the wood from the previous soffit and framed in the cabinets.
Re-using the previous wood and trim helped cut costs and our additional wood purchases were almost nil.
*Swoon* I LOVE those Corbels!
Next we primed the base cabinets.
ALL the trim in the house is oil based, including the wood windows, dentil moulding, doors and baseboards.
After consulting with a rep at our local Sherwin Williams about the copious amount of painting that needed done, he suggested we opt for oil.
Had we gone with latex, we would have needed to sand, then wash with TSP, then prime, and then try latex.
We opted not to go that route given the amount of work, so he gave us a GREAT deal on the oil if we purchased a case of it.
Our upper cabinets will be Sherwin Williams Pure White, the lower cabinets in Sherwin Williams Dovetail, and our walls are painted in Sherwin Williams Crushed Ice (not oil, hallelujah).
Once we applied the gray paint to the walls, it really made the peach doors and trim stand out.
We found an LED light (not my favorite) to replace the fluorescent ceiling light and it looks as if there is a skylight in the ceiling when it’s on.
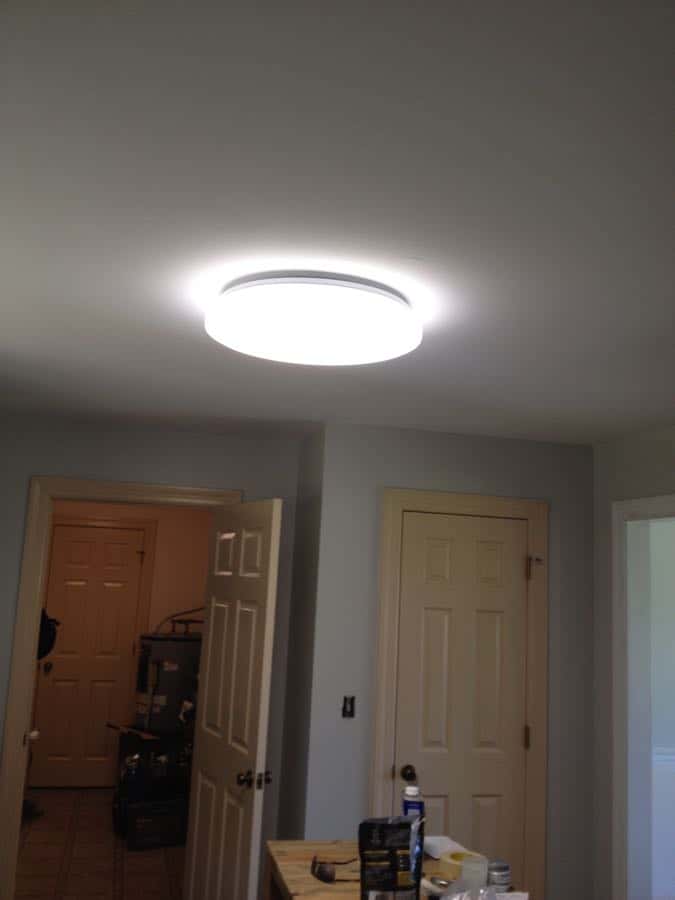
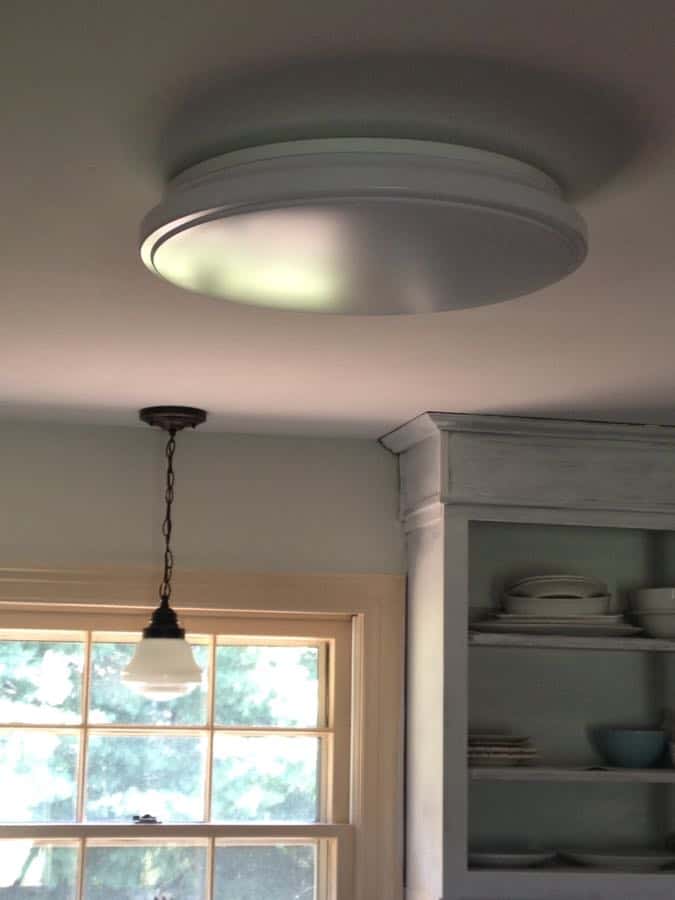
As I have said, we needed light and tons of it!
I’m not swooning, but it’s the light we have for now and after we find a replacement, we’ll move it to the garage.
The moulding along the light’s edge at least matches the schoolhouse light over the sink.
That’s it for our Farmhouse Kitchen Remodel Part One. This process took us about 8 months to complete, but we are finally making headway!
The next part of my Farmhouse Kitchen remodel, I’ll be showing my plans for a coffee hutch and post how we opened the wall and added a pass through to the dining room.
Click here to continue on to Part Two!
For more details about our Kitchen Remodel, check out these posts:
FARMHOUSE KITCHEN REMODEL PART TWO – TEARING DOWN THE WALL
FARMHOUSE KITCHEN REMODEL PART THREE – THE COFFEE BAR
INDUSTRIAL METAL LIGHT INSPIRED BY BALLARD DESIGNS
OUR AMAZING $5000 FARMHOUSE KITCHEN REMODEL


Renovating on a budget is quite a challenge, Jen. On a positive note, it’s nice to see that things are going well according to your plans. It’s good that you recycled some of the wood from the previous cabinets, and you picked a great choice of paint. Anyway, I’ll be looking forward to seeing the kitchen reveal as soon as you finished redecorating. Good luck!
Arthur Bryant @ ContractorExpress
Just started following you today! Can't wait to see Part2!!
It's so exciting to see your kitchen makeover! The kitchen is the first thing we redid in the Little Shack (the previous owners had never put in a 'real' kitchen). It's still got some things needing to be finished and trimmed, and they will get done once I find one of those round tuits! Looking forward to seeing yours all done!!-Sue
Whew! I am exhausted reading all of this! I can't imagine all that work! But so worth it! The kitchen is looking so pretty! Can't wait to see more!
Thanks for stopping by, Larissa! Hope all is well and let us know how the Big move goes!
Jen
Love it. You have worked hard…and it looks great. Can't wait to see the final reveal!!
We are getting ready to make a big move – and will no doubt be – buying an older house. Thanks for sharing! I look forward to reading the next post!